Hi and Happy Tuesday from Beth! I’m here on the blog today to share my Mason Jar Organizing tips, tricks and (new) technique!

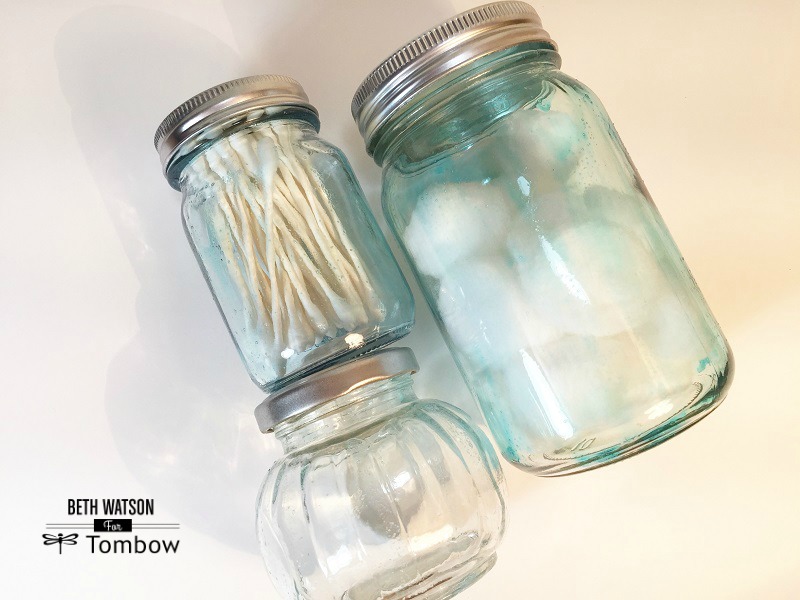
my Mom always used to say “A place for everything and everything in it’s place” and she was right! I love to organize and display everyday items in unique and pretty ways, so they don’t seem so ordinary. Clean crisp white and shades of blue has to be my favorite color scheme, but all of the mason jars out there are either a deep blue or clear, so I sat wondering how I could tint my jars to create those lovely sea blue tones.
I experimented and was successful on the first try – YEA!
Here’s how I made them:
Step One:
Wash jars with mild soap and water, then let dry completely. Scribble Tombow Dual Brush Pens 443, 452 and 515 (darker colors show up better on the glass) on the Tombow Blending Palette and apply Tombow MONO Aqua Liquid Glue in about the size of a silver dollar. Blend with a 1″ flat paint brush (use and old one) and apply in even strokes to outside of jar. Place on a piece of waxed paper to dry. NOTE: If there is too much glue on the jar a puddle will form at the bottom. Just flip the jar over and let dry upside down. I love how the imperfections, bubbles and streaks give a vintage feel to these brand new jars!
Check out the video HERE!
Step Two:
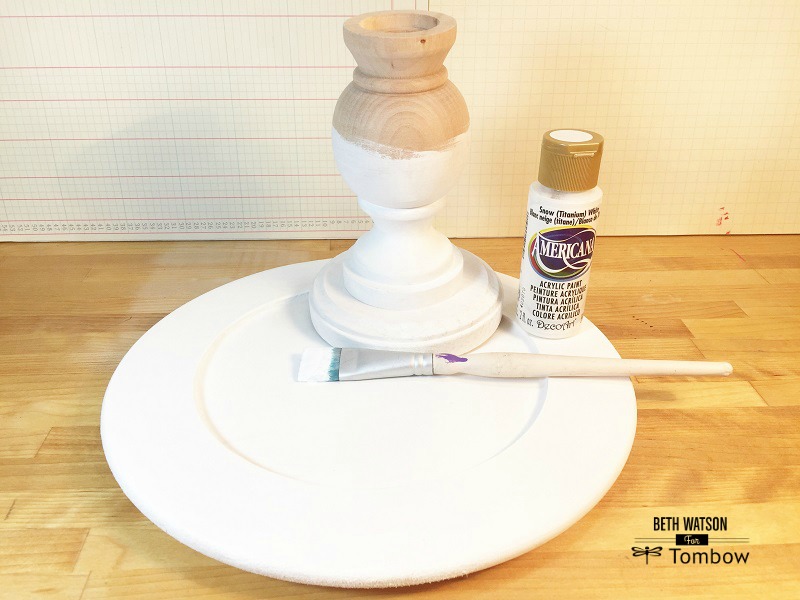
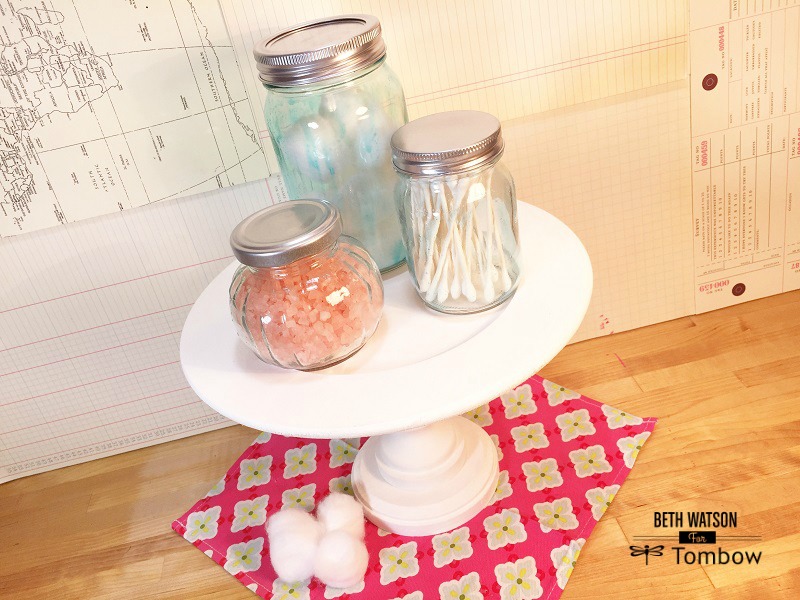
Paint wooden plate, candlestick and round plaque with Americana Paint by DecoArt Titanium White, let dry. Apply a second coat, let dry. I am going to use this in the bathroom, so I have also sealed it with several coats of DecoArt Multi-Purpose Sealer, letting dry completely between coats. I like this sealer because it drys matte.
Step Three:
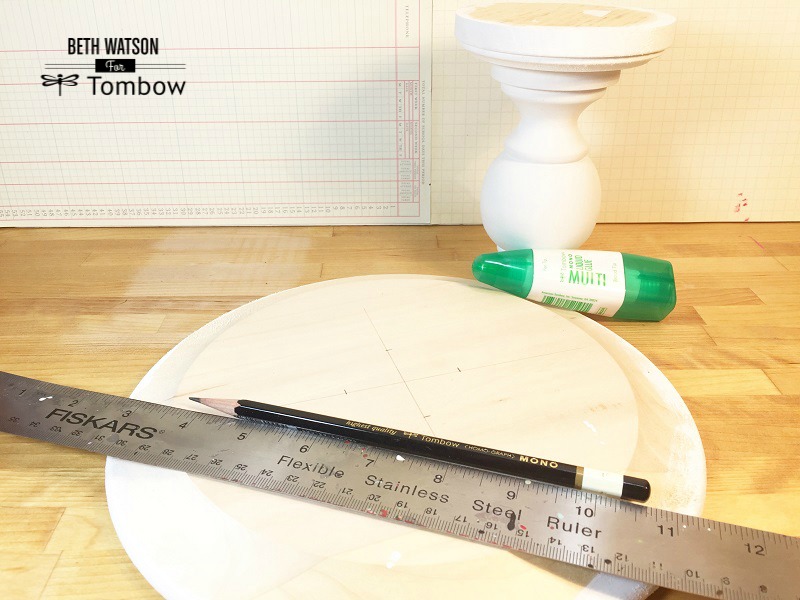
Measure center of under side of plate with Tombow MONO Drawing Pencil and mark 1″ out in each direction.
Step Four:
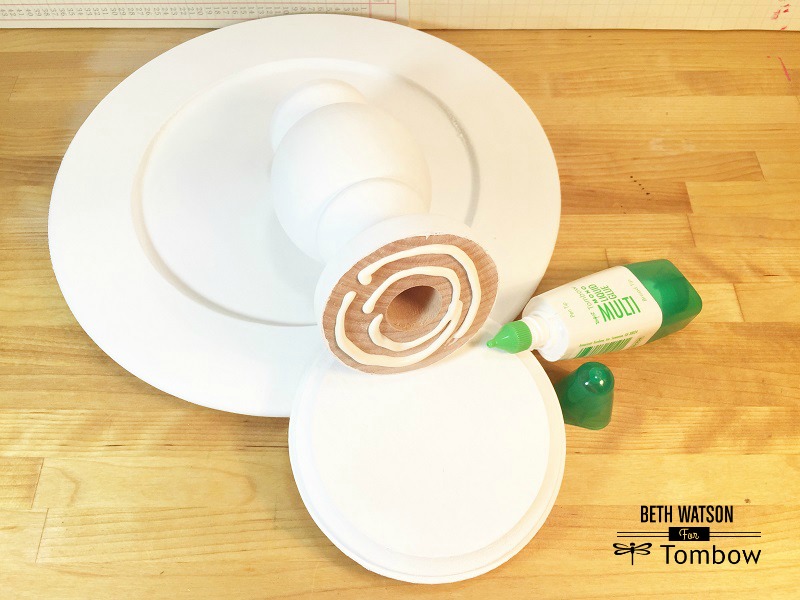
Attach candlestick to bottom of plate and round plaque to bottom of candlestick with Tombow MONO Multi Liquid Glue, let dry. TIP: Remove any extra glue that seeps out with a baby wipe.
Step Five:
My jar lids were different colors, so I spray painted them with Design Master Color Tool Super Silver, let dry.
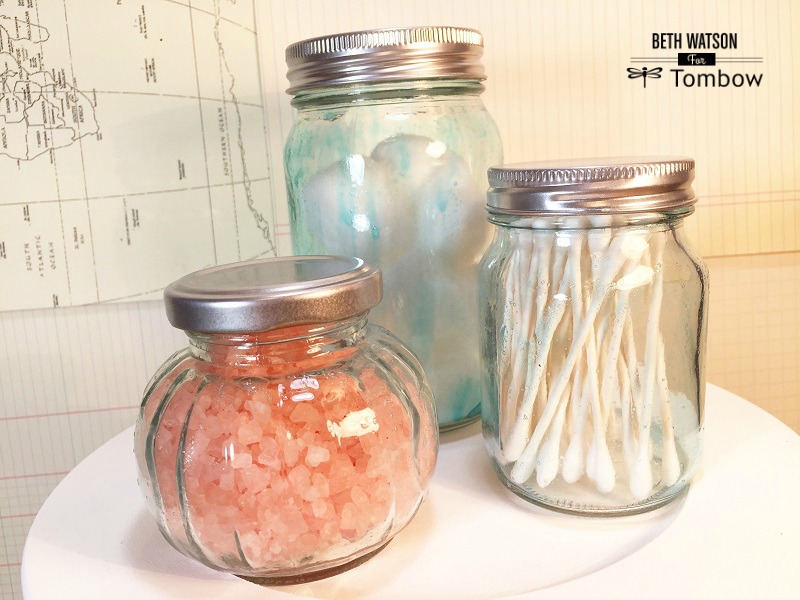
Fill your lovely tinted mason jars with cotton balls, swabs and bath crystals, then display on your counter for quick access to those essential items your use the most! Organizing with mason jars has never been easier, or prettier!
Check back each day this week to learn great organizing tips from the design team members – I can’t wait to see what everyone has created!
Thanks for stopping by! -Beth

Pingback: How to Make Dragonfly Inspired Jars for Spring - Tombow USA Blog