Hey everyone, Katie here! This week on the Tombow blog we are focusing on all things happy mail, which to me means anything that you can send through the mail to brighten someone’s day! So today I am showing you how to create a scrapbook mini album inside of an envelope!
This project is inspired by Moleskine’s Postal Notebooks, which are notebooks that transform into an envelope to mail. I wanted to create a handmade version so that I could fill it with pretty patterned papers and photos. Here’s how:
How to Create an Envelope Scrapbook – Supplies:
- Scrapbook Patterned Papers
- Envelope
- MONO Adhesive Permanent
- MONO Adhesive Removable
- Beginner Lettering Set
- MONO J Pencils
- MONO Air Correction Tape
- Transfer Foil
- Photos
- Scrapbook Embellishments
- Sewing Machine
Step one:
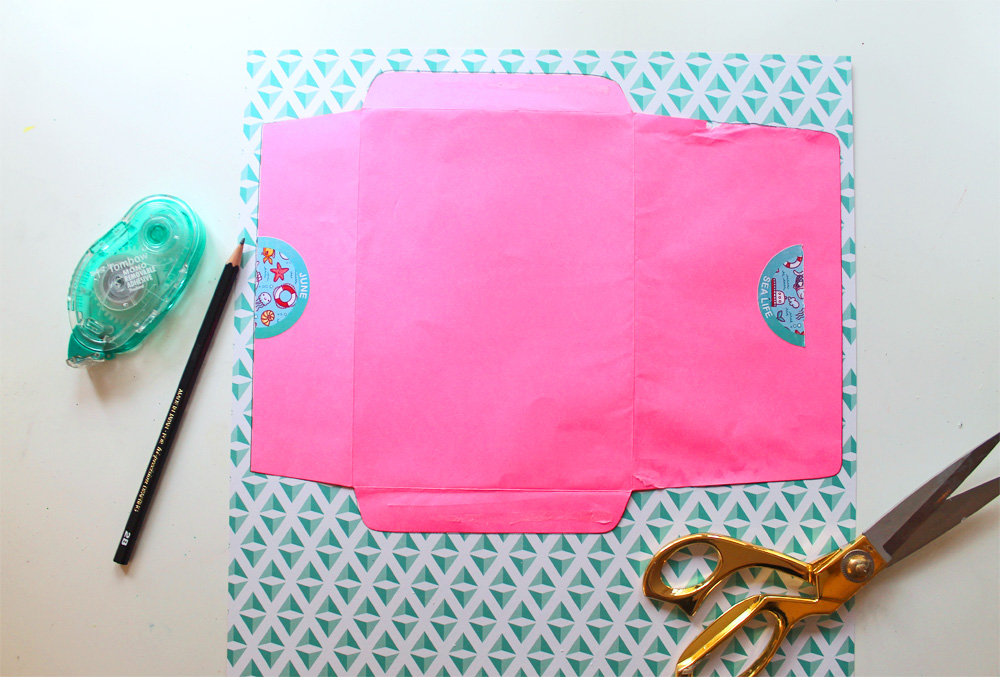
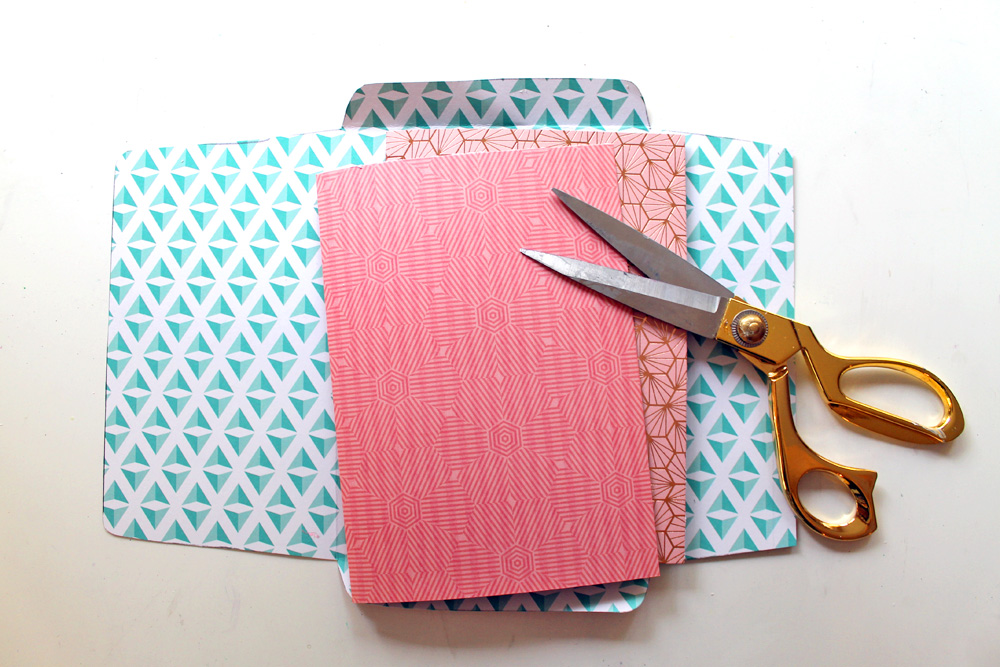
Unfold a regular envelope to use as a template. Apply MONO Adhesive Removable to the inside of the envelope and adhere it down to a piece of patterned paper. Trace around the envelope using a MONO J pencil and then cut the envelope shape out of your patterned paper.
I recommend using a double sided paper, so that you have a pattern on both the outside and inside of your mini album.
Step two:
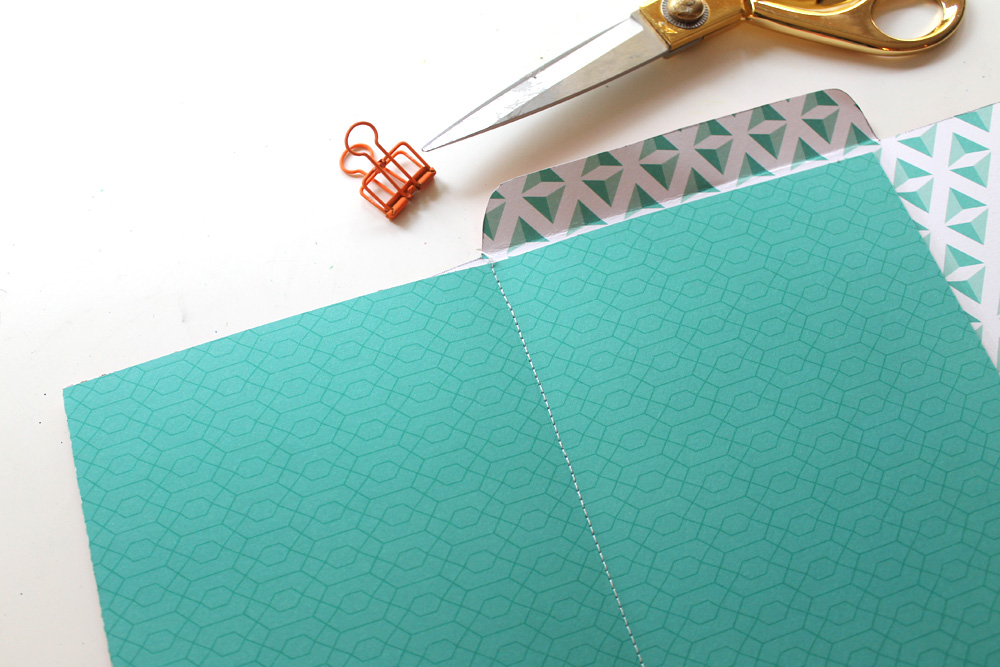
Measure the inside of your envelope so that you know how large to make your pages. Fold your pages in half and place them inside the middle of the envelope, with the folded edge up next to the crease in your envelope.
Depending on the thickness of the paper you are using, you will only want to add in 2-4 pieces of paper into your envelope so that it doesn’t get too bulky. I used 2 pieces of double sided paper for 8 pages.
Step three:
With your pages opened up, use your sewing machine to run a straight stitch down the middle of the pages in the crease, sewing them to the envelope.
Step four:
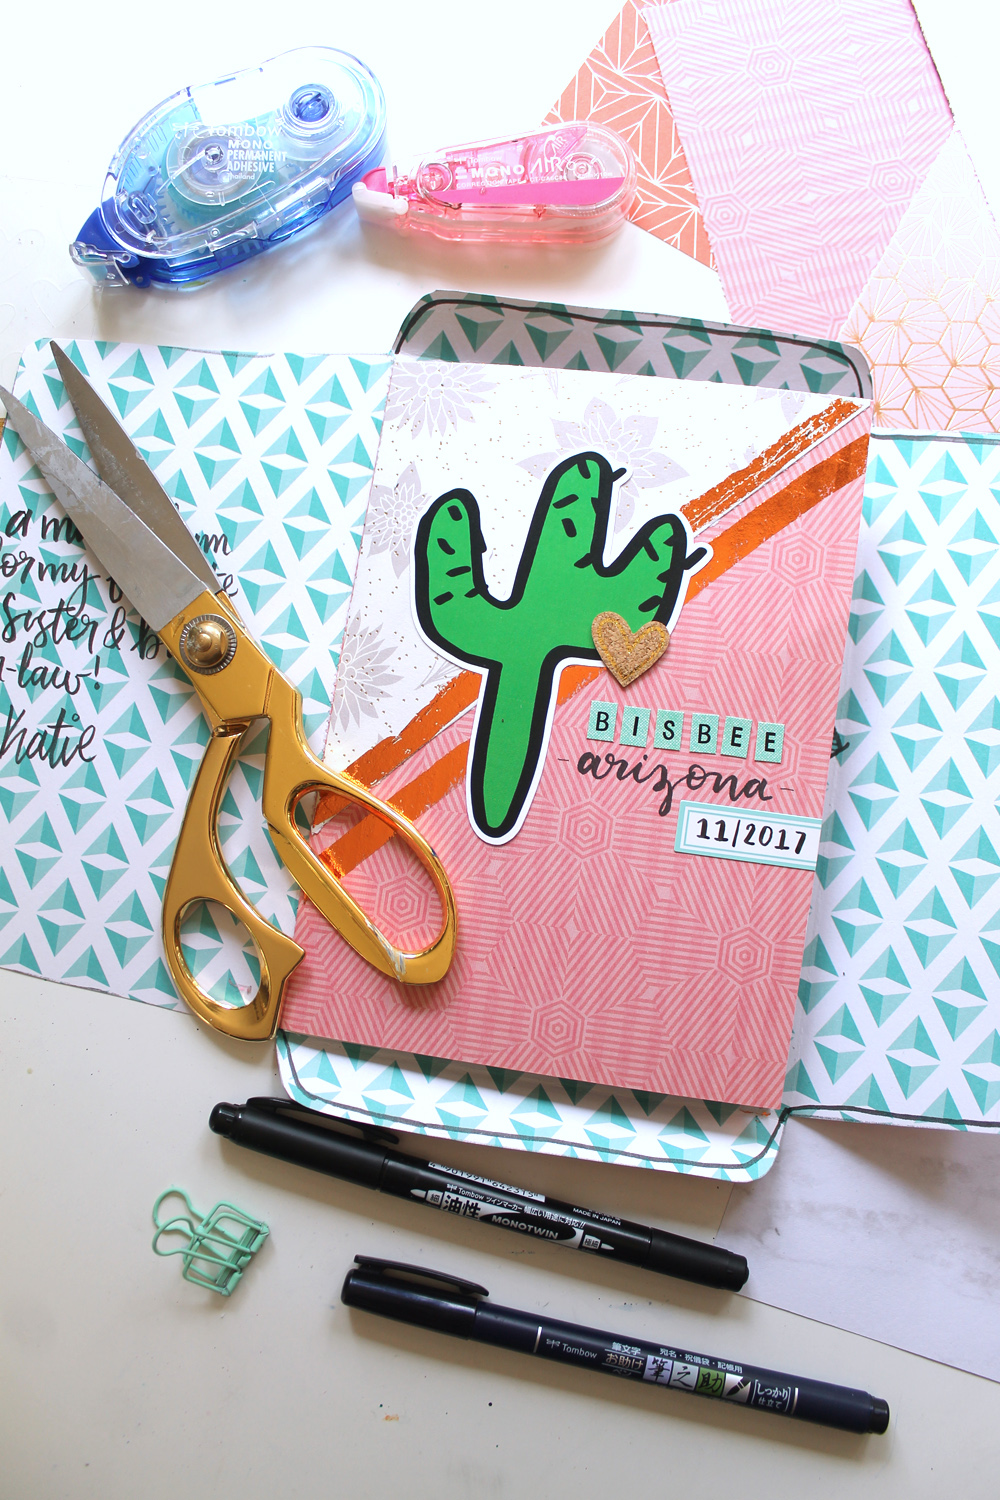
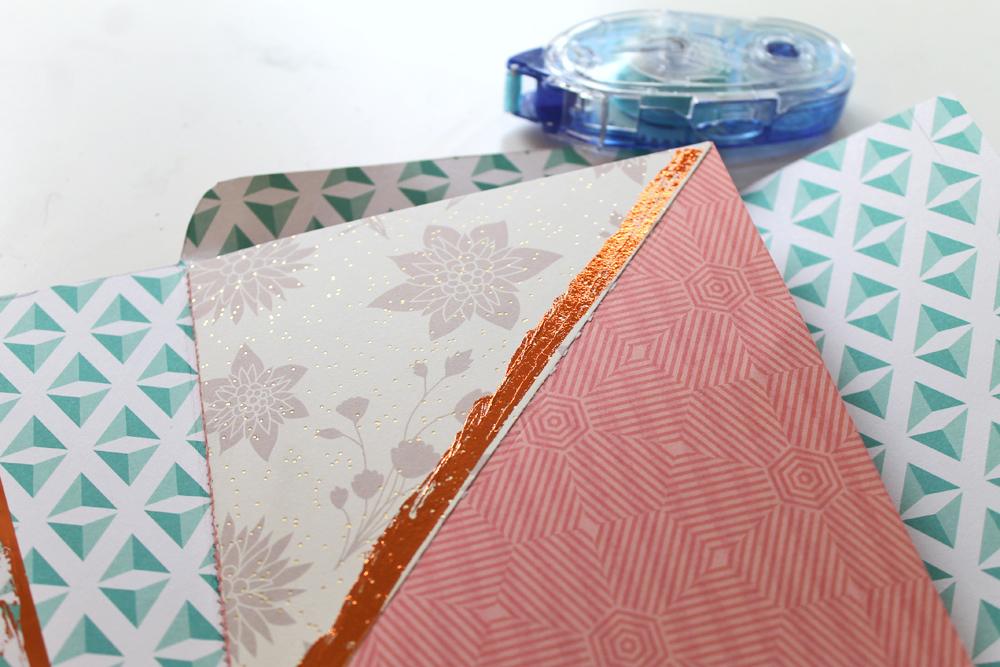
Now that the envelope scrapbook base is complete, all that’s left is to decorate the pages!
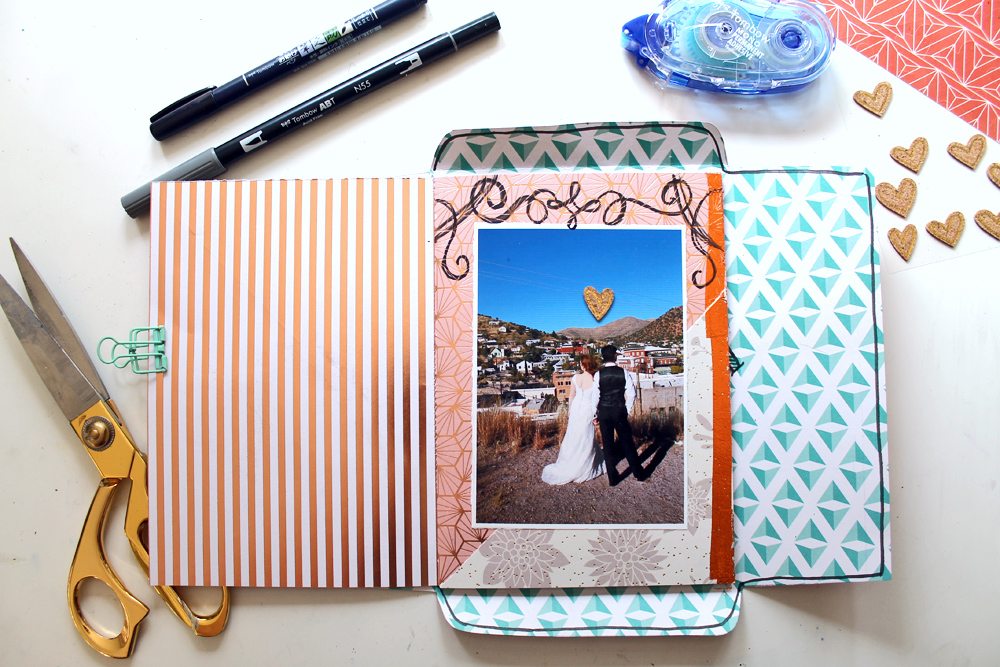
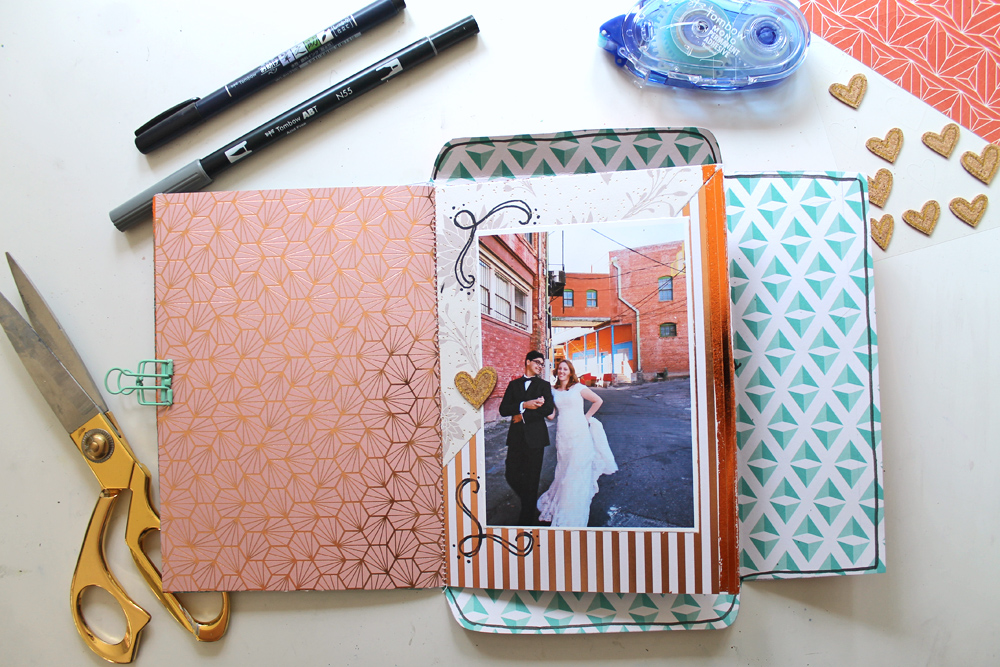
I added a bit of copper foil to each page. I always think adding a bit of foil to a project really makes it stand out, and the MONO Adhesive Permanent makes it super quick to add a metallic touch.
Simply run a strip of the MONO Adhesive Permanent along the page, and then press a piece of transfer foil on top of the adhesive. Peel it off and the foil will stick only where you applied the adhesive!
Step five:
Add your photos, scrapbooking embellishments and journaling! I also wanted to add a little bit of lettering and doodles to this mini album, so I grabbed the Beginner Lettering Set and used Amy Latta’s new book Hand Lettering for Relaxation as a reference to add a few custom designs onto my pages.
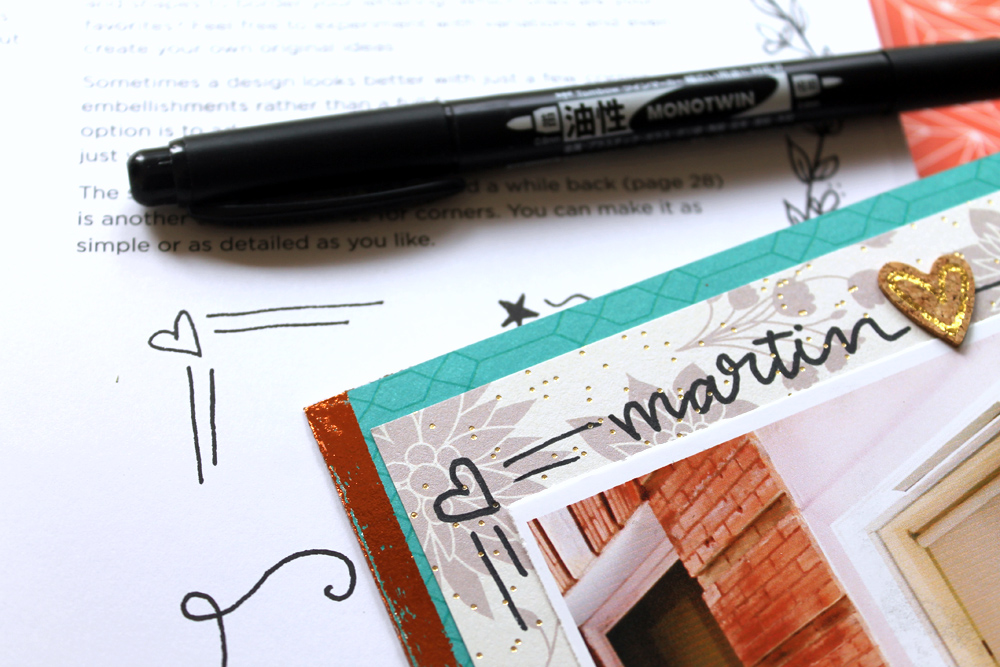
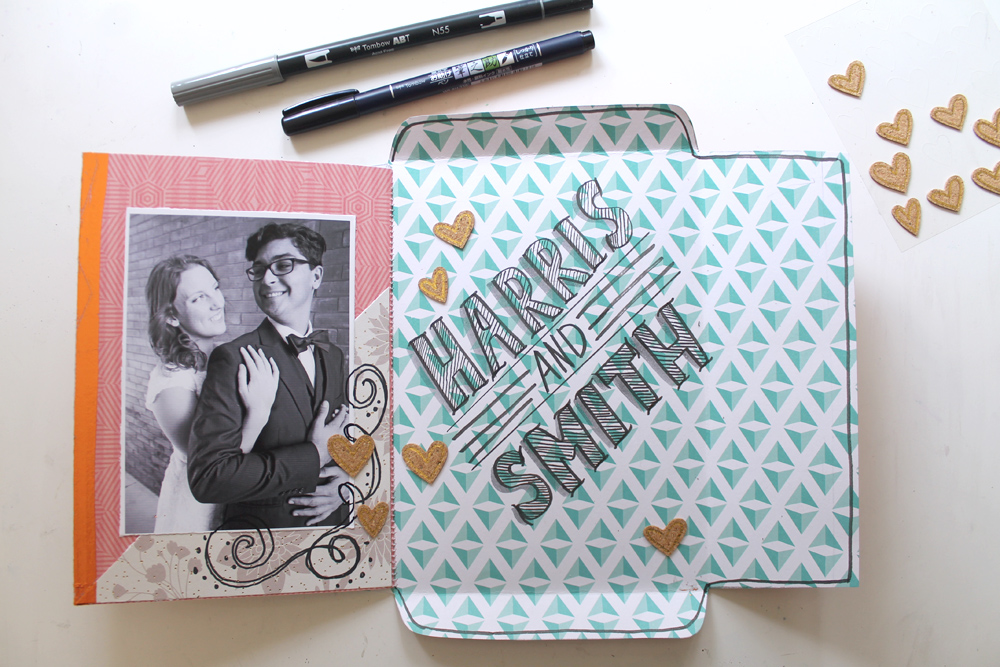
Here are a peek at a few of the pages I embellished. I recommend only using flat embellishments. Anything too large will make you envelope too bulky to mail.

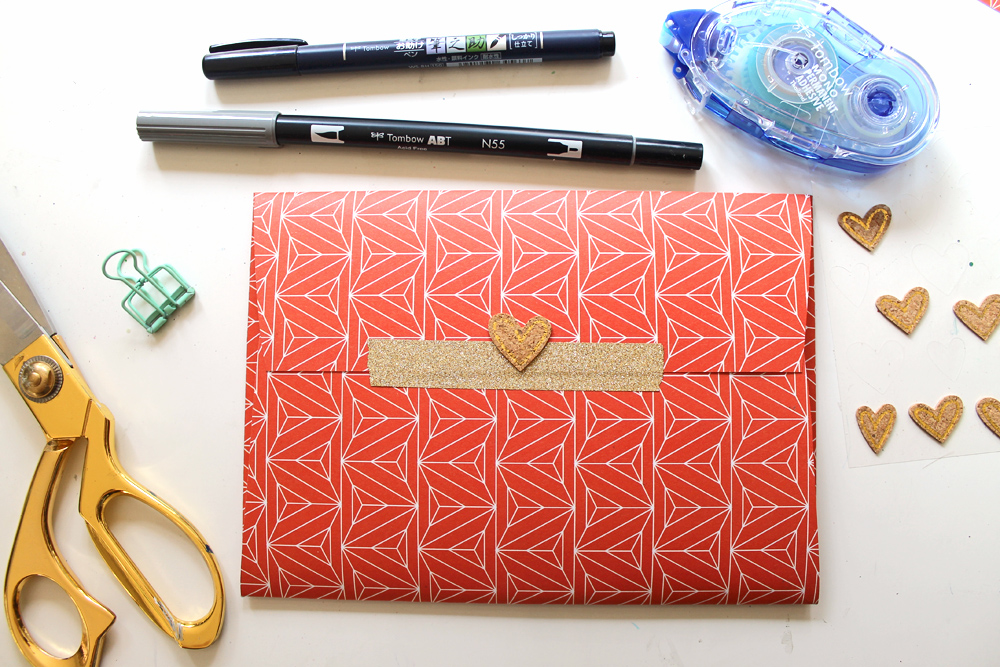
Step six:
Seal up the back of your envelope! I used washi tape to make it cute, but I will also be putting a piece of packing tape over top of it, just to maker sure the post doesn’t damage it.
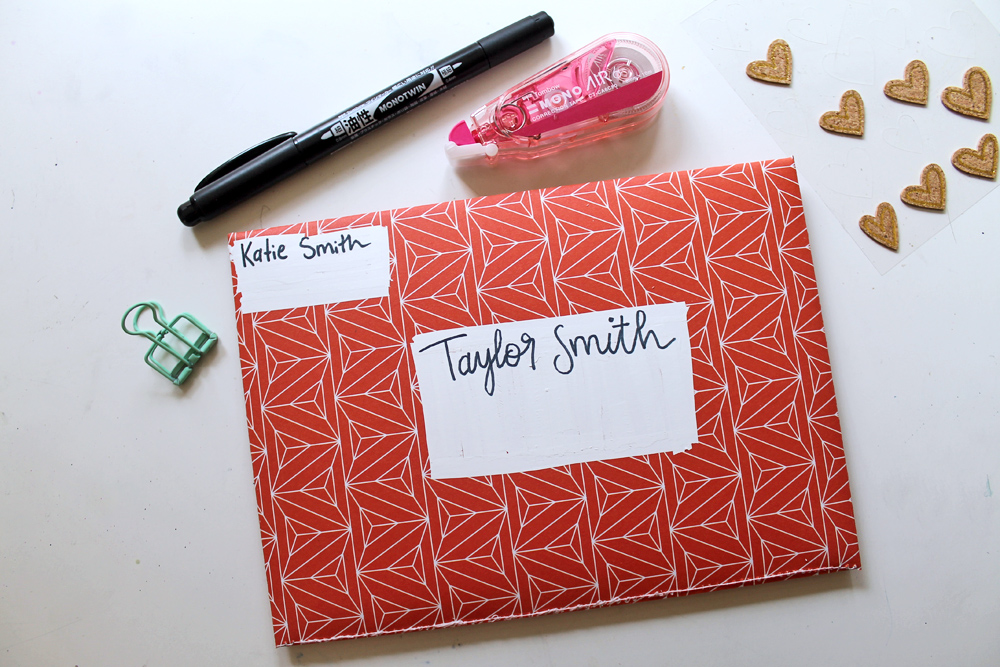
Step seven:
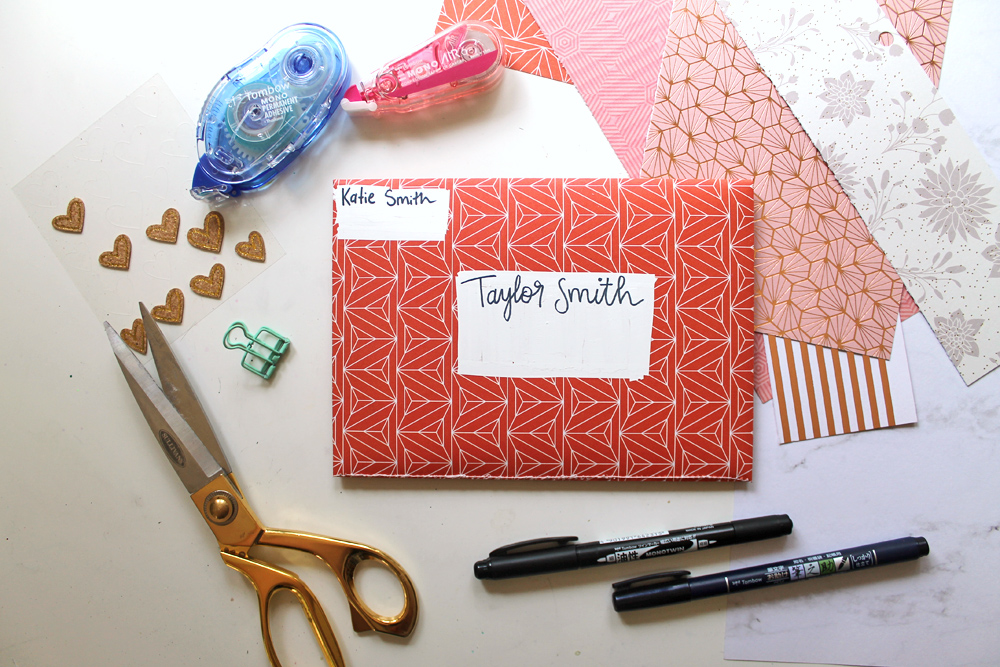
If you used a colorful piece of patterned paper to make your envelope like I did, you will need somewhere to address it! MONO Air Correction Tape to the rescue! Just use the Correction Tape to create little white boxes and address your envelope with the Mono Twin Permanent Marker!
Want another fun Happy Mail project? Check out the mini album Jennie created in a Cassette Tape Case!
I mailed this mini album to my sister in Arizona, and it got there just fine with only 2 stamps on it! Depending on how many pages/embellishments you added, you may need to add more.
What’s the coolest thing you’ve mailed?

Pingback: DIY Mini Album You Can Mail – Studiokatie
Pingback: Quick and Easy Mini Album with Journal Cards - Tombow USA Blog
Pingback: Mini álbum sobre - INSPIRACIONES PROFUNDAS