Happy New Year everyone! Marie Browning here with a step-by-step tutorial about lettering on wood. I am thrilled to be with Tombow as their Signature Designer! As well as many other tasks, I have the great pleasure of working with Tombow products and developing new techniques that will bring success to your creative projects. These steps today about lettering on wood will include how to prep your wood, the lettering steps, what to do if you make a mistake and, finally, finishing your project so it lasts for years.
Materials:
- Unfinished wood slice
- Varnish (I used a fast-drying polyurethane, but you can also use an acrylic varnish)
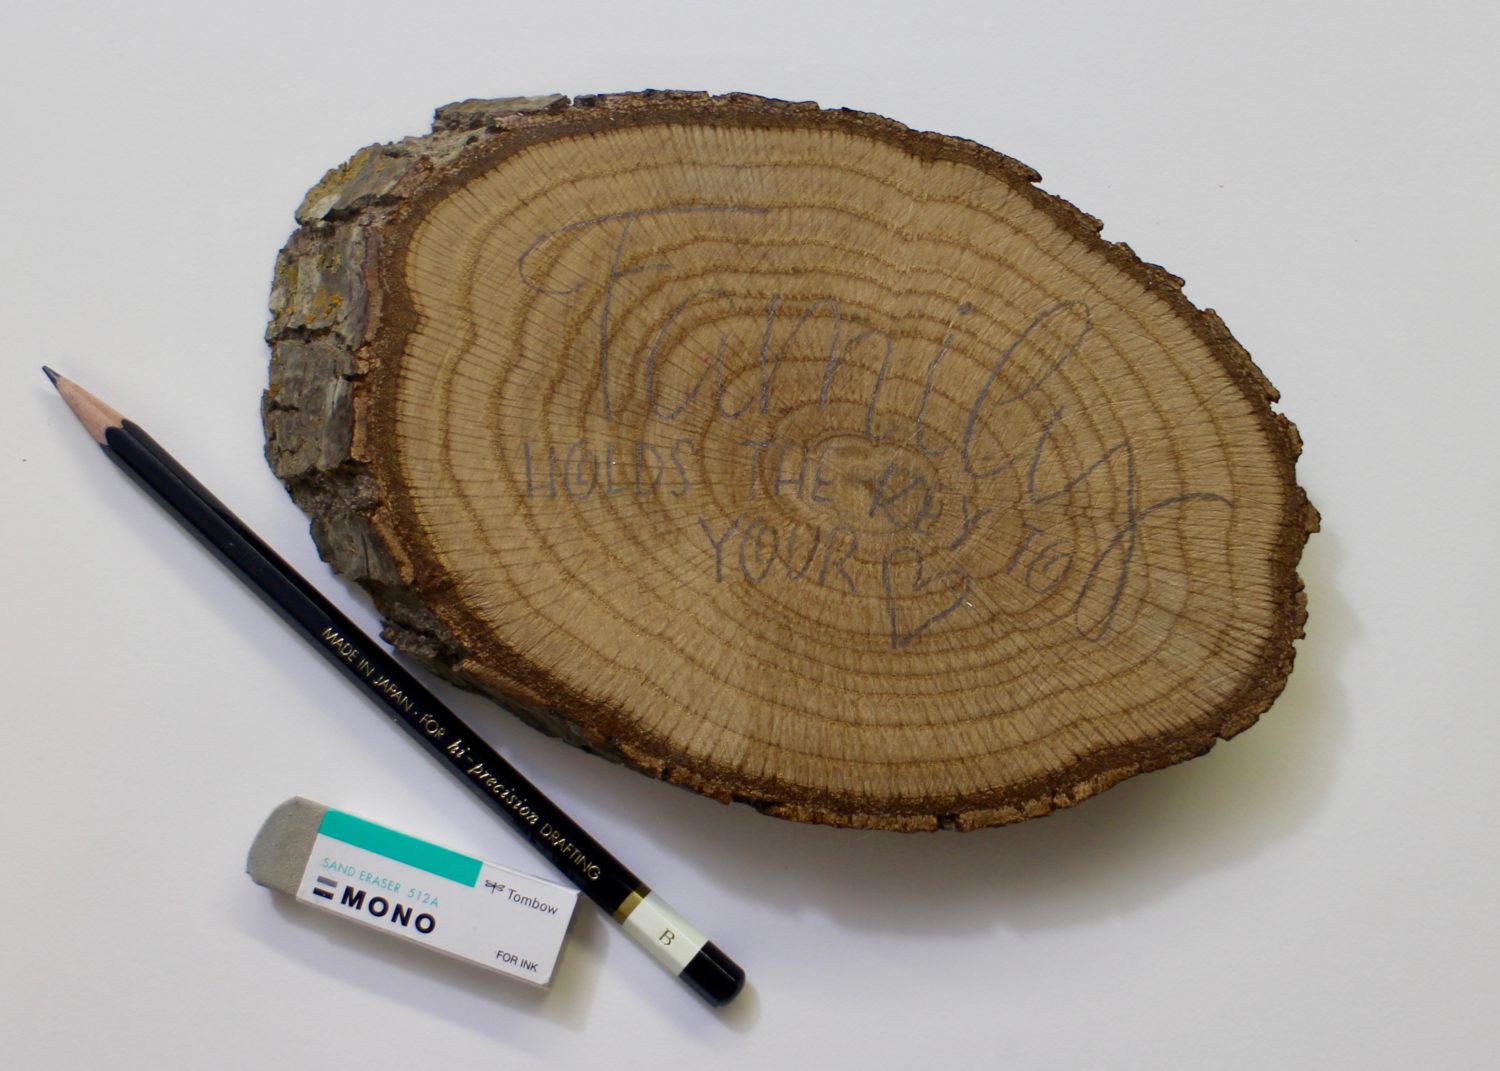
- Tombow MONO Drawing Pencil (I used grade B)
- Tombow MONO Sand Eraser
- Tombow MONO Twin Permanent Marker
Step 1: Preparing the Wood
The success of wood projects is in the preparation of the surface. This live edge wood plaque was cut from a trunk that had been cured and dried for many years. After cutting into oval plaques they were sanded with a palm sander. This wood was oak and very hard – your wood may be very different in how the steps react. Always do a test patch on the back of the wood to test each step!
The next step is to varnish. I used a fast-drying polyurethane for all the varnishing steps. Make sure it is well dried before adding the letters. Why do you varnish before lettering? The varnish prevents the ink from bleeding, and it also makes it easier to correct mistakes. If you use an acrylic varnish, you need to do a second sanding after it has dried. When a water-based product is used on the wood, the fibers stand up and make the surface rough again, no matter how smooth it was before. This light second sanding makes it nice and smooth again. You may also want to add another coat of acrylic varnish.
Use a soft grade B MONO Drawing Pencil to sketch in your lettering or illustration. The MONO Sand Eraser is the perfect tool to make corrections!
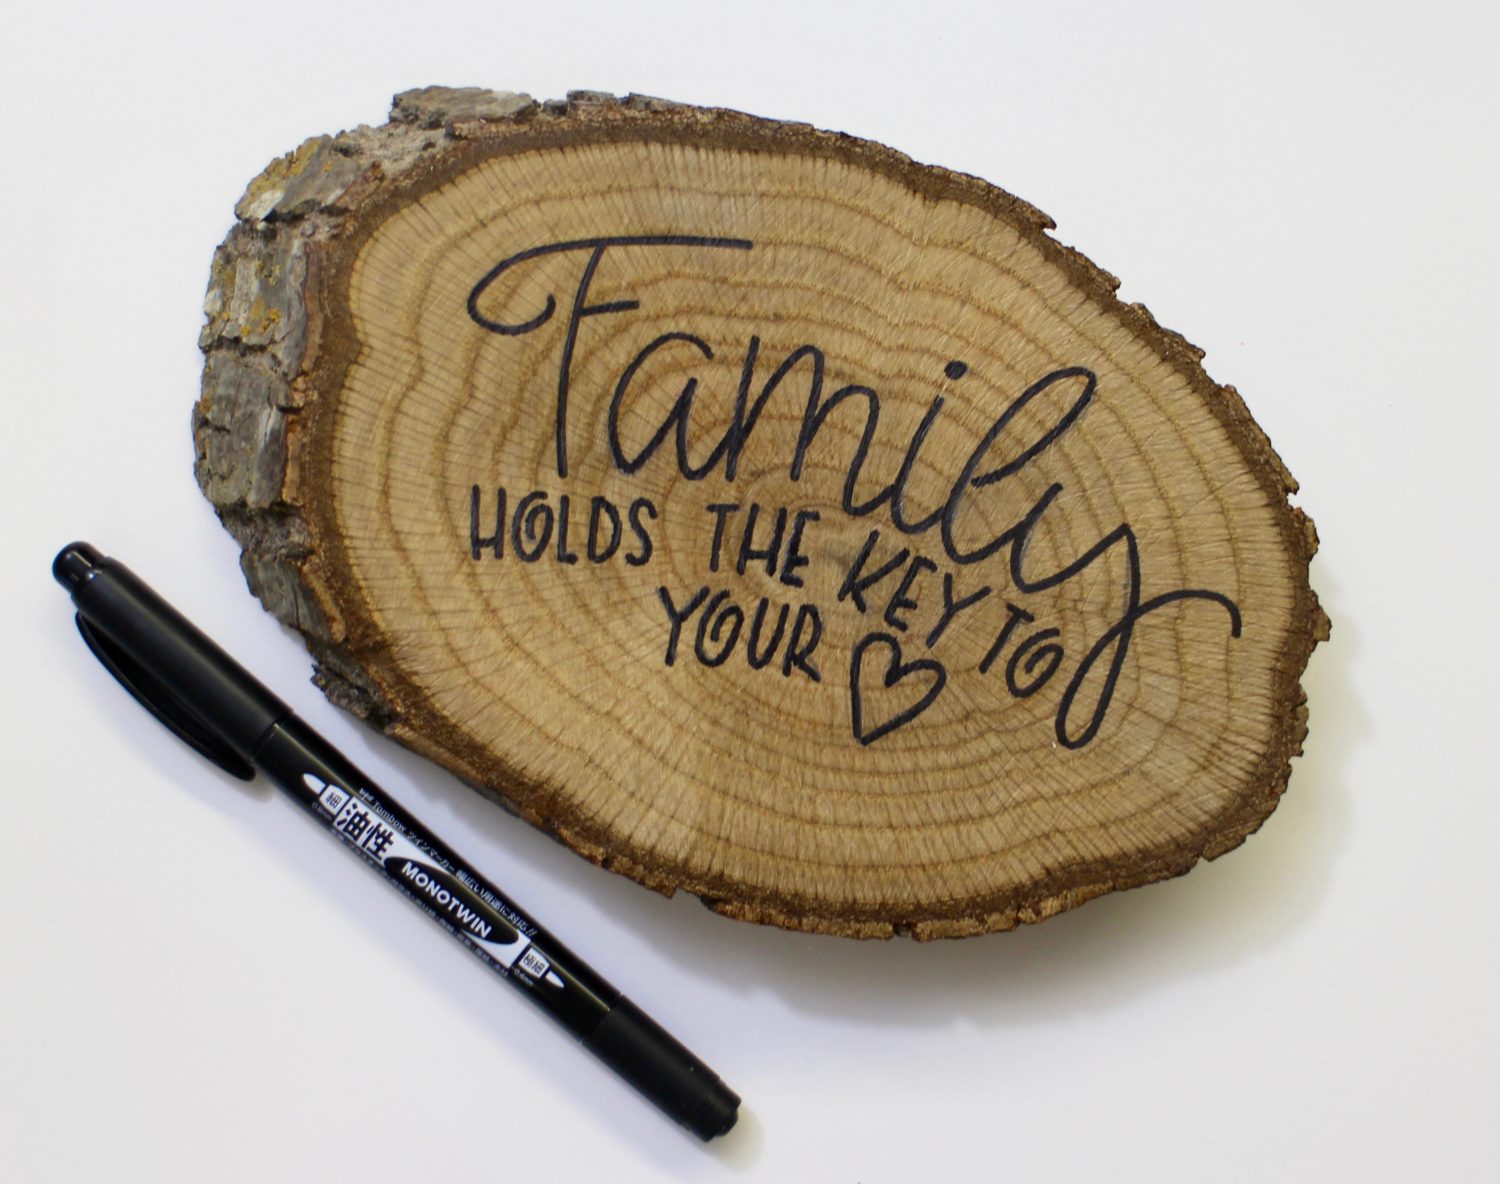
Step 2: Add Ink
Make sure on your test patch you don’t see any bleeding and the marker goes on smoothly. If everything looks okay, go to the front and using the MONO Twin Permanent Black Marker, trace the penciled letters. You can also find the MONO Twin Marker in the Advanced Lettering Set and the Beginner Lettering Set. Brittany Luiz also shows you many monoline alphabets with this marker in her book Lettering with Purpose.
Again, if you make a mistake, use the Sand Eraser to gently remove the ink. It will be easy as you added that protective varnish coat! You may need to add some more varnish where you corrected.

Step 3: Fill in Your Letters
Here you will add the thick lines of the downstrokes for the ‘faux calligraphy’ with the MONO Twin Marker. When finished, remove any visible pencil lines with the Sand Eraser.
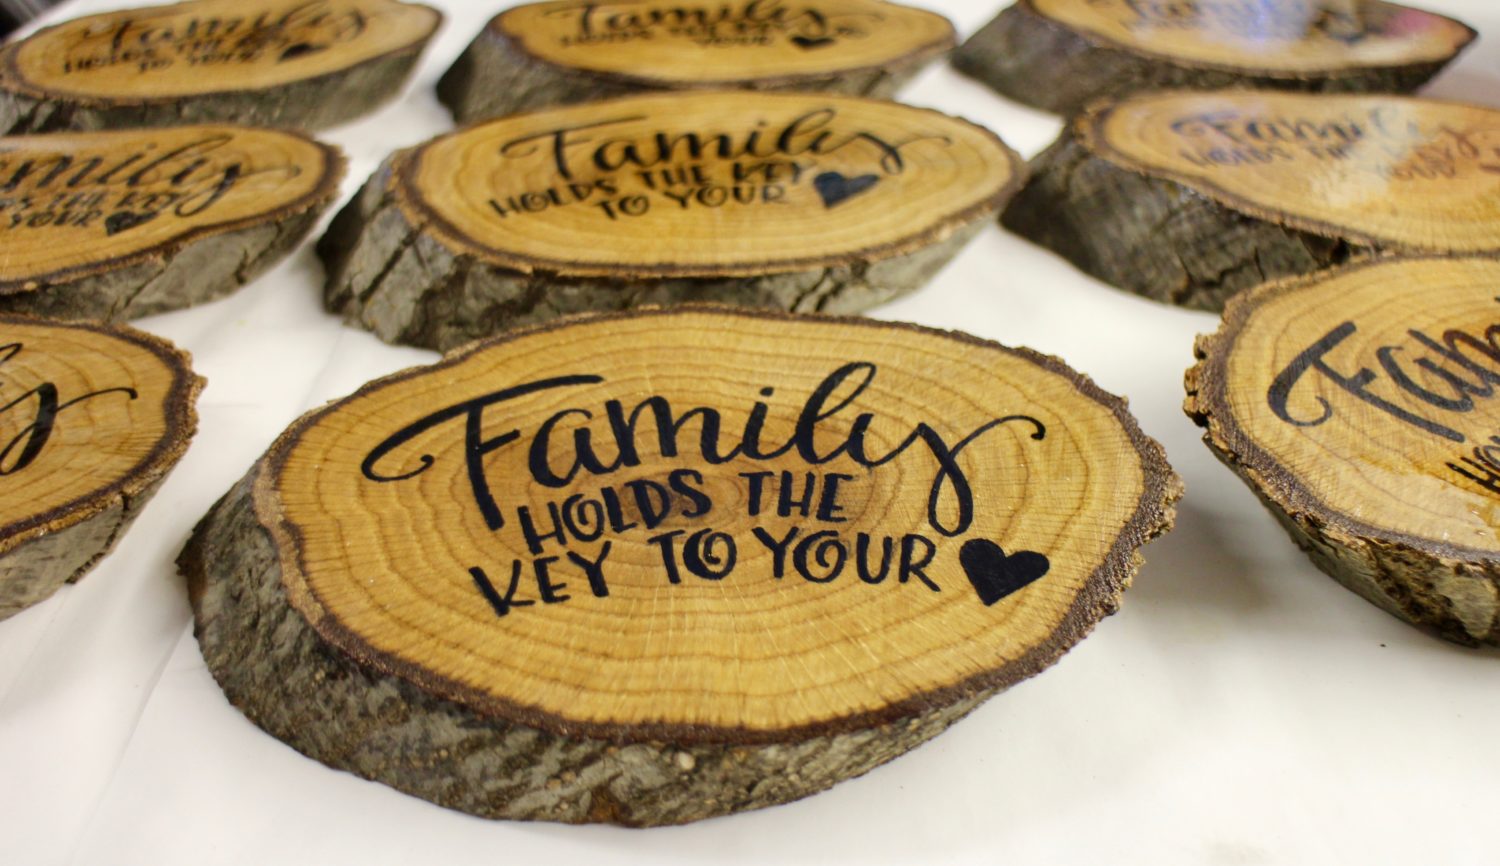
Step 4: Apply the Final Varnish
Paint on the finishing varnish coat. Make sure to try it first on your test patch. This photo was taken right after varnishing, so it looked shiny. I chose a matte finish for my varnish, but any finish would look great. You can also coat the plaques with high gloss resin. I would recommend two or three coats of acrylic varnish to seal the wood completely before adding the resin coating if you choose that direction.
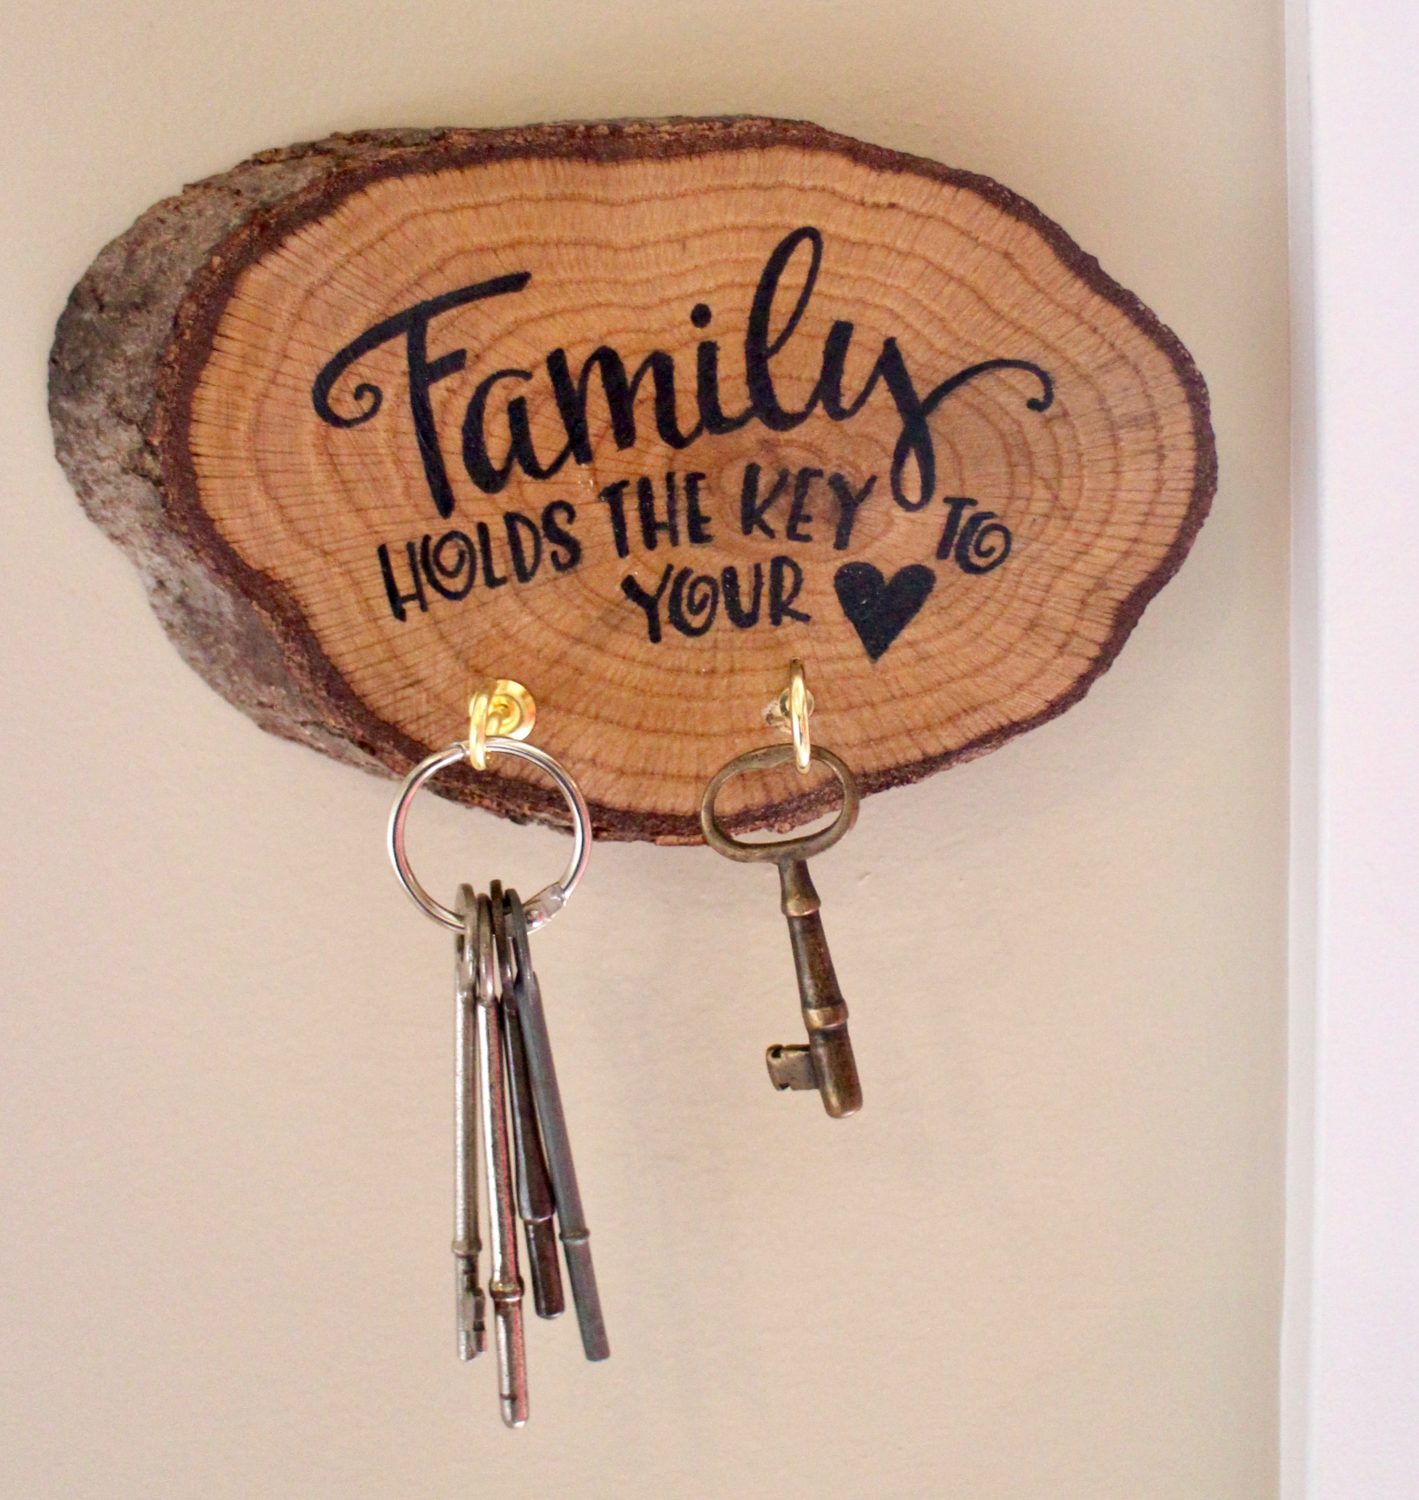
After adding the cup hooks and hanger on the back, my new key holder is finished! It made a great gift for our families as the wood had a very special meaning to us. Hope you enjoyed the lettering on wood steps! Now go forth and create!

Love this!! I’m the Editor of Fun Family Crafts and wanted to let you know that we have featured your project! You can see it here:
https://funfamilycrafts.com/family-key-holder/
Thanks for a fabulous project idea!
wow, this is a great article found for using lettering on wood. found new idea .thanks for the nice post.
Pingback: How to Watercolor Wooden Patriotic Decor - Tombow USA Blog
So Unique,
Love it