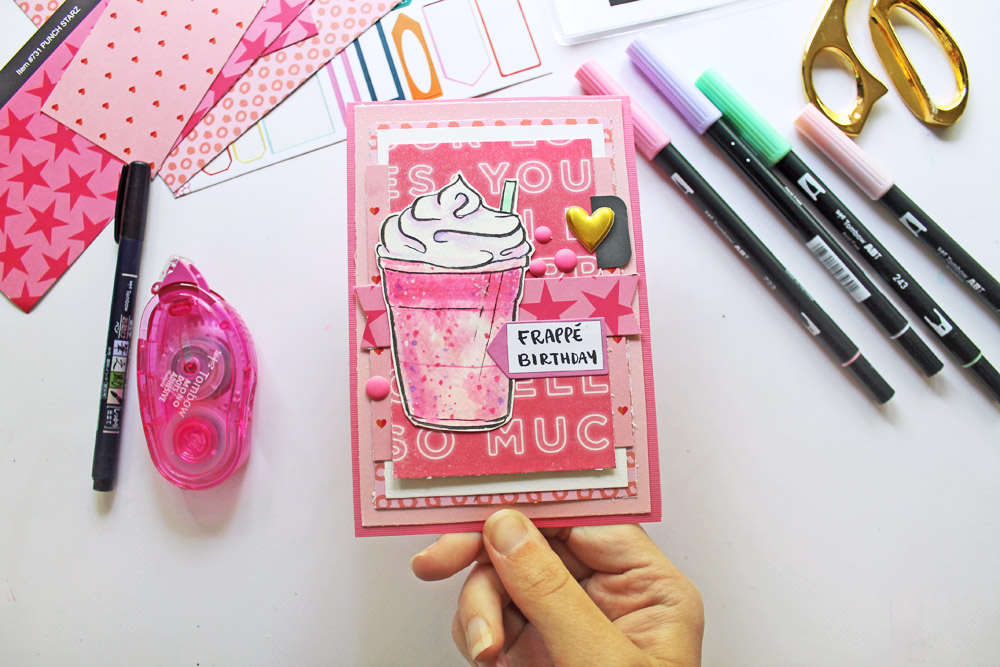
Hey y’all, It’s Katie here and today I want to show you how to make a frappuccino birthday card! It’s pink week here on the Tombow blog, so this doodle is obviously inspired by Starbuck’s Pink Drink. Which I haven’t tried, but I always think it looks SO pretty. Have you tried it?
DIY “Frappé Birthday” Card:
Supplies:
- Tombow Dual Brush Pen, 10-Pack Pastel
- Tombow Fudenosuke Brush Pen, Hard Tip
- Watercolor Paper
- Tombow MONO Dots Adhesive
- Tombow Blending Kit
- Patterned Papers
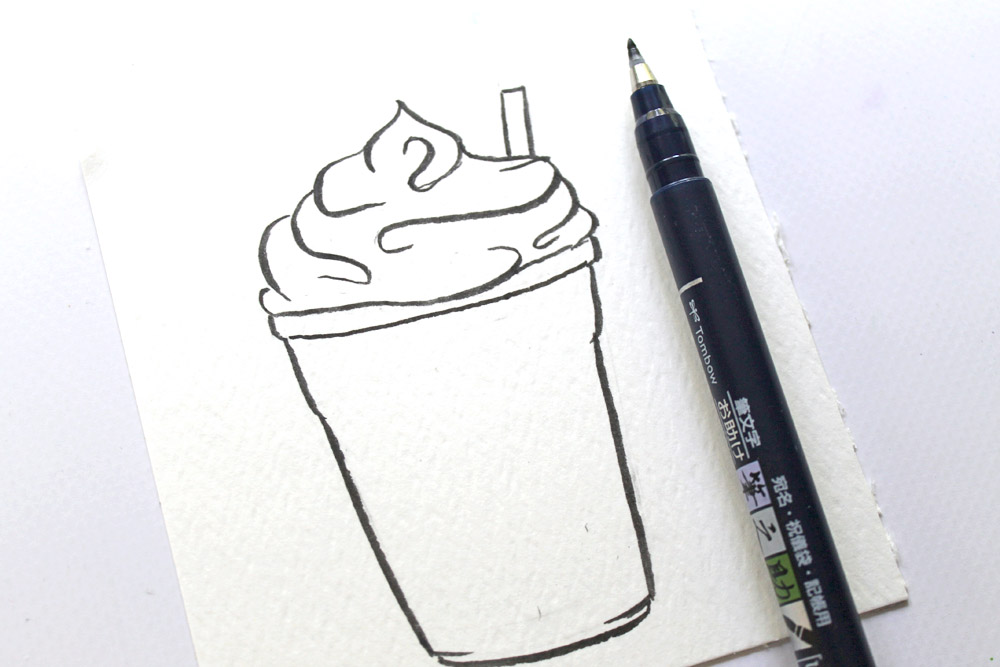
Step one:
Doodle that frappe on your watercolor paper! The cup is so easy – just an angled rectangle. And then the whipped cream is just a bunch of flourishes layered, and point at the top.
Try using the Fudenosuke Brush Pen for drawing to get lines with varying widths!
Step two:
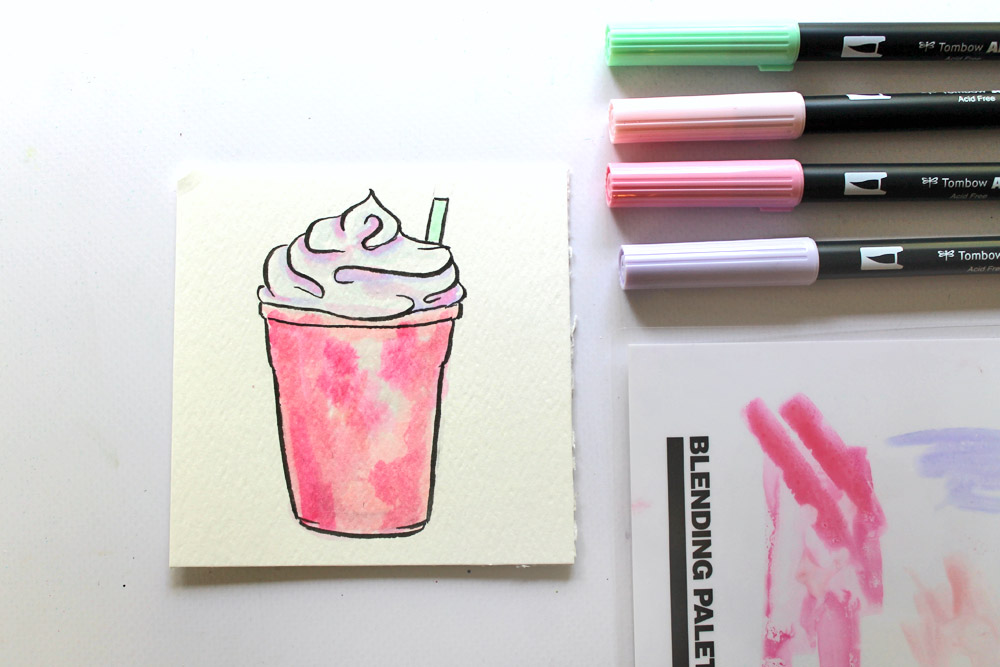
To color in the frappe, we’re going to use the Dual Brush Pens as watercolors. To achieve this, apply the Dual Brush ink onto the Blending Palette, and pick up the ink using a wet paintbrush. Then just apply it to the paper as “paint.” (For more watercolor ideas, check out these awesome card backgrounds by Smitha.)
This technique created a fun frothy look for the frappe, and I love it! I’m only using colors included in the Pastel Dual Brush Pen set for this doodle. So I used the pinks for the inside of the cup, the green for the straw, and the purple to shade the whipcream.
Step three:
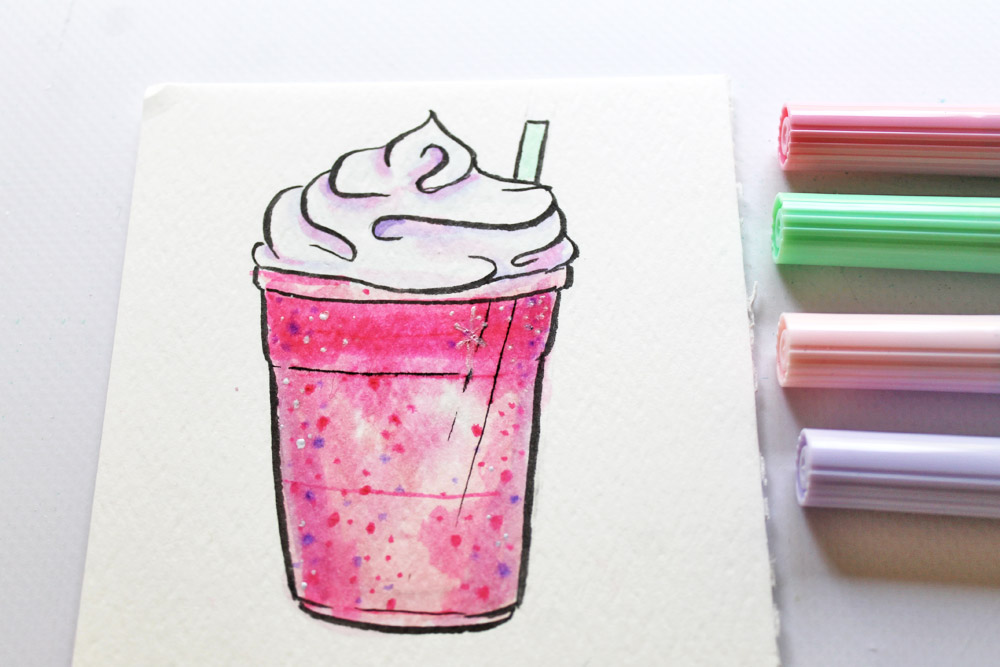
Next, use the bullet tip of the Dual Brush Pens to add details by dotting them over and over inside the frappe. This creates “bubbles” in your cup, and looks magical! I also used a little detail with white gel pen.
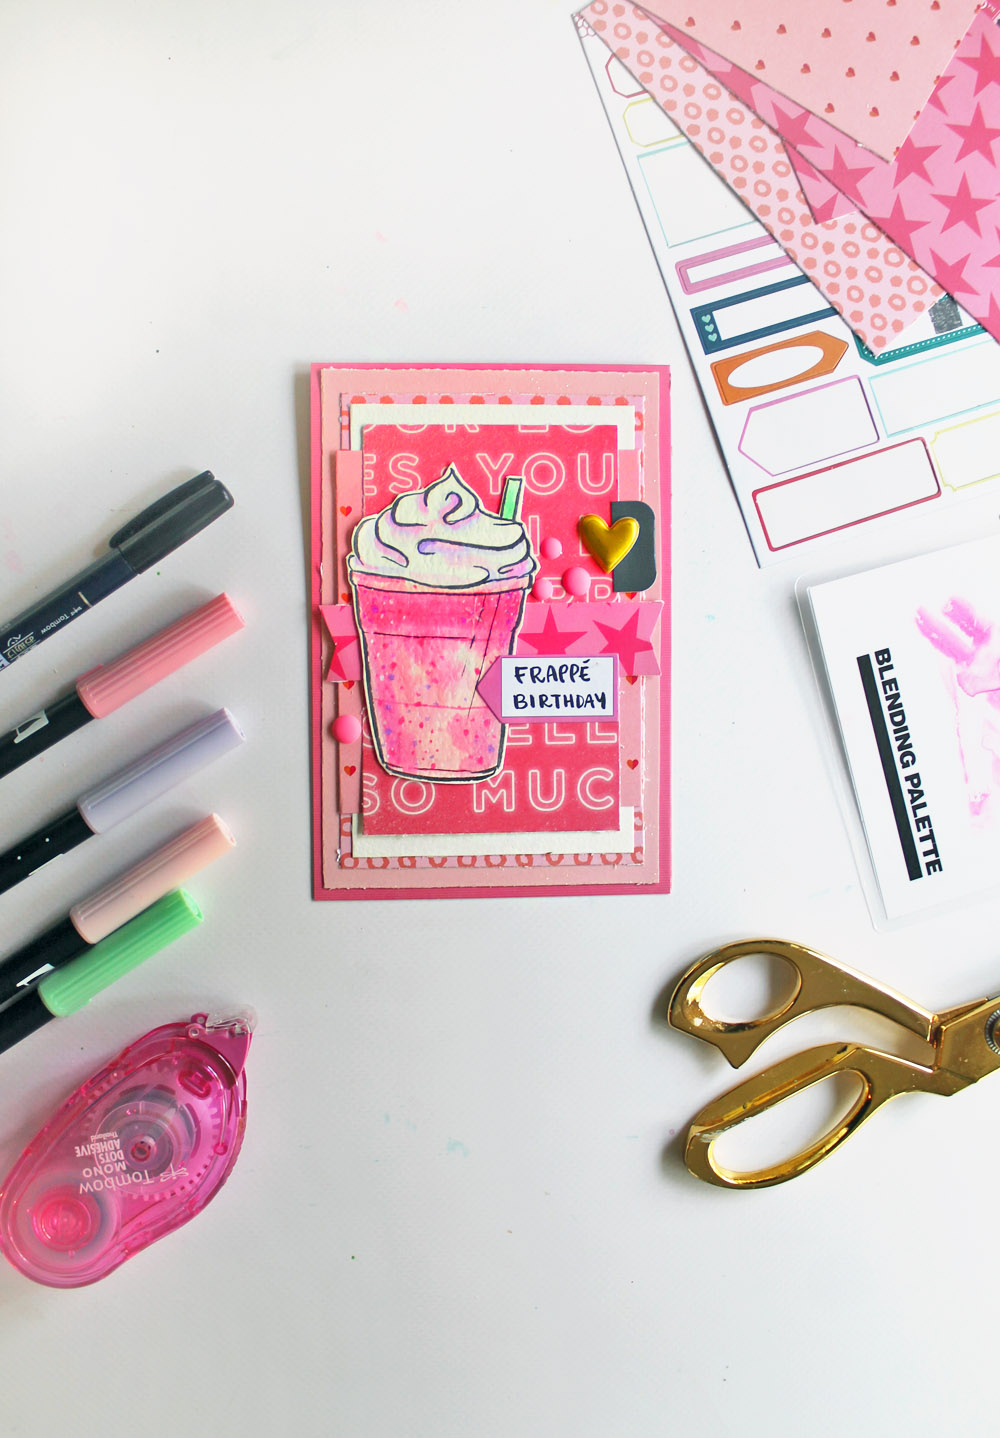
Step four:
Time to make the card! Choose your favorite pink scrapbook papers, and cut them to varying sizes, layering them and adhering them together using the MONO Dots Adhesive tape runner (which is also PINK!!). Cut around your frappe and adhere it as well. The awesome thing about the MONO Dots Adhesive is that it’s is initially repositionable, so you have time to play around with the composition before it sets to a permanent bond.
Step five:
Finish off the card by lettering a cute “Frappé Birthday” sentiment onto a sticker and adding some enamel dots as well.
Want more birthday cards? Here are 3 that you can make in under 5 minutes!
And that’s it! I hope your day is extra Frappé! If you make any following this tutorial, please be sure to share them and tag @Tombowusa and myself @studio.katie
how fabulous!