Happy New Year everyone! I’m Mandy, a hand lettering artist, and I’m beyond thrilled to be joining the Design Team this year! It’s a dream come true for me! I started lettering in January 2016, and when I decided to buy a Tombow Dual Brush Pen, I instantly fell in love. I’ve been using all things Tombow since then, their products are my absolute favorite tools for my art.
To start off the new year, the Design Team is sharing their personal style. If you were to ask me to describe mine, I would have to say it’s a modern and pretty style of script and mixed script lettering. I also love adding depth to my lettering with blending, outlines and shadows. So today I’m going to show you how to letter in my favorite way. I’m also going to use my 2 absolute favorite Dual Brush Pen colors, 873-Coral and 803-Pink Punch. After experimenting with blending these 2 colors, and LOVING the end result, I found out that Pantone’s color of the year for 2019 is Living Coral. It’s a gorgeous color, and Coral and Pink Punch together come out similar to it!
So let’s gather our materials and get started!
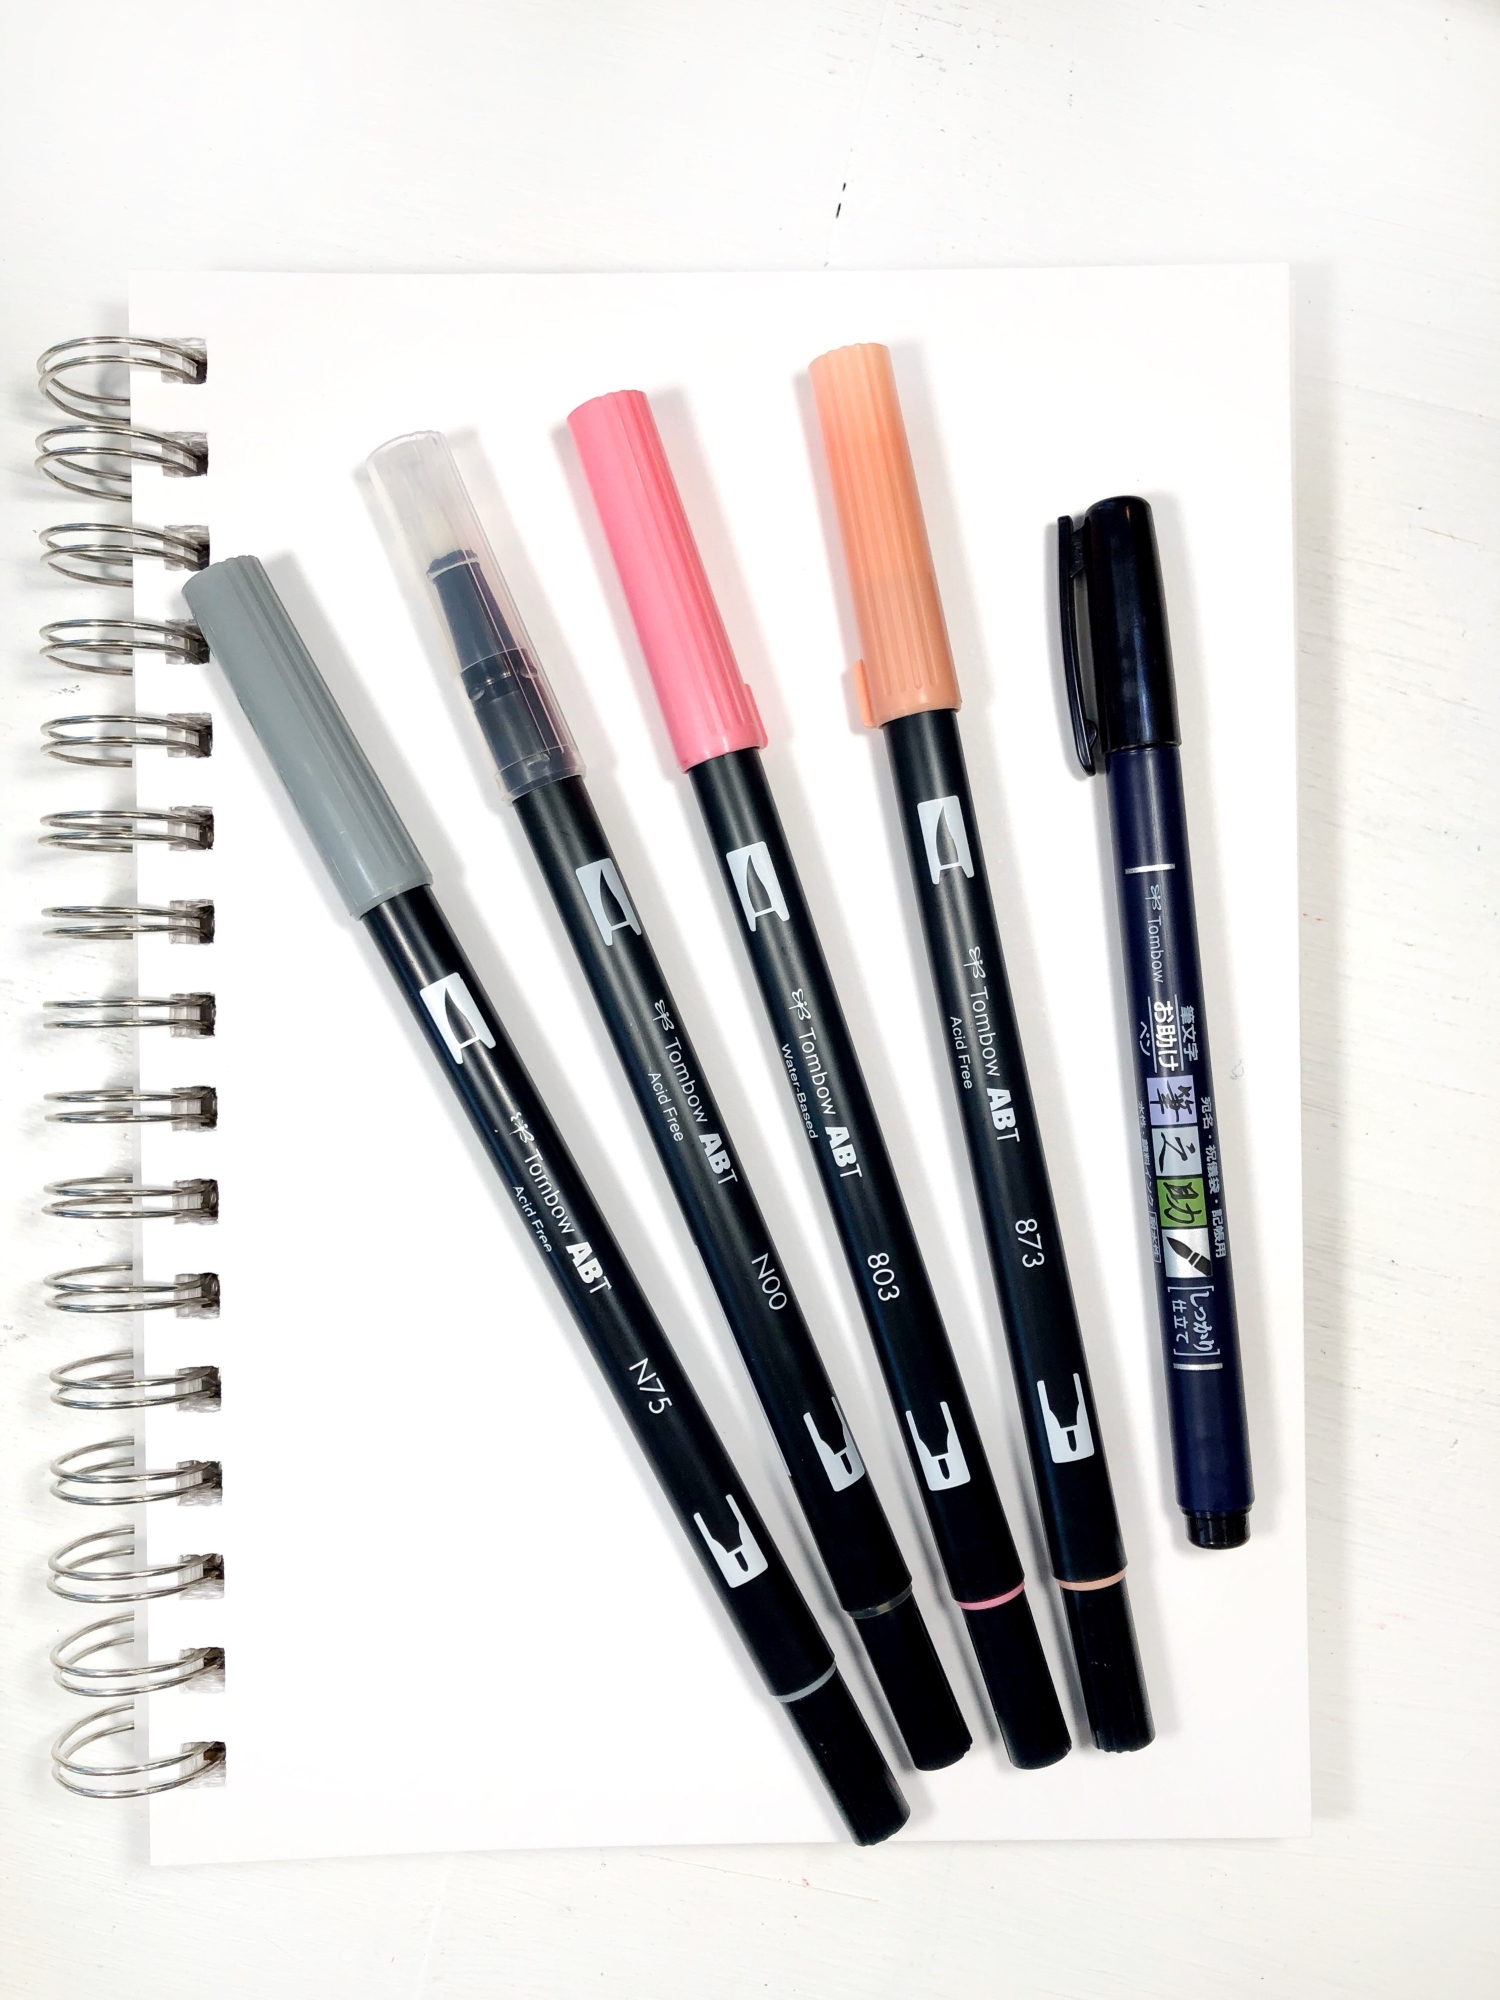
MATERIALS
- A sheet of Mixed Media Paper
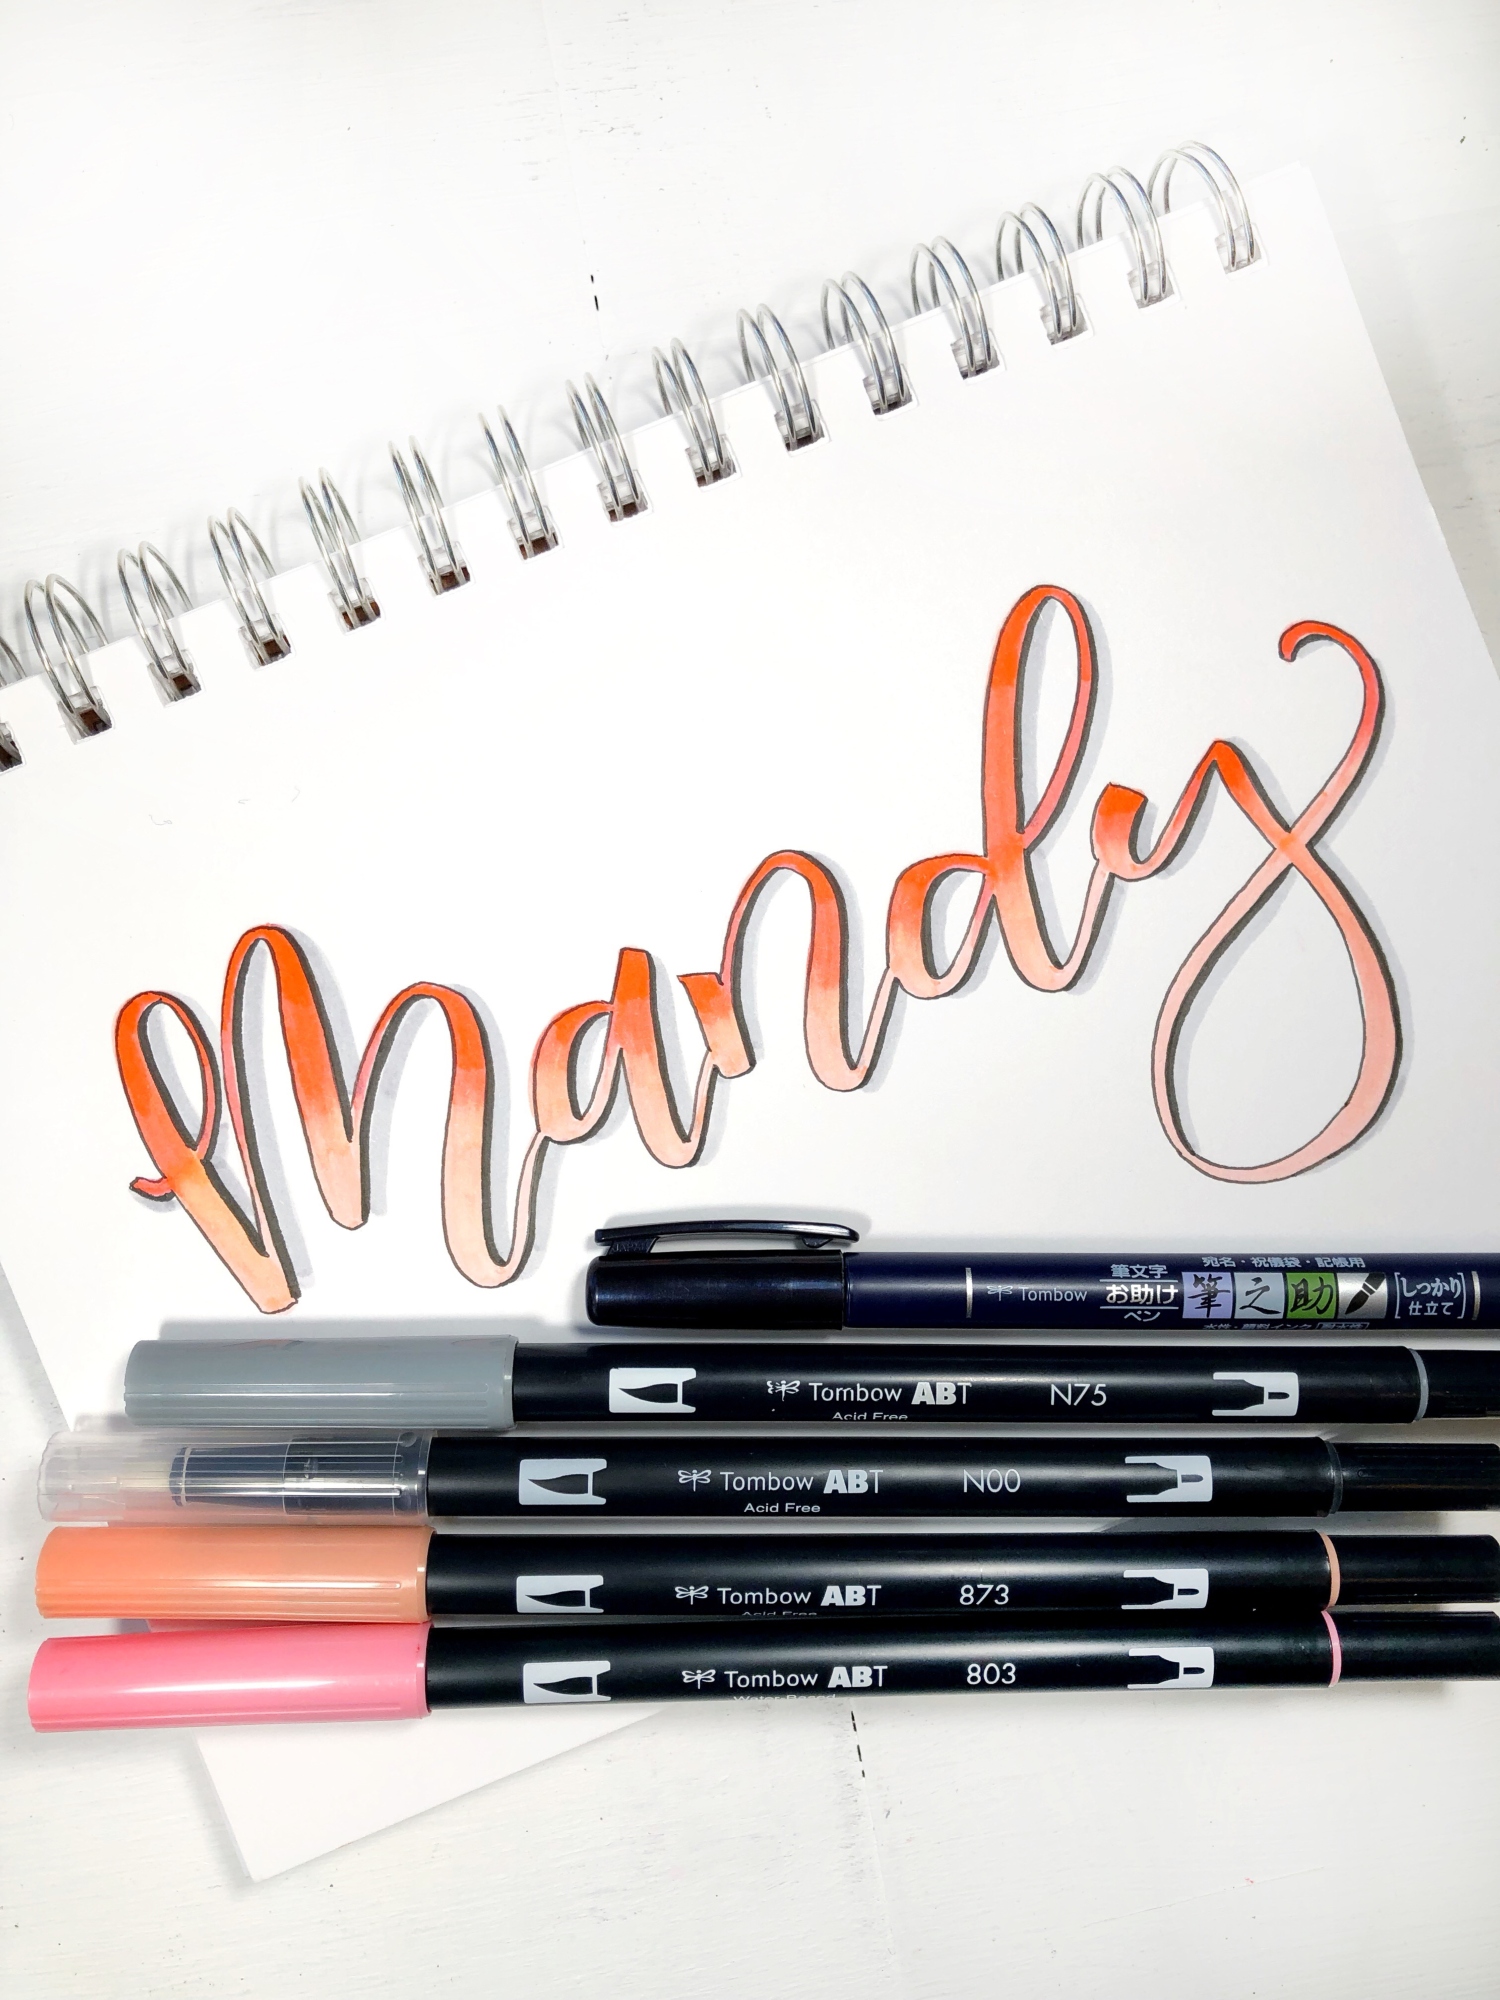
- Tombow Dual Brush Pens: 803-Pink Punch, 873-Coral, N75-Cool Gray 3, and N00-Colorless Blender
- Tombow Fudenosuke Hard Tip Pen
STEP 1
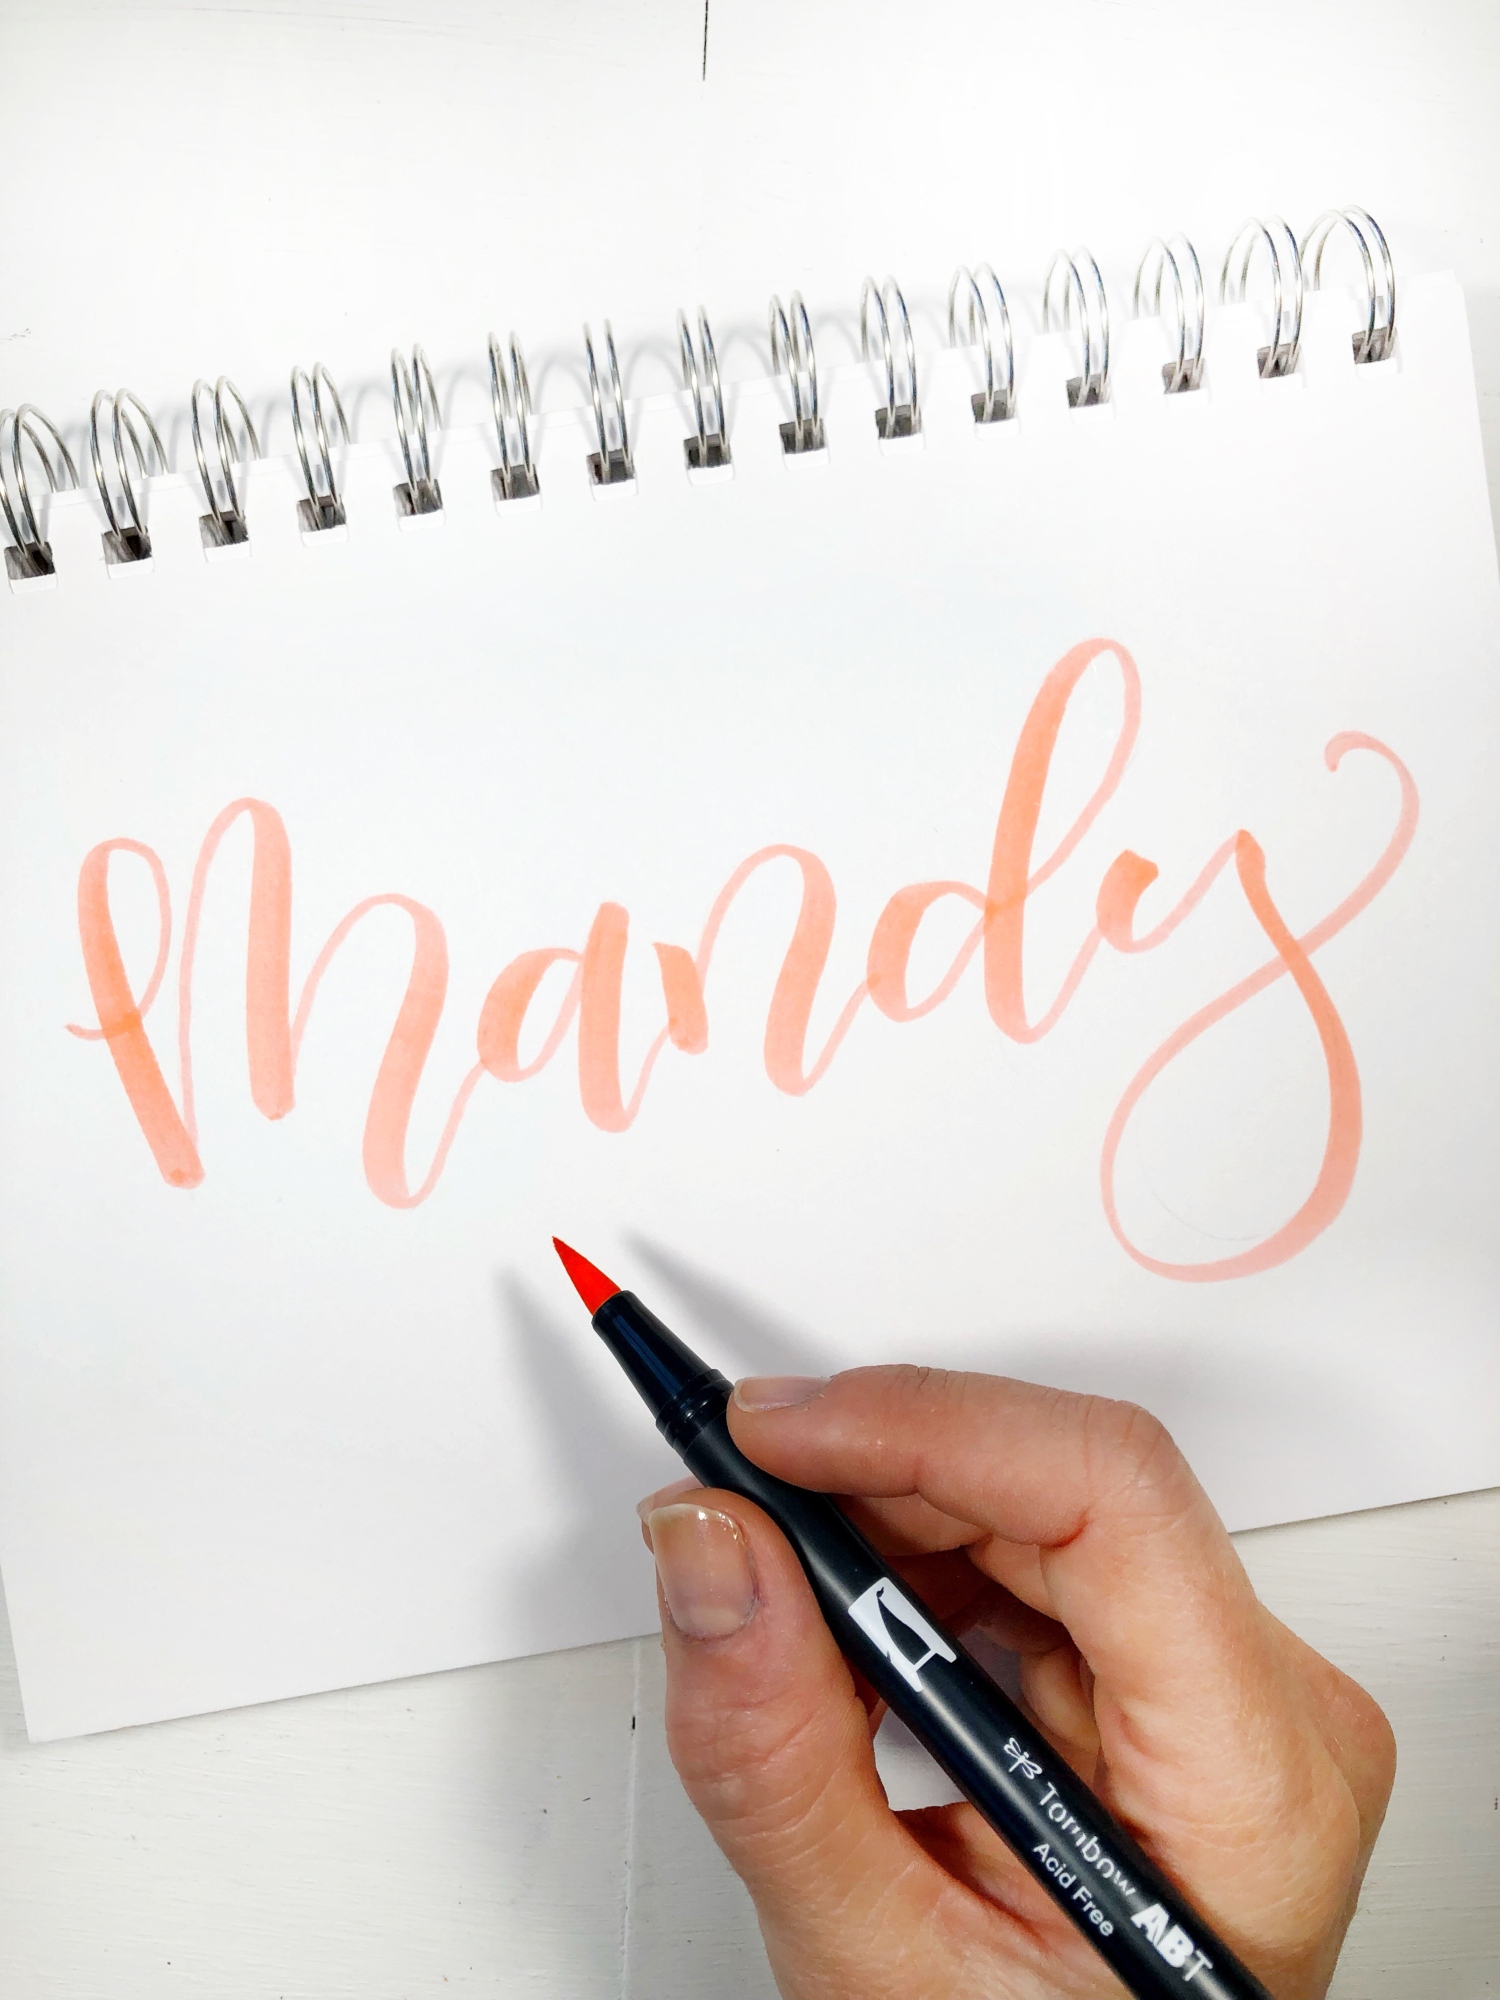
Using Dual Brush Pen Coral (873), letter out your name or any word you want! A little side note: I find mixed media paper to be the best for blending. It’s made to handle multiple layers of color, but it’s also smooth enough to protect your precious Tombow pens!
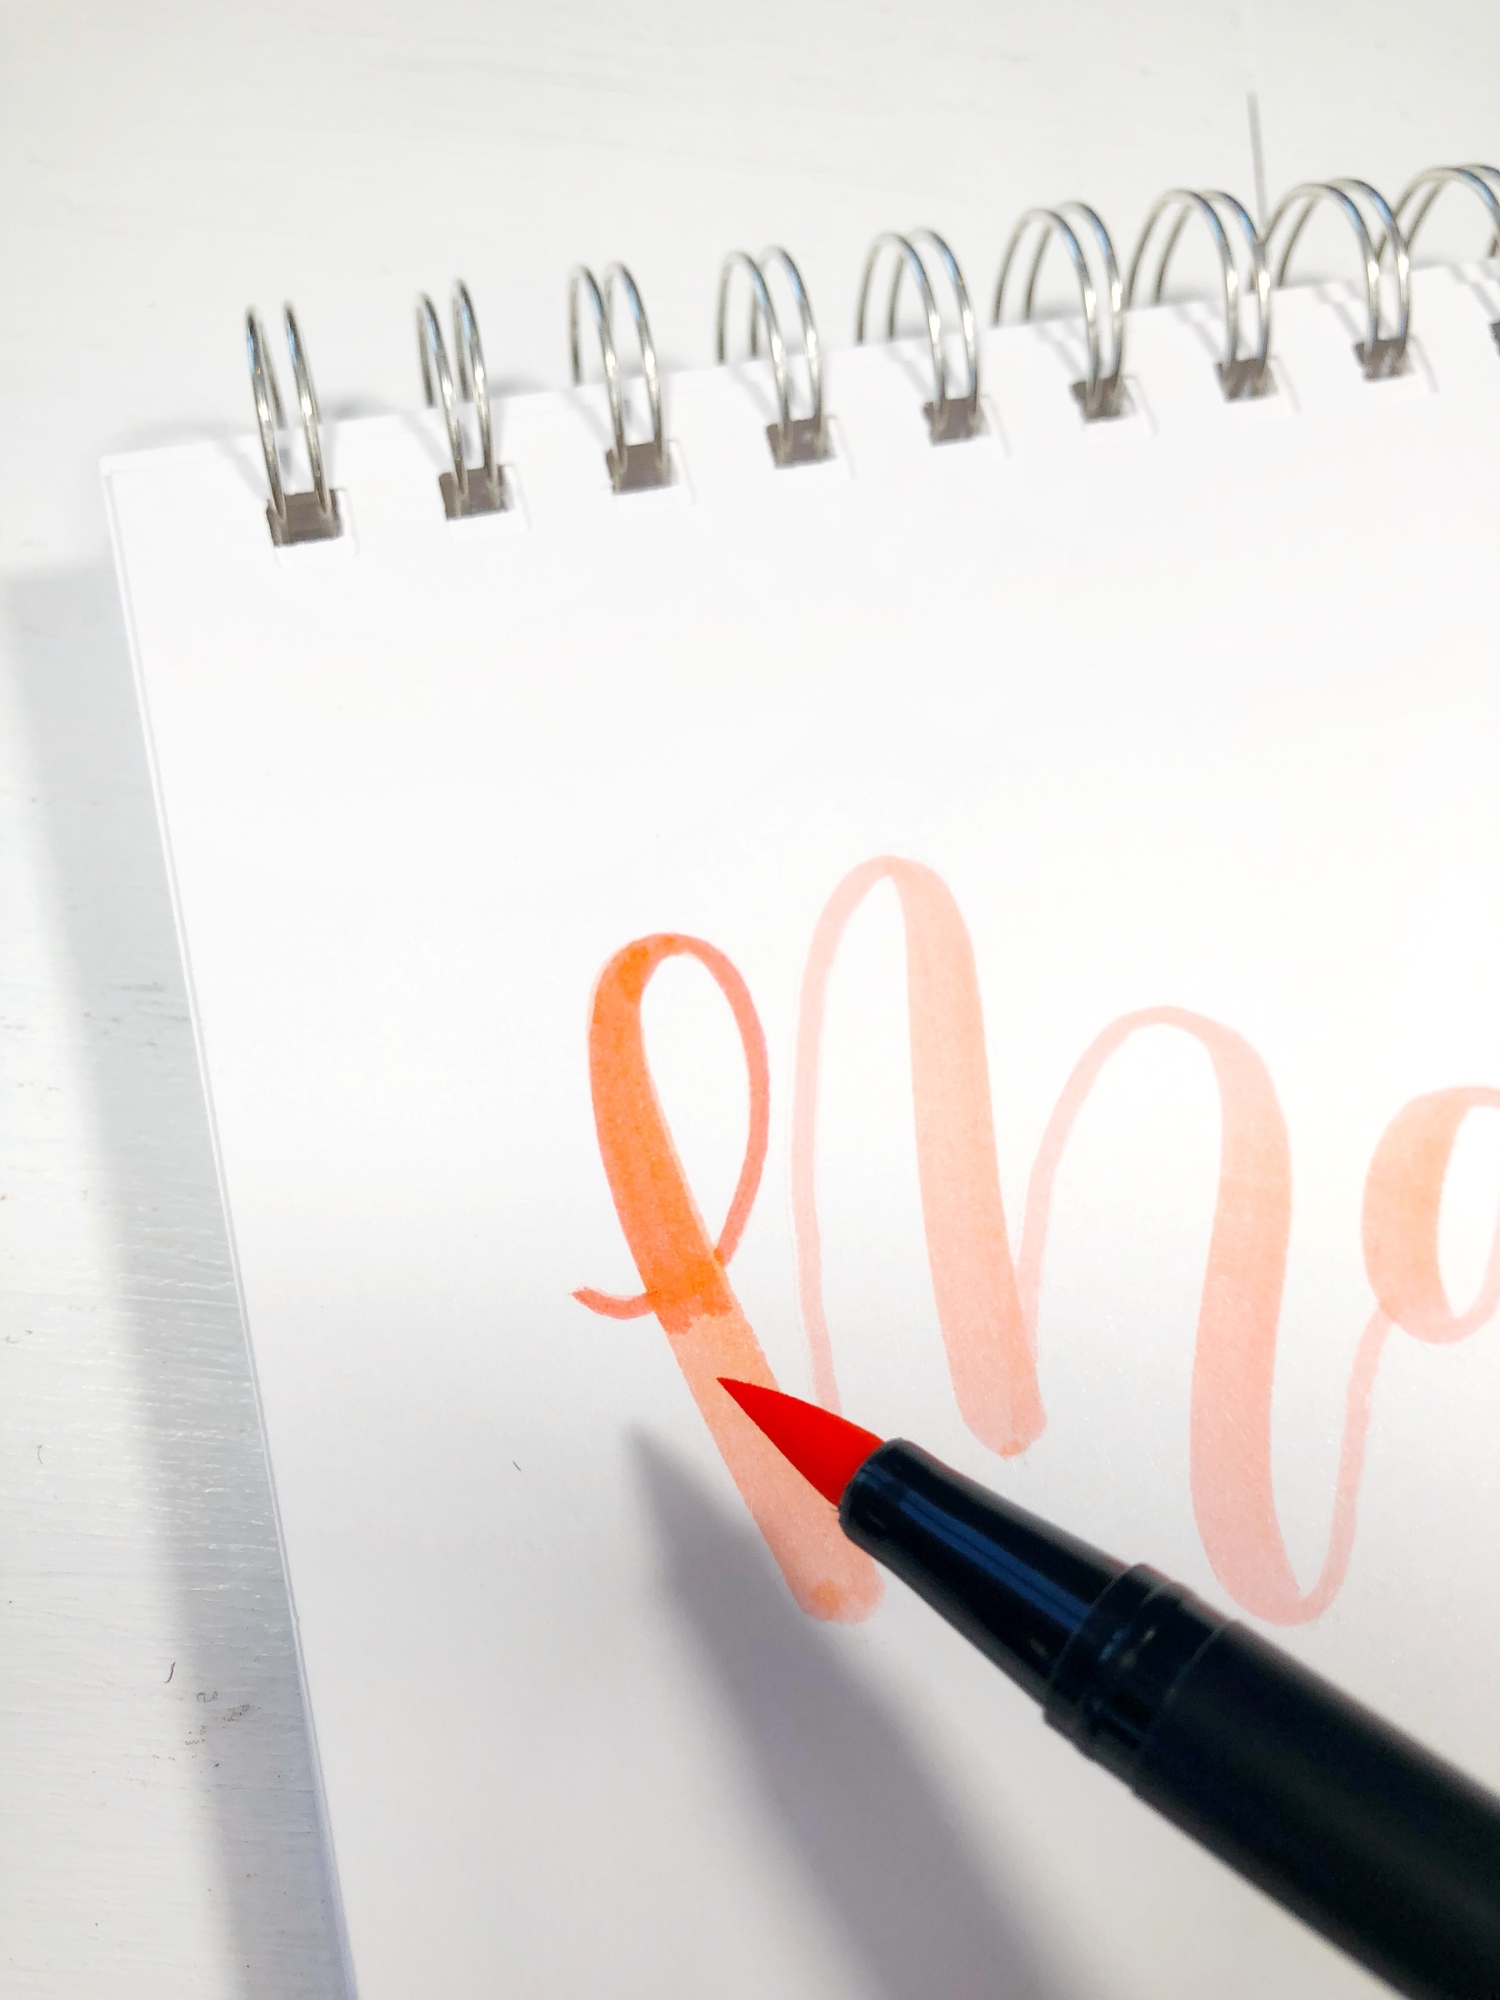
STEP 2
Using Dual Brush Pen Pink Punch (803), color in the top half of your letters covering the Coral. It’s best to work on one letter at a time. If you fill in all your letters at once with your second color, it will be dry by the time you get to your last letter, making it harder to blend the ink.
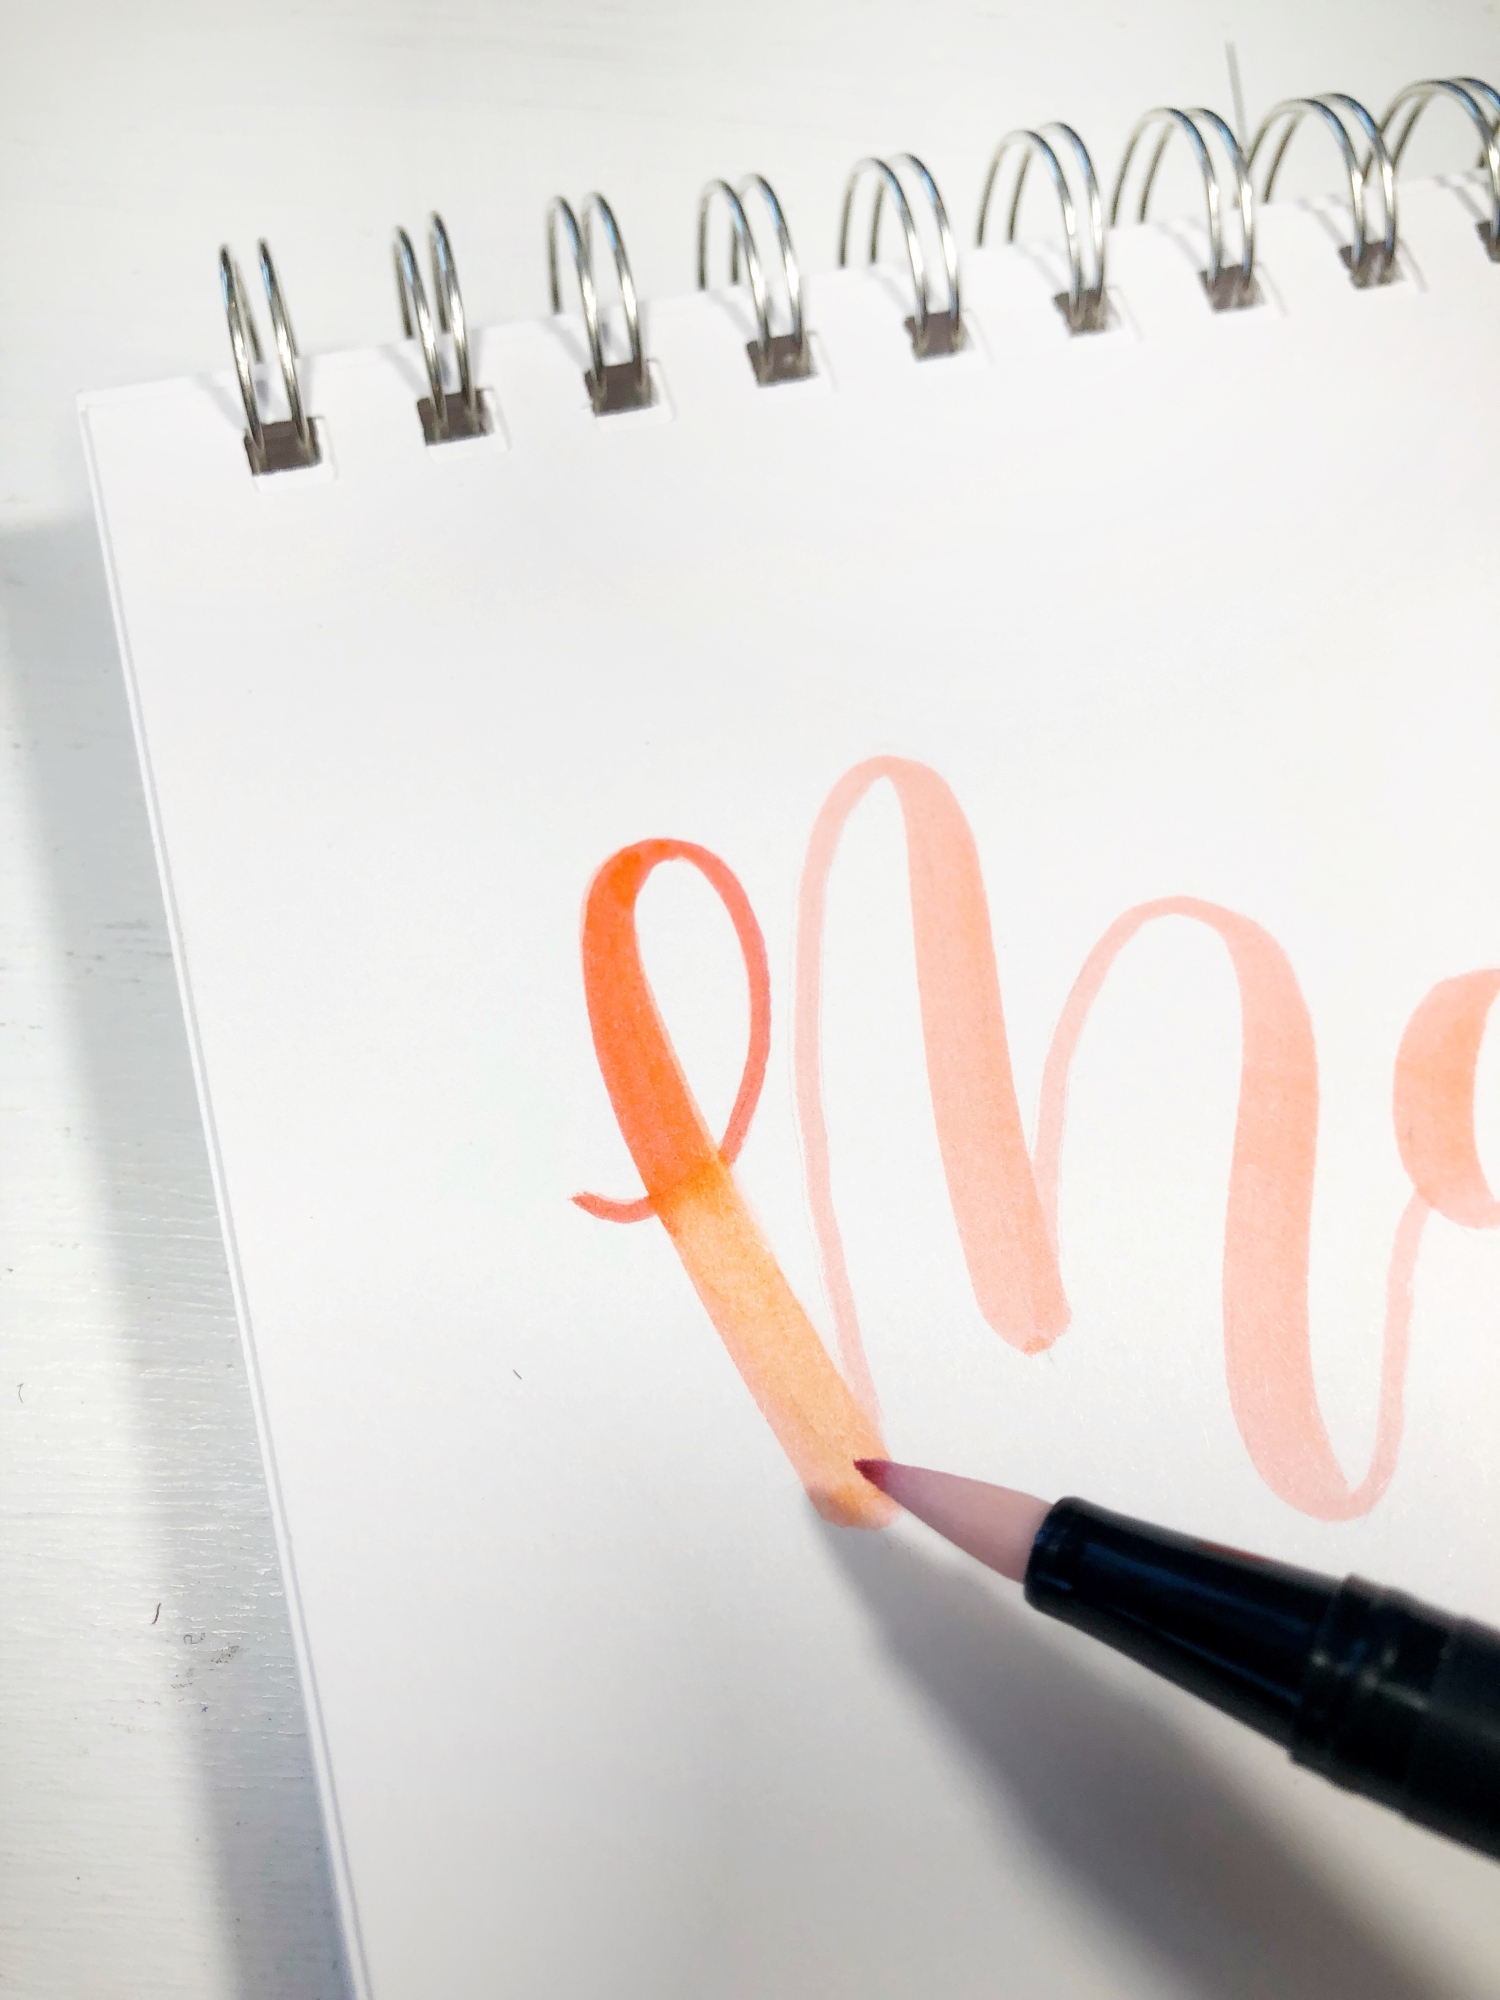
STEP 3
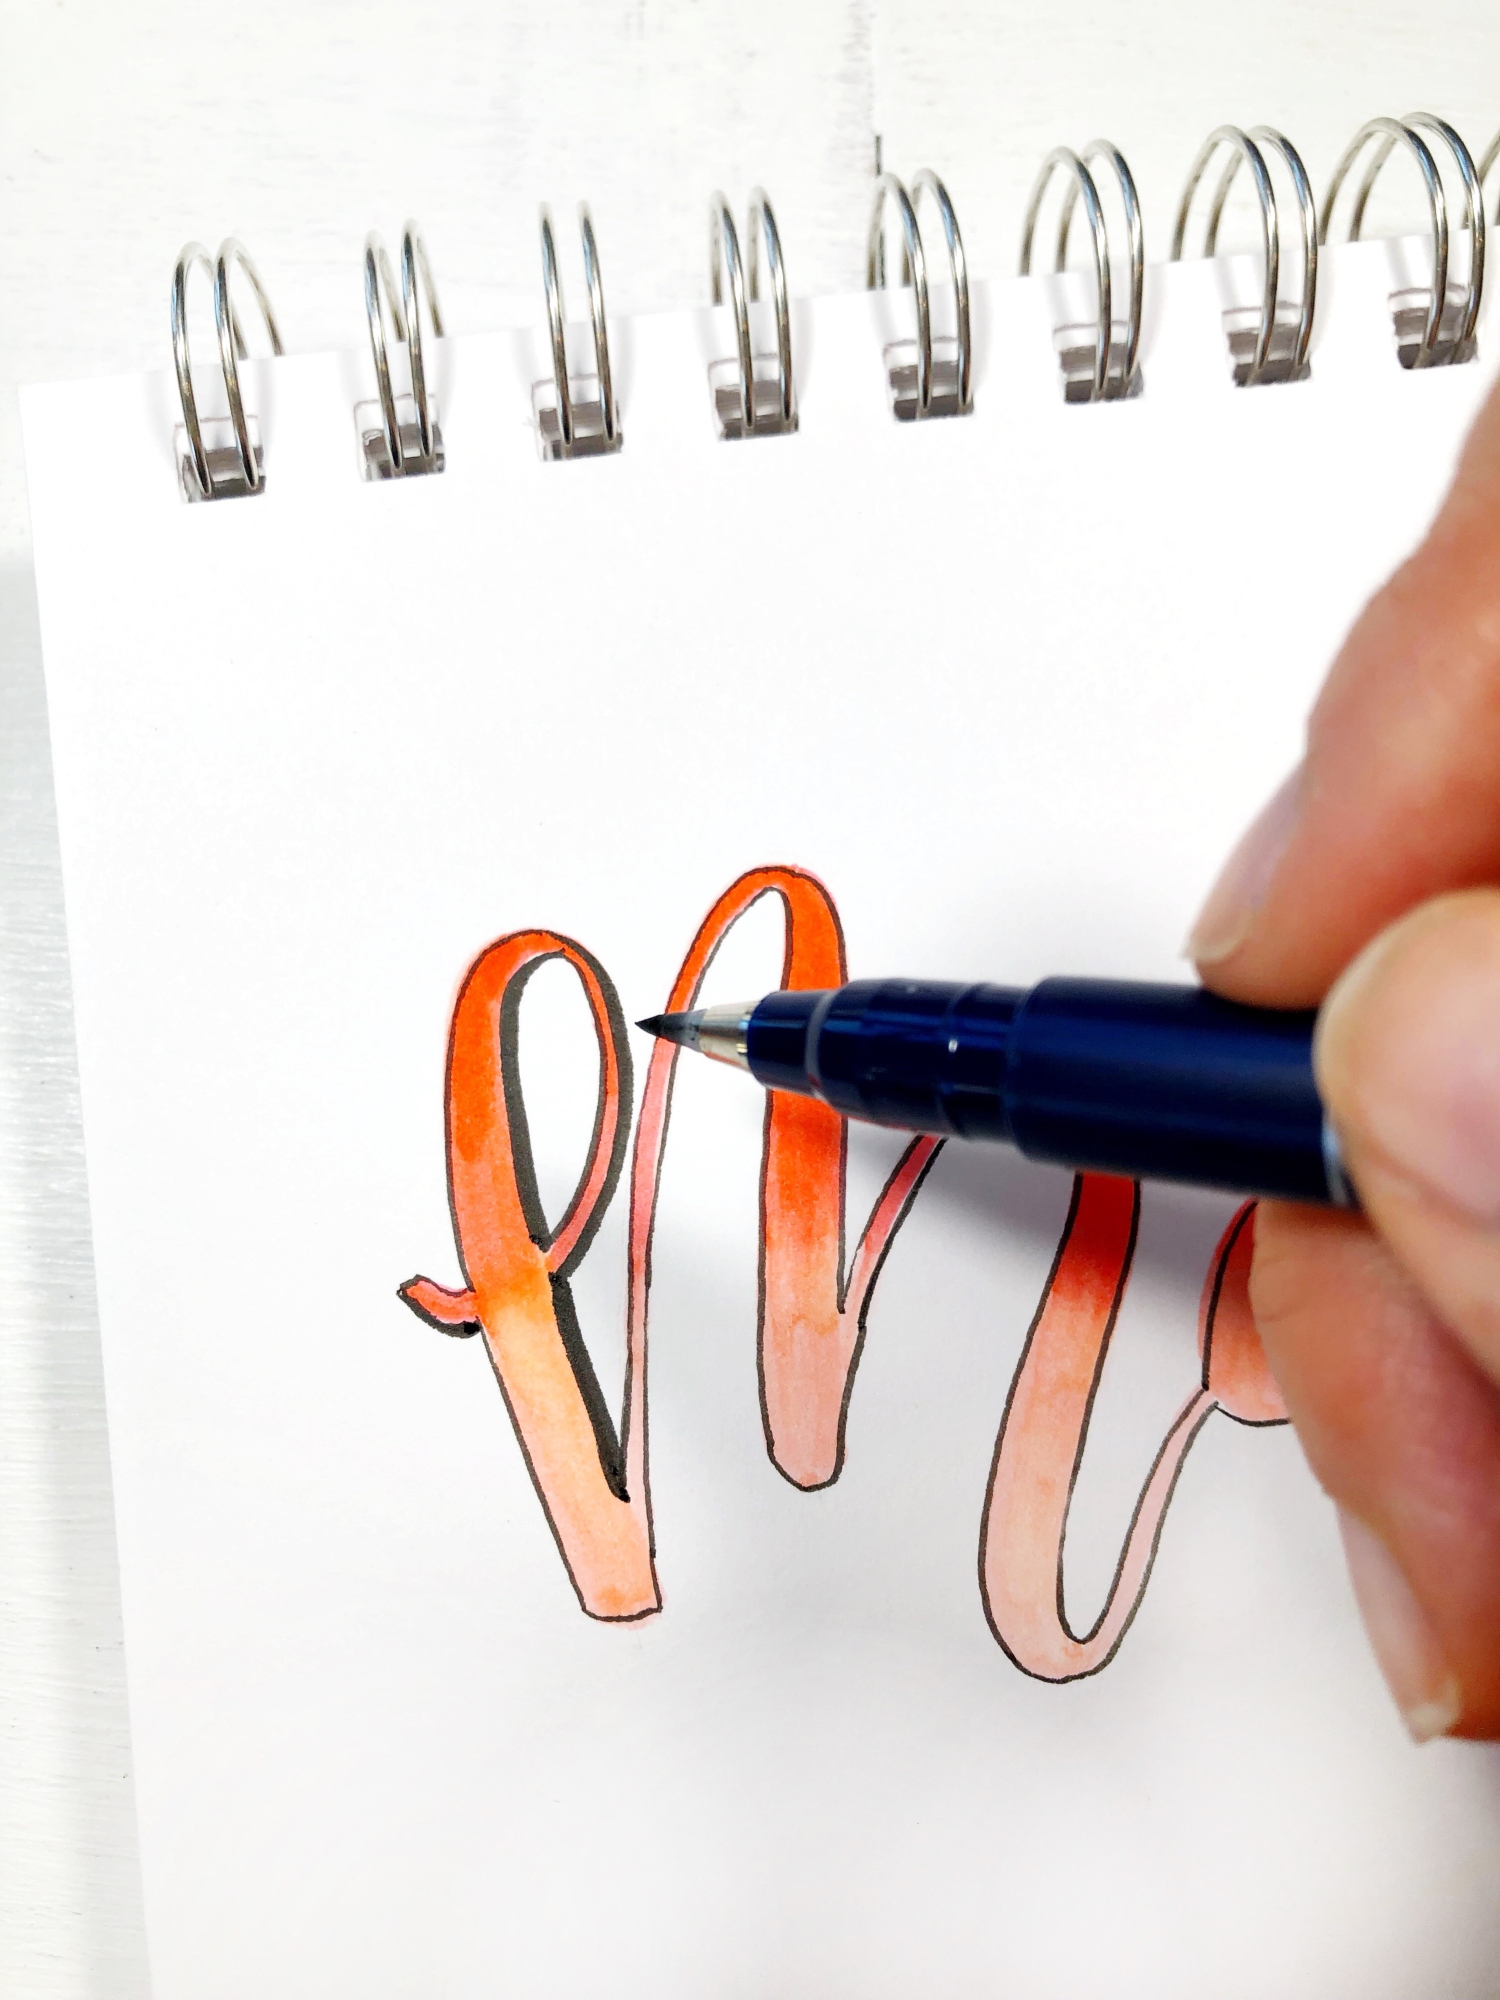
Using the Colorless Blender Pen (N00), start at the top of your letter (in the Pink Punch area) and use downward strokes to bring the Pink Punch color down to the bottom of the letter.
STEP 4
Outline the outside of your letters with the Fudenosuke Hard Tip Pen. I use very light pressure when tracing around the letters. Next, apply some pressure to the pen and add thicker lines to all the down strokes of your letters. This will give your letters some depth with a thicker shadow.
STEP 5
Lastly, using Dual Brush Pen Cool Gray 3 (N75), add a somewhat thick line to all the down strokes of your letters to add a gray shadow effect. Here’s a tip: pick either the left or right side of your letters to add the shadow, so they all look consistent.

Here’s what the end result will look like!
I hope you enjoyed learning my favorite way to letter, and creating some amazing lettering effects. I’m looking forward to sharing more projects with you this coming year!
Till next time,
Mandy
Pingback: 5 Things To Do With The Tombow Advanced Lettering Set - Tombow USA Blog
Pingback: Animal Print and Blending Tutorial - Tombow USA Blog
Pingback: Easy Blending for Beginner Letterers - Tombow USA Blog