Hi friends, Adrienne from Studio 80 Design here today! Are you ready for summer?! I wanted to share a fun tutorial on how to create summer popsicle lettering! Tombow just released their new line of water brushes. I am OBSESSED! There is a small round tip, medium round tip, and a flat tip brush. They make blending the water-based Dual Brush Pens a breeze! Let’s get started!
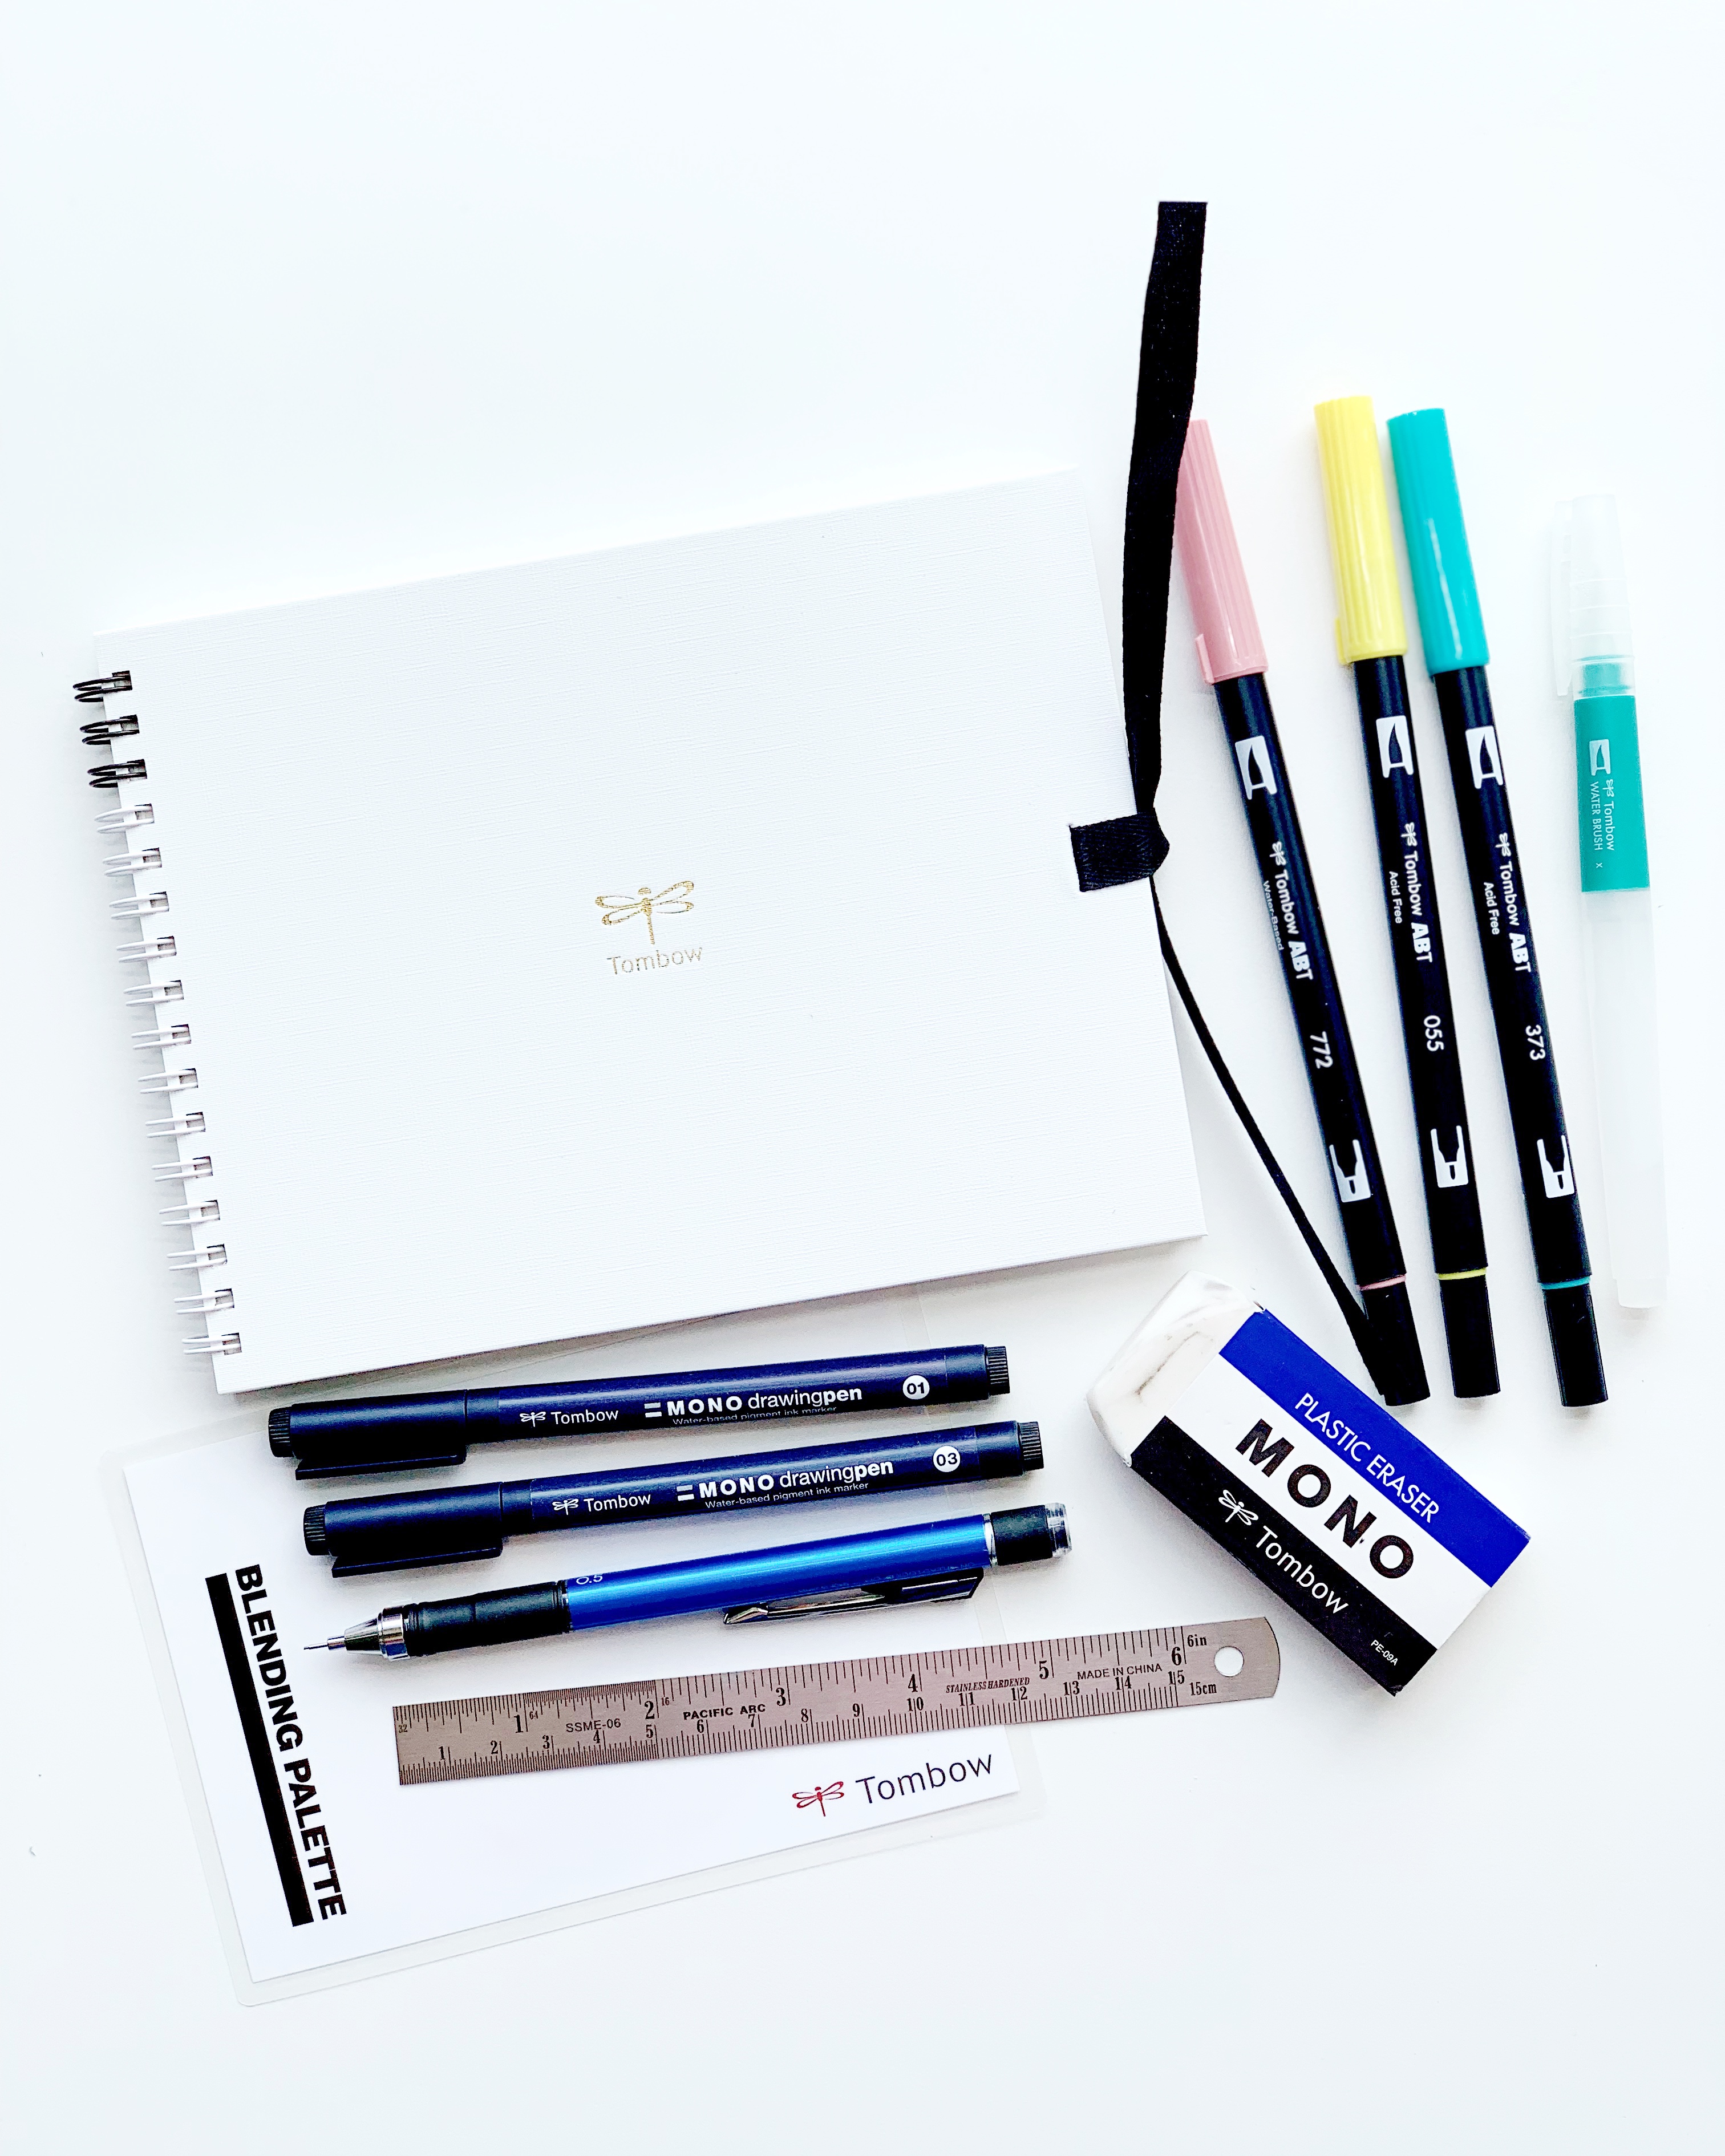
Materials you’ll need:
- Tombow Spiral Art Journal
- Tombow MONO Graph Grip Mechanical Pencil
- Ruler
- Tombow Dual Brush Pens in 772, 055, 373
- Tombow Blending Palette
- Tombow Round Water Brush Pen, Medium
- Tombow MONO Drawing Pens, 03 and 01
- Tombow MONO Eraser
- Cup of water
Step 1
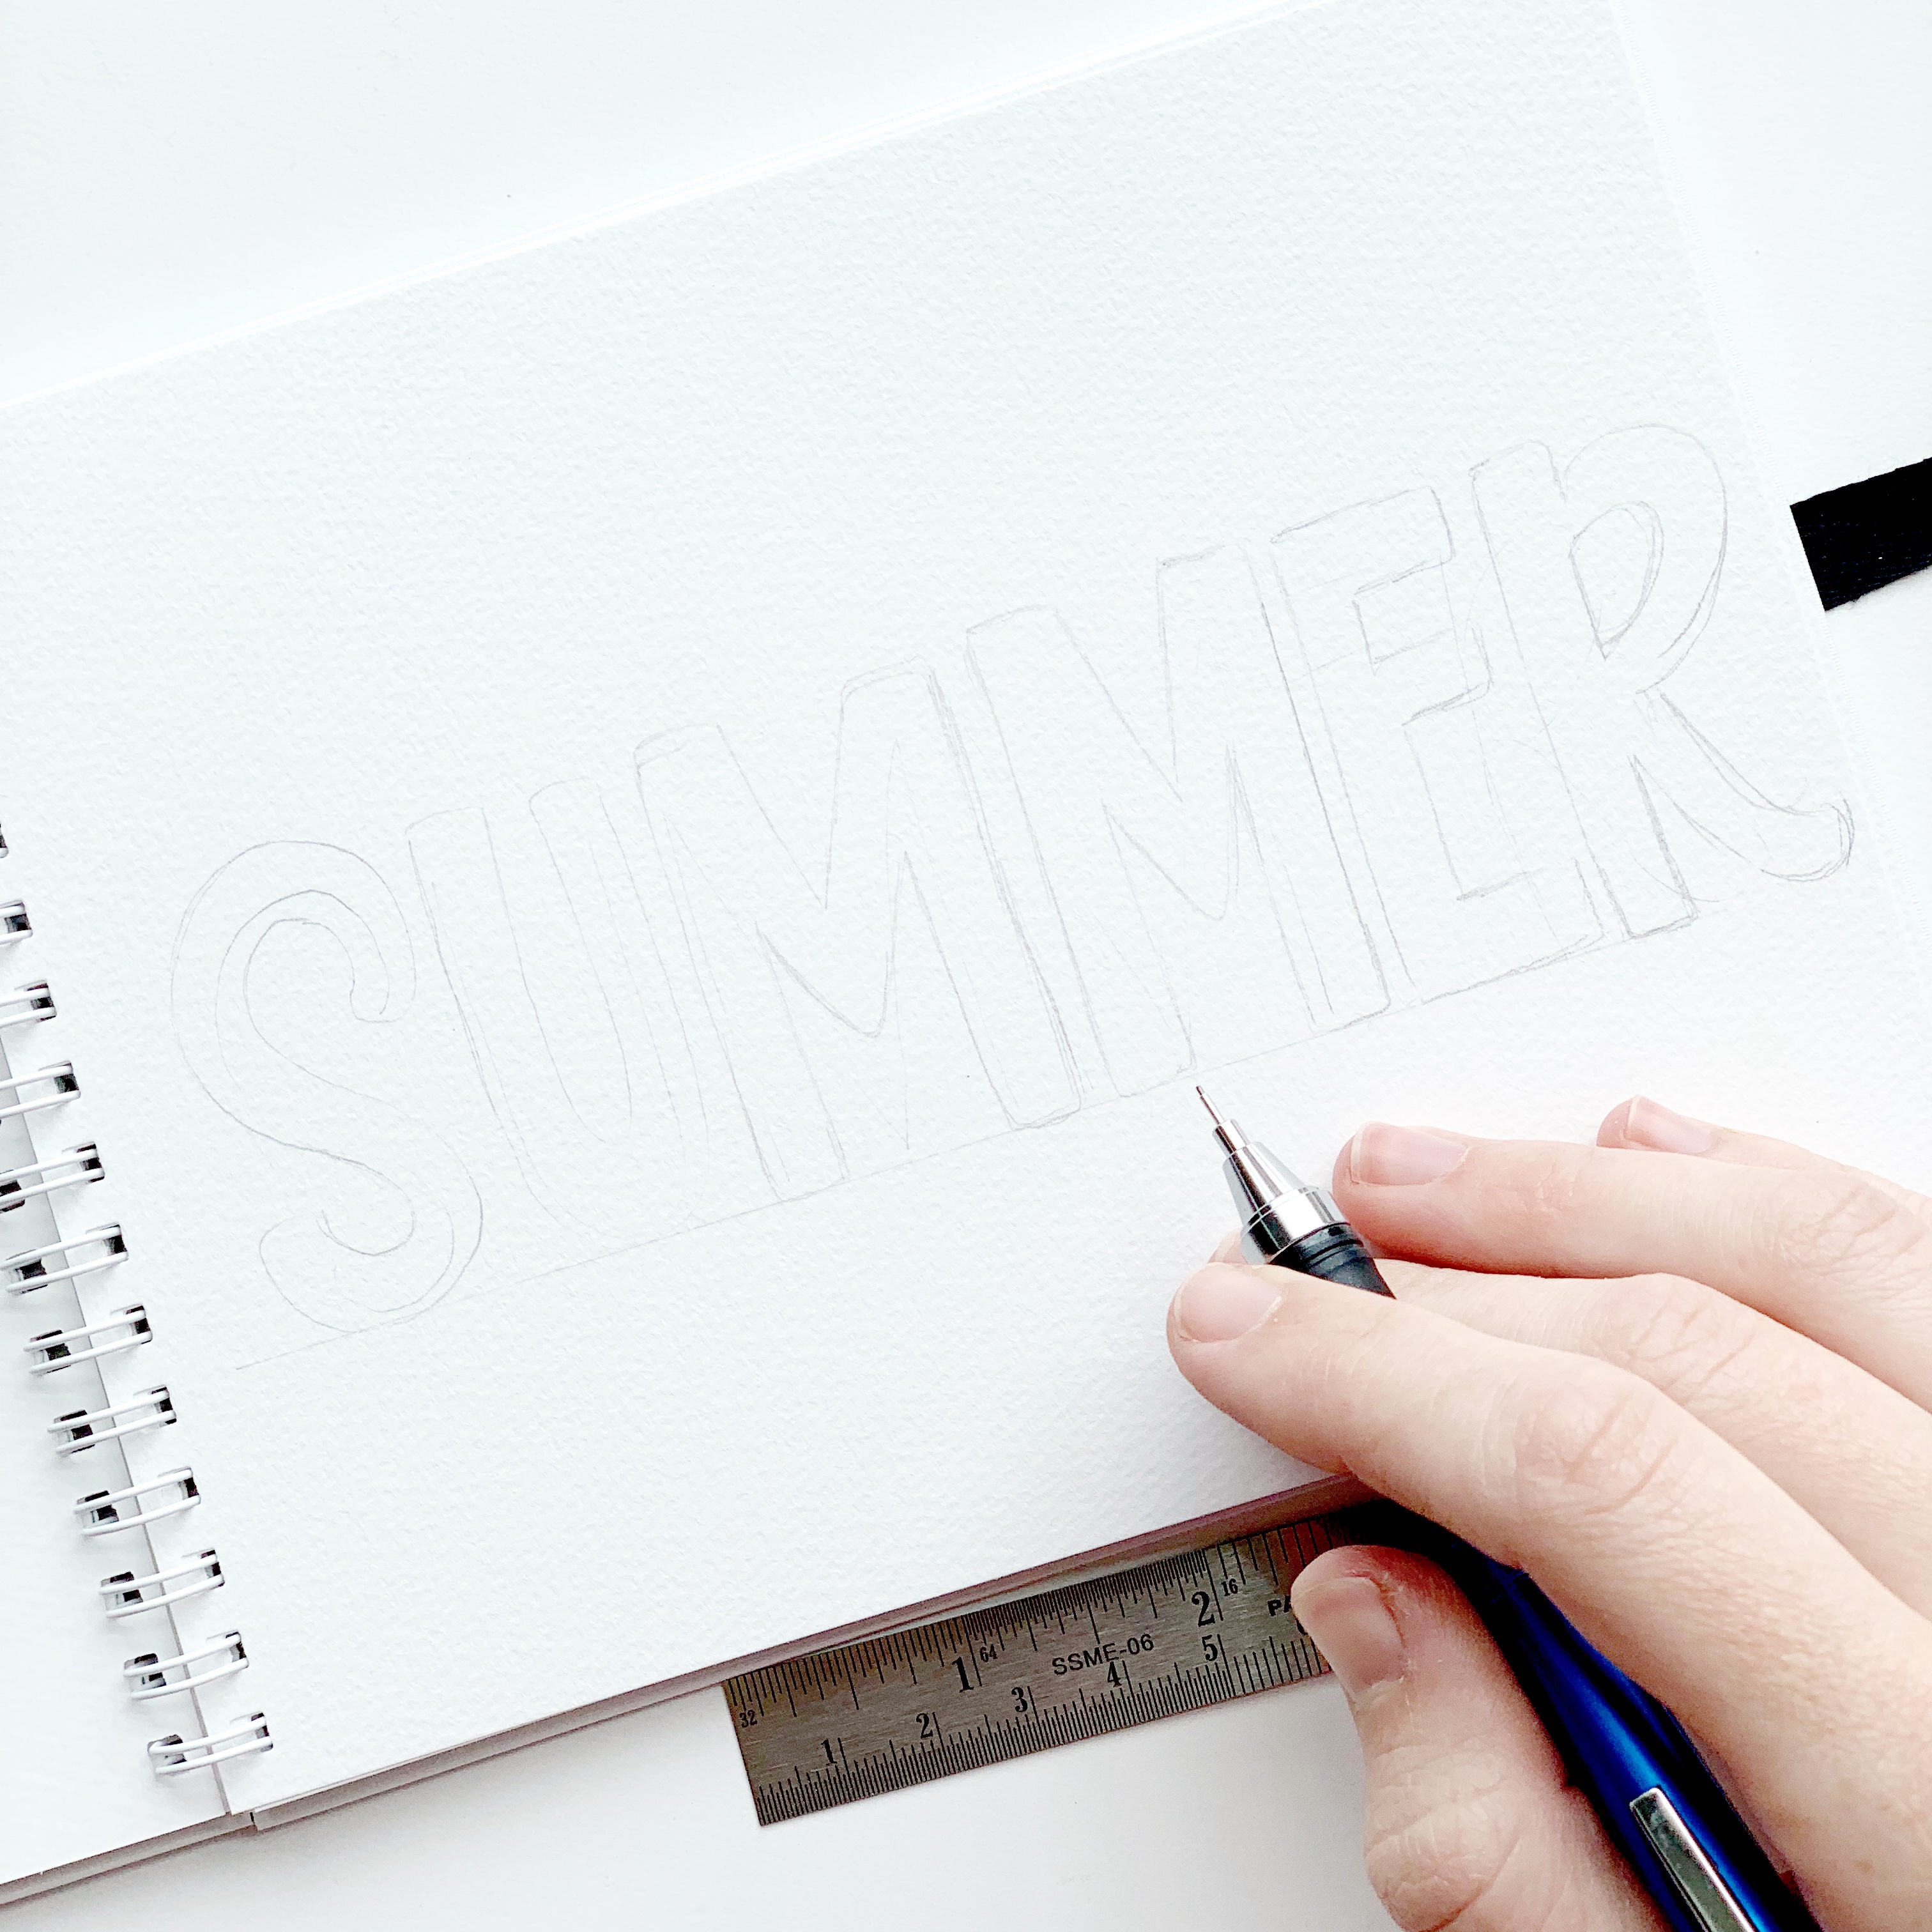
Use the MONO Graph Grip Mechanical Pencil to draw a baseline on a page of the Tombow Spiral Art Journal. Then lightly sketch out the word “summer” on the baseline.

Step 2
Sketch out rounded letters around the original “summer” letters. Erase the first sketch of letters with the MONO Eraser, so the letters are neat and clean.
Step 3
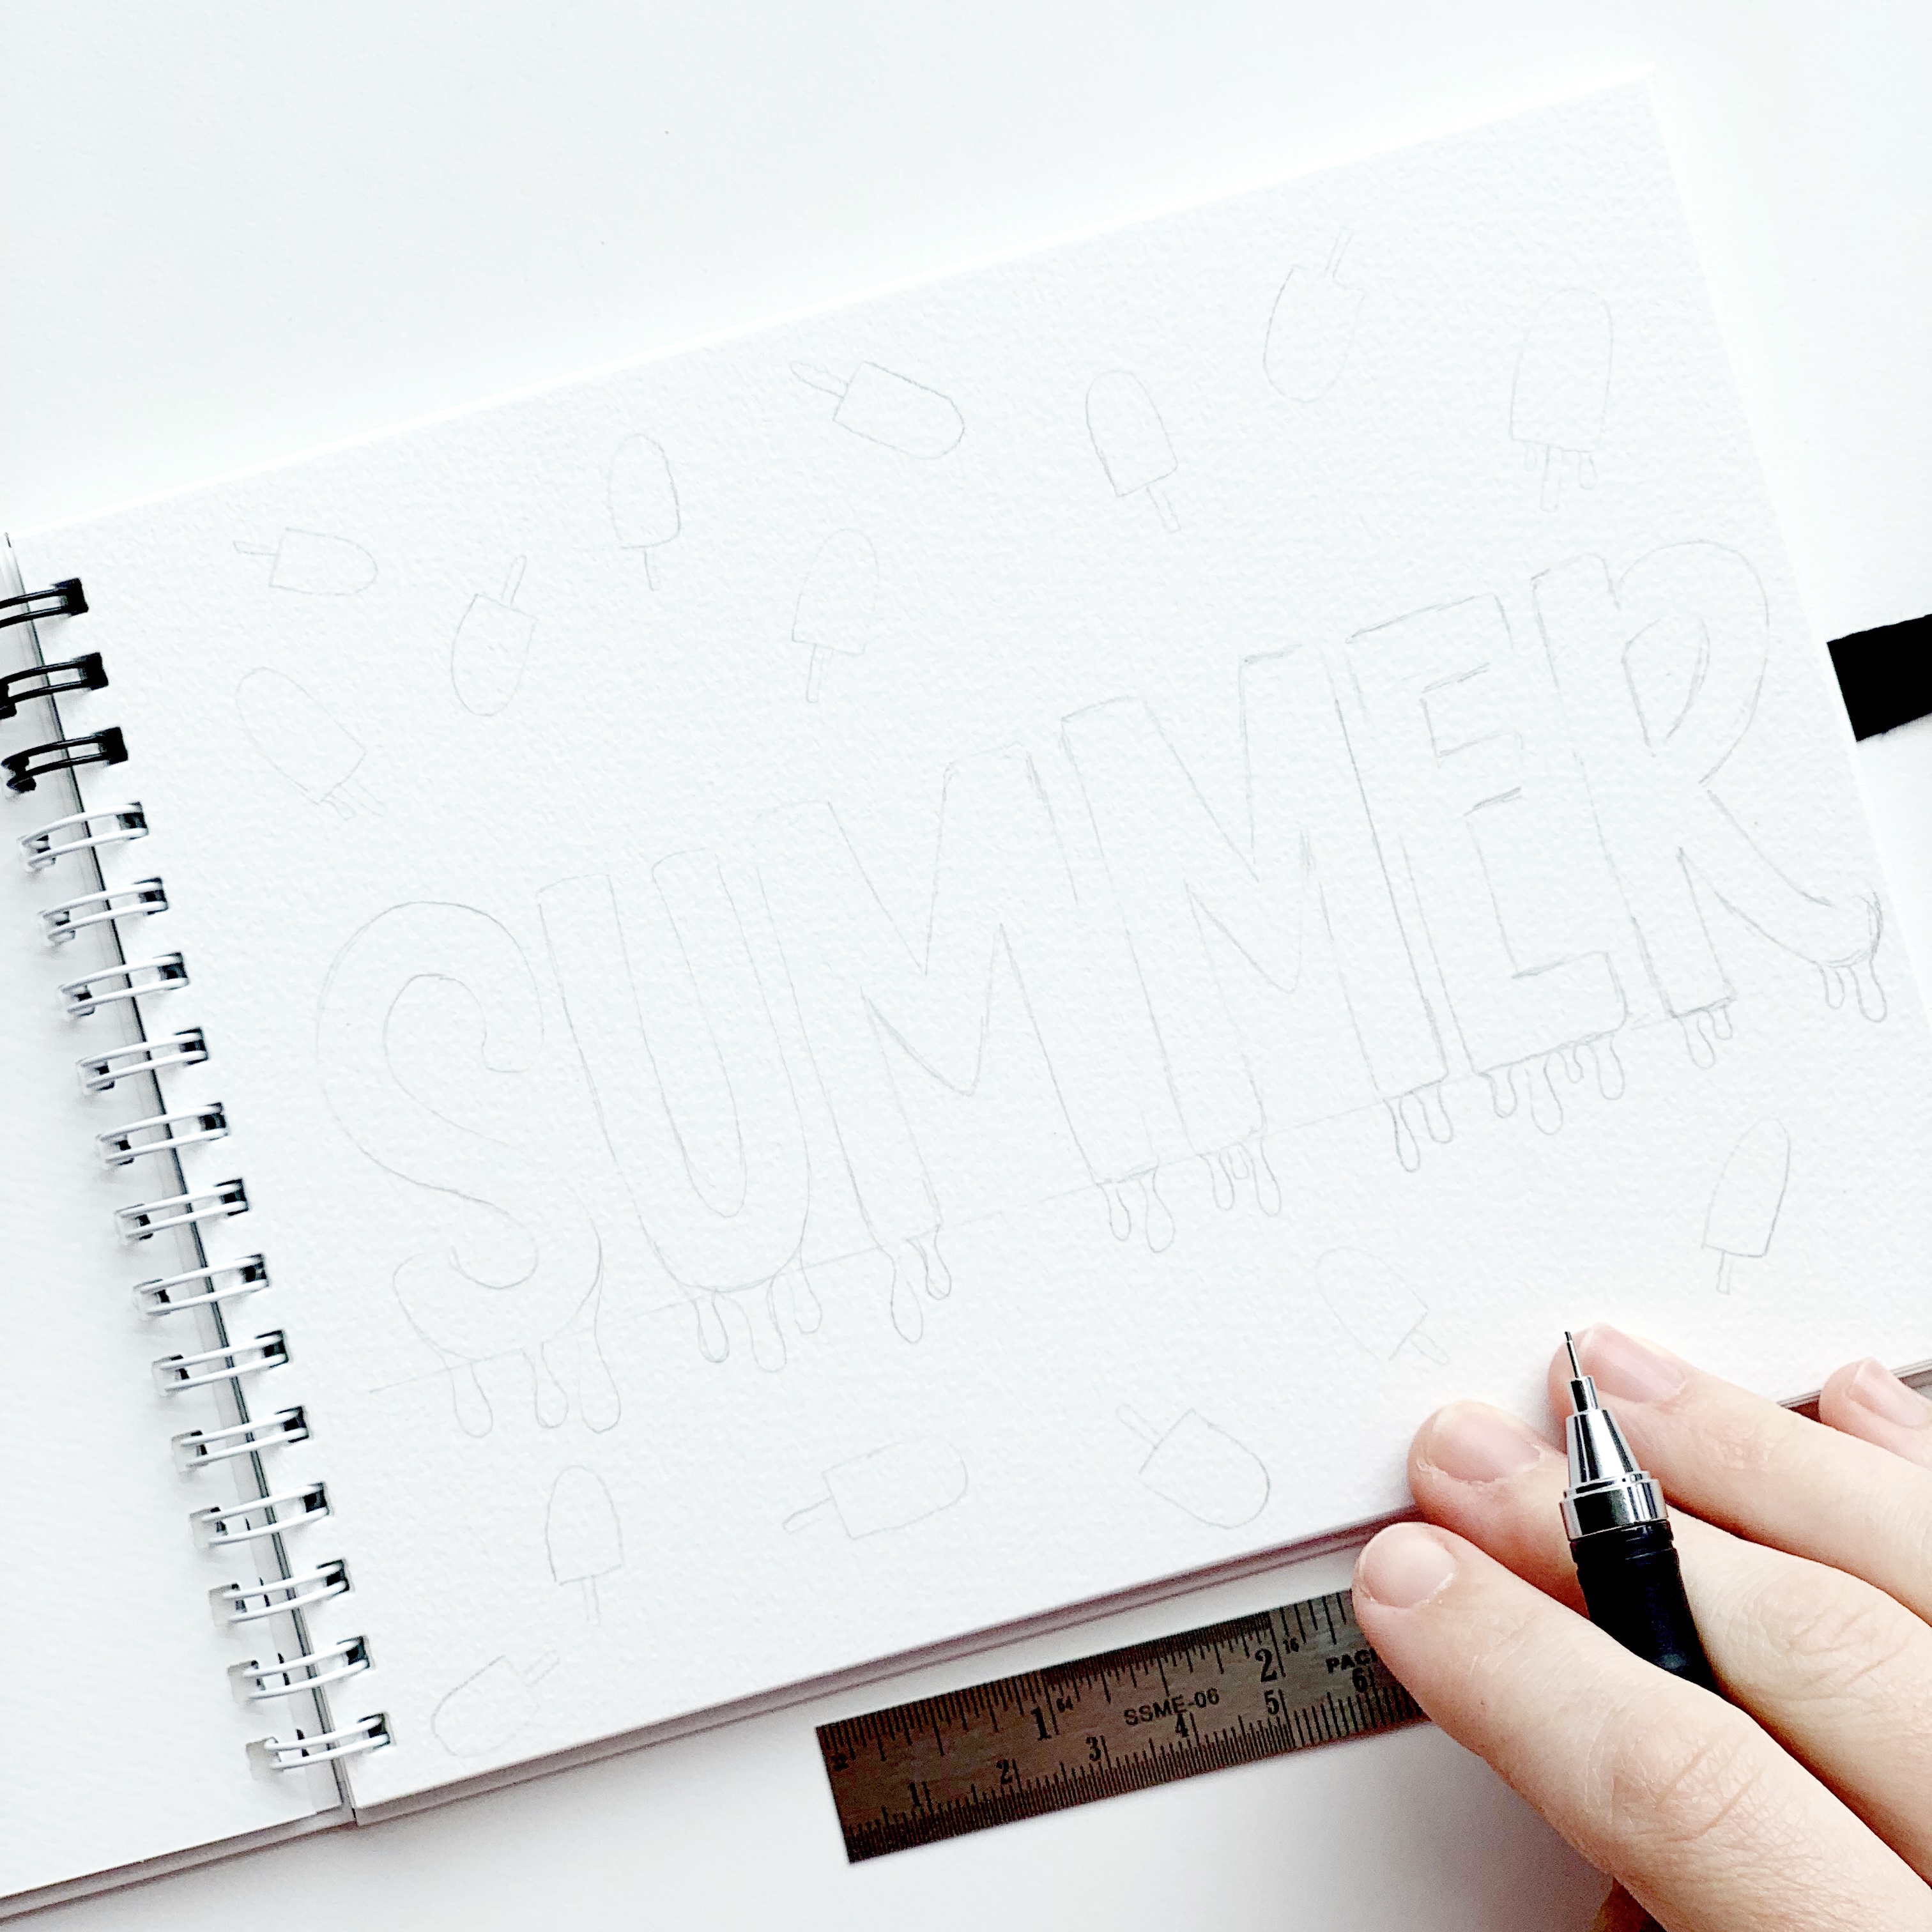
Draw in drips at the bottom of each letter as well as small popsicles around the page!
Step 4
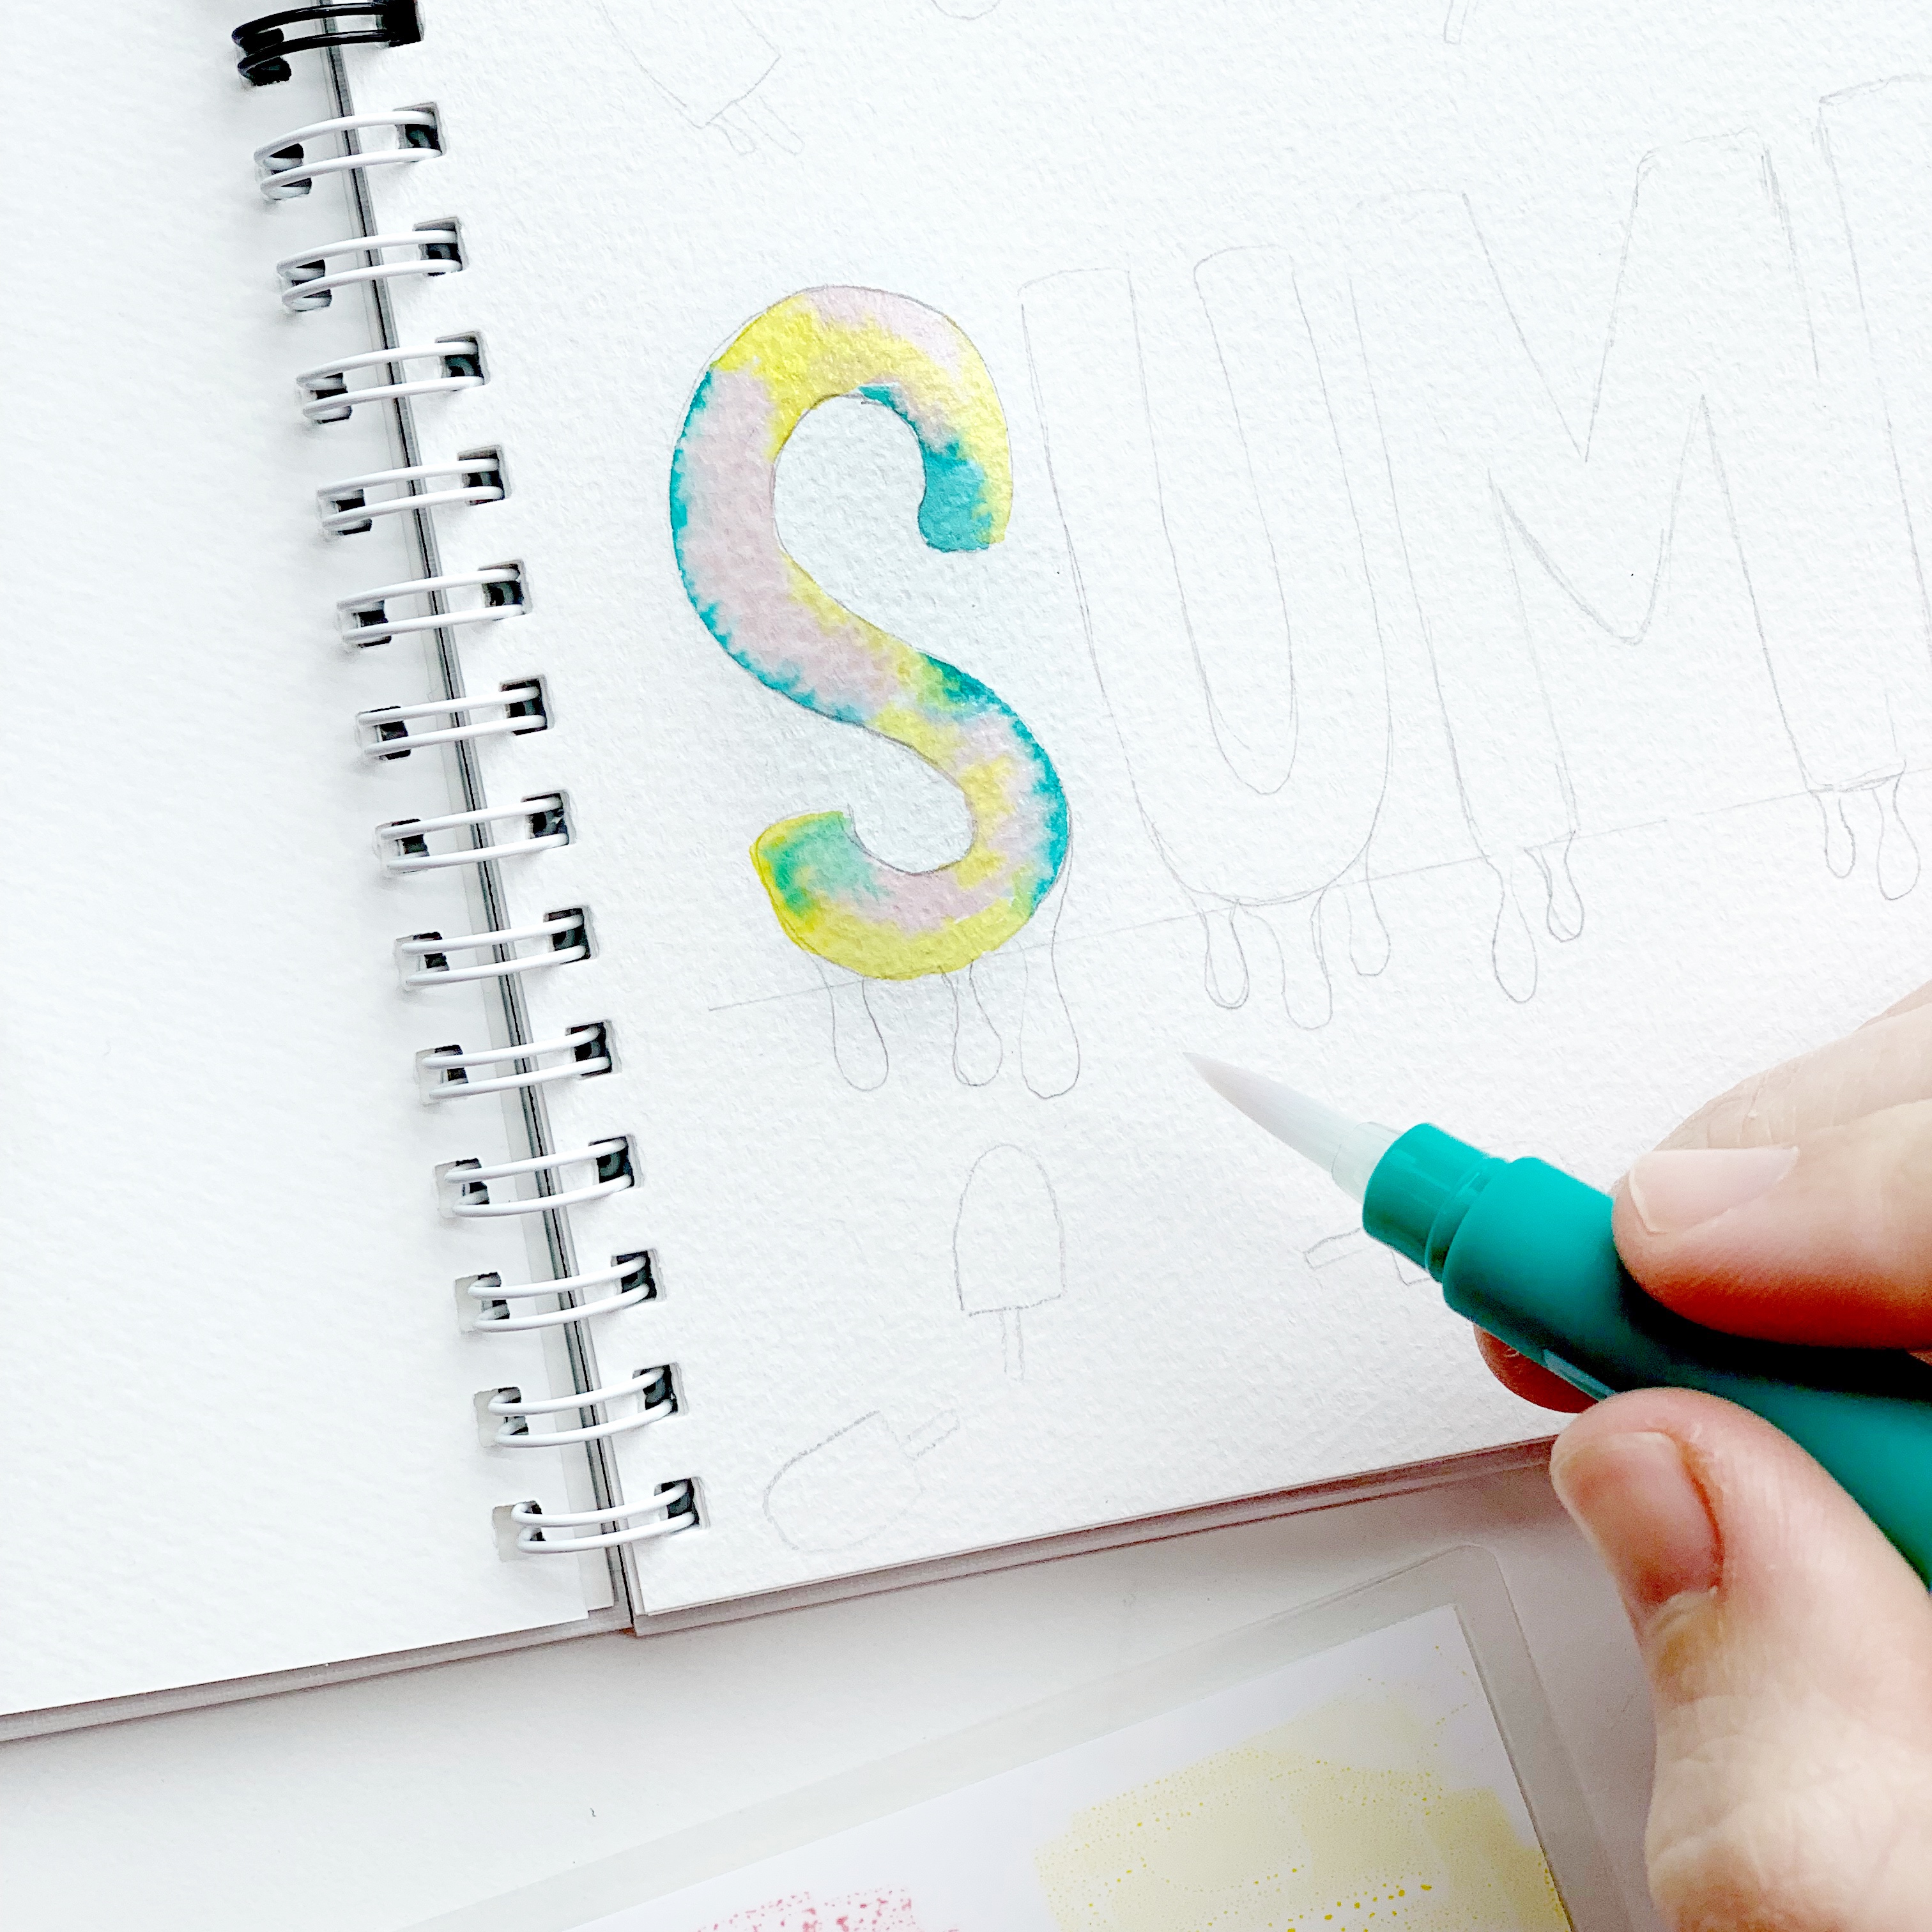
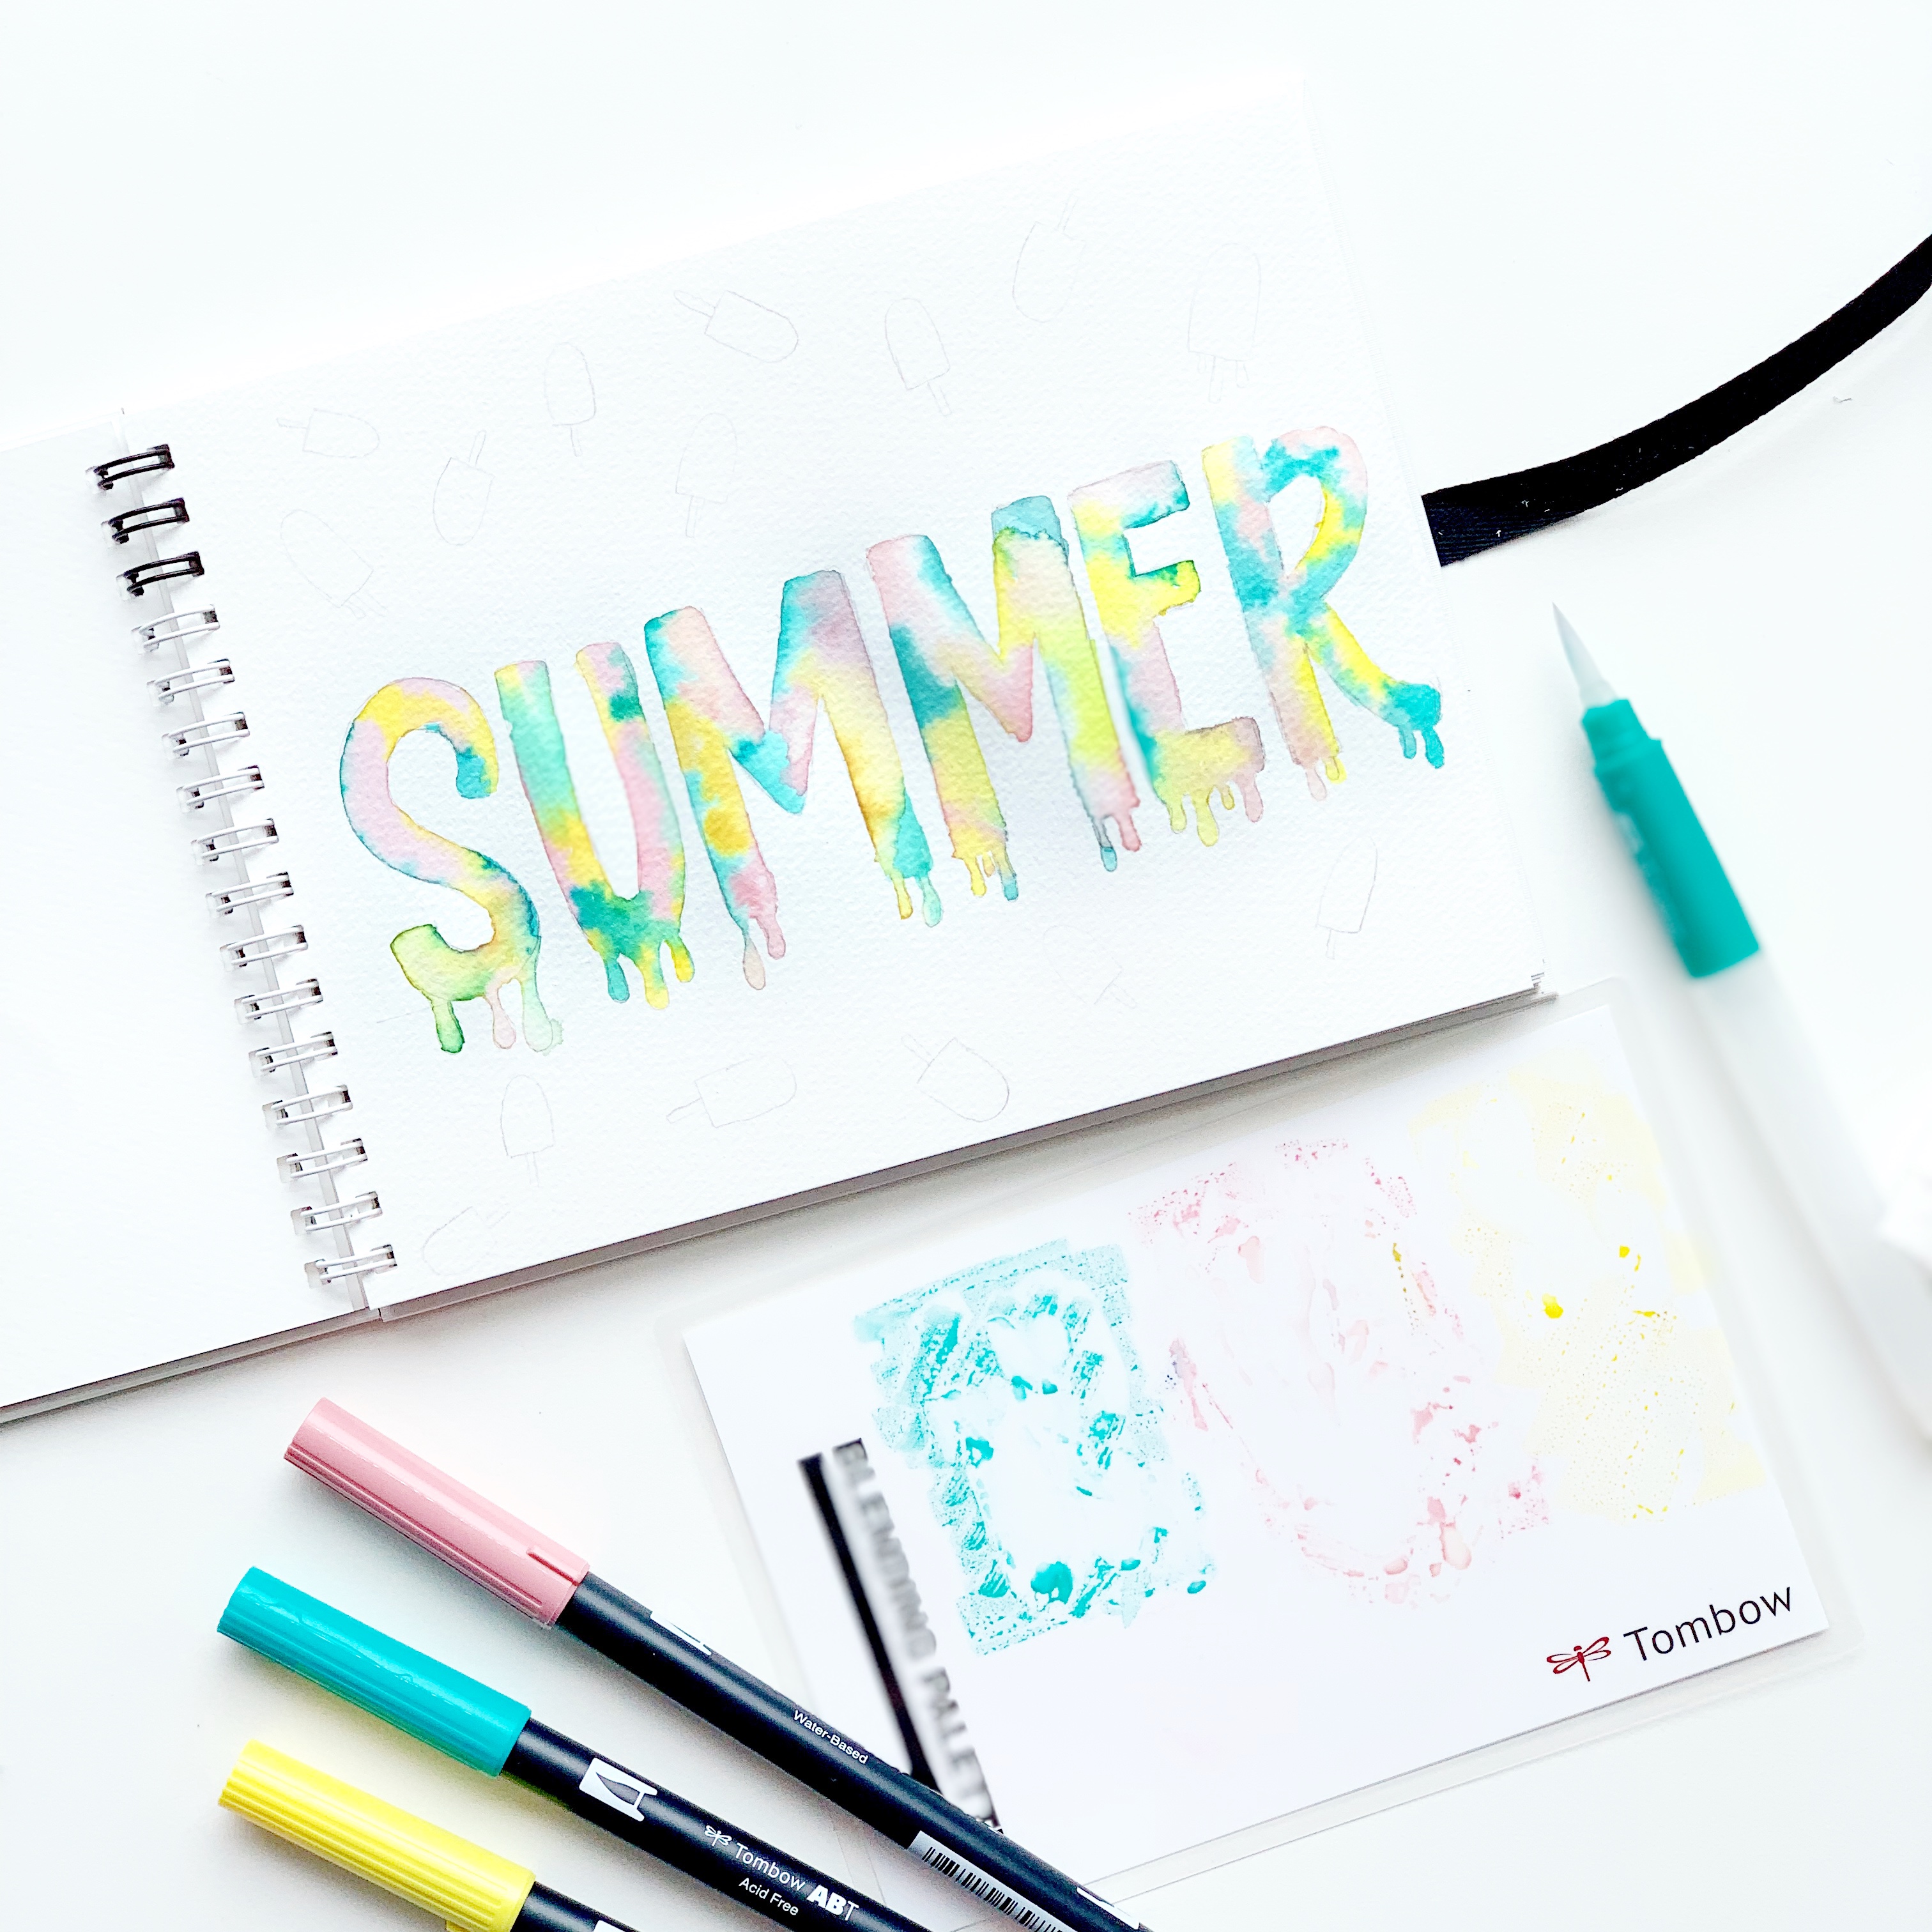
We’re going to work letter by letter now! Swatch out each color of the Dual Brush Pens onto the Blending Palette. Dip the Medium Round Water Brush Pen into a cup of water and saturate the S with water. Next, pick up some teal with the water brush and tap it into the saturated S. The color will bleed with the water. Next, do the same thing with the pink and yellow. Dip onto the S until the letter is completely filled in. Be careful not to mess with the color too much. Otherwise, it will look muddy.
Step 5
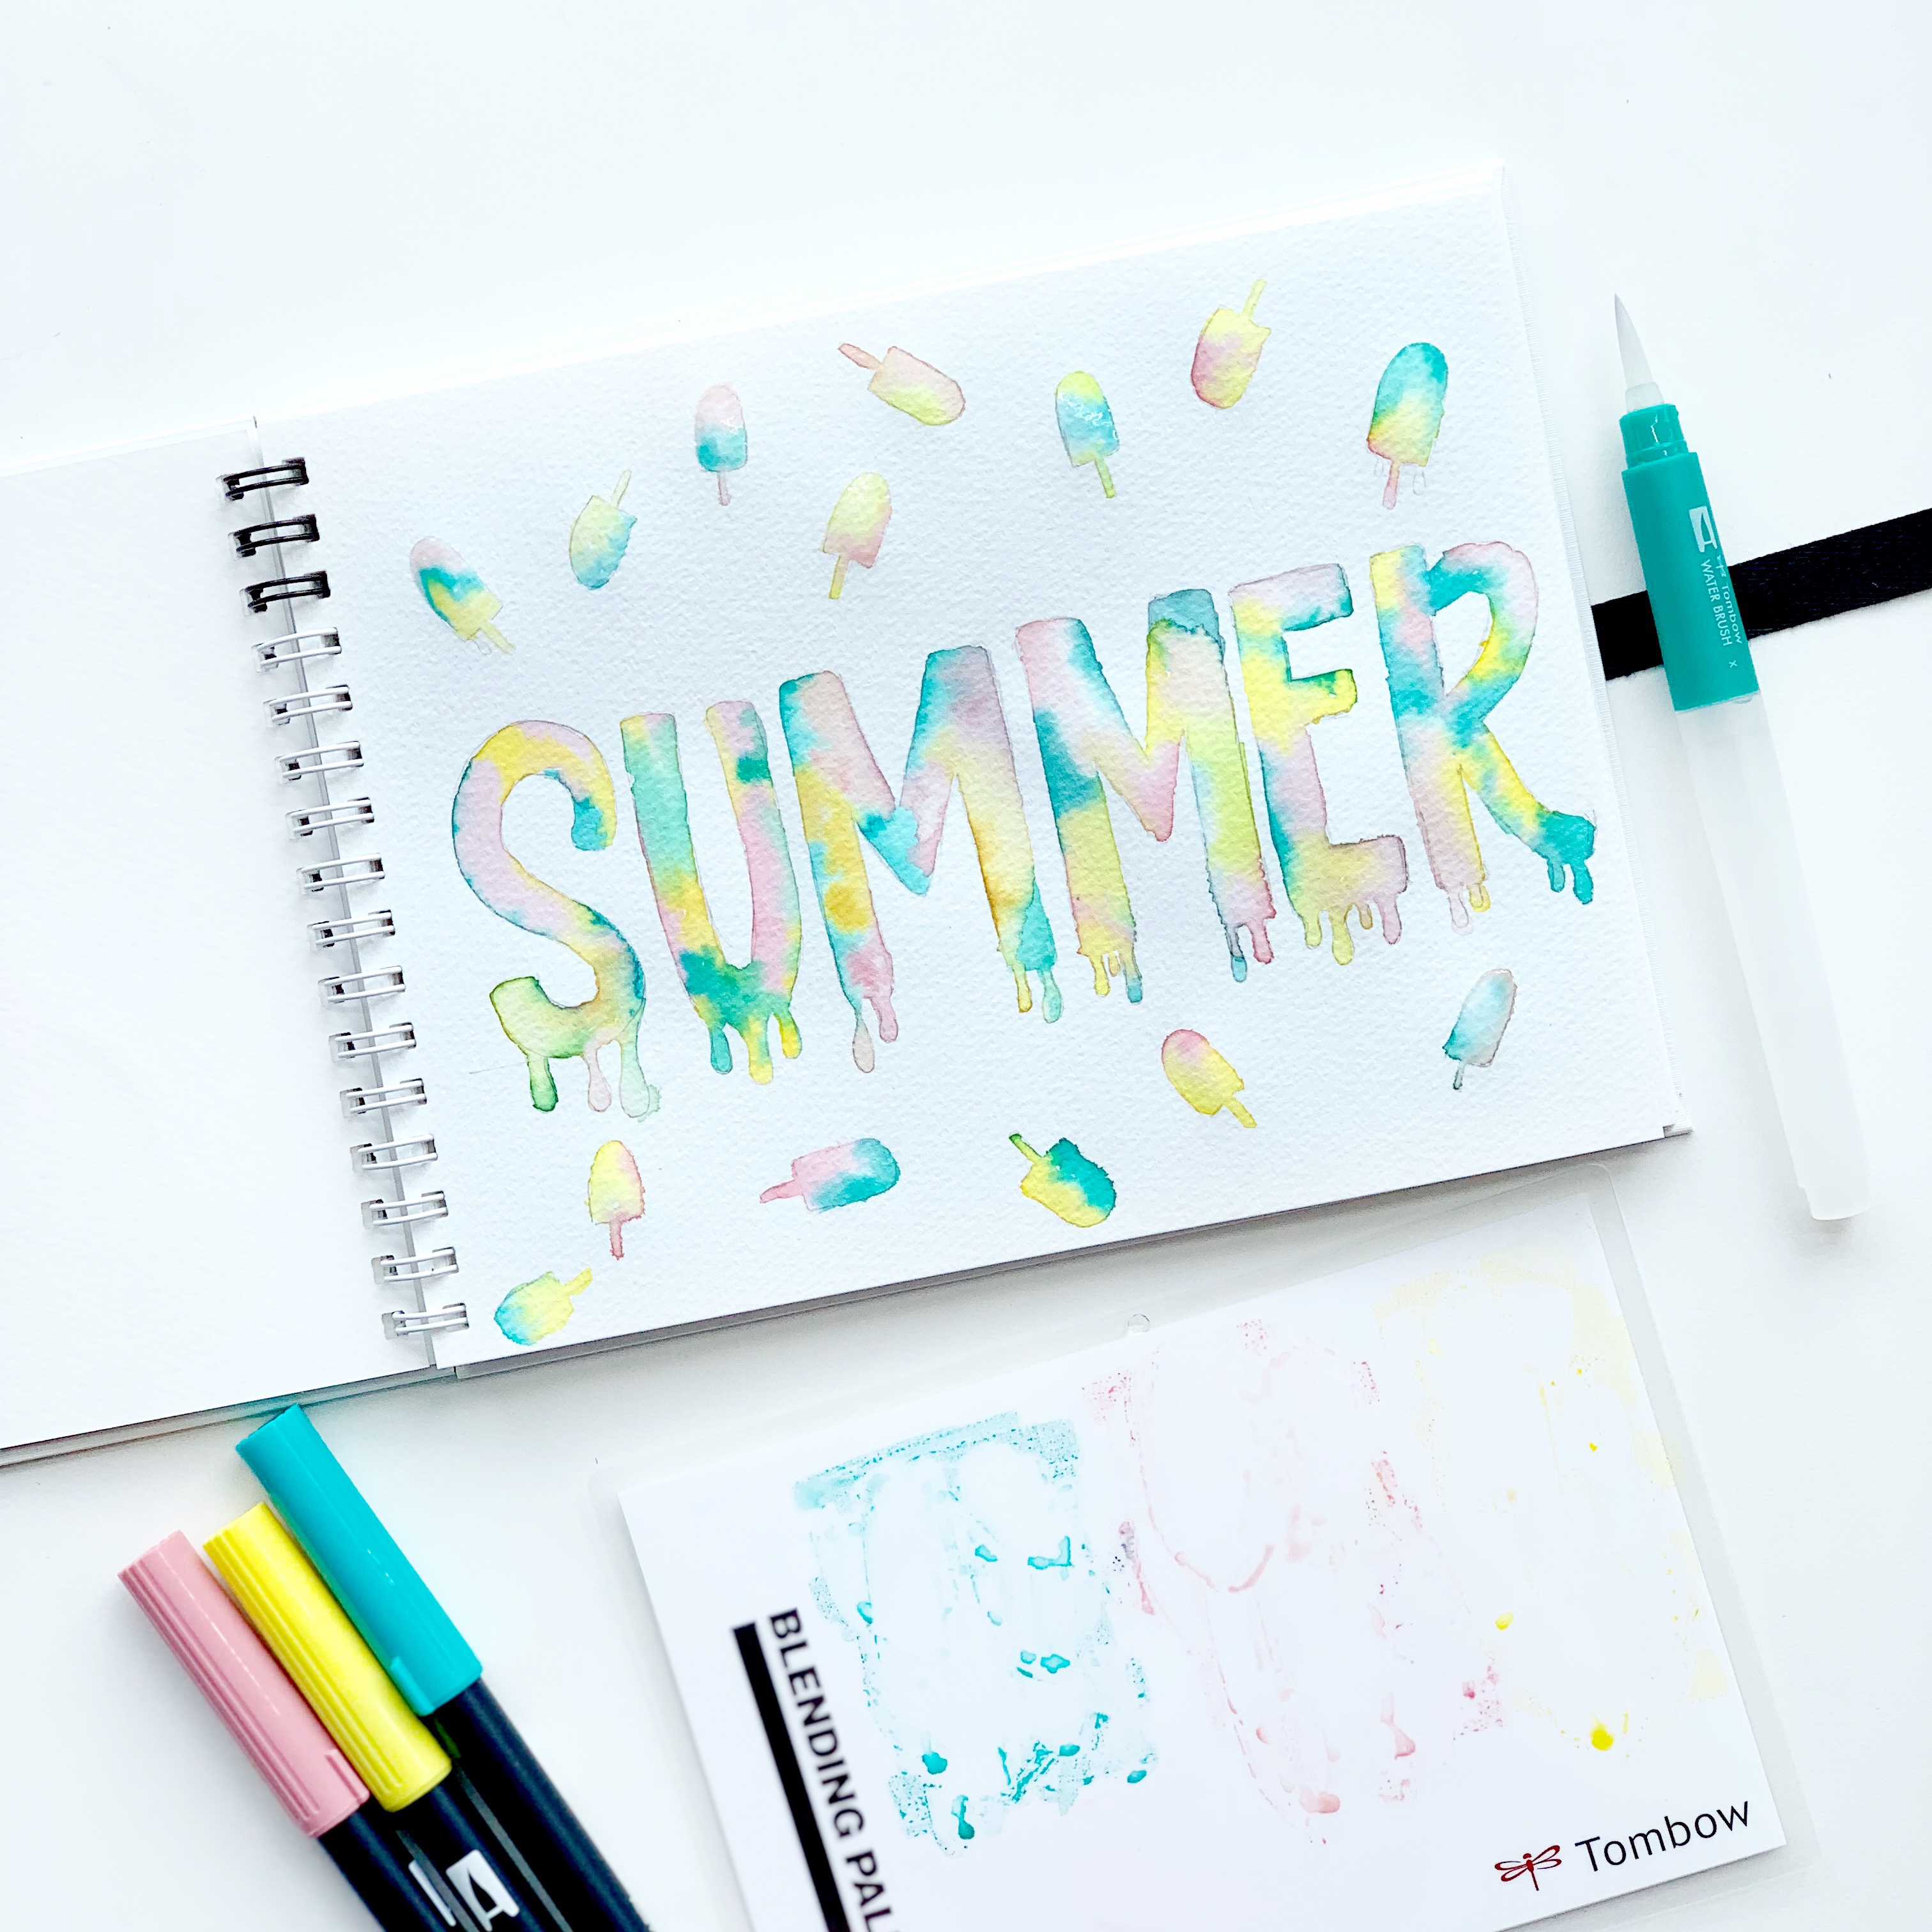
Keep going with the rest of the letters of “summer” until they’re all filled in! Next, fill in all the popsicles around the page using the same method. Erase any extra pencil marks with the MONO Eraser.
Step 6
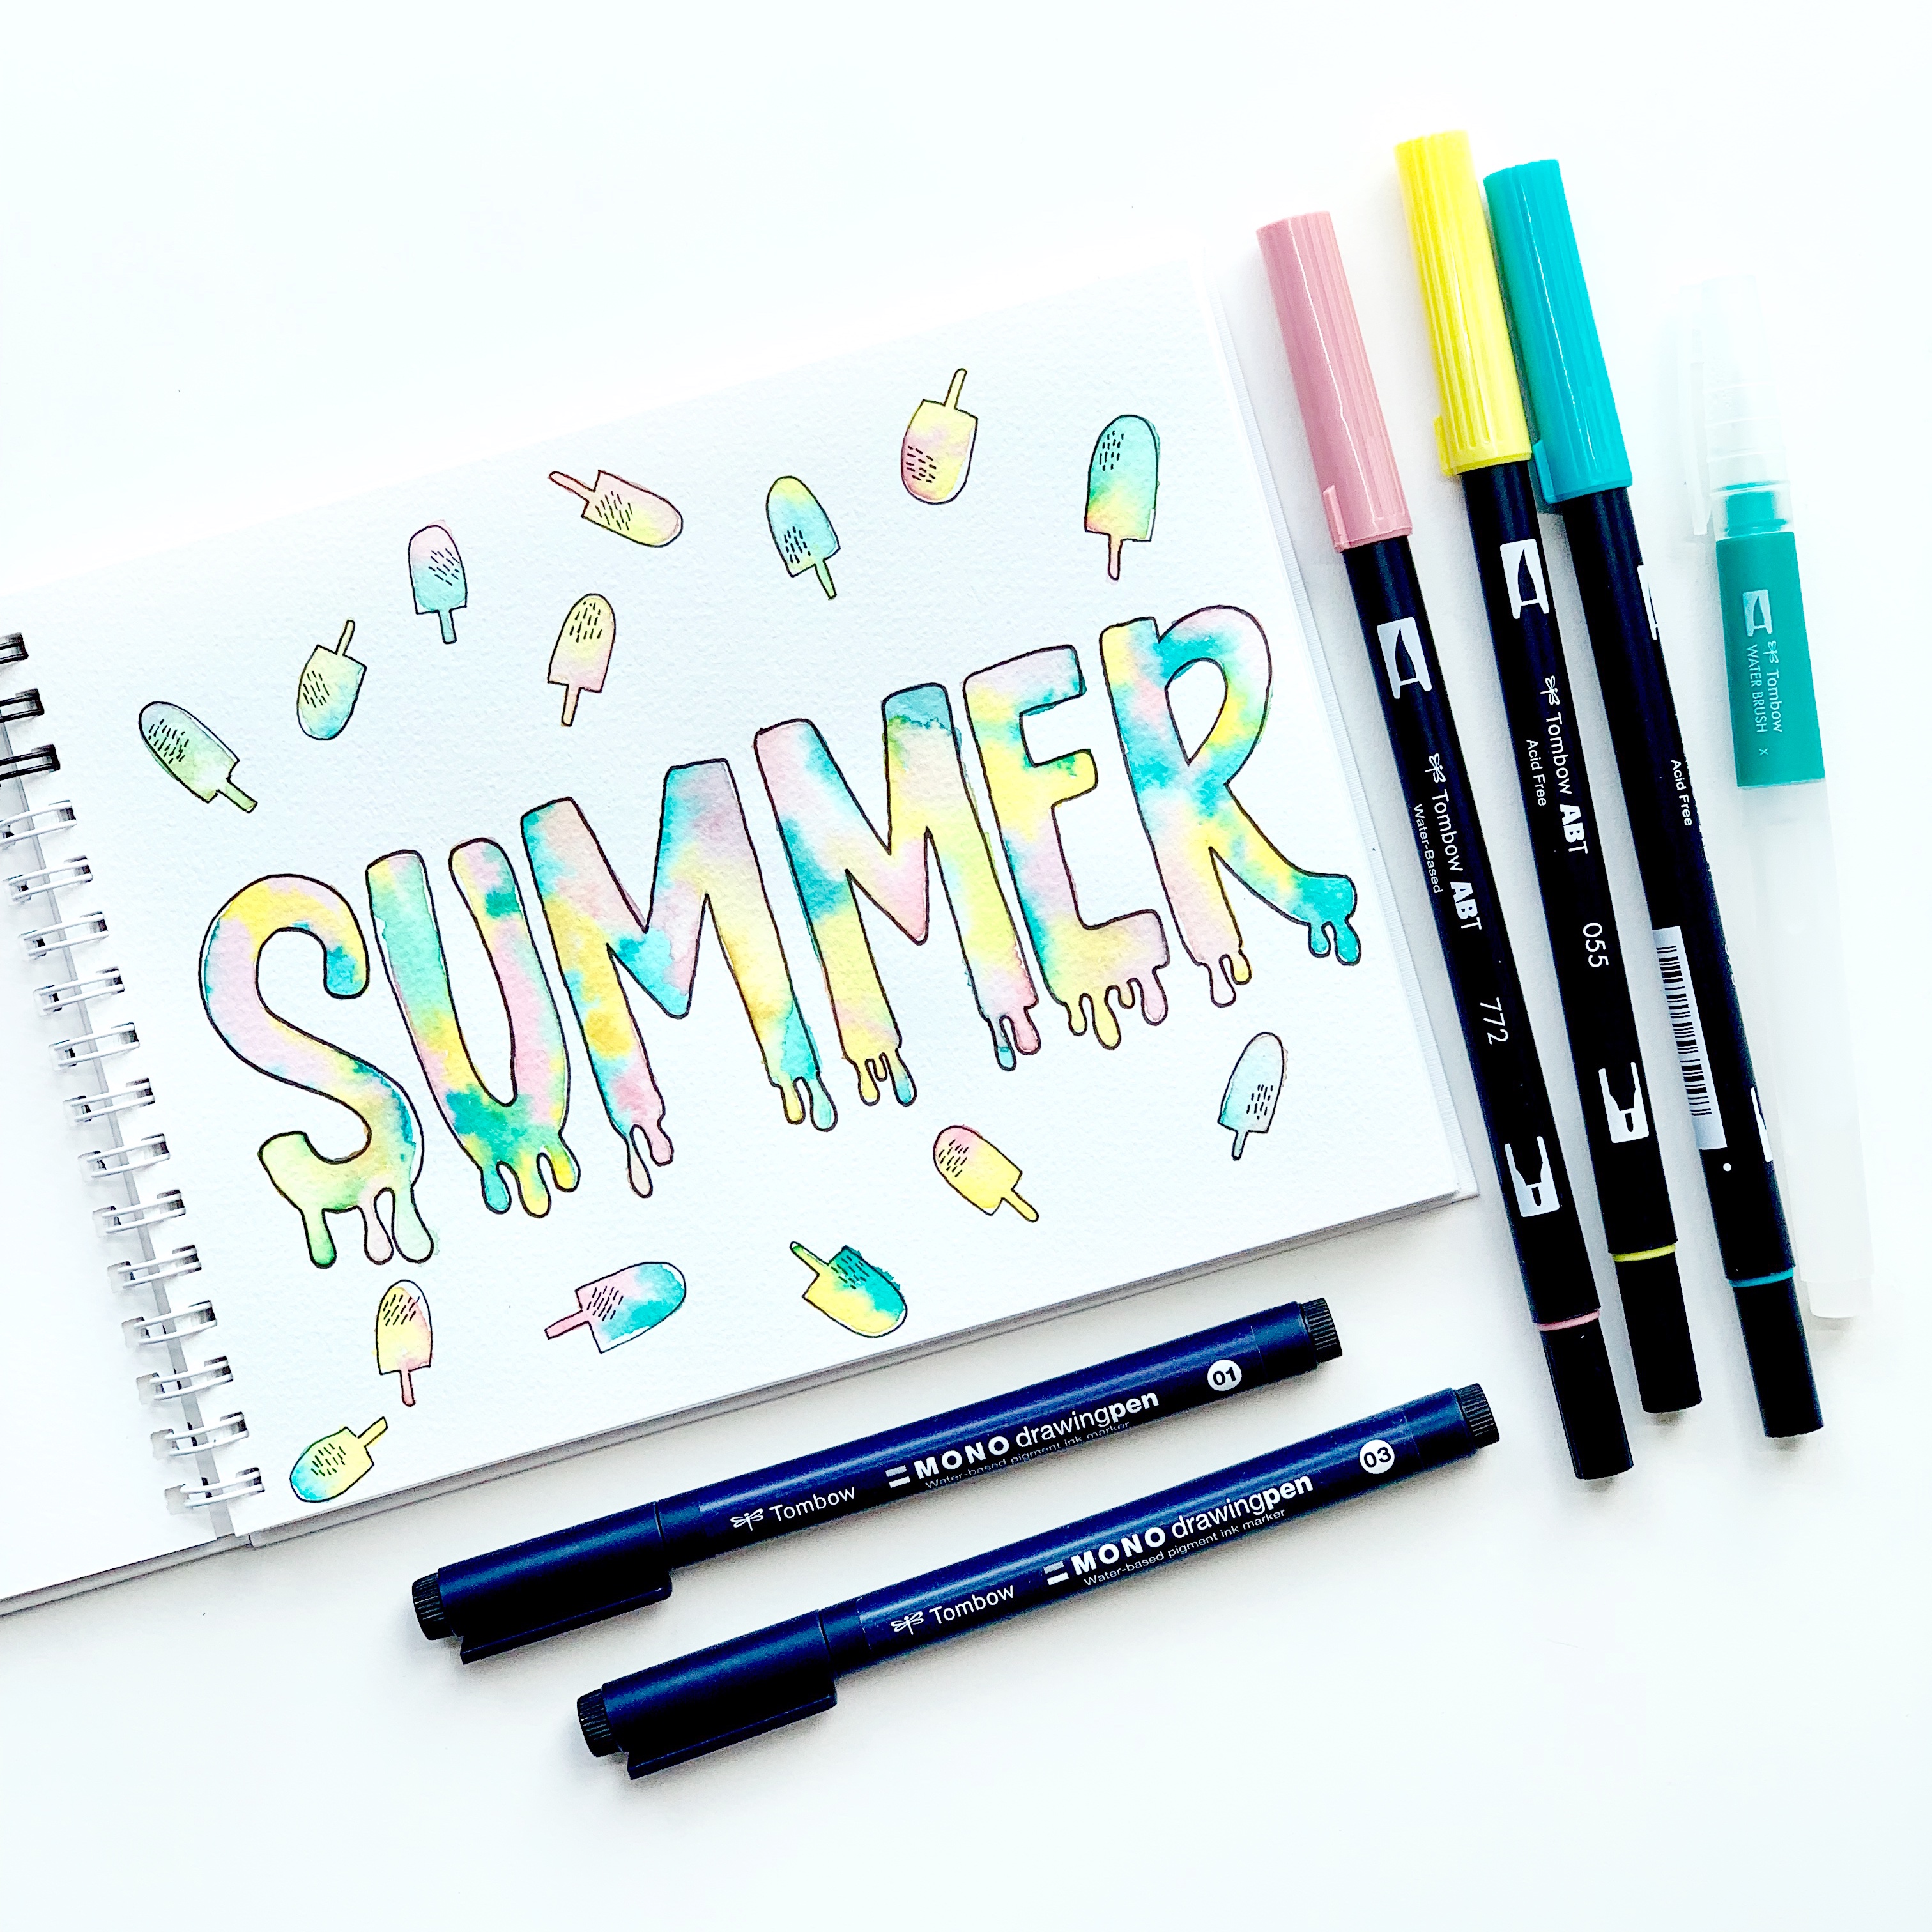
After all the letters and popsicles have dried, roughly outline the letters and the drips with the MONO Drawing Pen 03. Then use the MONO Drawing Pen 01 to roughly outline the popsicles around the page. Add some accent marks to each popsicle by drawing lines inside each one. You’re done!
I hope you enjoyed this Summer Popsicle Lettering Tutorial! For more inspiration like this, make sure to follow @studio80design!
For more blending ideas, make sure to check out these tutorials:
- Blending Dual Brush Pens With Water
- Art Journaling With The XL Blending Palette
- DIY Watercolor Floral Card with the XL Blending Palette
Good tutorial! I always forget to saturate my image with water BEFORE applying the Tombow marker from the palette.
Pingback: Create Blended Watercolor Lettering - Tombow USA Blog