Hello friends, this is Serena from @serenabeecreative and I am so excited to be back on the Tombow design team! Today’s project is inspired by my personal style. Also, I will be highlighting the new Tombow ABT PRO Markers!
When prepping for this post, I listed off things I like and represent me. I came up with: purple, black and white stripes and skulls! I put all three together to bring you this quick and easy card tutorial!
When I first starting papercrafting years ago, cards were one of the first crafts I made. I wanted to go back to my roots so to speak.
So, let’s get started. Below you will see a list of supplies I used to make this card. Grab your supplies (substitute what you can) and join me below for the step by step tutorial!
Supplies:
- ABT Pro Markers: Purple Tones (P603, P660, P673) and Gray Tones (PN55, PN75, PN95)
- Blender Pen (PN00)
- 1500 Series Colored Pencils: White
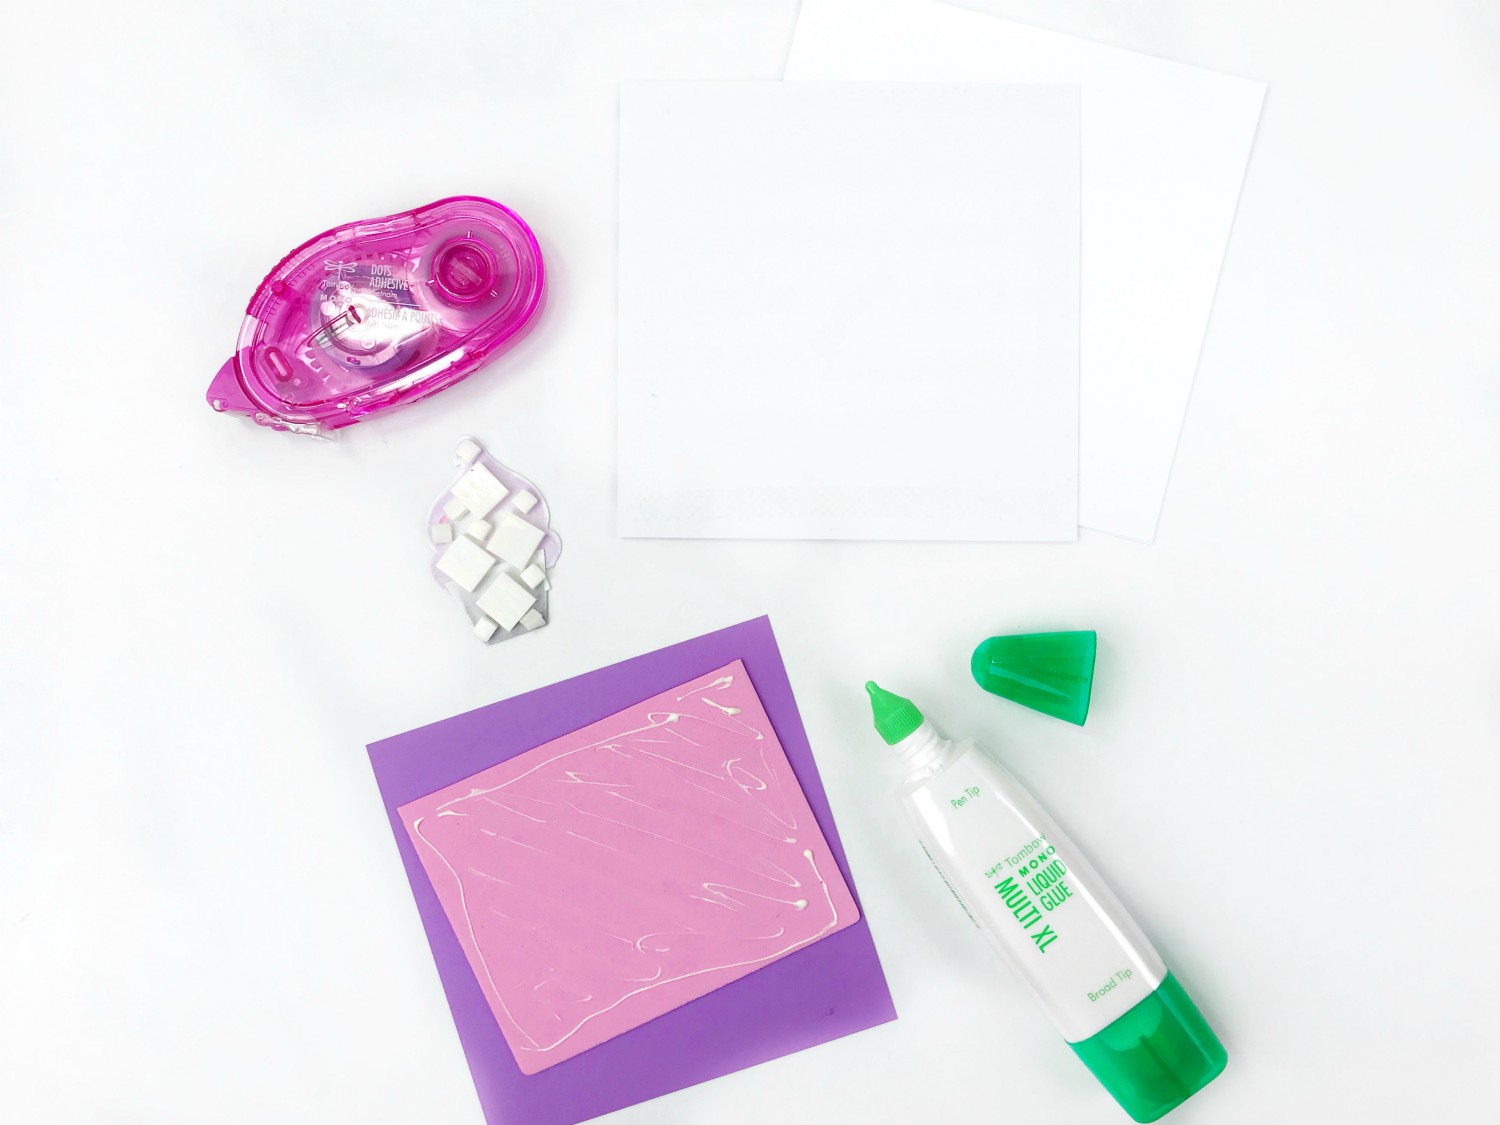
- Tombow MONO Adhesive Dots
- Tombow MONO Multi XL Liquid Glue
- Tombow Foam Tabs
- Tombow Mono Drawing Pen 01
- Stamp set
- Card base
- Colored cardstock
- Stamping block
- Black ink
- Scrapbook paper
- Washi tape
Step 1: Coloring the Image
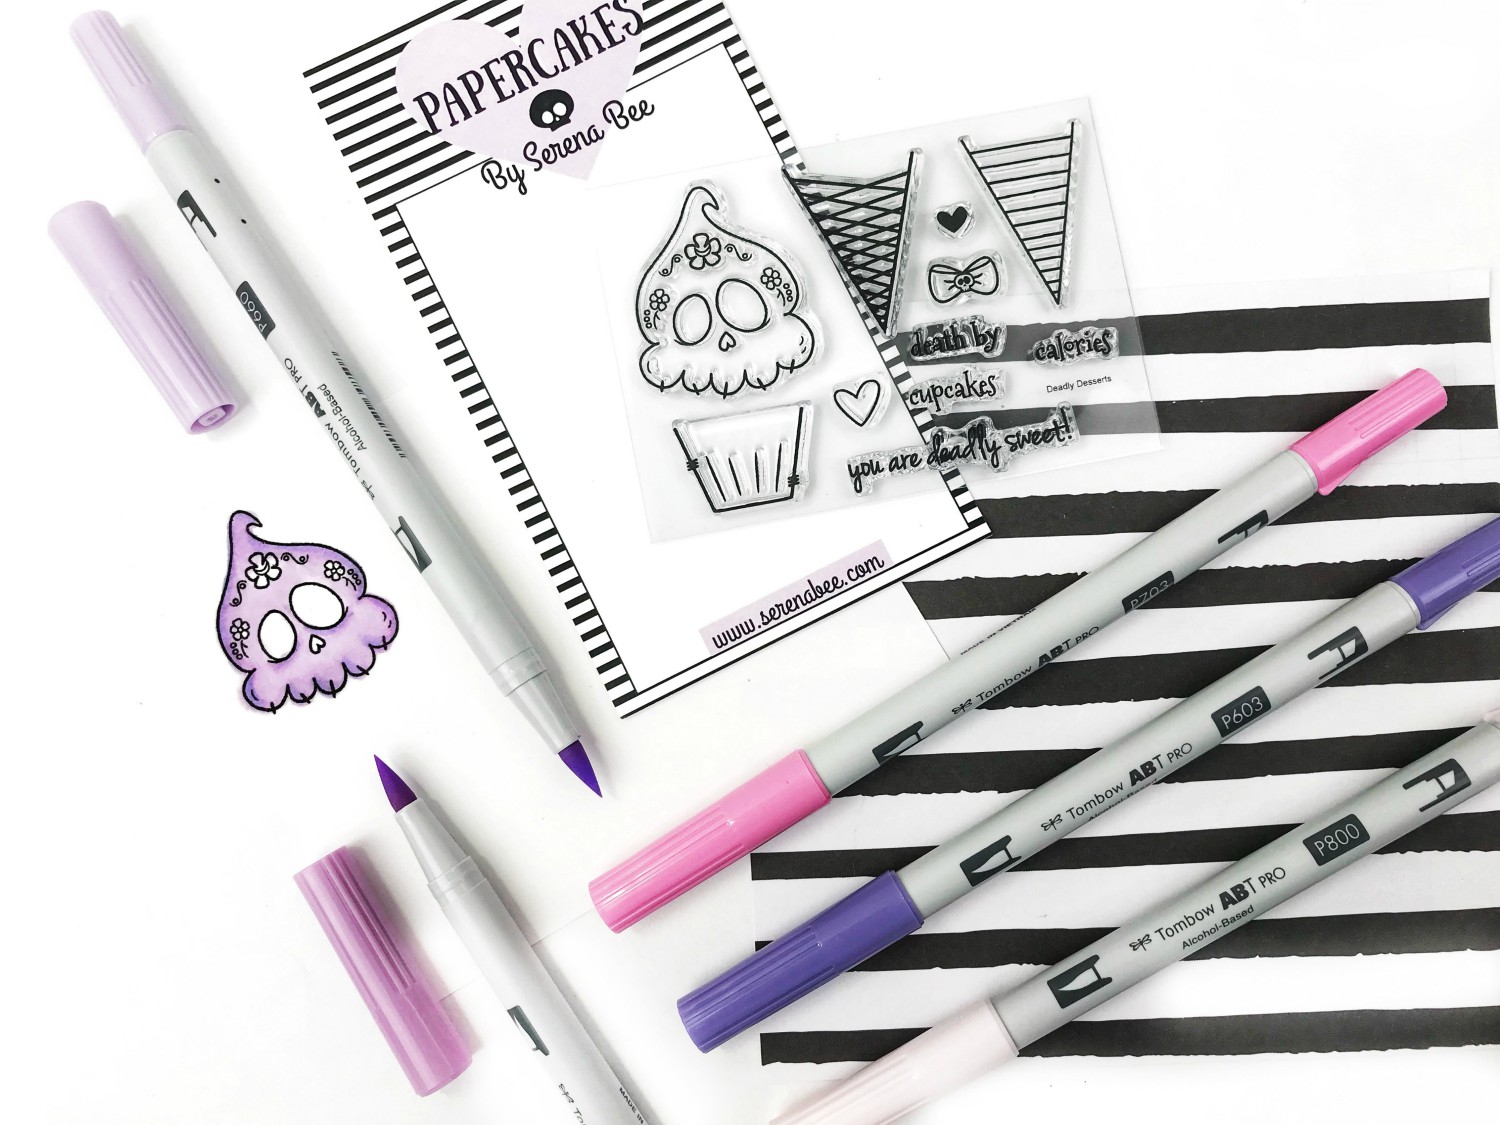
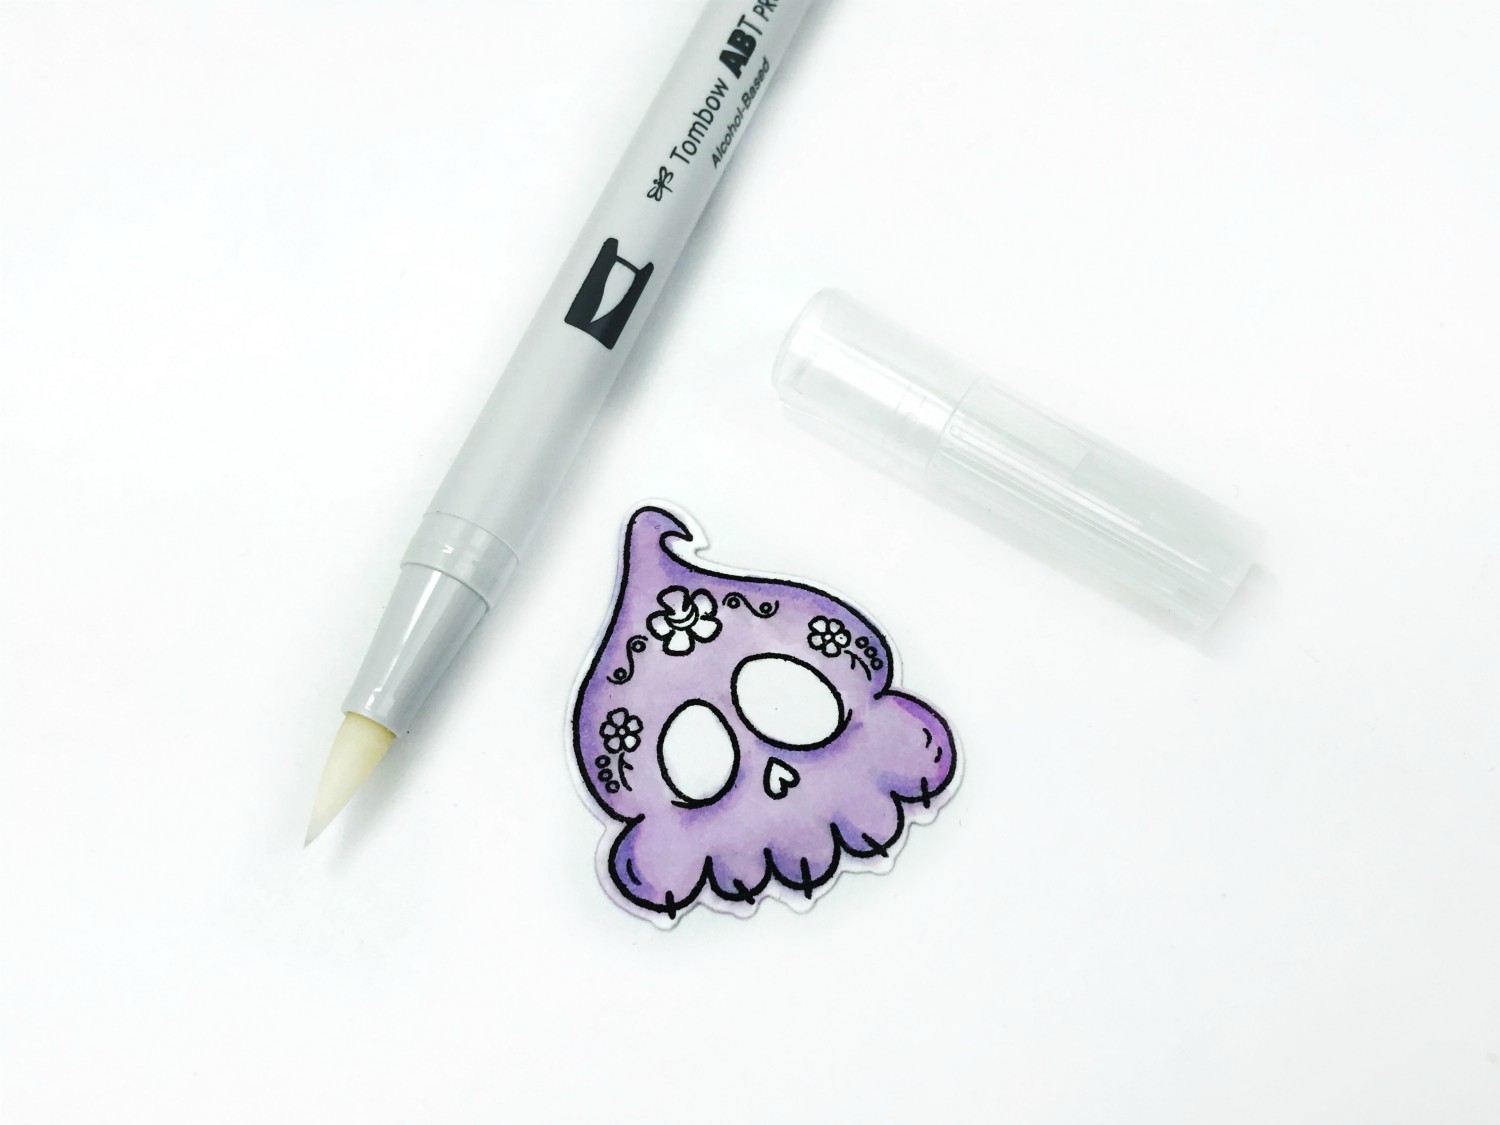
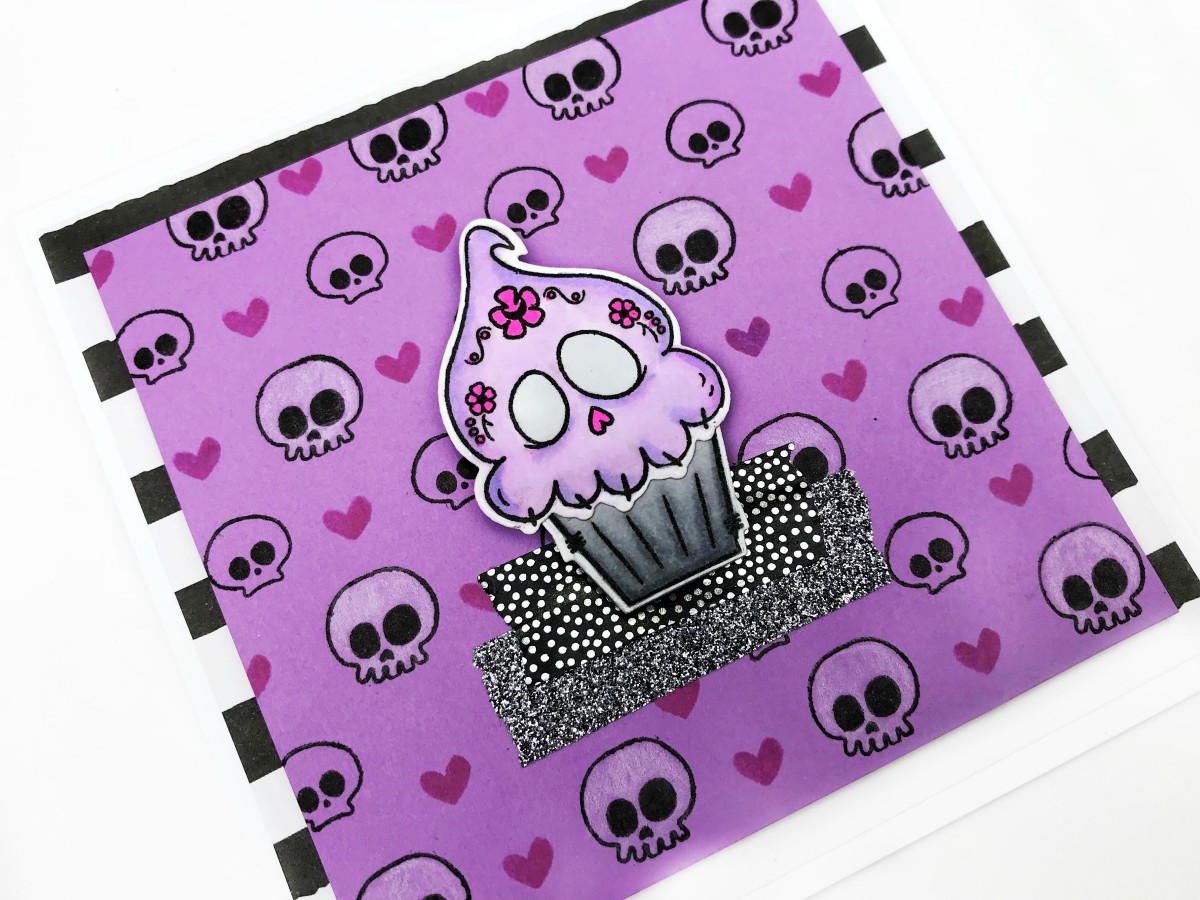
To begin, select the stamp set you want to work with as your focal image for the card. I’m using my Deadly Desserts Stamp Set, designed by yours truly! When coloring with the Tombow ABT PRO Markers, it is best to select 3 to 4 markers in the same color family. For my sugar skull cupcake topper, I used a variety of purple shades: P603, P660 and P673.
Begin with your lightest shade (P660) and color in the whole image. Next, using your medium shade (P673), color in where you would think there’d be some shadowing. You can continue to blend the two colors before bringing in your darkest shade.
TIP: To achieve a nice blend, color your image with a circular motion.
Using your darker color (P603), go back to your shadow sections and add in the darker shade. This will enhance the two colors previously used and will add depth to your image. The last step is to blend all three shades together using your lightest shade again (P660). Remember to use a circular motion.
TRICK: If you get some ink outside of the lines, use the ABT PRO Blending Pen (PN00) to push the color back towards the inside of the lines. You can also clean up around the edges using a white gel pen.
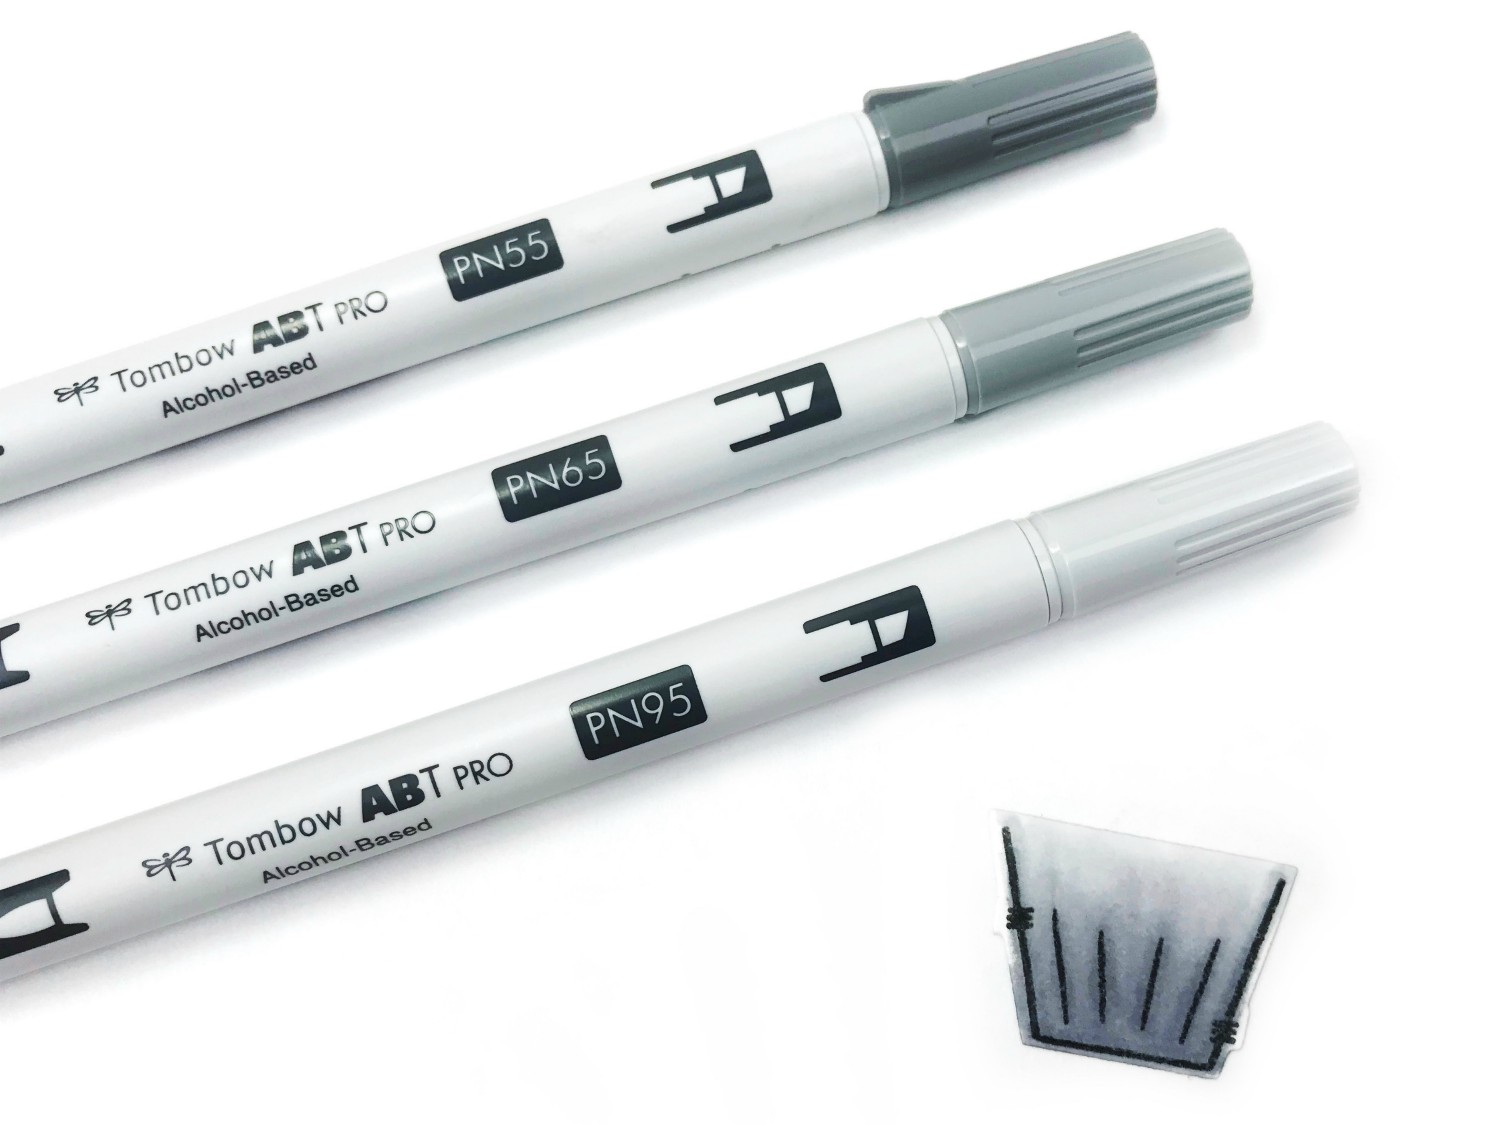
Next, I am coloring the cupcake bottom using the same technique. I started with my lightest shade of the Gray ABT PRO Markers (PN95). I added the shadow with my medium shade (PN65) and darkened the shadow areas with my darkest color (PN55).
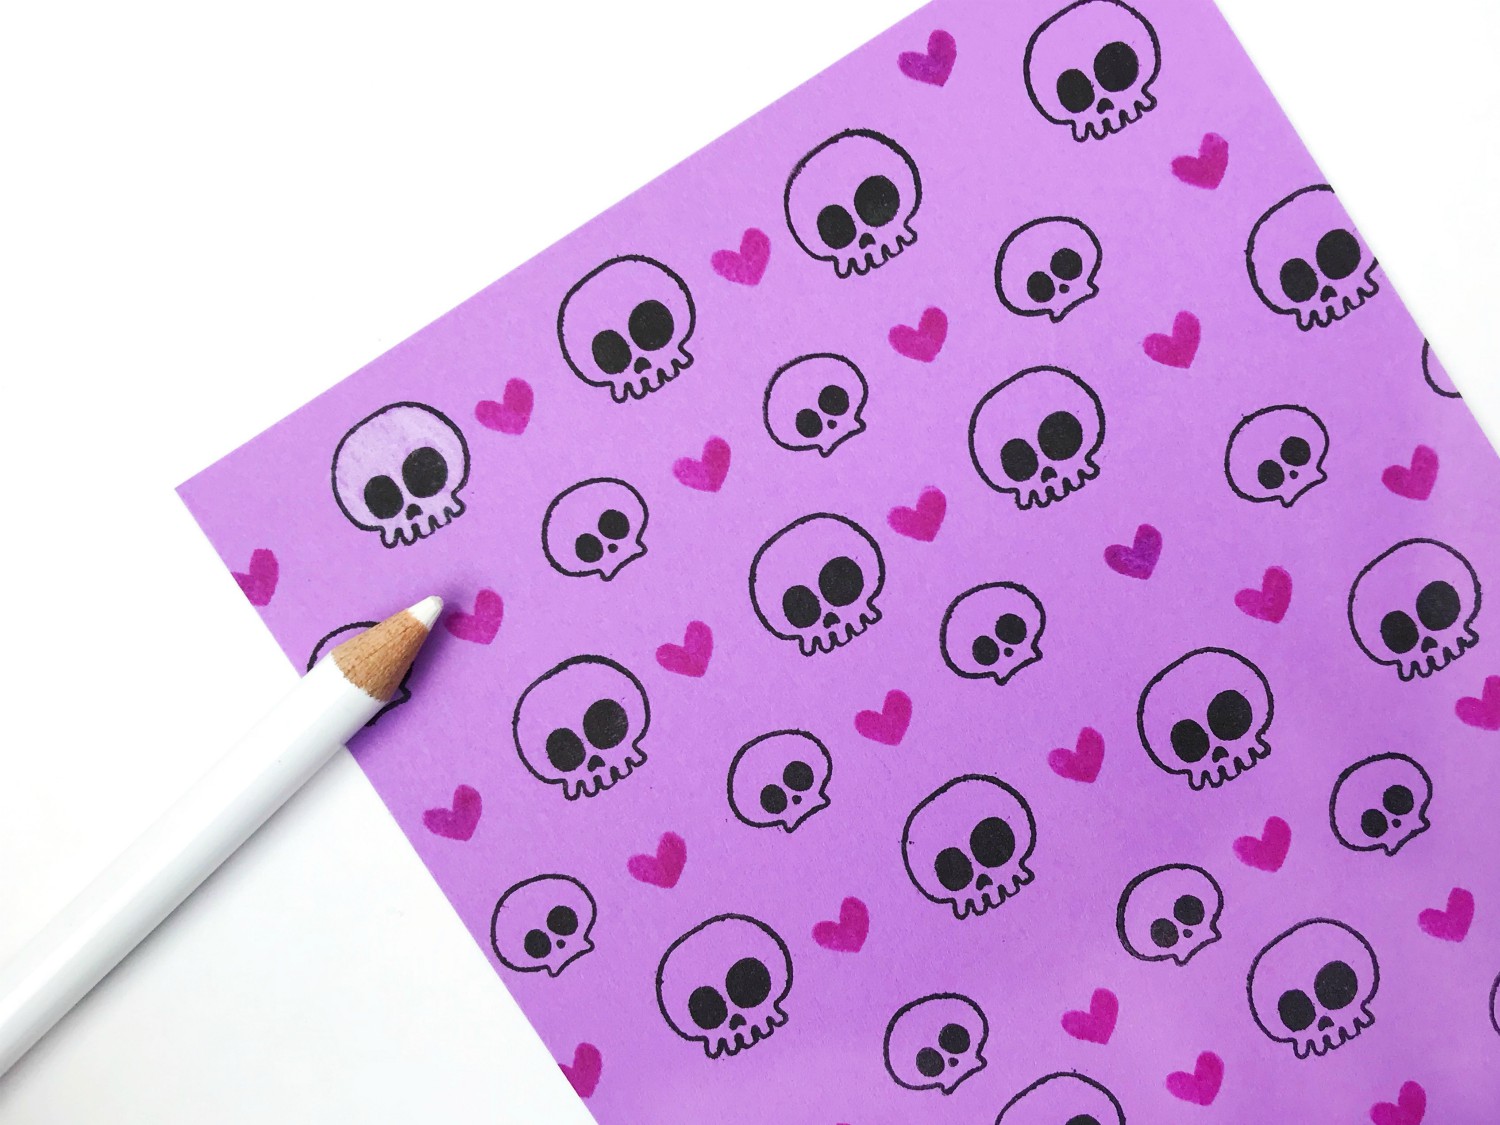
Step 2: The Background
For my card, I will be creating my own pattern with my retired skull stamps. You can use any small stamped image that coordinates with your card/theme. Using your stamping block and black ink, repeatedly stamp your cardstock to create your own pattern. If you don’t get a clear impression, that’s alright. Go over the stamped lines with the Tombow Mono Drawing Pen 01.
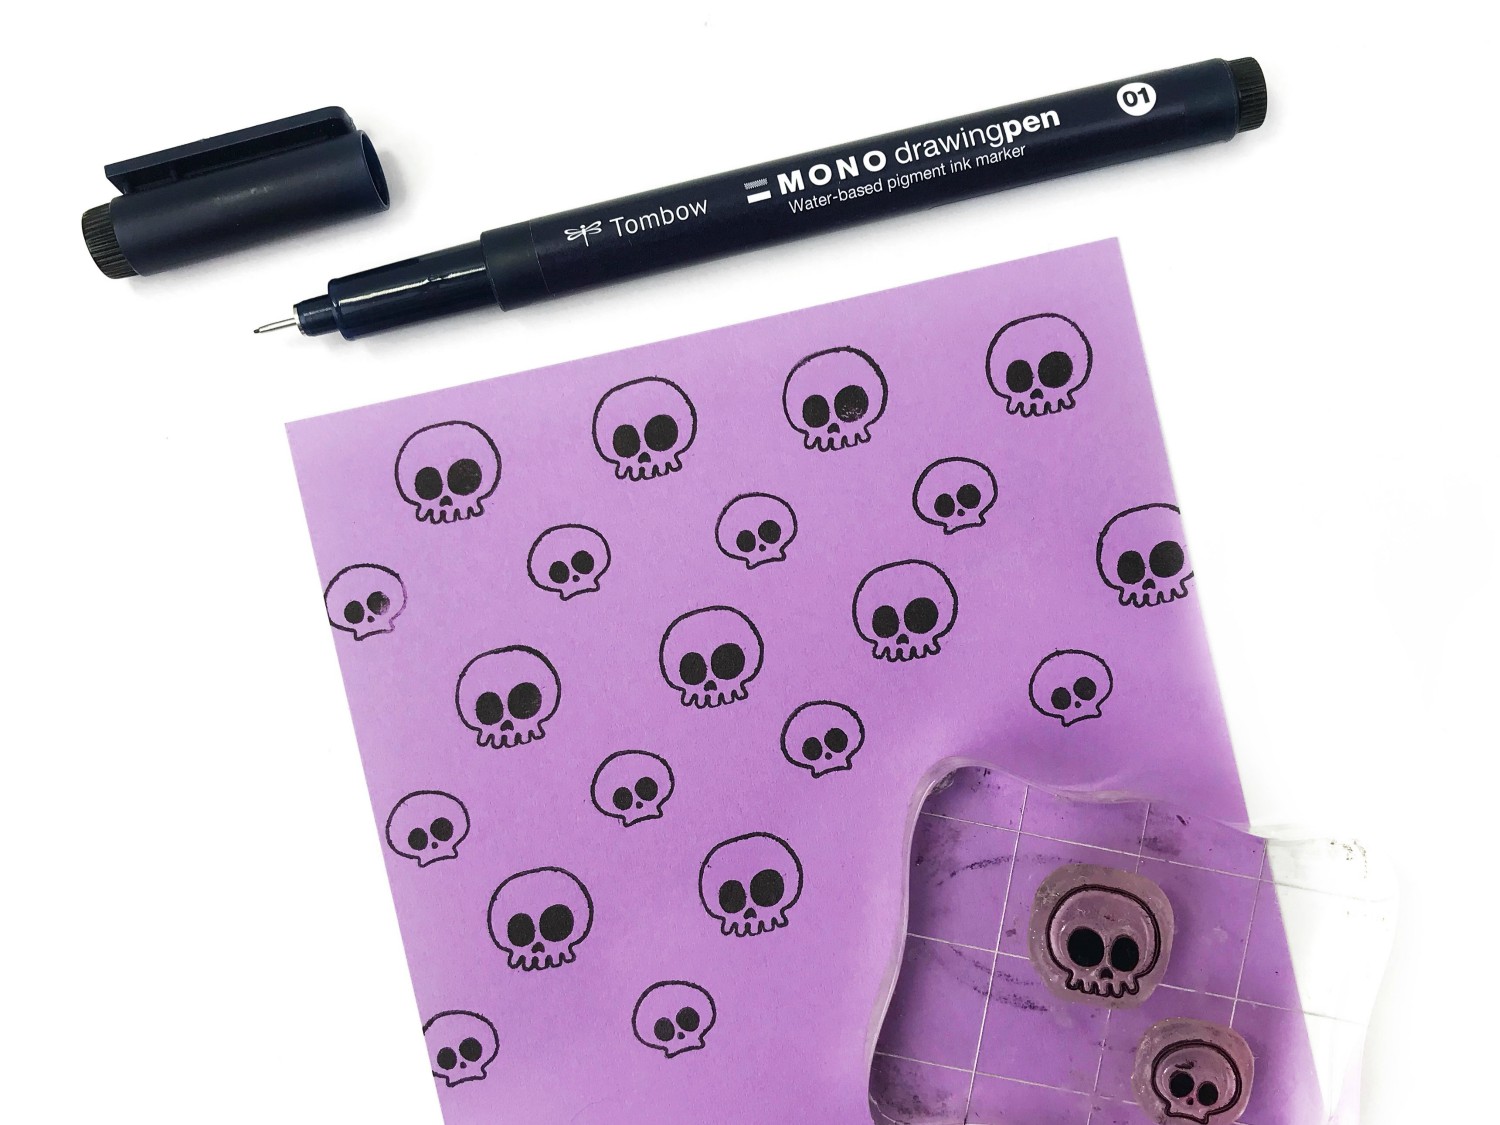
To make the skulls pop, I used the White 1500 Series Colored Pencil. I love coloring over dark cardstock using the Tombow 1500 Series Colored Pencils. It really makes the stamped images pop. I just love that look! For my background, I decided to only color in the larger skull images.
TIP: If you go over the black stamped images while you are coloring, simply go over the lines and color it in with the MONO Drawing Pen 01.
Step 3: Card Assembly
Once you have your background panel and images colored, the next step is to assemble the card.

Select a pattern of scrapbook paper that coordinates nicely with your card and adhere it down to your card base using the Tombow MONO Adhesive Dots. Next, trim down the background pattern you made to fit the patterned scrapbook paper.
This next step is optional if you want a little more dimension between the layers of cardstock. You may use a thin sheet of fun foam or packaging cardstock and adhere to the backside of the background panel using the Tombow MONO Multi XL Liquid Glue. For extra dimension, I backed the cupcake image on Tombow Foam Tabs,so that it can really stand out as the main focal point of the card.
To finish off, you may decorate or add your finishing touches. I added a couple strips of washi tape.
I hope you enjoyed this simple cardmaking tutorial! What’s your favorite thing about creating cards?

Make sure you tag @serenabeecreative, so I can see your lovely card creations. If you want more exclusive content from me, check out my Crafty Rebelles Gang!
See you next time!
Serena Bee
Pingback: Candy Heart Card Tutorial - Tombow USA Blog
Pingback: ABT PRO Alcohol-Based Marker Gray Palette 12-Pack for Stamped Images - Tombow USA Blog
Thank you for the outstanding article. Looking forward to additional updates from you. The time spent on this blog is enjoyable. I appreciate you sharing.