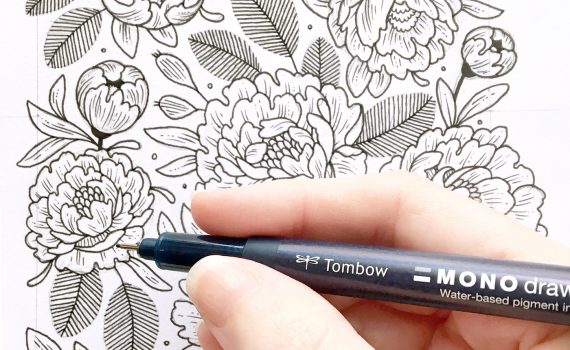
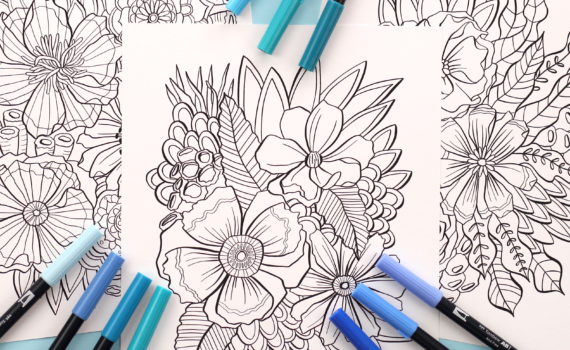
Posts from ‘Guest Designers’

Jul
27

I’ve been a loyal blog follower of our guest designer, Jennifer Ingle, for years now. Let me first say that her ideas and writing will suck you in with inspiration and giggles and if you just happen to start poking around over there and suddenly realize 2 hours has past well…. I won’t say ‘I told you so.’ Okay now on to some of her latest creations!

An Altered Ikea Mirror…
SO cute! These would make adorable Thank You gifts and seriously so cute. Made with MONO Aqua Liquid Glue, MONO MULTI Liquid Glue, and MONO Adhesive Tape POWERBOND.

more? well since Jennifer has so much- A Chocolate Card! (and who doesn’t love chocolate?!)

Using Tombow Adhesive Tape Powerbond (for ric-rac and ribbon) Mono Glue Pen and Mono Permanent Adhesive Runner.
Wait? Theres more! Yeah, this girl seems to come up with projects more often then I eat… which is really sayin’ something! Check out this awesome card using Tombow Mono Adhesive Tape POWERBOND. Look at all that texture?! Seriously it adds so much to the finished product. We really have all fallen in love with Jennifer’s work, can you tell?!  So… we’ve decided to really spice things up. Leave a comment on today’s post letting us know what you think of our guest designer and be entered to win Jennifer’s three Favorite Tombow Adhesives, POWERBOND, Mono Glue Pen and the classic MONO Permanent Adhesive Roller. We’ll also throw in a pack of her favorite MANGA DUAL BRUSH PENS! Be sure to check out Jennifer’s Blog- Just Jingle for another chance to win the same Tombow sponsored love!

Jul
26

I have been planning this Guest Designer for weeks and I am SOOO excited to share with you her uber creativity. Jennifer Ingle is a gem, full of personality, fun and artistic talent. Of course she loves Tombow too! This card uses our Dual Brush Pens (Jennifer loves our Blender Pen) and PowerBond, aren’t the colors BEAUTIFUL?!

I asked Jennifer a few questions to get a peak into her creative process … and be sure to check back tomorrow for a fun surprise and WAY MORE of Jennifer’s work!

Where do you live? Massachusetts

Family? I have a wonderful husband and two black labs, Maggie and Thatcher.  They are my little girls!  LOL!

How would you describe your style? Yes.  HA!  I love trying new things and working according to how I feel.  Because of this, my style changes with my mood!

How long have you been scrapping? Oh, it’s been a long time now…over 10 years.

What’s your favorite Tombow product?  Hmmm…that’s a tricky on, but I think I have to go with the Mono Permanent Adhesive.  It’s a classic and I am never without one handy!

What size do you scrapbook? 1 pg or 2? . Mostly 12×12, single page.  I’m interested in doing more mini albums, though.

Do you make cards? Yup!  LOTS!  I love card making!

What is your creative space like? I am fortunate enough to have a room just for crafting.  My studio is set up so that I have a view of my supplies and things like tools and adhesives are very close for quick access.

Is your scrap area messy or neat? Messy.

What camera do you use? Right now I’m shooting a simple Nikon point and shoot.  It’s a great little camera.  I plan to move to a dslr, as I used to shoot the N75 35mm slr, but that will come later.

Your favorite ink? Close to My Heart and Ranger

Where do you find your inspiration? EVERYWHERE!  The world is so full of it!

Hand journaling or computer? Both.

What’s your favorite scrapbooking color?  Hmmm….kraft, maybe?  I love red, though, so you will see that in my work a lot.

What’s your most-used scrapbook tool? My CutterBee scissors.

Are you a slow scrapper or a quick scrapper?  I would say I am in between.  I can do a layout in a few hours.  Sometimes they come quicker and other times they take forever.

What’s your favorite quote? Honestly, I don’t really have one.

What do you do to get out of a creative ‘funk?  I look to magazines and books for inspiration and I get together with other creative people.

What project have you done that you are most proud of?  Lately I have been creating dolls and I am really proud of those.  They are a whole new way for me to express myself.

Give us your favorite tip:  You didn’t screw it up – you just changed your plan.  – In other words, take advantage of mishaps and use them to be creative and try something new or unexpected!  Sometimes you will find you are happier with it in the end!!!

Jun
09

Guest Designers are my favorite! Not only because we get new ideas and perspectives but because it’s so fun to introduce you to some amazing designers out there! Today it’s all about Jennifer Weight. You may have seen Jennifer win the Gypsy Design Challenge last fall her winning wedding centerpiece was seriously insanely beautiful! Thankfully, I’ve been lucky enough to have known Jenn since I was 8 (and yes, she’s always been that creative and talented!). She currently lives and works in Eagle Mountain, UT. Check out this creat Thank You Card (and Gift!) she made just for us…

We all have many gift giving occasions and in this day and age, many of us have a limited budget to work with.  Here is a quick, simple and inexpensive way to give a heartfelt, hand made “thank you” to a friend.  This project includes a very simple card and a small arrangement of “forever flowers” (because flowers made with paper never wilt or die).

Items needed:
Empty glass juice or drink bottle
Decorative marbles or rocks
Floral Wire
Dual Brush Pens
Lot’s of Adhesive (including double sided foam squares)
Paper
Flower stencil, die cuts or punch
Ribbon
Hot glue gun
Buttons
“Thank You” sentiment (stamped, written or printed)
Card embellishment (optional)

Skill Level:
Beginner
Approx. 20 – 30 minutes

First prepare your empty glass bottle.  Empty juice or drink bottles work great!  Remove the label and clean the bottle thoroughly.  Next, fill the bottle with decorative marbles or rocks.  These can be found in small inexpensive bags at your local craft store or Walmart.

Next you’ll need 3 lengths of floral wire.  This can also be purchased at a local craft store or Walmart.  If you are using pre-made lengths you may need to trim them to be shorter.  If you are cutting lengths from a spool, cut each to be 12 – 15 inches long.  Use a marker or pen and wrap the upper half of the floral wire around it to create a curled look on the wire.  (Leave about an inch or so uncurled. The top and the lower half should remain uncurled.)  These will be the stems of your “forever flowers” and the curl in the wire makes them fun and easy to position at different angles.

Next you’ll need 9 die cut or hand cut paper flower shapes.  You can purchase pre-cut die cuts at a scrapbooking store, cut out traced flowers from a stencil or use a personal die cutter or punch.  Different shades and colors on the same flower really make it pop!  Each of your 3 “forever flowers” will use 3 layers.  Two of the layers should be cut the same size and the 3rd layer should be cut 1/2 inch smaller.  Here I’ve cut the larger flowers at 3 inches and the smaller at 2.5. Place a double sided adhesive foam square on the back of each of the smaller flower layers.  Adhere the small layer to one of the larger layers and offset the petals to fill in the gaps.  Adhere buttons to the front center of the small layer to enhance the center of each flower using Tombow MONO POWER BOND.   I used a Dual Brush pen to draw a “stitched” border around the smaller flower petals for more dimension. 

Now turn your flowers over and and place a large dot of hot glue on the back.  Nestle the top of your floral wire into the glue while it is still hot.  Then place your last large flower layer over the glue to cover and finish the back of the flower nicely.  Repeat for the other 2 flowers.  Arrange your flowers into your glass bottle.  Pull on either side of the curled portion of the wire to extend a flower higher or push together the curled section to set the flower lower.  You may also need to trim your floral wires further to achieve the levels you’d like.  Wrap, tie and trim decorative ribbons around the lid of your bottle.
To create a small and simple card, simply cut the short side of an 8.5 X 11 sheet of cardstock in half.  Now you’ll have an 8.5 x 5.5 piece of cardstock.  Fold this in half to create a top fold card.  Cut a piece of decorative paper or cardstock to fit your card front.  Adhere decorative ribbon using Tombow’s MONO permanent adhesive roller and adorn with buttons and/or embellishments.  Cut a small piece of cardstock and write or stamp a “Thank You” sentiment in the center. Now you can give a beautiful little handmade gift without breaking the bank!  Enjoy!

~Jennifer Weight
Don’t you just love her?! You can see more of Jenn’s creativity here. Thanks girl for such a fun project. We love your creativity!

-Joanna


Feb
15


There are some designers that not only speak to me but YELL! (in a good way) Their work inspires on so many levels that I’m left slack-jawed. Tania Willis is one of those type of designers. When I grow up I hope to be half the designer that she is! I love, LOVE, LAH-VE her work. All of it! Today we’re lucky enough to have her be our Guest Designer! Tania is a contributing designer for Little Yellow Bicycle, Get It Scrapped Online Classes, Karen Foster Design, srm stickers, The Story Matters and Good Greif. (Talk about a busy woman!) She teaches multiple online classes (I think I’m signing up for her FABRIC one! It looks AWESOME!) and she even sells some of her work on Etsy. Nope, there is nothing this woman can’t do! And Guess what? Tania’s Favorite adhesive is Tombow’s MONO Multi Liquid Glue!

When asked why Tanina love’s Tombow MONO Multi she said…

why do i love Tombow Mono Multi adhesive? let me count the ways….

  1. it has dual tip action….one end for fine line work such as adhering punched strips from my Fiskars border punches without gooping globs everywhere, and one broad tip for applying gooping globs and spreading with the broad tip such as edge to edge coverage for say covering a mini album
  2. it has dual function….as a wet permanent adhesive AND if you apply and allow to dry before pressing paper to paper it works as a temporary adhesive. how cool is that! my favorite way to use it as a temporary adhesive is to squeeze out small drops onto waxed paper, allow to dry and voila! i have my own handmade glue boogers, errr, um, gluedots! no more fear of running out of gluedots at 2AM
  3. one bottle….retailing for around $2.99 has staying power! i seriously just completed 25 layouts and 7 cards for karen foster with one bottle and i STILL have glue left. don’t let the small bottle deceive you!
  4. i haven’t used any other adhesive in the last 4 years! i swear. it’s my go to adhesive for everything and i include it in every class kit when i teach.
  5. it adheres my buttons too! um, yeah. love that!
  6. and paper to wood—no specialty glues needed baby! looooooooove it.
  7. they have an uber cool blog!


    Look for more of Tania’s amazing, inspiring and beautiful work on HER blog! Thanks Tania for inspiring and sharing!

Feb
01

Shemaine Smith has got to be one of the hardest working designers in the industry. She is always coming up with something new and always pushing the envelope a little. Her work is filled with texture, color and LIFE. She is a design team member for Imaginisce, Paper Posies,  Jacksonbelle Embellishments and Get Sketchy. To top it off she uses TOMBOW on ALL of her projects! She’s a doll to work with and her creativity just makes you want to be around her hoping it will rub off onto you! She made this great card for Get Sketchy last month and I thought it would be the perfect card to kick off  a great February here at Tombow! Continue Reading

Jan
13

I’m loving seeing everyone’s talent and creativity. It’s so fun to get a peek into your lives. Remember that to fully qualify for the contest you need to have a link on your blog and/or listing Tombow product was used. I’m trying to comment on everyone’s blog but a few won’t accept my username but I promise we’re looking at all of your amazing efforts. We’ll post the winner Thursday!
Today we’re posting another great card by Debbie Fisher.
DebbieFisher-musical flower
This card has so much depth and texture to it! The colors are perfect too. Debbie used Mono-Adhesive Permanent for the beautiful patterned paper and Mono Aqua Liquid Glue for the Embellishments and ribbon. Thanks Debbie, we love your work!

Dec
23

Debbiecandy cane candleWe wanted to start featuring a few artists in our blogging community and today we’ve chosen Debbie Fisher! Debbie is a creative machine! Her fun projects and cards are always inspiring me. I love that she can take a simple notepad and make it so much more. Debbie was wonderful enough to create the adorable Candy Cane Candle for us by just recovering an exisiting candle jar. It is such a cute idea. (great for those last minute gifts!)


Continue Reading