Hi, Jessica from BrownPaperBunny here. Are you as excited as I am about spring?! I’ve been creating lots of spring letters with Tombow Dual Brush Pens and I want to show you how to make them. Here’s what you’ll need to get started.
Supplies:
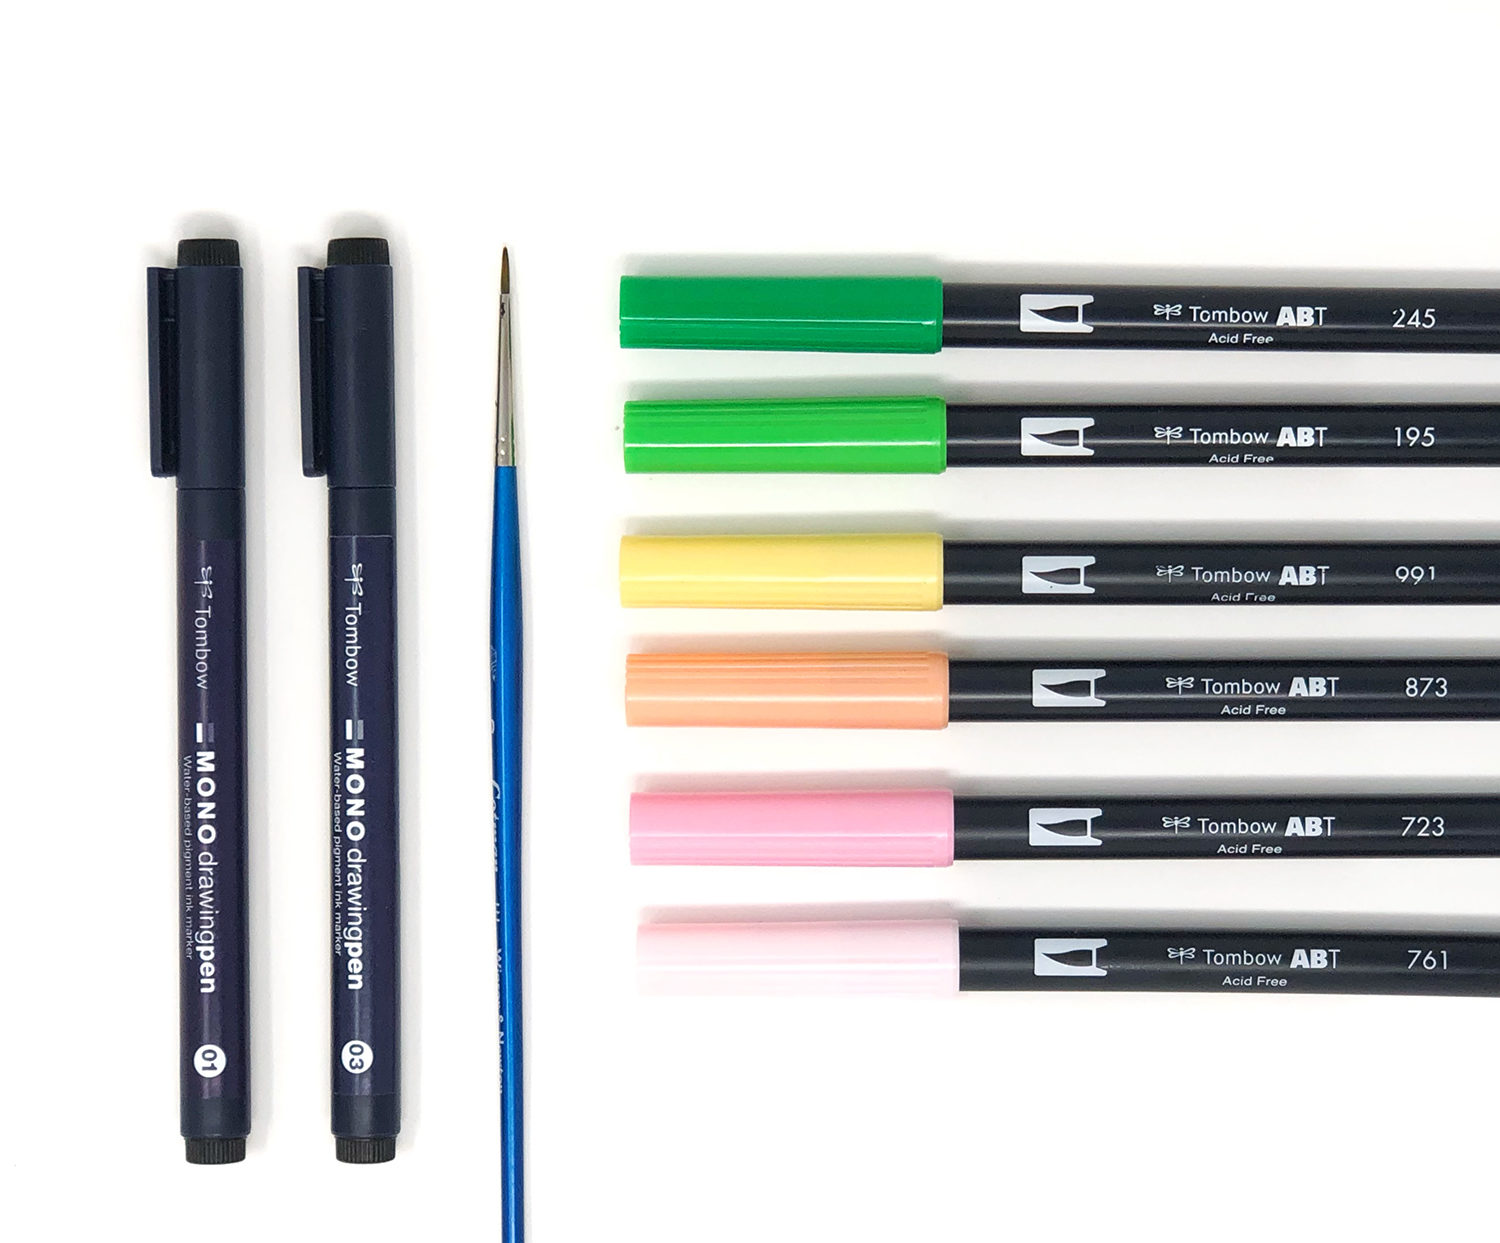
- Tombow Dual Brush Pens
- Watercolor paper (140lb)
- Tombow MONO Drawing Pens
- A small paintbrush
- Tombow MONO Drawing Pencil
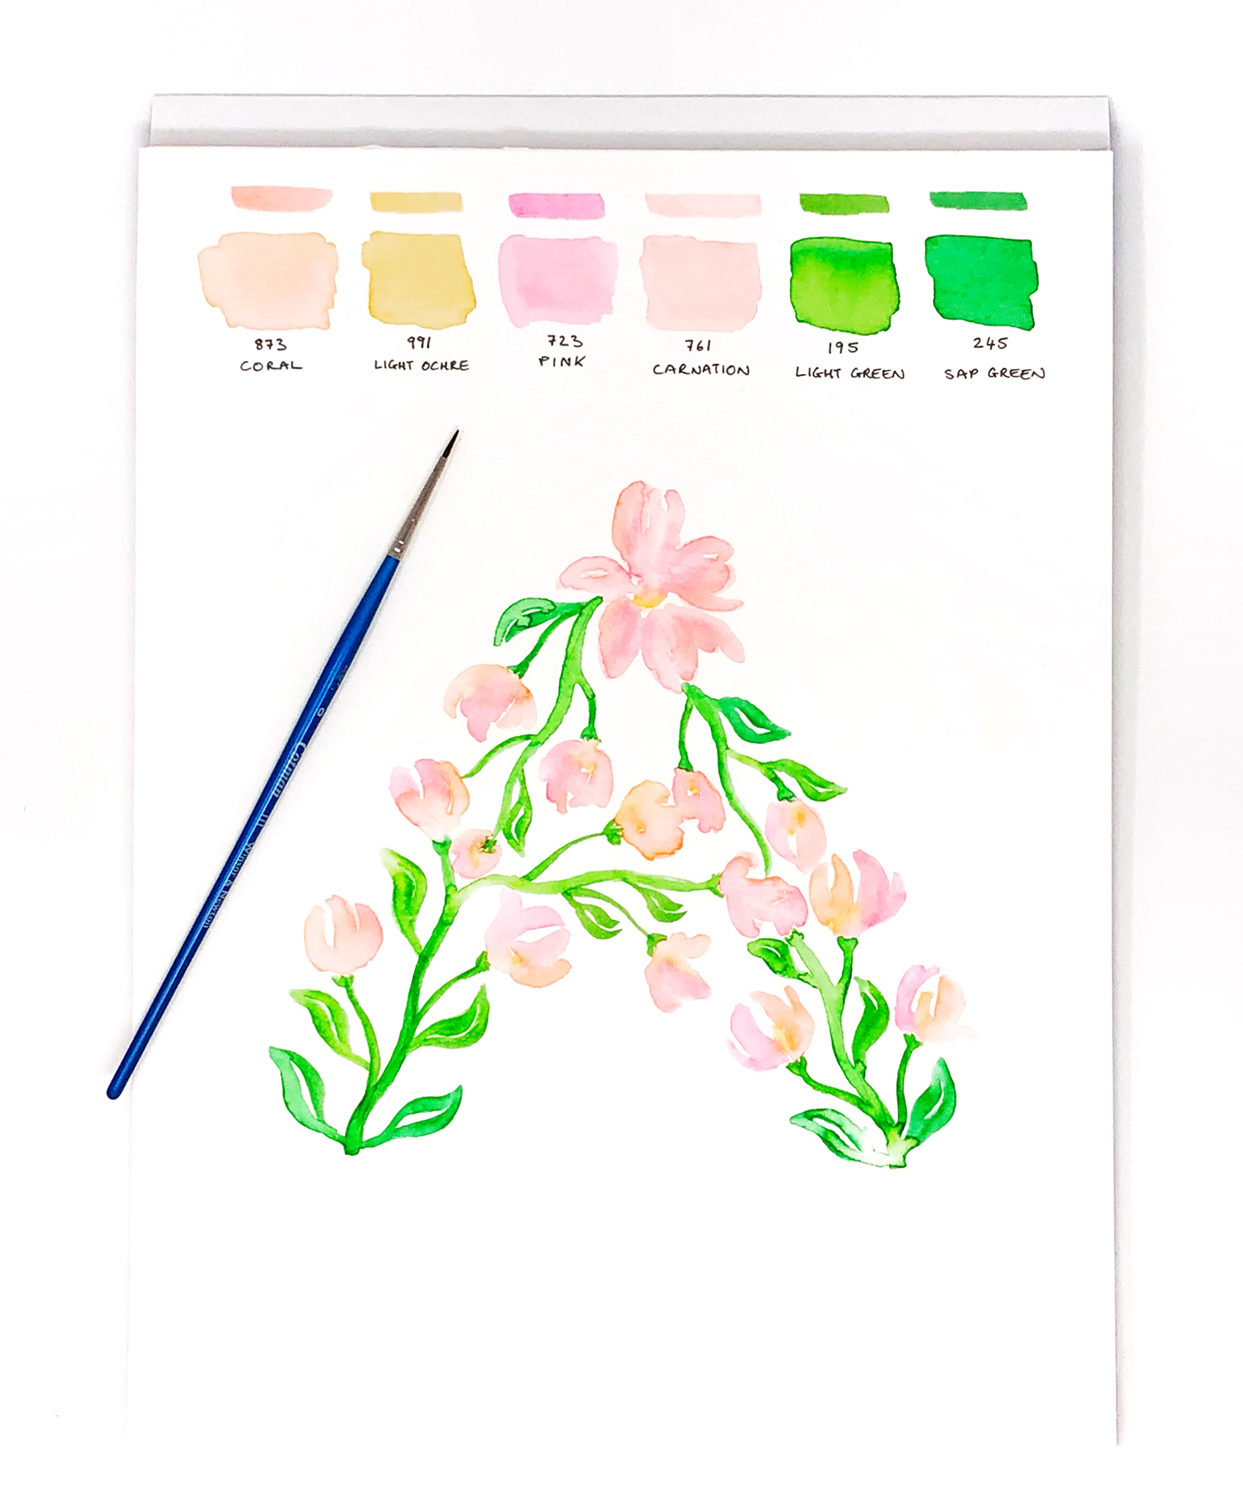
Step 1: Draw Your Letter Shape
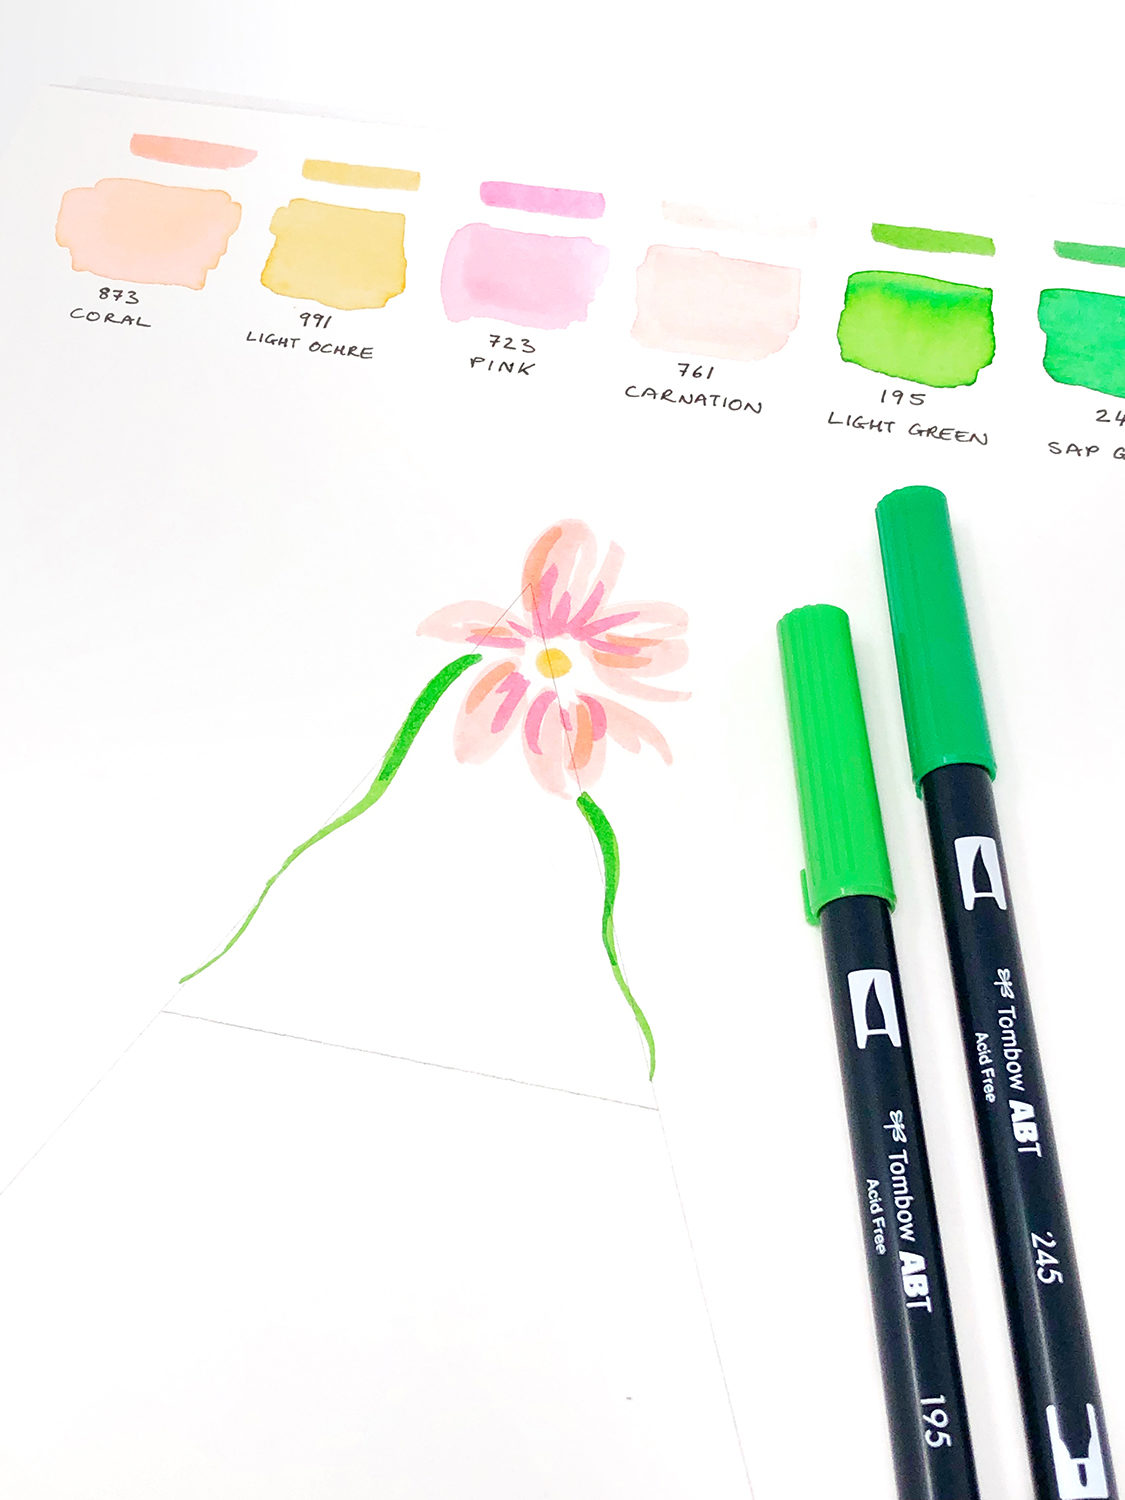
Start by drawing the shape of your letter in pencil. You can choose to draw either an uppercase or lowercase letter. Next, add your first spring flower. I like to draw one larger flower near the top of my letter as a focal point. Keep it nice and loose, starting with the lightest color first. Add small amounts of different shades to give it some variety. The colors I chose were 873 Coral, 991 Light Ochre, 723 Pink, 761 Carnation, 195 Light Green, and 245 Sap Green.
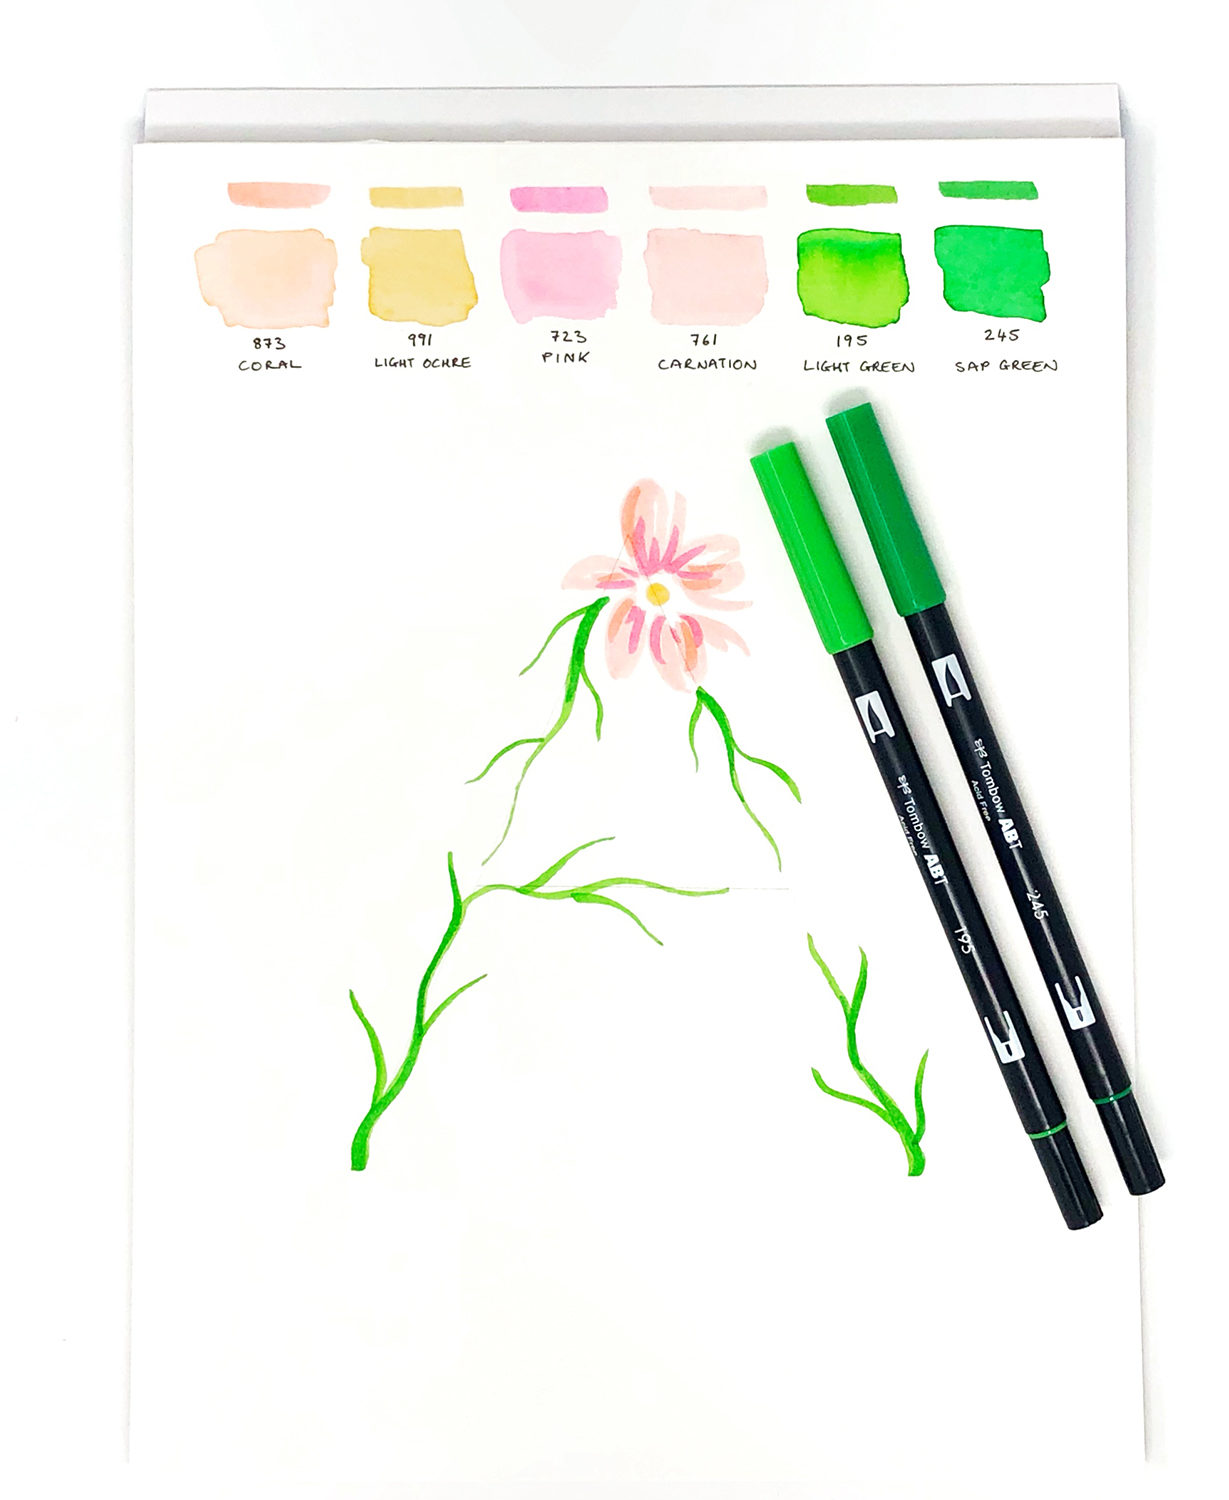
Step 2: Draw Your Stems
Next, draw flower stems along the penciled shape of your letter, leaving some spaces for smaller flowers and buds to be drawn in between them.
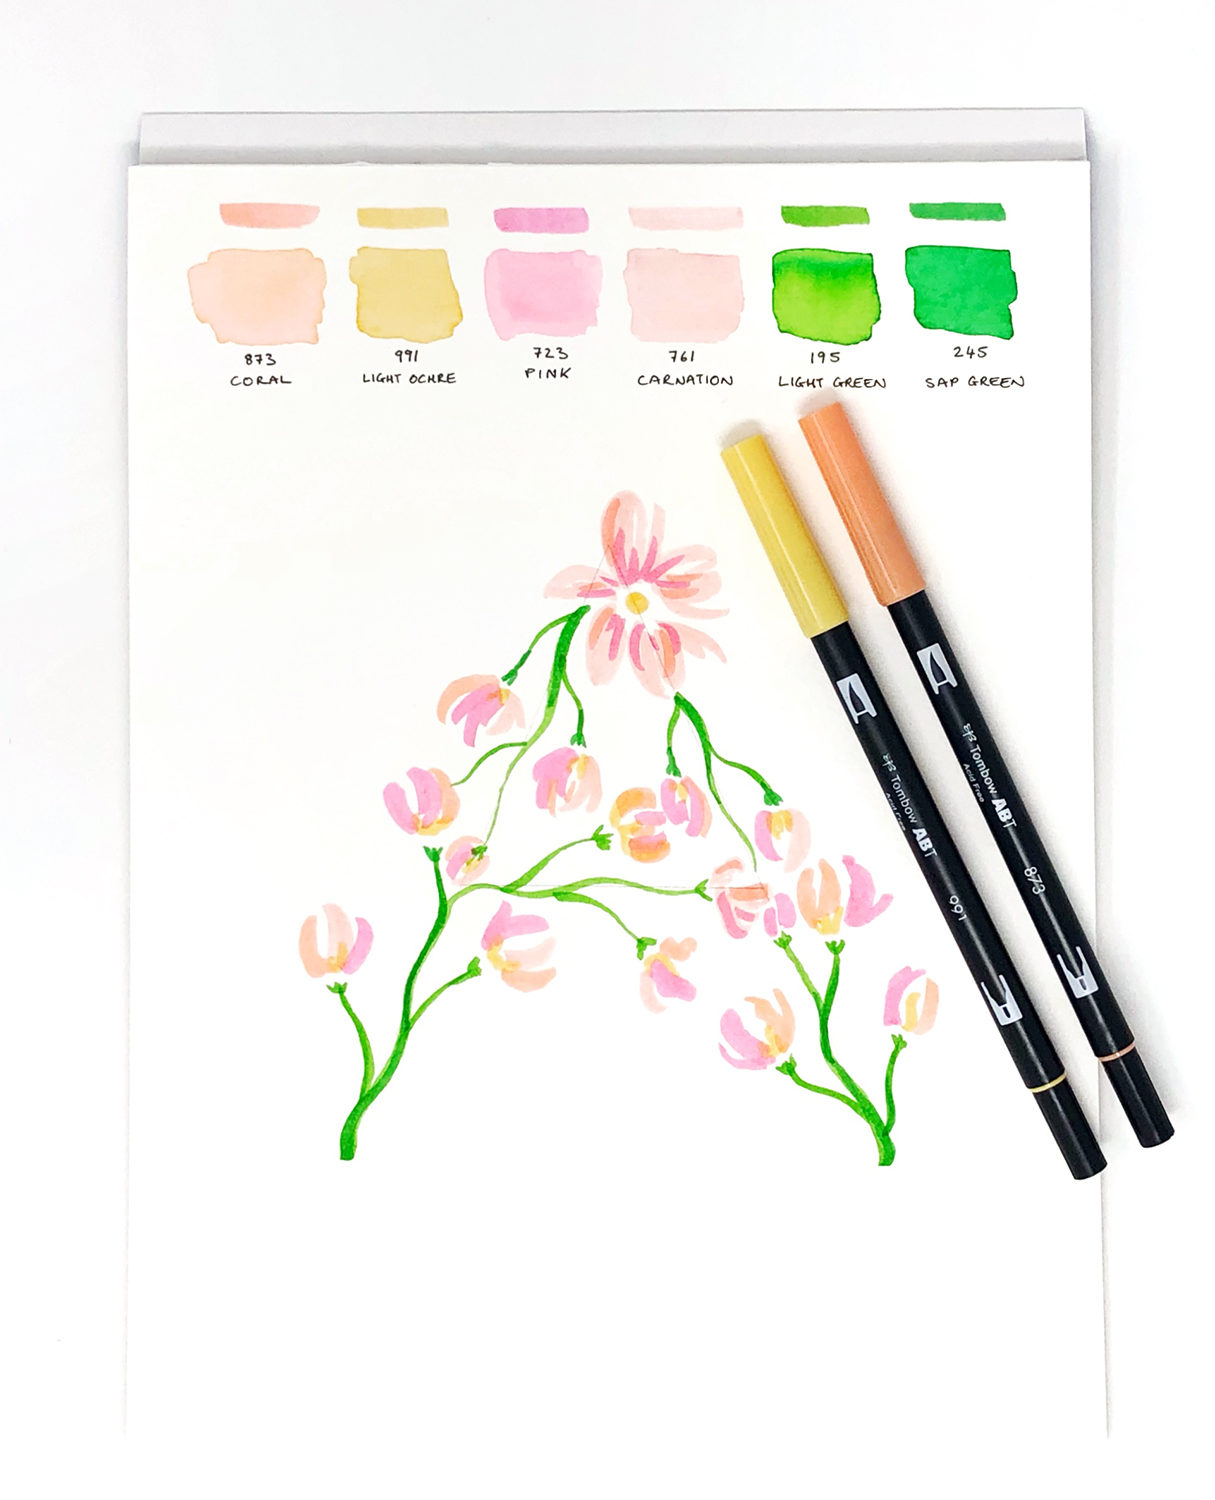
Step 3: Add Buds and Smaller Flowers
Start filling in the spaces at the ends of the stems with flower bud shapes and small, slightly open flowers. Follow the same approach as you did for the first flower by adding different colors to each flower for variety. Don’t worry if they don’t look much like flowers at this stage. It’s ok if they’re a little messy. After all your flowers have been drawn, you can fill in any gaps with leaves.
Step 4: Add Water
Next, it’s time to add water. Start with either the stems and leaves or the flowers. Don’t do everything at once, otherwise it will run together into a muddy mess! With a damp paintbrush gently brush over the ink, blending the colors together a little until you have a watercolor look. Once your first part is dry, then you can start on the next bit.
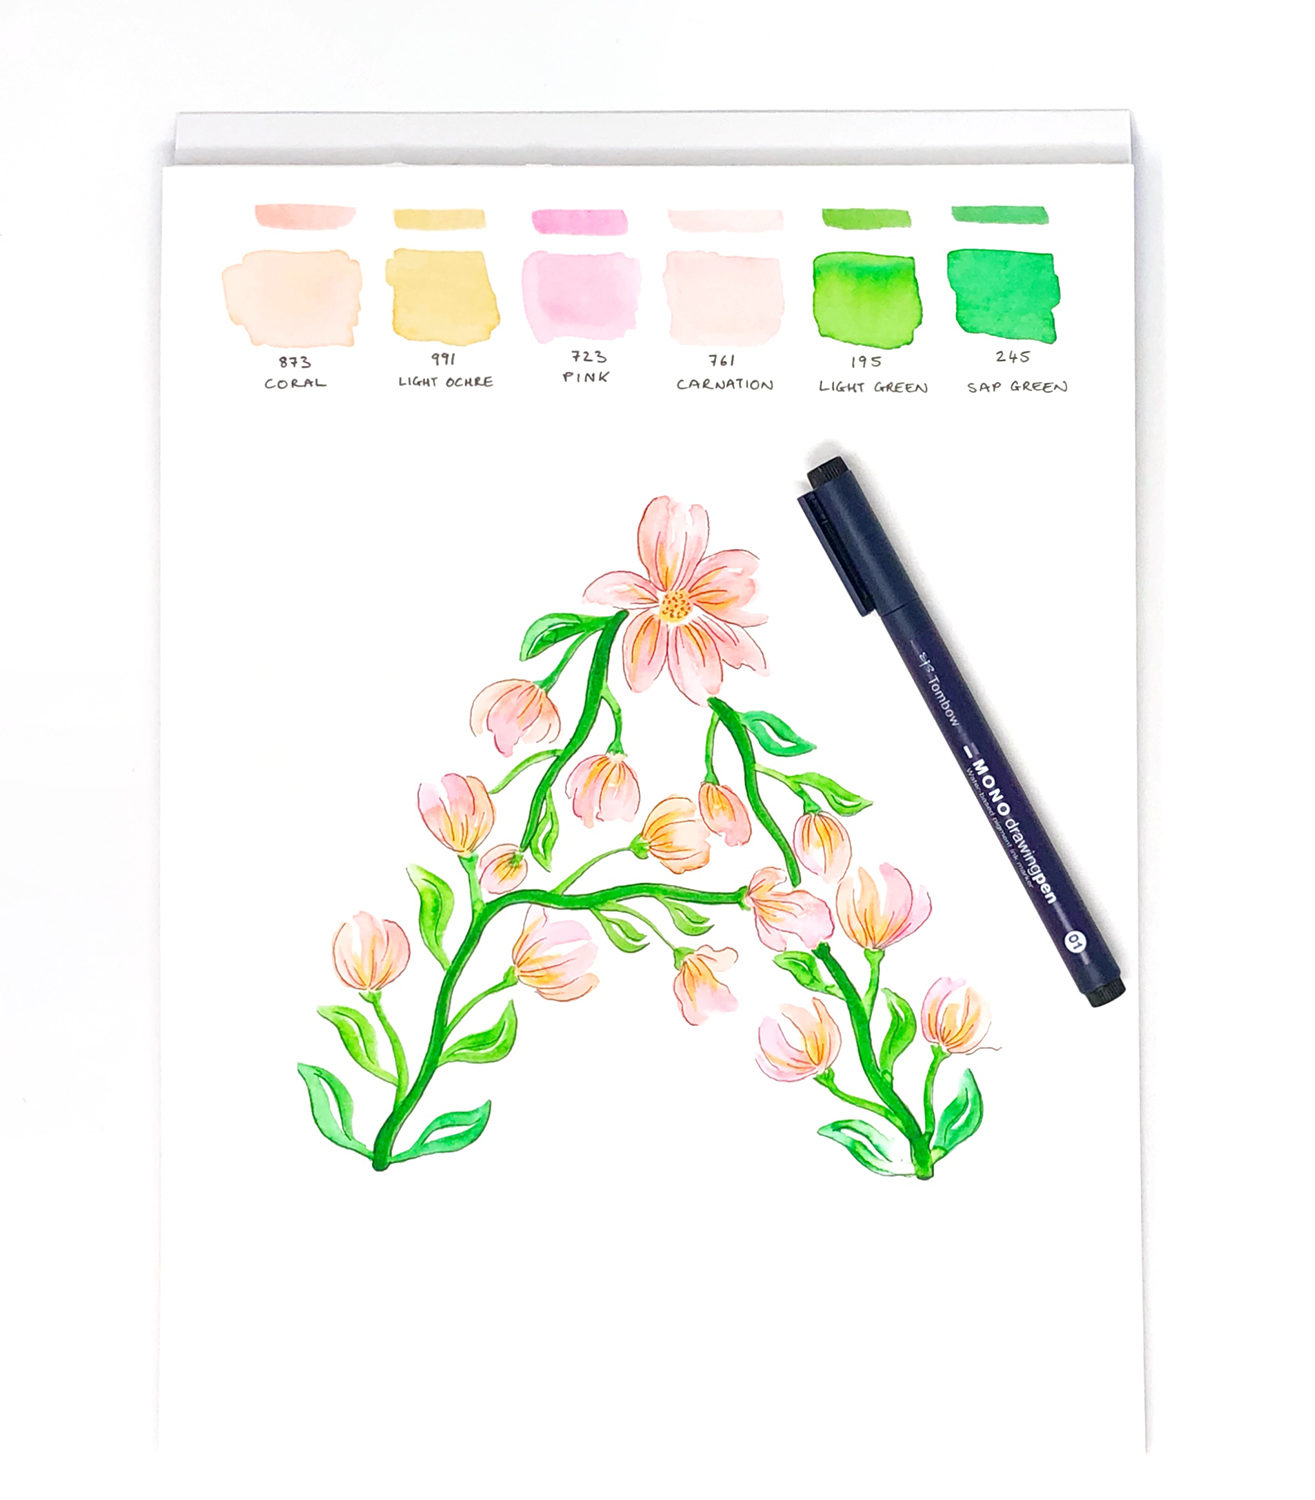
Step 5: Adding Detail
If you’d like, you can leave your spring letter at the last watercolor stage. If you’d like to add some small details, grab your MONO Drawing Pens and add thin lines to suggest where the petals are. You can add some lines to the outsides of the stems and leaves as well. To keep it looking loose and fresh, I recommend not closing all of the petal and leaf shapes completely (leave some gaps here and there).
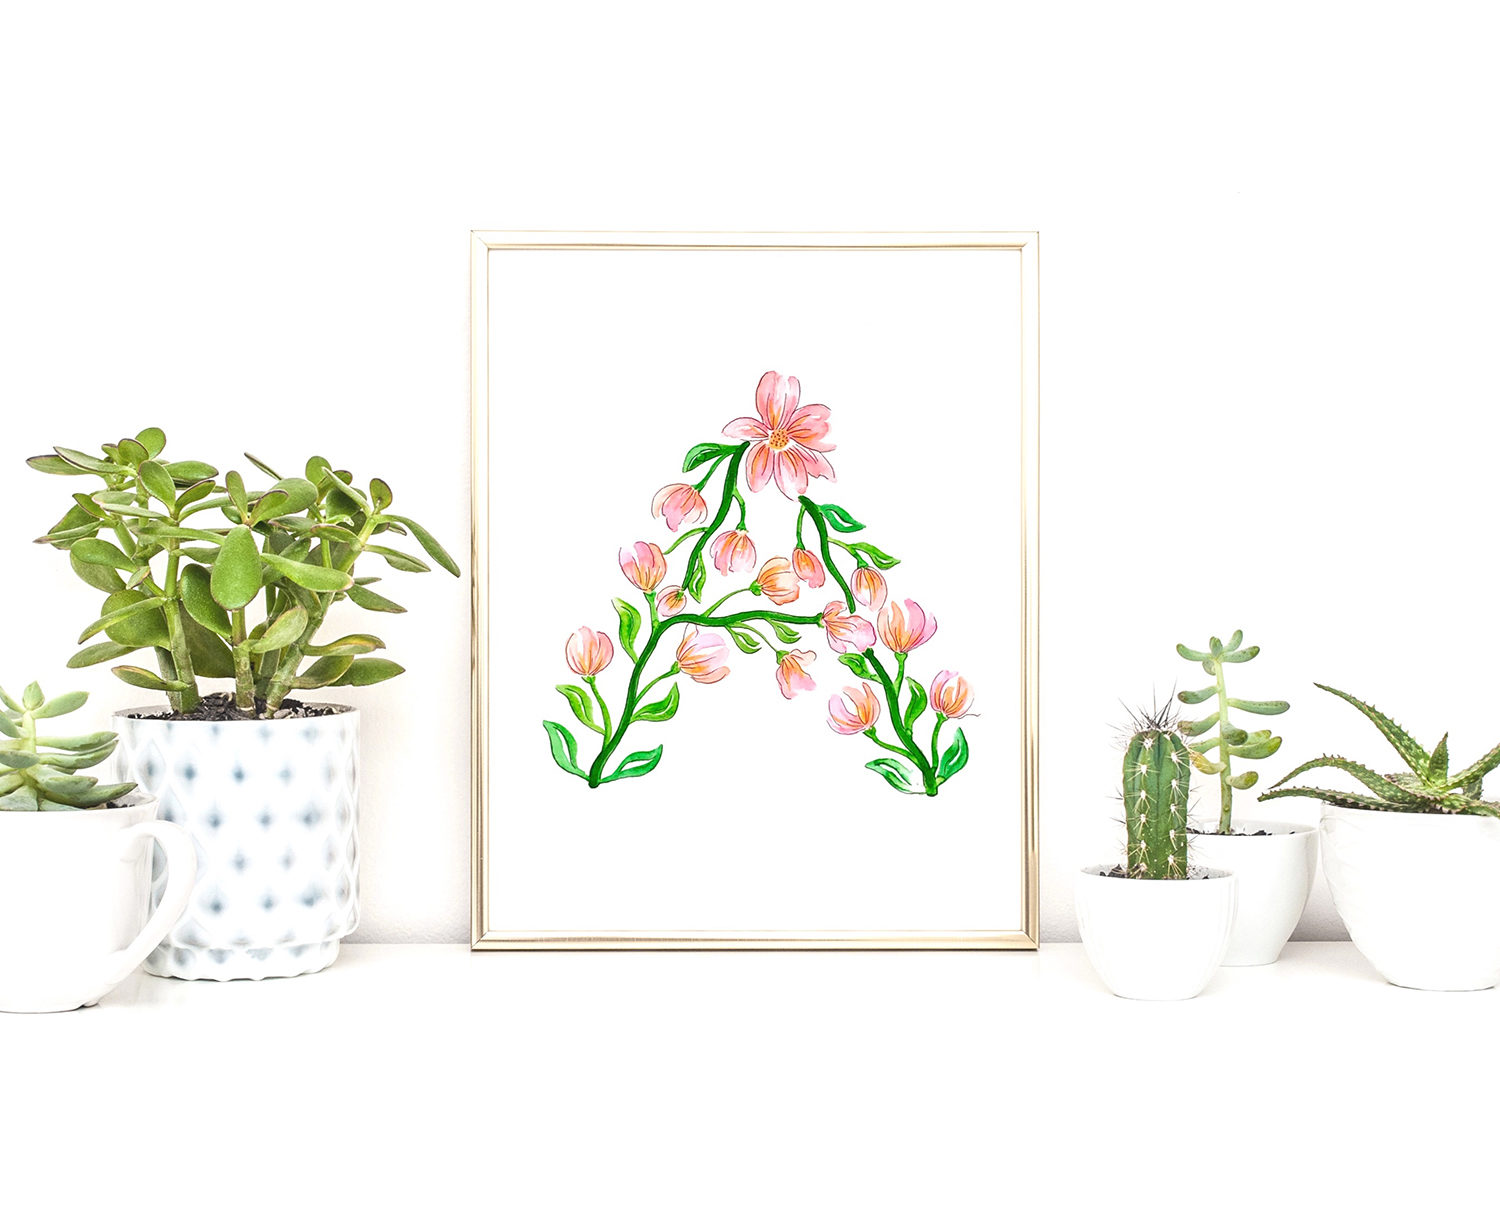
Voila, you’re finished! Now you can frame it and hang it on your wall or give it as a gift! We’d love to see your spring letters, so be sure to tag @TombowUSA and @BrownPaperBunny if you share them on social media!
Pingback: Pantone Color Of The Year Inspired Wall Decor - Tombow USA Blog
Pingback: How To Create Loose Sketchy Spring Florals - Tombow USA Blog
Pingback: How To Create Spring Florals - Tombow USA Blog