Are you SO excited Tombow’s new ABT PRO Alcohol-Based Markers are finally here?!! It’s Mandy from @a_heartened_calling! Today, I’m going to show you how to create a Stargazer Lily with the new ABT PRO Alcohol-Based Markers! I absolutely LOVE these markers! I know you will too!
If you’re looking for more information about the new ABT PRO Aclohol-Based Markers, you can visit this link here: LEARN MORE ABOUT THE ABT PRO MARKERS. You’ll learn some basic techniques, tips and tricks.
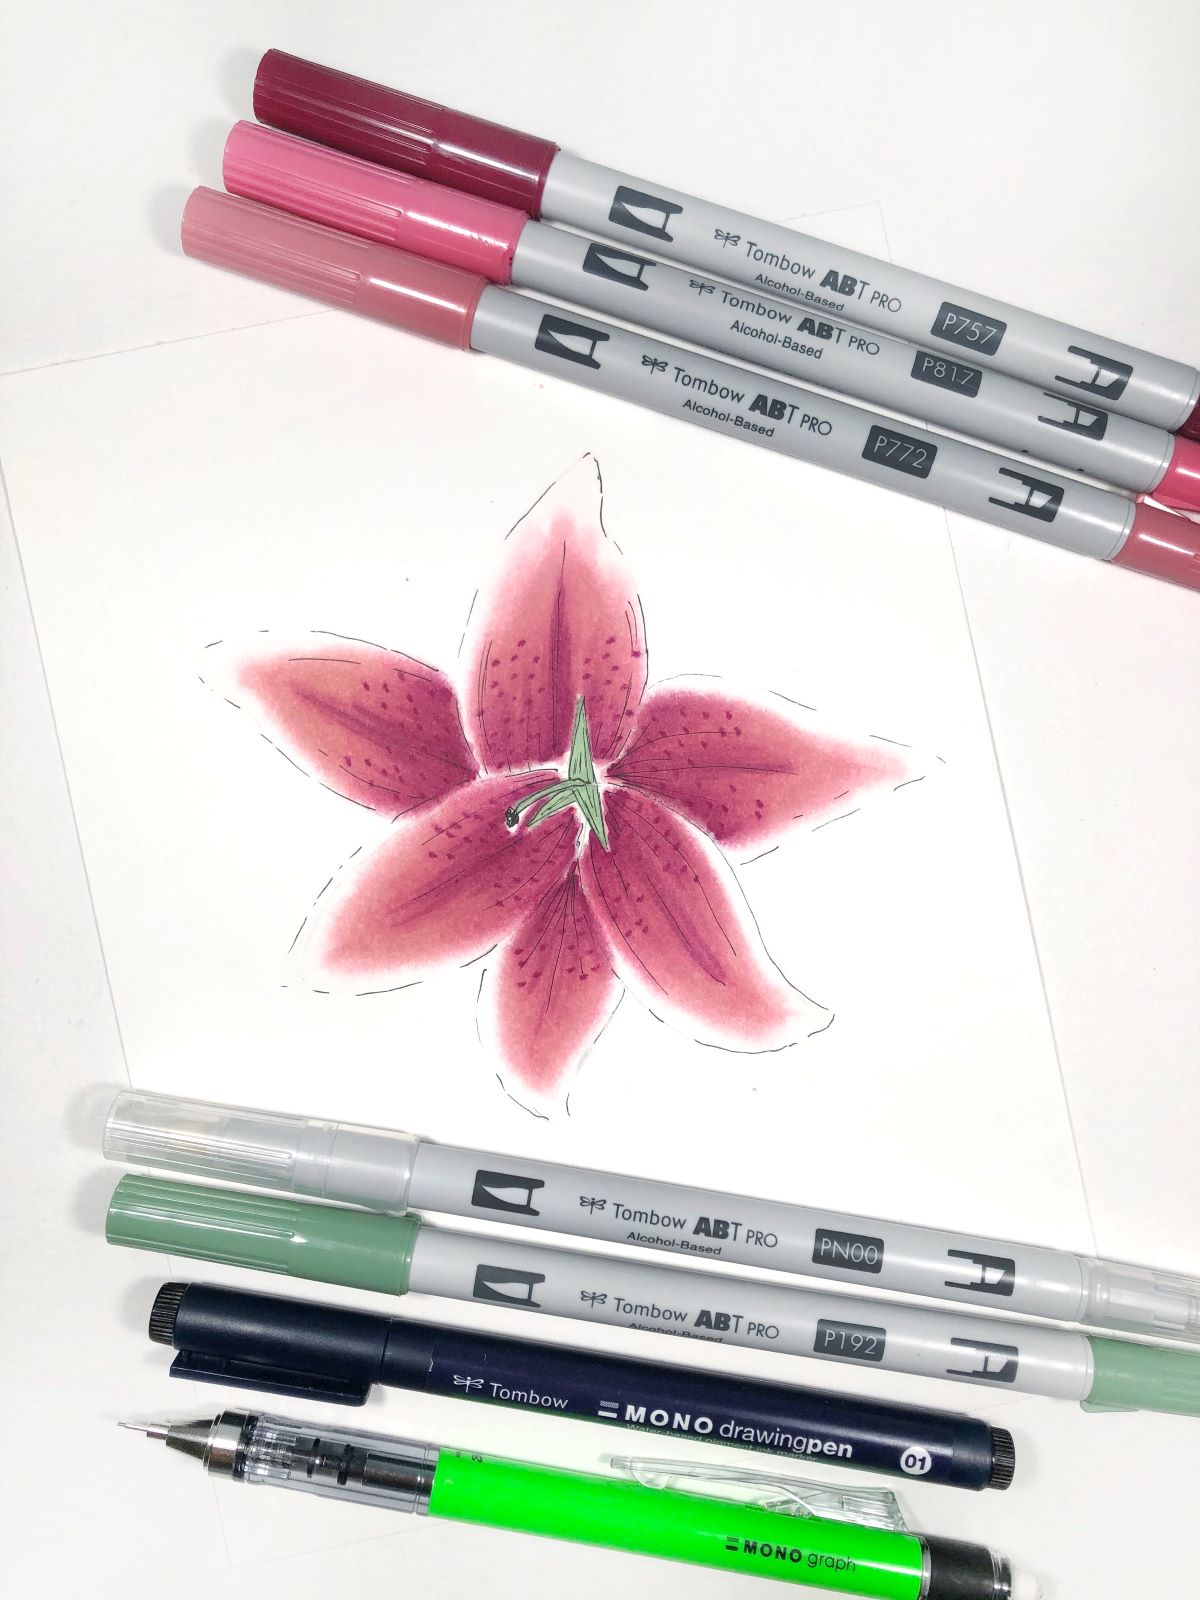
I thought creating a lily was the perfect project to learn how to use the new ABT PRO Markers. It requires lots of layers of color, as well as learning how to use the Blender Pen to get a smoother transition of color. So, let’s gather our supplies and get started!
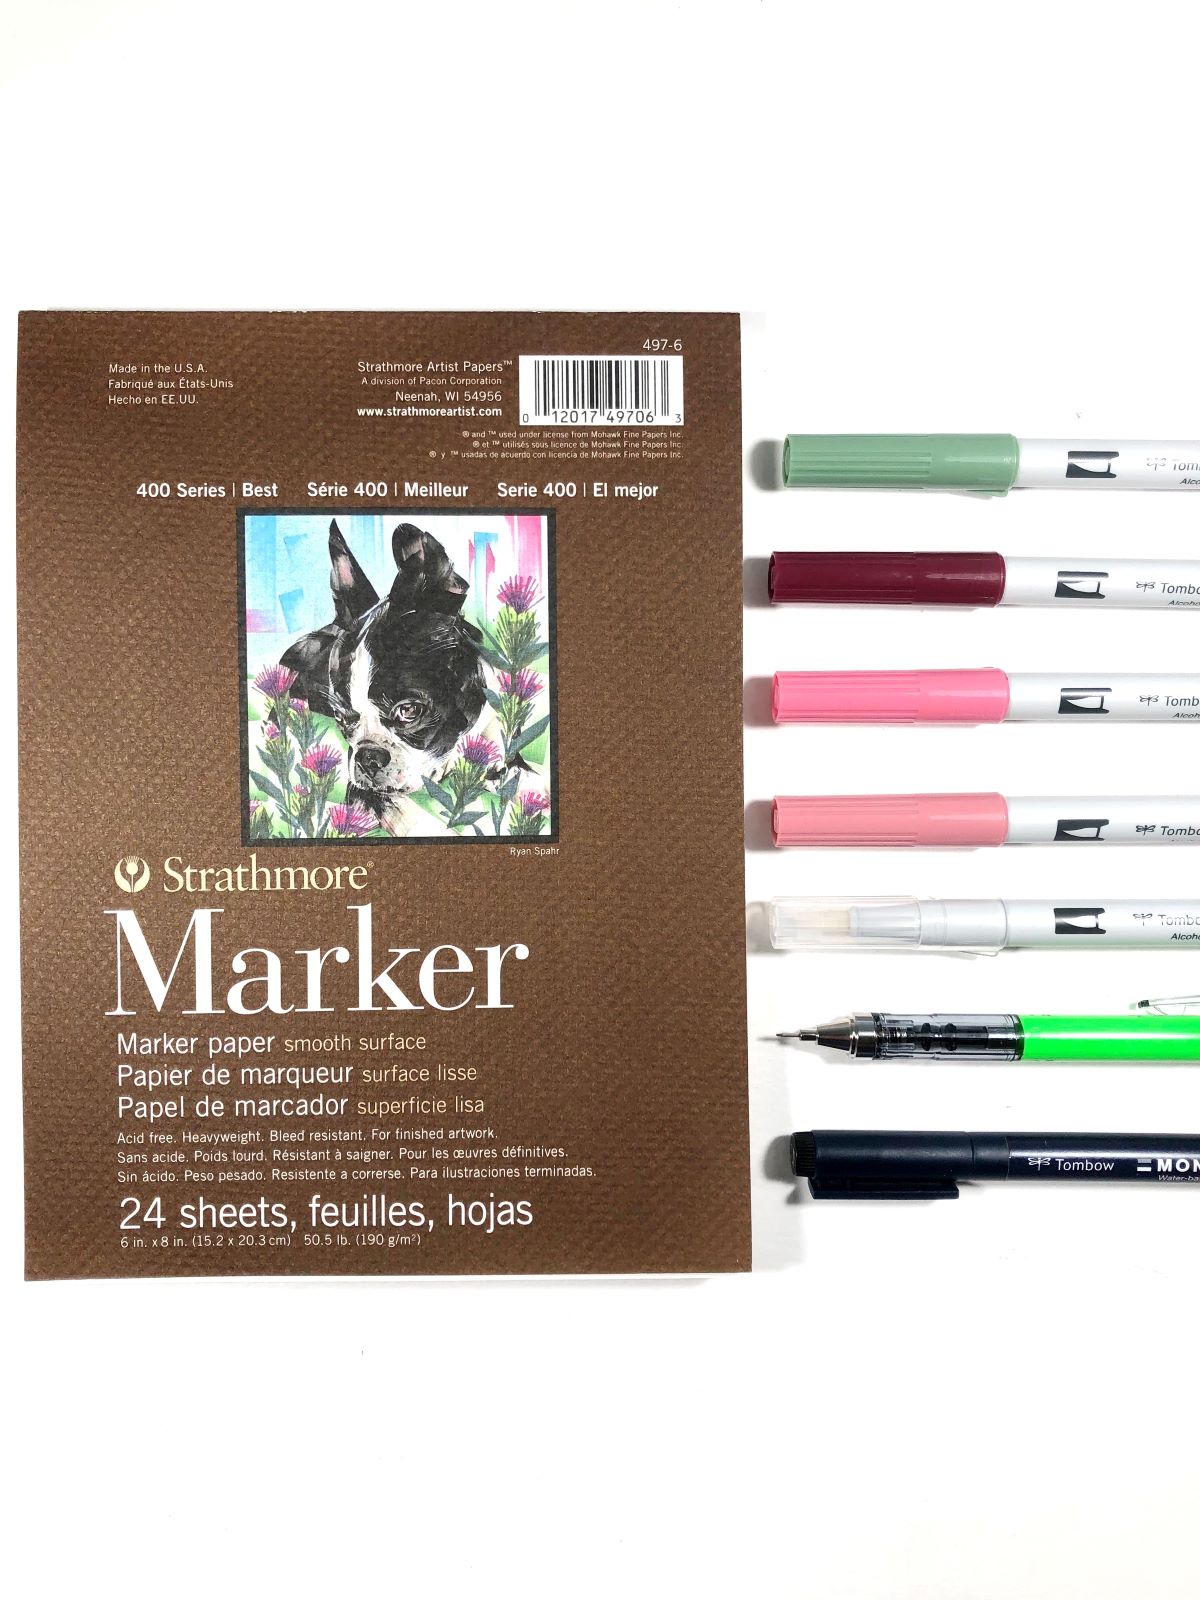
MATERIALS
- Strathmore Marker (Smooth Surface 400 Series Heavyweight) or Bristol Paper
- Tombow MONO Graph Mechanical Pencil
- Tombow MONO Drawing Pen 01
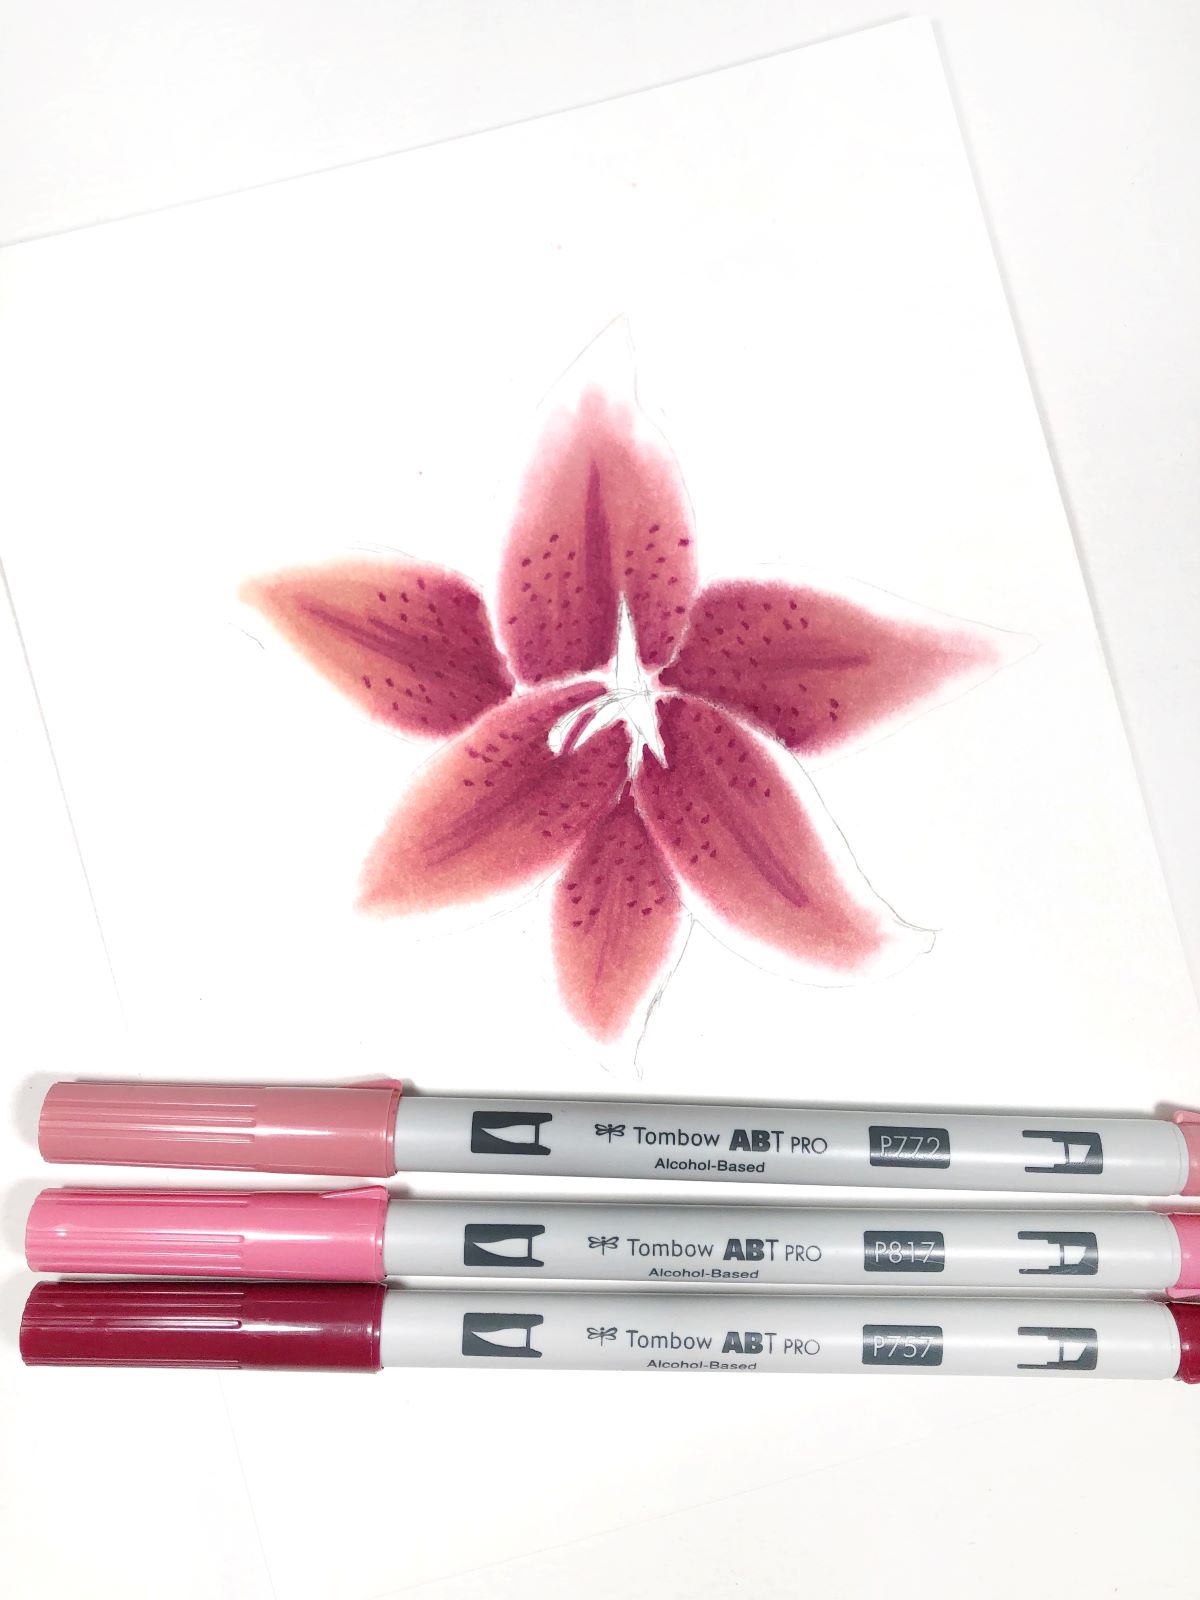
- Tombow ABT PRO Markers N00, 192, 757, 772 and 817
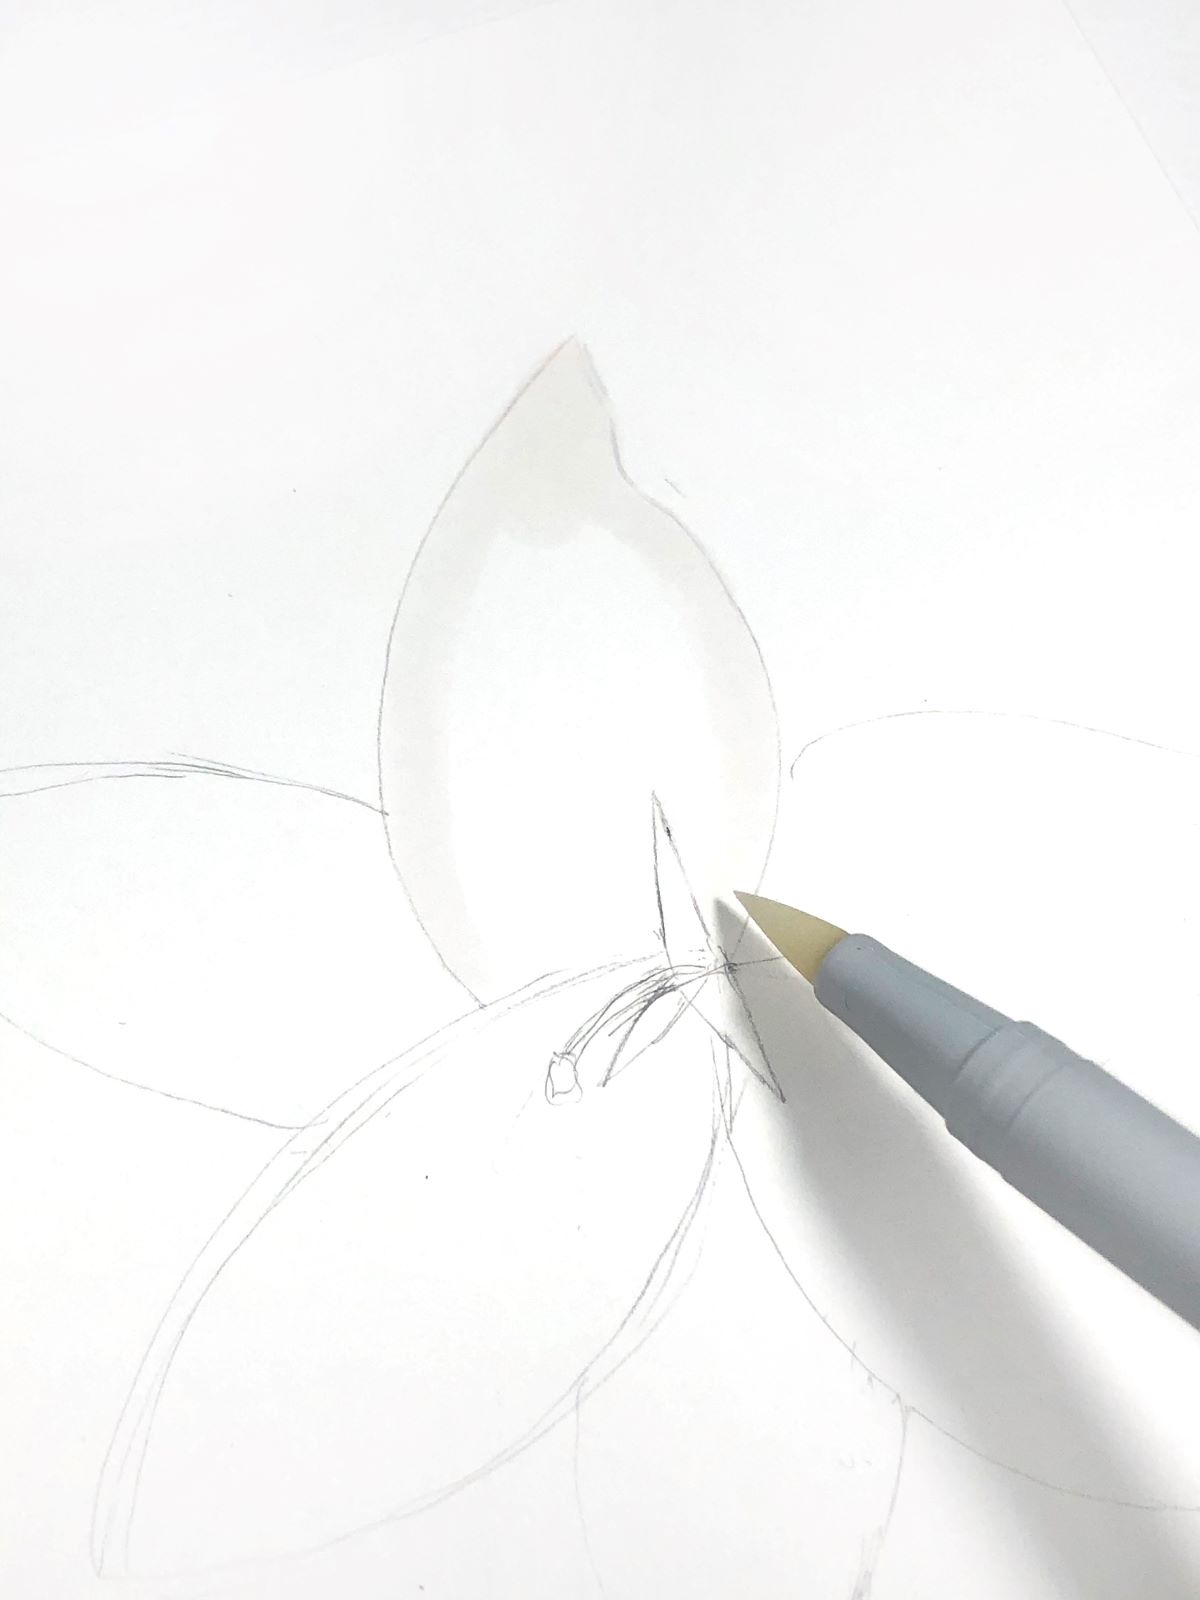
To start, use the MONO Graph Mechanical Pencil to sketch out a lily flower. Also, be sure to place a mat or extra piece of paper underneath your artwork. Alcohol markers do bleed through paper and can stain. Next, use the brush tip of Blender Pen N00 and add solvent to just the edges and tip of the petal. This pen is colorless and is filled with solvent. It is actually designed to remove or lighten color, push colors around and create textural effects. Because the edges of each lily petal are white, we are going to use this marker to help soften the edges of our color to make a smoother transition of pink to white. If you lay the solvent down before adding color, it will help in blending that added color.
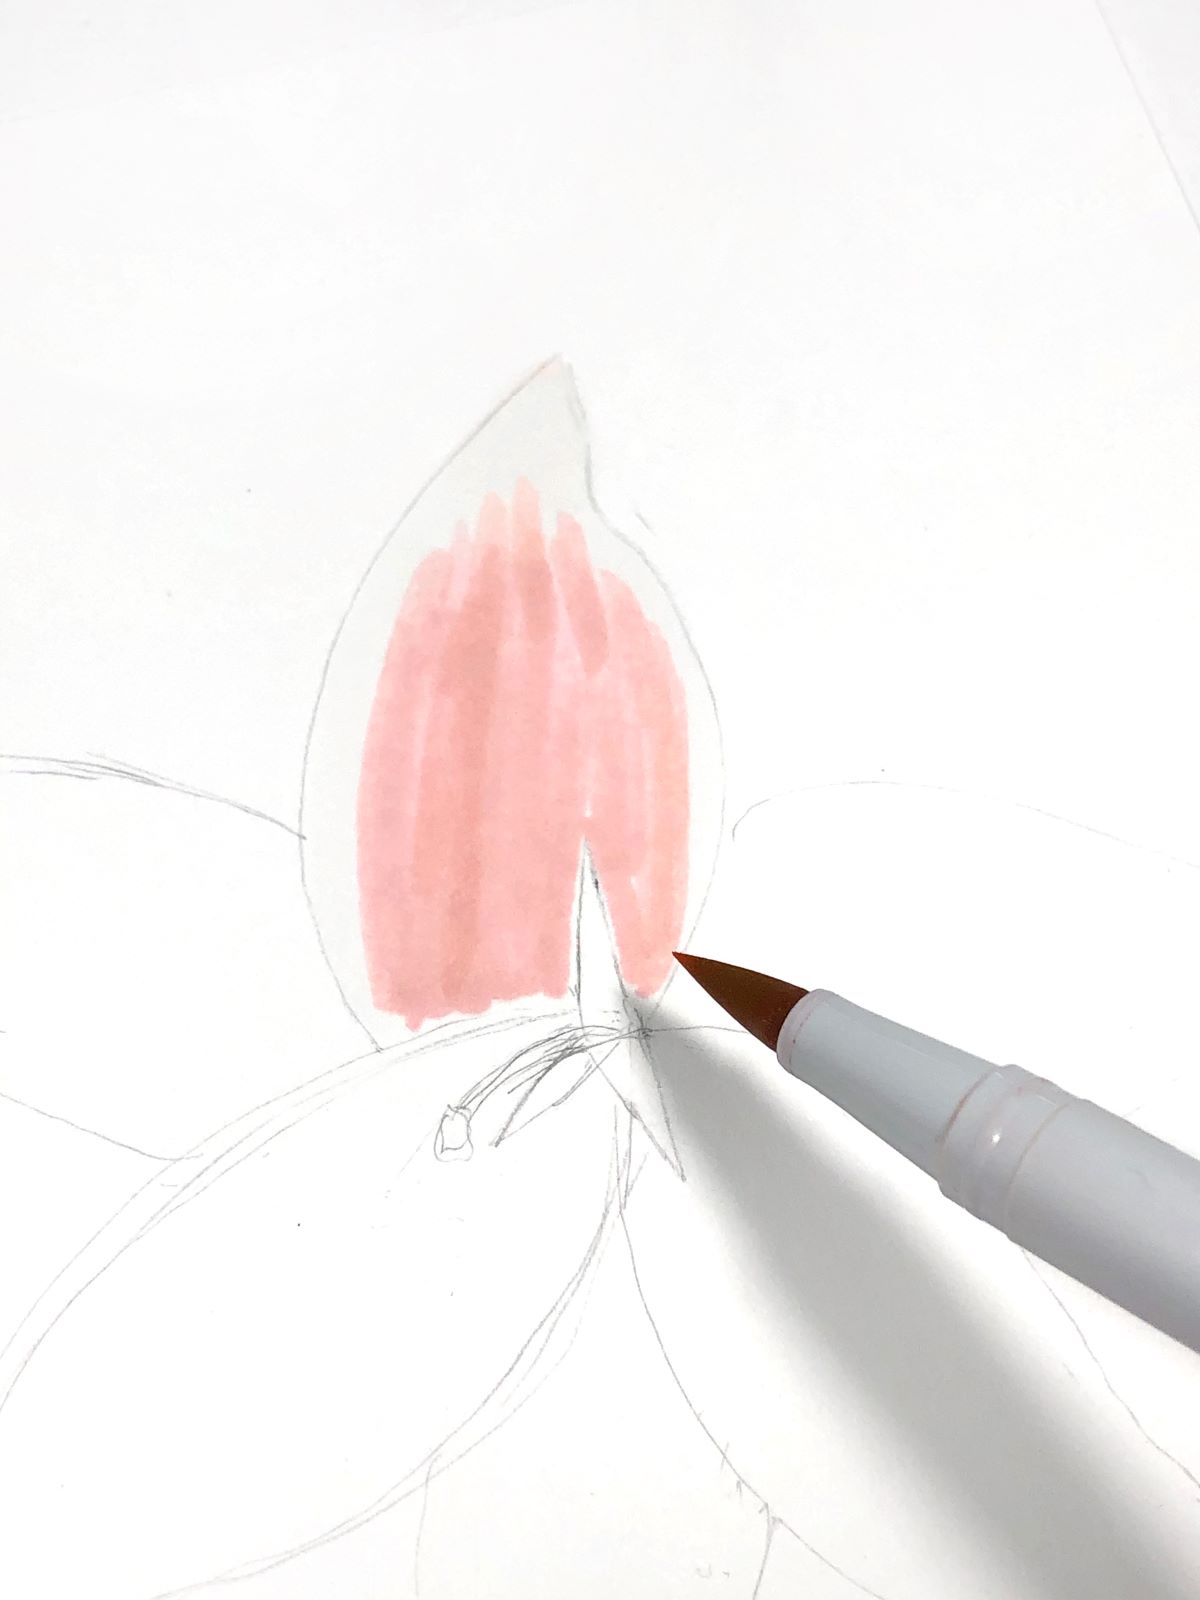
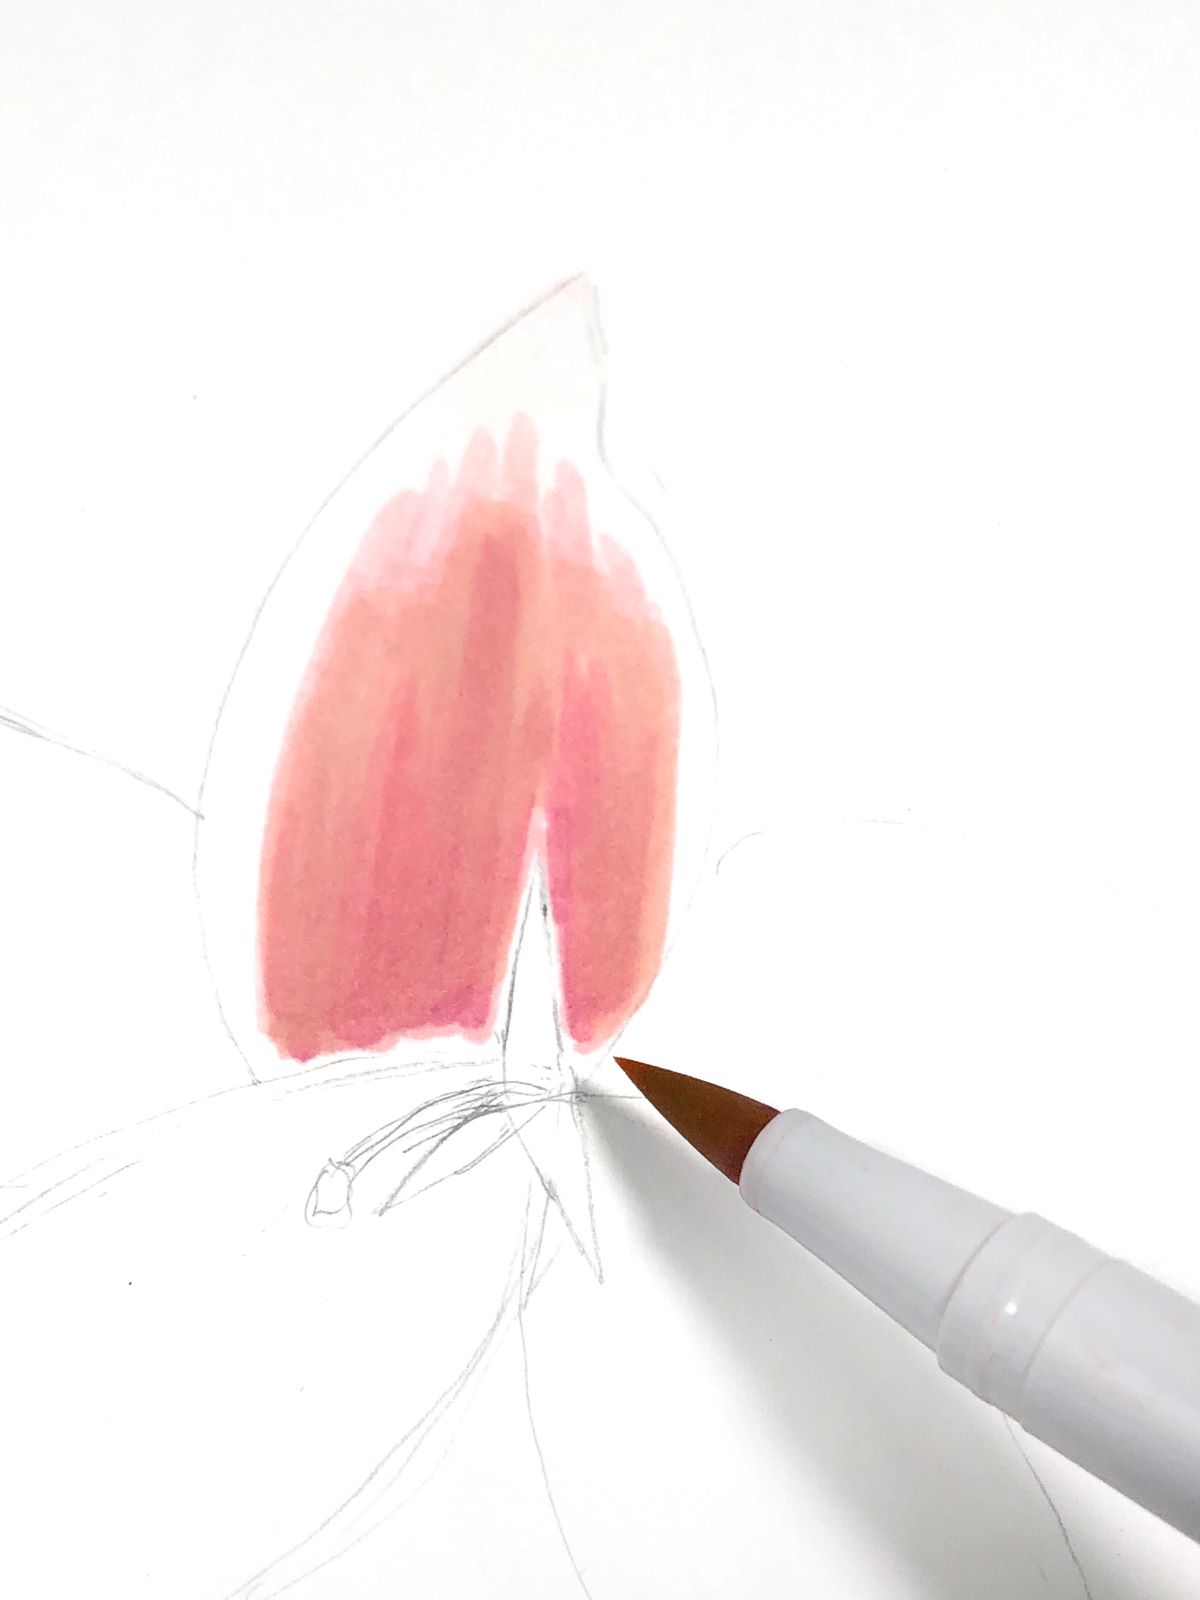
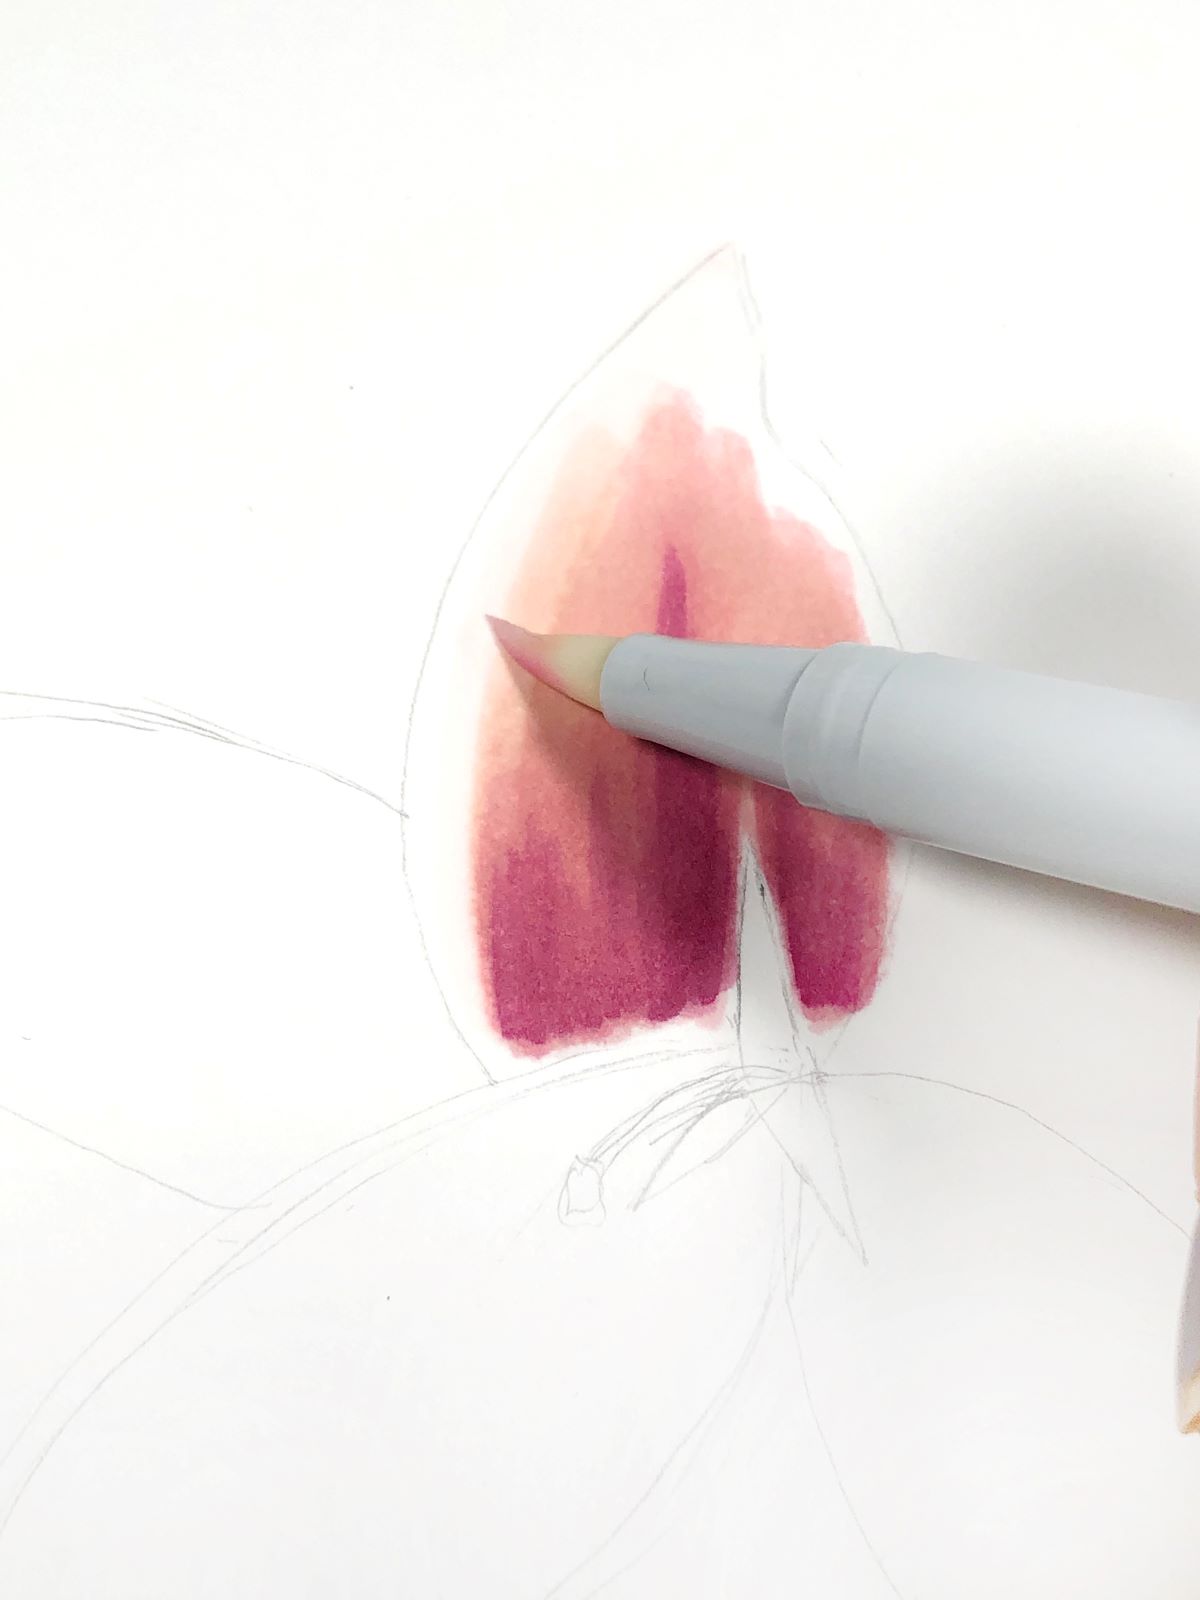
Next, use the brush tip of ABT PRO Marker 772 and add color from the bottom of the petal upwards. Fill in the area until you start to touch where you first added the solvent.
Use the brush tip of ABT PRO Marker 817 to add color from the bottom of the petal upwards. In the middle of the petal, bring the color almost up to the top. On the sides, bring the color up about two thirds of the way. Use light strokes to flick the ink upwards.
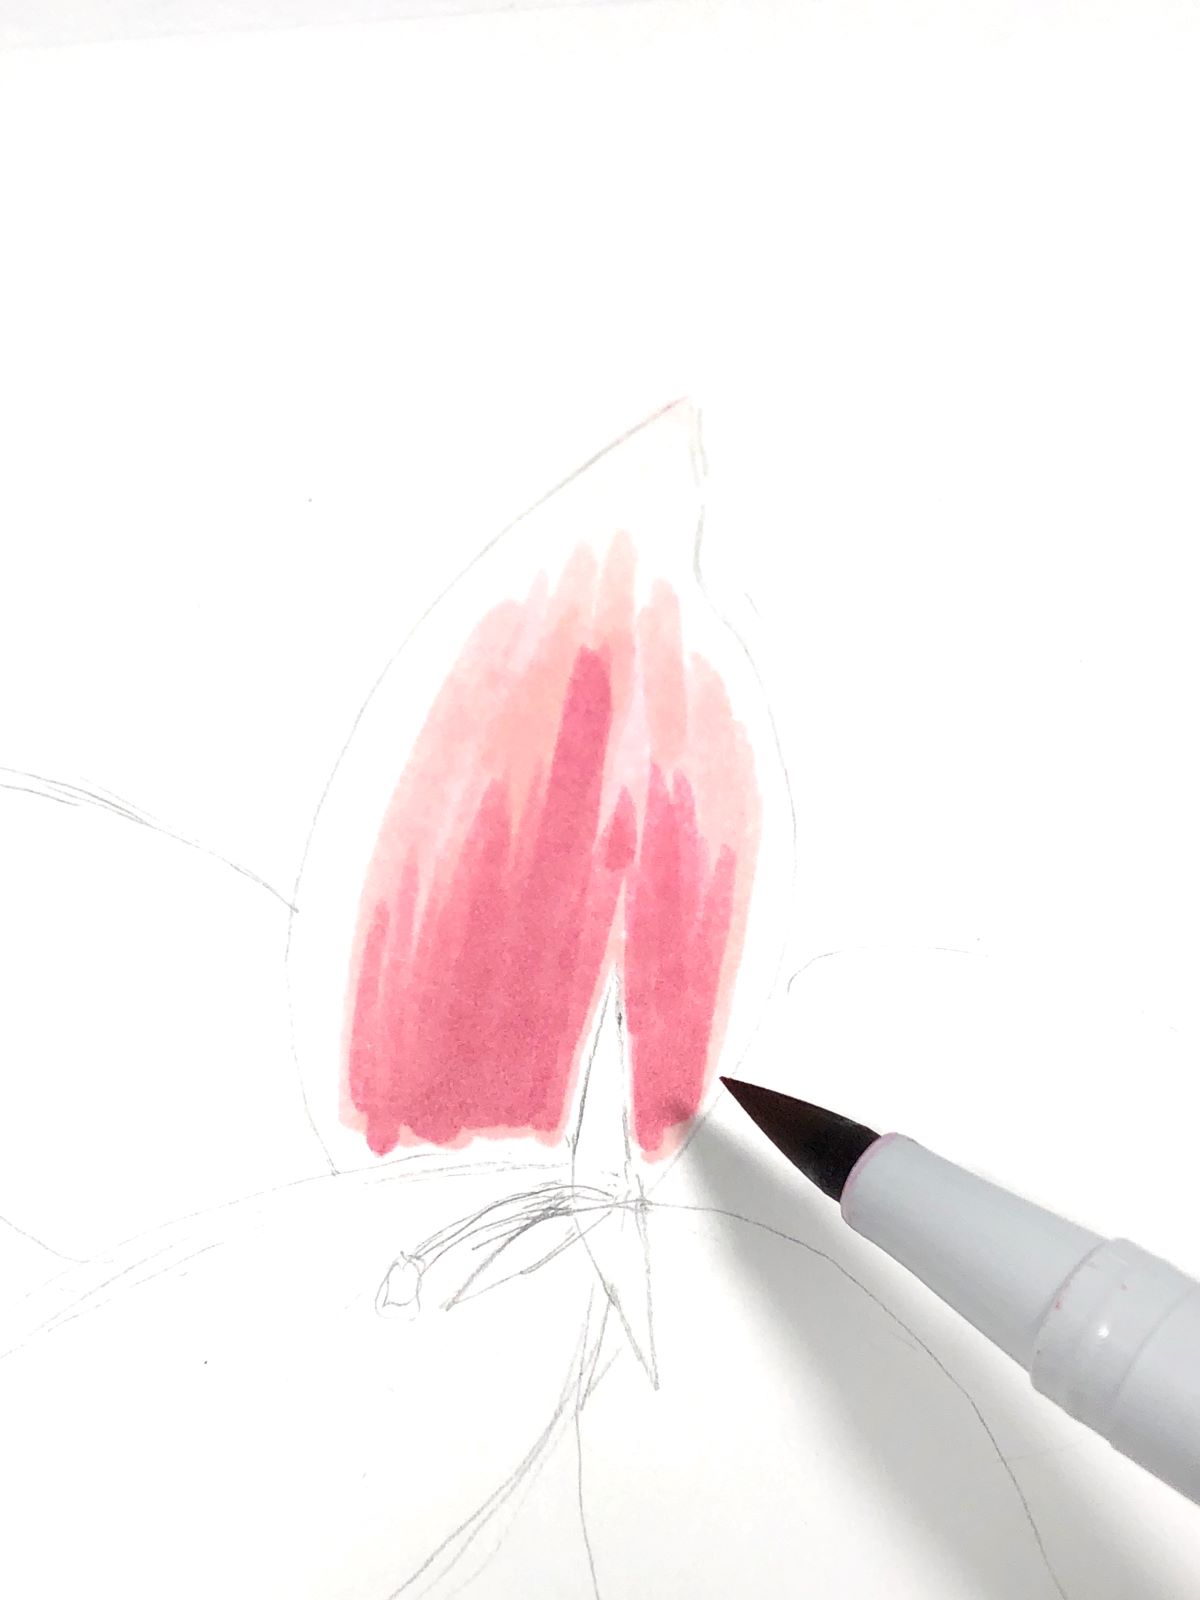
Next use the brush tip of 772 to add a couple layers of color over 817. Adding layers of color is what helps the ink to look blended.
Using the brush tip of 757, add color from the bottom of the petal upwards about halfway. In the middle, bring the color up a little more. Use light strokes to flick the ink upwards.
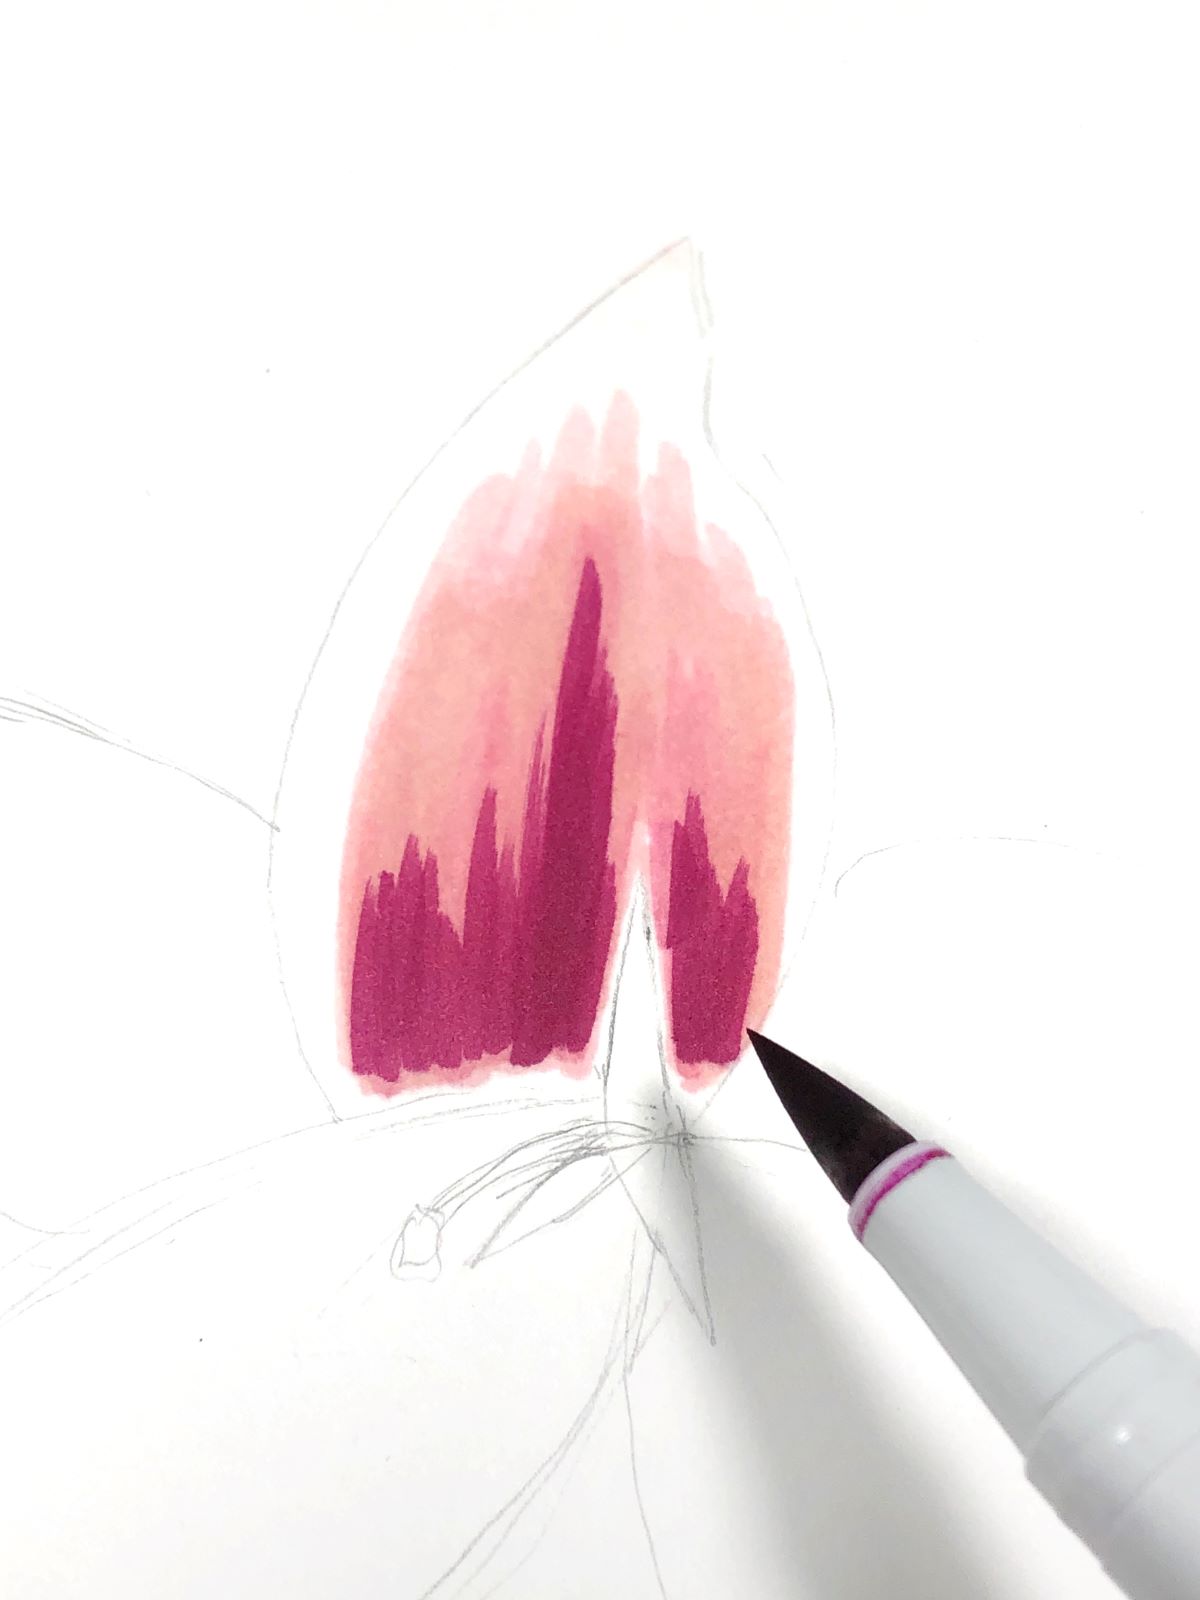
Next, use the brush tip of 817 to add a couple layers of color over 757. Just color over the darkest part.
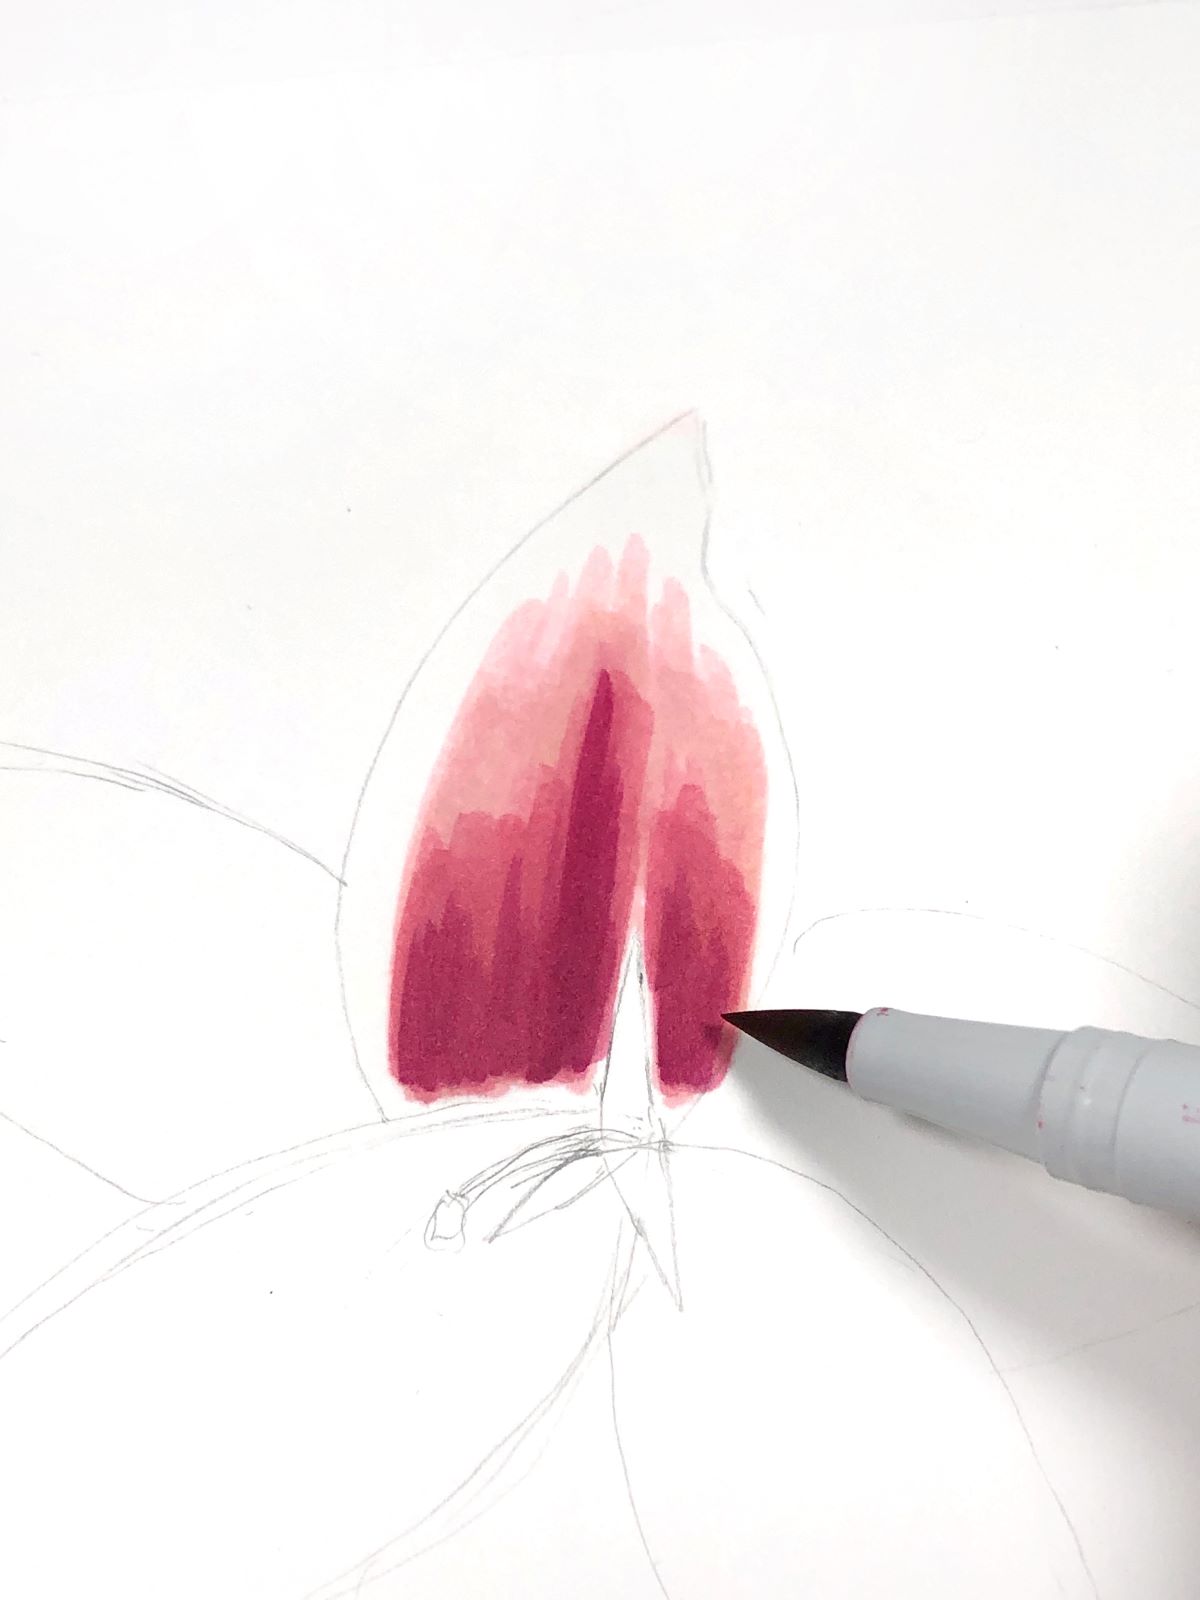
Then using the brush tip of 772, add 3-4 layers of color to the whole petal area, bringing color up to where you originally added the solvent. This will help blend everything together.
Ready for a little magic? Using the brush tip of N00, add several layers of solvent to JUST the edges of the pink color all the way around the petal. This trick helps make the transition from pink to white look a lot more natural.
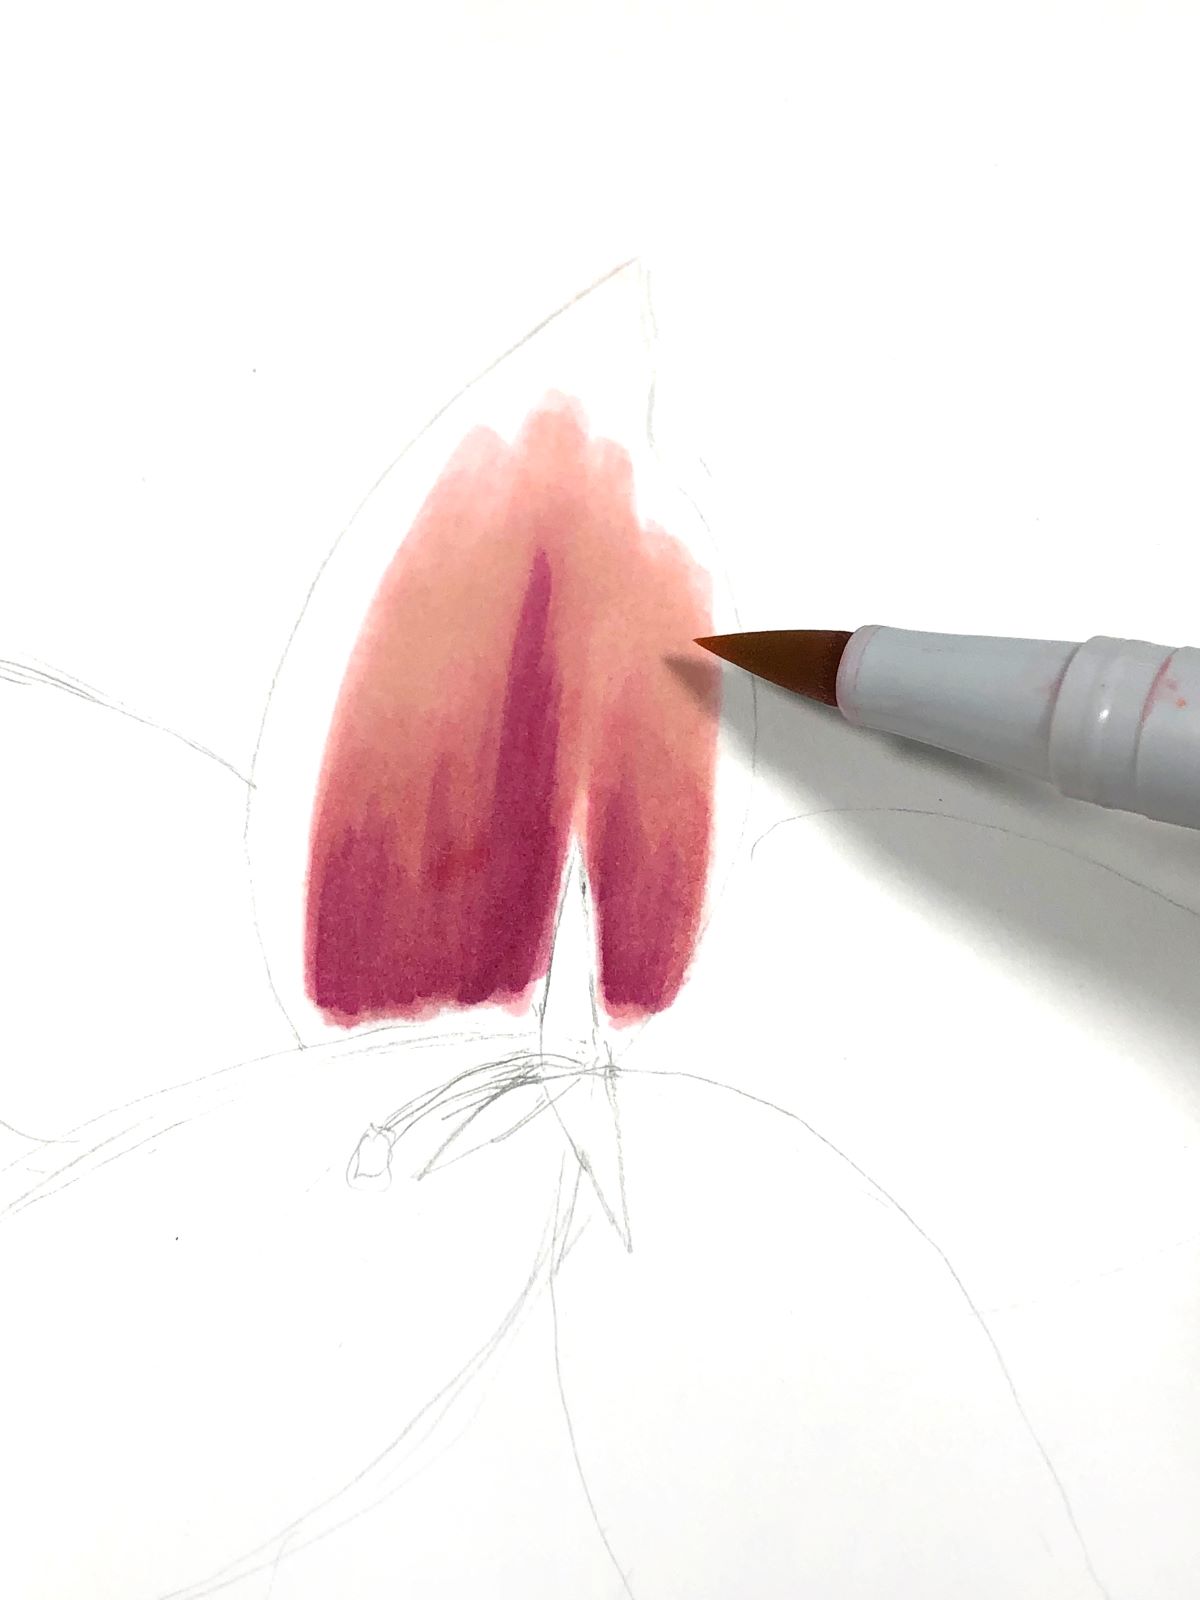
Next, use the chisel tip of 757 to add little dots to the bottom half of the petal.
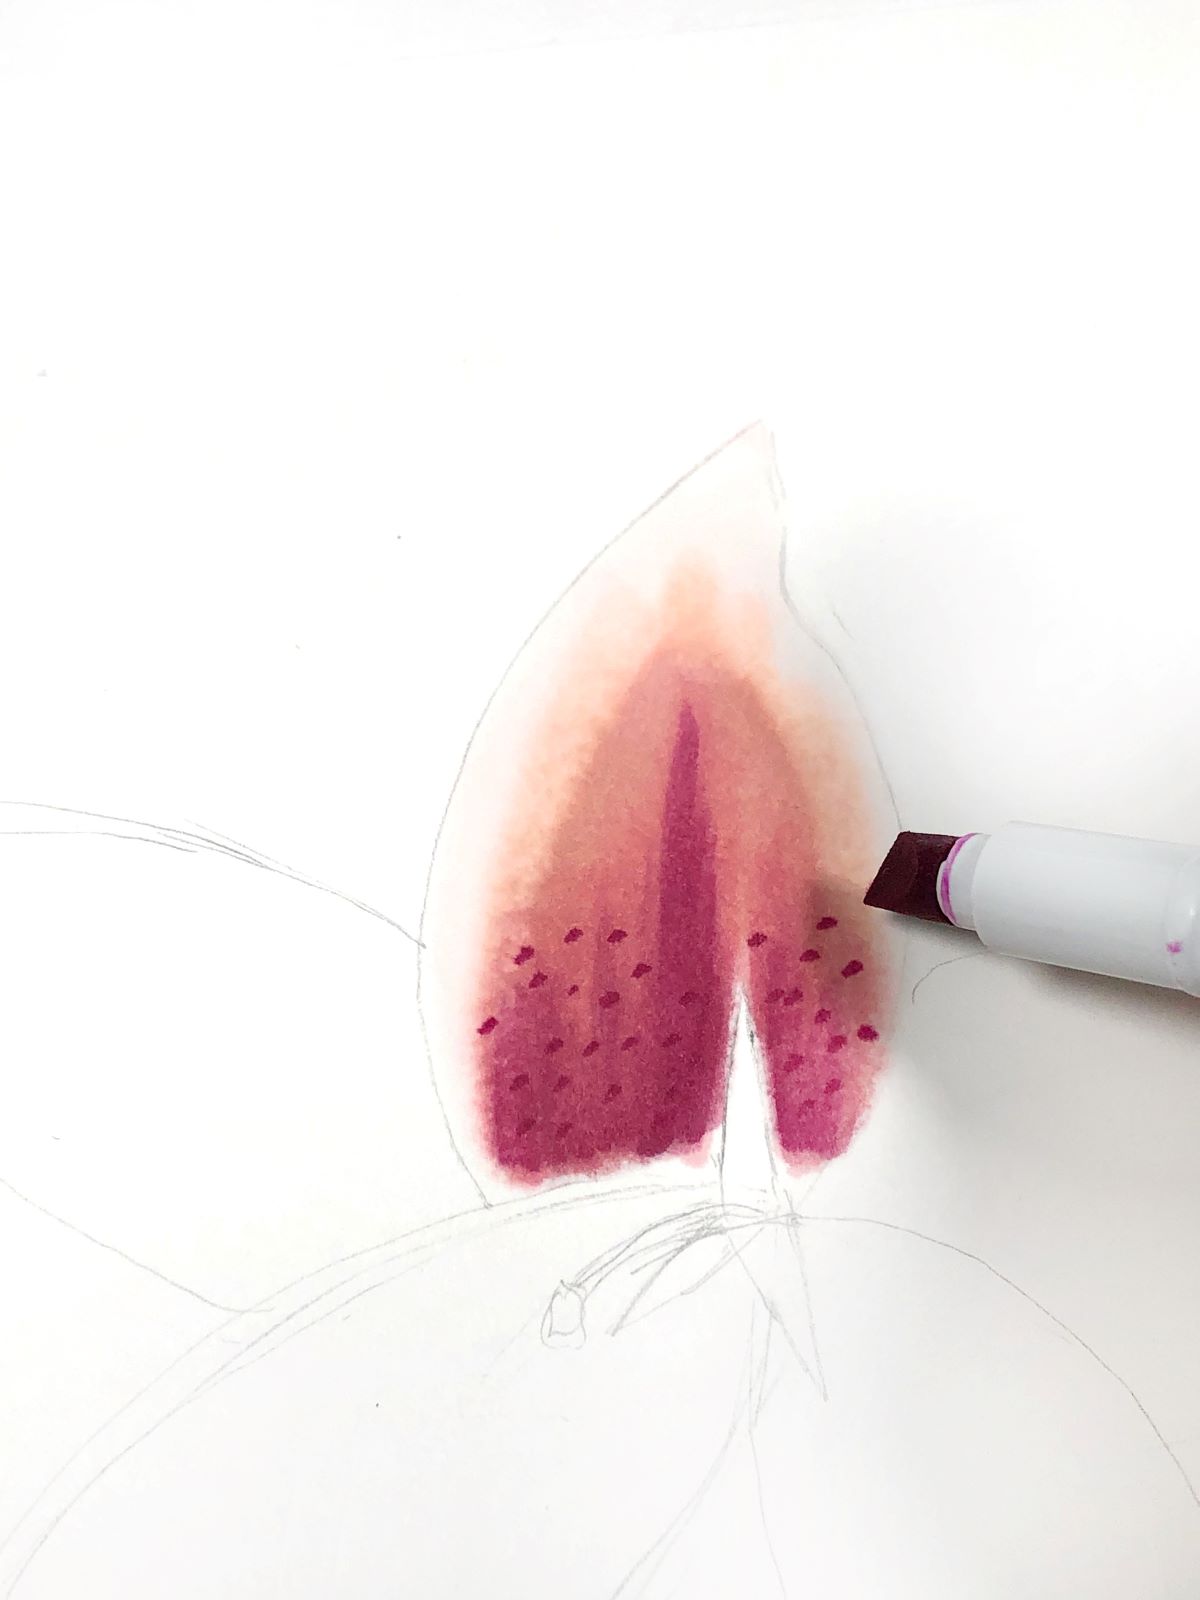
Then use the brush tip of 772 to add one more layer of color on top of the whole petal to help soften the dots made with the chisel tip.
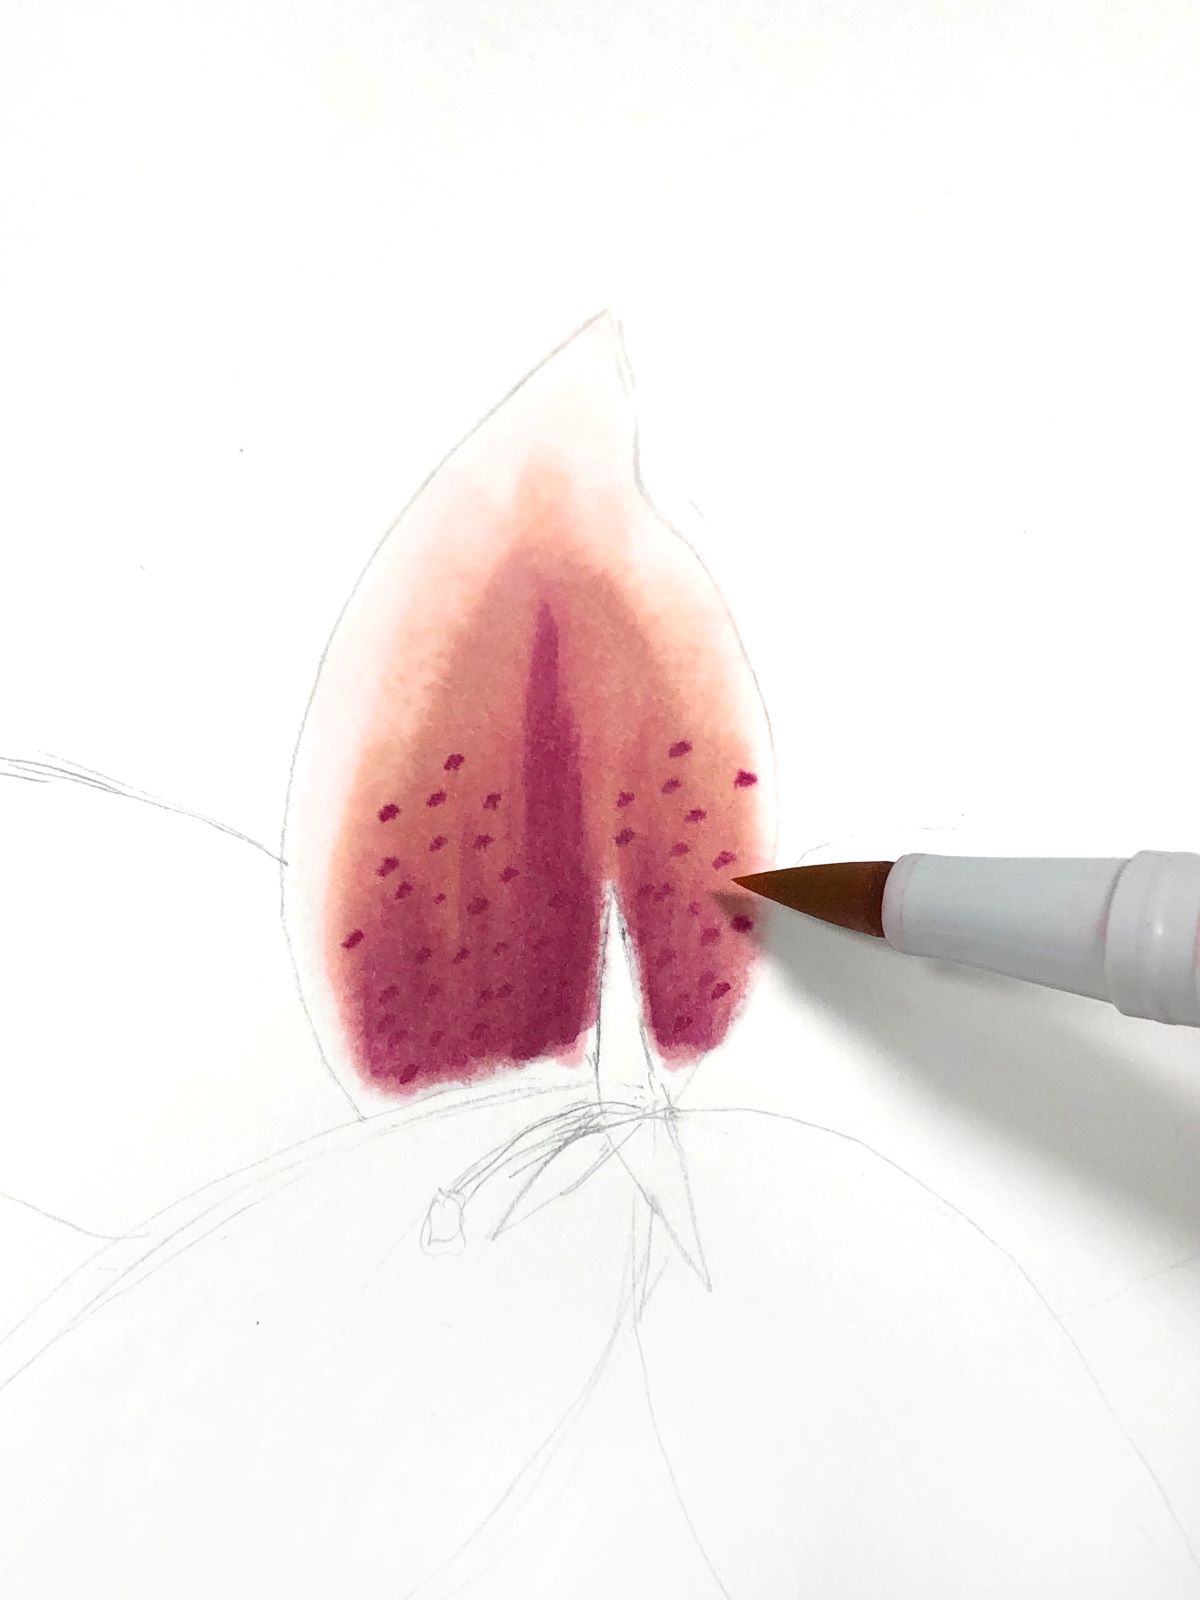
Repeat these steps for all remaining petals. Your lily should look something like this after:
Next, use the brush tip of 192 to add color to the center of your lily. Then, use MONO Drawing Pen 01 to outline the center and to slightly outline the shape of each petal. Leave parts of the petals untraced. This helps to give a more natural look to the white petals. Add petal details. Lastly, erase any remaining pencil lines. Your stargazer lily is complete!
I hope you had fun learning how to create a stargazer lily with the new ABT PRO Markers! If you try this project, be sure to tag us at @tombowusa and @a_heartened_calling so we can see your amazing work!
For more project inspiration, check out these posts!:
- How to Paint like Bob Ross Using Dual Brush Pens with Katie
- Watercolor Nautical Nursery Art Using Dual Brush Pens with Grace
- Leaf Stamping with Dual Brush Pens and FREE Wallpaper with Jennie
Thanks for following along! Happy creating!
Mandy
Gaziantep Menekşe Halı Yıkama Fabrikası Olarak Tam Otomatik Halı Yıkama Makinalarıyla Gaziantep’in Tüm İlçeleri ve tüm semtlerinde hizmet vermeteyiz.