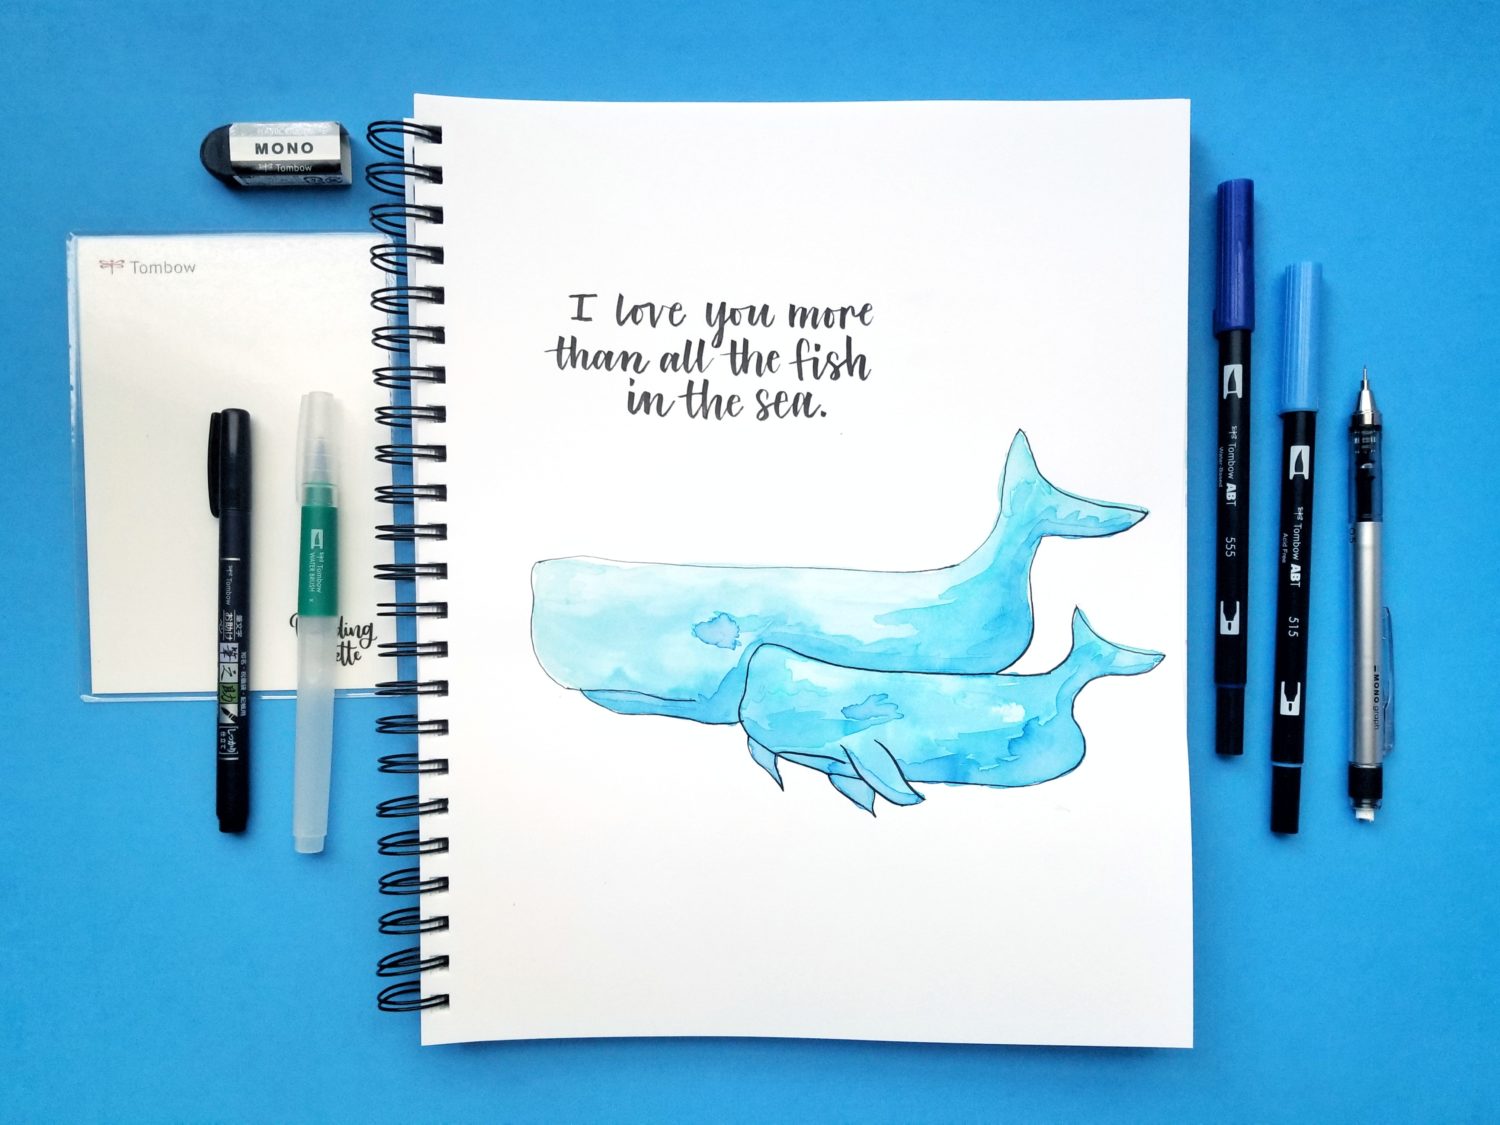
Ahoy there, Tombow friends! It’s Grace from Grace Anne Studio. This week, the Tombow Design Team is creating nautical inspired projects. One of my favorite nautical trends is nautical themed nurseries! (Or maybe I’m just being nostalgic that my baby is turning ONE this week!) Either way, let’s create some watercolor nautical nursery art using my favorite Tombow products!
Supplies
- Tombow Water Brush Pen – Medium
- Tombow Dual Brush Pens – 555, 515
- Tombow Fudenosuke Brush Pen – Hard Tip
- Tombow MONO Eraser – Black
- Tombow MONO Graph Mechanical Pencil
- Tombow Blending Palette
- Mixed Media or Watercolor Paper
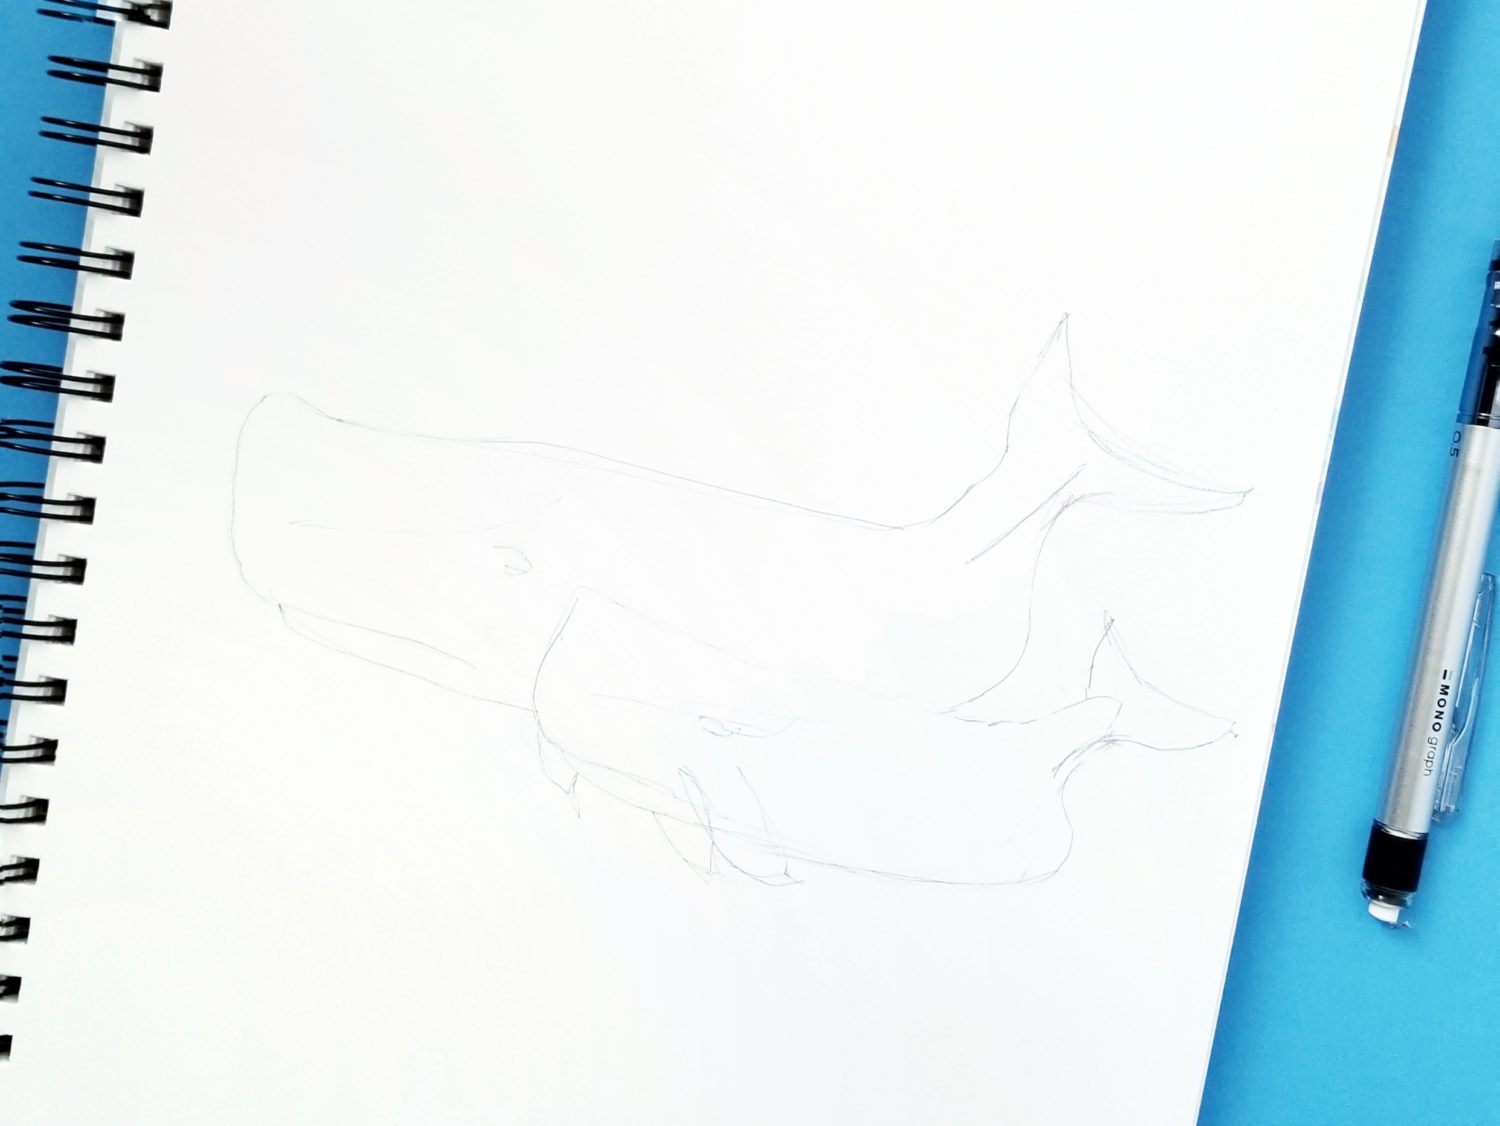
Step 1: Sketch Art
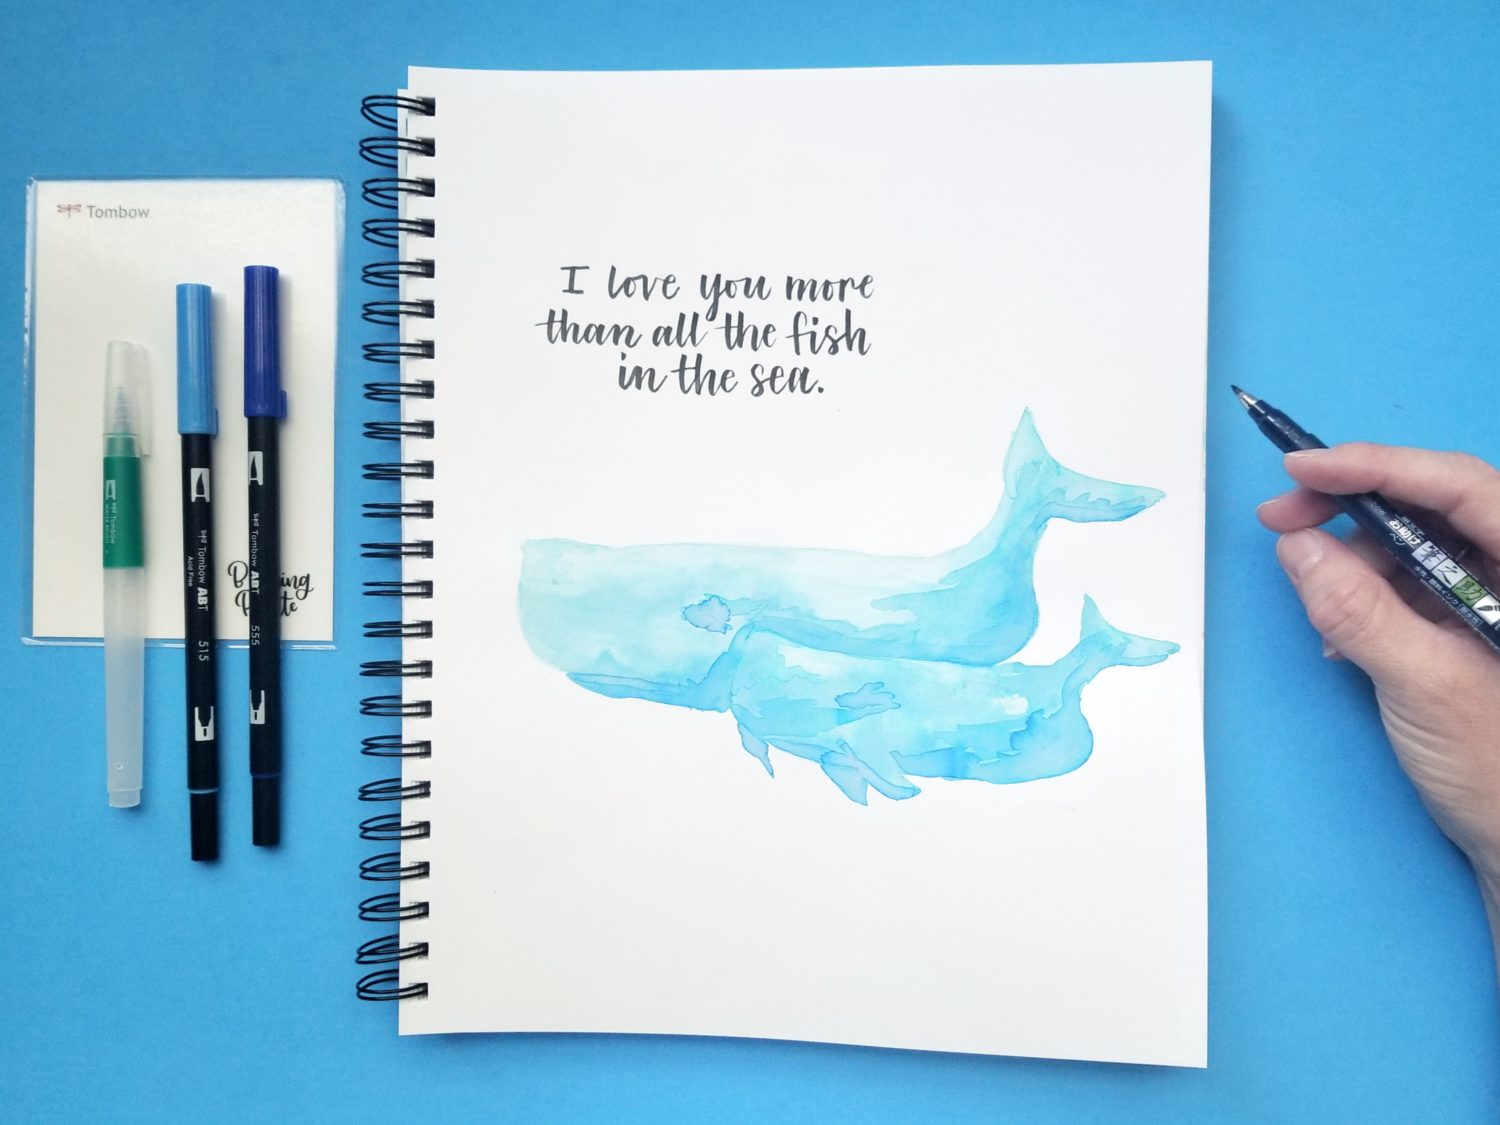
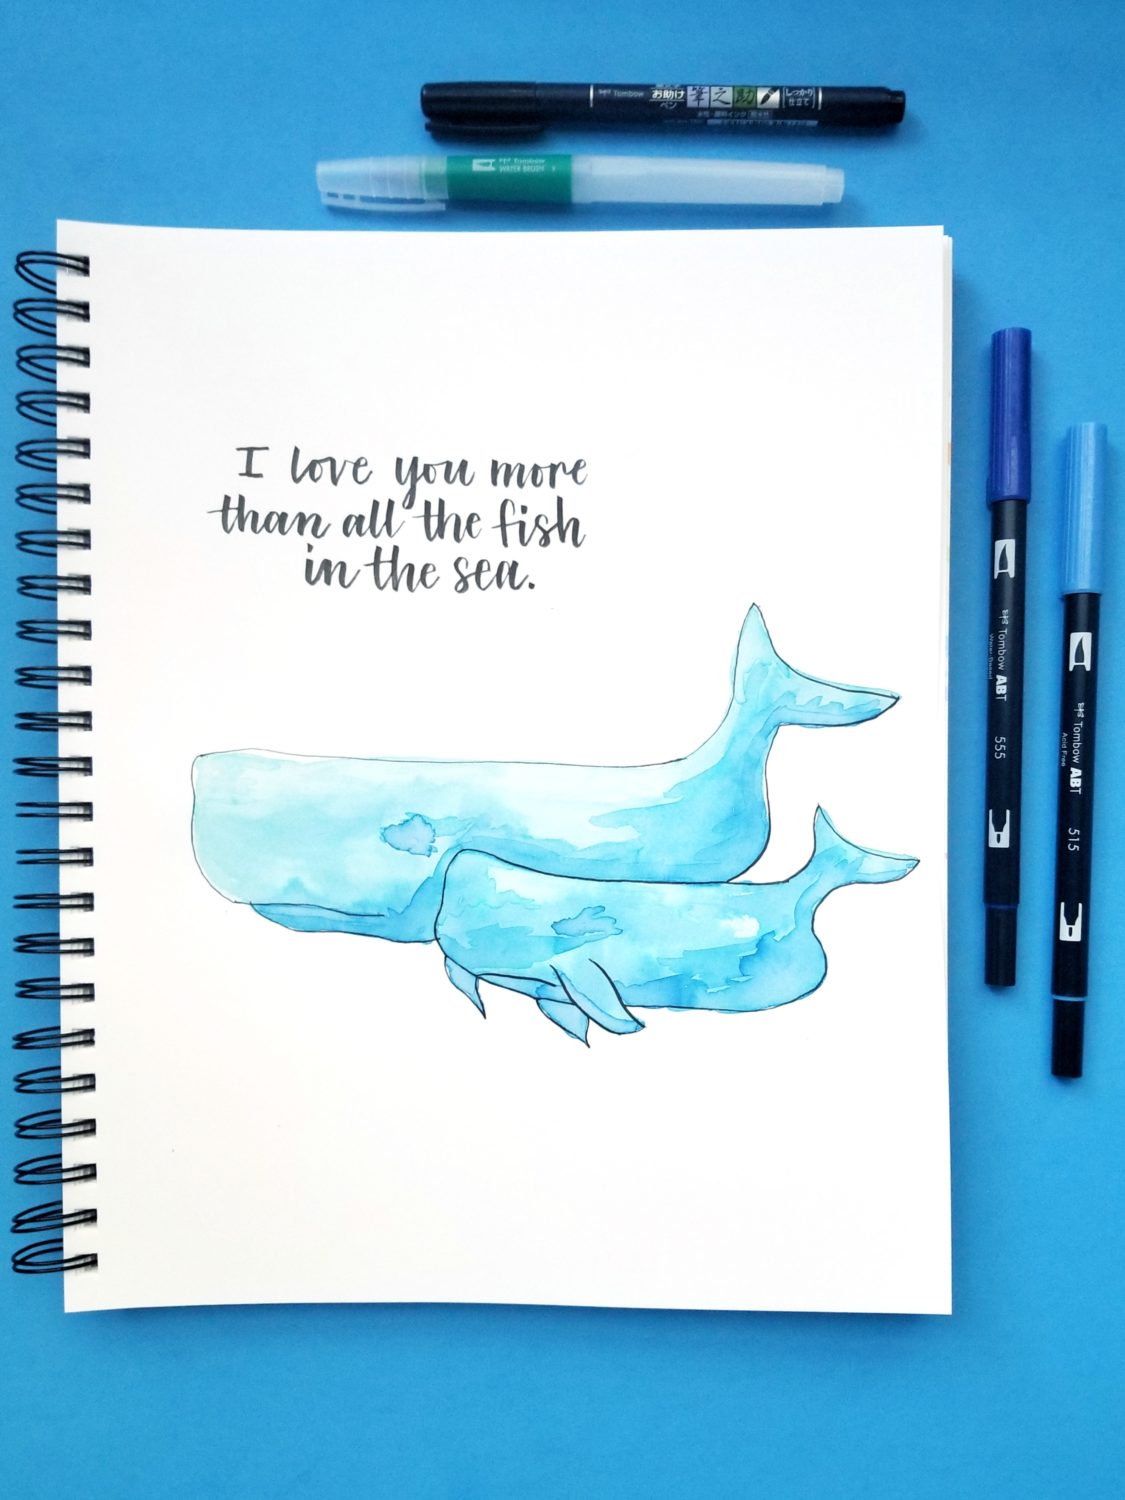
First, use your MONO Graph Mechanical Pencil to lightly sketch a nautical subject on mixed media or watercolor paper. I went with a whale and a calf. (Keep in mind the size of the frame when you are sketching. After we’re done, you’ll need to cut this down to a standard size.) Once you have your sketch finalized, use your MONO Eraser to lightly erase the pencil marks. I do this because once you add the watercolor, the pencil marks do not erase completely. Be sure to leave enough of the outline there to guide you when you watercolor!
Step 2: Watercolor
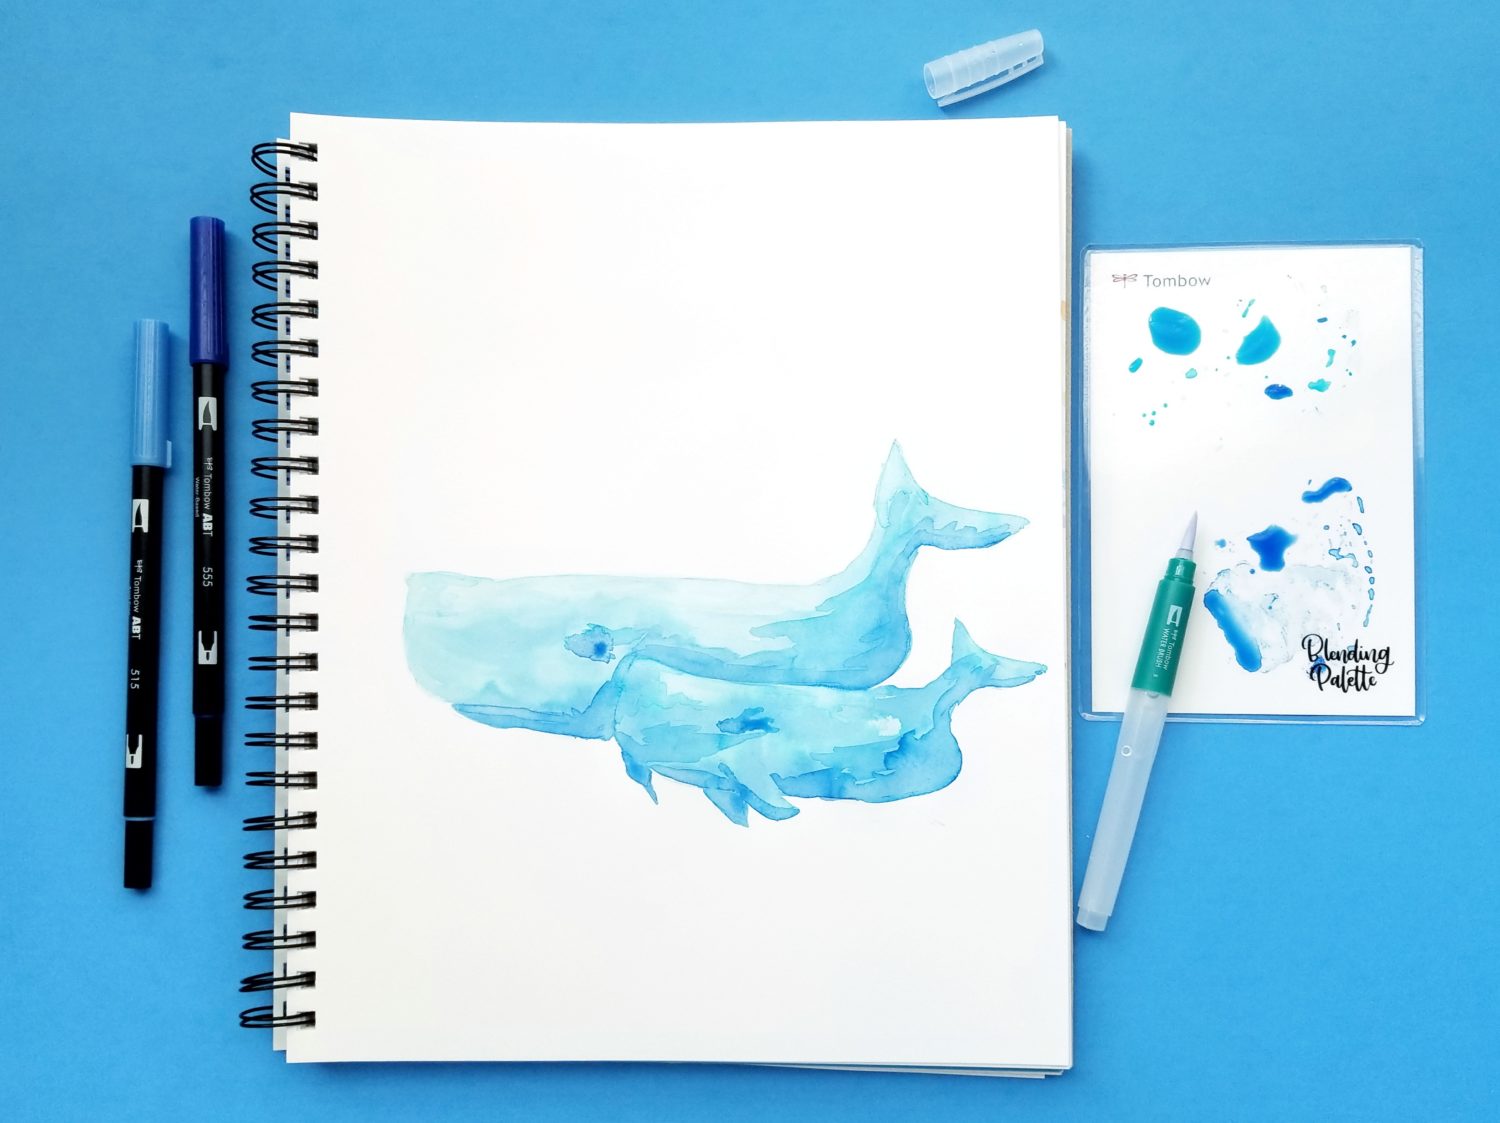
Next, use your Dual Brush Pens and scribble some color on the Blending Palette. I chose colors 555 and 515, however any two that blend well would work! Then, squeeze some drops of water onto the color using your Water Brush Pen to dilute the ink and make watercolor. I used the wet on dry method for my nautical nursery art. That just means I added wet paint to dry paper or a dry painted area.
Use your Water Brush Pen to paint the whales. Start with 515 and apply a base coat with a good amount of water to the top of the whale. (We’ll get to the calf in a minute.) Then, use 555 and paint the bottom half of the whale. Because 555 is so much darker than 515, you should use a light hand. A little will go a long way if you have enough water! Let the colors meet and create their own unique bleeds for a true watercolor look. Once the whale is dry, repeat the process for the calf. If you do not wait for the whale to dry before painting the calf, you risk the colors from the whale bleeding where you do not want them. Watercolor takes patience, just like parenthood!
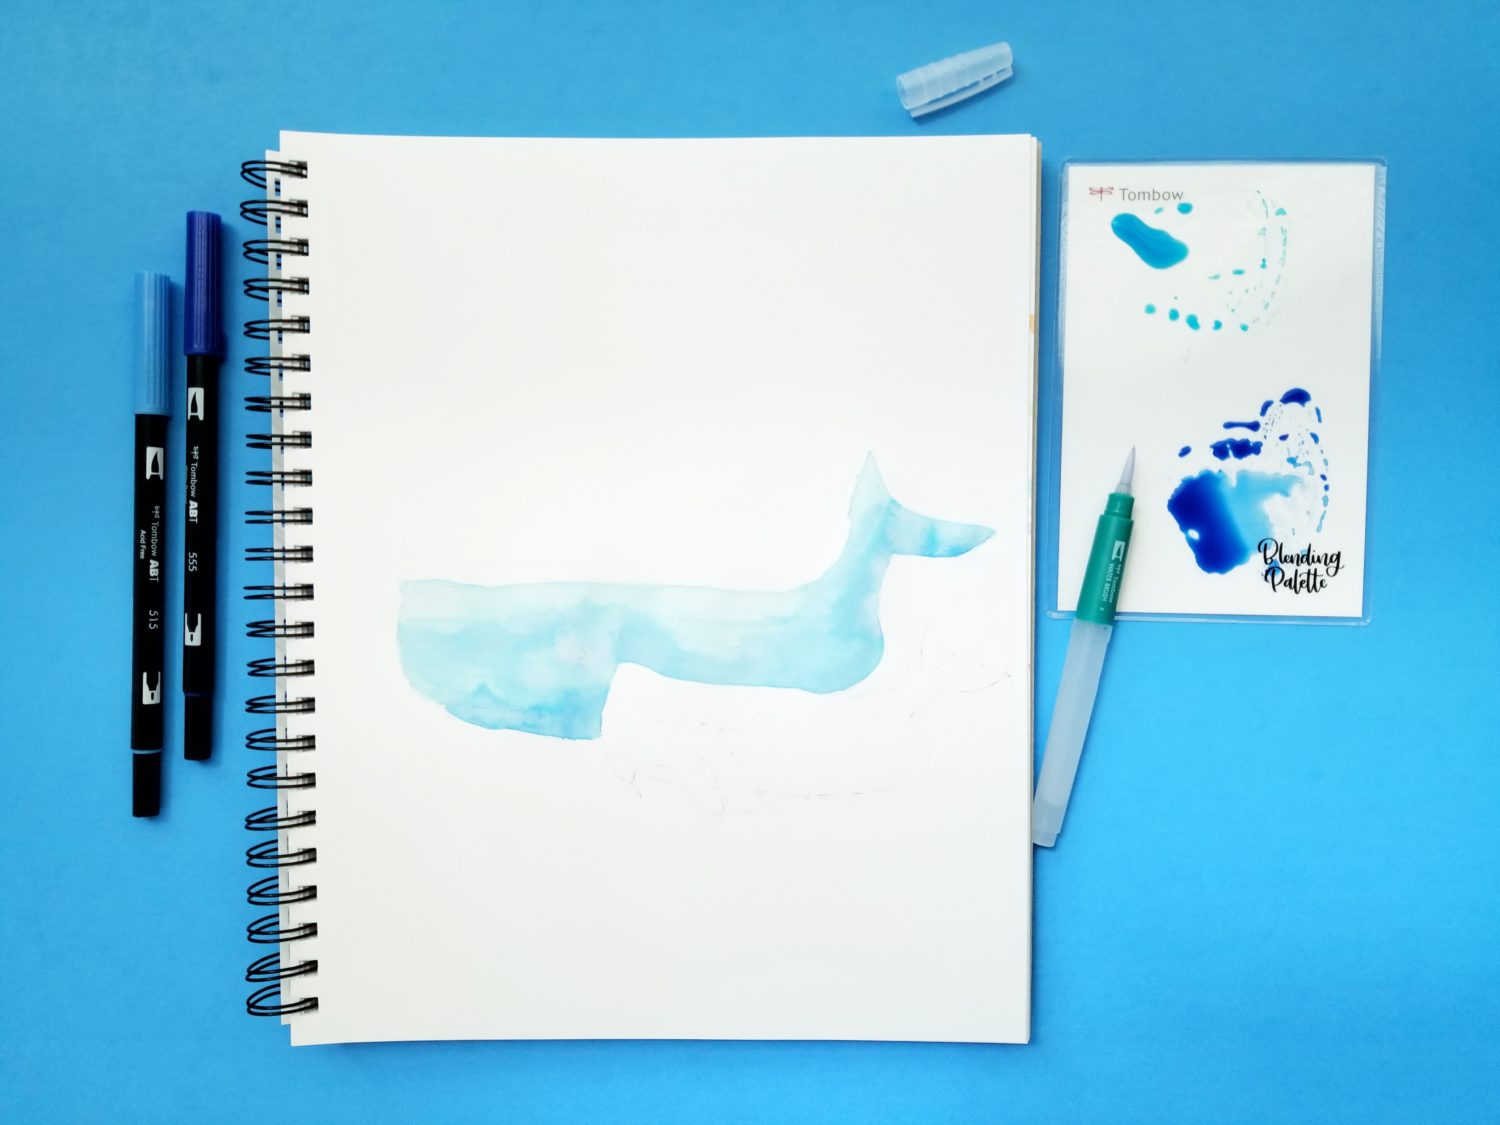
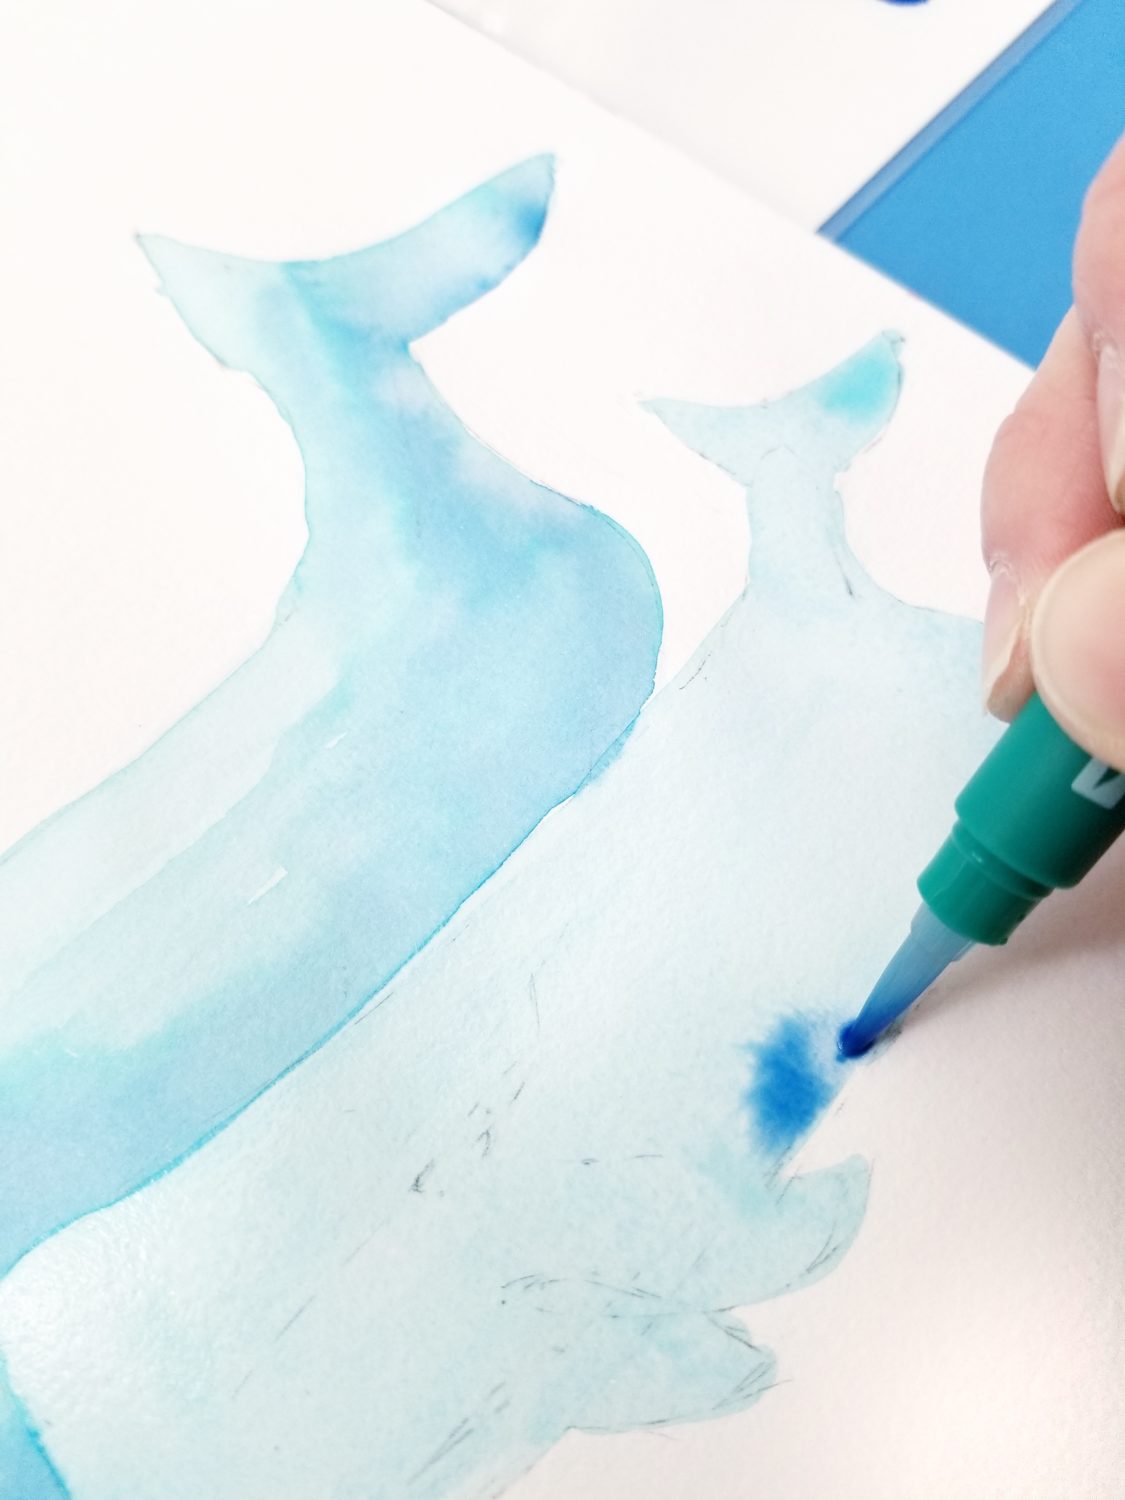
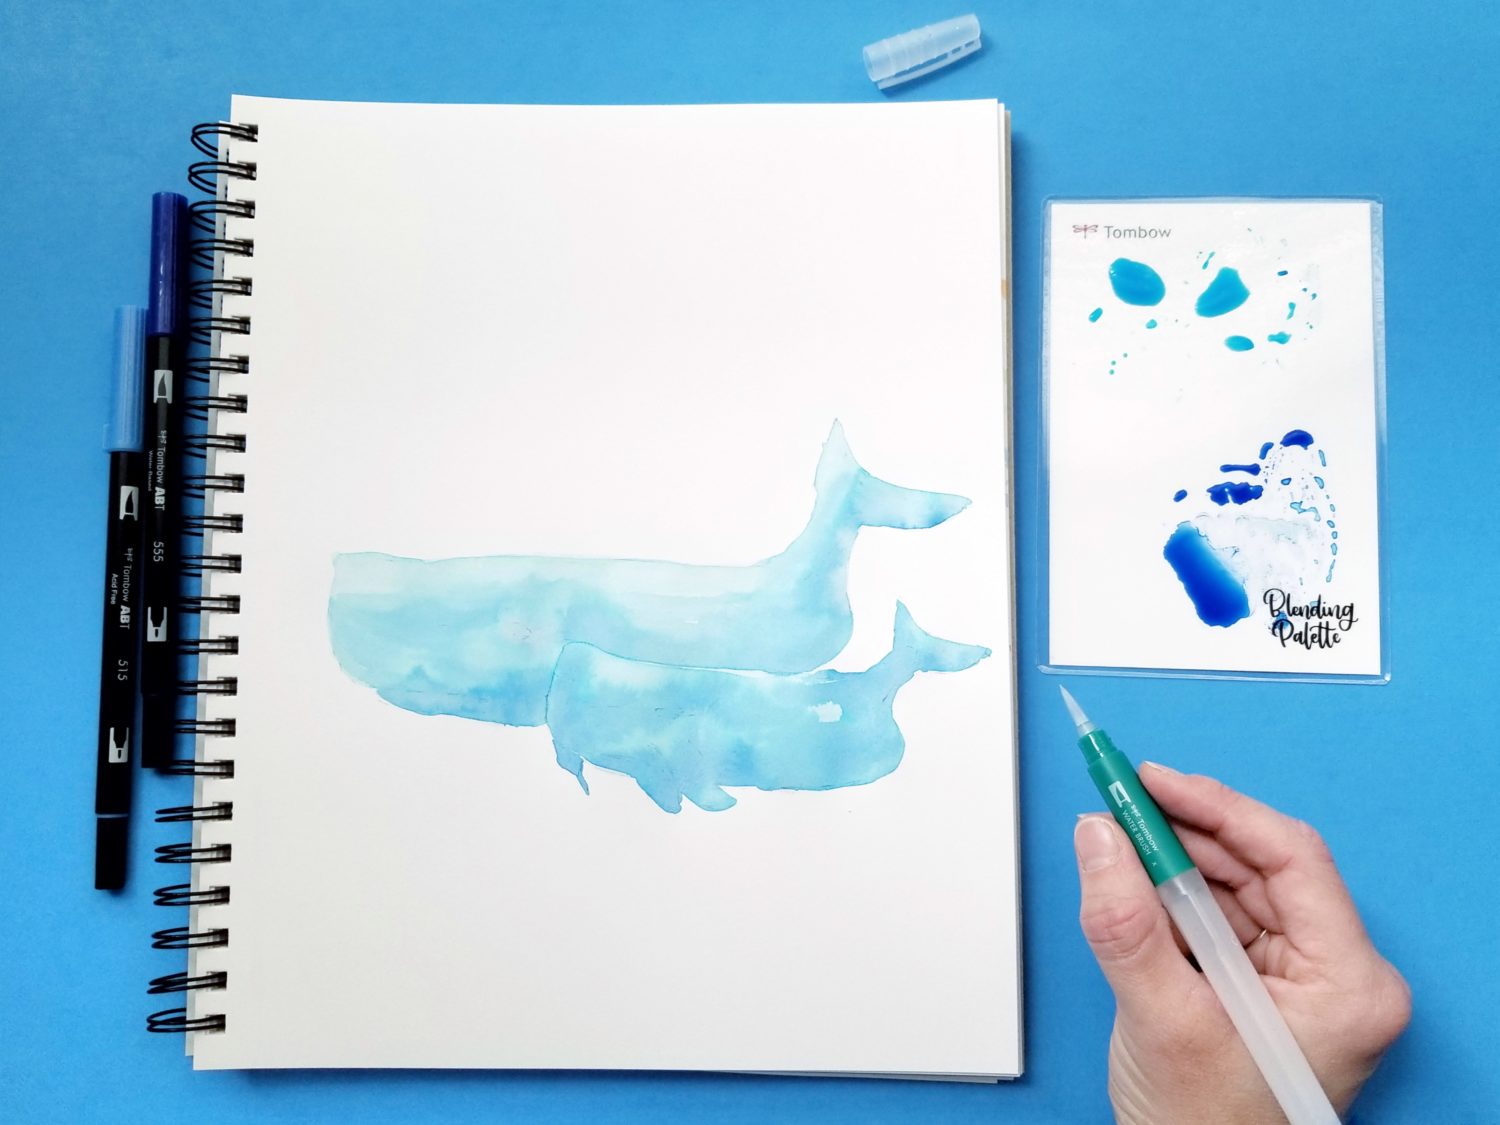
Let the first layer dry, then go back and add more layers of each color to both the calf and the whale to create depth.
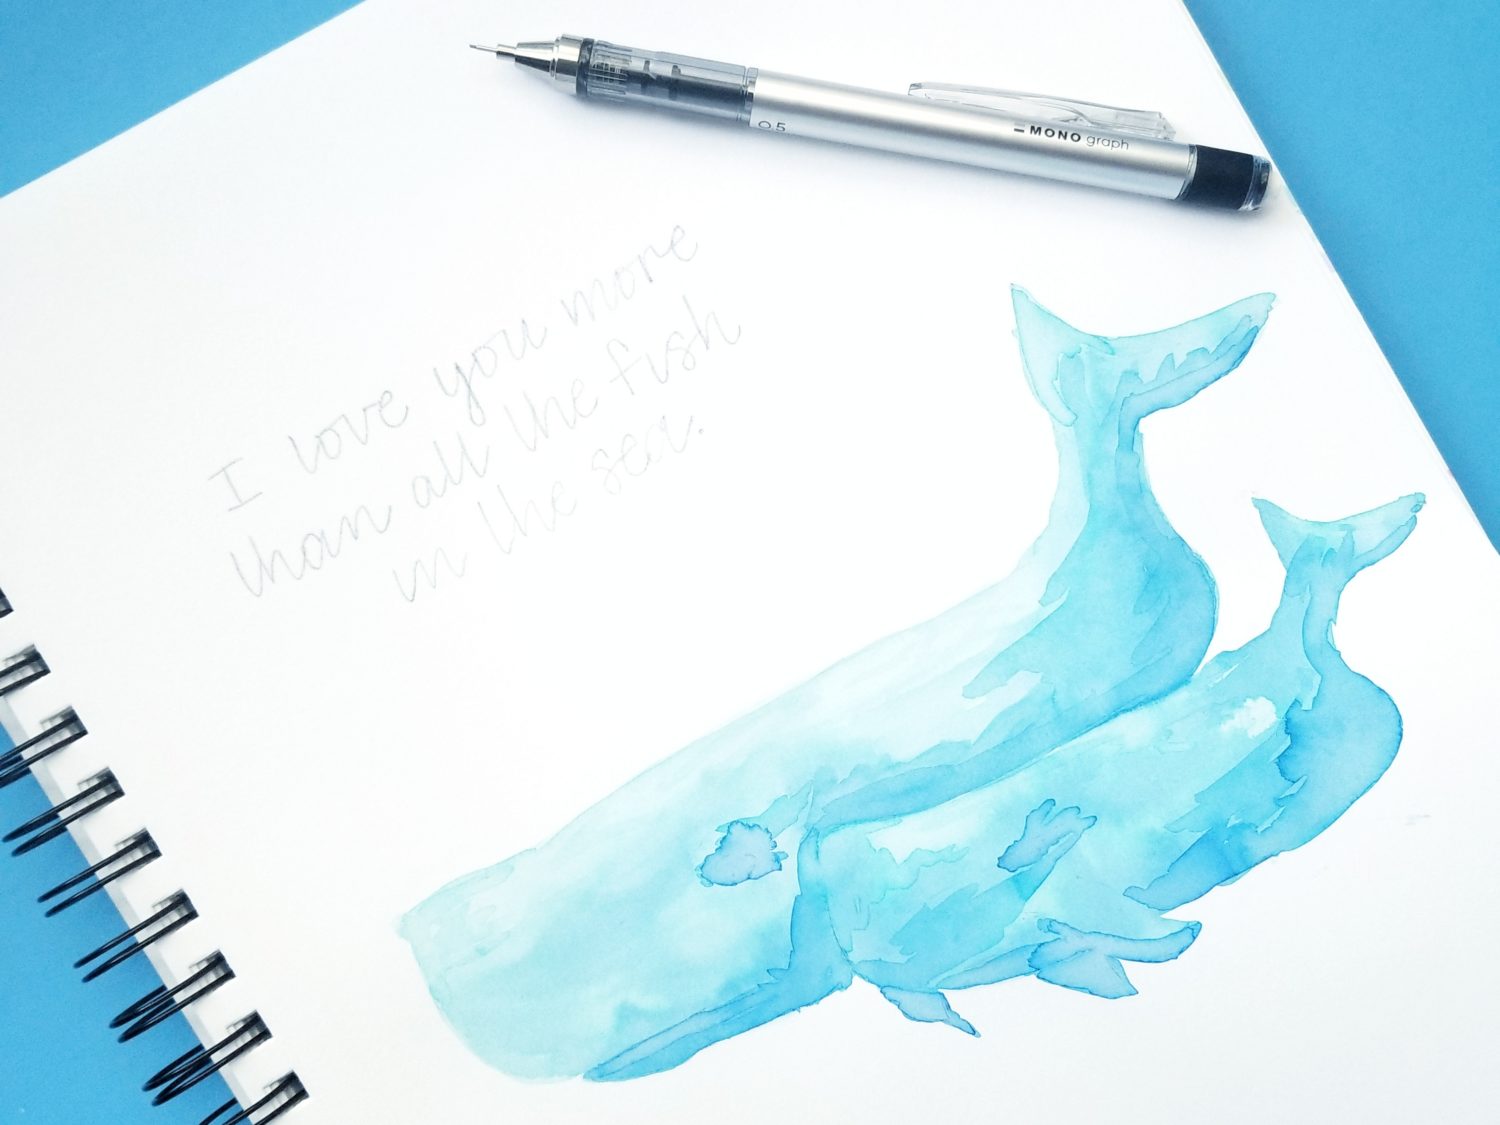
Step 3: Sketch Lettering
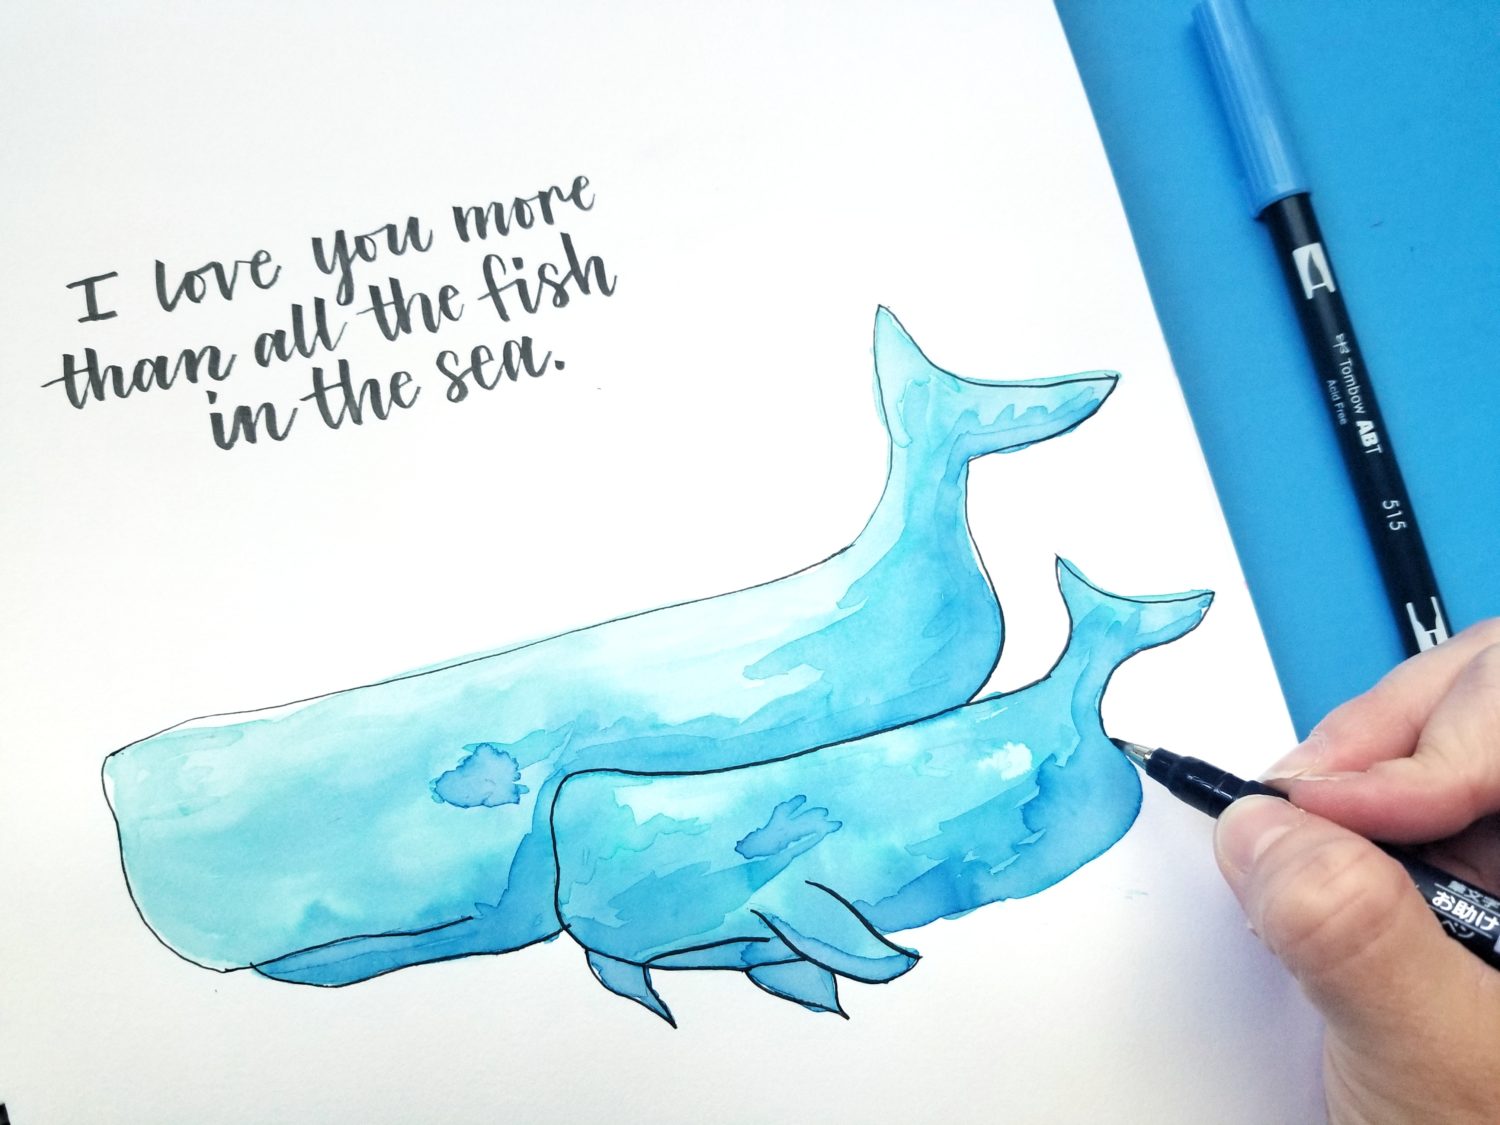
Once the watercolor art is dry, use your MONO Graph Mechanical Pencil to sketch a nautical theme quote. I chose “I love you more than all the fish in the sea.” If you plan on using brush calligraphy instead of mono-line, be sure to leave enough space for a thick downstroke.
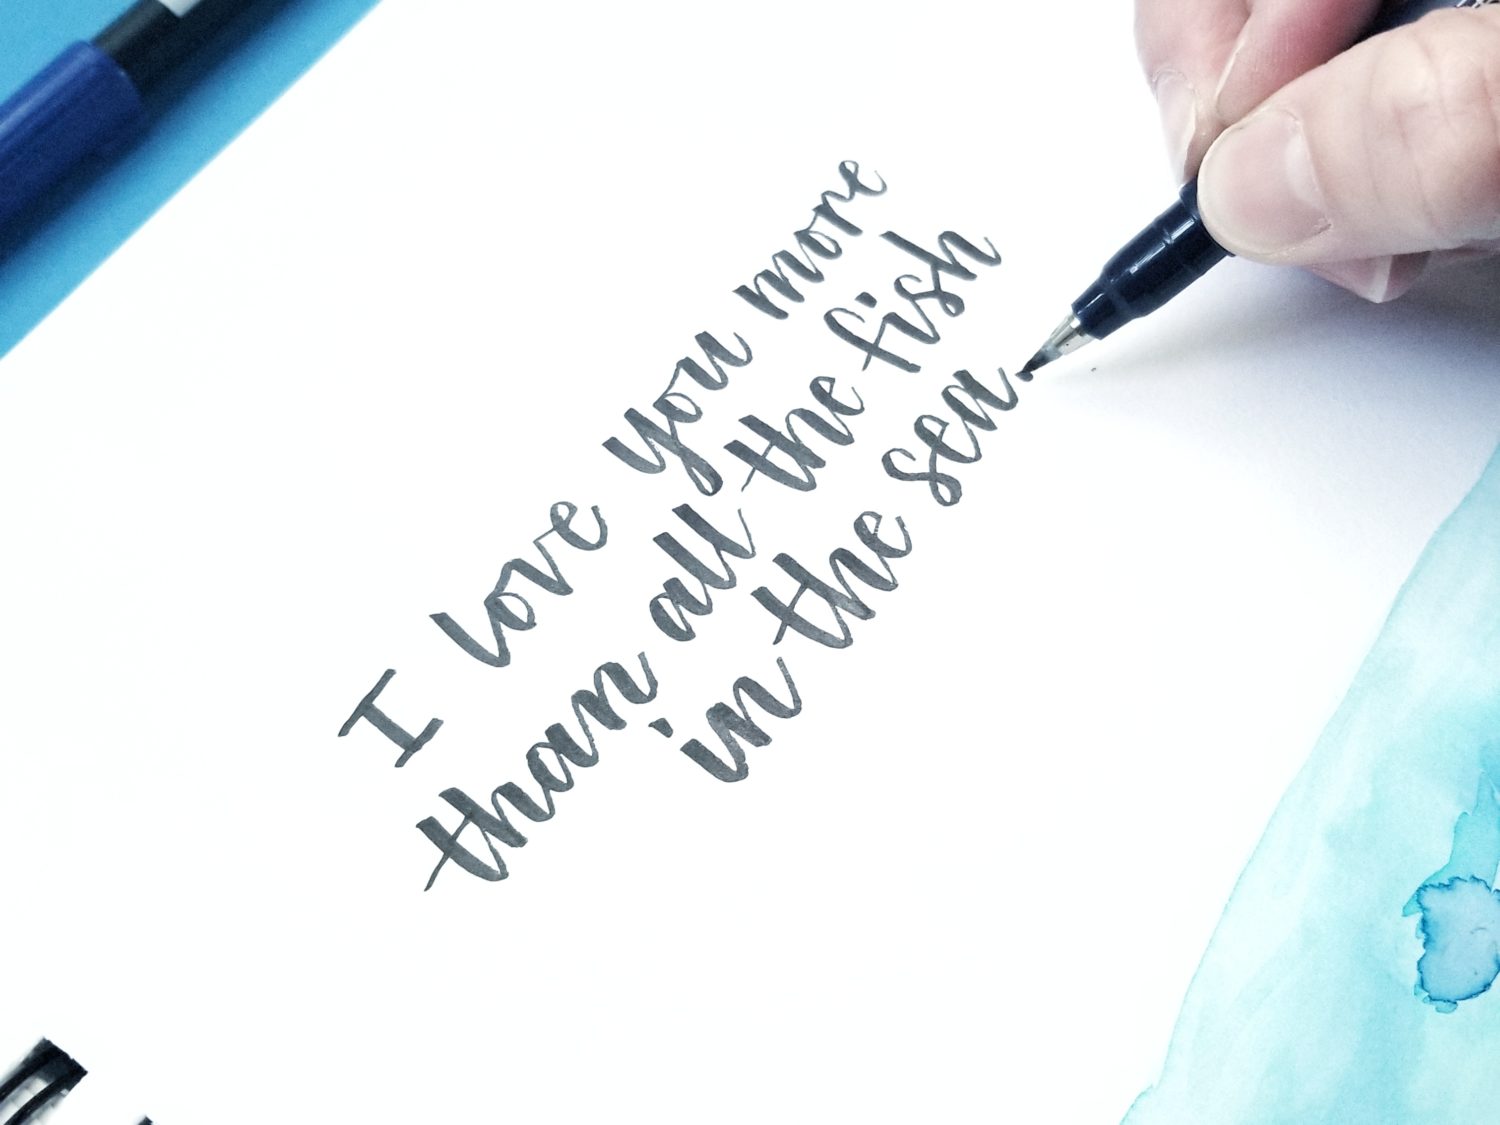
Step 4: Ink Lettering
Next, use your Fudenosuke Brush Pen and trace over the quote. Once the ink is dry, use your MONO Eraser and erase any stray pencil marks from the quote and art. If you love how it looks at this point, you’re done! Just cut it down to size, add a frame, and hang it up! If you think it needs a little more, check out step 5.
Step 5: Outline Art (Optional)
I like adding outlines to some of my watercolor art, so I used my Fudenosuke Brush pen and lightly traced the outline of the whale and the calf to finish my nursery art. That’s it! Once you’re done, just cut it down to a standard size, add a frame, and hang it up!
Thanks for following along today! For more nursery art ideas check out Jessica’s posts on Easy-to-Make Nursery Art and Playroom Decor. If you use this tutorial to make nautical nursery art, be sure to tag @tombowusa and @graceannestudio so we can cheer you on!
Happy Painting!
Grace
Pingback: How to Paint Watercolor Dolphins using Dual Brush Pens