Hi friends, Adrienne from @studio80design here to show you how to illustrate a Thanksgiving page you can insert into your journal! Thanksgiving is right around the corner. Can you believe it?! Let’s get started!
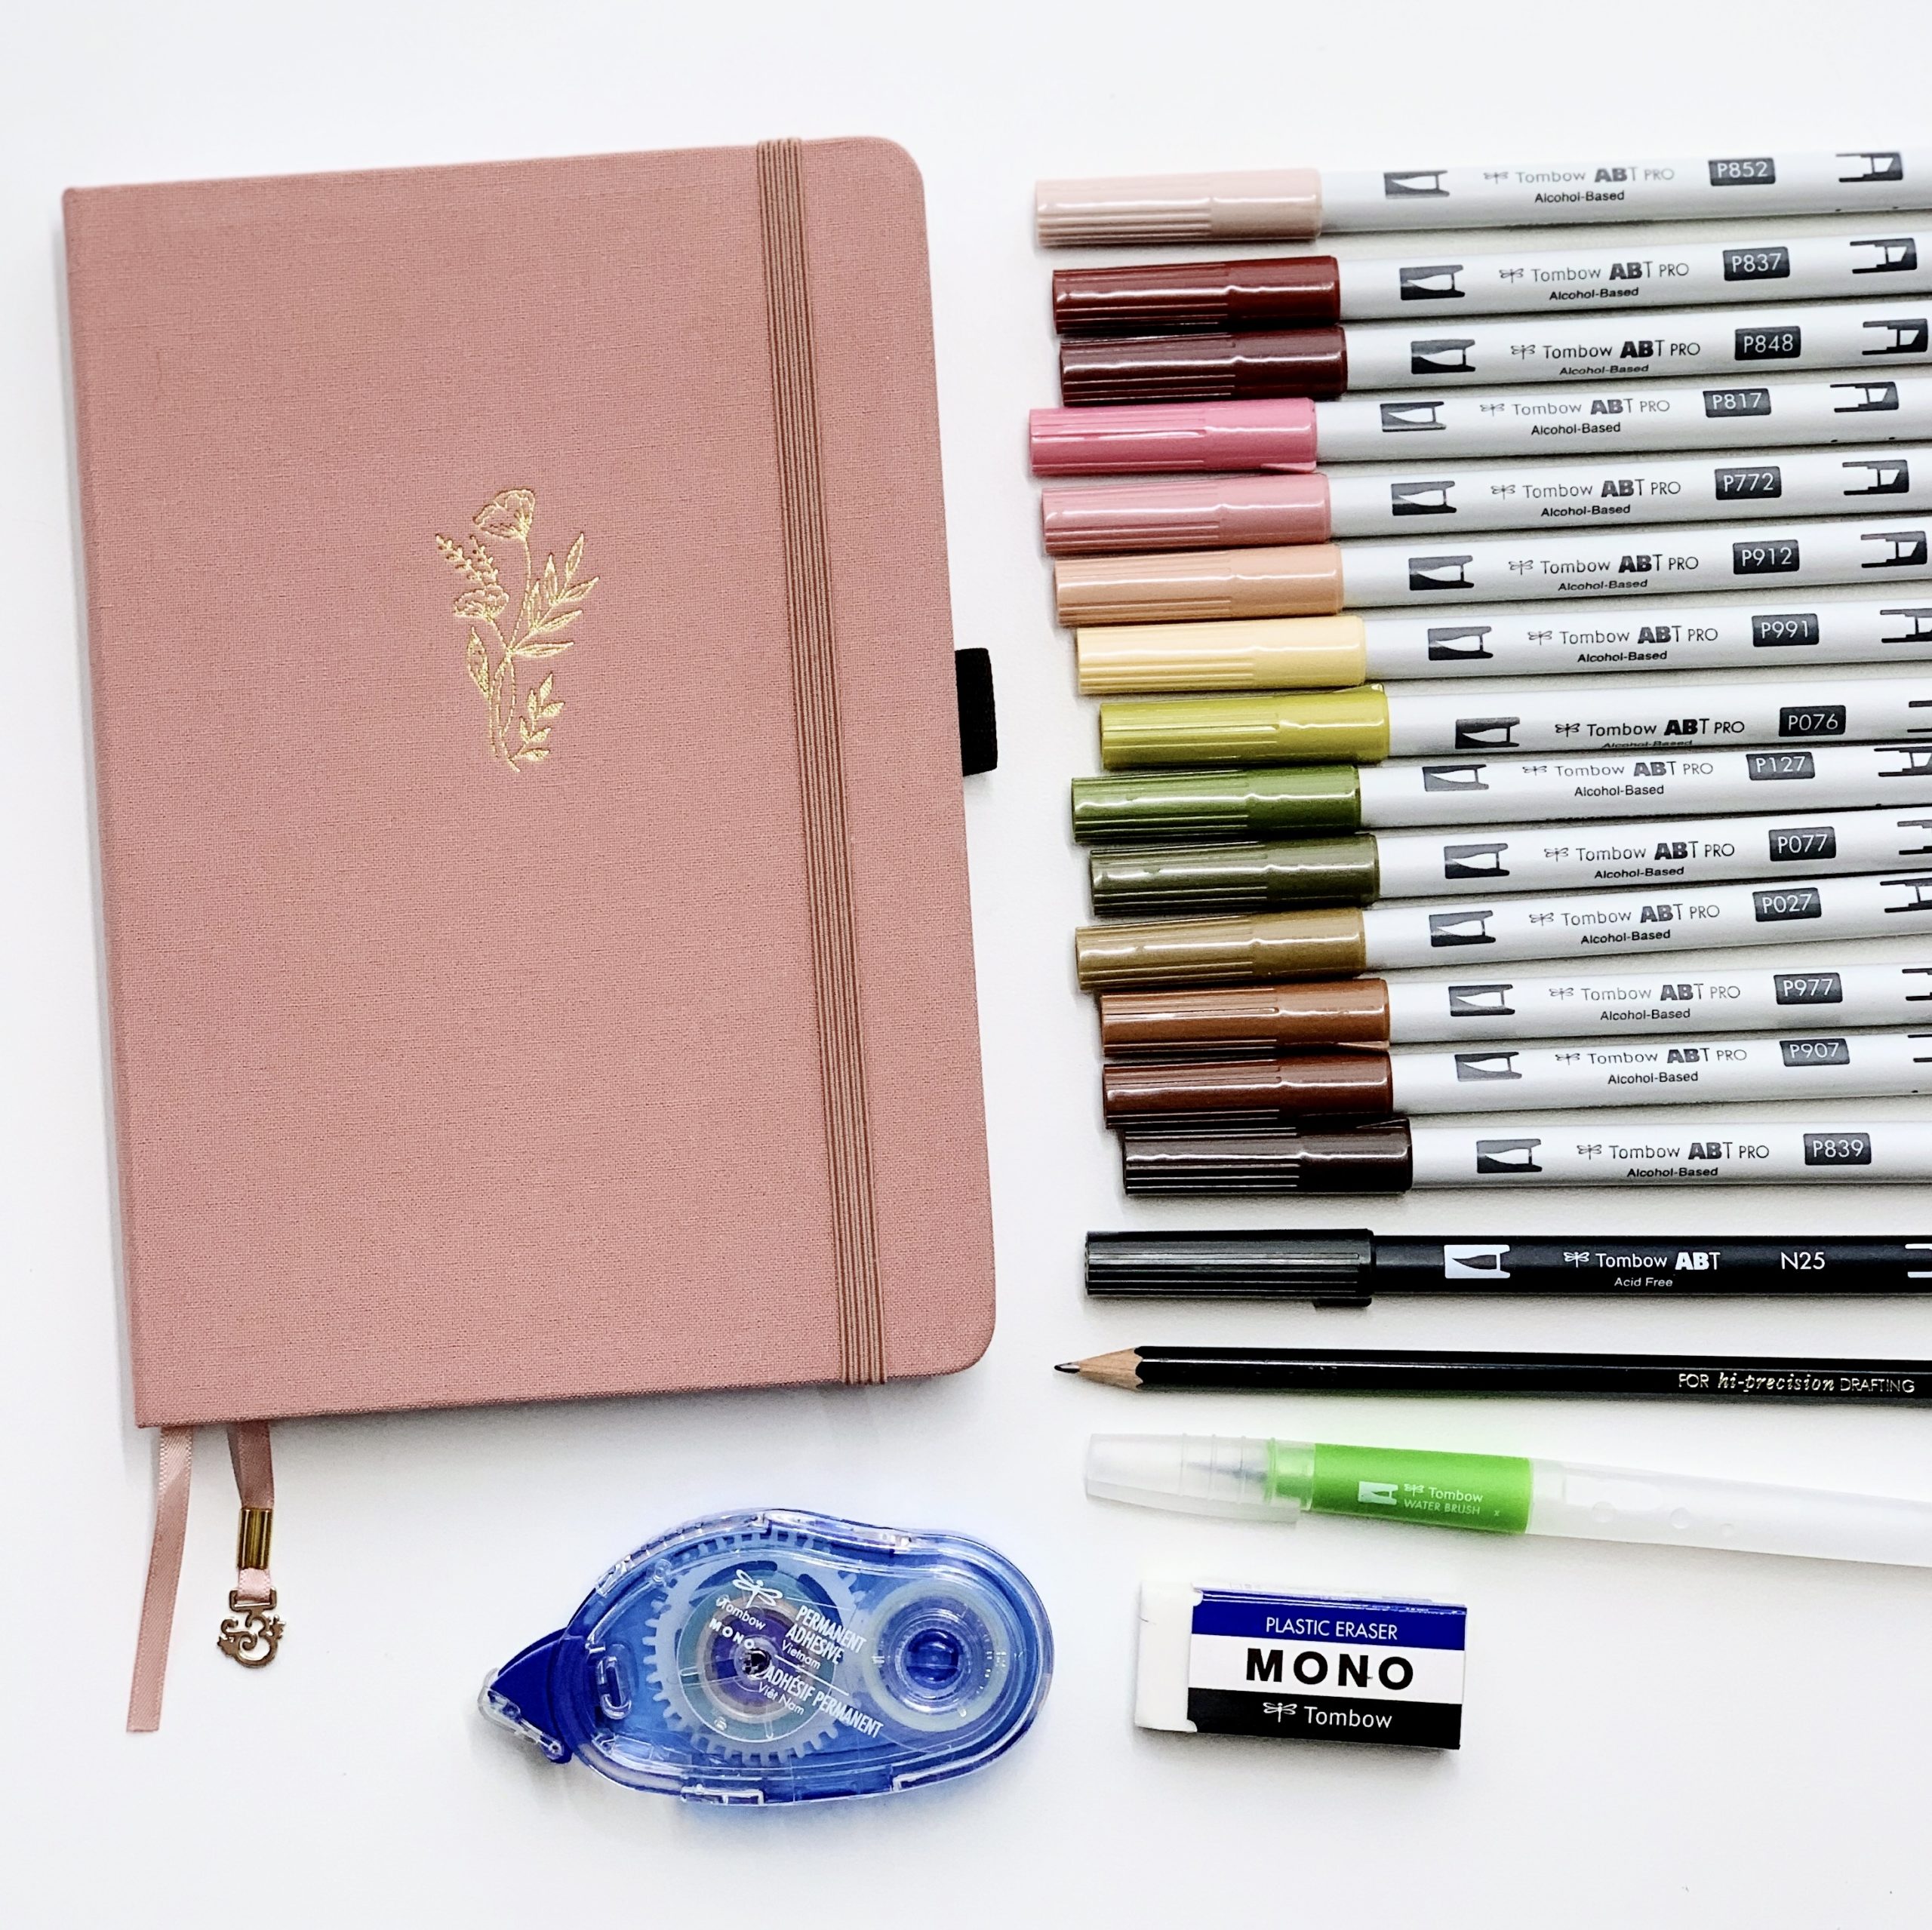
Tools you’ll need:
- Mixed media paper
- Tombow MONO Drawing Pencil
- Tombow MONO Eraser
- Tombow ABT PRO Alcohol-Based Markers
- Tombow Small Water Brush
- Tombow Black Dual Brush Pen
- Tombow Blending Palette
- Tombow MONO Permanent Adhesive
- Journal
Step 1
Use a MONO Drawing Pencil and a ruler to make guidelines on your mixed media paper to the size that will fit in your journal. I’m using a separate mixed media paper because alcohol markers will bleed through my pages of my journal. This way, I can create my page and glue it into my journal to avoid any pages bleeding!
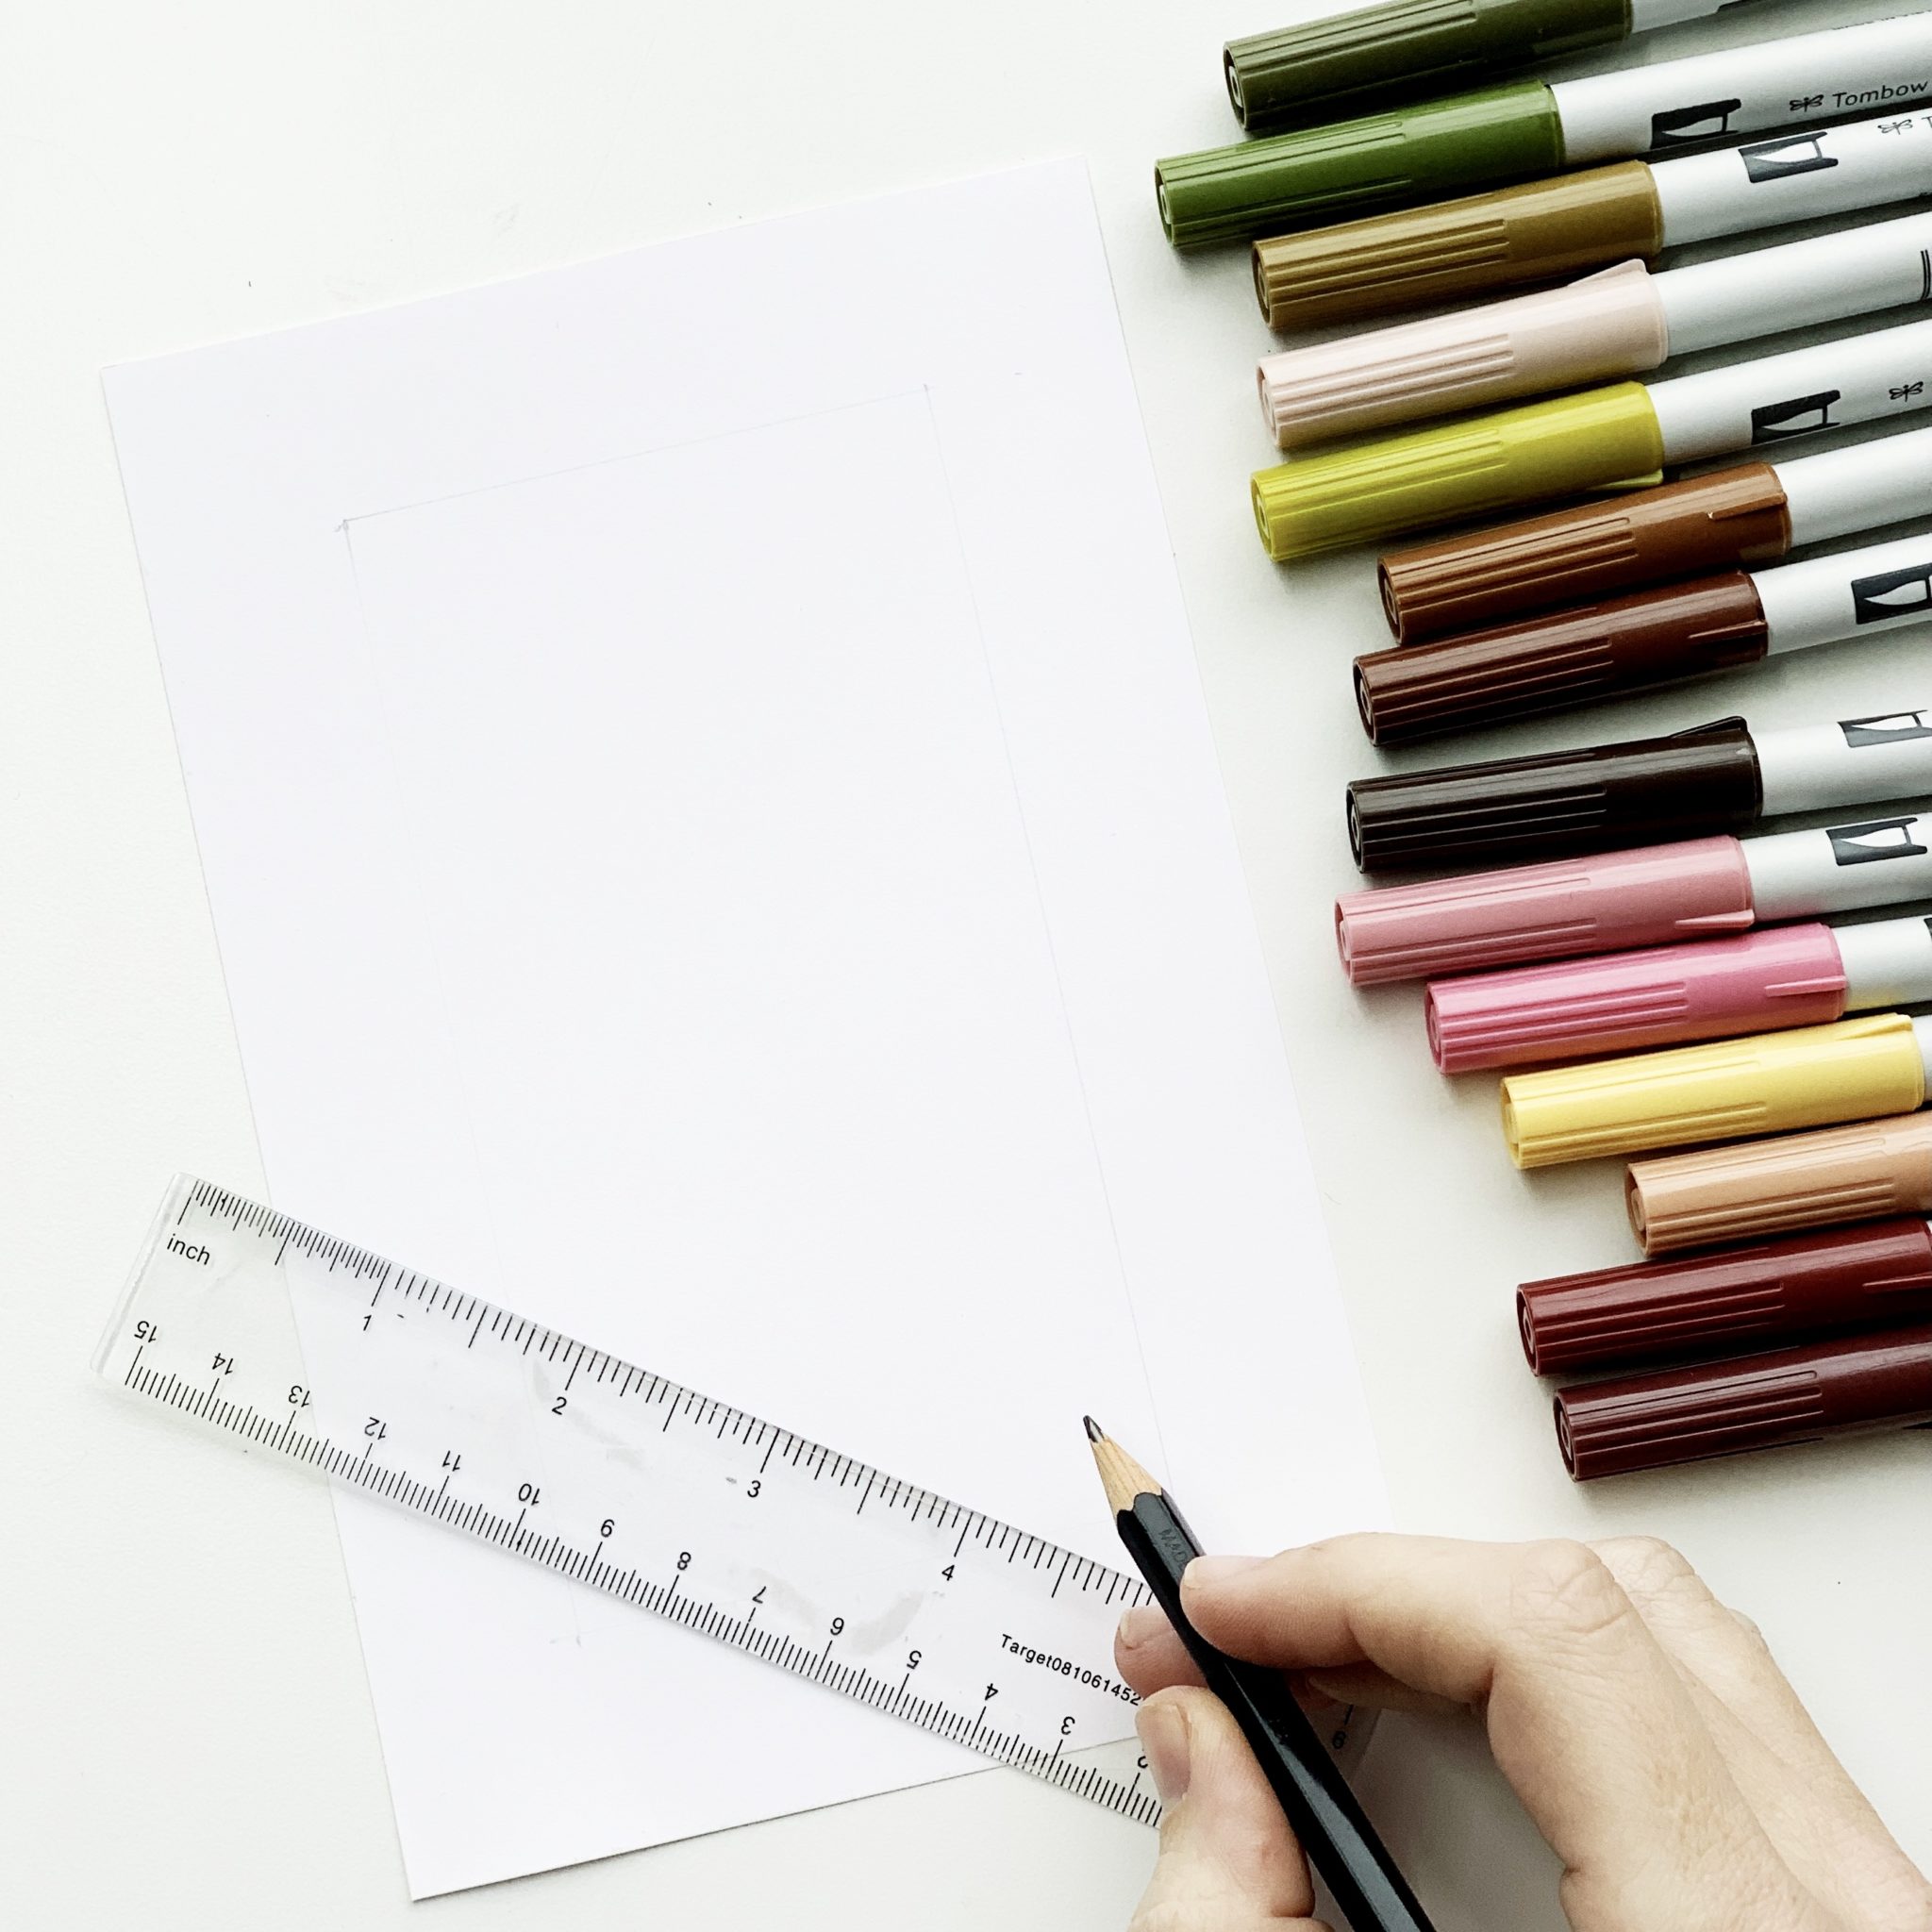
Step 2
Cut out your mixed media paper with scissors. Then, use the ruler to create a one inch border on the outside of your page. This will be our guide for the border. This border is not set in stone. It’s just meant to be a guideline for where things will go. You will see that I made the bottom section of my border slightly bigger than the top and sides.
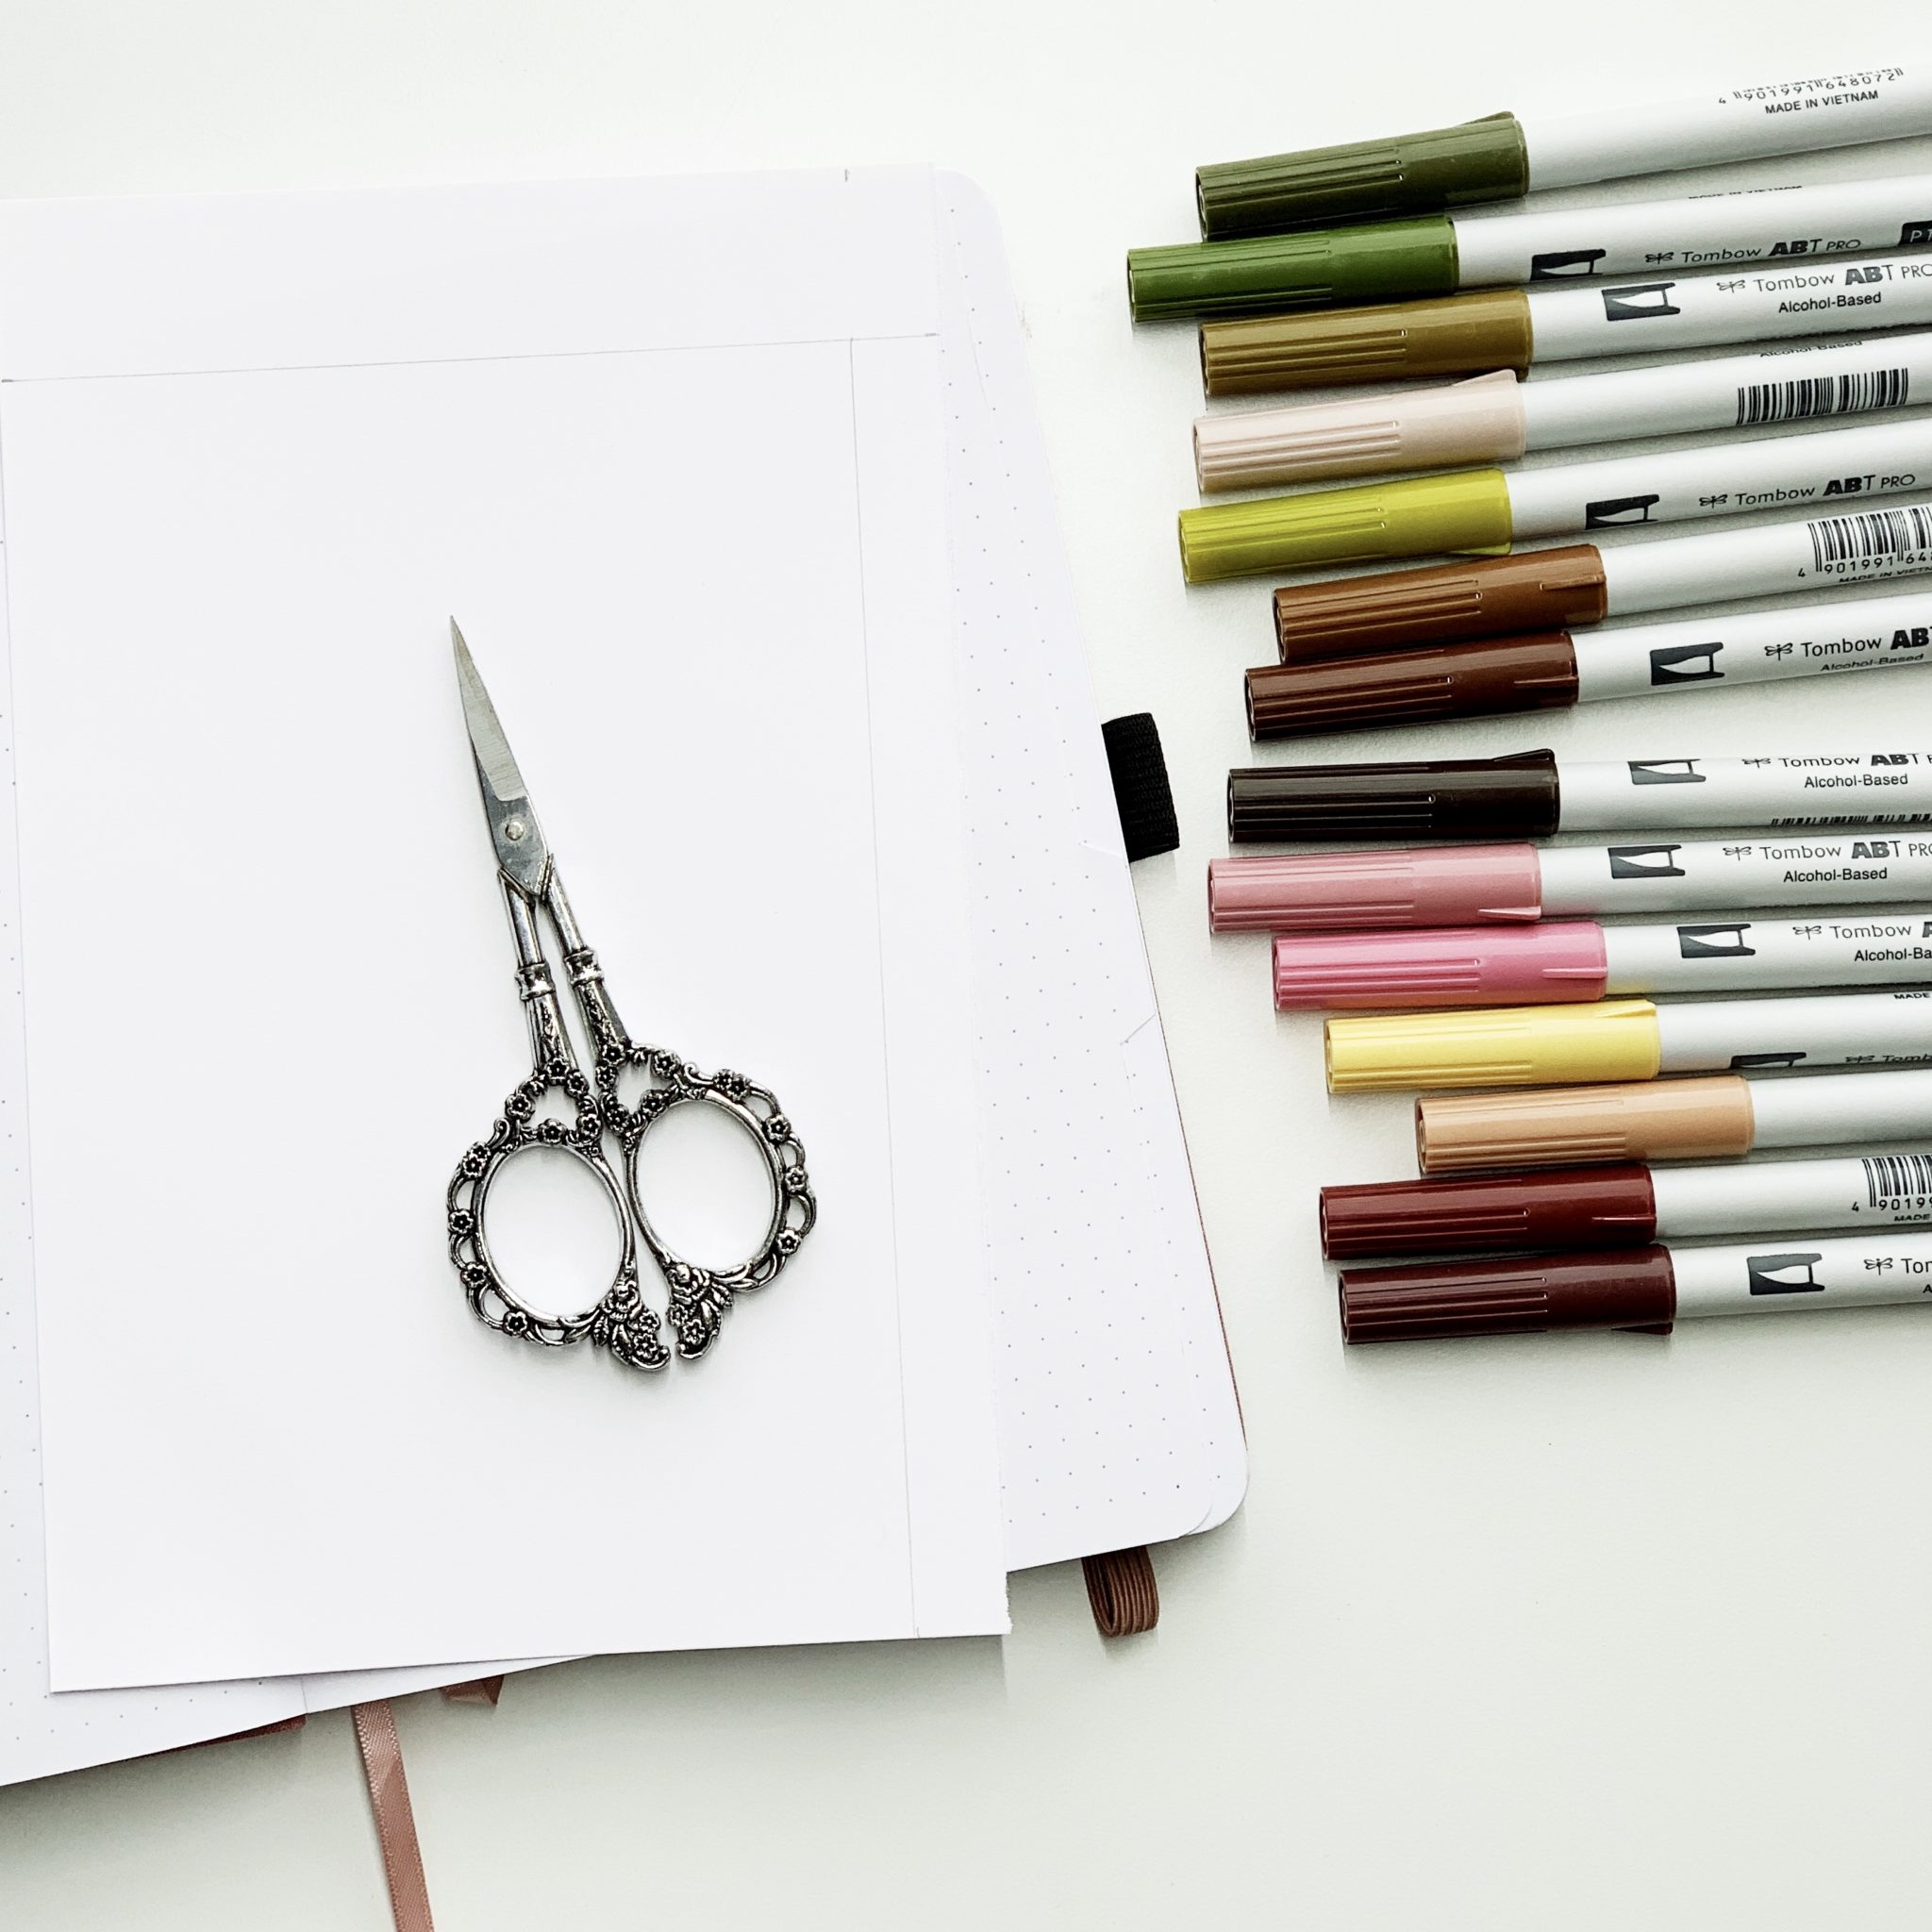
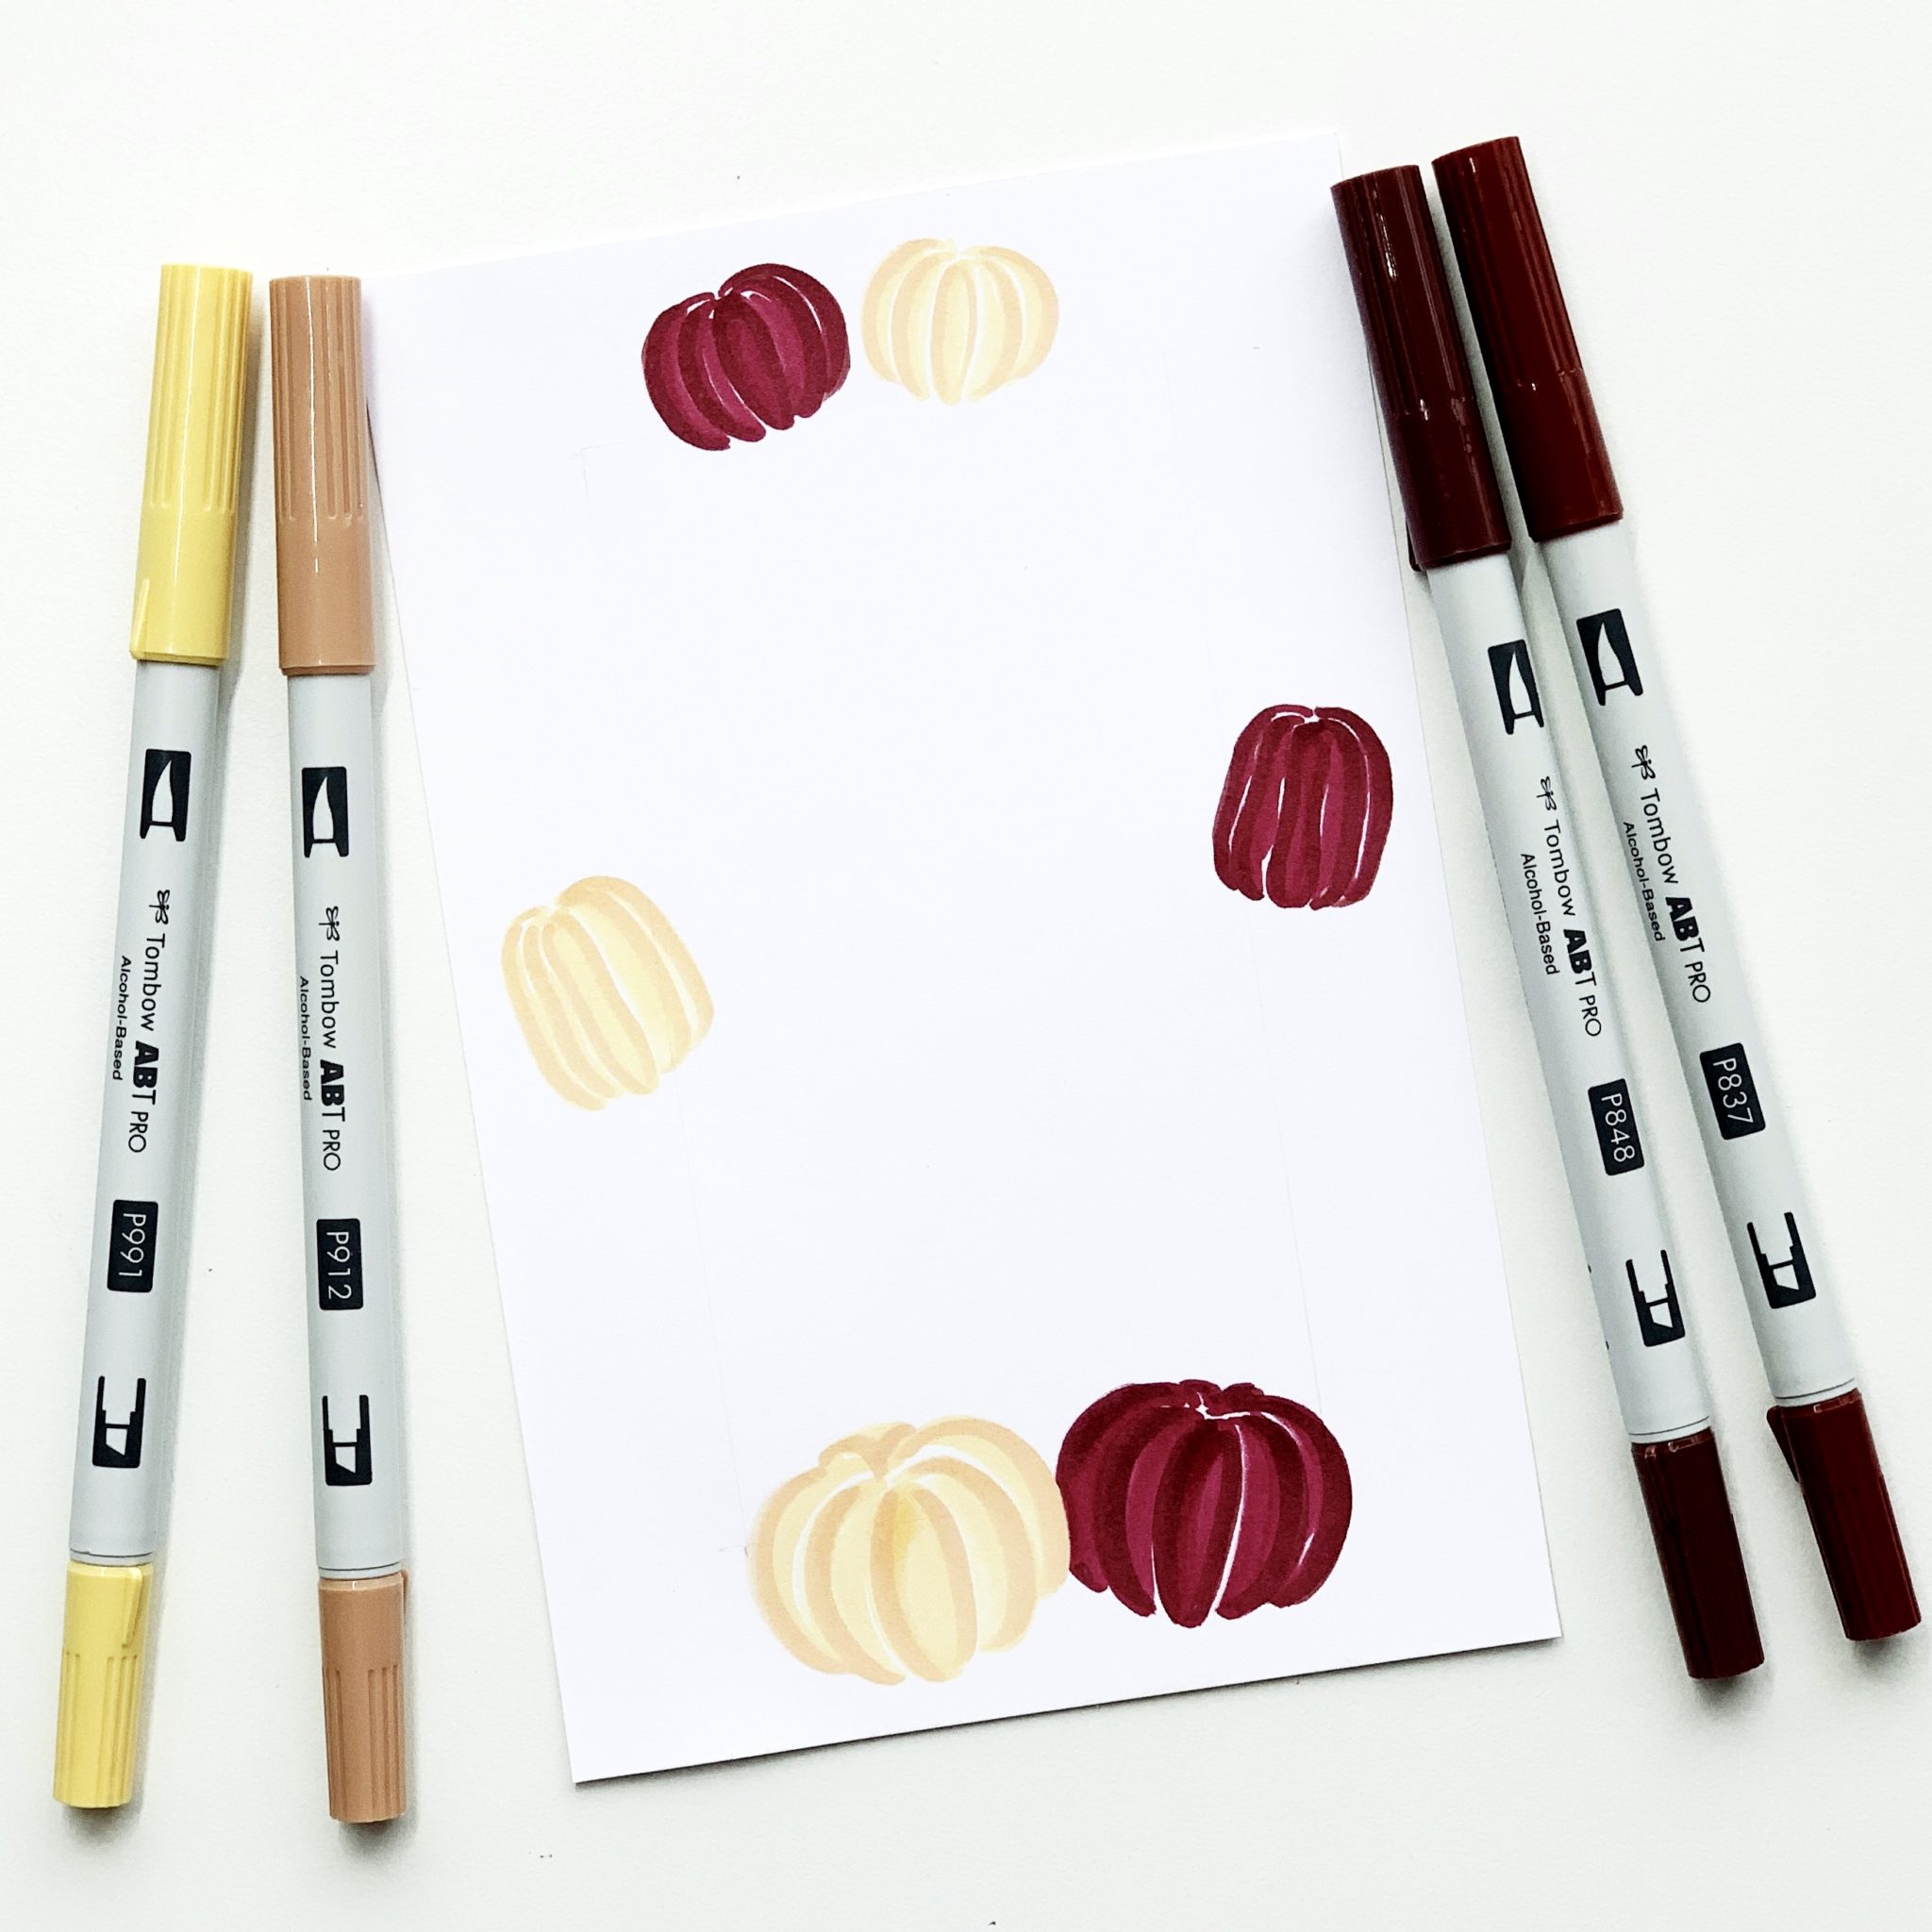
Step 3
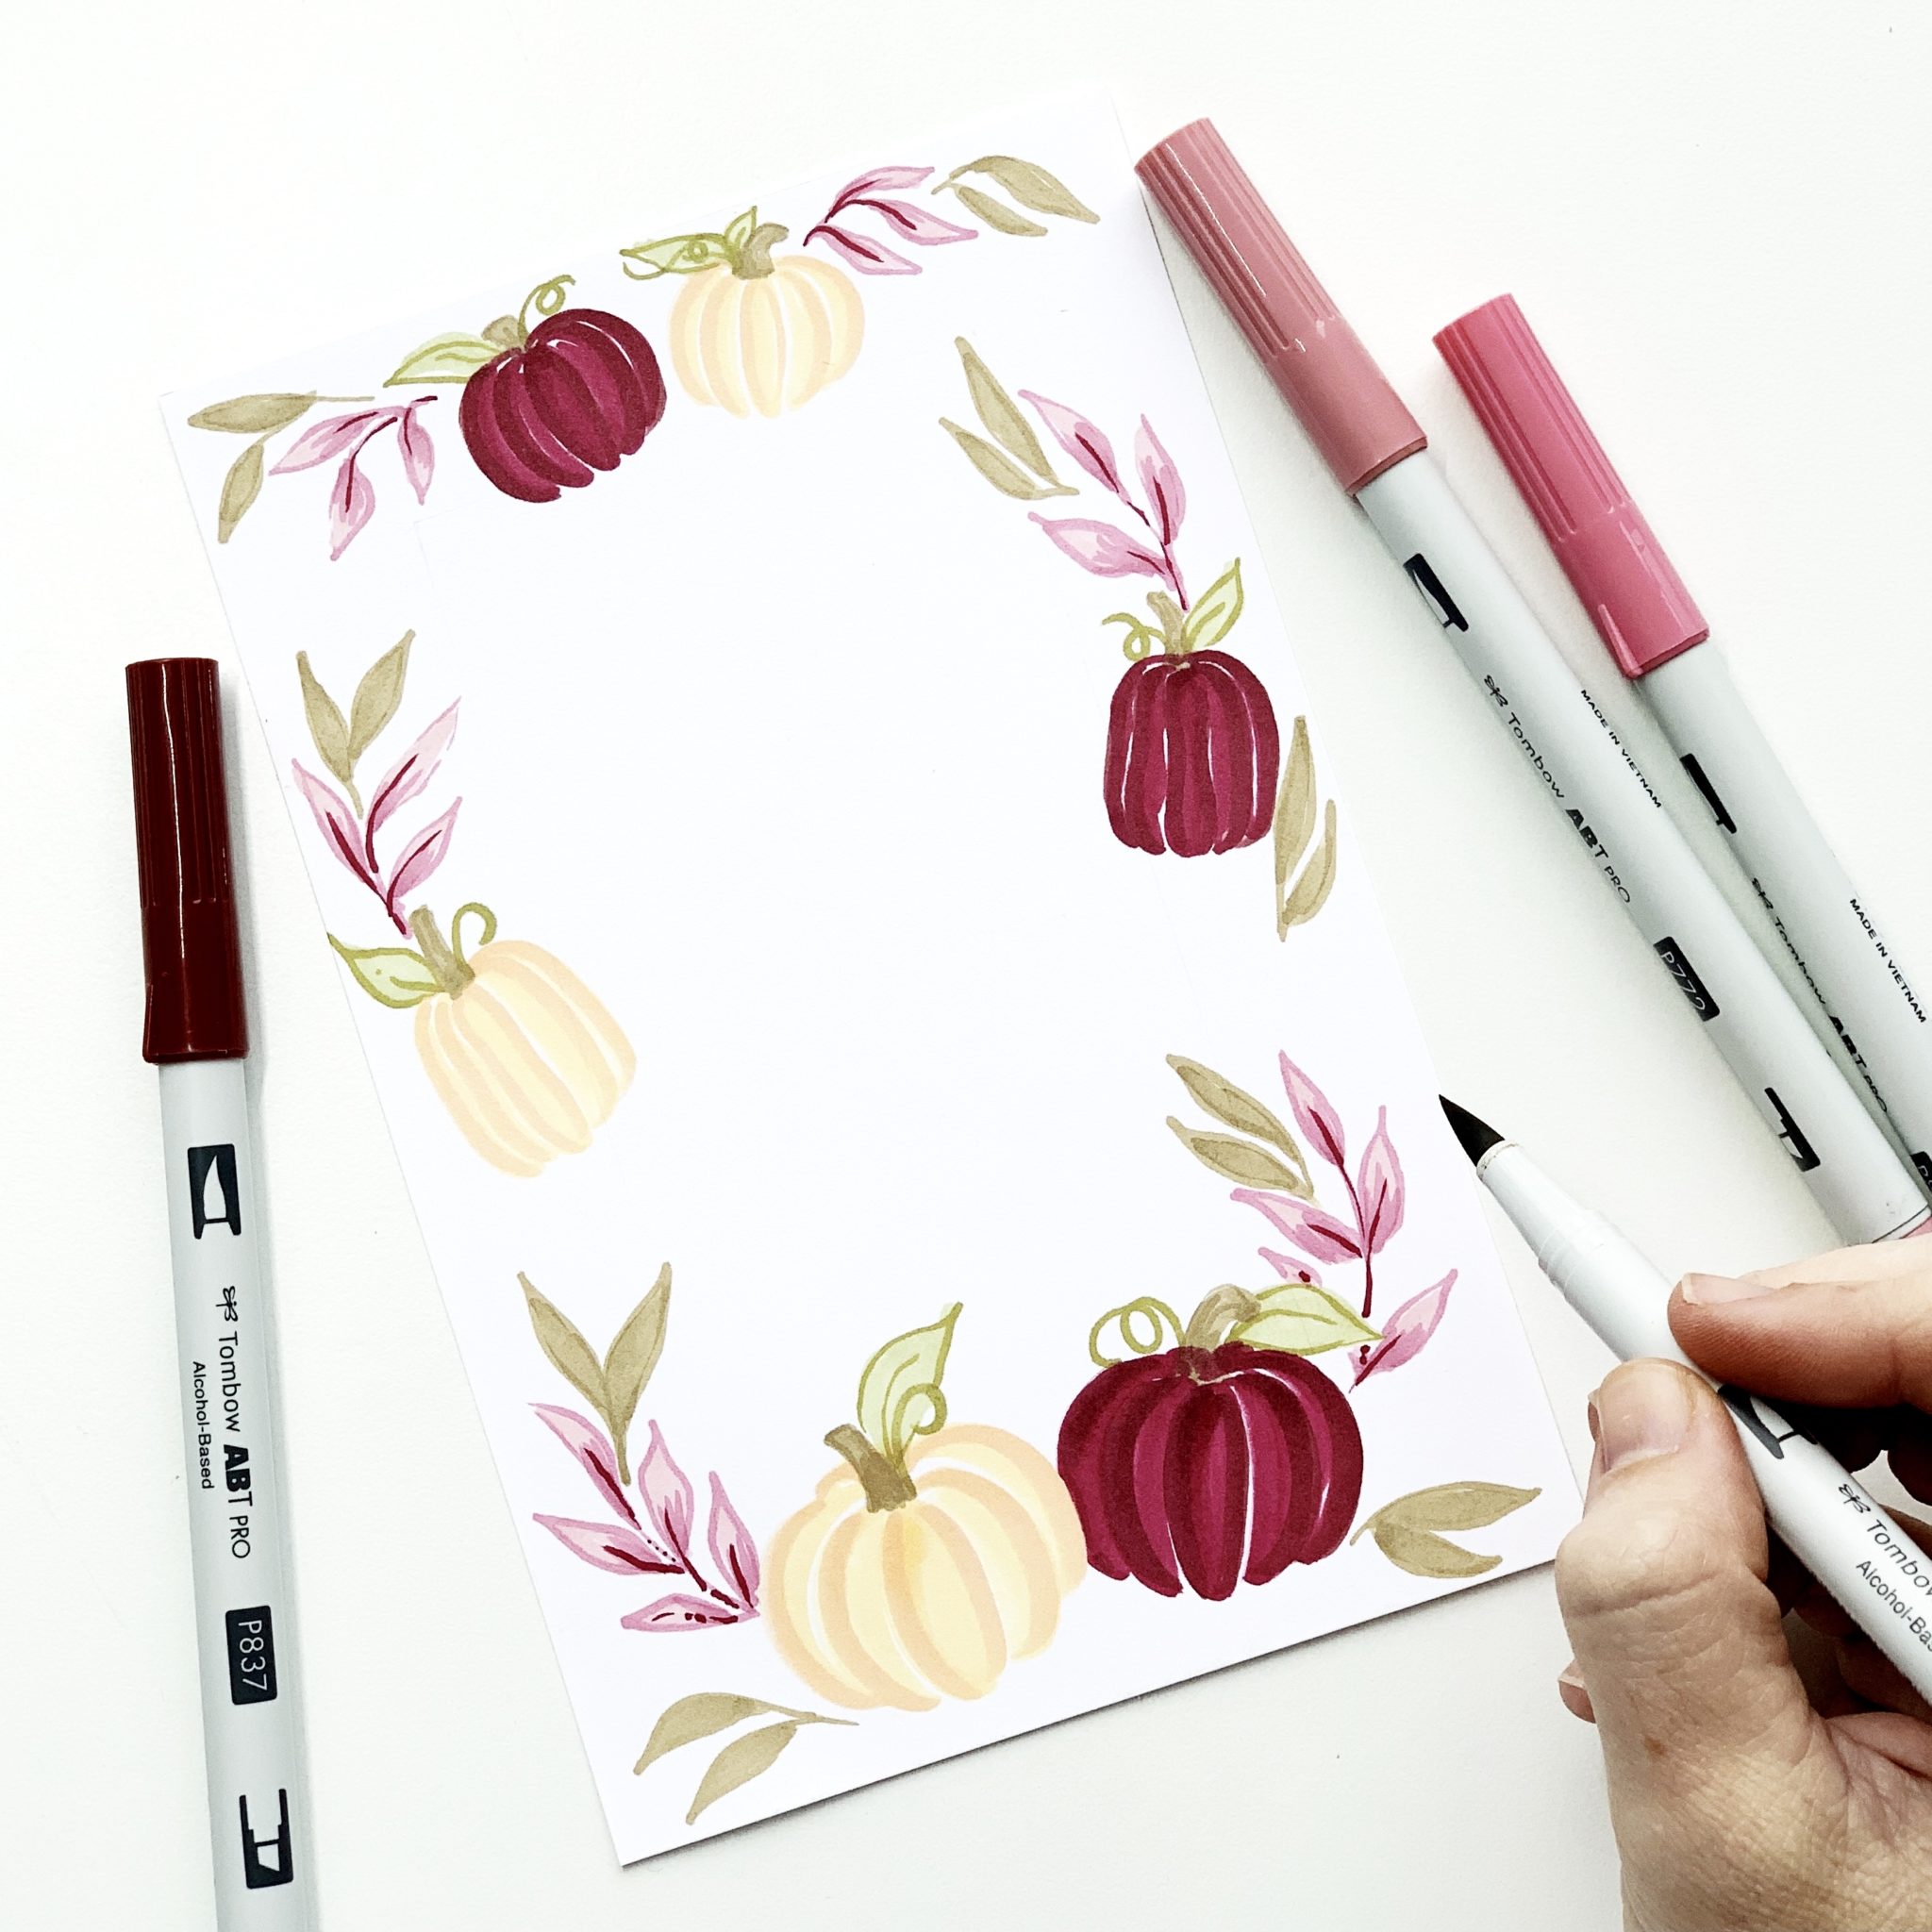
Now, it’s time to start drawing Thanksgiving elements into our border! I used two sets of ABT PRO Alcohol-Based Marker colors to draw two different colored pumpkins around my border. This was just to give it a little bit of variety. Start with the lighter color and roughly sketch a pumpkin. Leave some white spaces in between the strokes. Then, use the darker marker to draw in detail lines on the outside of each pumpkin rind to add shading.
Step 4
Draw in leaves and floral elements around the border to fill it in! A good rule is to use lighter colors first and then use a darker shade to go back in and draw small detail lines and shading. This helps define the elements without using a straight black!
Step 5
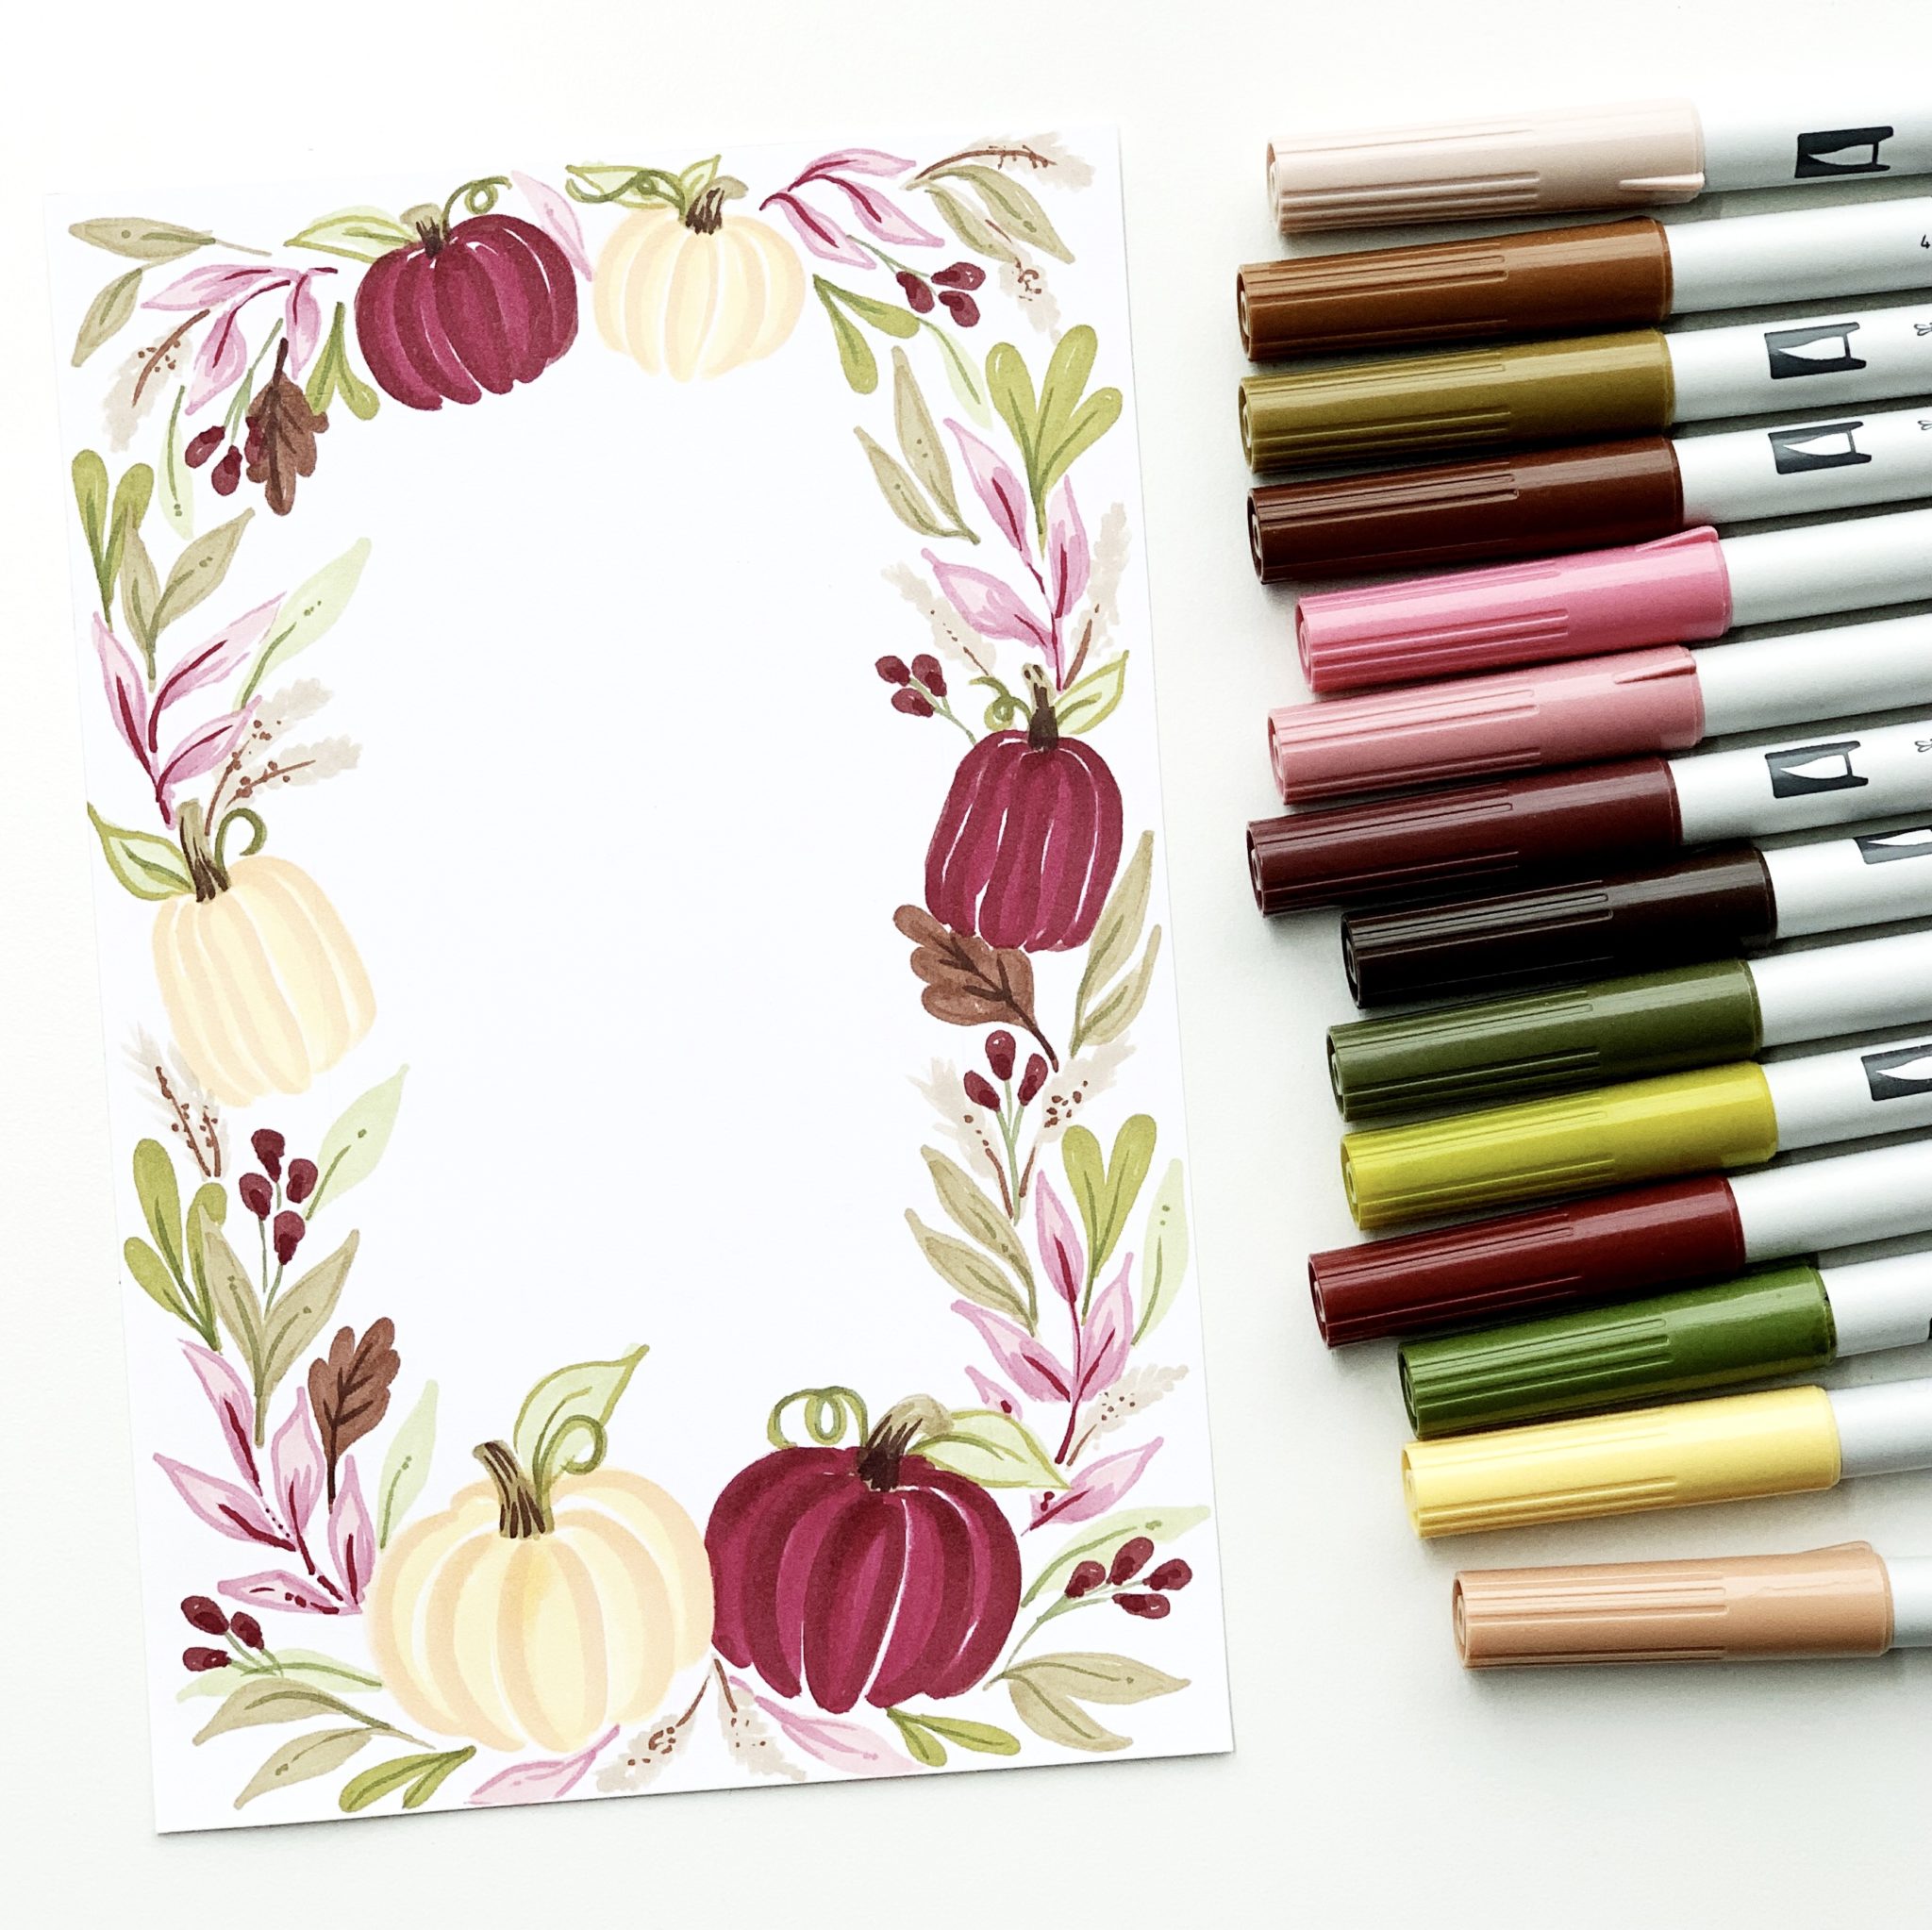
Continue to use your ABT Alcohol-Based Markers to draw in florals and leaves around your Thanksgiving page border to fill in any empty areas. Add a variety of leaves to make it interesting! All the colors I used are shown in the first photo with all the materials!
Step 6
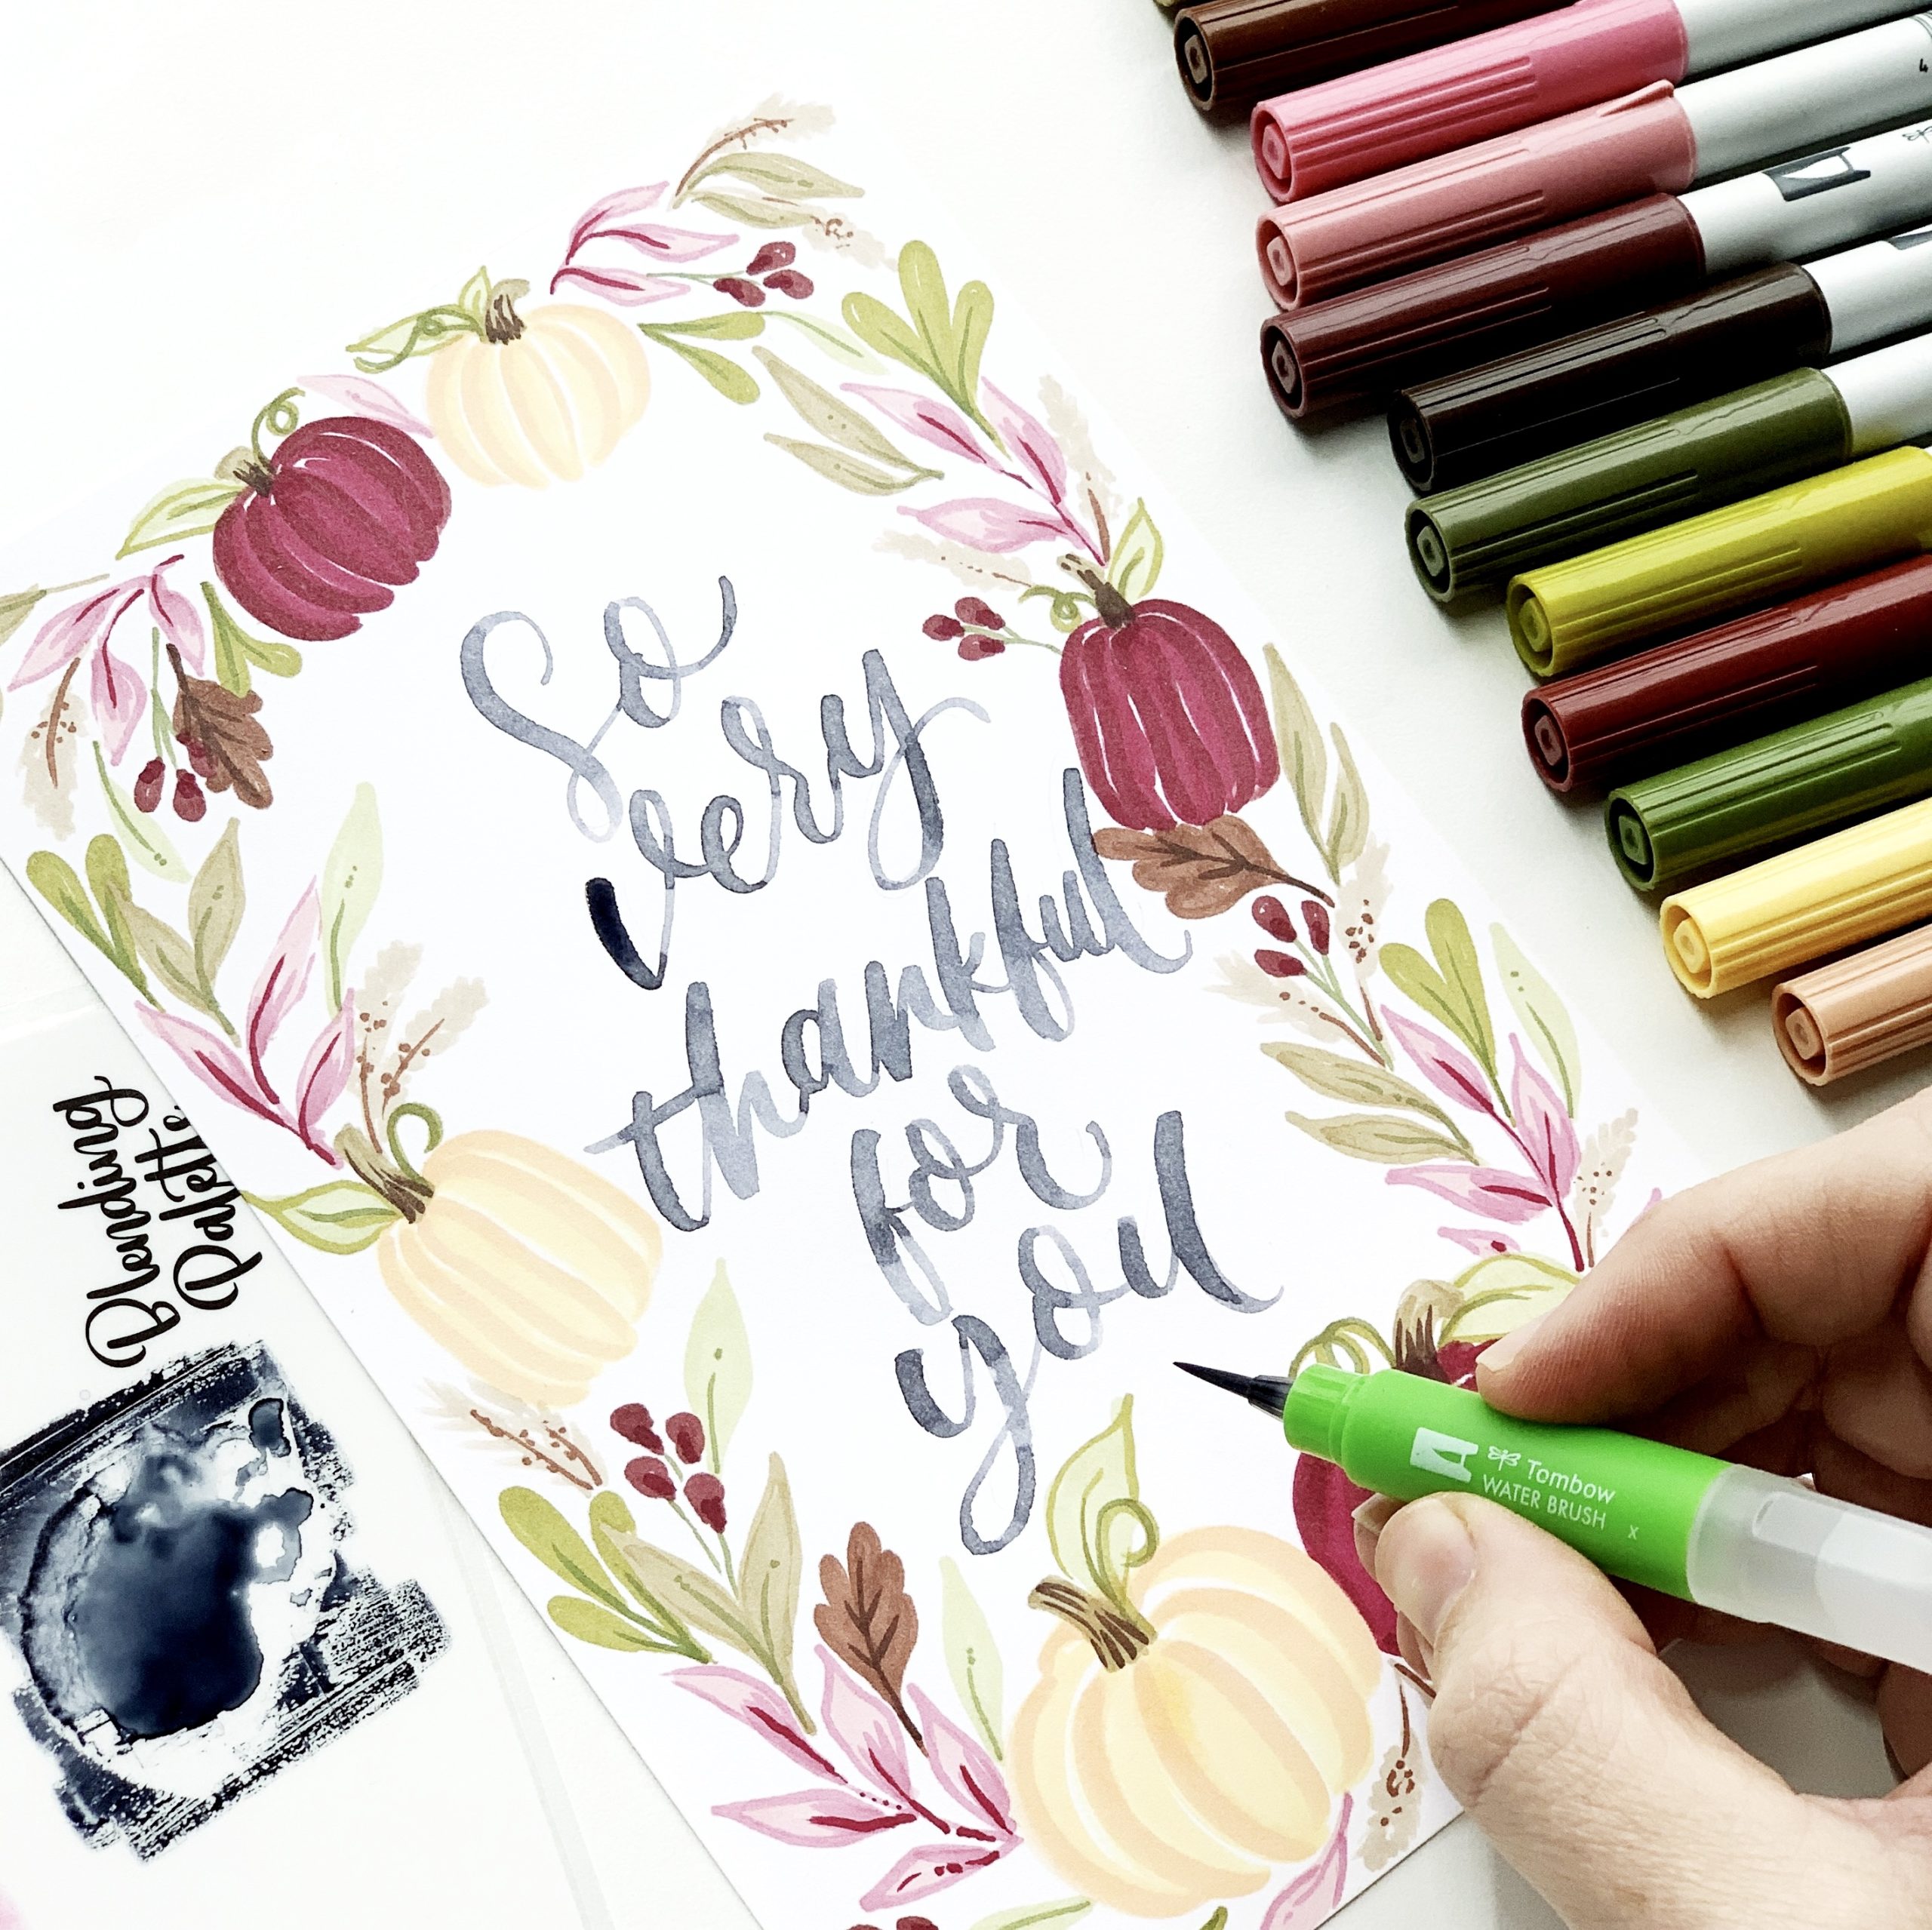
I wanted to create watercolor lettering so I used my black Dual Brush Pen, Blending Palette and Small Water Brush to letter in “So very thankful for you” in the center of my page. Then wait for it to dry completely!
Step 7
Once your Thanksgiving page is completely dry, use the MONO Eraser to erase any extra pencil marks. Then, use the MONO Permanent Adhesive to glue and insert into your journal! I love this adhesive because it is user-friendly and is so easy to use!
You’re done! I hope you found this Thanksgiving page tutorial helpful and you give it a try! For more inspiration like this, make sure to follow @studio80design!
For more Thanksgiving-inspired projects, check out these posts:
- DIY Fall Thankful Branch
- Express Your Gratitude with a Thankful Banner
- Watercolor Thanksgiving Turkeys