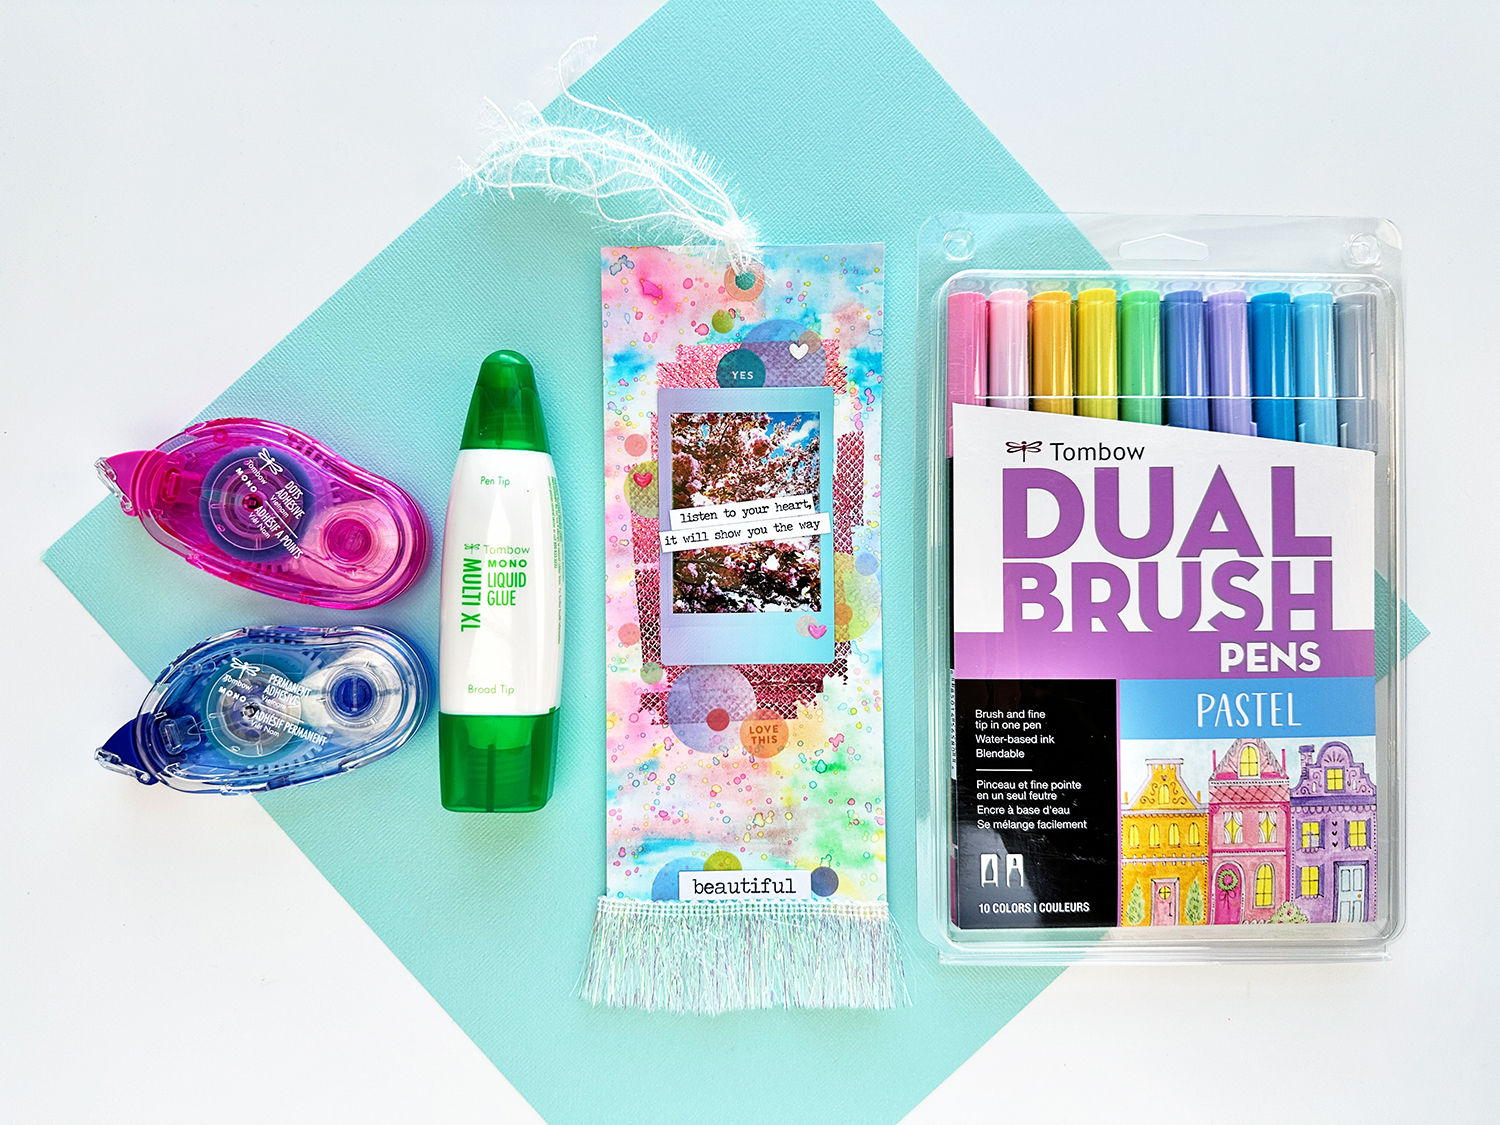
Hi Tombow Friends! This is Jennie with a Spring inspired idea for a bookmark. I live in Maryland and every Spring we get beautiful blooms that sadly last very little, but in a way that makes them extra special! One of those special blooms is the Japanese Flowering Cherry.
Supplies:
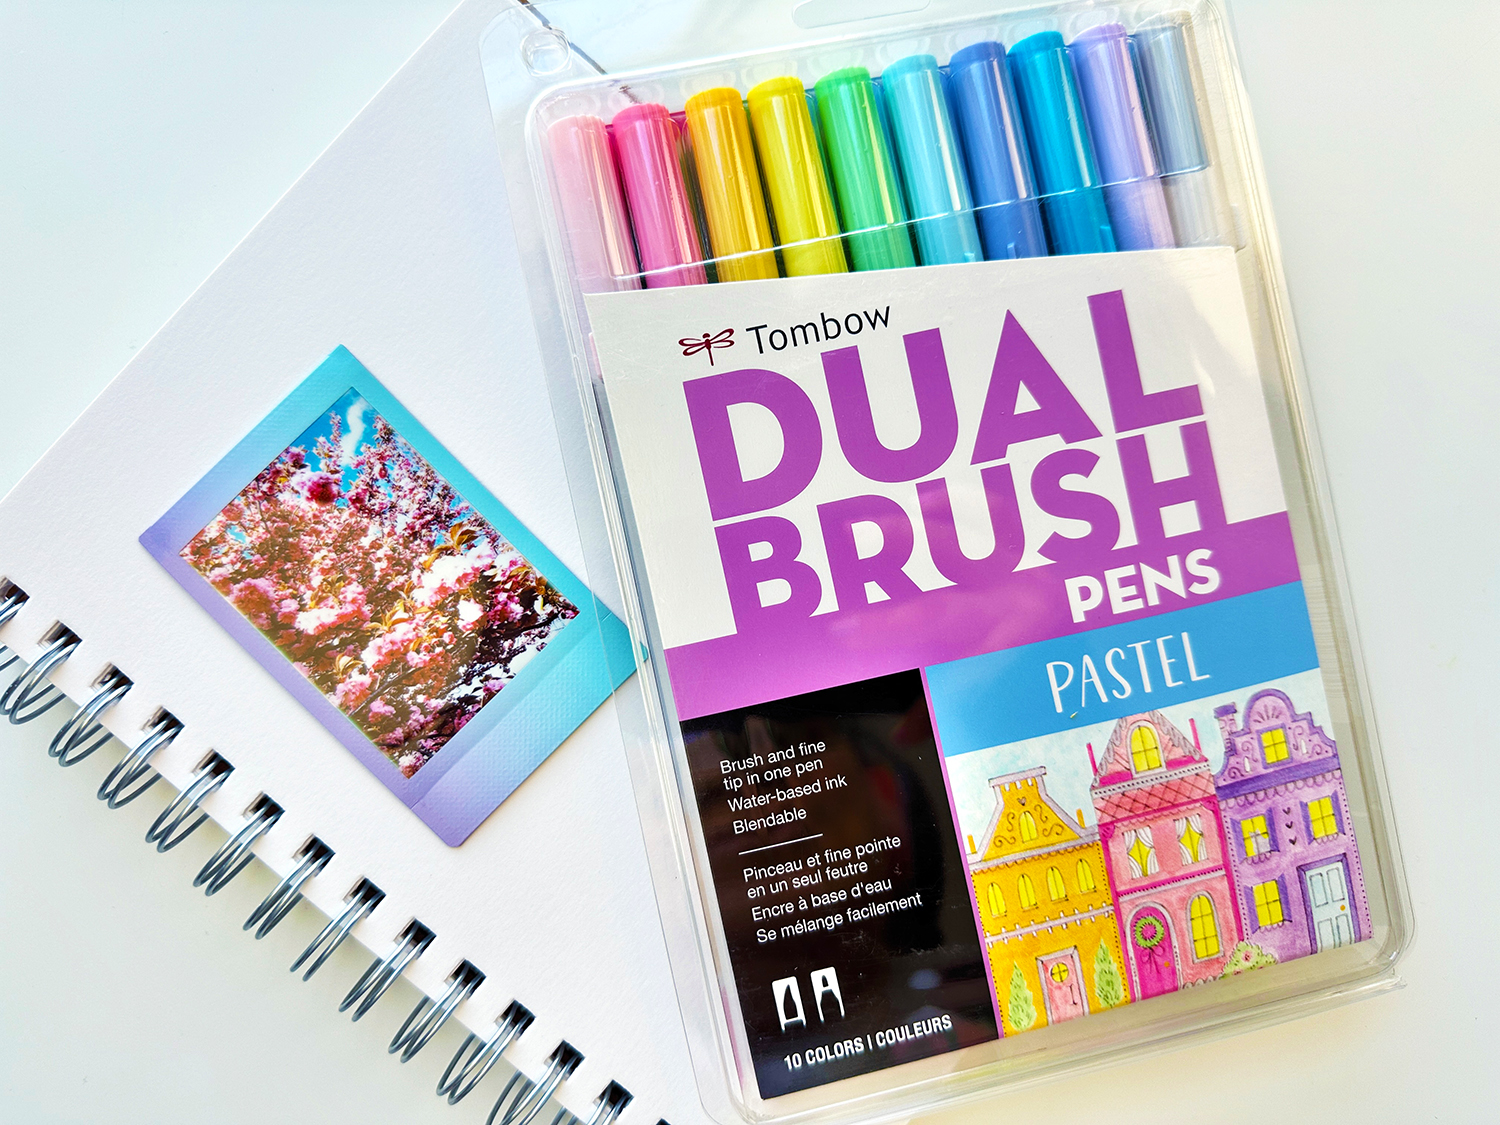
- Tombow Dual Brush Pens
- Mixed Media or Watercolor Paper
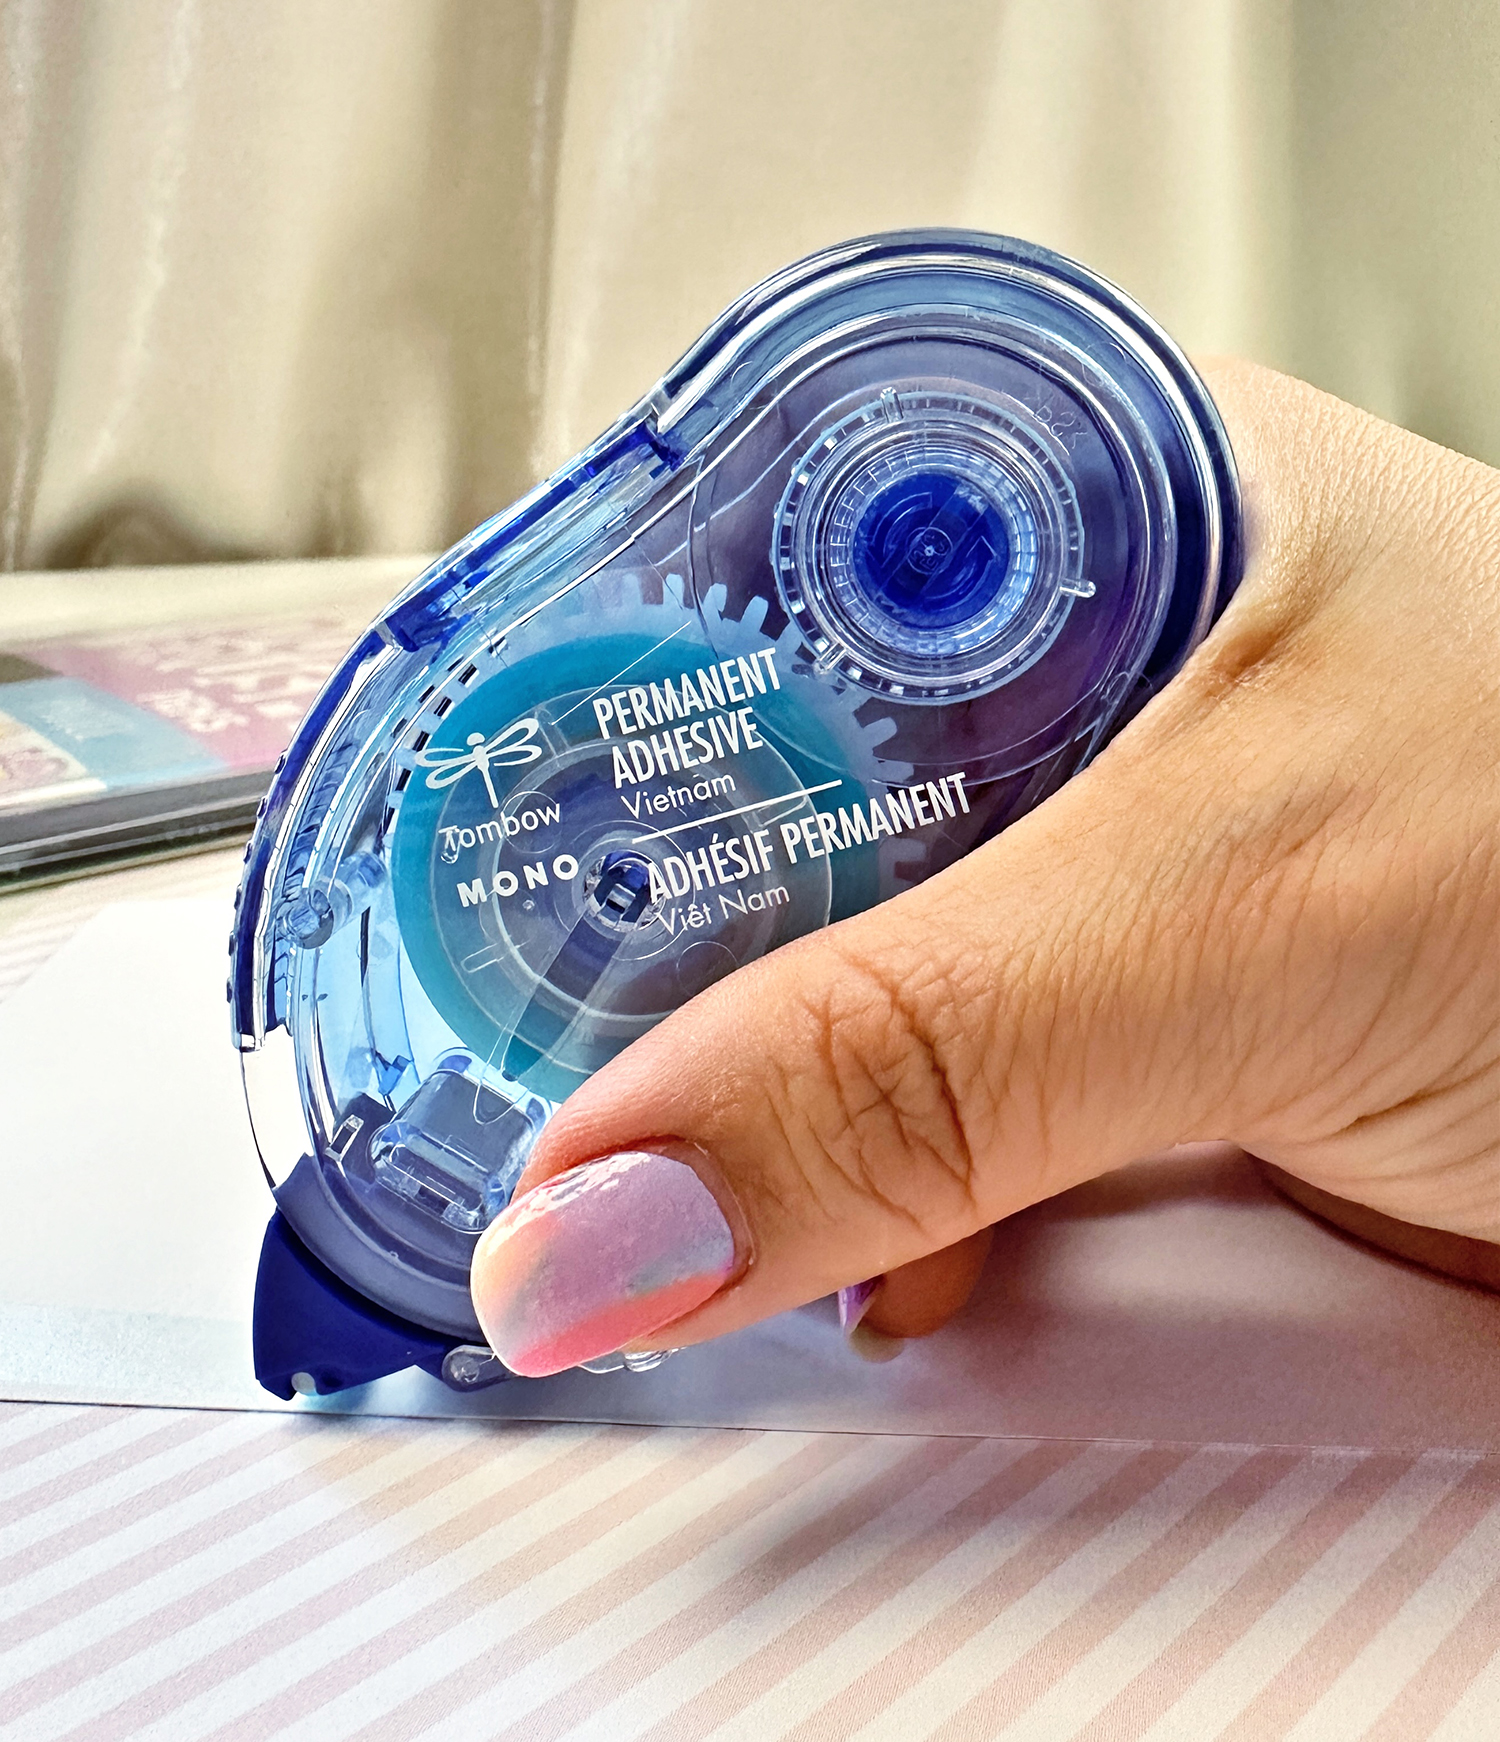
- Tombow MONO Permanent Adhesive
- Photo
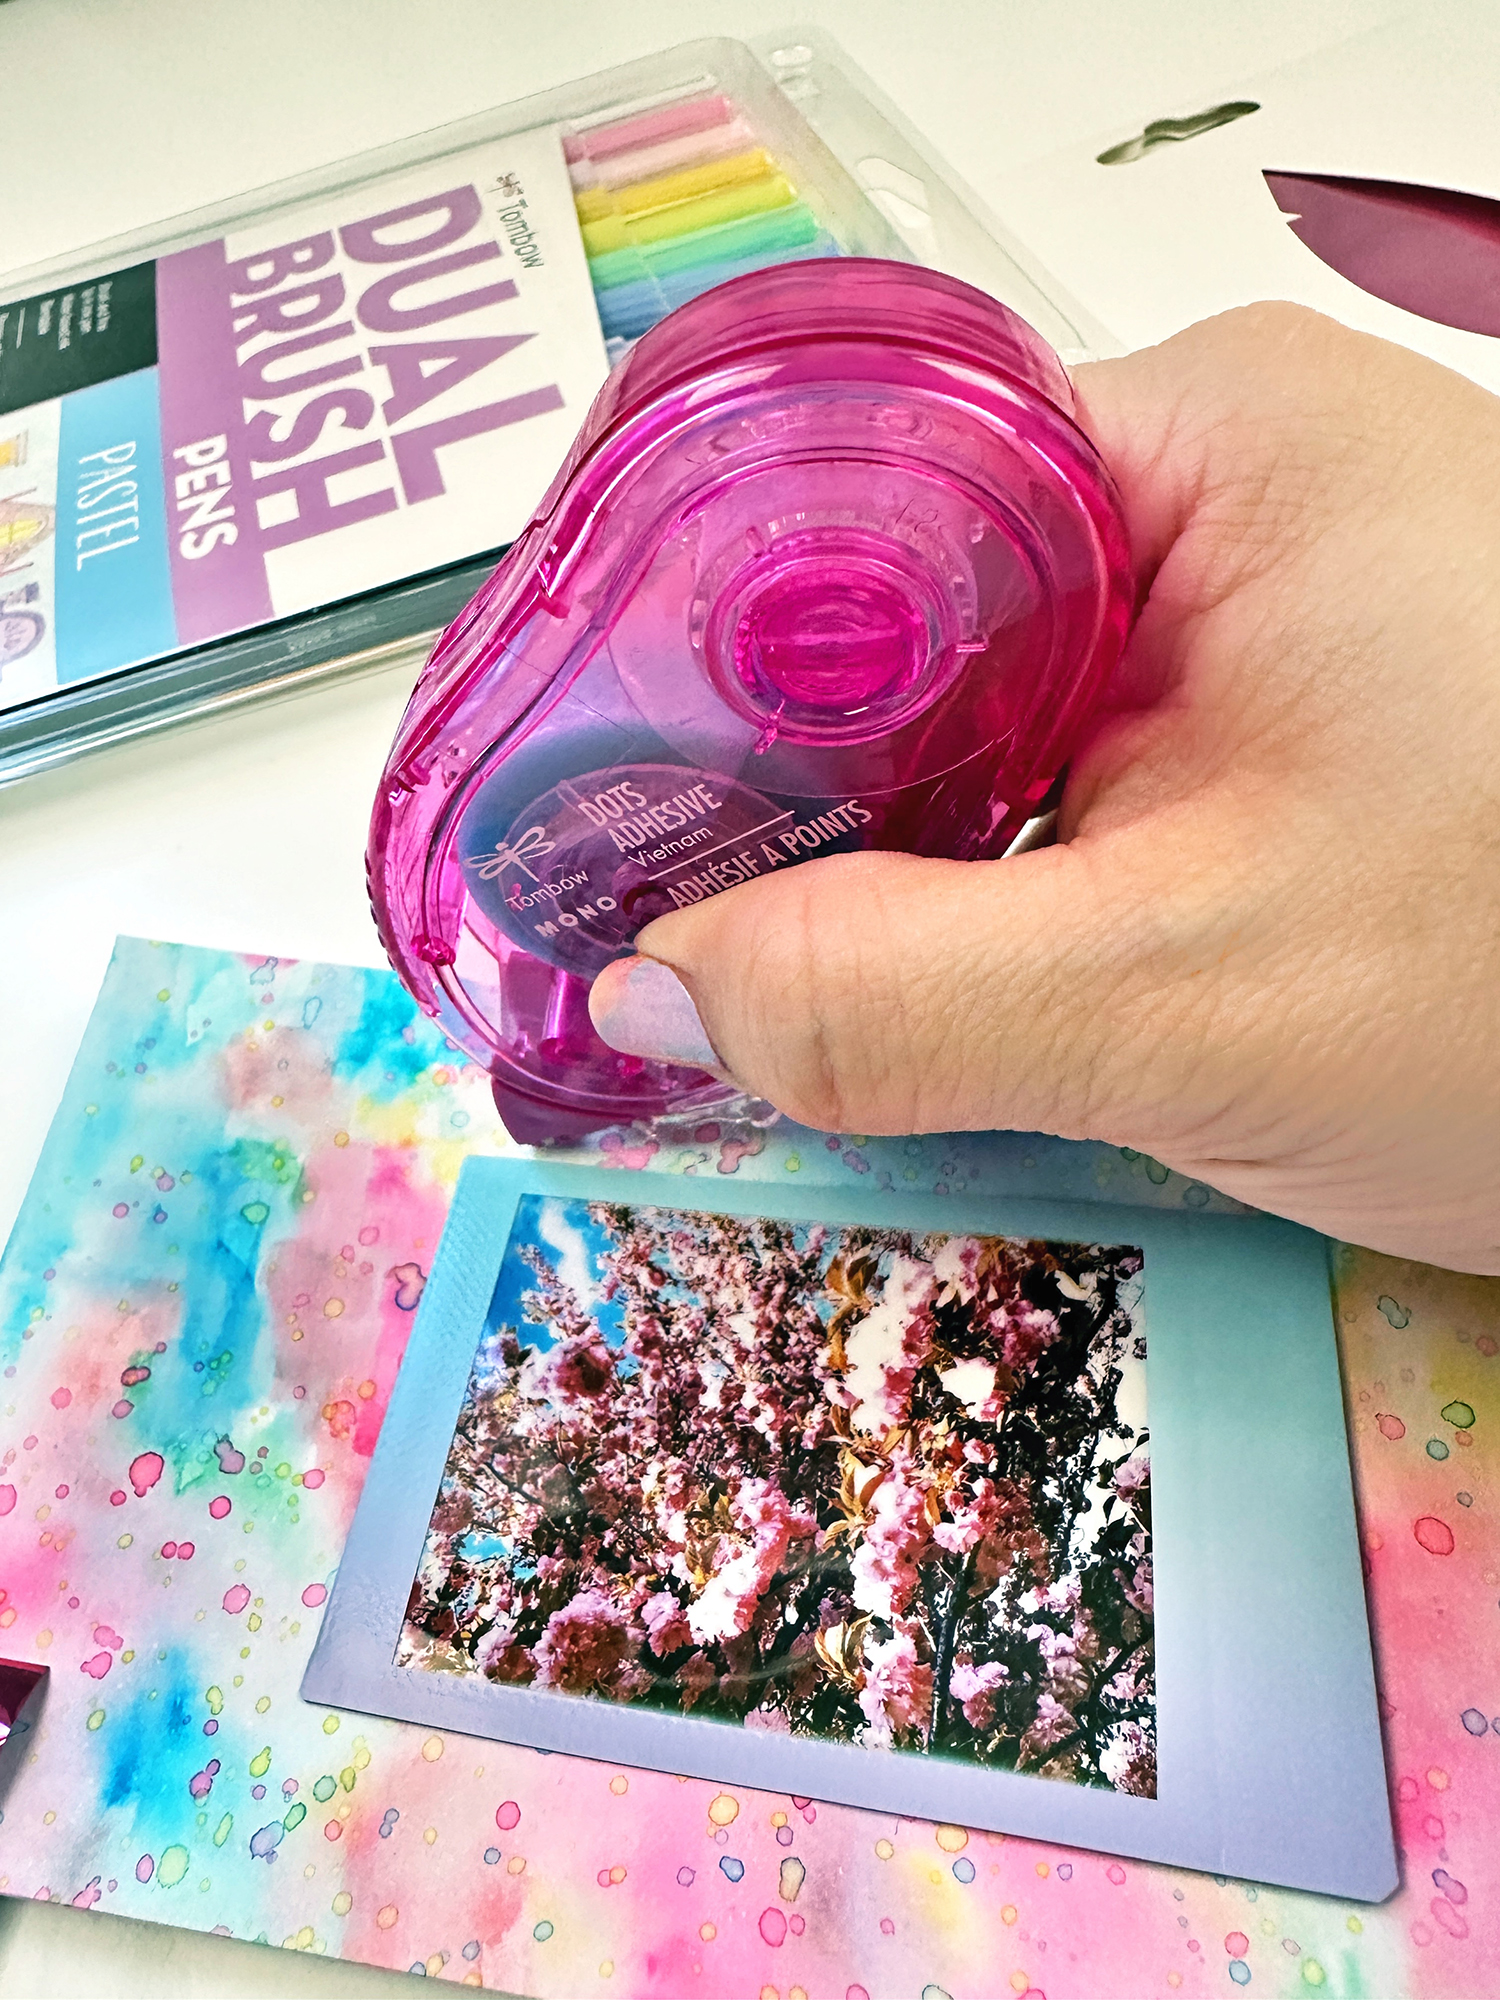
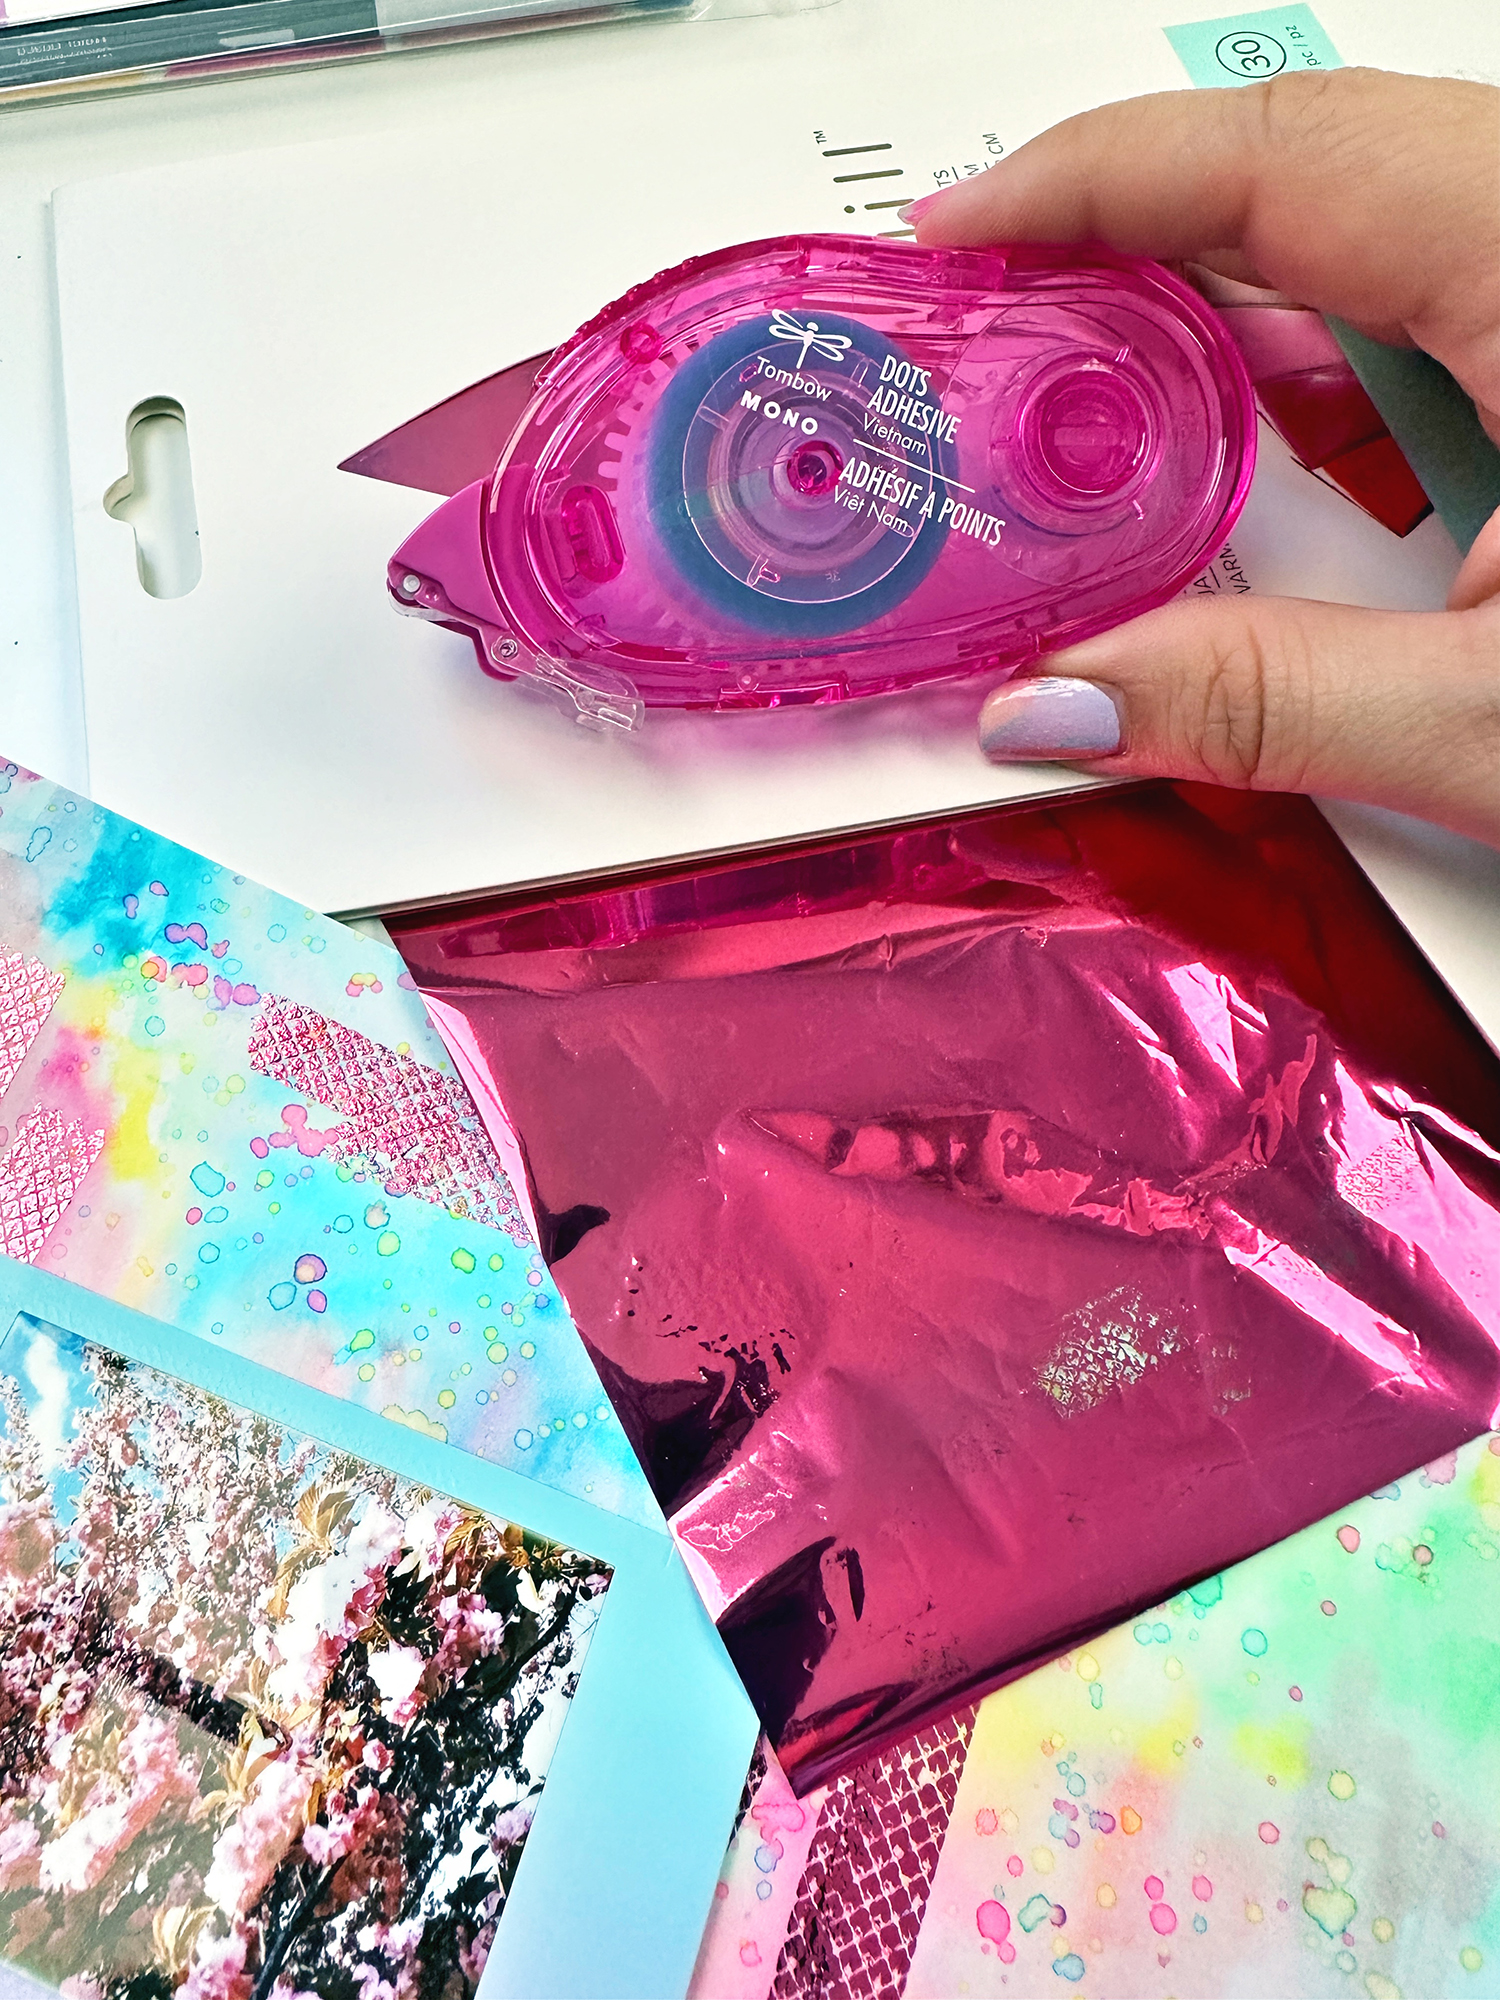
- Tombow MONO Dots Adhesive
- Foil
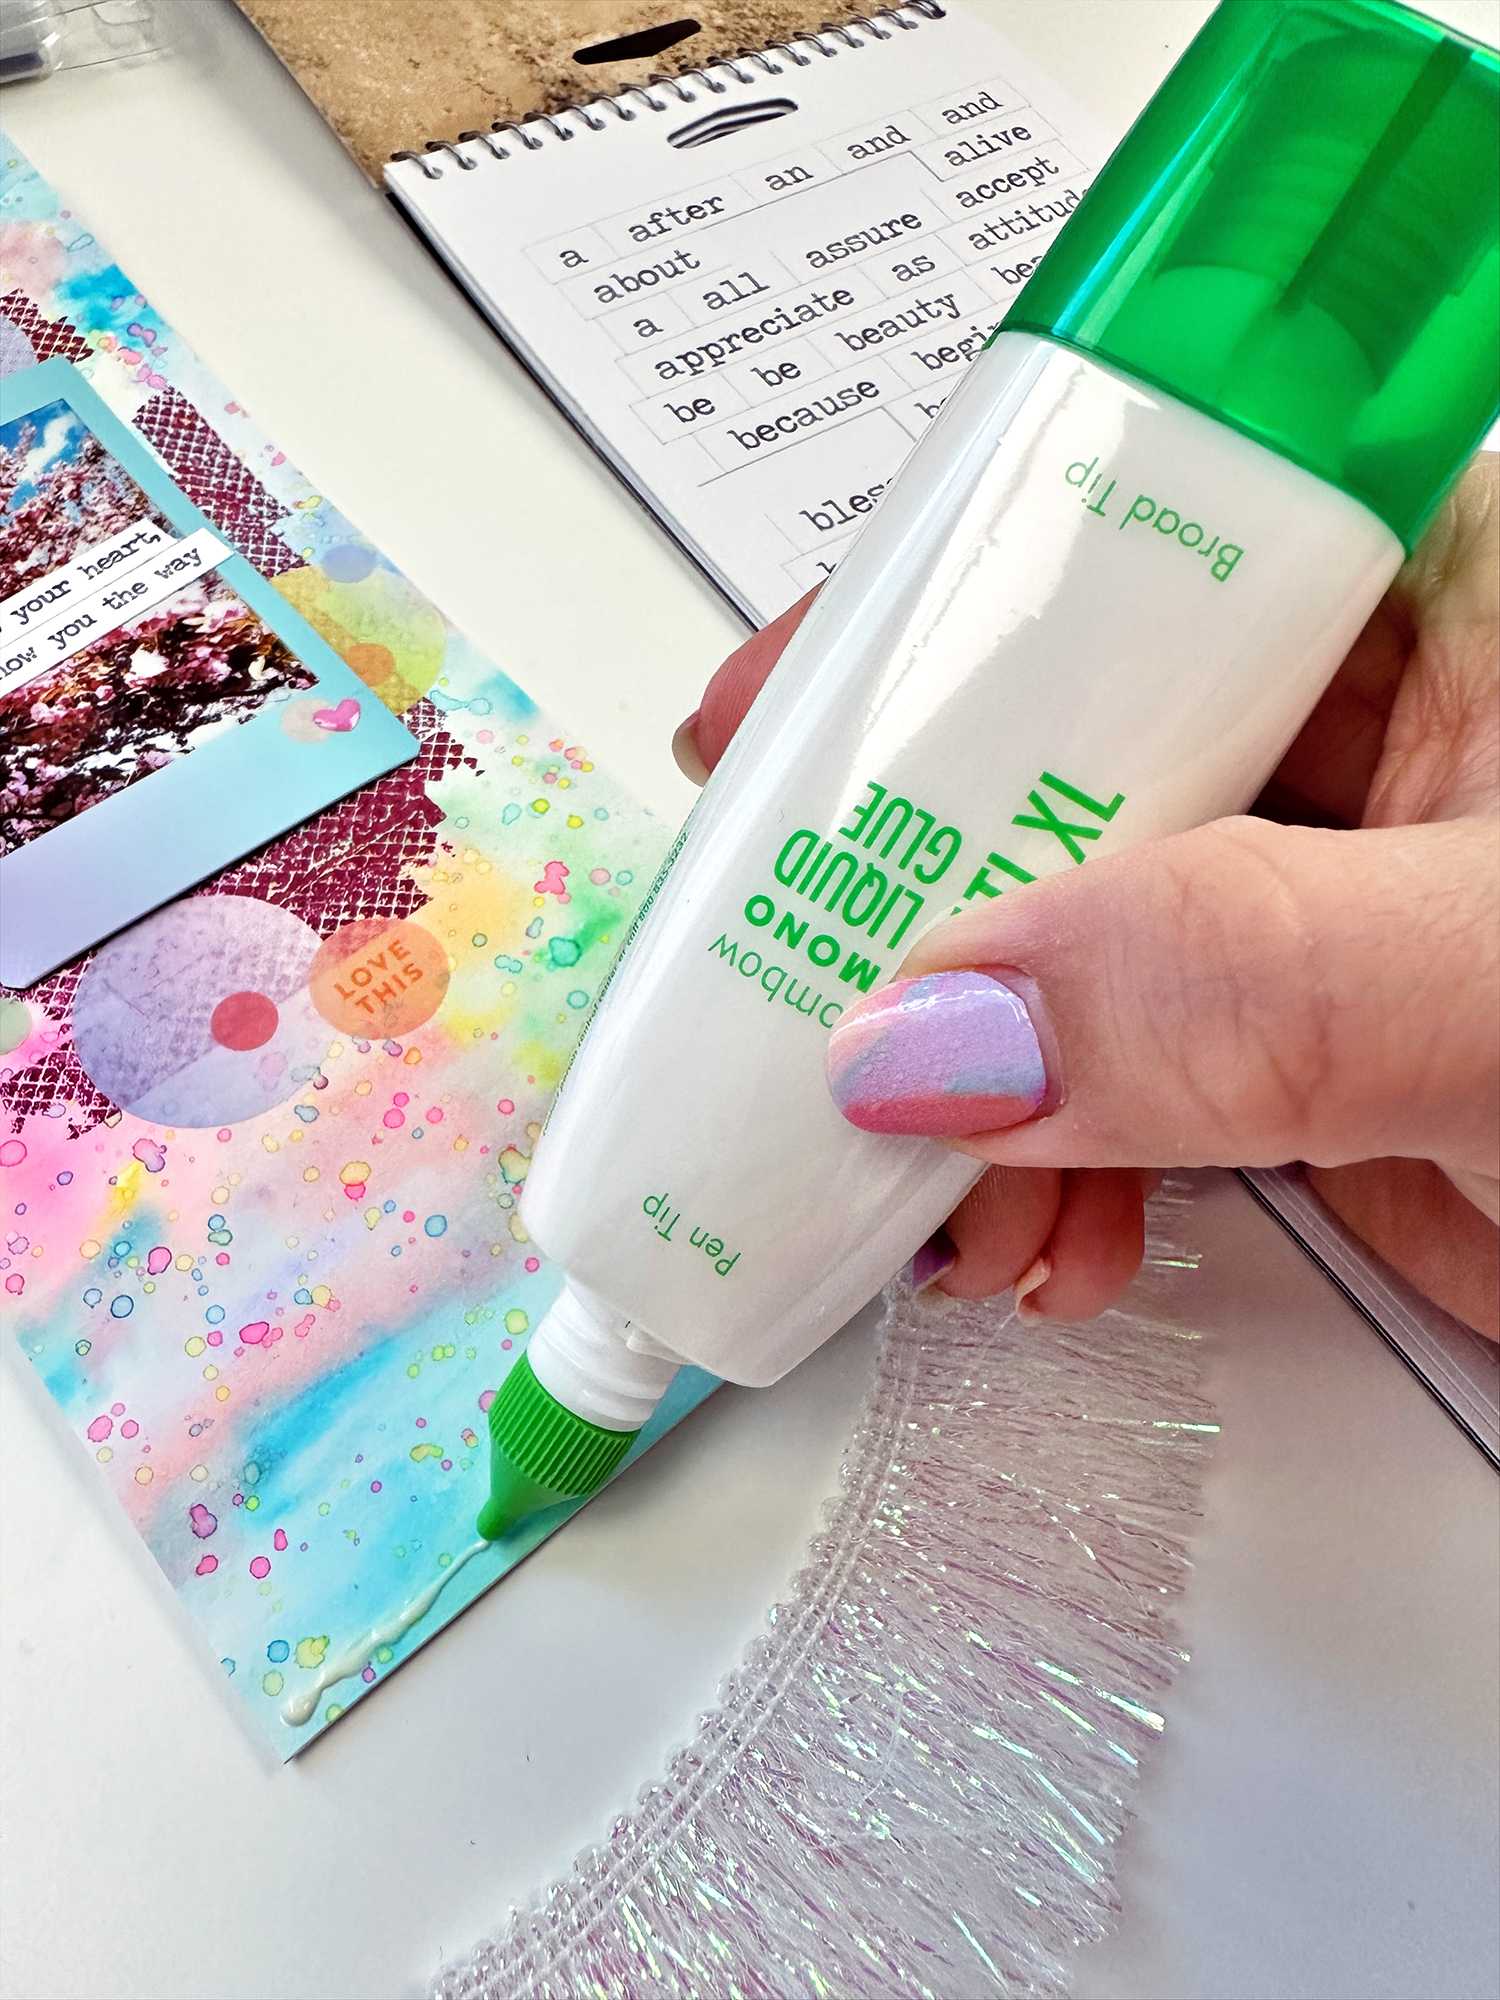
- Tombow MONO Multi XL Liquid Glue
- Embellishments
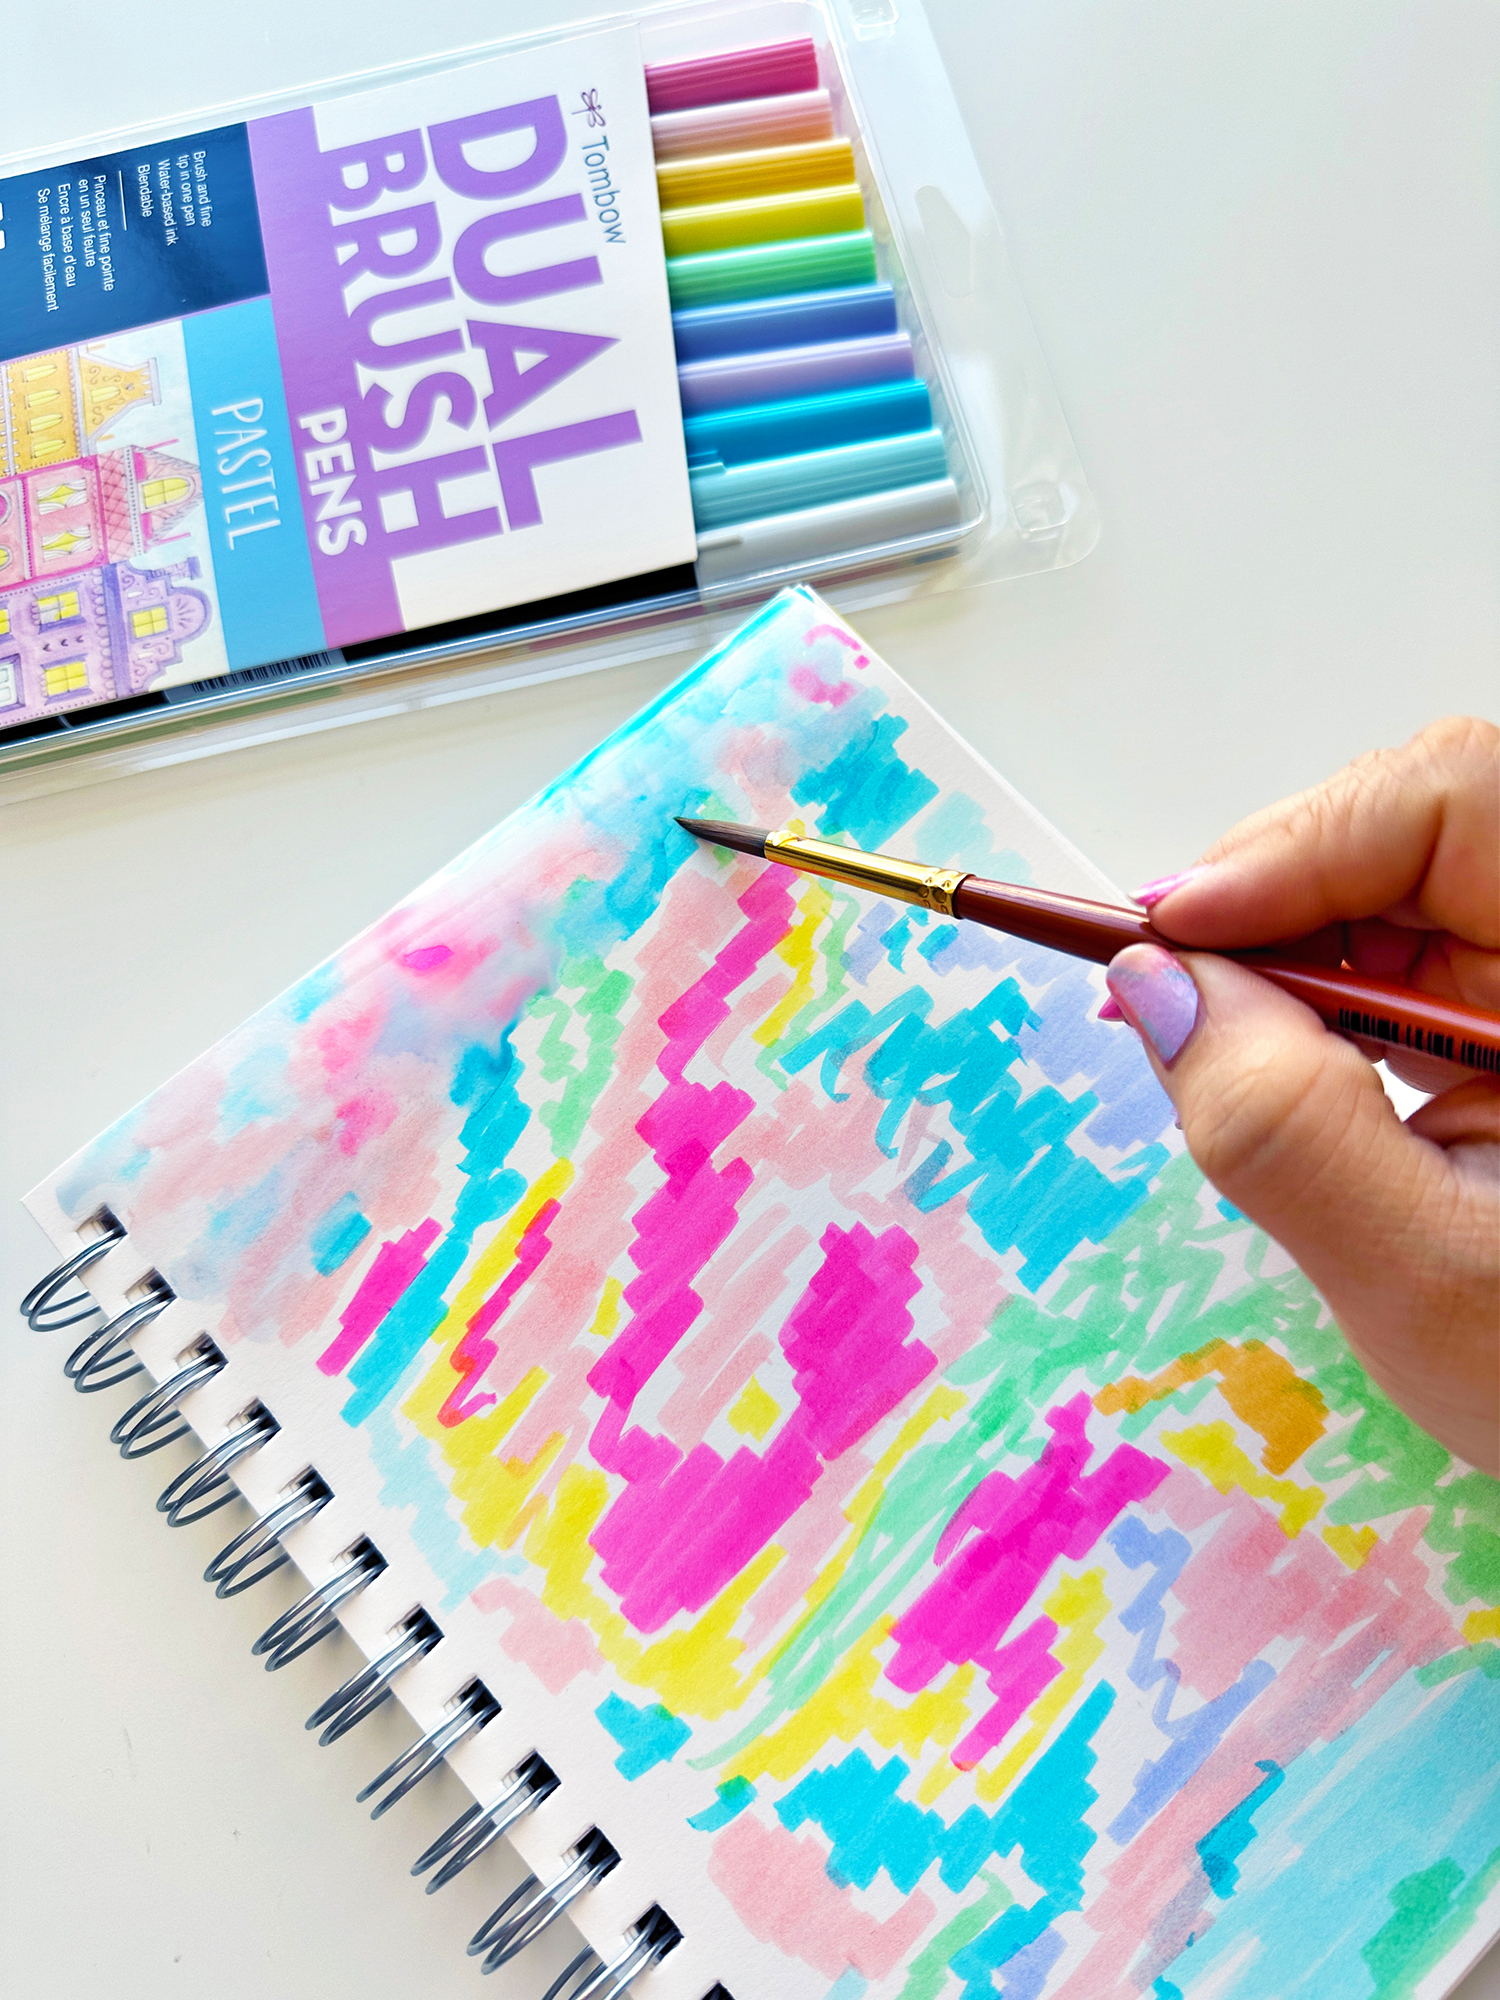
Step One: Color the paper
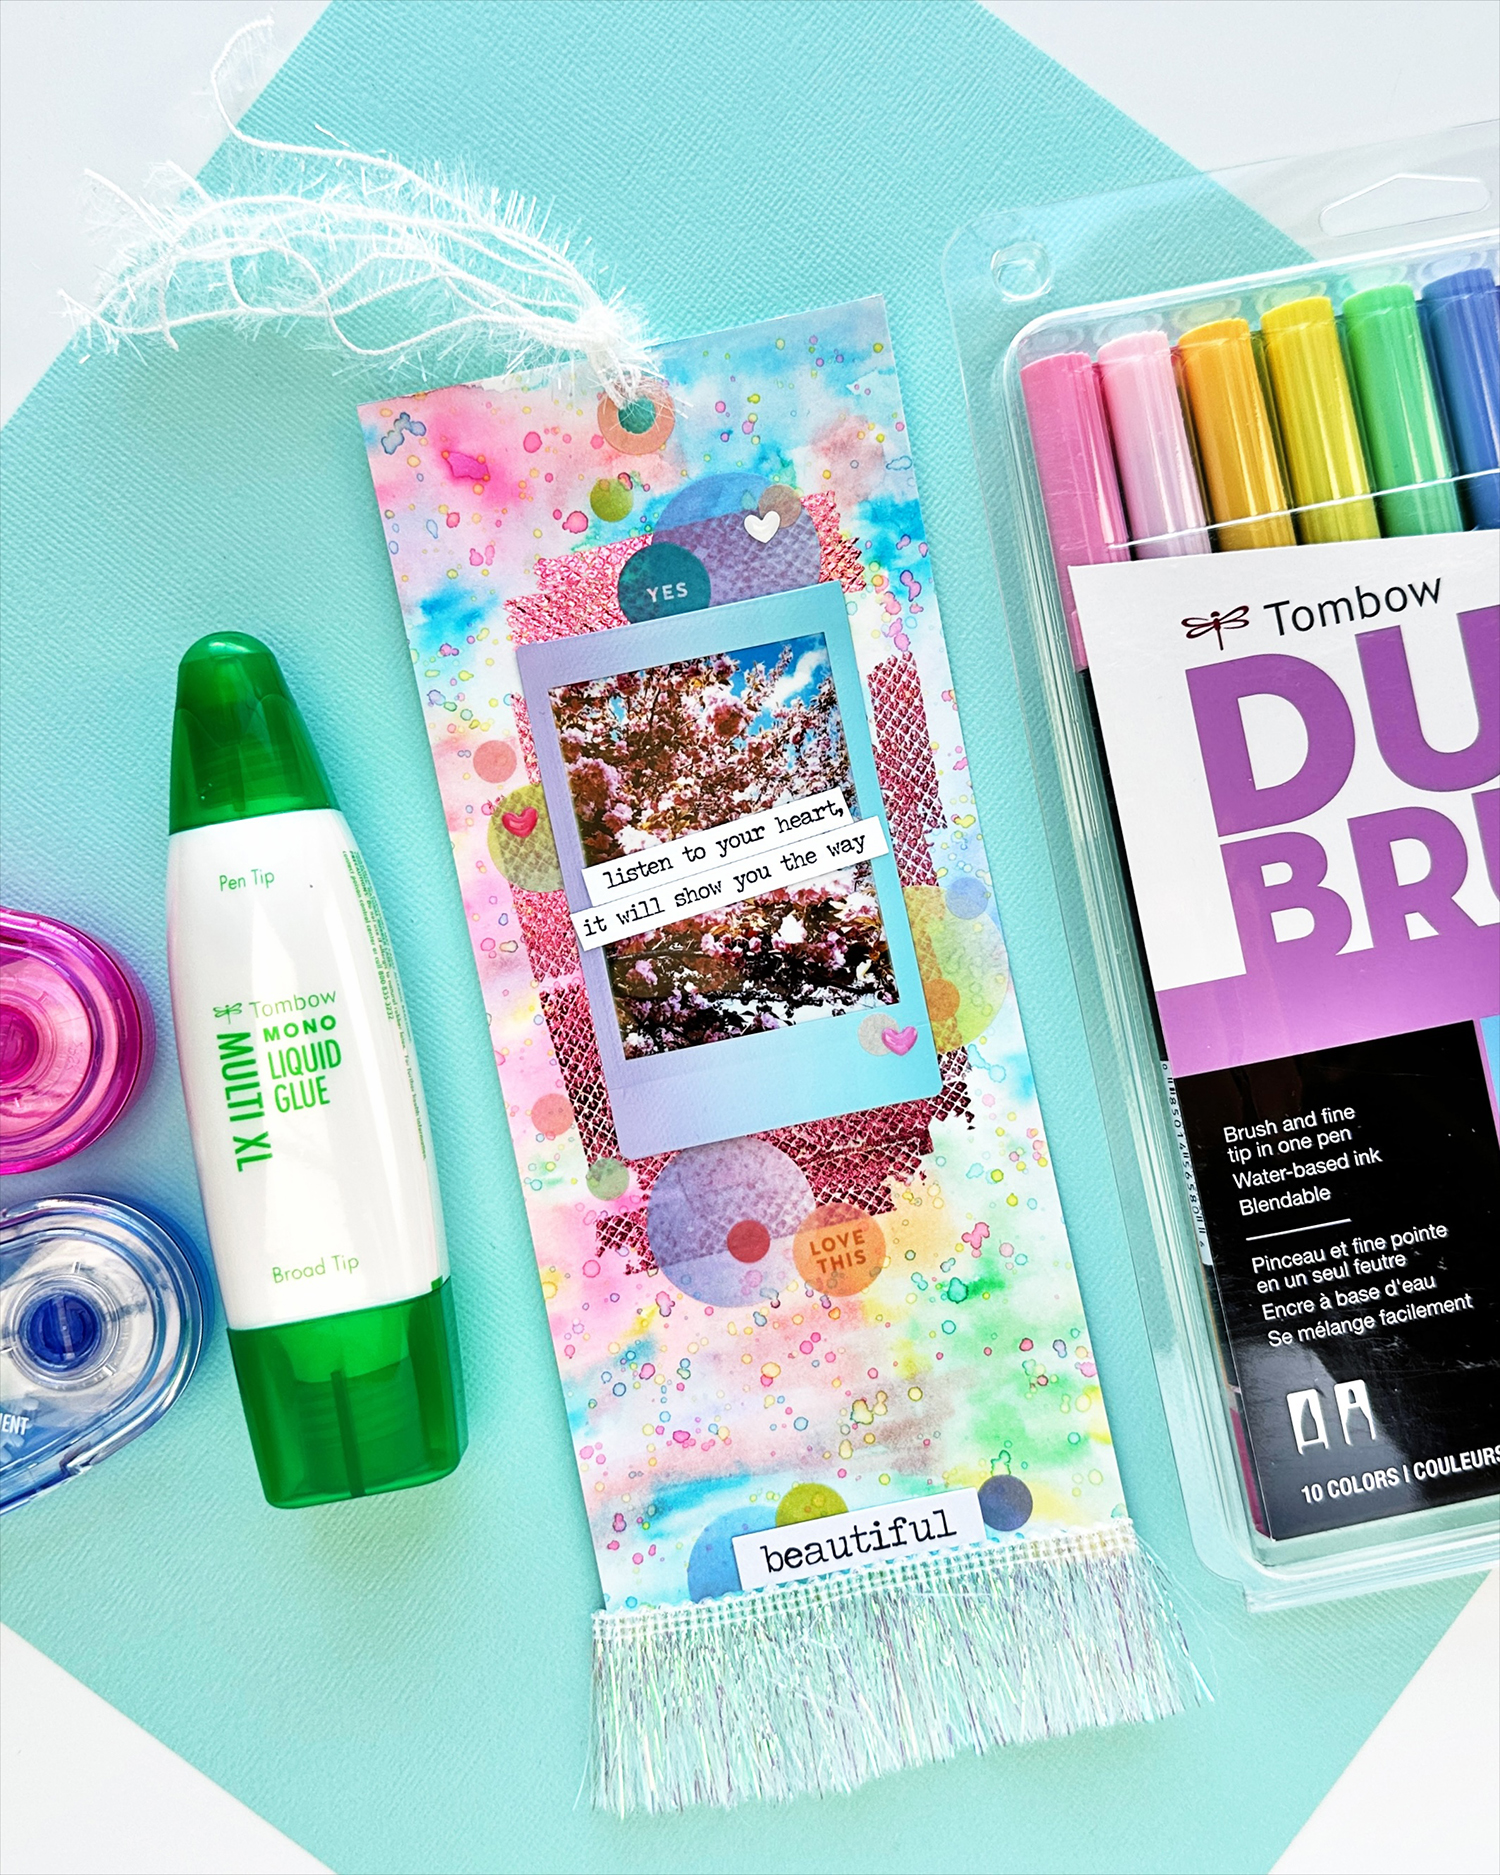
I was inspired by the colors of the Japanese Flowering Cherry to pick the Tombow Dual Brush Pens Pastel Set for this bookmark. I used an Instax Printer with Macaron film to print the photo. It matches the Tombow Dual Brush Pens Pastel Set perfectly!
I really wanted a saturated background so I made sure to cover every inch of the page with the Tombow Dual Brush Pens Pastel Set. I alternated dark and light colors, and different colors!
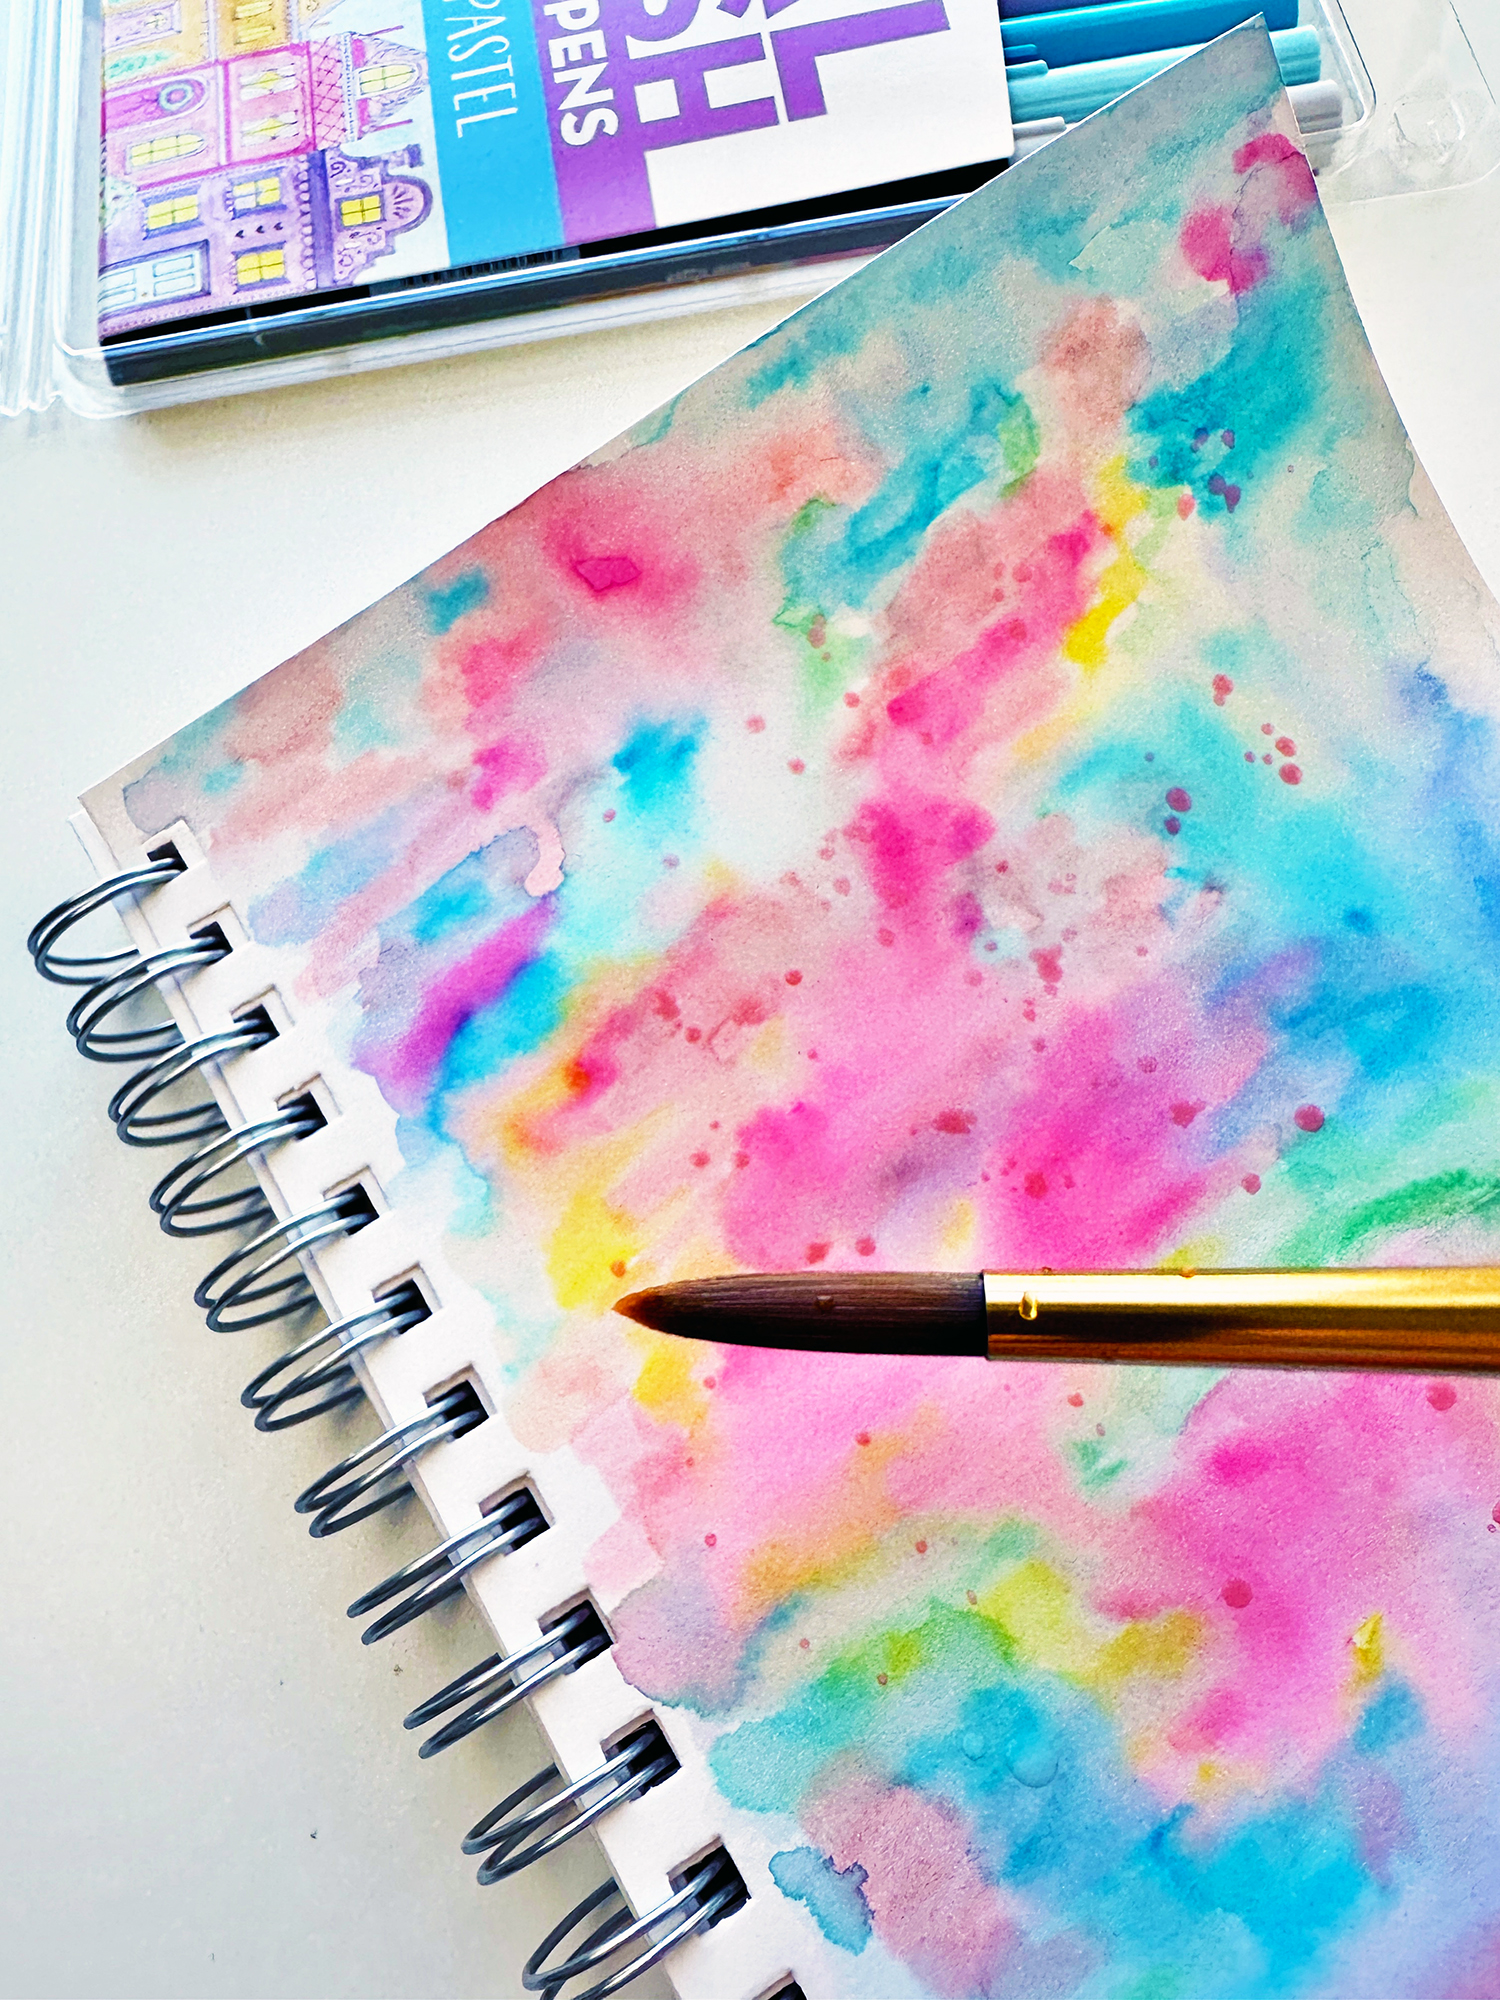
Once the page is covered use a watercolor brush and water to blend the colors. I purposefully didn’t try to blend colors because I wanted pockets of colors on the paper.
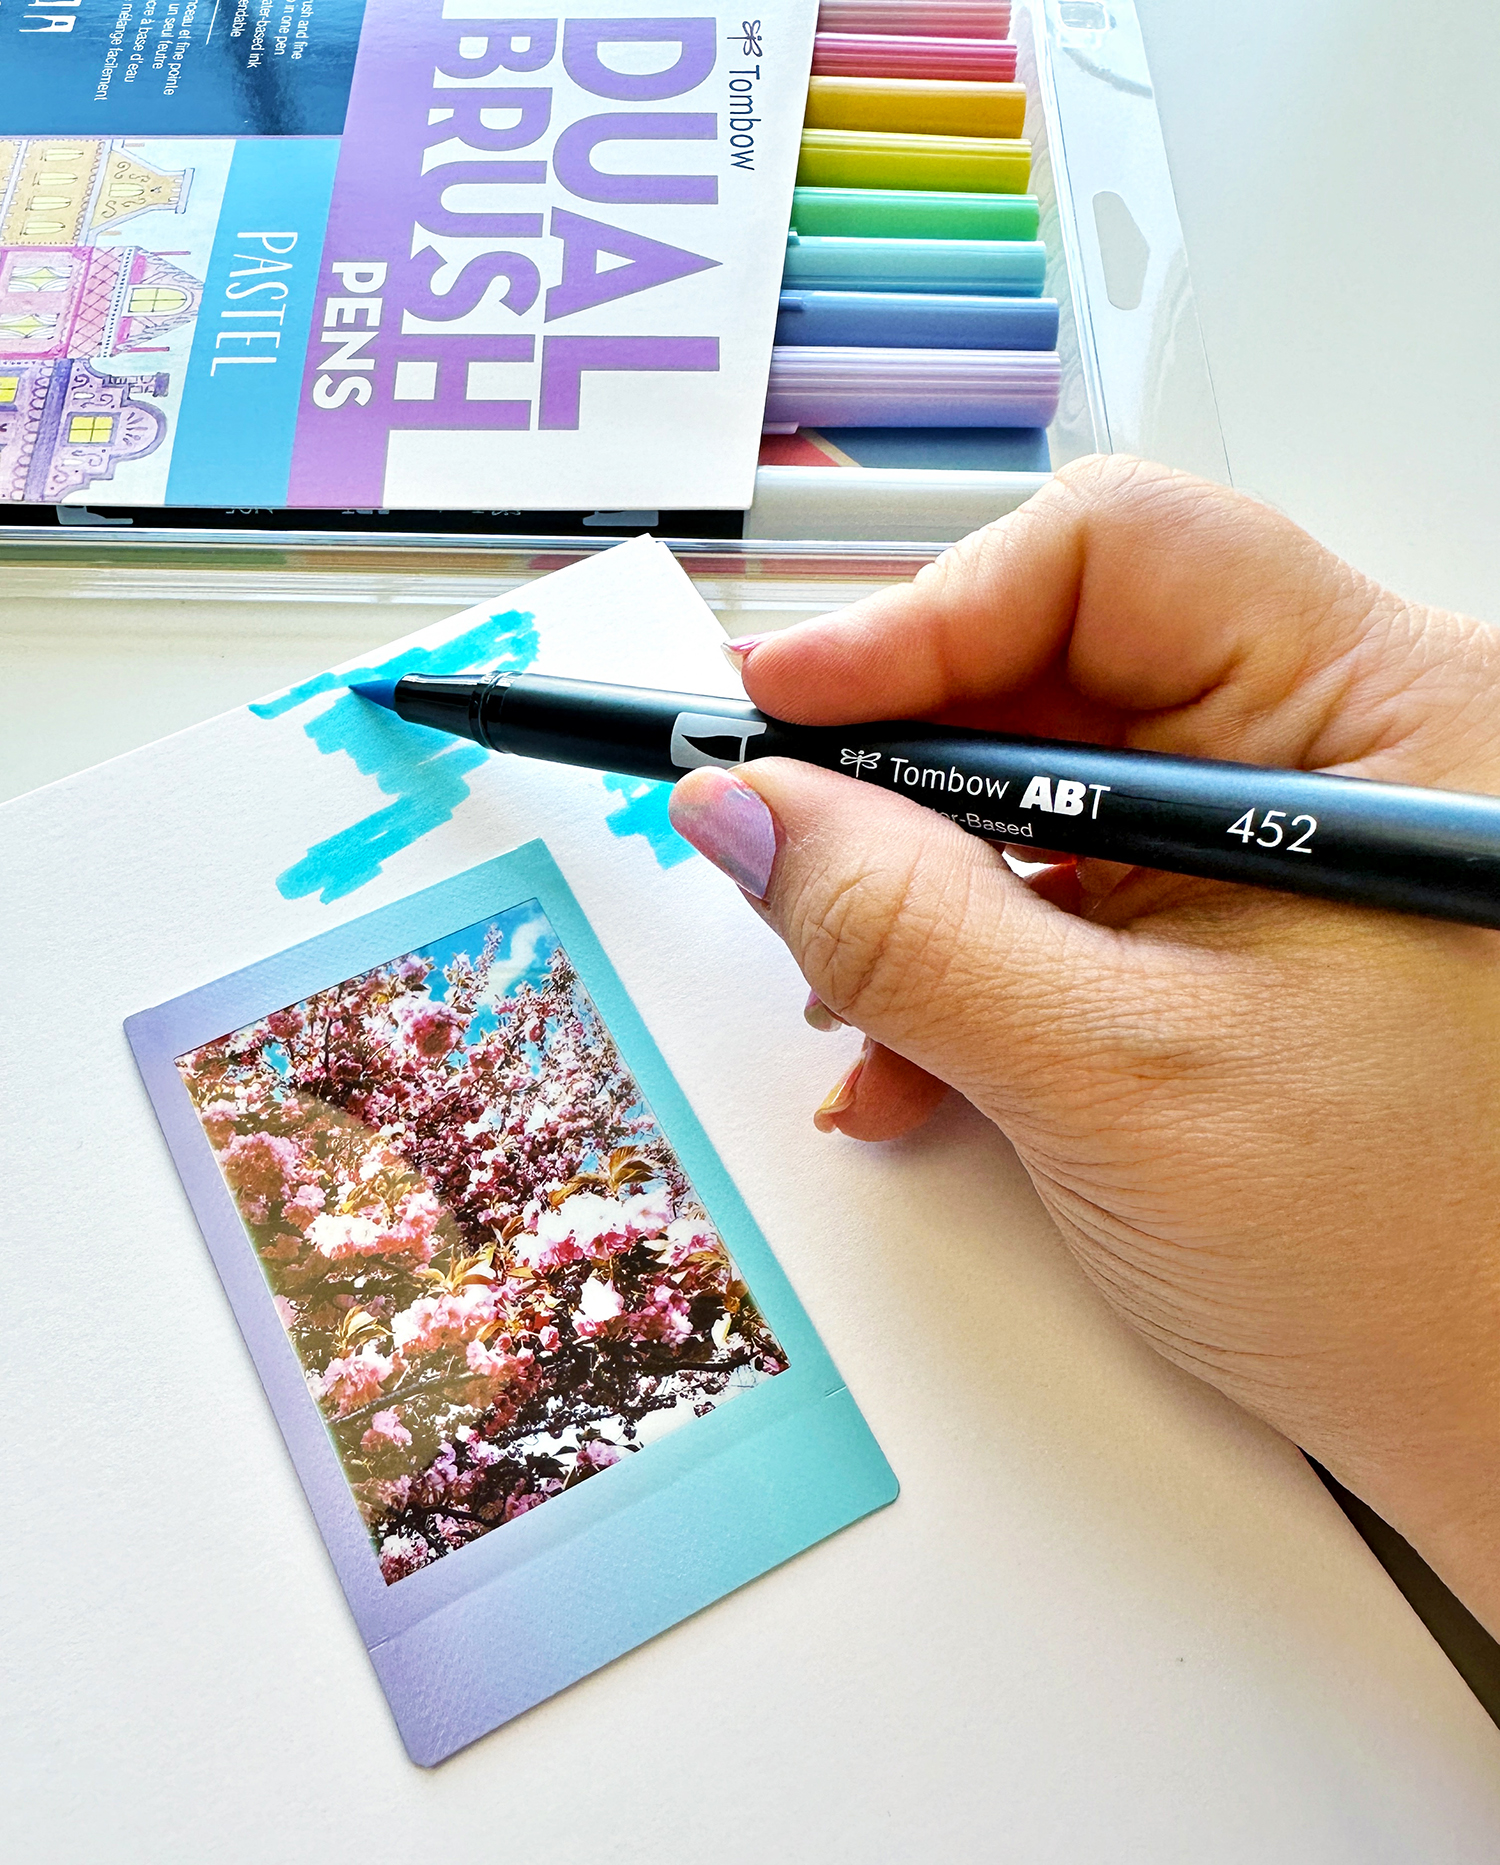
This is optional: Add splatters! Scribble with the Tombow Dual Brush Pens on a Tombow Blending Palette. Add water and pick up the color with a brush. Tap on the brush to create splatters. I used the darkest colors from the Tombow Dual Brush Pens Pastel Set: 723 Pink, 062 Pale Yellow, and 452 Process Blue.
Step Two: Cover the back of the bookmark.
If the paper you used is not thick or strong enough and it warps you can add pattern paper to the back to make it strong an keep it straight. You can also fold the paper you watercolored to have a pattern on both sides.
Step Three: Decorate the bookmark!
I wanted to add foiling under the photo so I used the Tombow MONO Adhesive Dots to create a pattern.
Use foil sheets on top of the adhesive. You can also use the Tombow MONO Multi XL Liquid Glue after it’s dry to foil paper or embellishments.
To add ribbon to the bottom with the bookmark use the Tombow MONO XL Liquid Glue.
To add the photo to the bookmark I used the Tombow MONO Permanent Adhesive. I also added a few stickers to finish the bookmark.
Put a photo of a favorite memory or a cozy vibe image to create your own memory bookmark.
Show us your memory bookmark using the hashtag #tombowusa!