Hey Tombow friends, it’s Katie here to show you how to create fun Summer Envelope Art using Tombows Irojiten Colored Pencils! There’s something magical about receiving cards in the mail, especially in today’s digital era where happy mail from a friend feels extra special! This summer, I’m excited to send out more letters, beginning with adding some artistic flair to the envelopes!
Supplies:
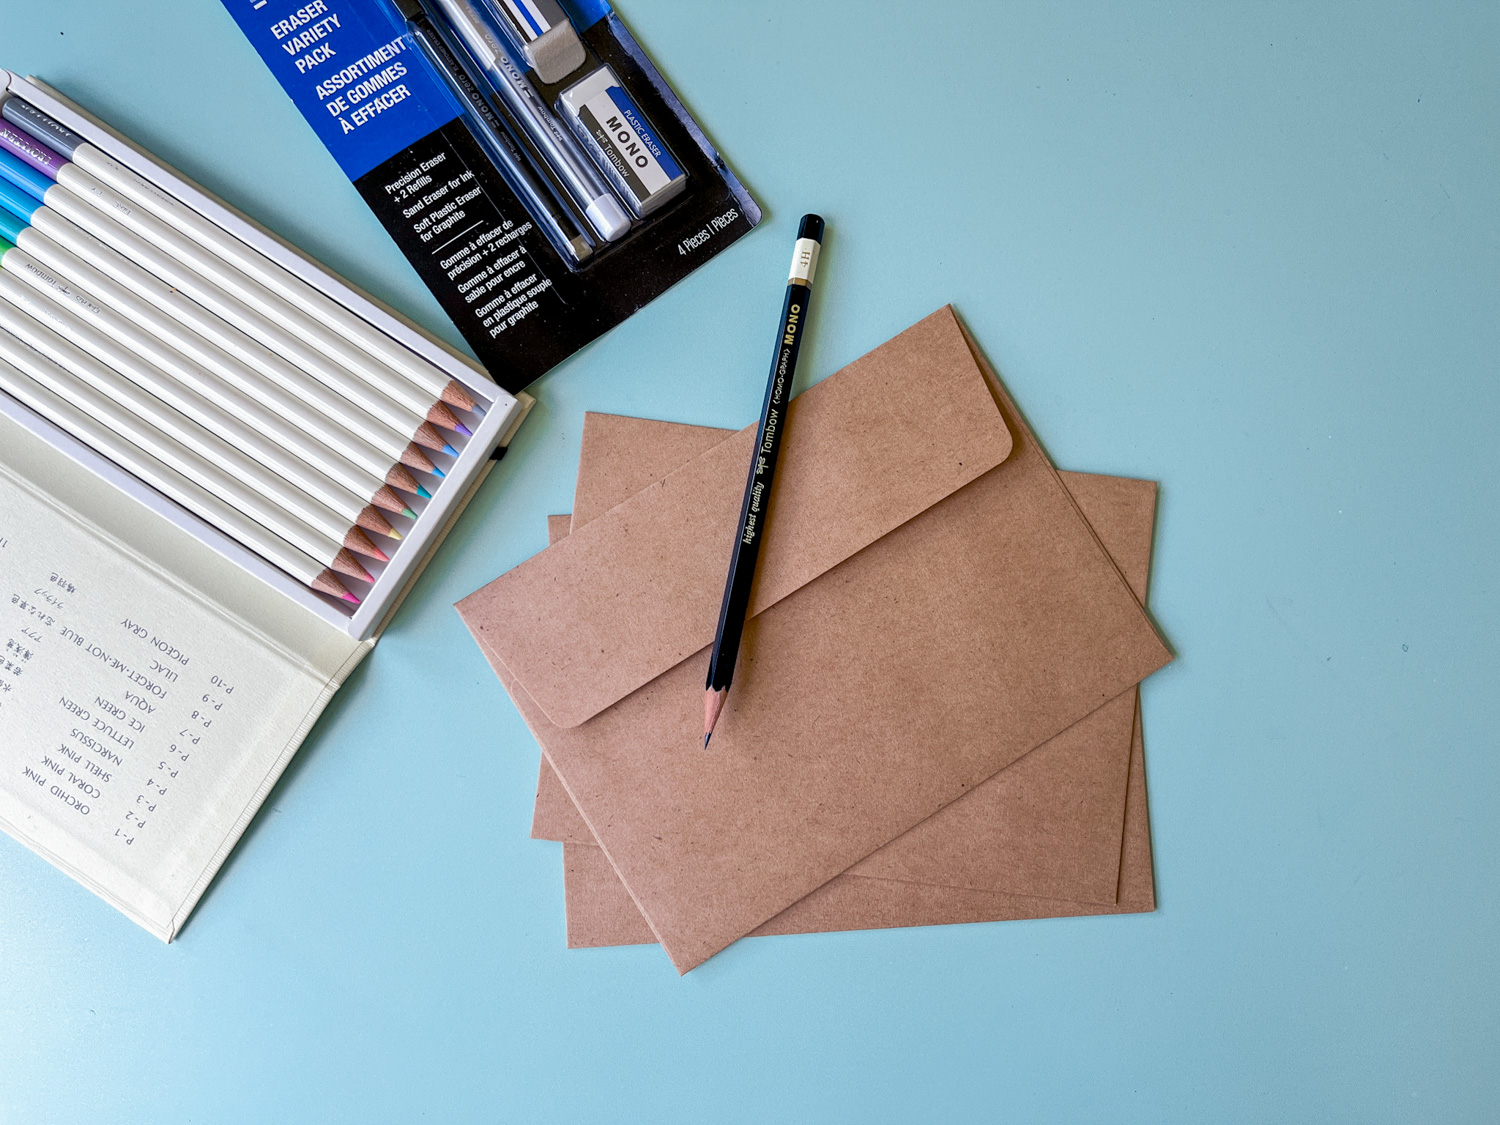
- Tombow Irojiten Colored Pencils Dictionary, Rainforest
- Kraft Paper Envelopes
- Tombow Eraser Variety Pack (I love that this pack includes the MONO Sand Eraser, which is perfect for erasing colored pencil mistakes!)
- Tombow MONO Drawing Pencil
- Tombow MONO Drawing Pen
- Tombow Fudenosuke Brush Pen, Black, Hard Tip
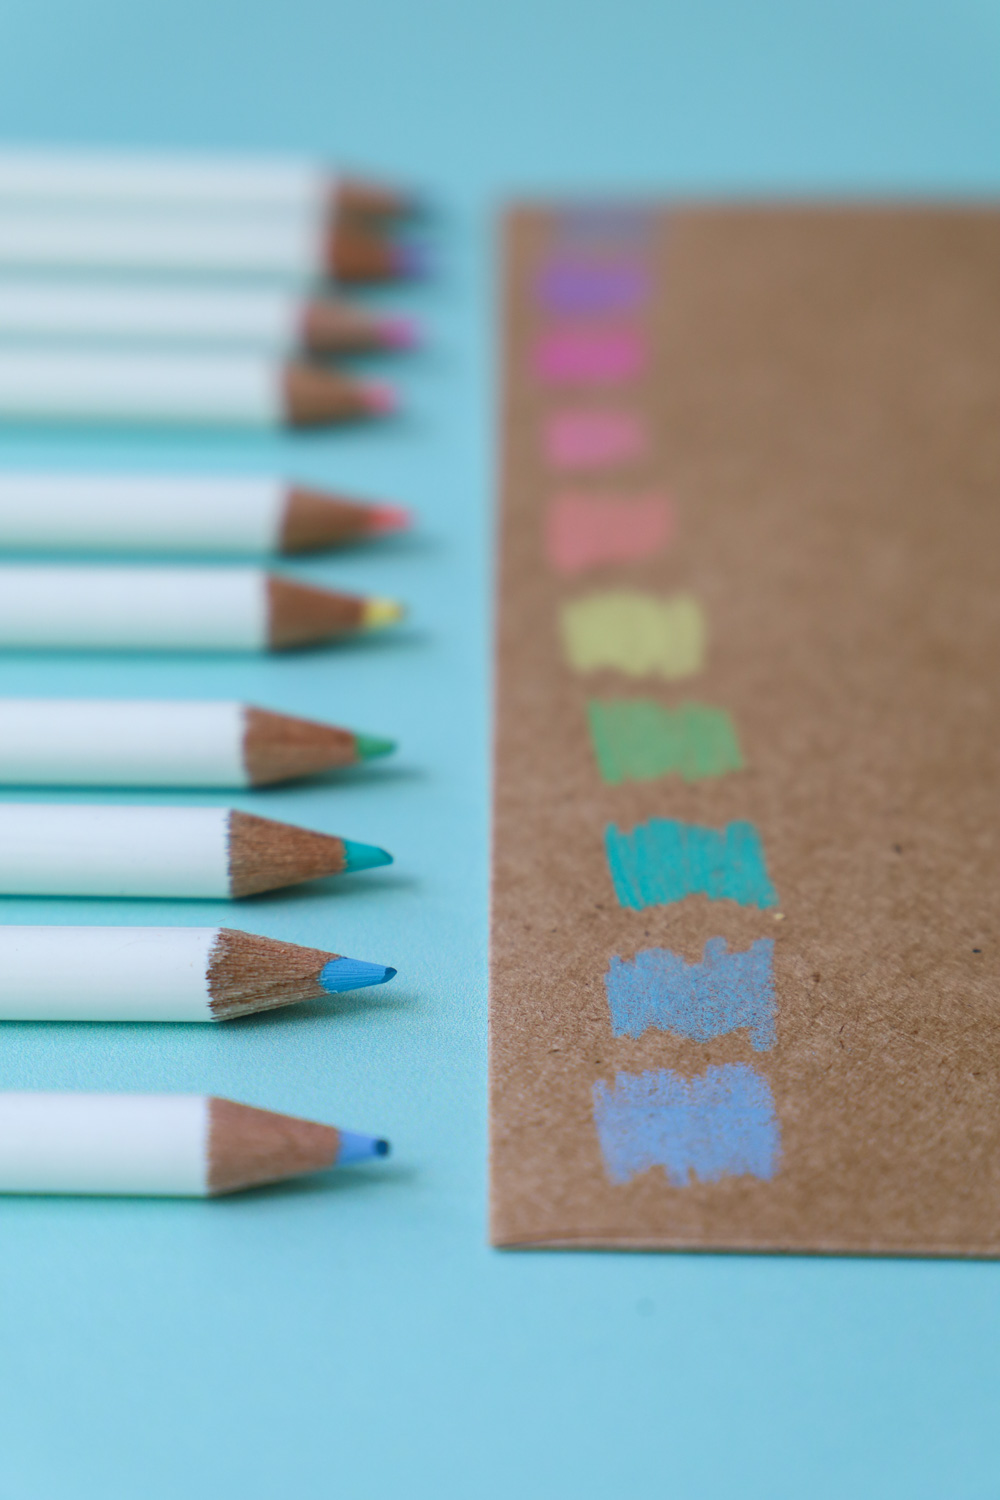
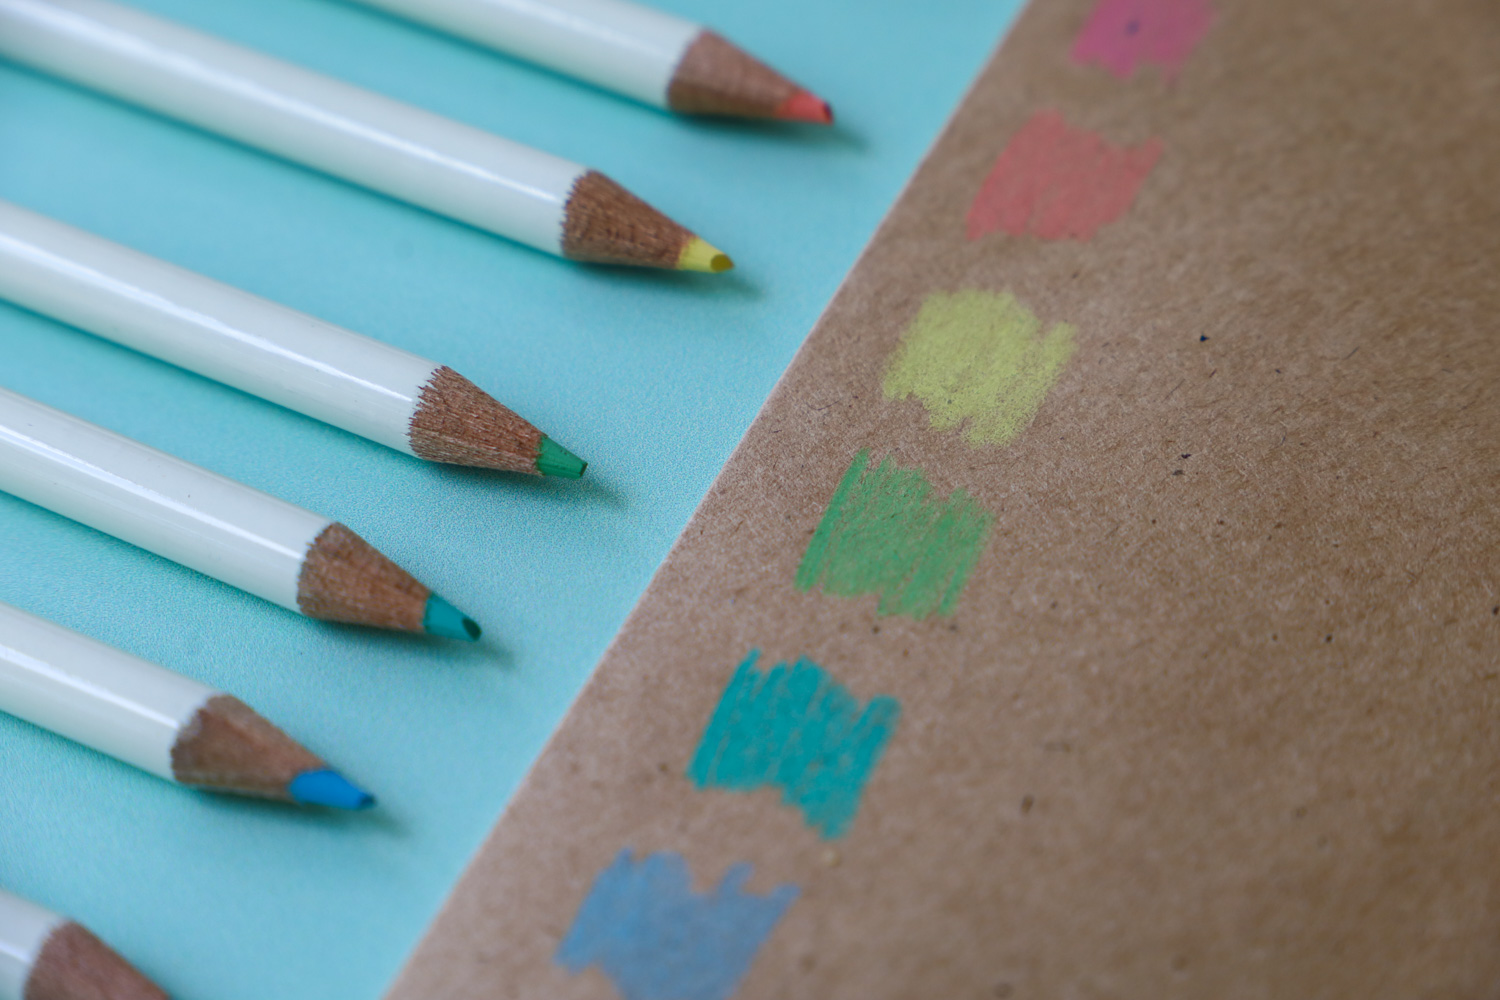
I always love to start by swatching out my colored pencils (especially if I’m using a colored paper) just to see how each color looks! The irojitens are so beautiful on kraft paper.
For these envelopes I’m using Volume 1 Pale Tone 1 & Volume 2 Vivid Tone 1 from the Irojiten Colored Pencils Rainforest Dictionary
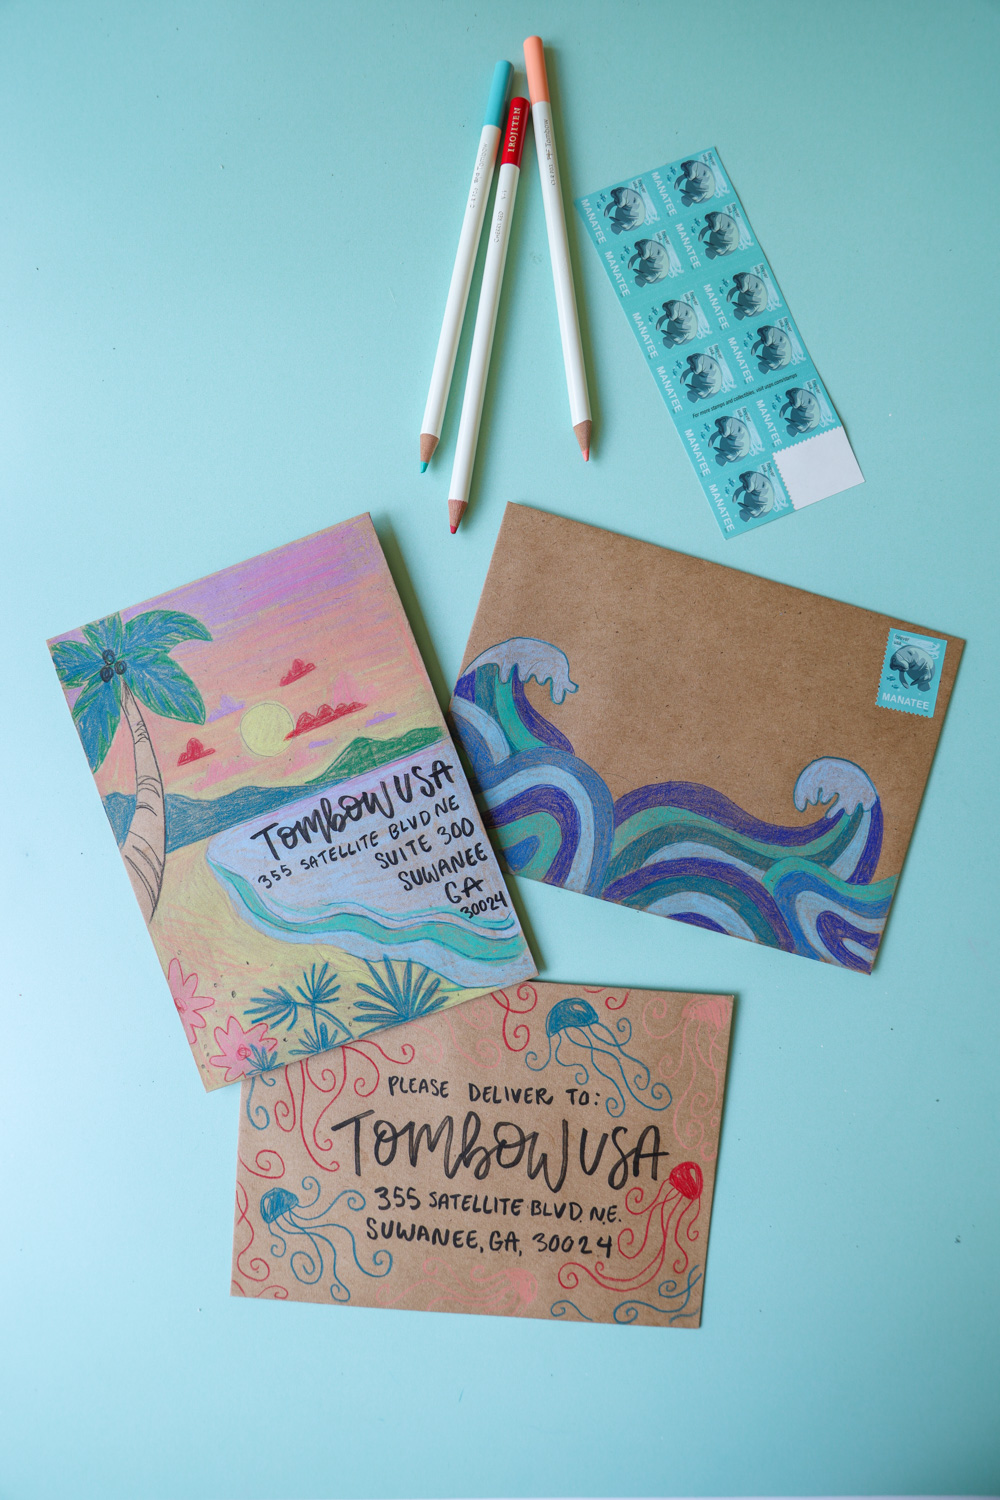
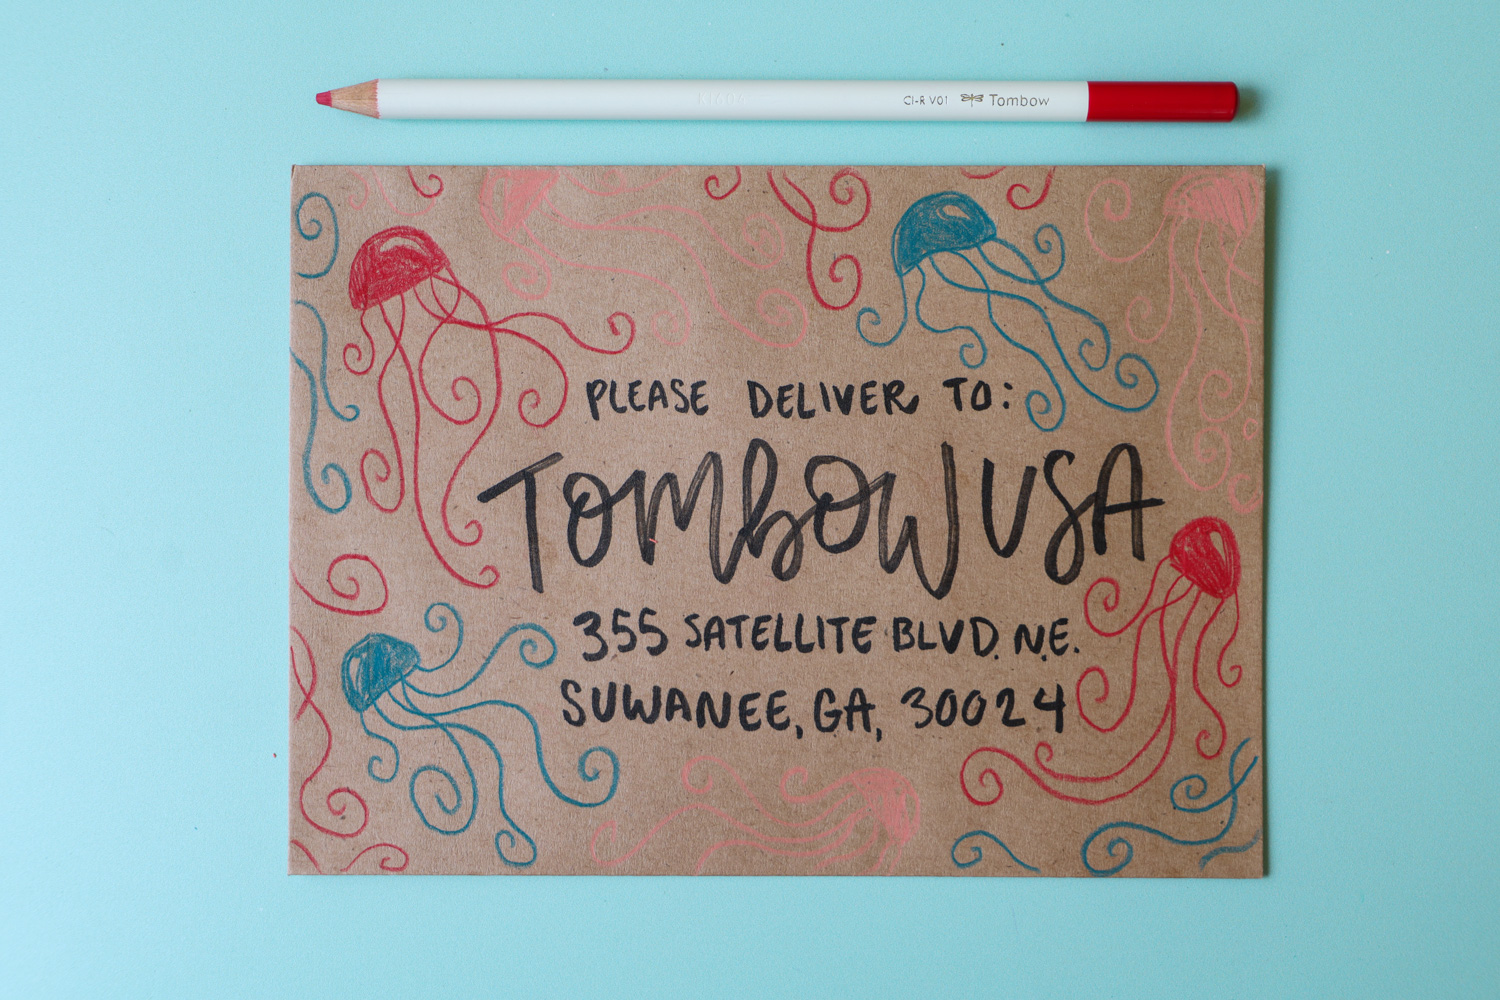
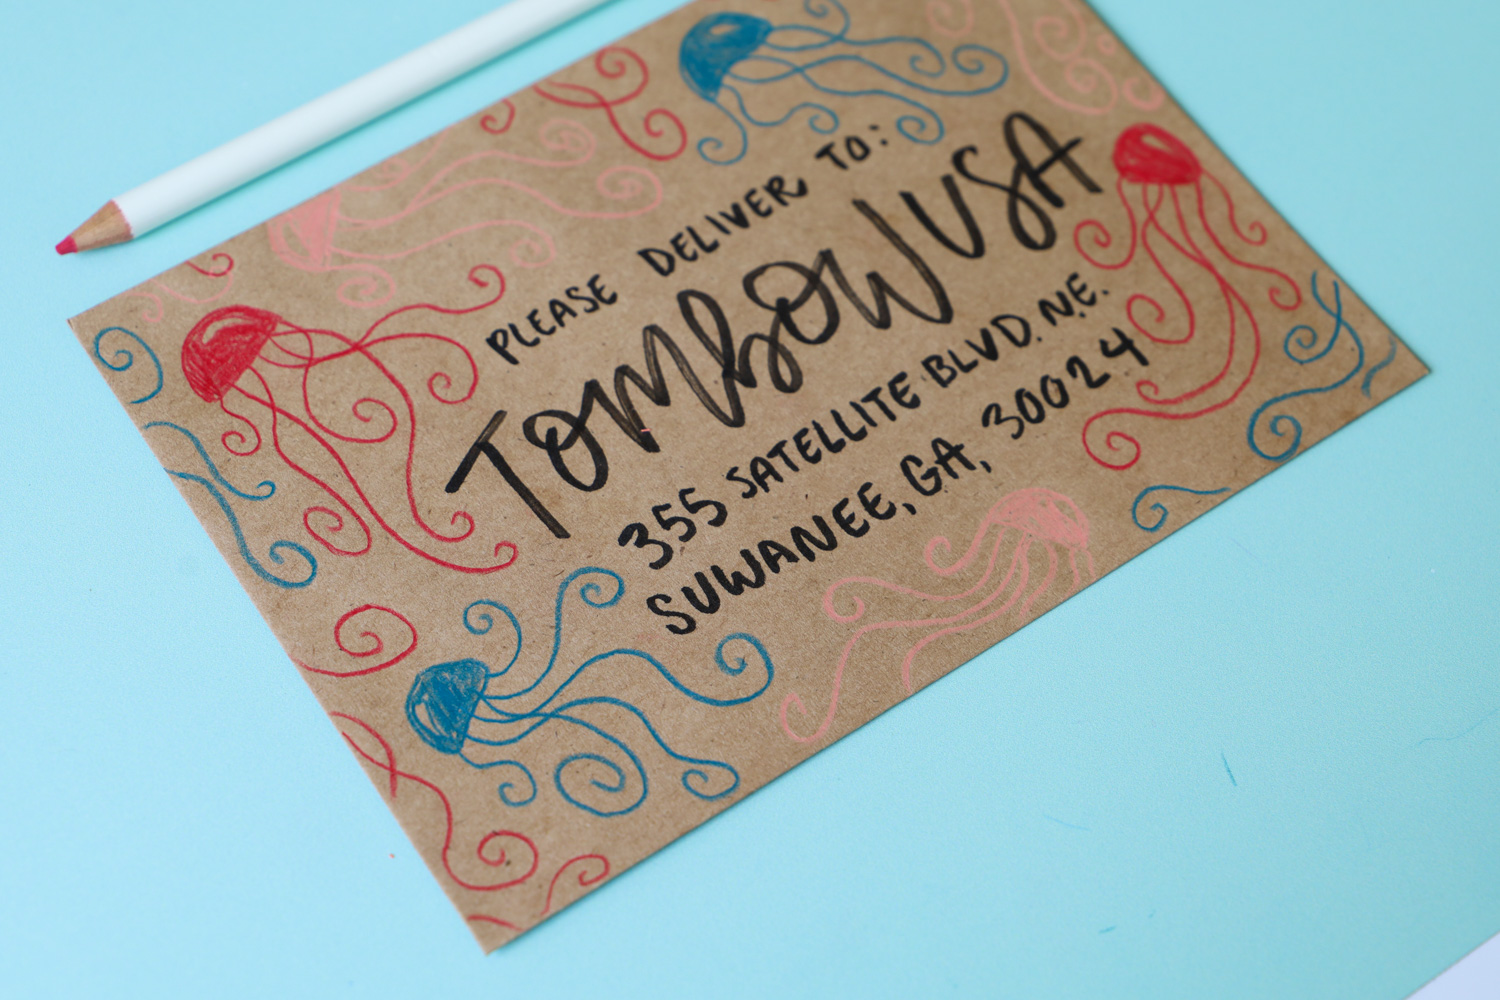
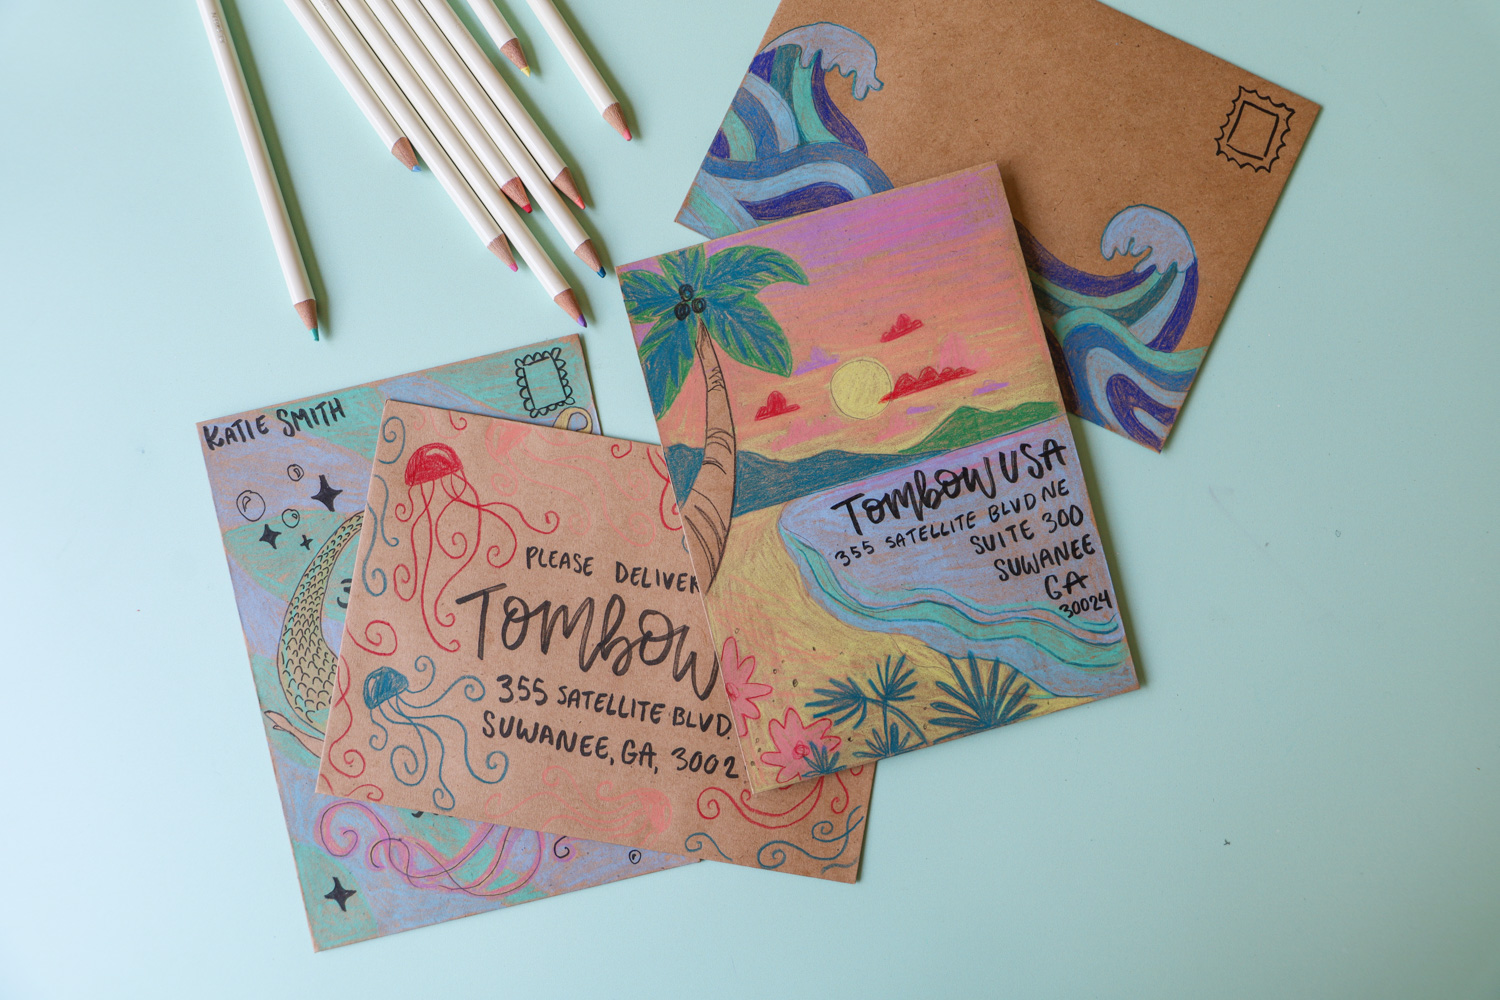
Envelope #1: Create a pattern
This is such an easy way to add a bit of fun to an envelope without taking too much time. To create this jellyfish pattern: start by writing the address with a Fudenosuke Brush Pen, and then use the Irojiten Colored Pencils to draw jellyfish all around it. Don’t worry about making them perfect, just give them fun squiggly tentacles!
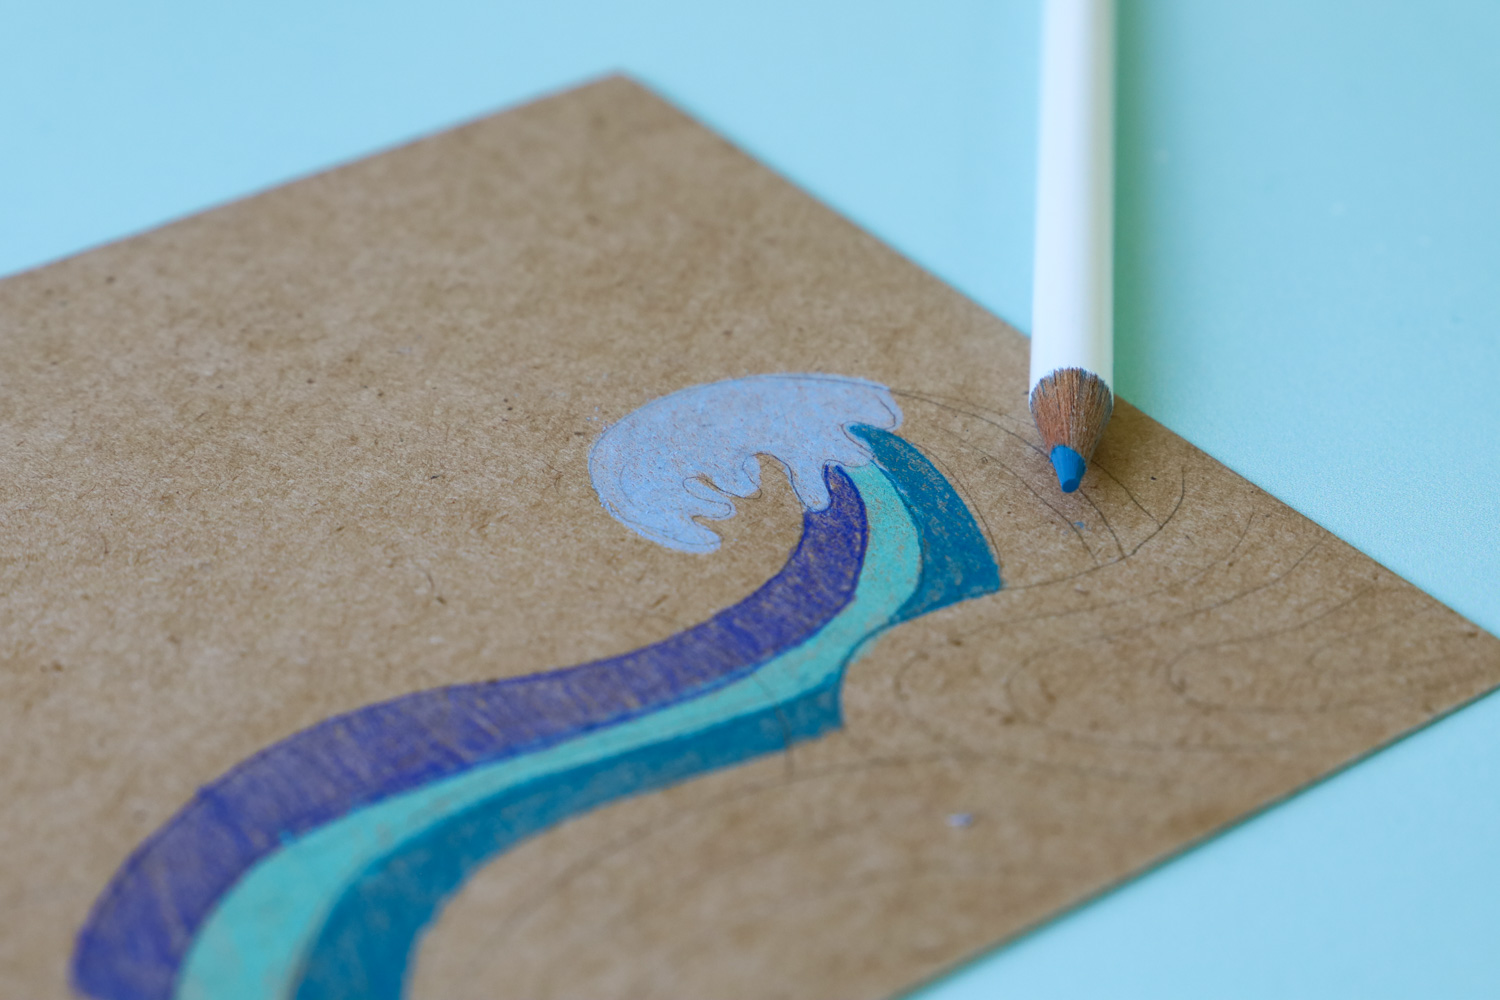
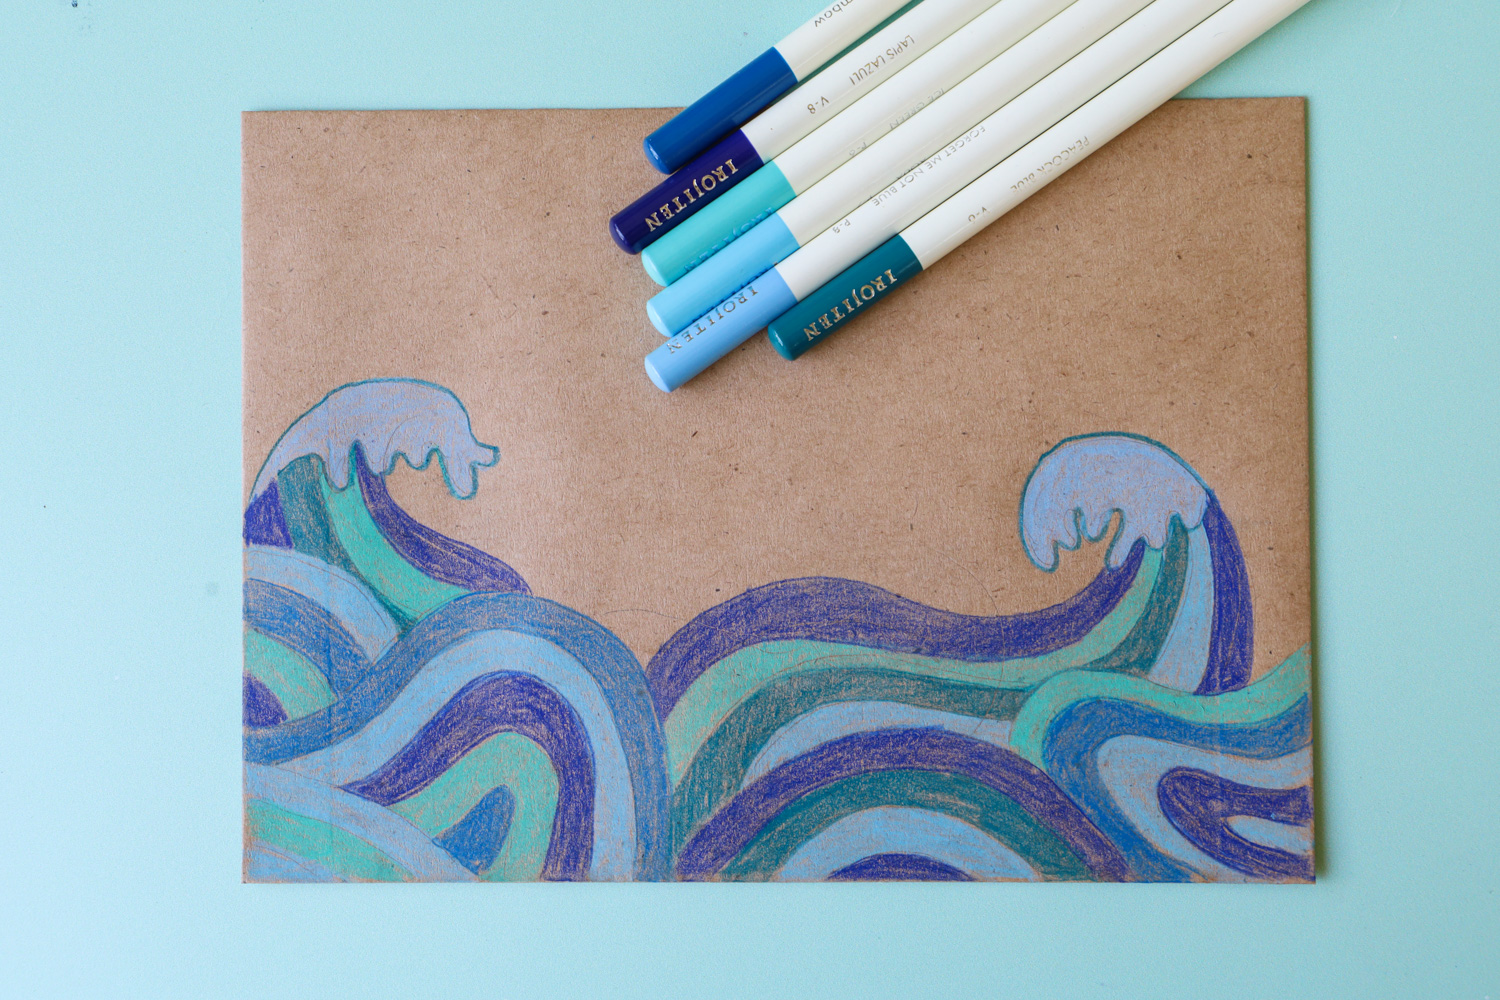
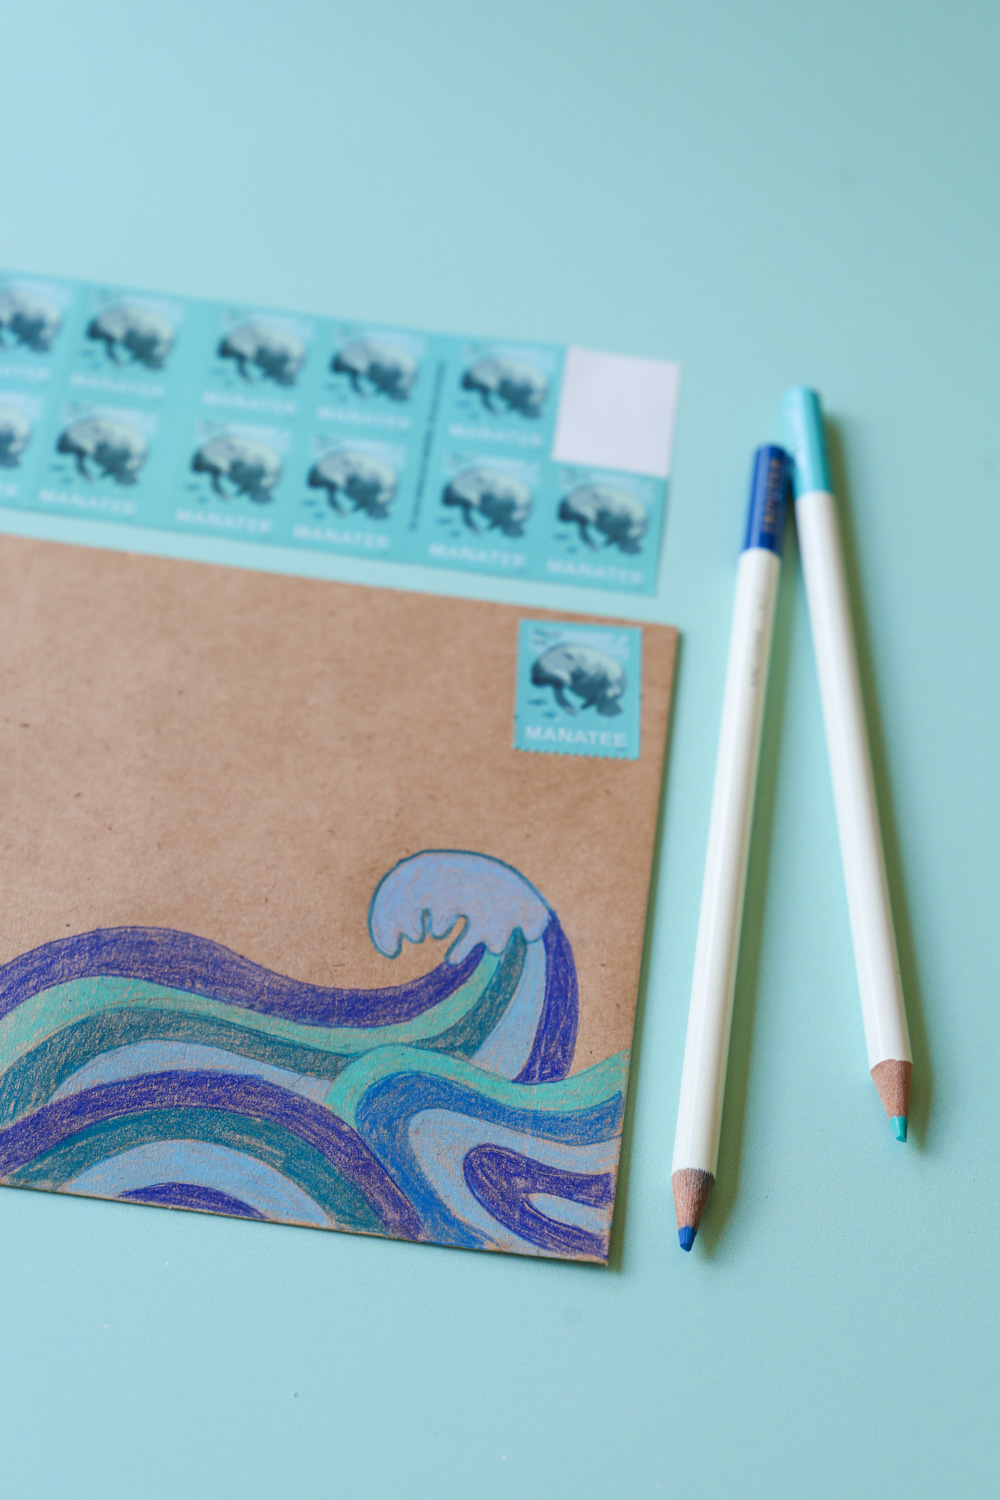
Envelope #2: Add waves to the bottom half!
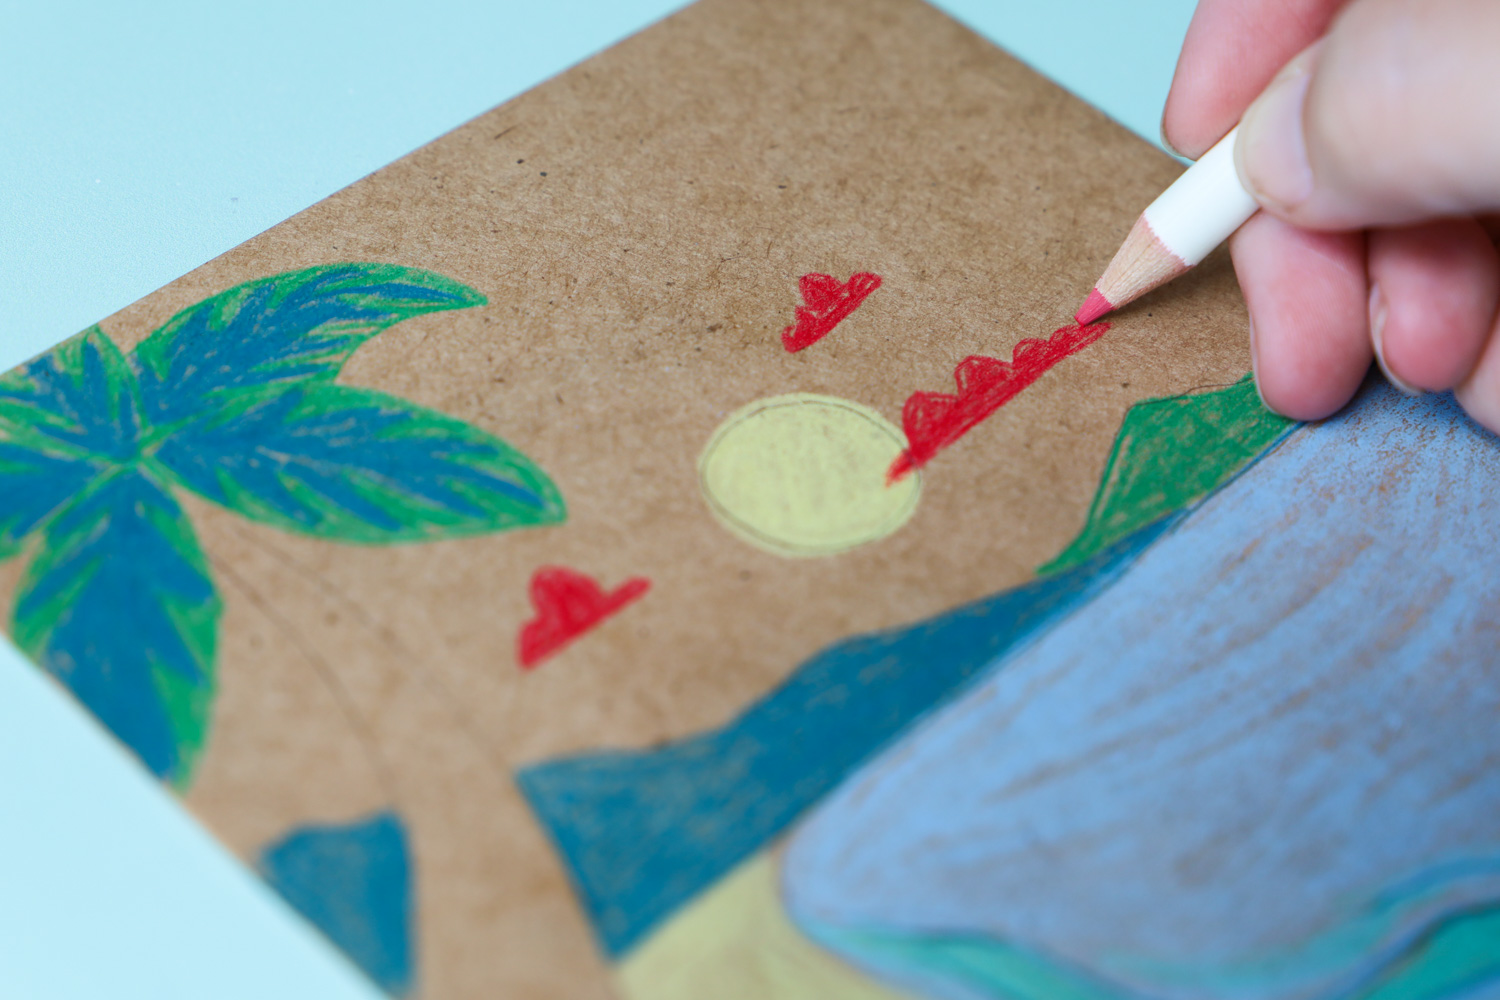
Focus on just the bottom half of the envelope but adding some bright ocean waves to it. I recommend sketching them out first in pencil, and then filling in the lines with different shades of blue colored pencil.
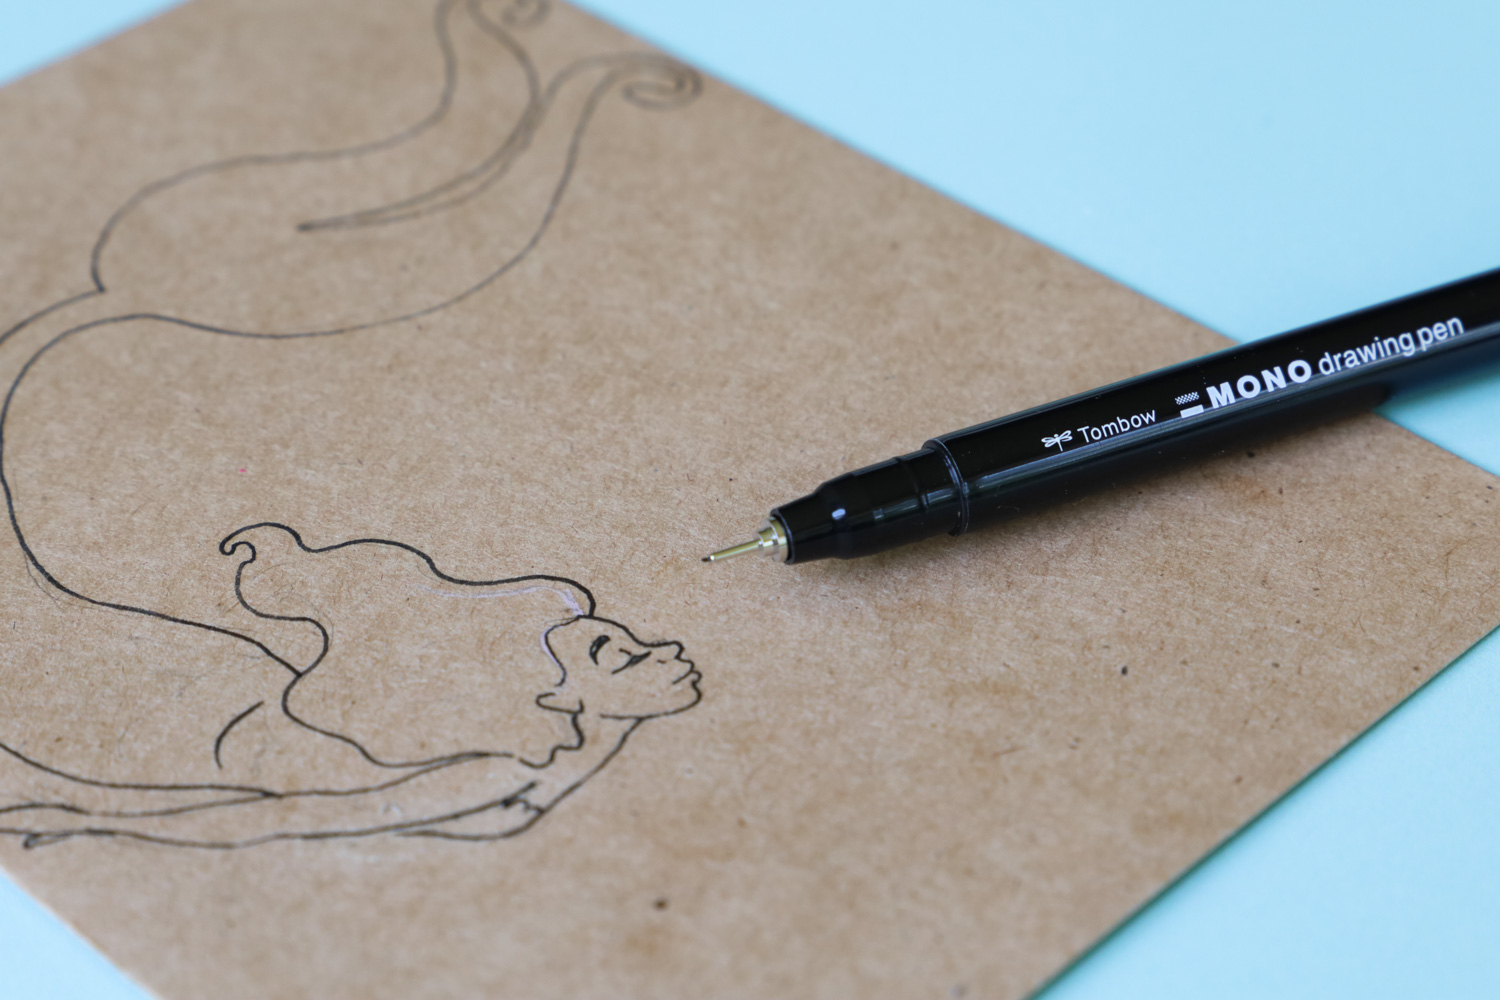
Envelope #3: Draw in ink first!
If you love black outlines as much as I do, try sketching/doodling in ink first using a MONO Drawing Pen, and then going back in to fill in the lines with the colored pencils!
For sketching the small details of the mermaid, I’m using the 005 size tip MONO Drawing Pen!

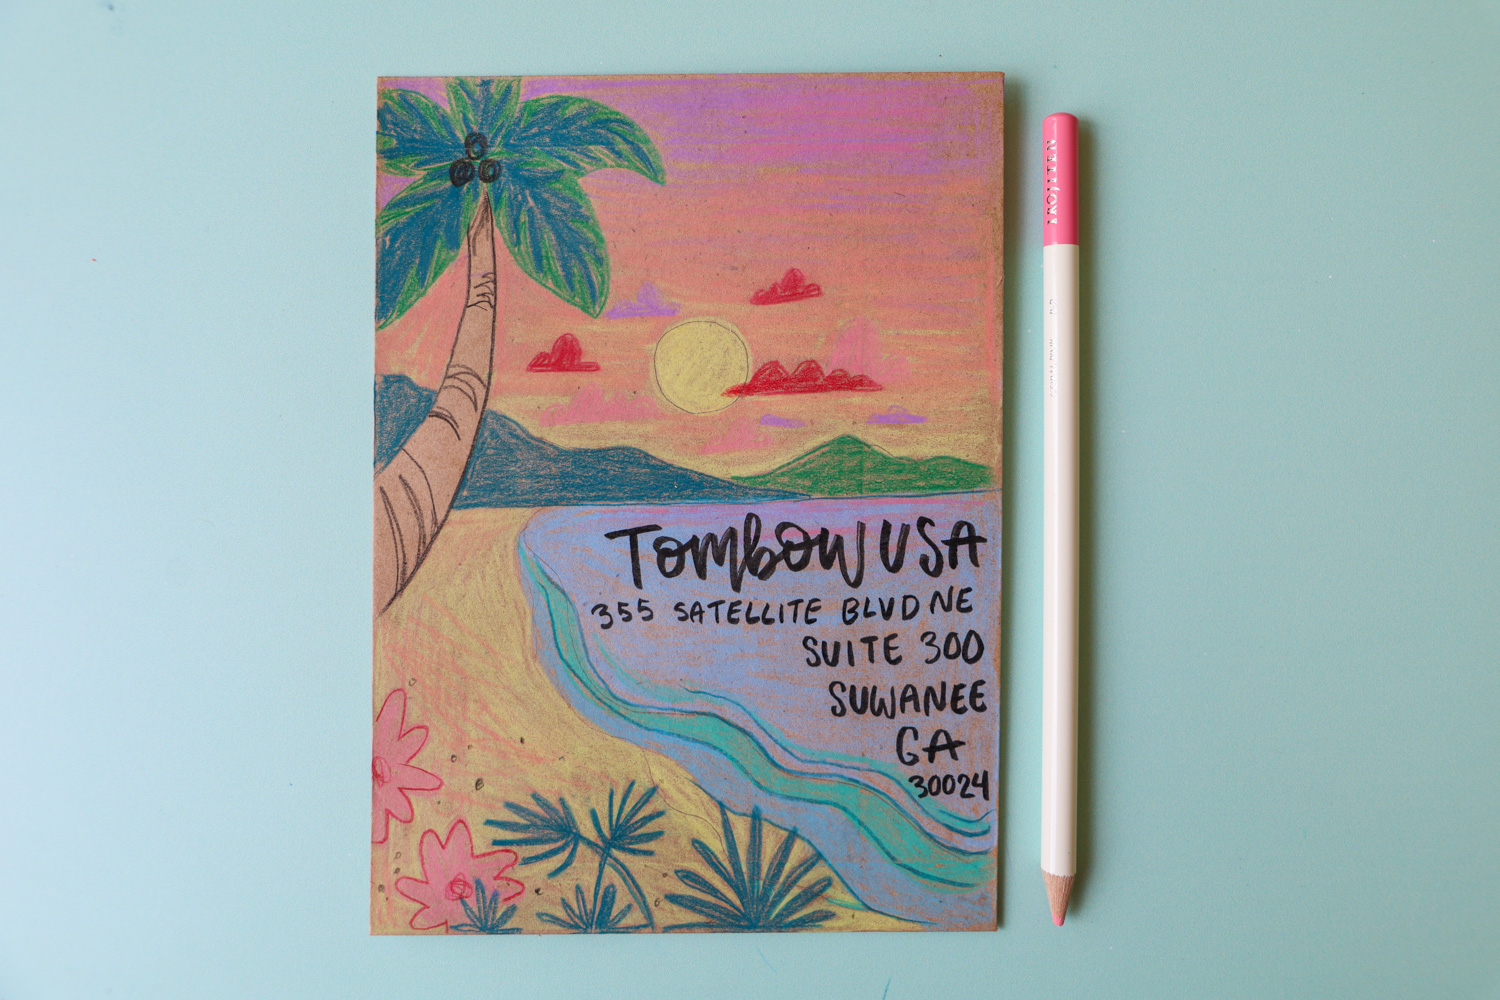
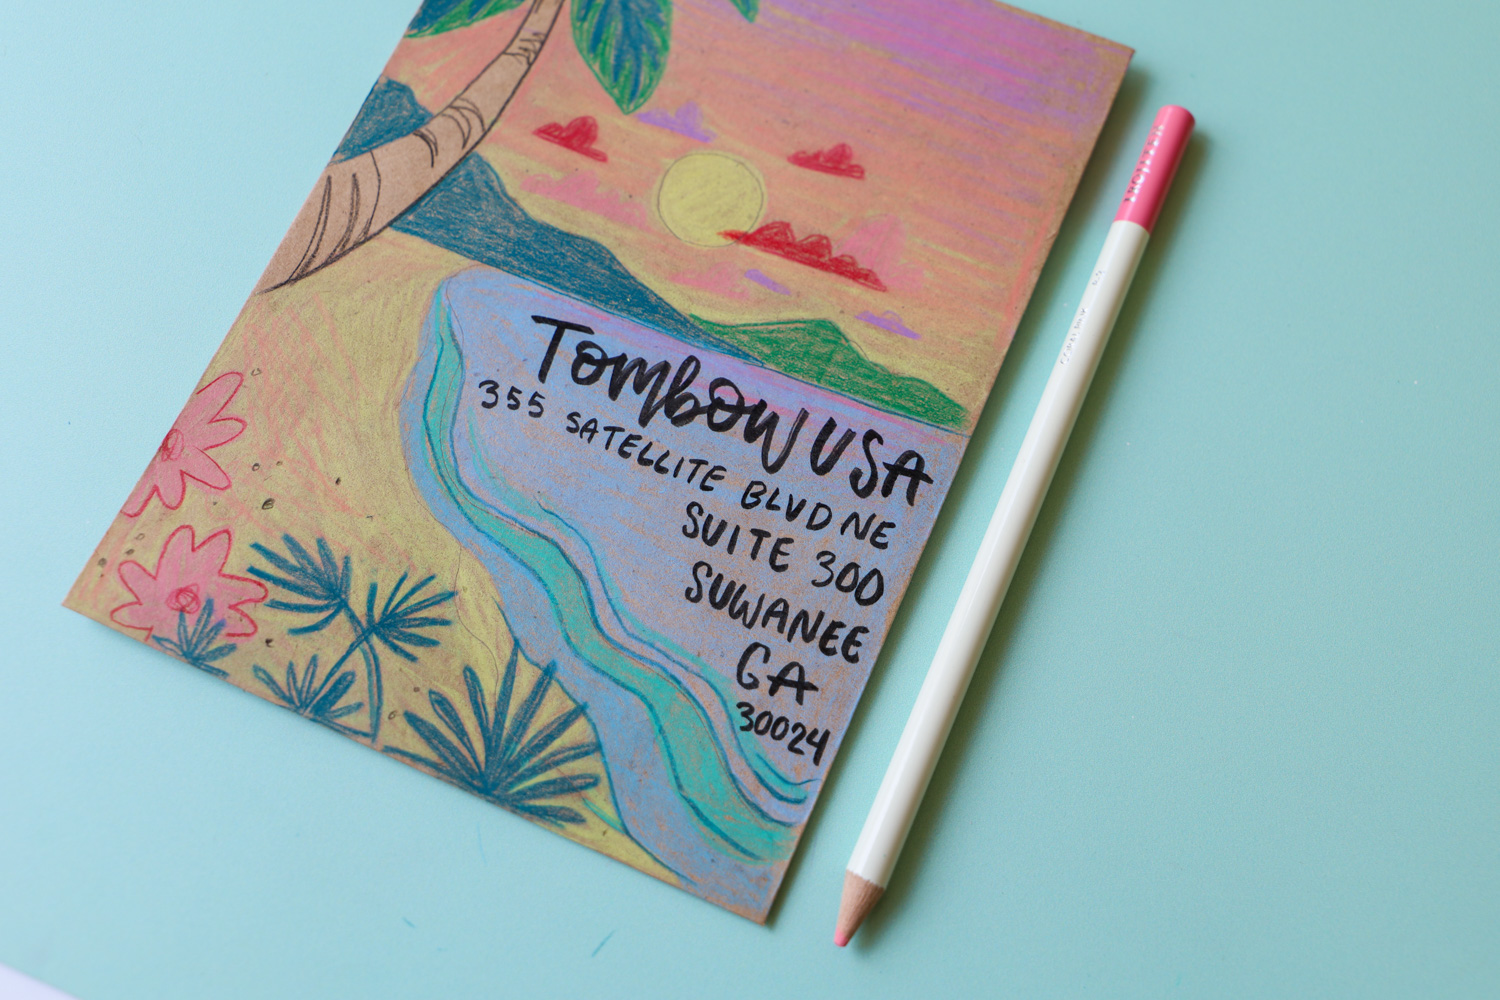
Envelope #4: Go vertical! Bonus idea: Make it a landscape!
There are no rules that say you have to address an envelope horizontally, so why not turn that envelope 90 degrees!
For a creative summer envelope idea, sketch out a beach scene, making sure to leave a big area to fill in the address, such as the the big blue ocean on my envelope below.
One last fun idea:
Match your envelope art to your stamps! I have these cute manatee stamps and tried to match the blues of my wave envelope to the stamps!
I hope you enjoyed these ideas! If you create your own envelope art using Tombow products, make sure to tag @tombowusa and @studio.katie on instagram so that we can see, we love connecting with you!
If you’re looking for more Happy Mail projects, check out these from the blog archive:
5 Ways to Letter Happy Mail Addresses
DIY Envelope Scrapbook You Can Mail
Simple Envelope Liner Tutorial