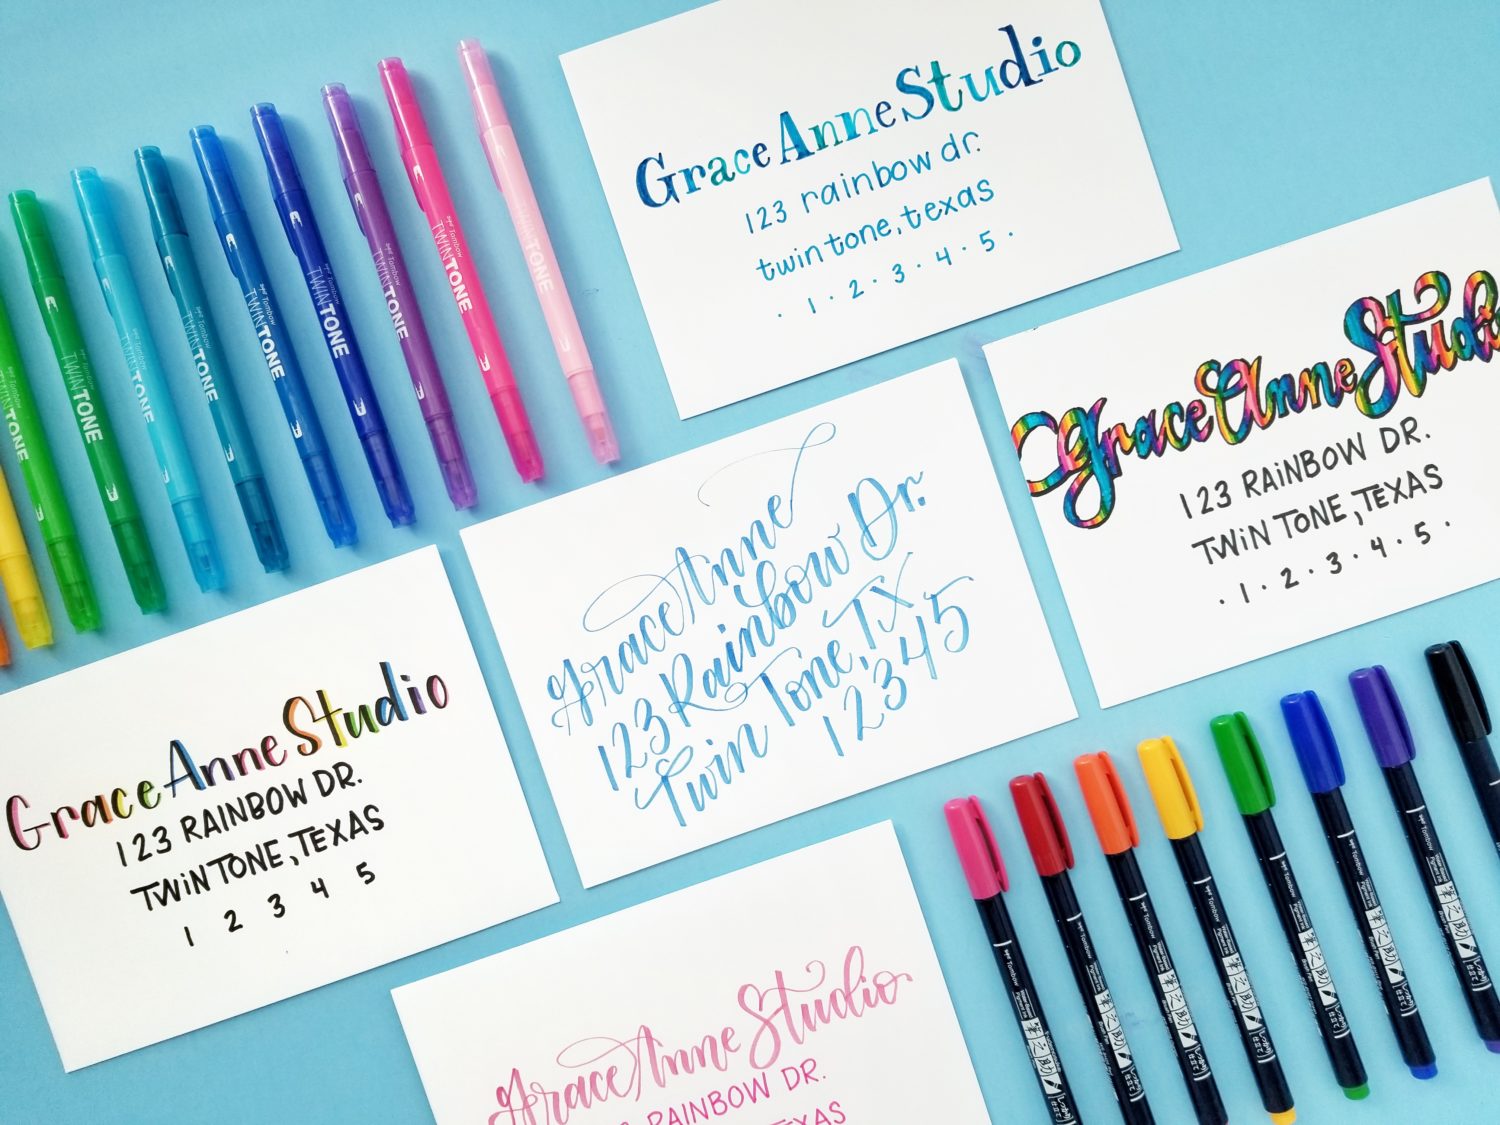
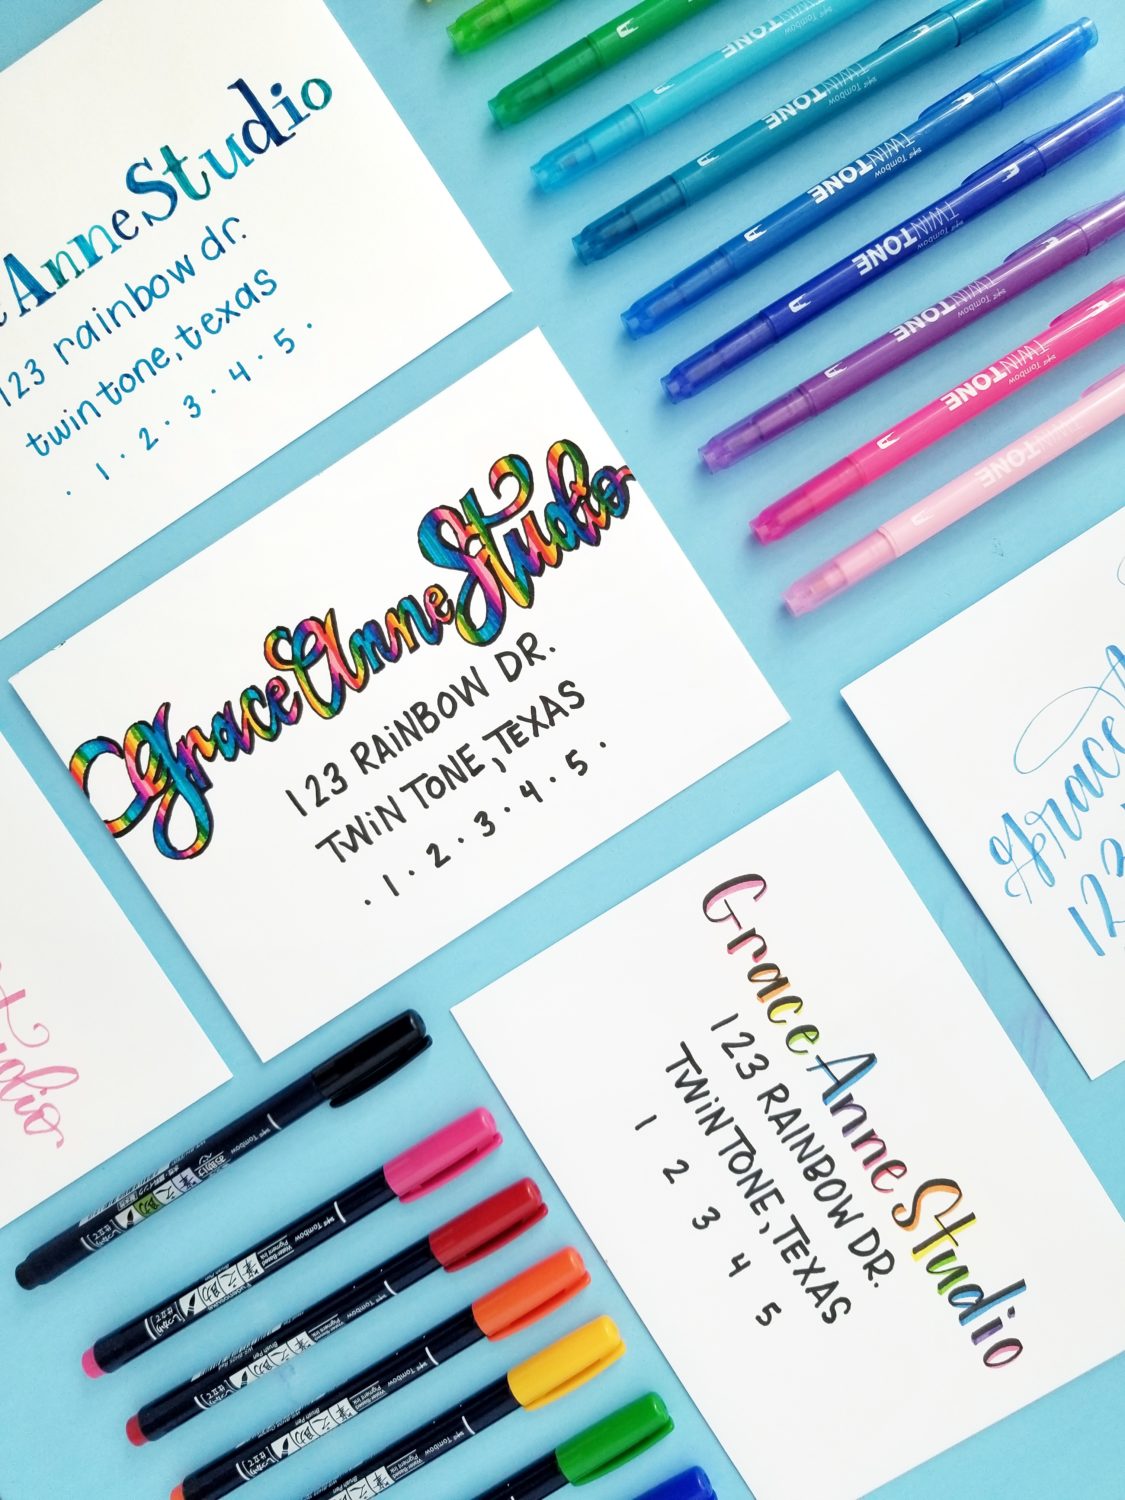
Hi there Tombow friends! It’s Grace from Grace Anne Studio. One of my absolute favorite things is getting and sending happy mail. Coming up with new ways to address them is half the fun and sometimes half the battle! Today, I’m doing away with the battle and walking you through 5 ways to letter your happy mail addresses. Grab your supplies and let’s get started!
Supplies
- Tombow TwinTone Marker Set, Rainbow
- Tombow Fudenosuke Colors Set, 10 Pack
- Tombow MONO Twin Permanent Marker
- Tombow MONO Graph Mechanical Pencil
- Tombow Dust Catch Eraser
- Triangle
- Laser Level or Ruler
- Letter Mate Envelope Addressing Template
- Blank Envelopes
- Dot grid notebook or lined paper
1. Simple Script and Sans Serif Address
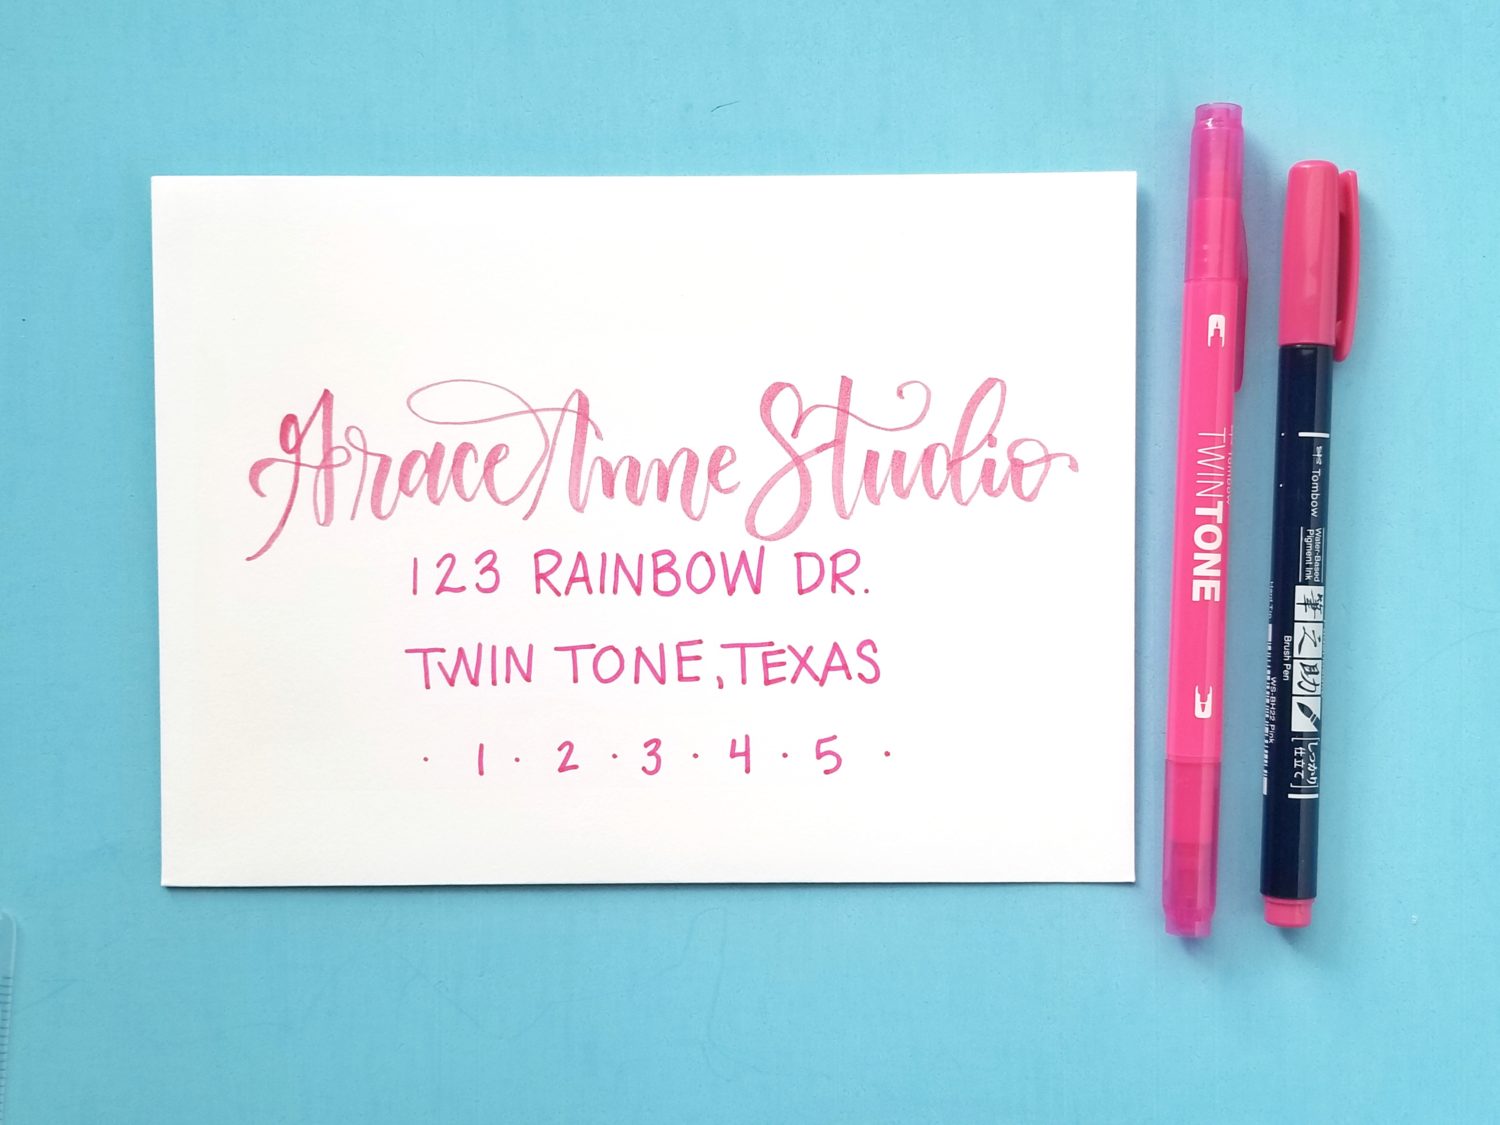
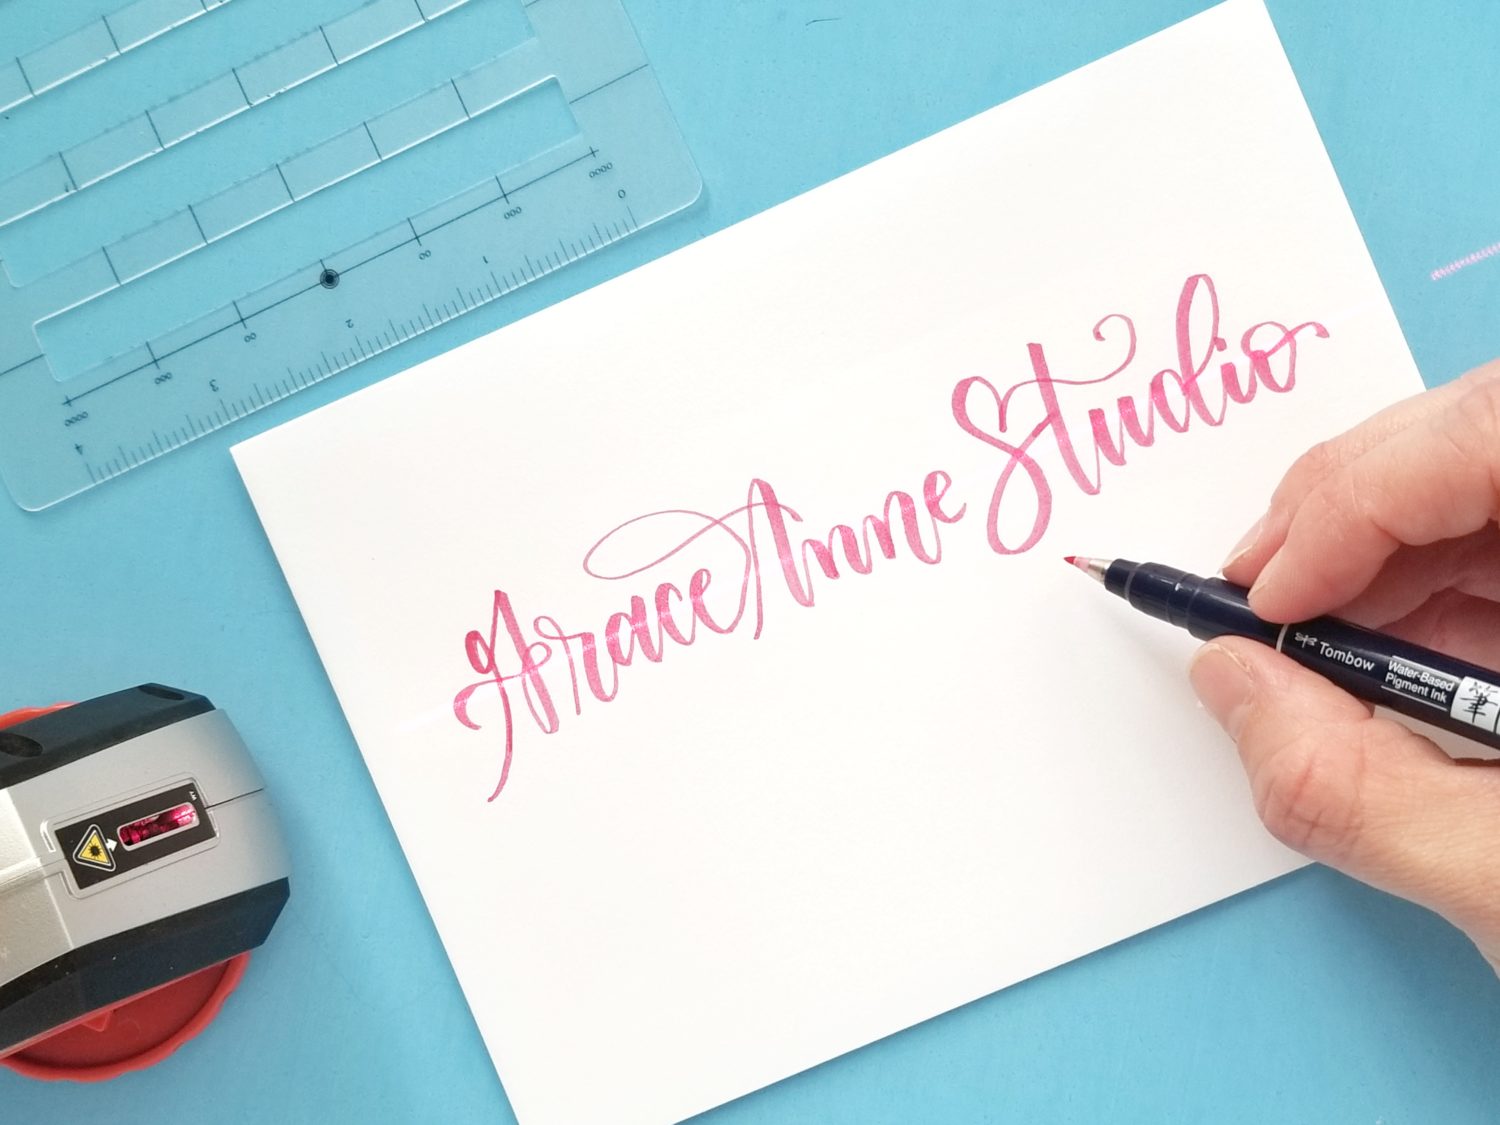
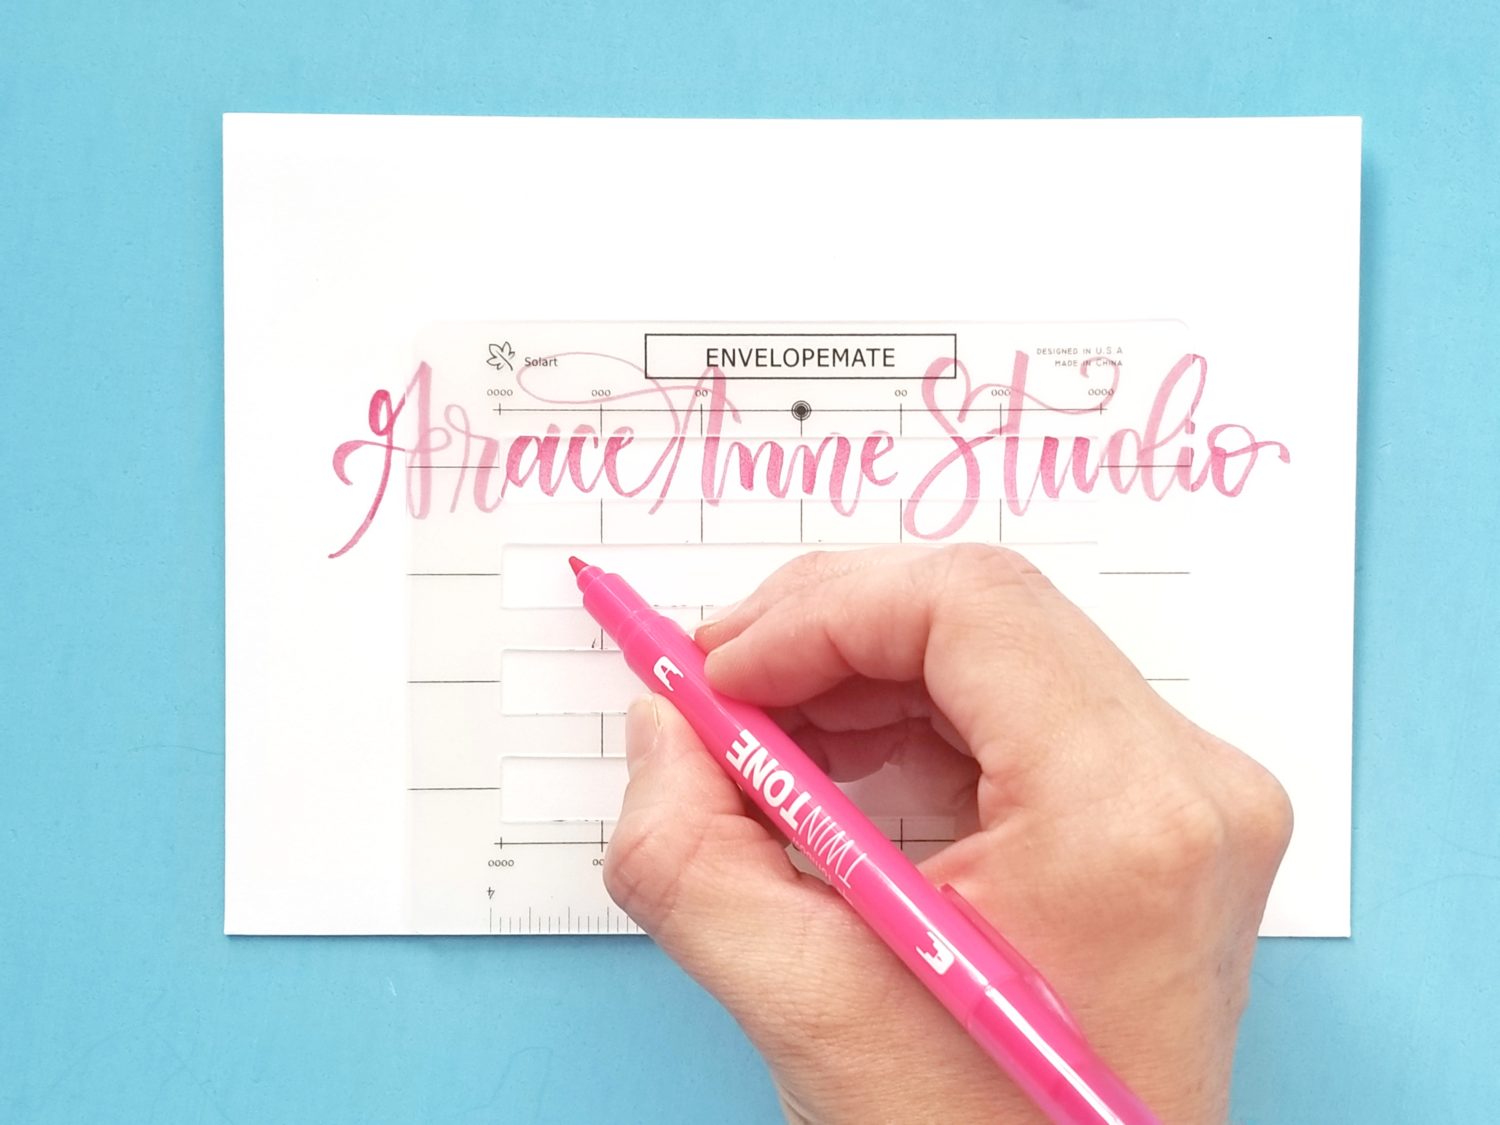
This option is great when you want to dress up your happy mail, but you don’t have a lot of time to complete the task. First, use your laser level to mark the baseline. Then, write your addressee’s name in Script. Next, use the Lettermate to fill in the rest of the address using a Sans Serif print. The Lettermate is SO GREAT for this because it helps you keep consistent spacing and alignment. Here I used the Pink Fudenosuke Brush Pen and the Bright Pink Rainbow TwinTone Marker to address the envelope.
2. Angled Script Address
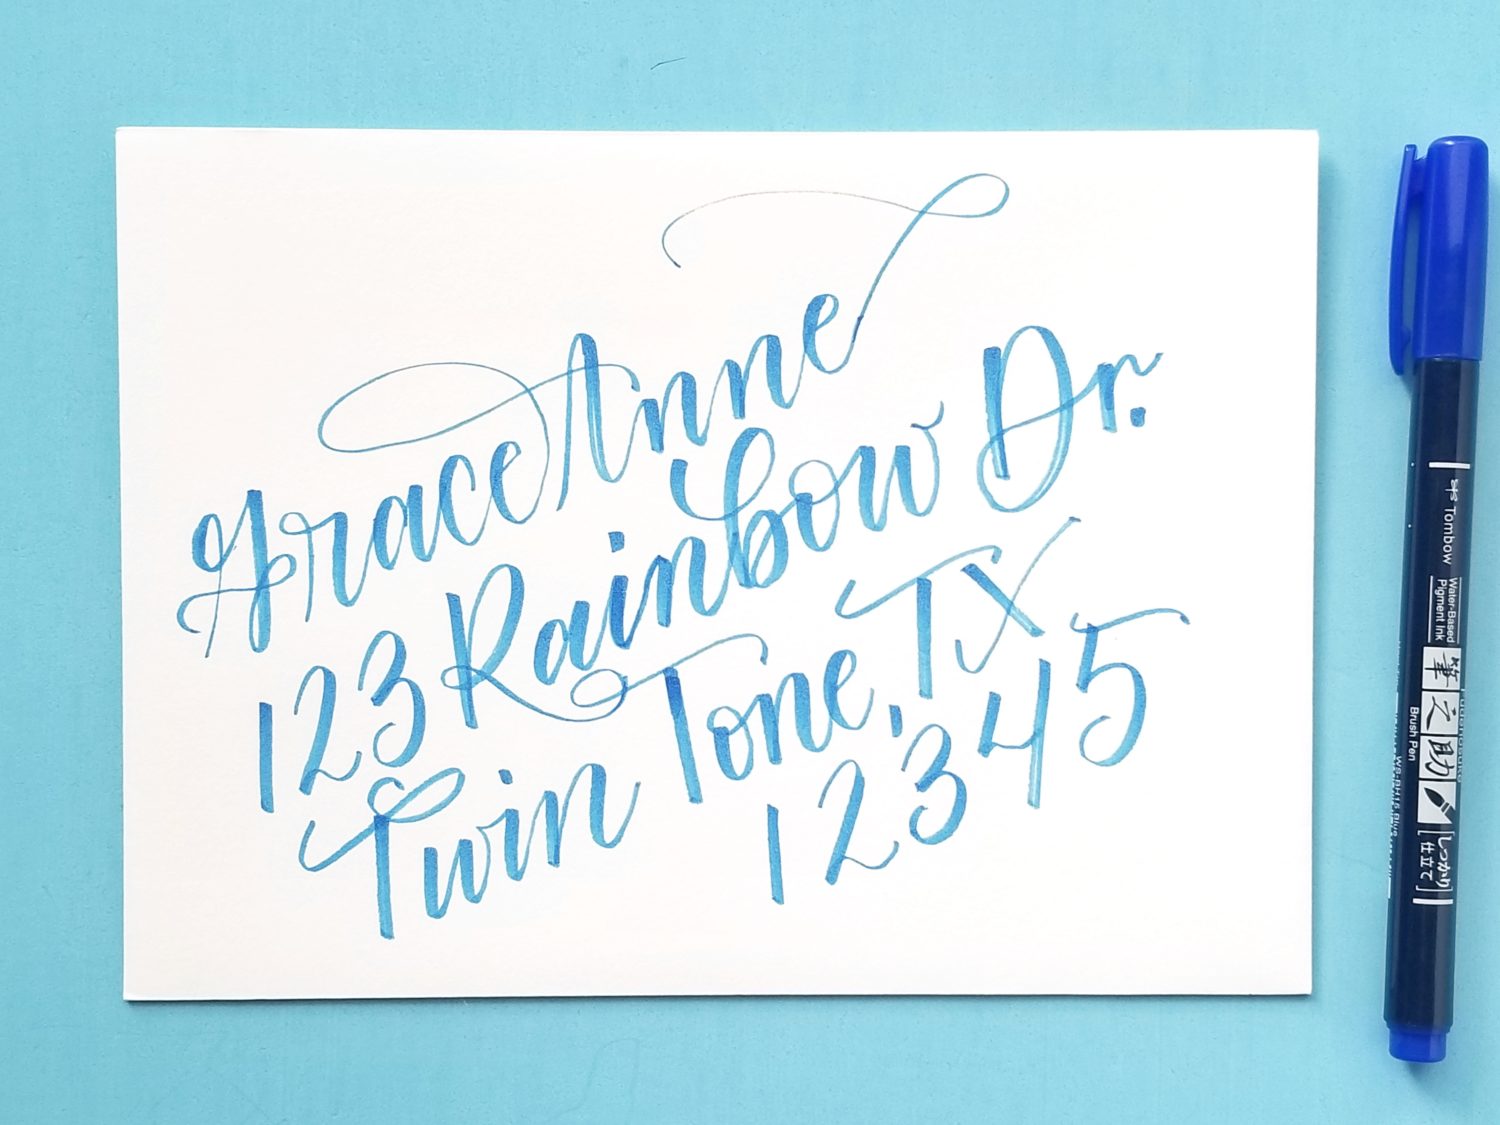
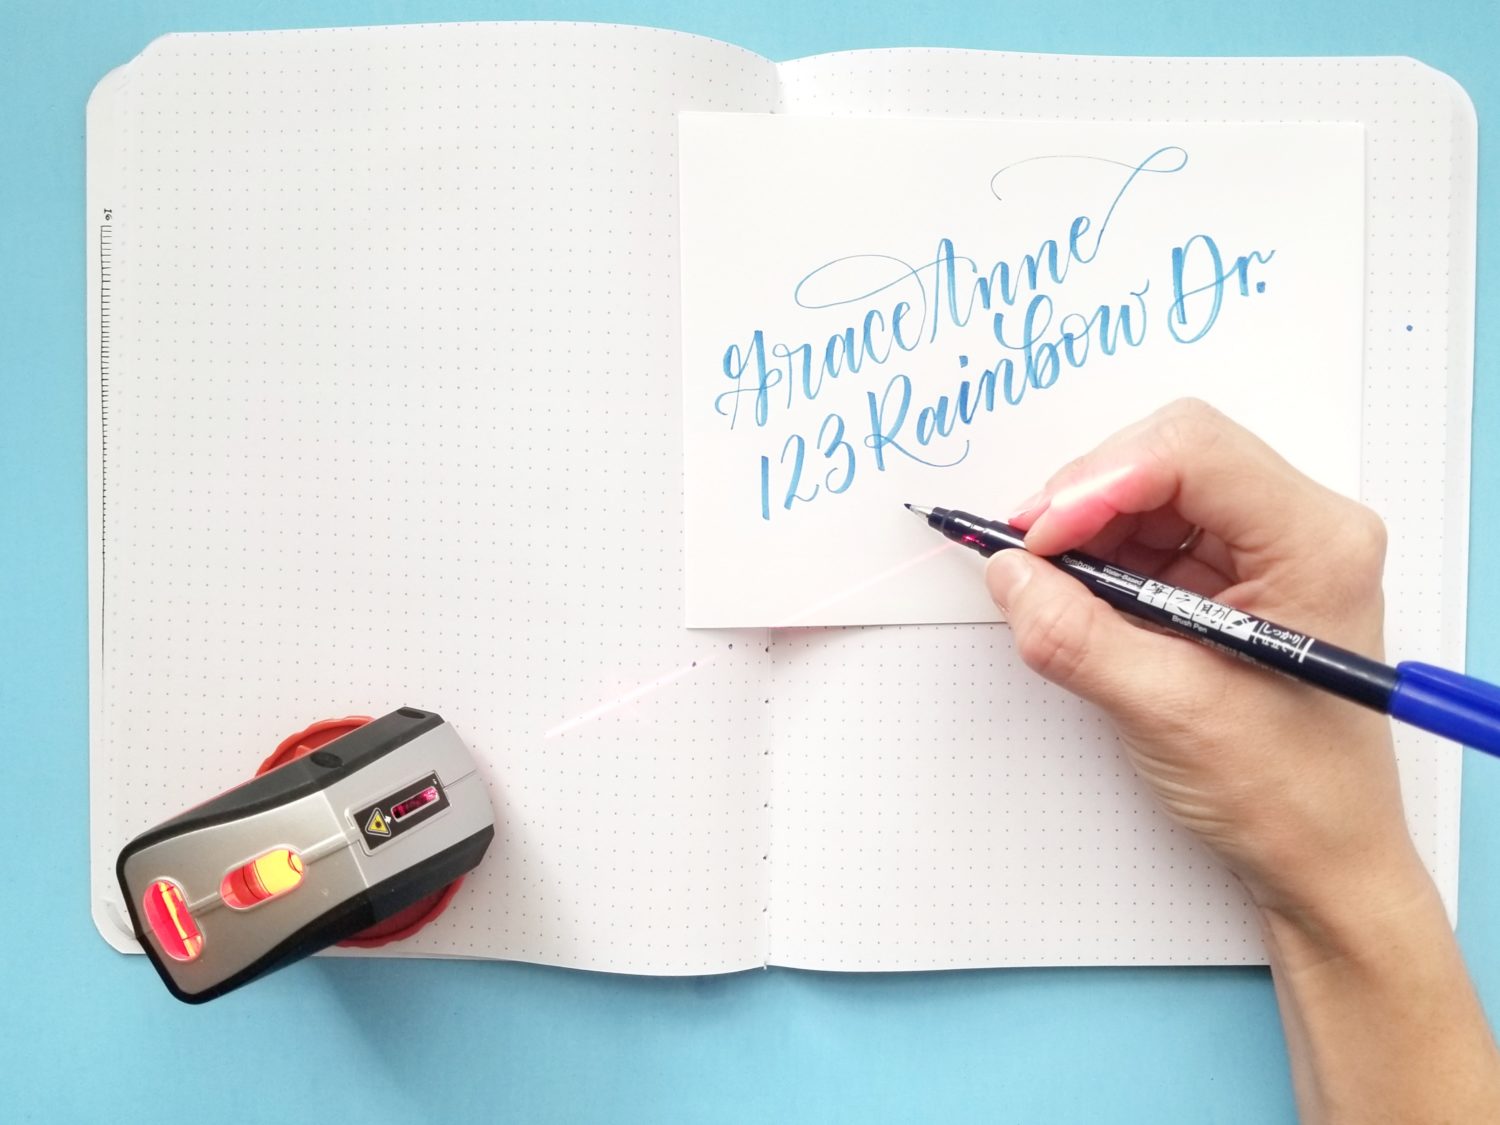
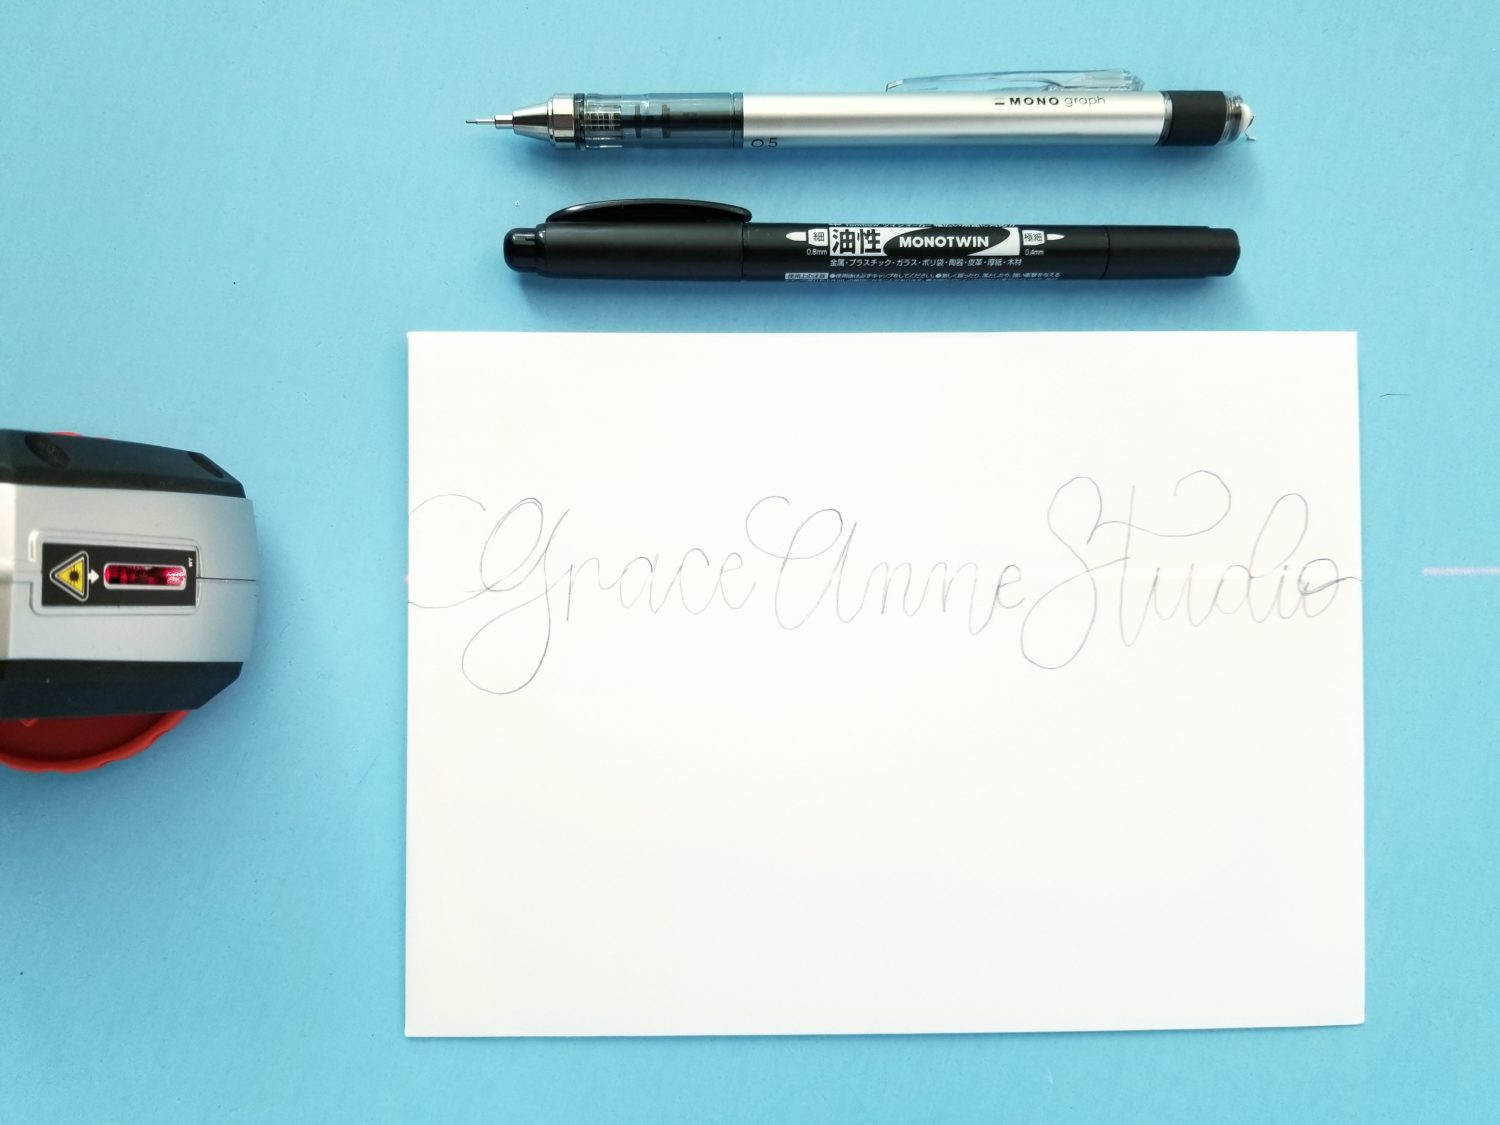
To create an elegant look for your happy mail, try writing the entire address in Script. Write it on an angle for added interest! First, decide on your baseline angle. Then, place your envelop on your lined paper and use the laser level or ruler to mark the baseline. Finally, just letter! Add some large and loose flourishing to really take it to the next level!
TIP: When you’re ready to letter the next line, move the envelope instead of the laser level. This will help ensure you keep the same angle!

3. Sans Serif with a Rainbow Shadow Address
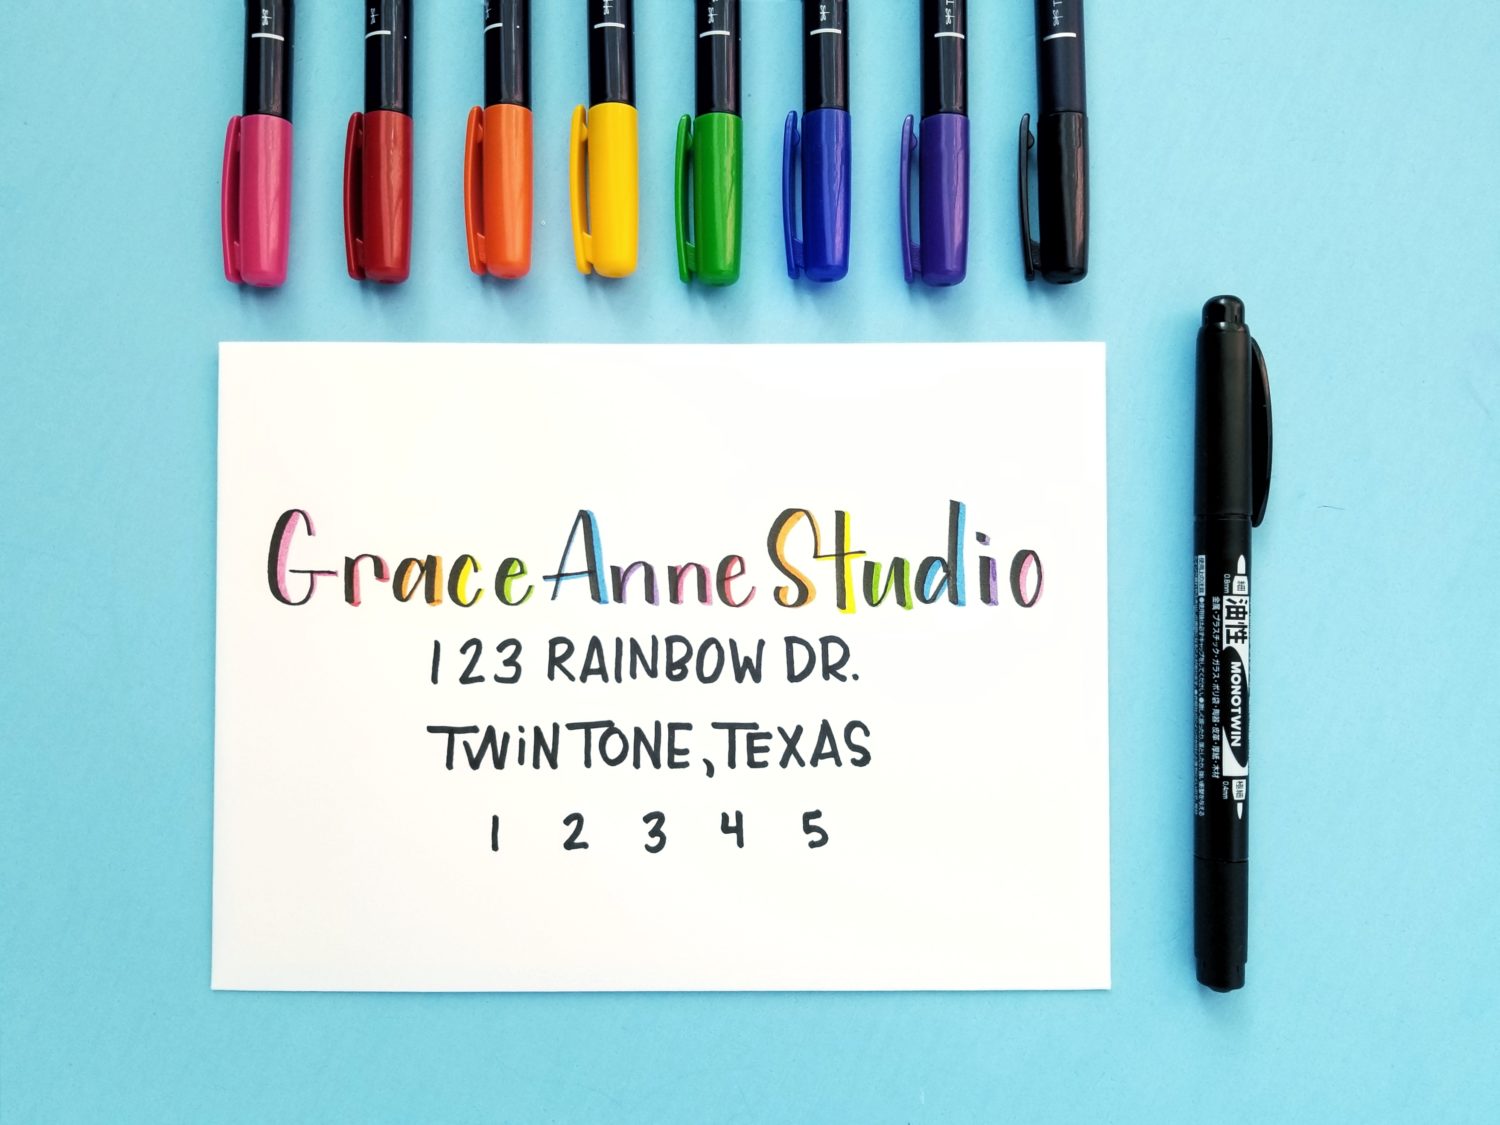
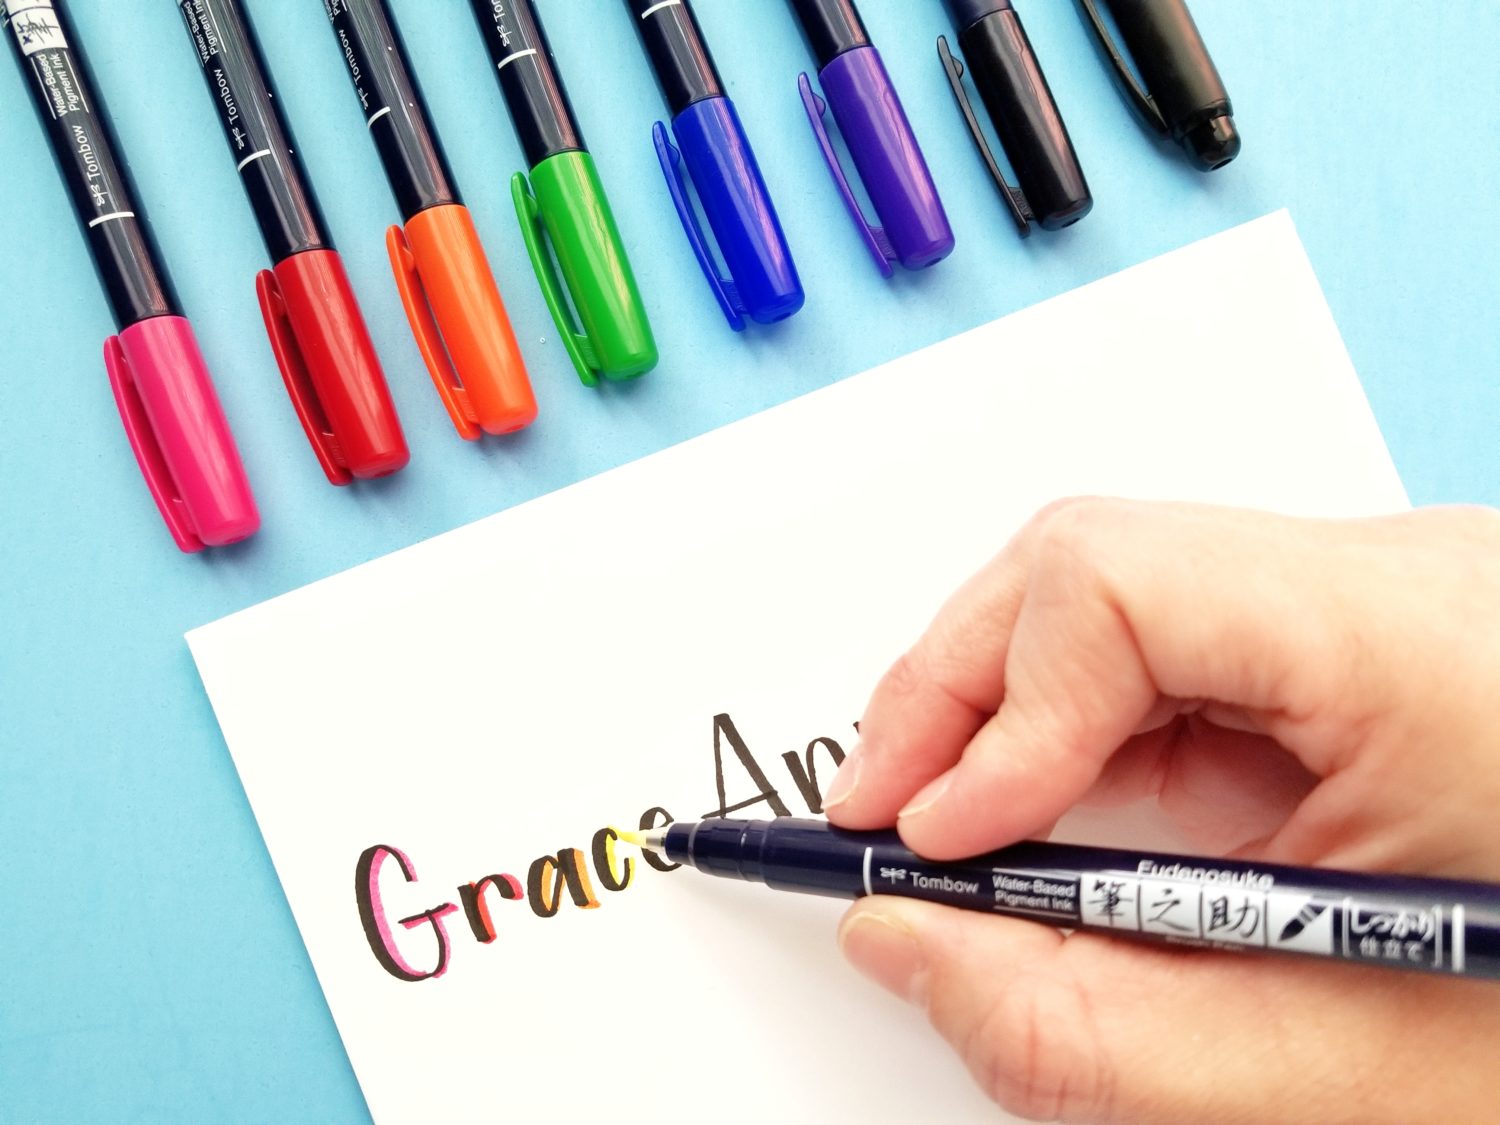
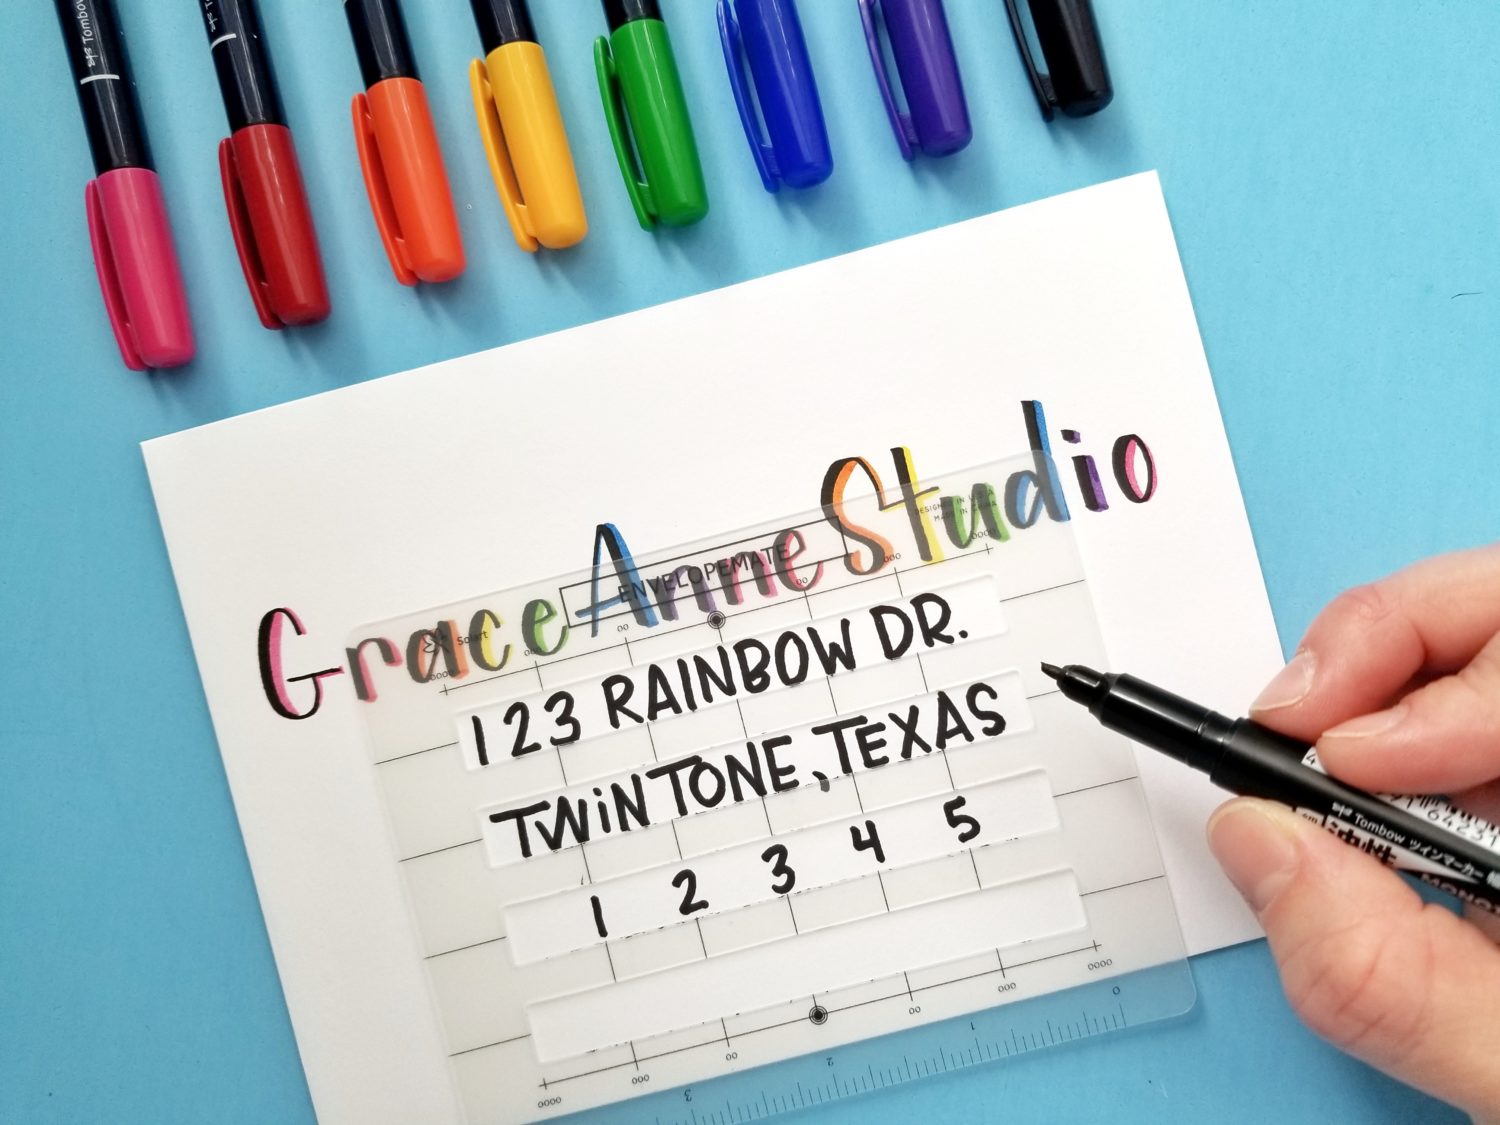
If you’re not confident with your script, but want to add a little pizzazz to your happy mail, try adding a rainbow drop shadow to the addressee! To start, use your Black Fudenosuke Brush Pen to write the addressee’s name. Be sure to leave a little more space than normal between each letter. Next, use your Fudenosuke Bush Pen colors to draw a thick line on the down stroke of each letter. Change colors on every letter for a fun rainbow shadow or use your favorite color for all the letters! Finally, use the Lettermate and a MONO Twin Permanent Marker to fill in the rest of the address. I chose title case for my addressee and all caps for the rest of the address for a little added interest.
4. Typewriter and Sans Serif Address
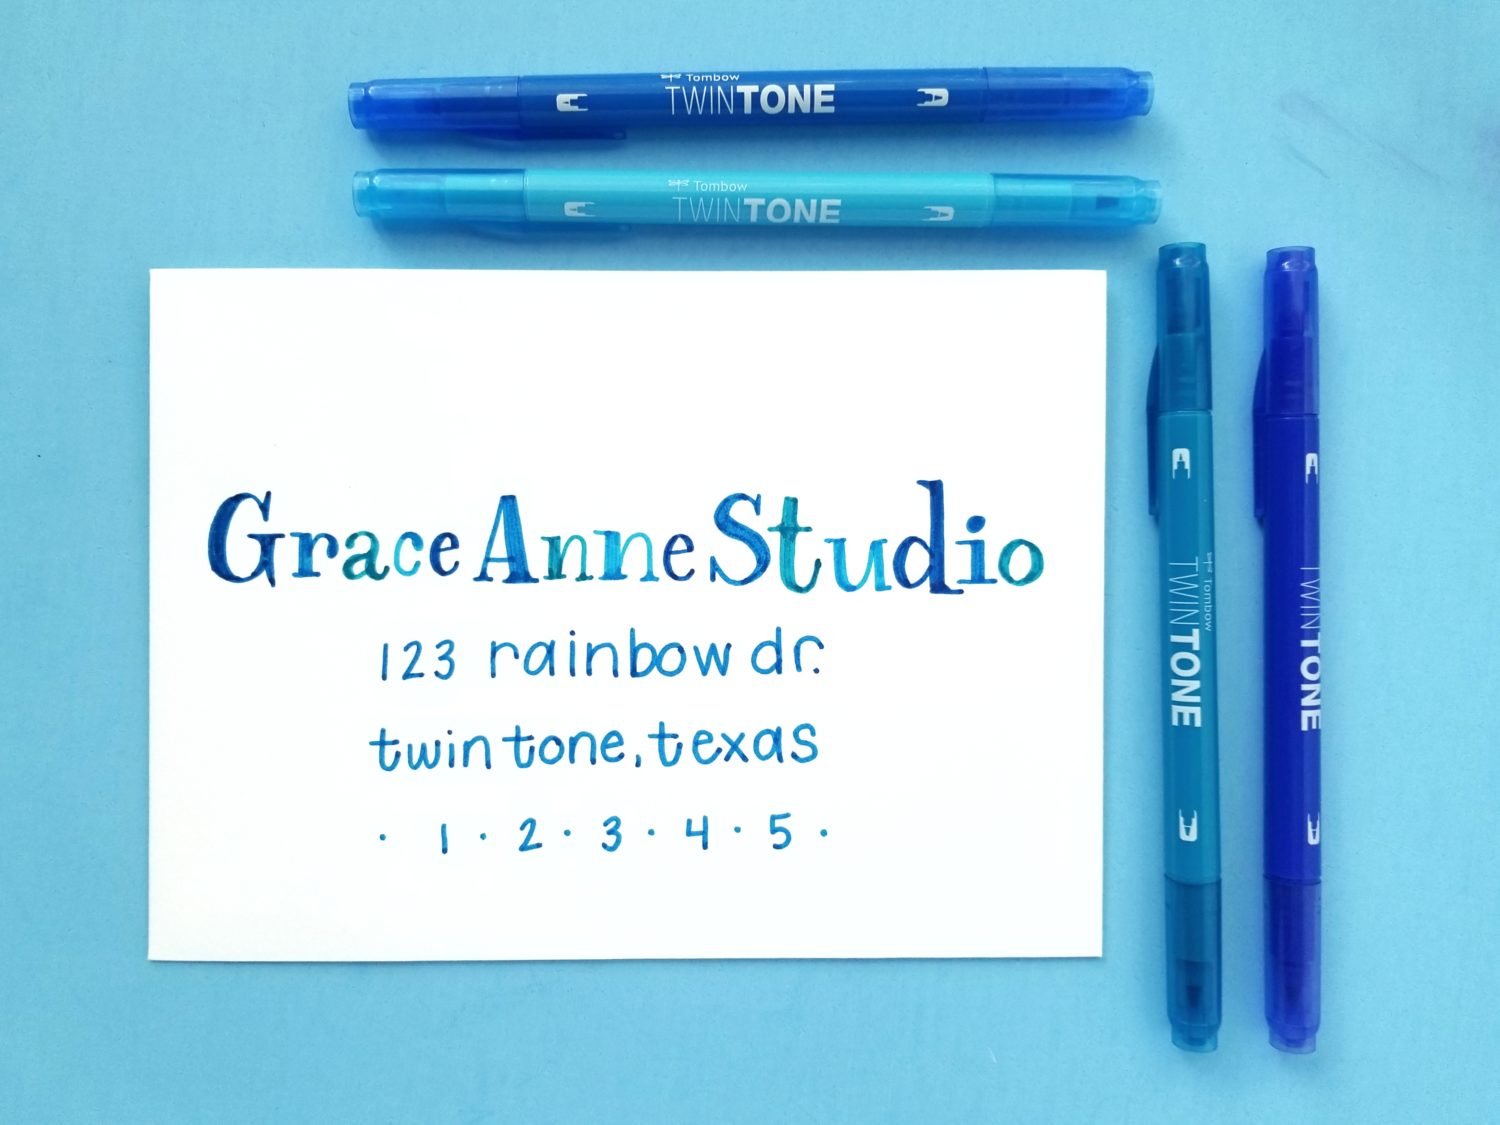
For a simple, playful way to address your happy mail, try a Typewriter print paired with a lowercase Sans Serif. First, use your ruler or laser level to mark your baseline. Then, write the addressee’s name using a typewriter print. It may help to practice how each letter will look on some scrap paper before the final draft. Next, use the envelope mate to fill in the rest of the address in a lowercase Sans Serif. Here, I used the blues out of the rainbow TwinTone Marker set.
5. Rainbow Filled Script and Sans Serif Address
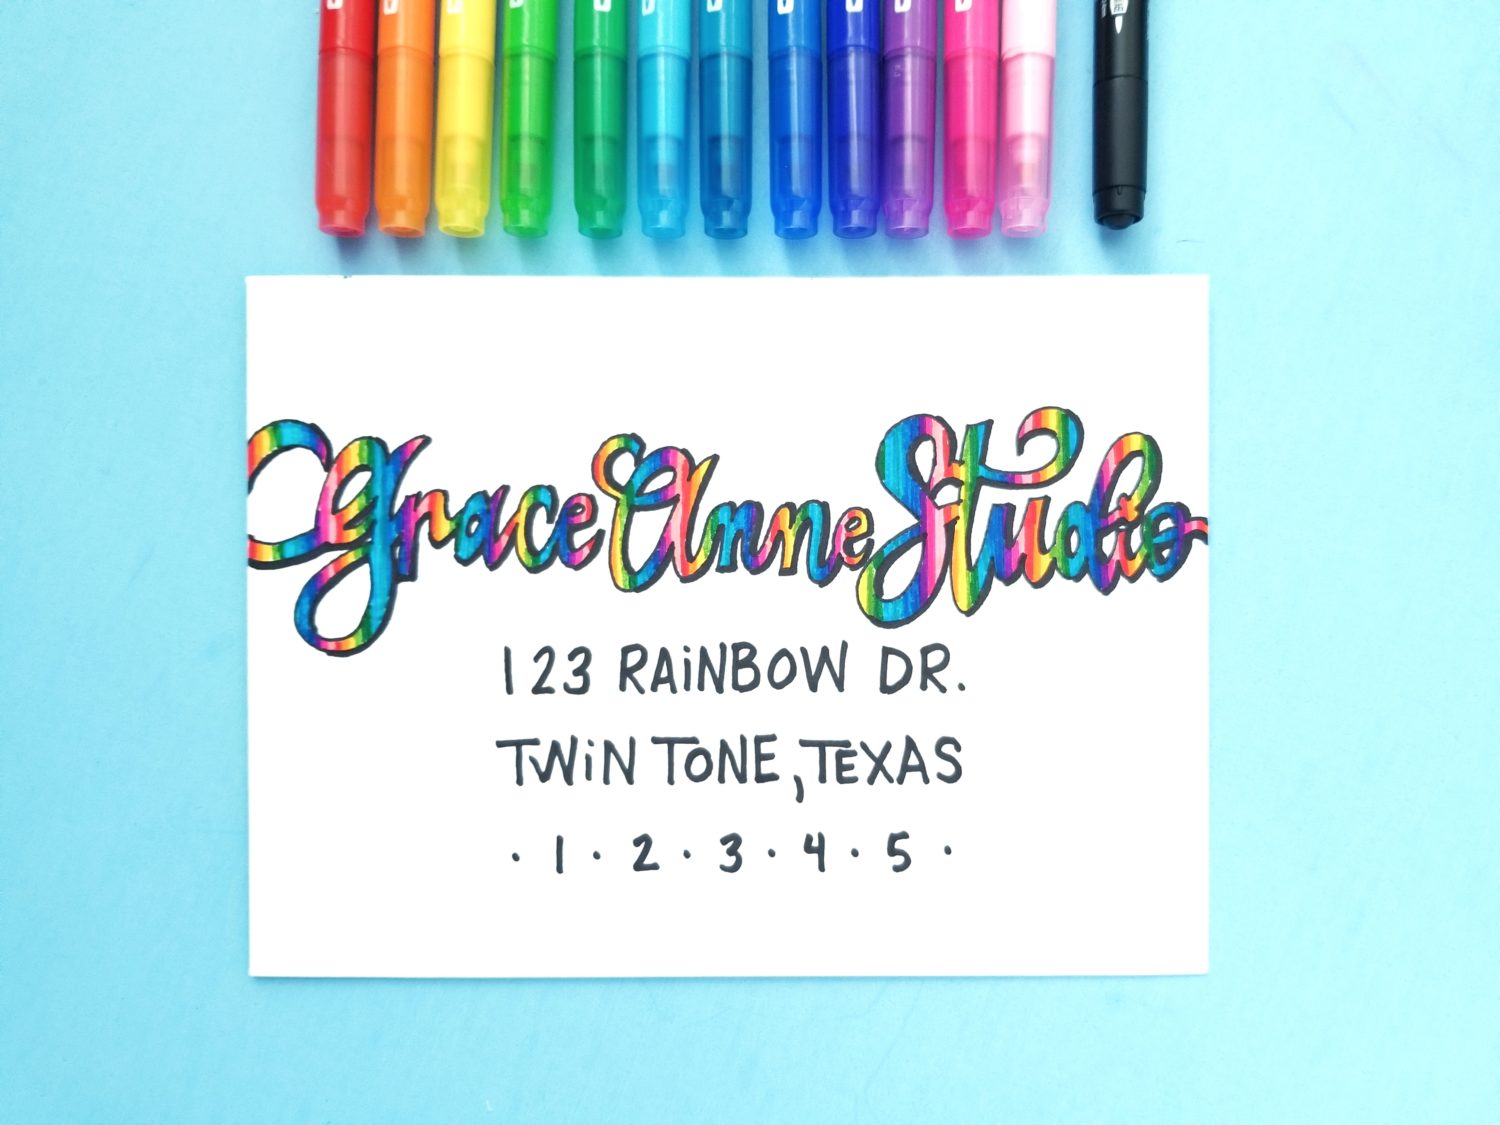
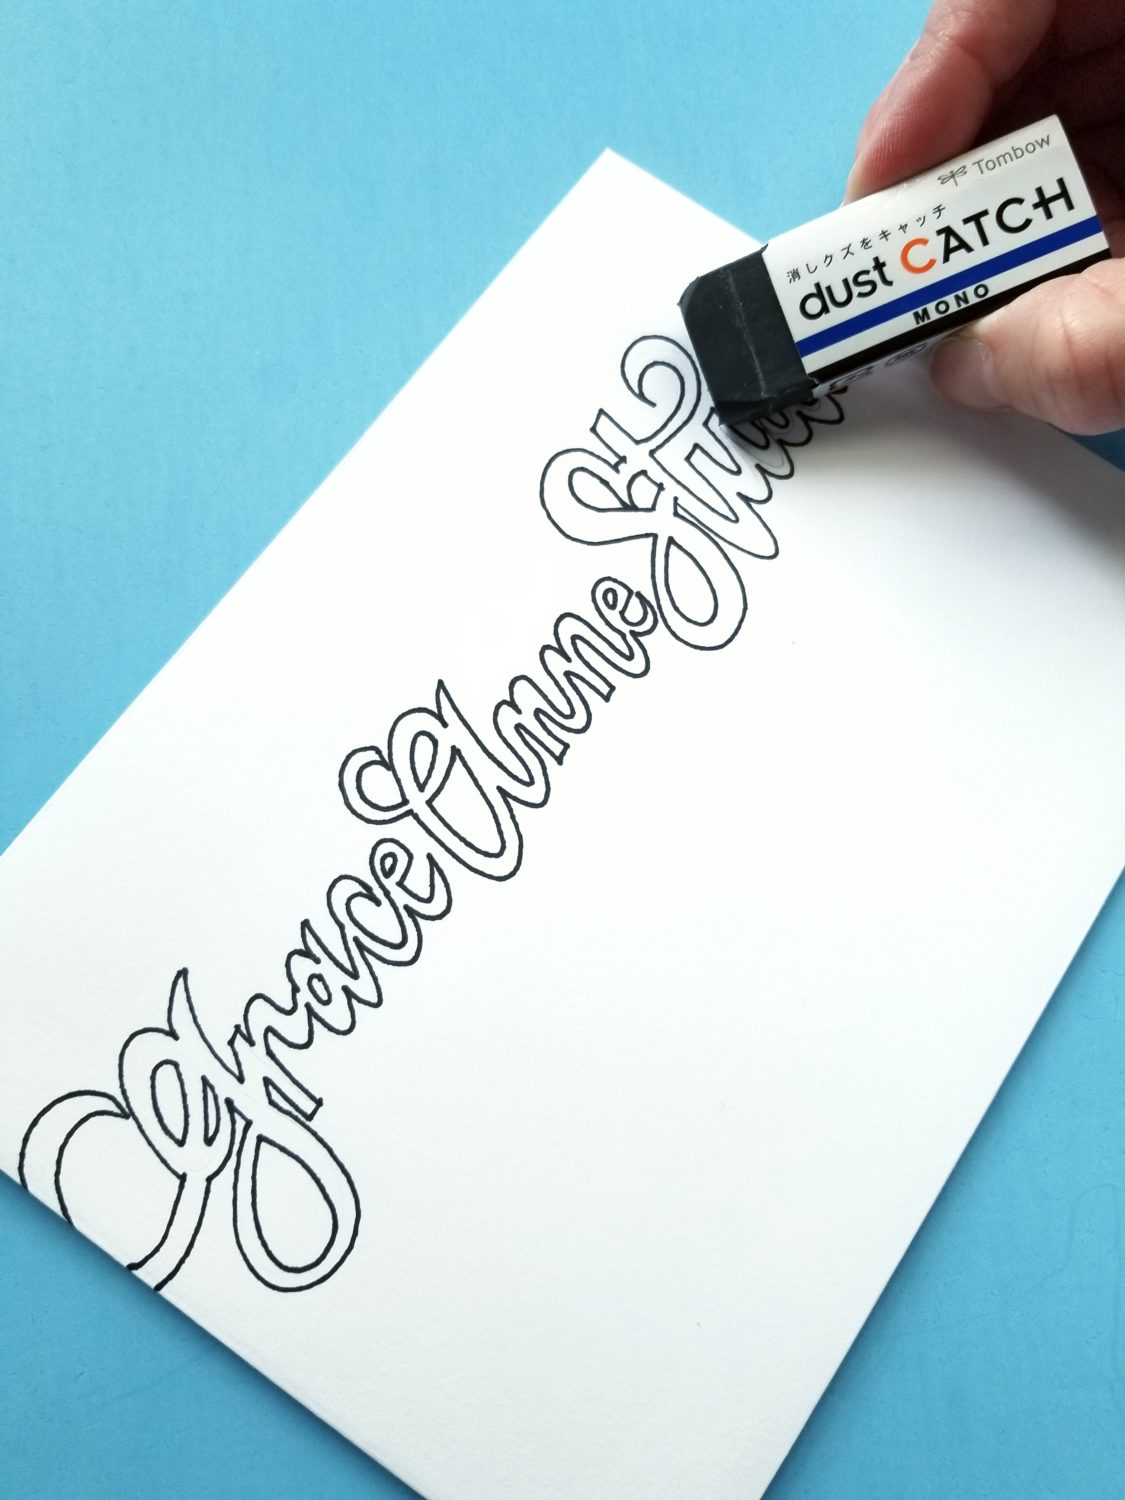
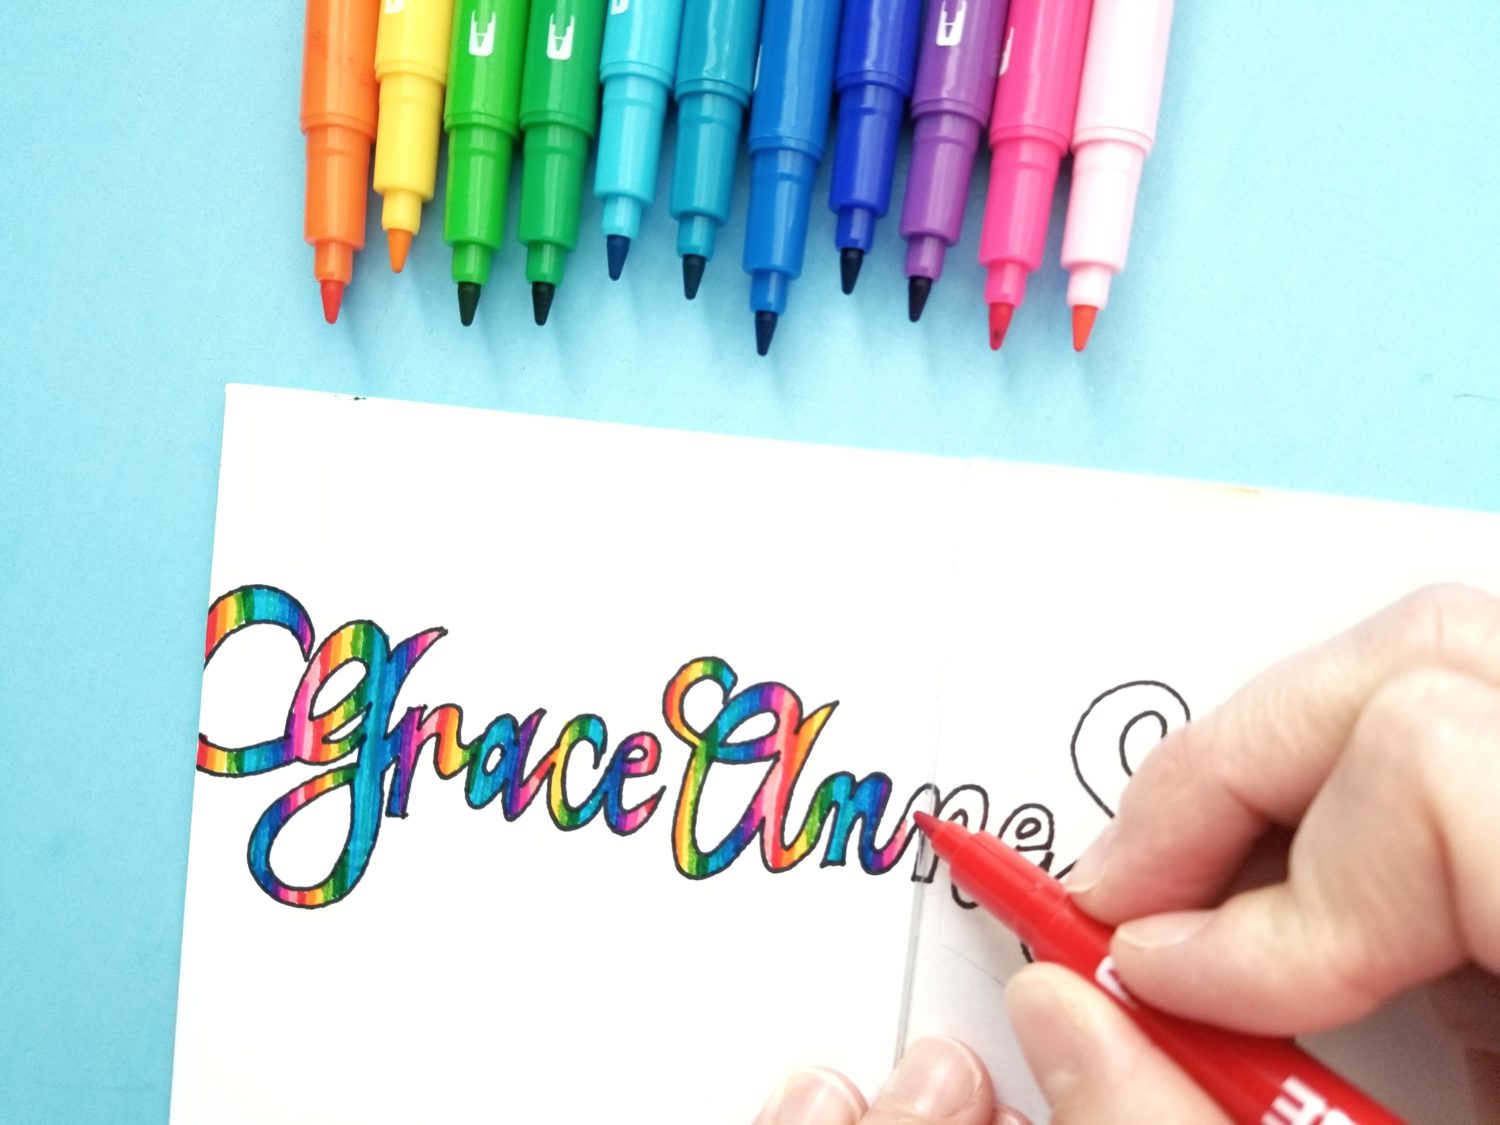
This style is perfect for when you have extra special happy mail to send out. Be warned though, it takes some time! To start, use a MONO Graph Mechanical Pencil to write the addressee in Script. Then, use the fine side of your MONO Twin Permanent Marker to outline the pencil. Next, use your Dust Catch Eraser to erase the pencil marks and line your rainbow TwinTone Markers up in the order you’ll use them.
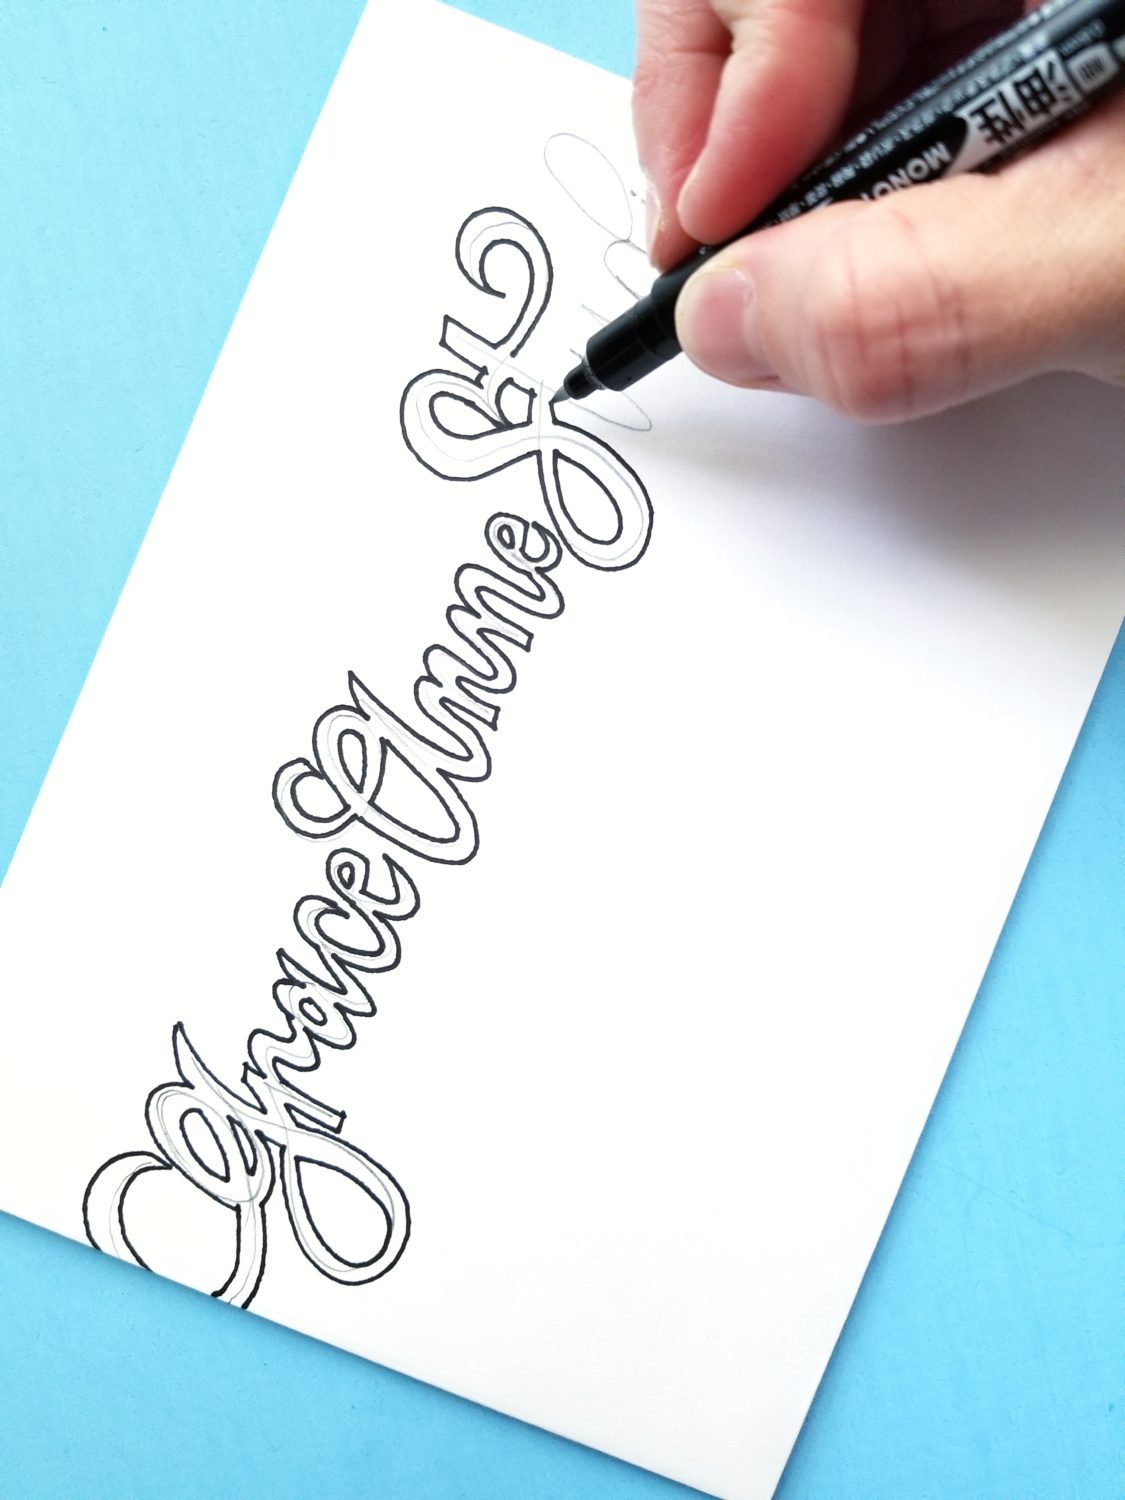
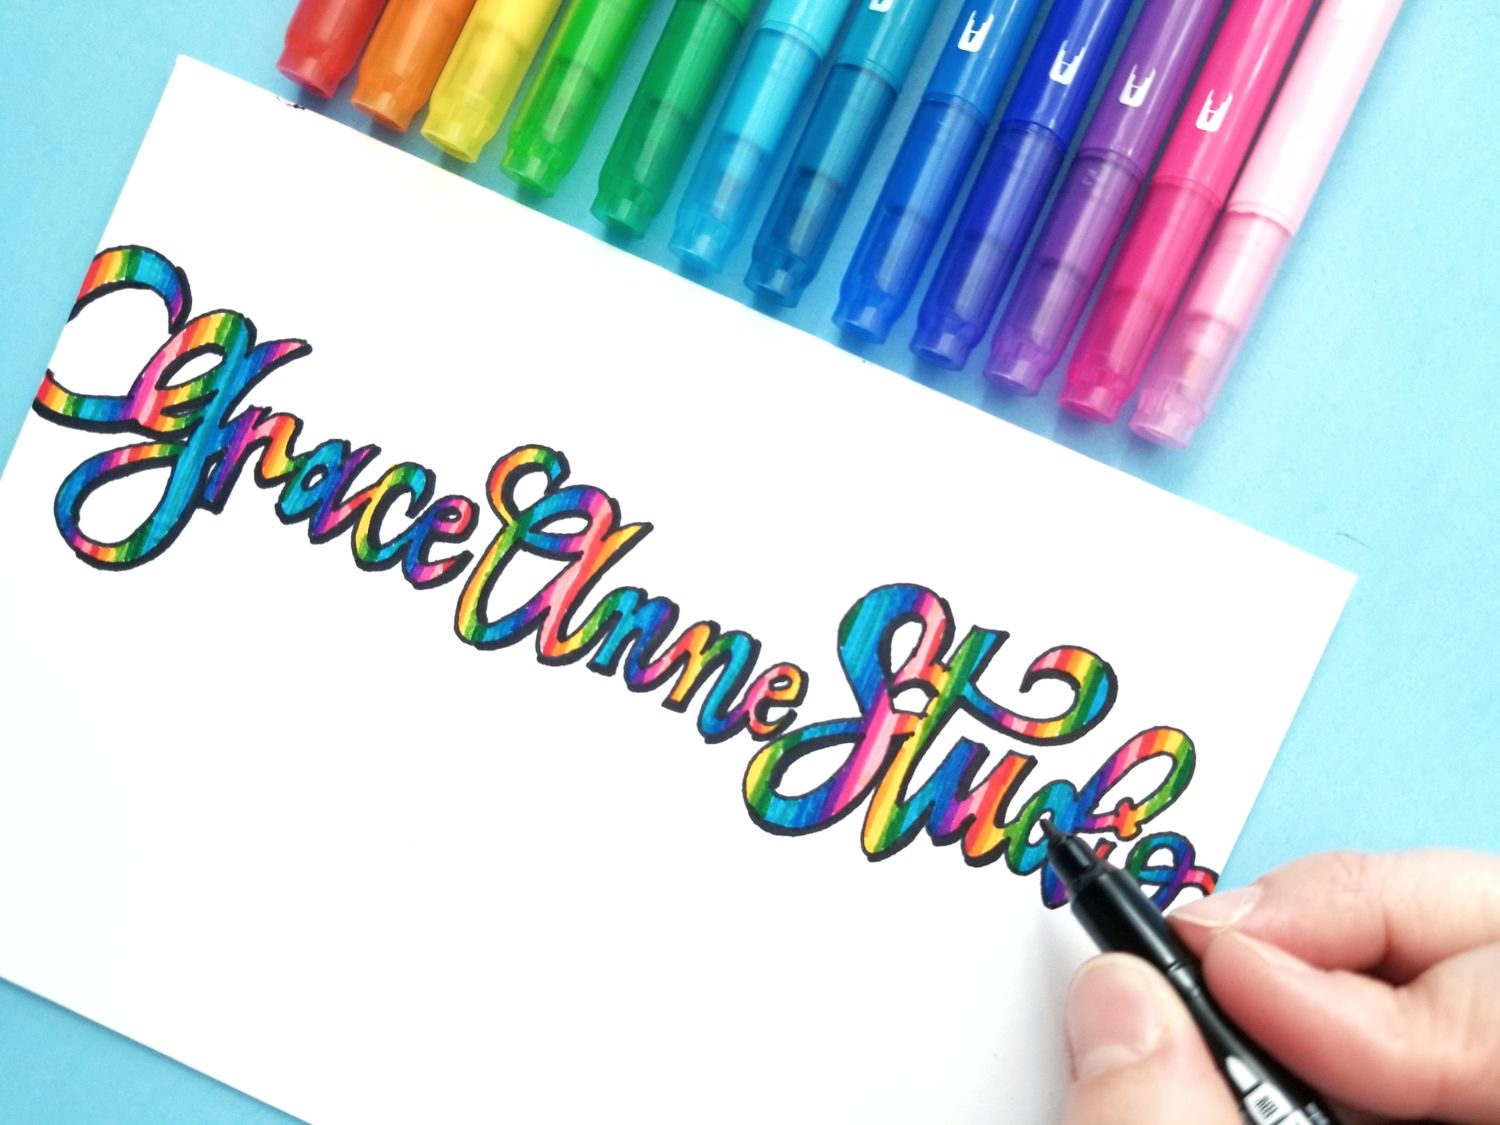
Then, starting on the left side, use your triangle to draw two vertical lines per color and fill in the addressee’s name. I use a triangle rather than a ruler to ensure I’m drawing each line on the same angle. Repeat the pattern until you have completely filled in the addressee’s name. Next, use the bullet tip of a MONO Twin Permanent Marker and add a shadow on the right side of the lettering. Finally, use your letter mate and MONO Twin Permanent Marker to fill in the rest of the address in a Sans Serif print.
That’s it! With these 5 ways to letter happy mail addresses, you can dress up happy mail for any occasion! For more ways to dress up your happy mail, check out Brittany’s post here or Katie’s post here! If you use this tutorial to letter your own happy mail, be sure to tag @tombowusa and @graceannestudio on social media so we can cheer you on!
Happy Lettering!
Grace
This was such a fun project! I love happy mail as well!?✉ The 2nd and 3rd envelopes were my fav.!?
Thanks Anna!! I’m so glad you enjoyed it! I love those too. Such an easy way to spice up happy mail!
Pingback: Two Fun Ways to Embellish Your Handmade Cards with Whimsy Stamps - Tombow USA Blog
Pingback: Simple Envelope Liner Tutorial - Tombow USA Blog