Hey there! It’s Mandy from @athebrewtifulword and I am creating a project inspired by my favorite book! I LOVE cookbooks! Even with all the recipes, you can find online, I’m still very partial to my published cookbooks. My absolute favorites that I always cook out of are The Joy of Cooking and The Rodale Whole Foods Cookbook. For today’s project, I’m using my favorite chocolate chip cookie recipe from The Joy of Cooking to create an easy and fun recipe art print. Let’s gather our materials and get started!
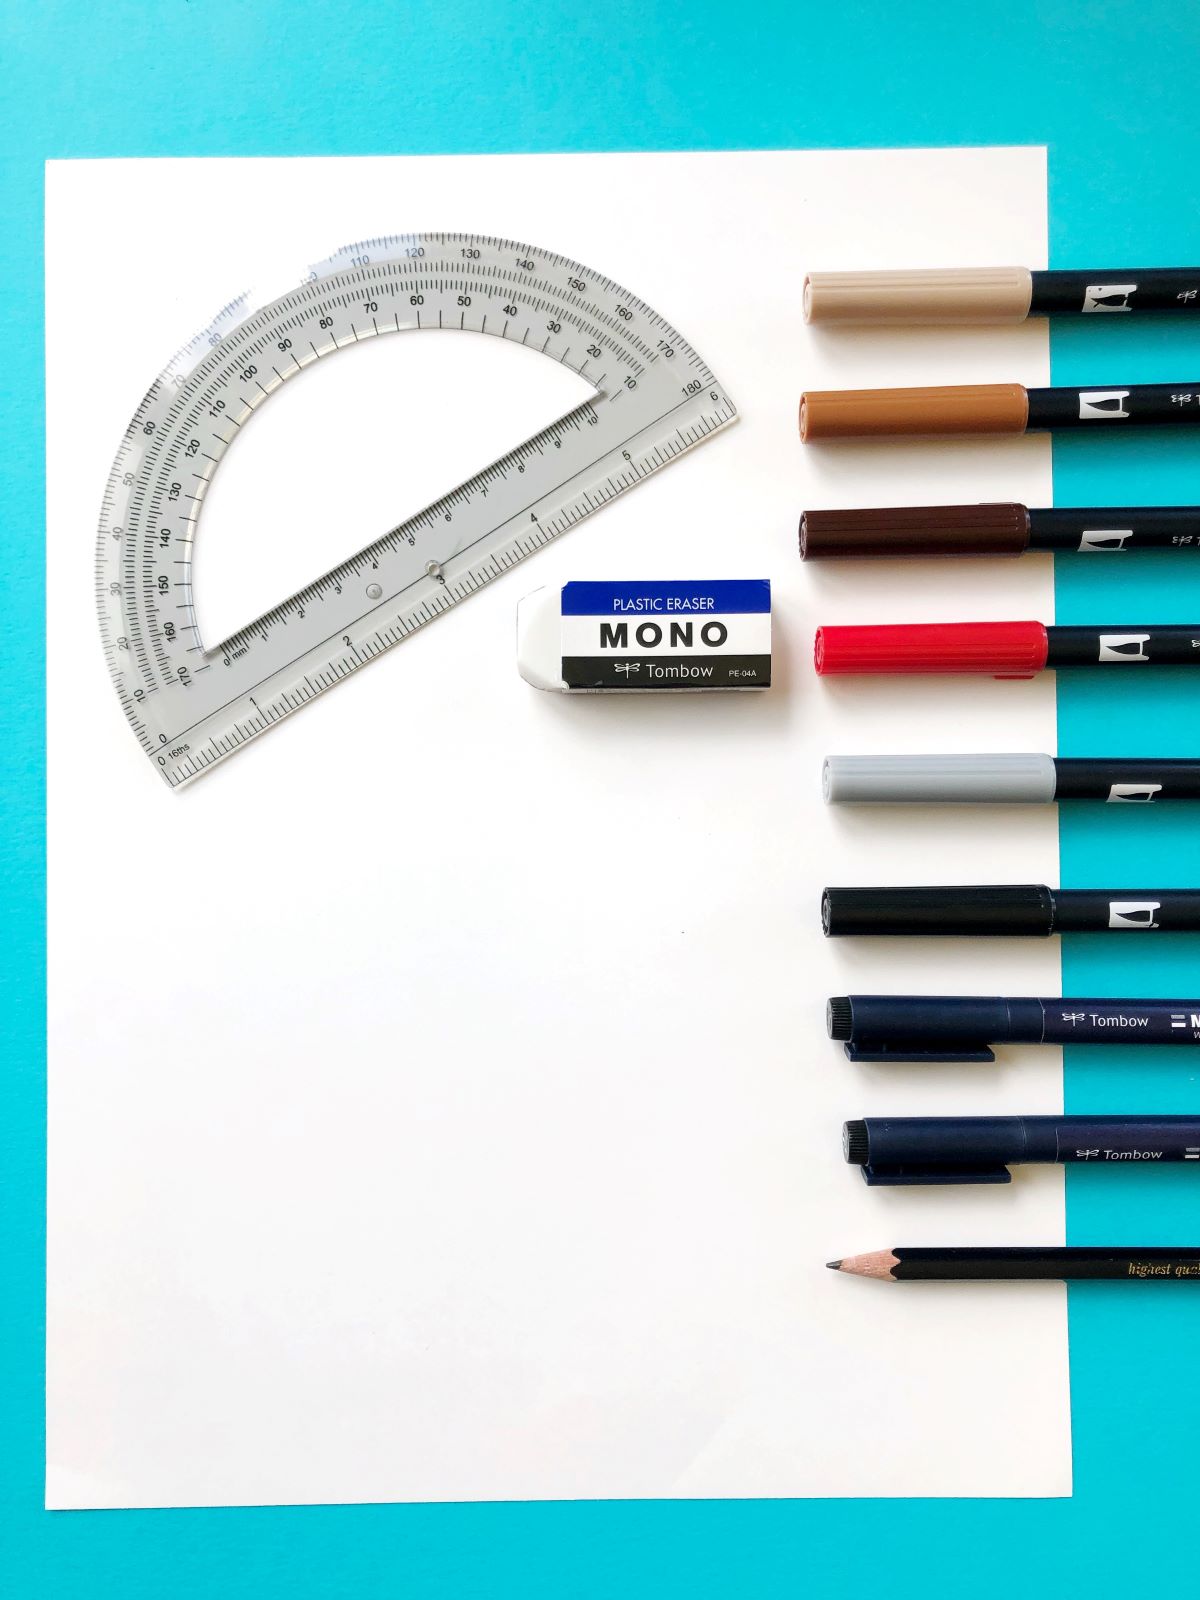
MATERIALS
- Piece of Heavyweight Marker Paper
- Tombow MONO Plastic Eraser
- Tombow MONO Drawing Pencil 3H
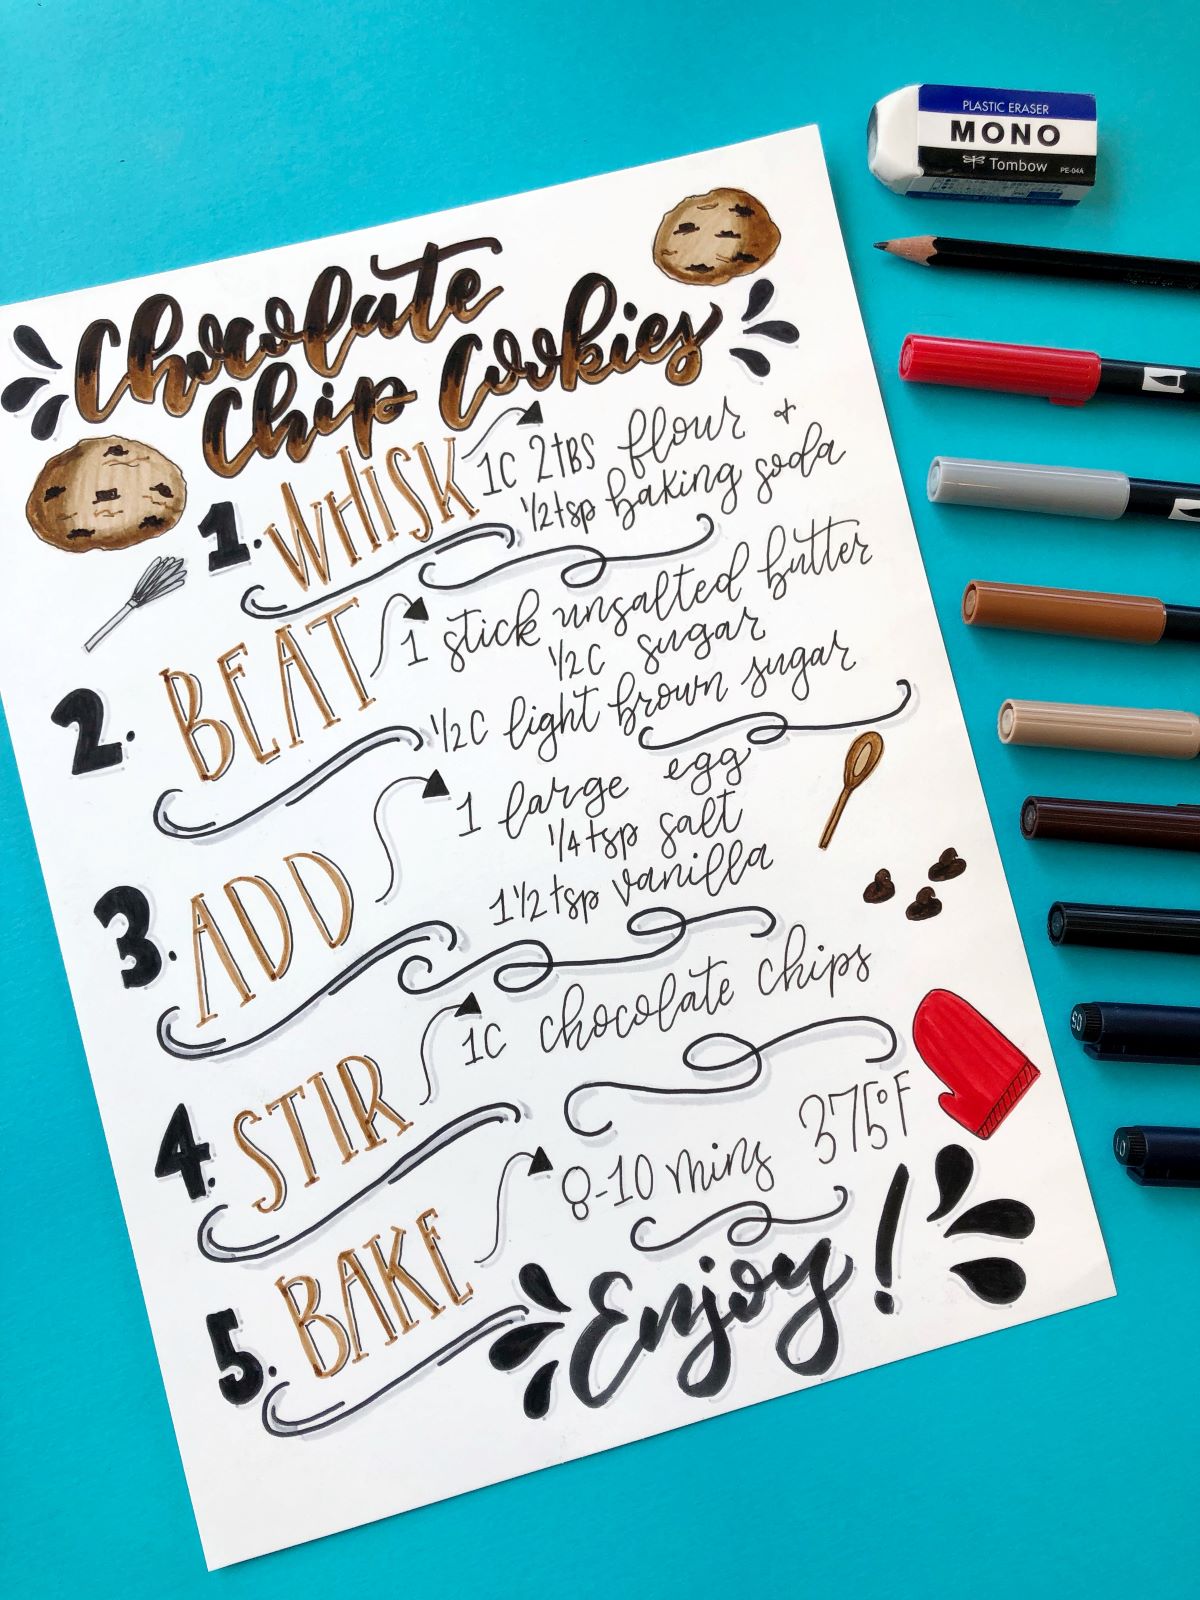
- Tombow Dual Brush Pens N75, 992, 977, 879, 856 and N15
- Tombow MONO Drawing Pens 01 and 05
- Ruler
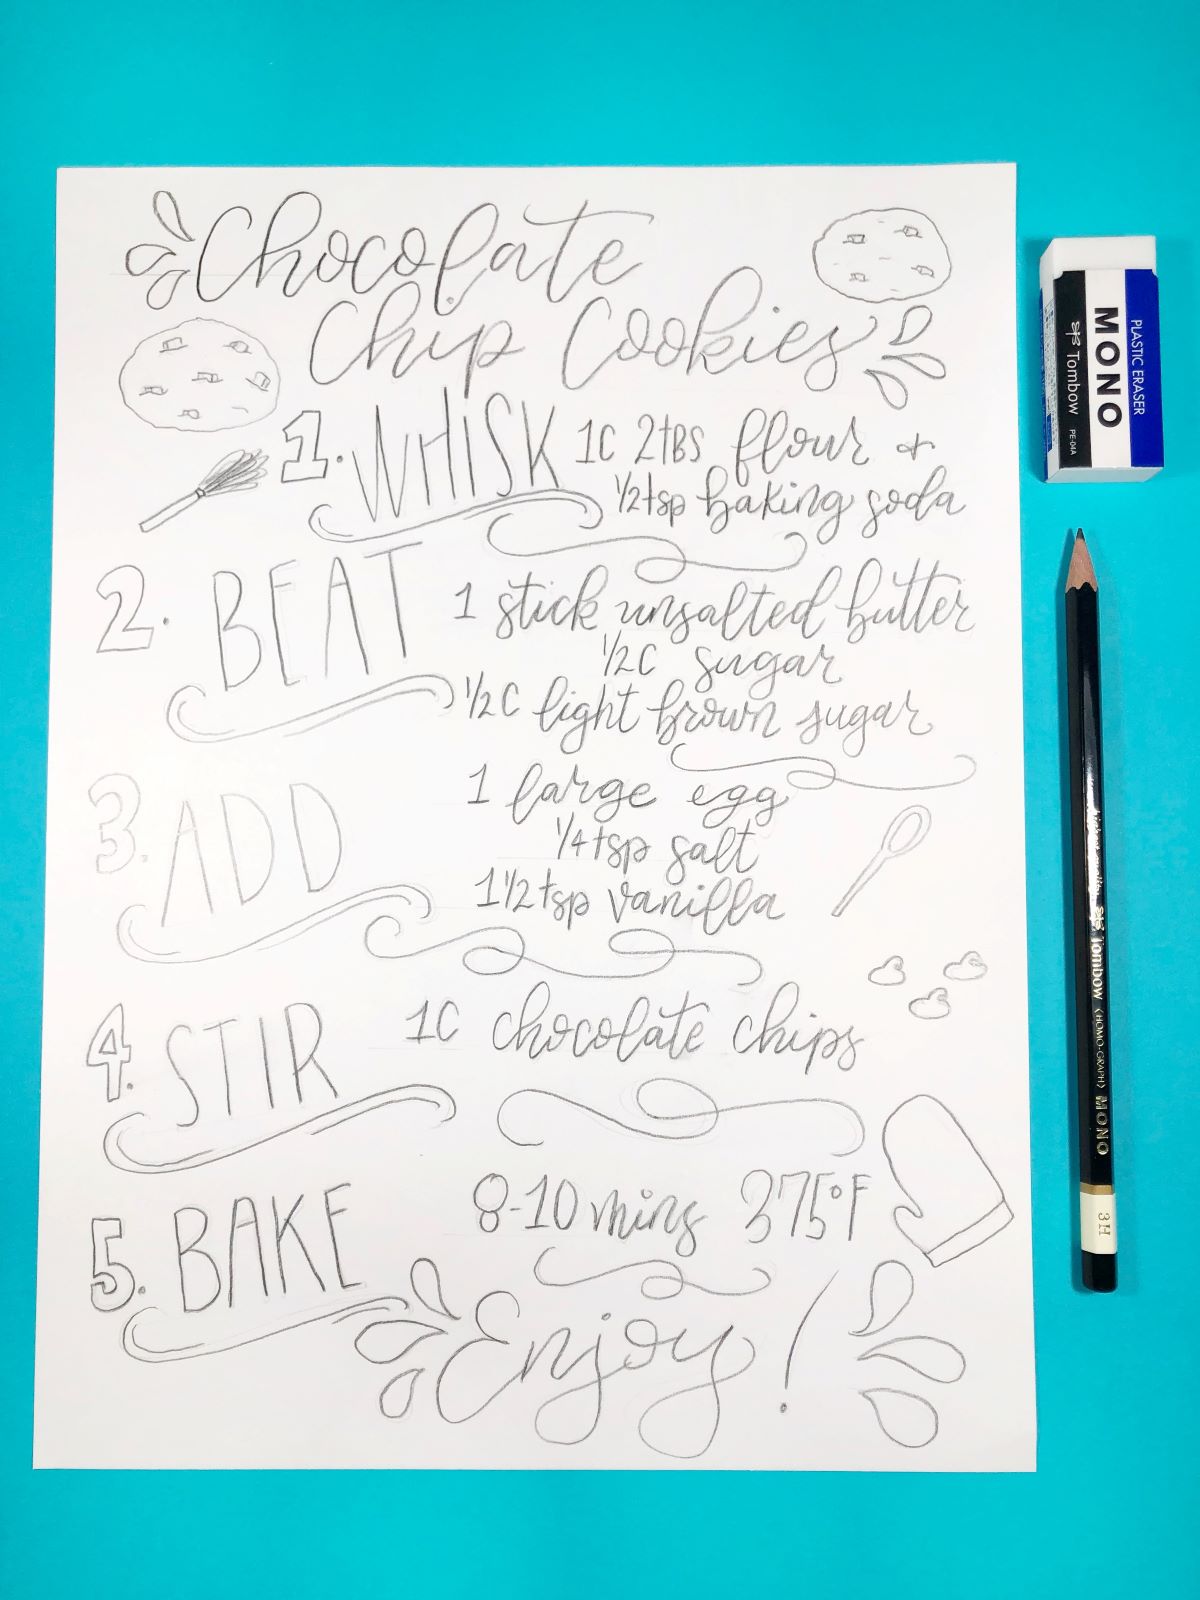
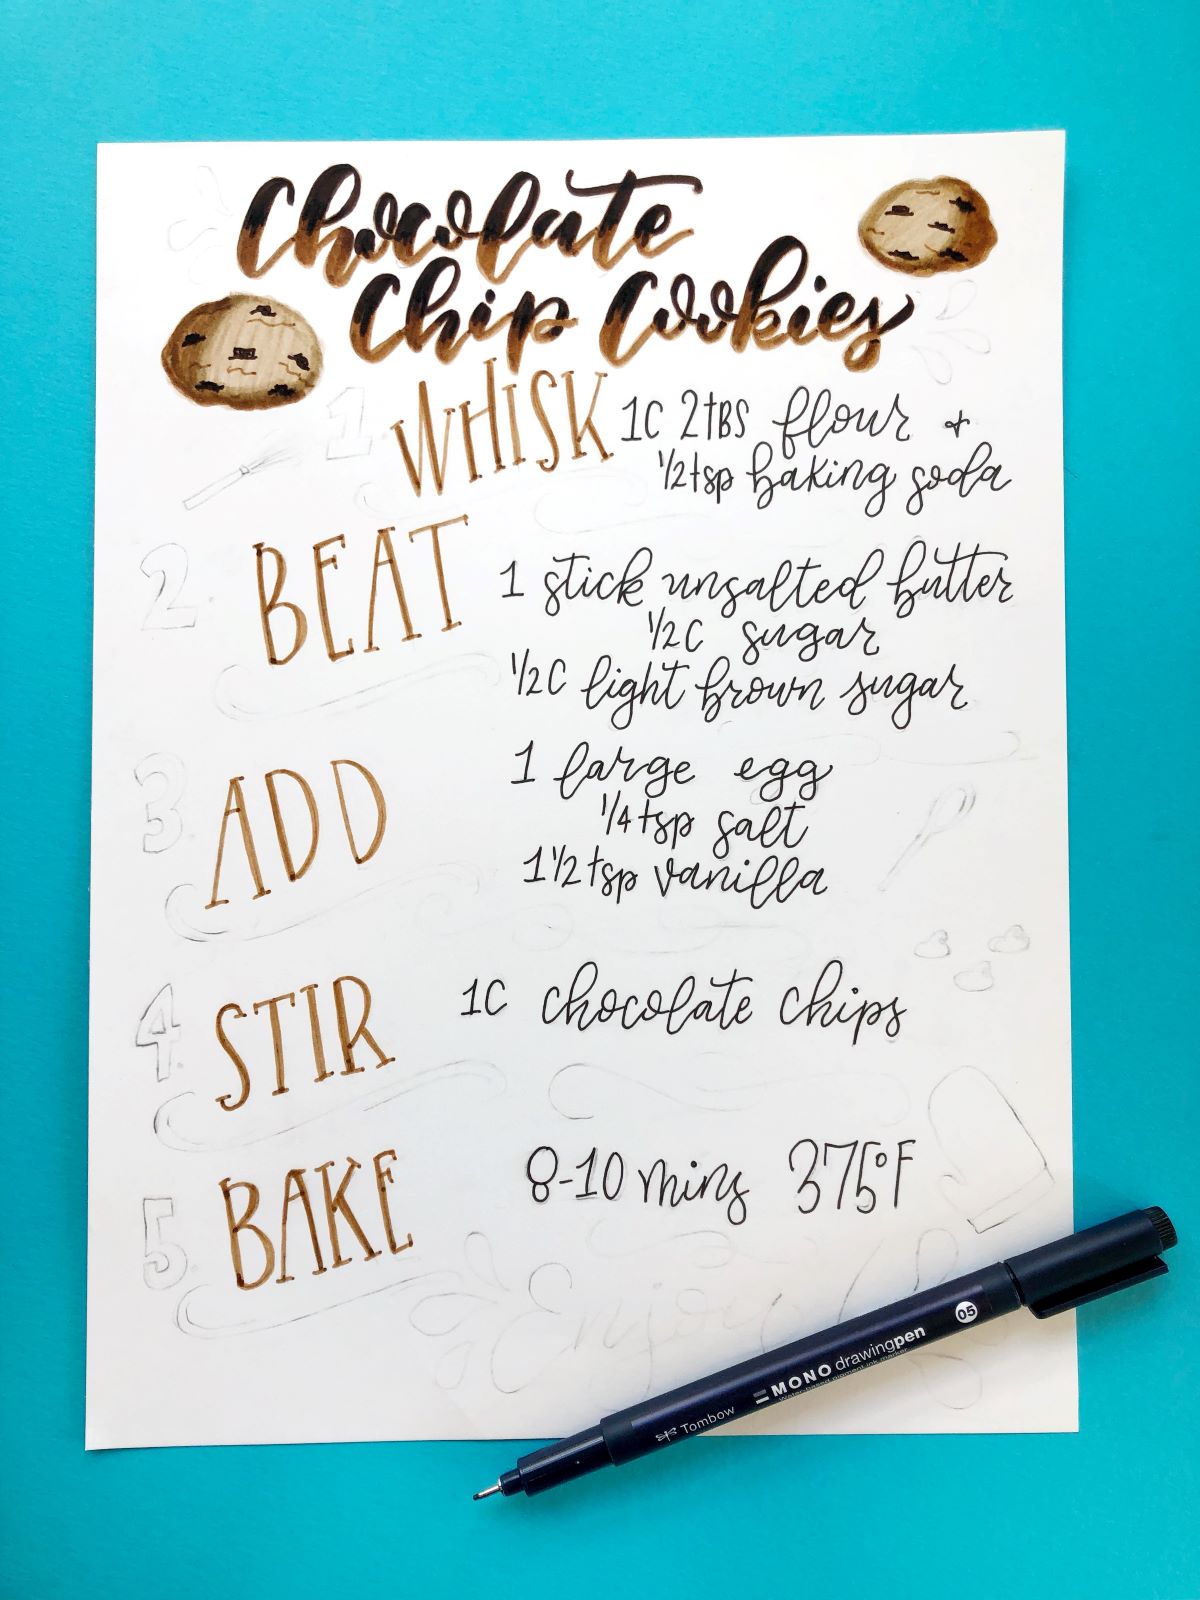
STEP 1 – Sketch your design
Using the MONO Drawing Pencil 3H and a ruler, sketch out your recipe steps on the marker paper. At the top, letter out the name of the recipe. On the left side, sketch out each step number and the ingredients that belong to each step. Once your steps are added, add in baking illustrations. Lastly, add embellishments such as flourishes and arrows to fill in any remaining white space around the lettering. Use the MONO Plastic Eraser to erase and make any changes along the way.
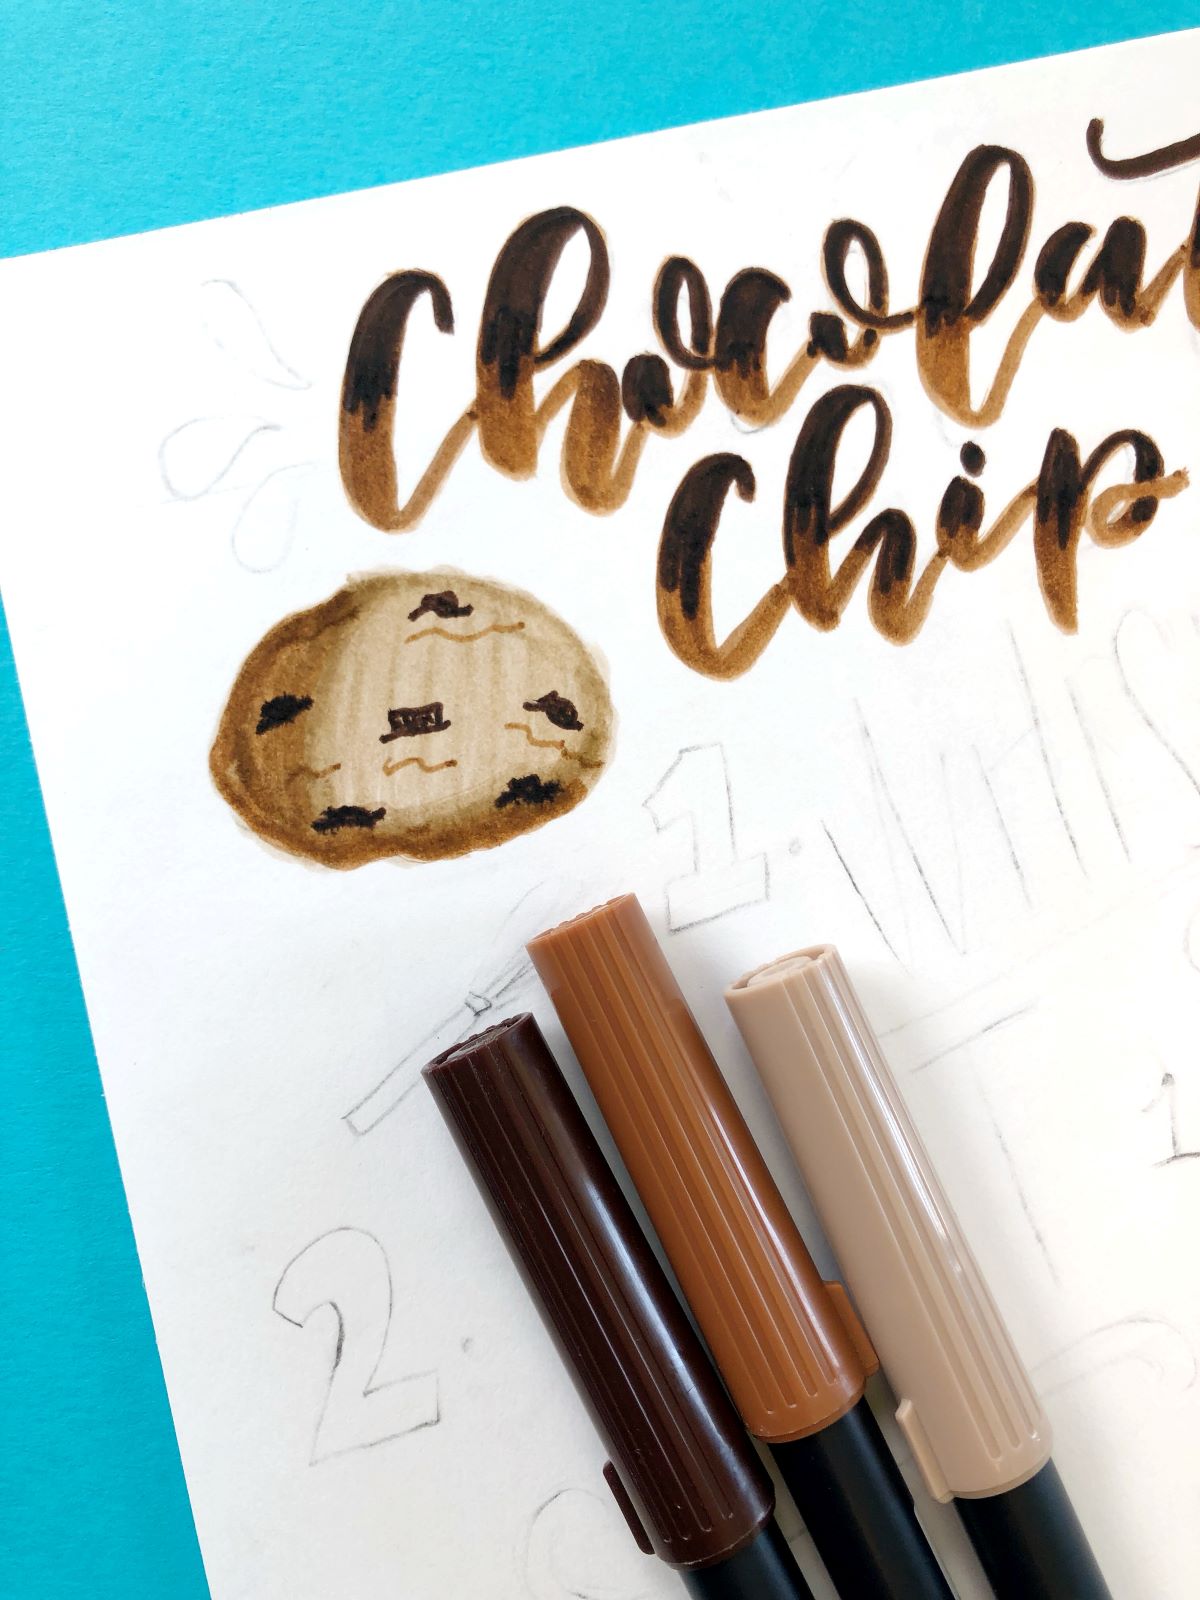
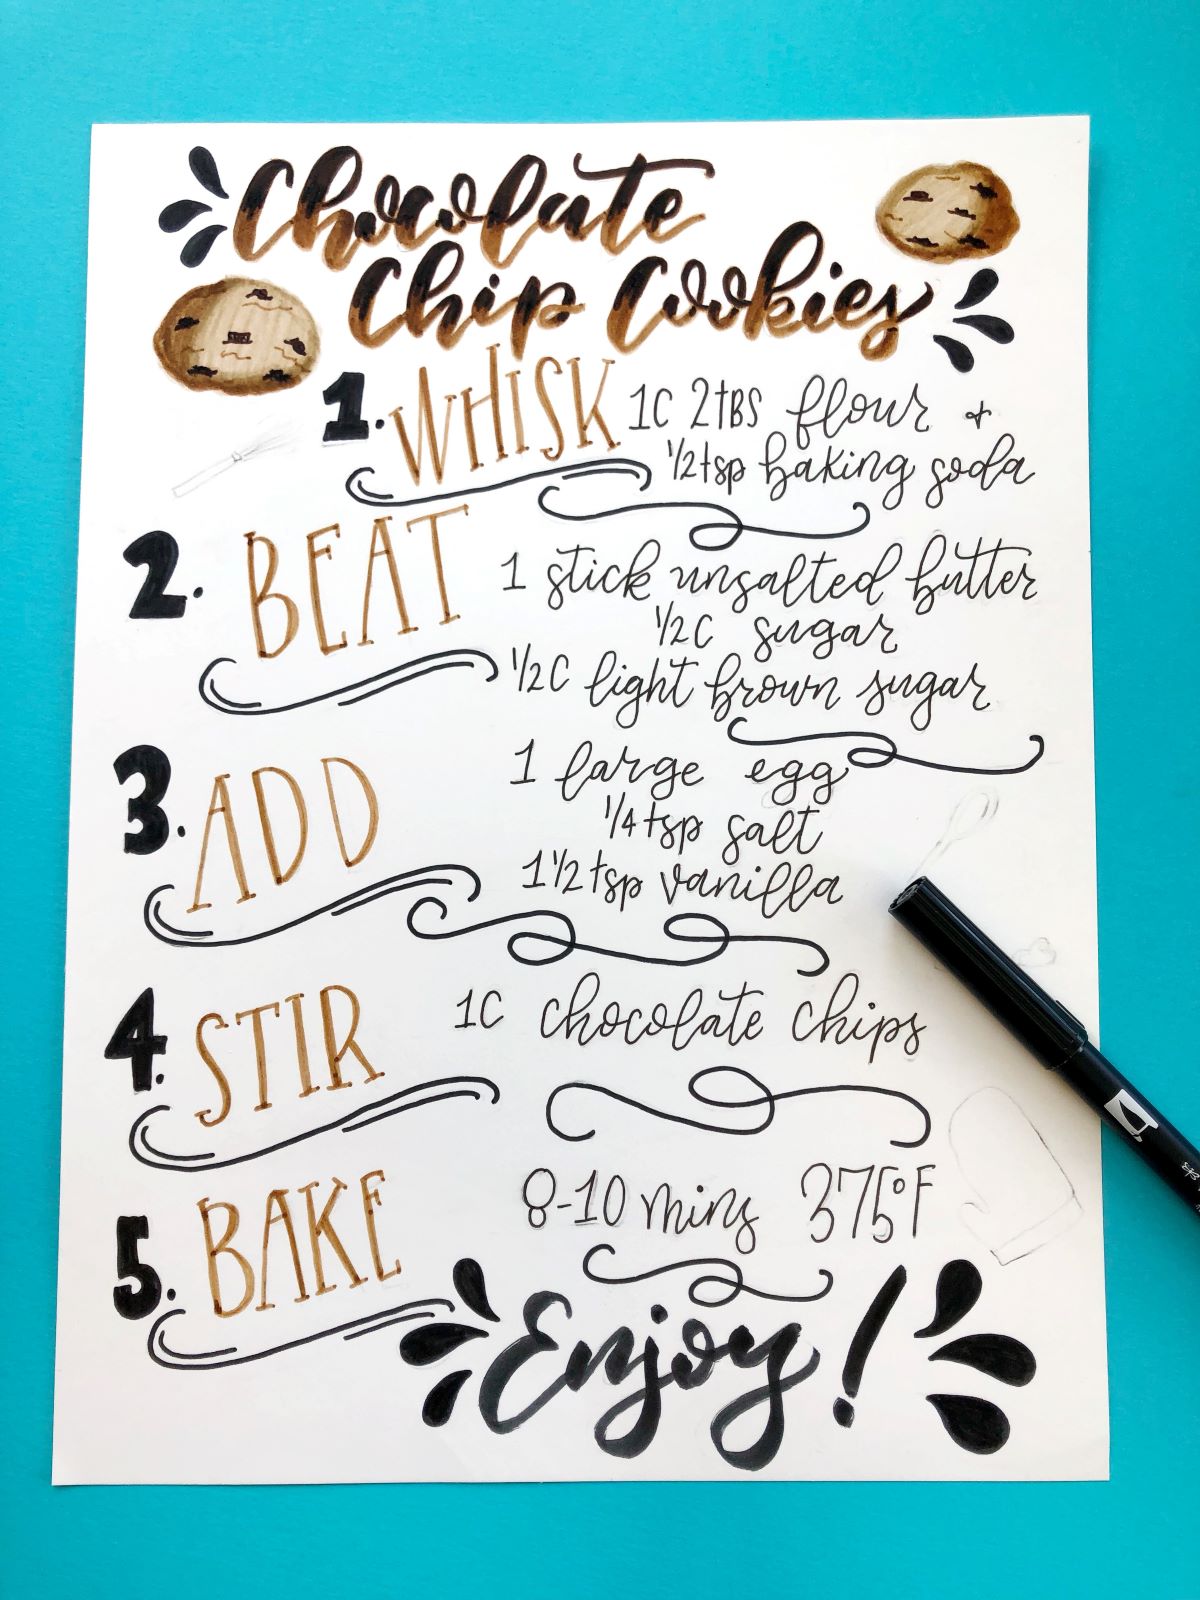
STEP 2 – Add color and details
To start, lightly erase all your sketching with the MONO Plastic Eraser so the pencils lines don’t show through your lettering. Using Dual Brush Pen 992, letter over the name of the recipe with the brush tip. Then use the bullet tip of Dual Brush Pen 879 to color the top half of each letter and add little drip marks to make it look like melted chocolate.

Next, use Dual Brush Pens 992, 977 and 879 to color in the cookies. Use 992 as the base, add 977 to one side to create a little depth to the cookie, then blend in with 992. Use 879 to color in the chocolate chips. I love chocolate chunks more than chips, so I drew chunks!
Next, use the bullet tip of Dual Brush Pen 977 to trace over each step name: Whisk, Beat, Add, Stir and Bake.
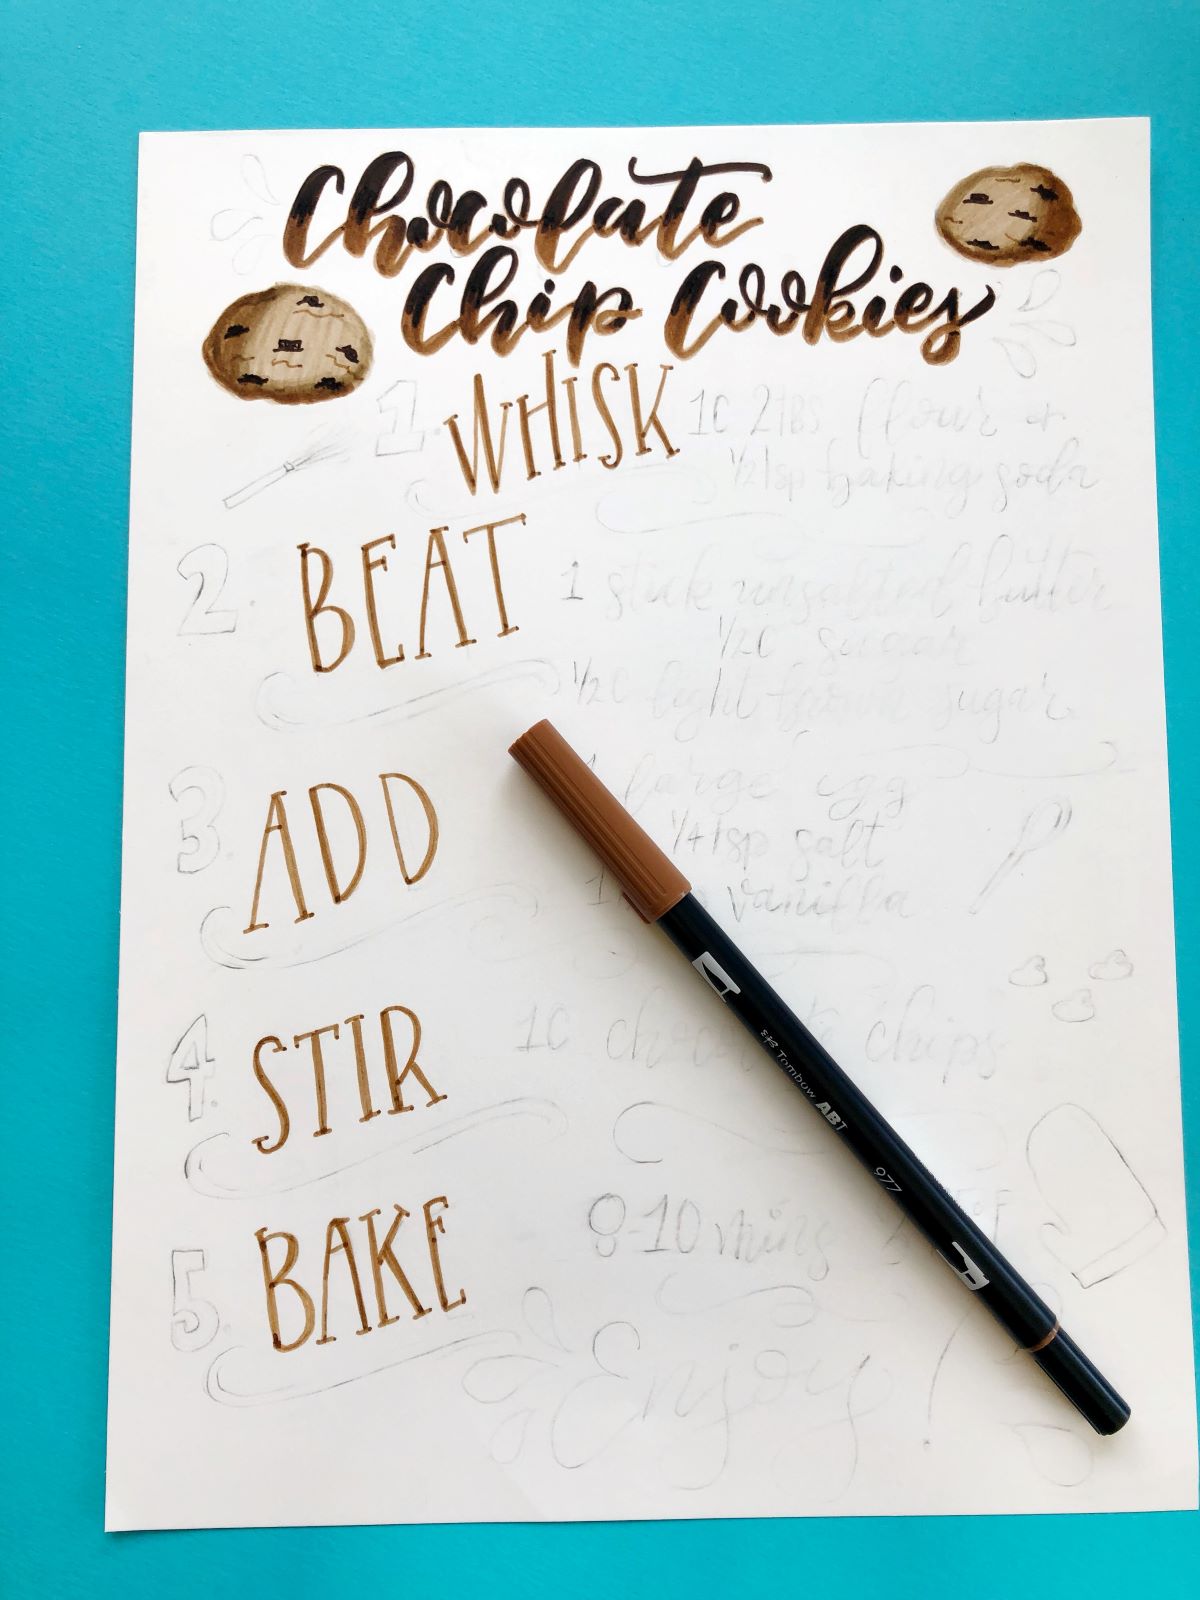
Use MONO Drawing Pen 05 to letter over the ingredients in a monoline style.
Next, use Dual Brush Pen N15 to color in the step numbers, the word “Enjoy” and all the embellishments.
Lastly, add the remaining details. Use Dual Brush Pens 856 to color in the oven mitt, N75 to color the whisk, 992 and 977 for the wooden spoon, and 879 for the chocolate chips. Use MONO Drawing Pen 01 to add shadows to each step name and to trace around each illustration. Next, use MONO Drawing Pen 05 to trace around each letter in “Chocolate Chip Cookies”. Lastly, use Dual Brush Pen N75 to add shadow to your flourishes and to the word “Enjoy”. Erase any remaining pencil lines with the MONO Plastic Eraser.
Thanks for following along today! I hope you enjoyed learning how to create this fun and easy recipe art print! Be sure to tag @tombowusa and @a_heartened_calling if you create your own recipe art!
For more projects inspired by food, check out these posts:
- Yummy Love Donut Lettering Inspired by Lauren
- Cool and Easy Ice Cream Lettering with Jennie
- How to Letter Food Puns With Tombow Dual Brush Pens with Dani
Have fun creating and see you next time!
Mandy
There is certainly a lot to find out about this topic. I really like all of the points you have made.
It looks really cool! It will make my favorite recipes look even more colorful. By the way, do you have any special recipes or special ingredients for your usual dishes?