Hello Ali LePere here! After doing a ton of thinking, I decided to make a project based on the art of Lisa Frank. If you grew up in the 90’s, you know her by her use of rainbows and animal prints. Today, I’m going to walk you through a project where I make a tiger striped rainbow heart in Lisa’s eye-catching style. Let’s get started!
Materials
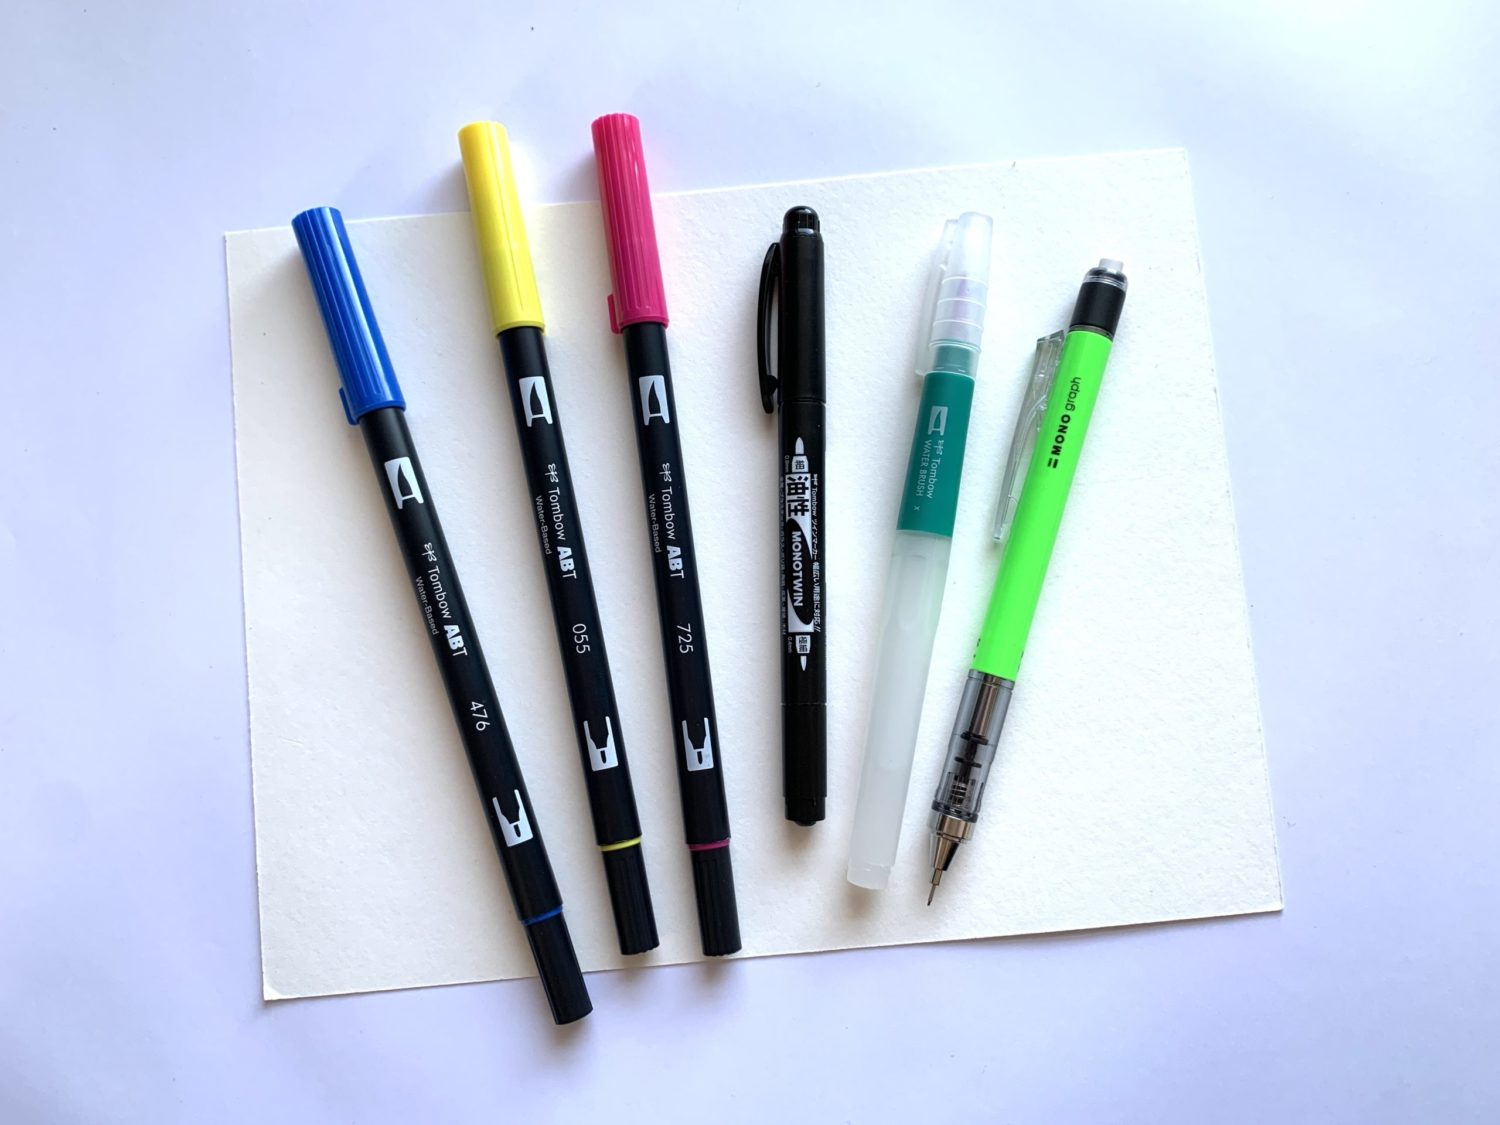
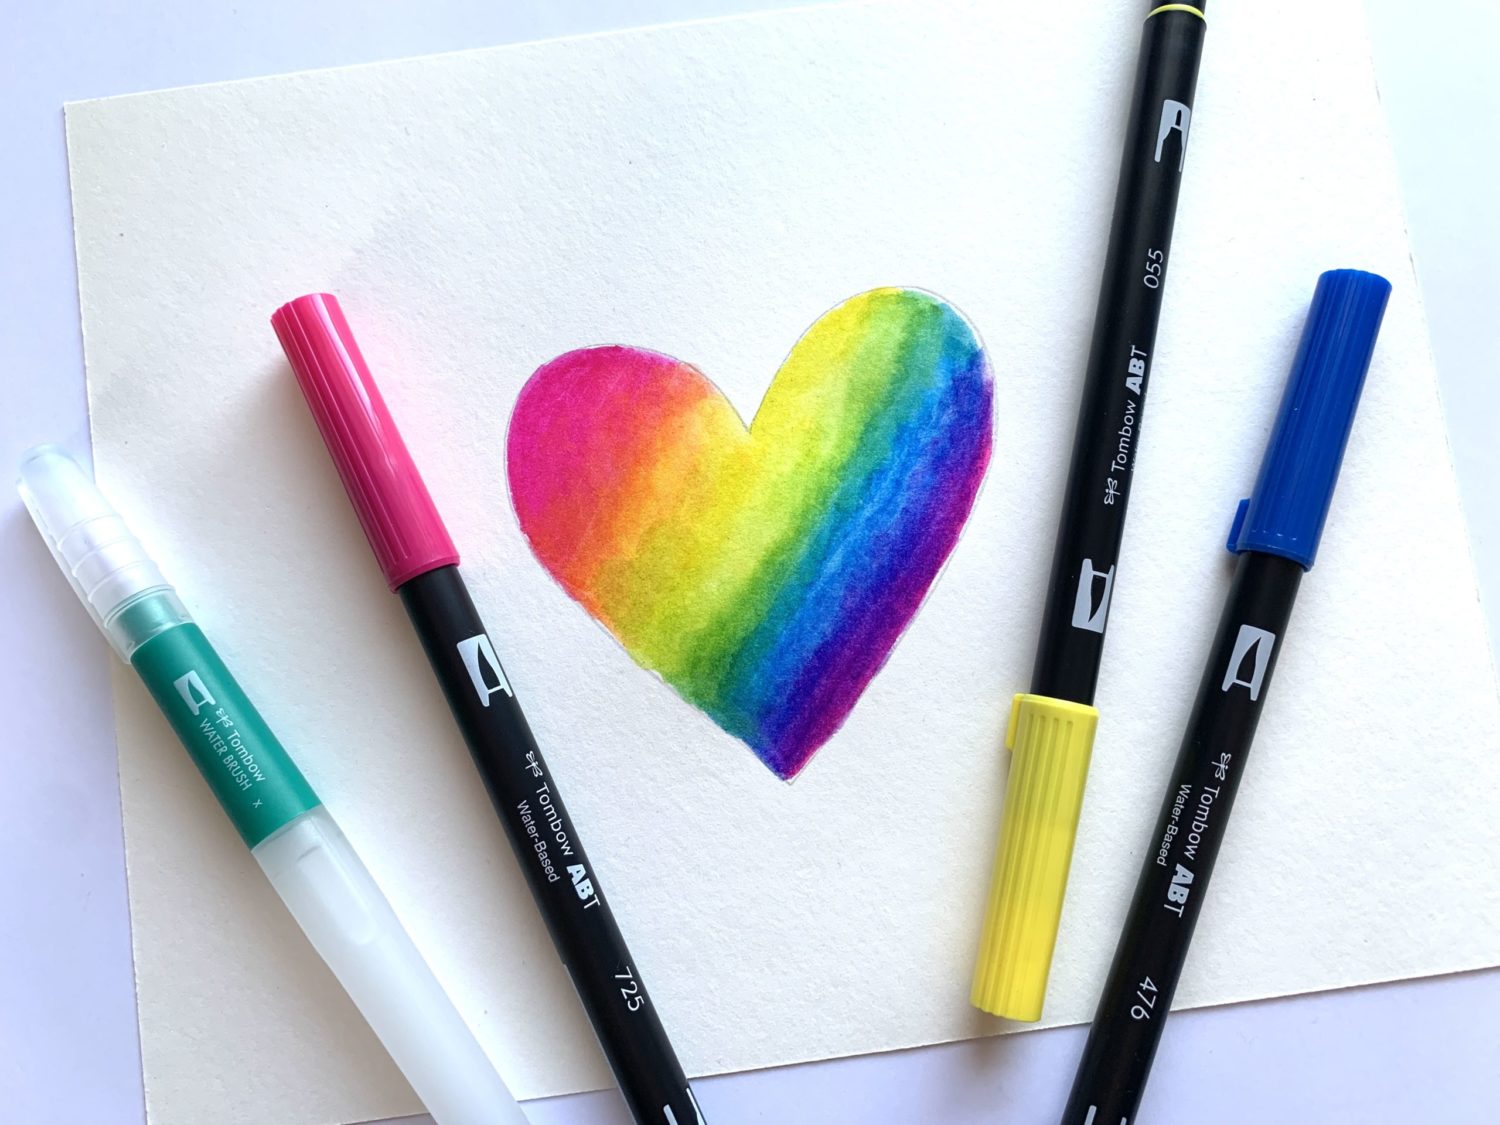
- Tombow Dual Brush Pens – 476, 055, 725
- Tombow MONO Graph Mechanical Pencil
- Mixed media or watercolor paper
- Tombow Medium Water Brush
- Tombow MONO Twin Permanent Marker
Step 1
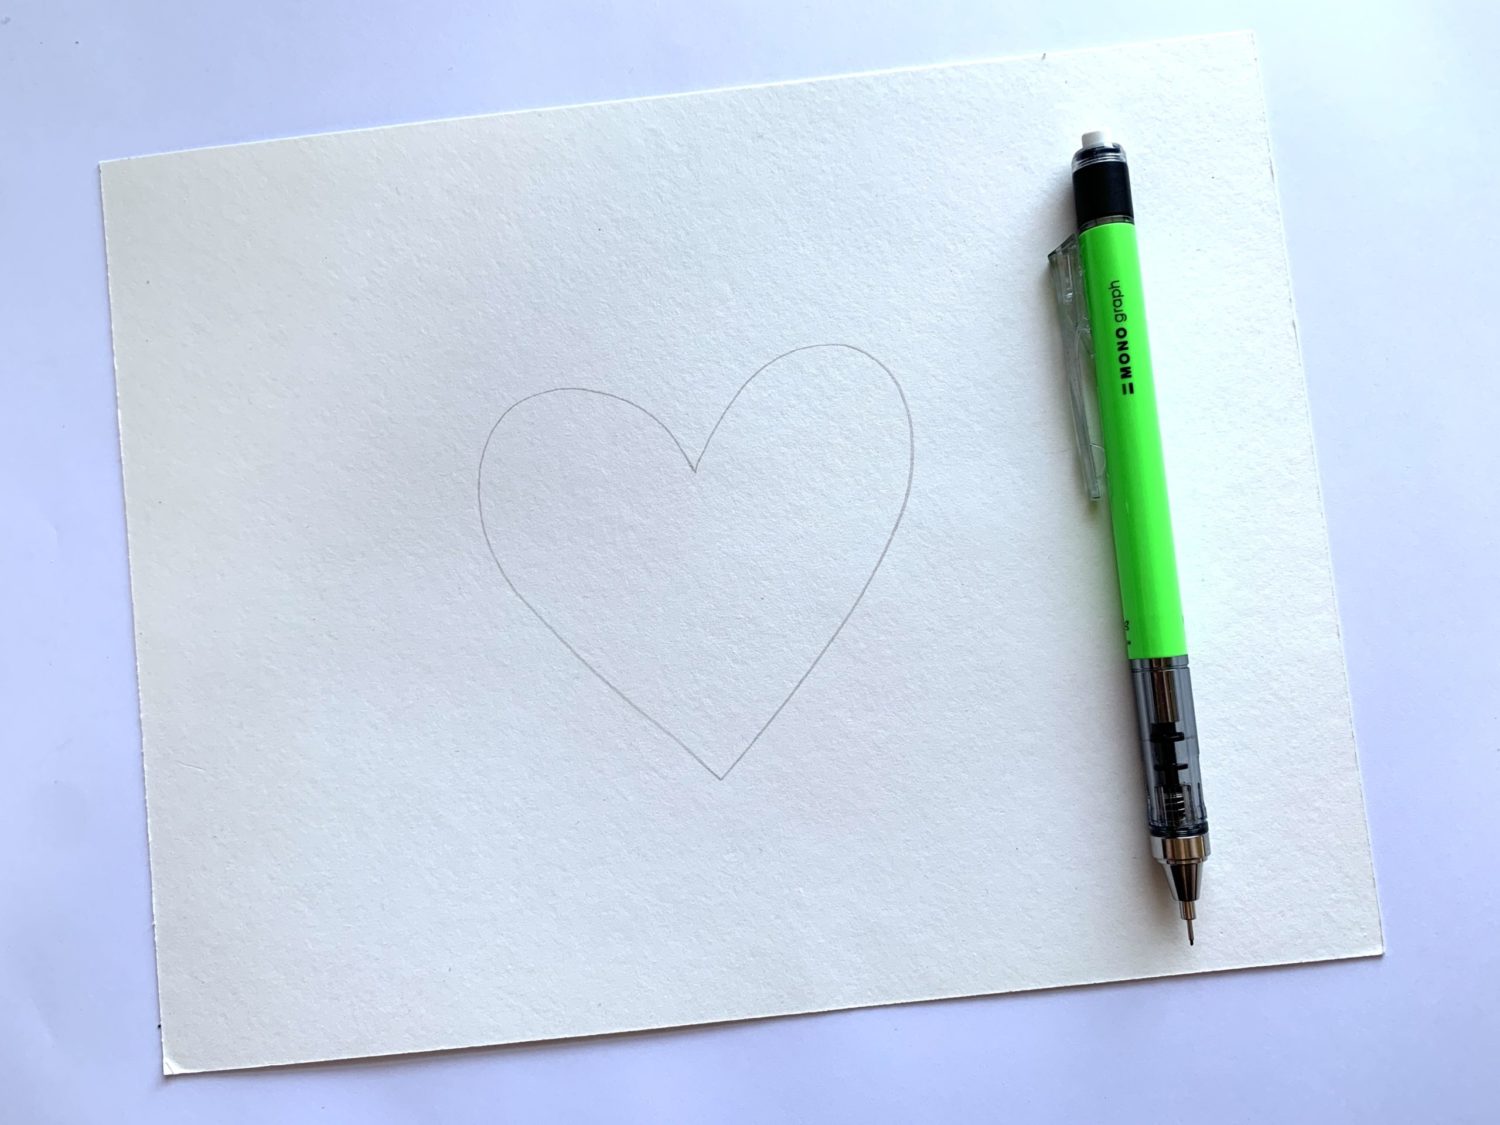
I drew a simple shape with the MONO Graph Mechanical Pencil. I drew a heart, but any shape would have worked.
Step 2
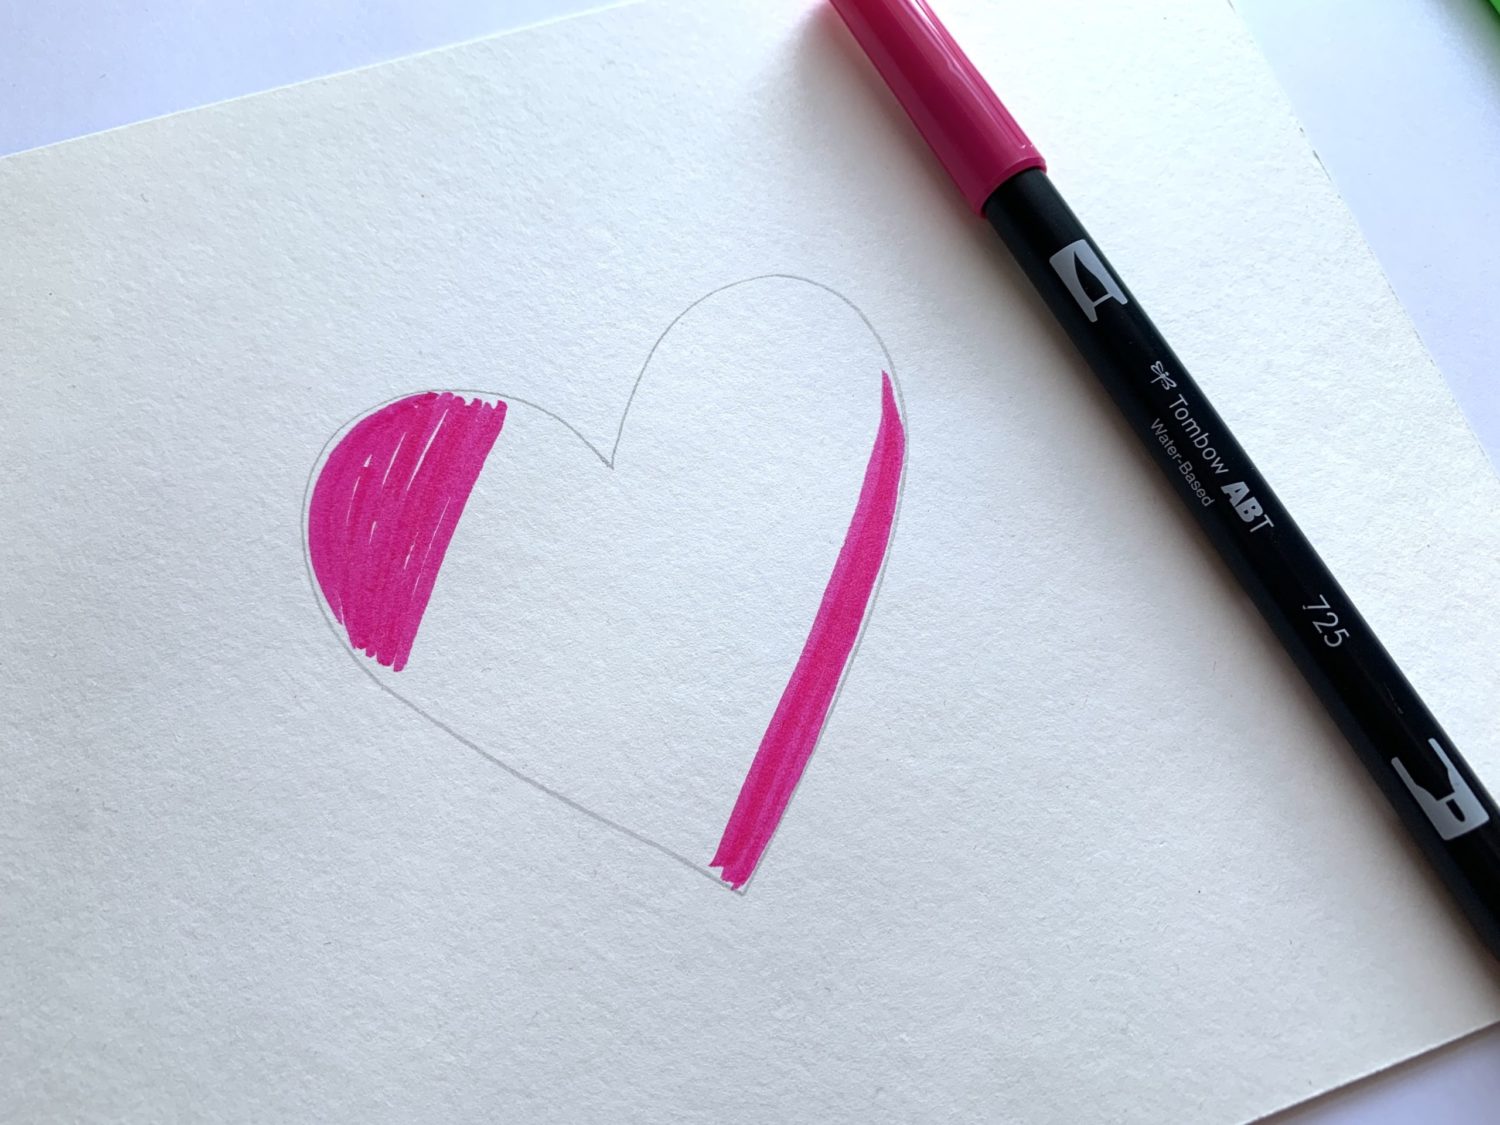
Using Dual Brush Pen 725, I colored in two small areas of my shape. The larger swatch of pink is the beginning of the rainbow. I colored a smaller bit of pink on the opposite side of the shape.
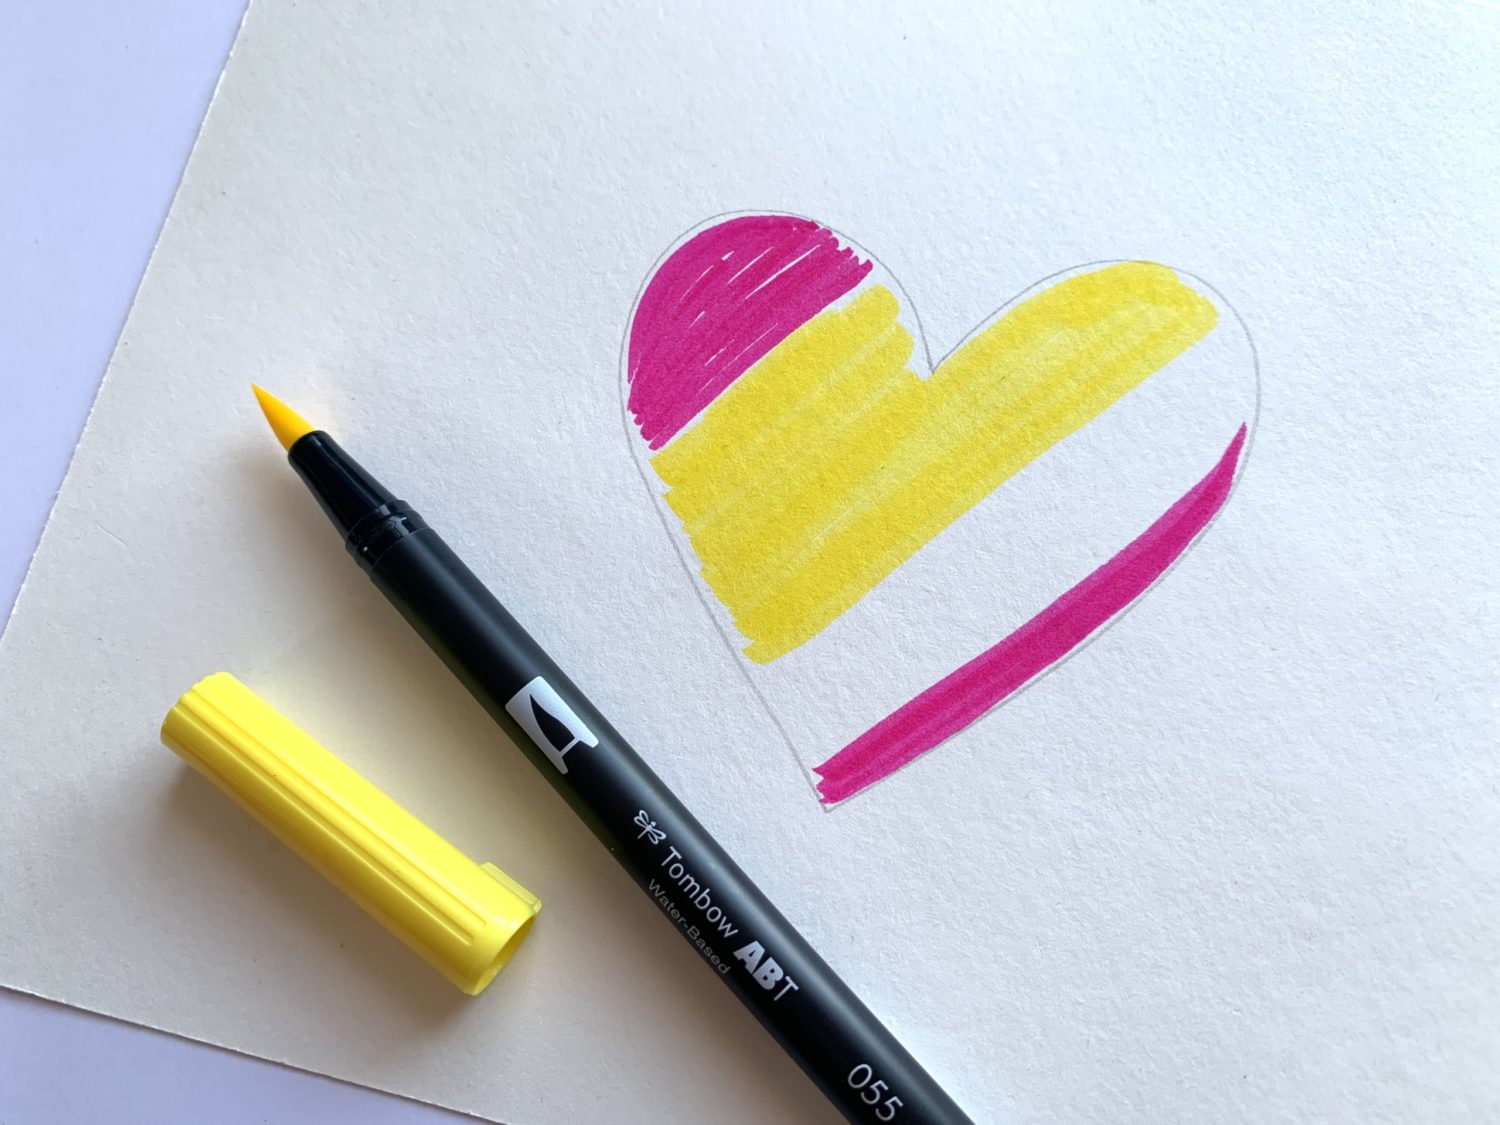
Next, I used Dual Brush Pen 055 to color a large swatch of yellow next to the larger of the two pink sections. IMPORTANT: Since the yellow needs to be blended with both the pink to make orange and the blue to make green, I needed to make this color swatch large. This helped leave room for blending without losing the yellow color in later steps.
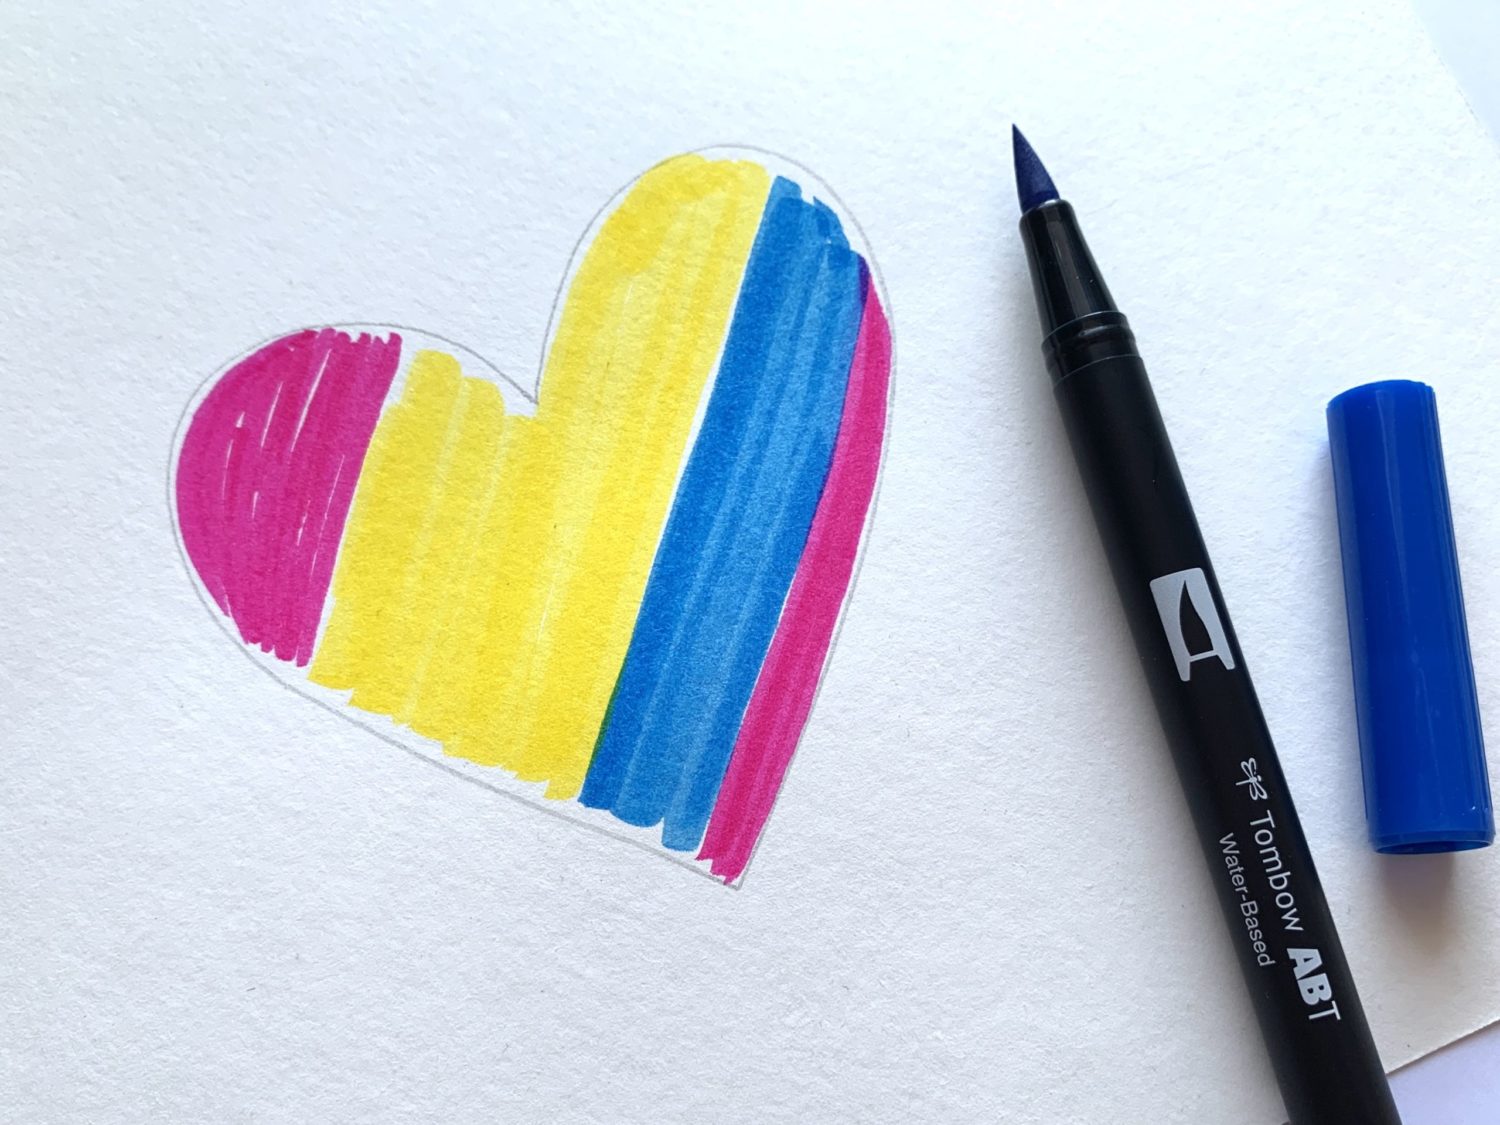
Lastly, I colored the rest of the heart with Dual Brush Pen 476.
Step 3
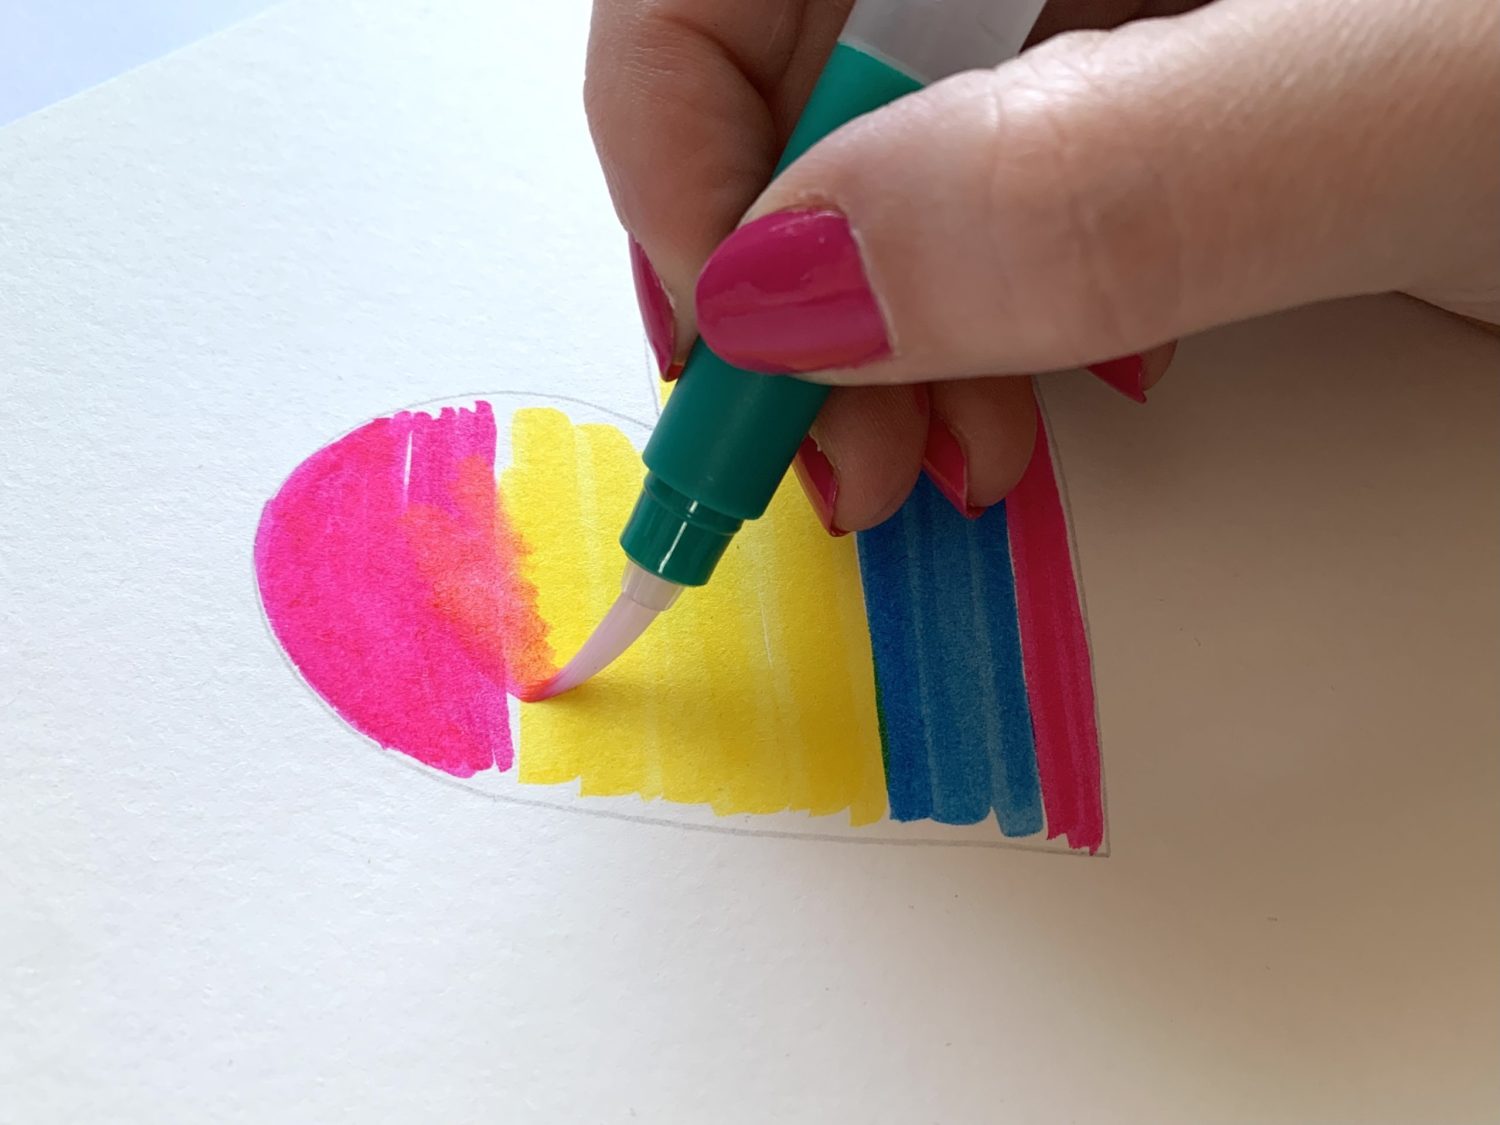
With the Water Brush, I wetted the larger pink area and slowly blended it into the yellow ink. As I moved the pink ink, it began to dilute and also mix with the yellow ink. This created an orange color that blended the pink and yellow sections together.
Step 4
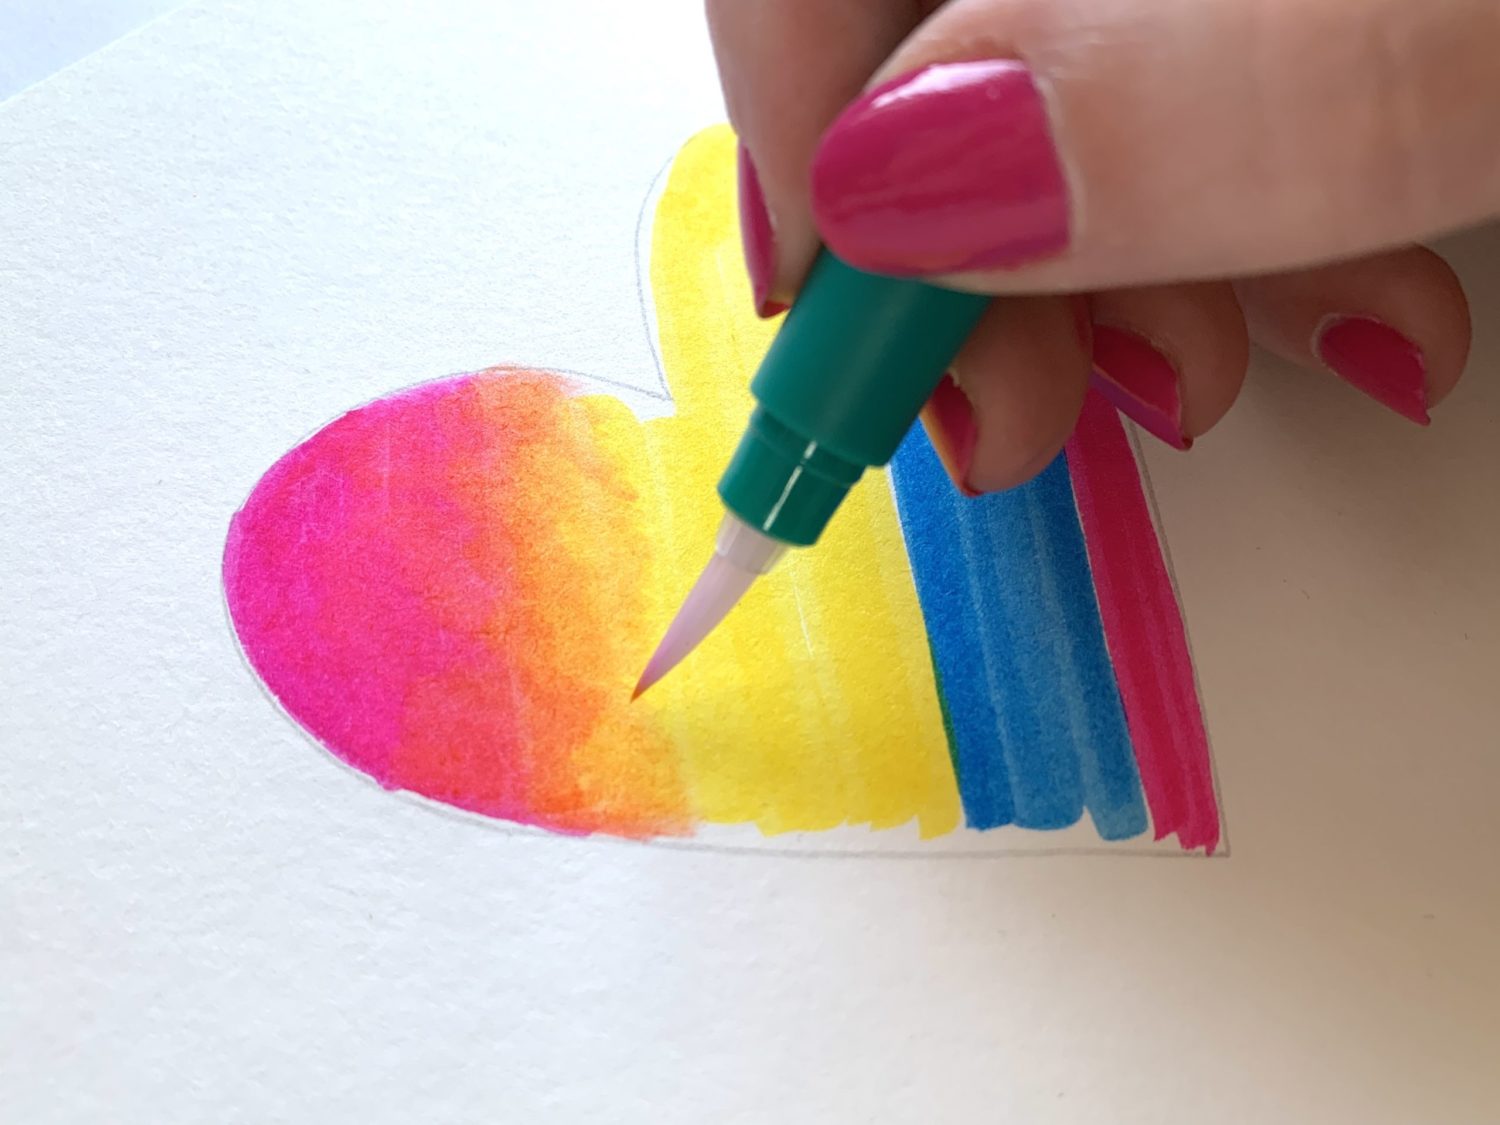
After making sure any remaining ink was squeezed out of the Water Brush, I moved to the opposite side of the shape. I wetted the area where the pink and blue ink met with the Water Brush and began to blend the area. Since the pink ink is there specifically to make a purple color, I didn’t have to preserve that color. I made sure the blue ink was covering that pink area completely.
Step 5
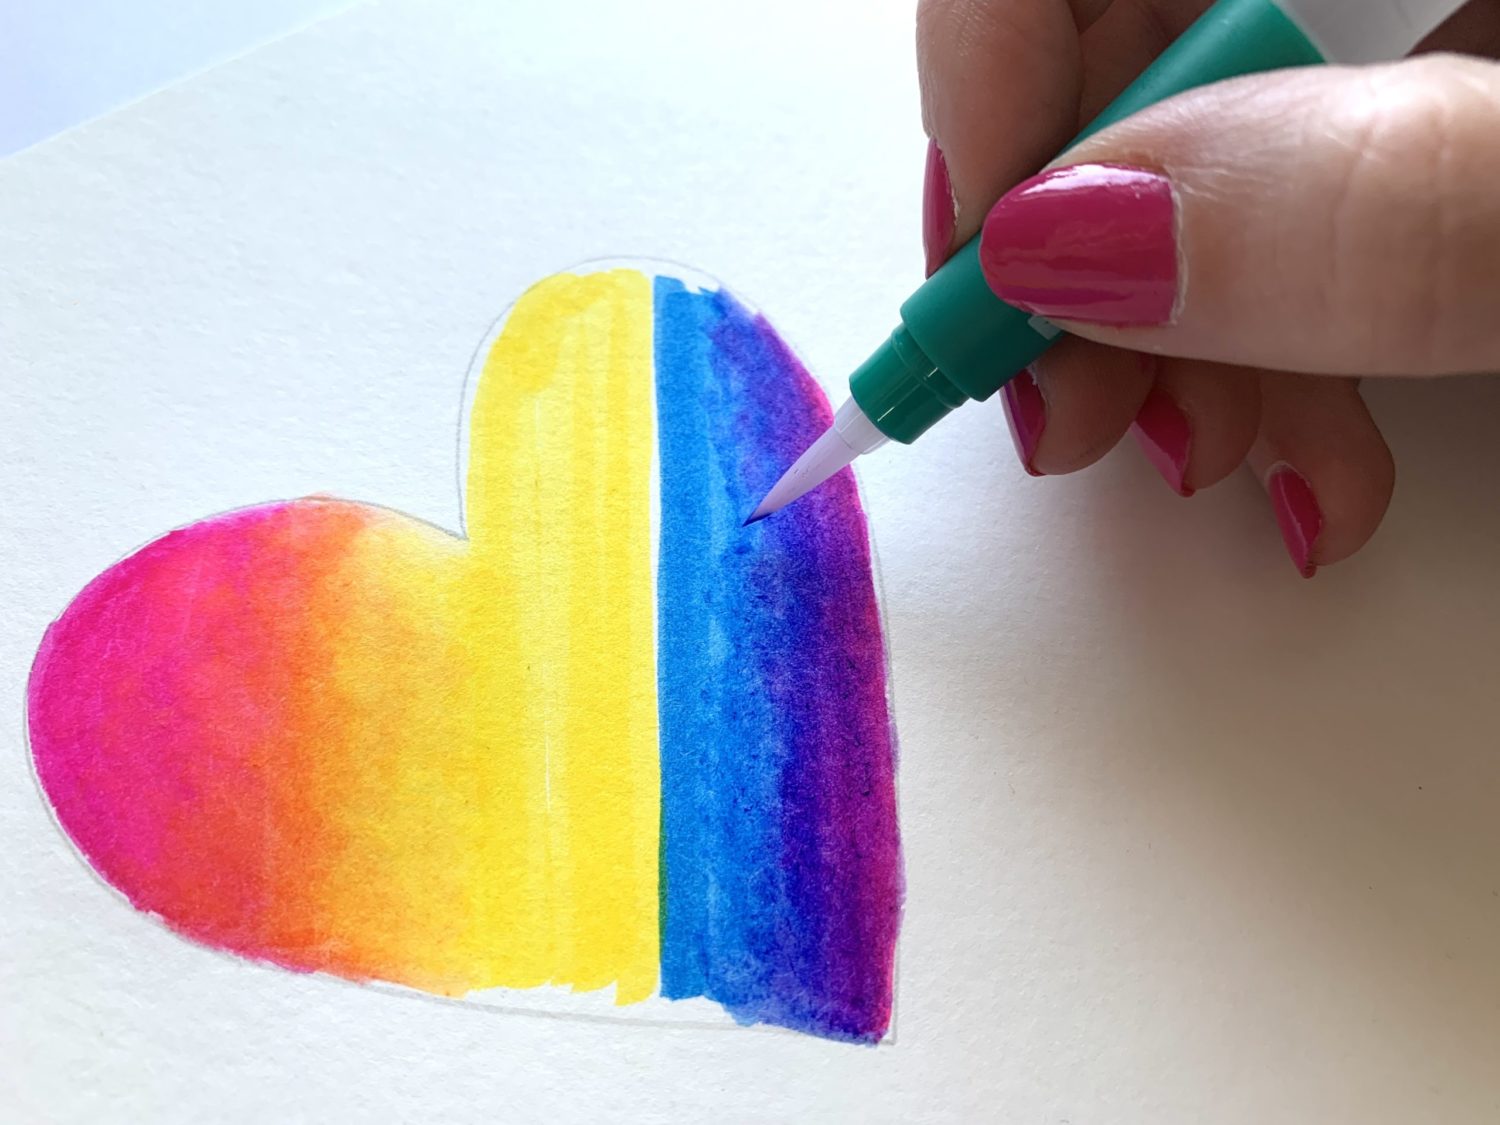
After squeezing out any blue or purple ink left over on the Water Brush, I wetted the area where the blue and yellow ink met. Doing so made a green, but it didn’t make a smooth color transition.
In order to make a smooth gradient from yellow to green, I needed to dilute the green ink more. Just like before, I used the Water Brush and wetted the area where the green and yellow inks met.
The green color was lighter, but still a little too dark to make a smooth transition into the yellow color. I needed to wet the area where the green and yellow met one more time.
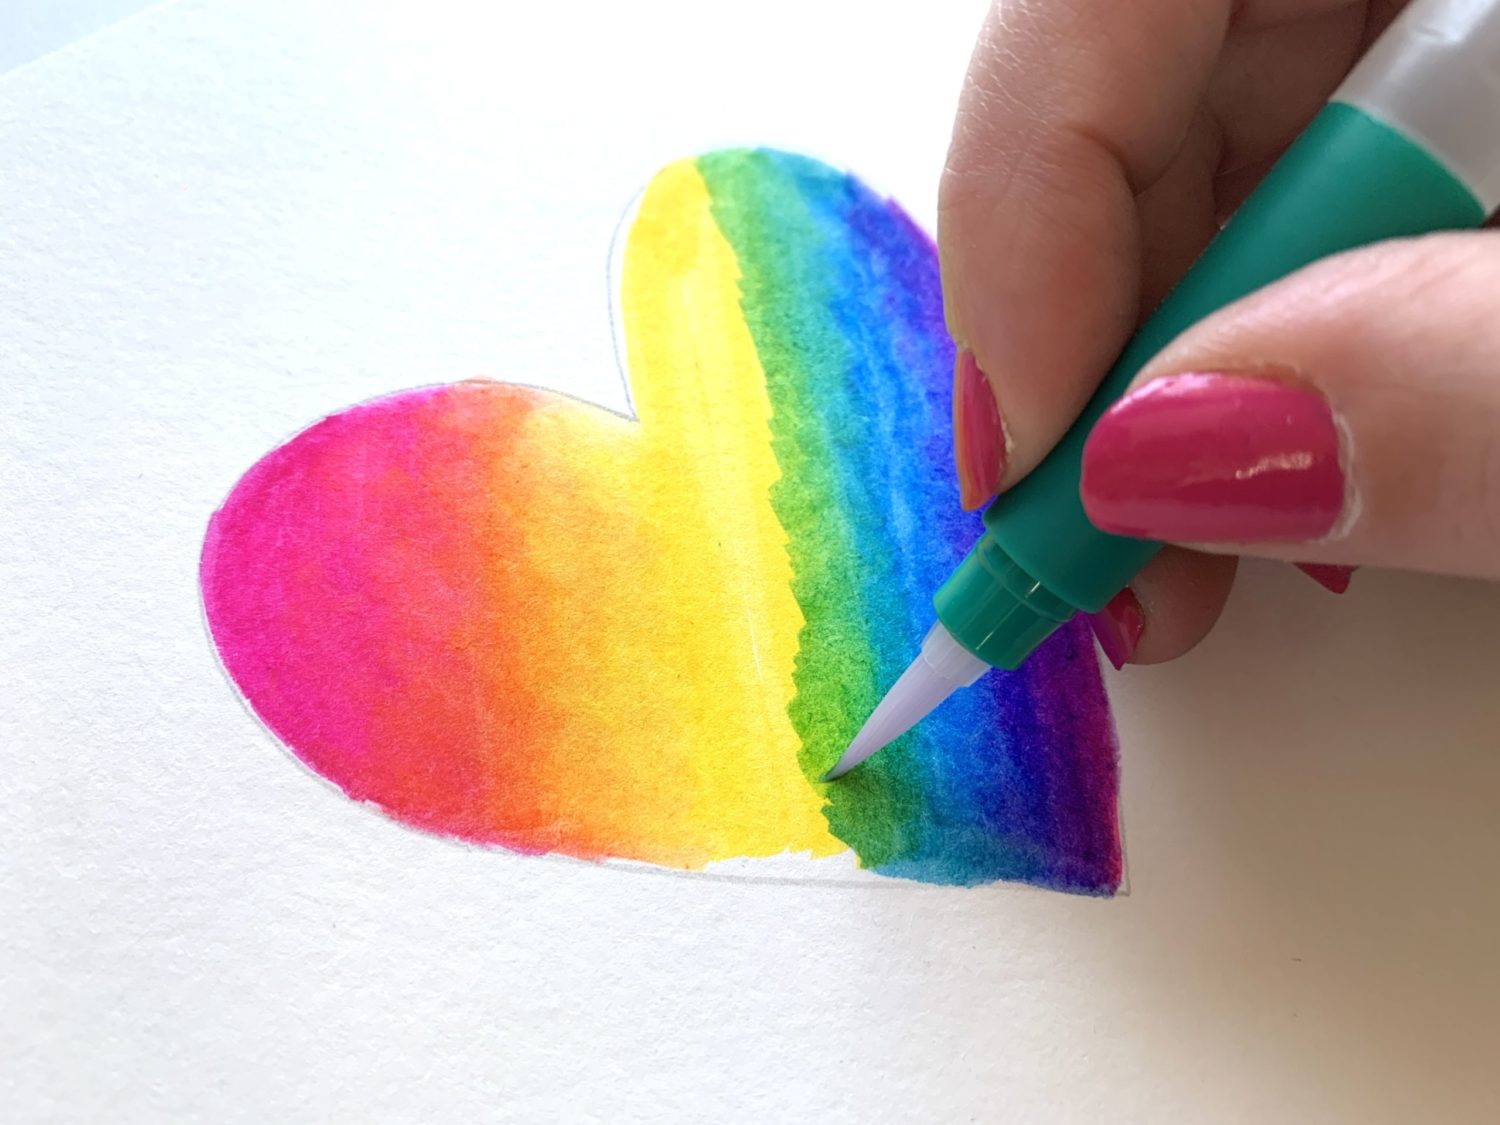
This is why it was so important to make a large area of yellow ink in Step 2. If the yellow area was smaller, the green color would meet the orange color. Instead, since that area was large enough to blend the green ink into, that yellow color was preserved.
Step 6
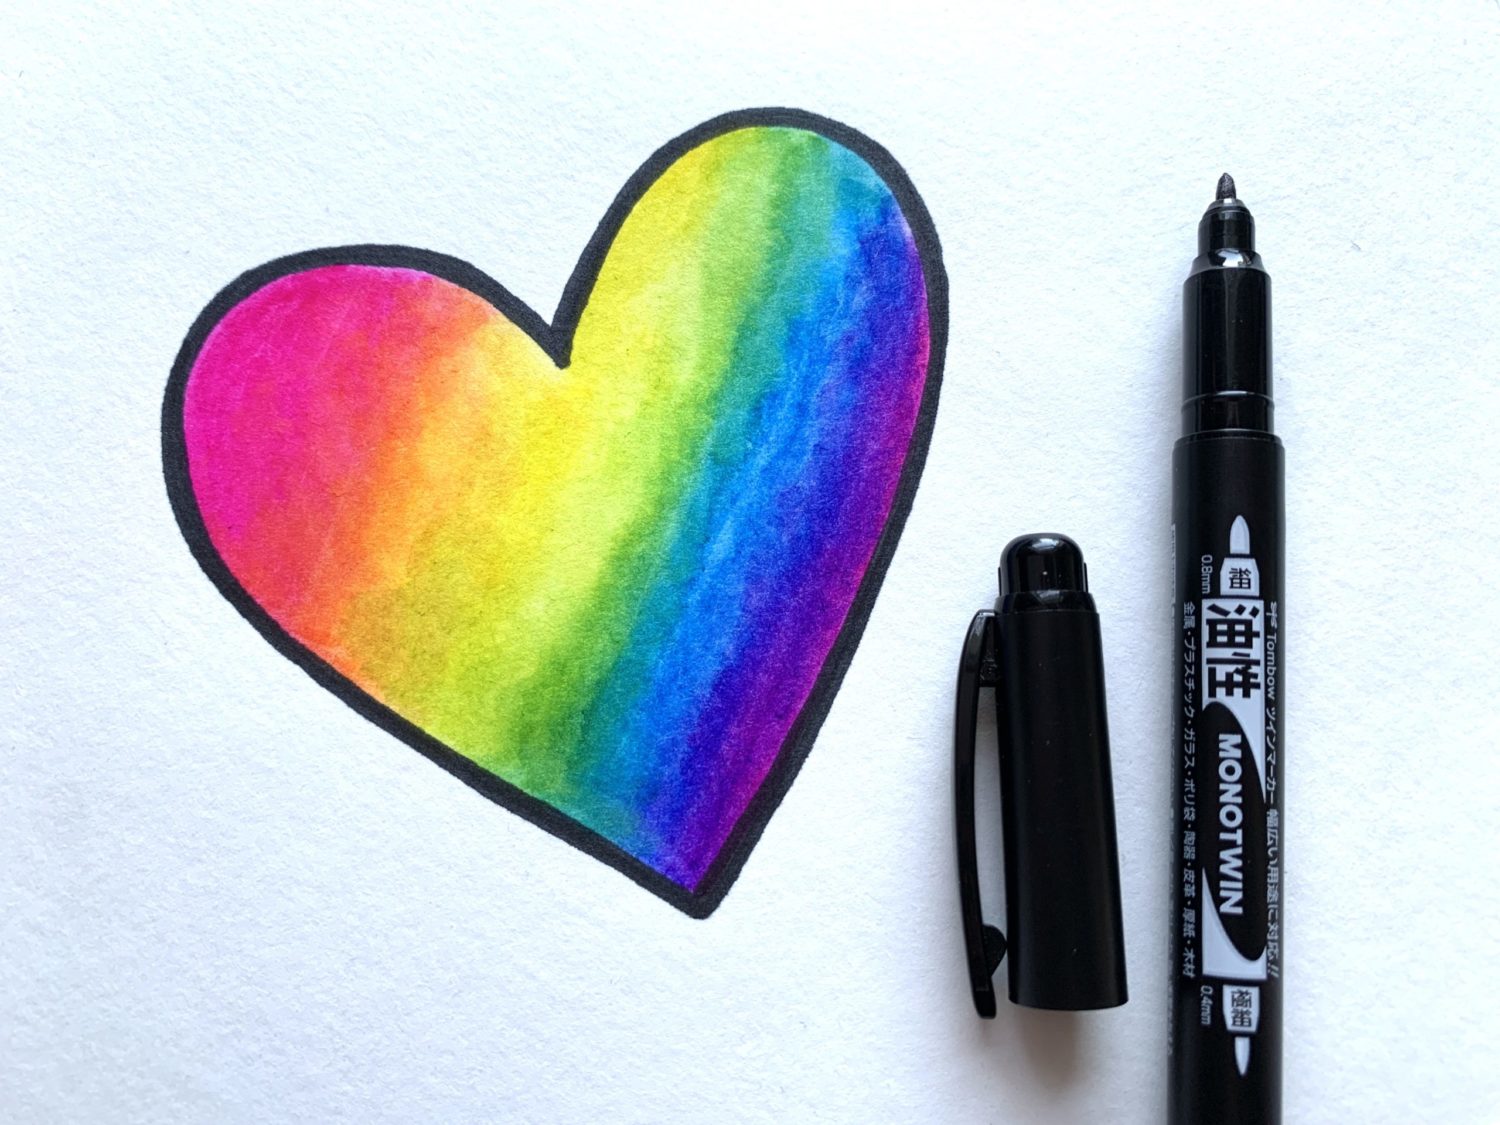
After letting the rainbow heart dry for a few minutes, I used the broad tip of the MONO Twin Permanent Marker to draw a bold outline around the heart shape. This marker is fantastic for watercolor projects because the ink is oil based. The oil based ink won’t have any strange interactions or bleeding with the water based ink from the Dual Brush Pens.
Step 7
Using the fine tip of the MONO Twin Permanent Marker, I drew the outline of tiger stripes over the colored area.
Step 8
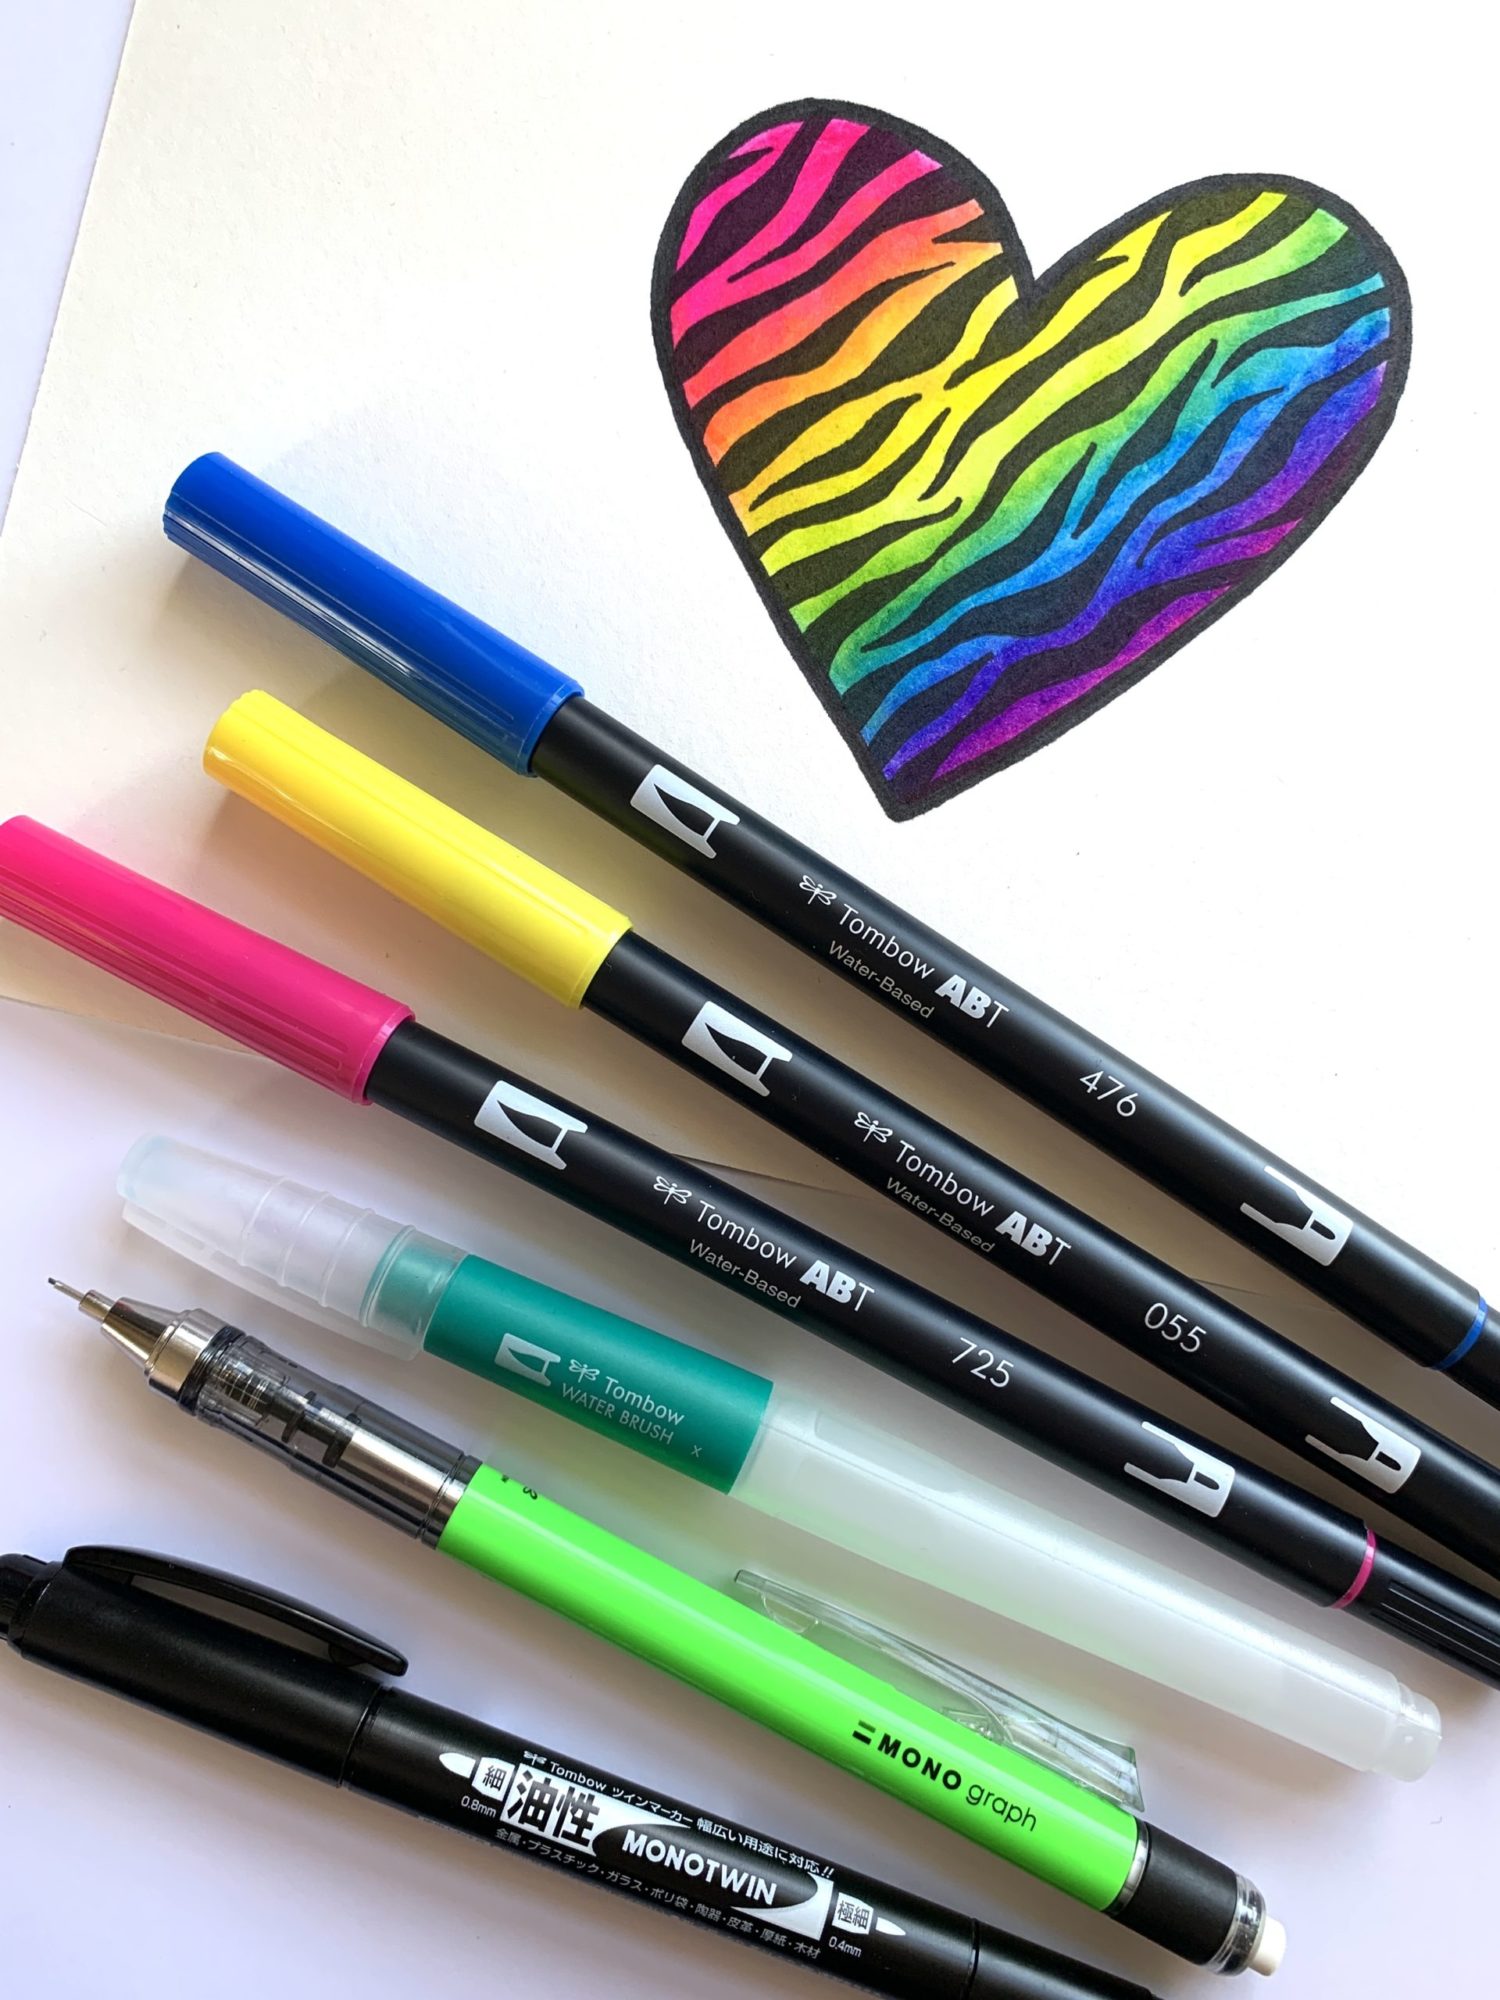
Lastly, I switched back to the broad tip of the MONO Twin Permanent Marker and carefully colored in the tiger stripes. Once the stripes were filled, my rainbow heart was completed!
Make sure to tag Tombow if you decide to make your own rainbow heart so we can see your art and cheer you on!
so cute! I like it!