Hi, Jessica from BrownPaperBunny here to show you how to draw a peony. They’re one of my favorite flowers, and if you’re here, I’m betting they’re one of yours too. Here’s what you’ll need to follow along.
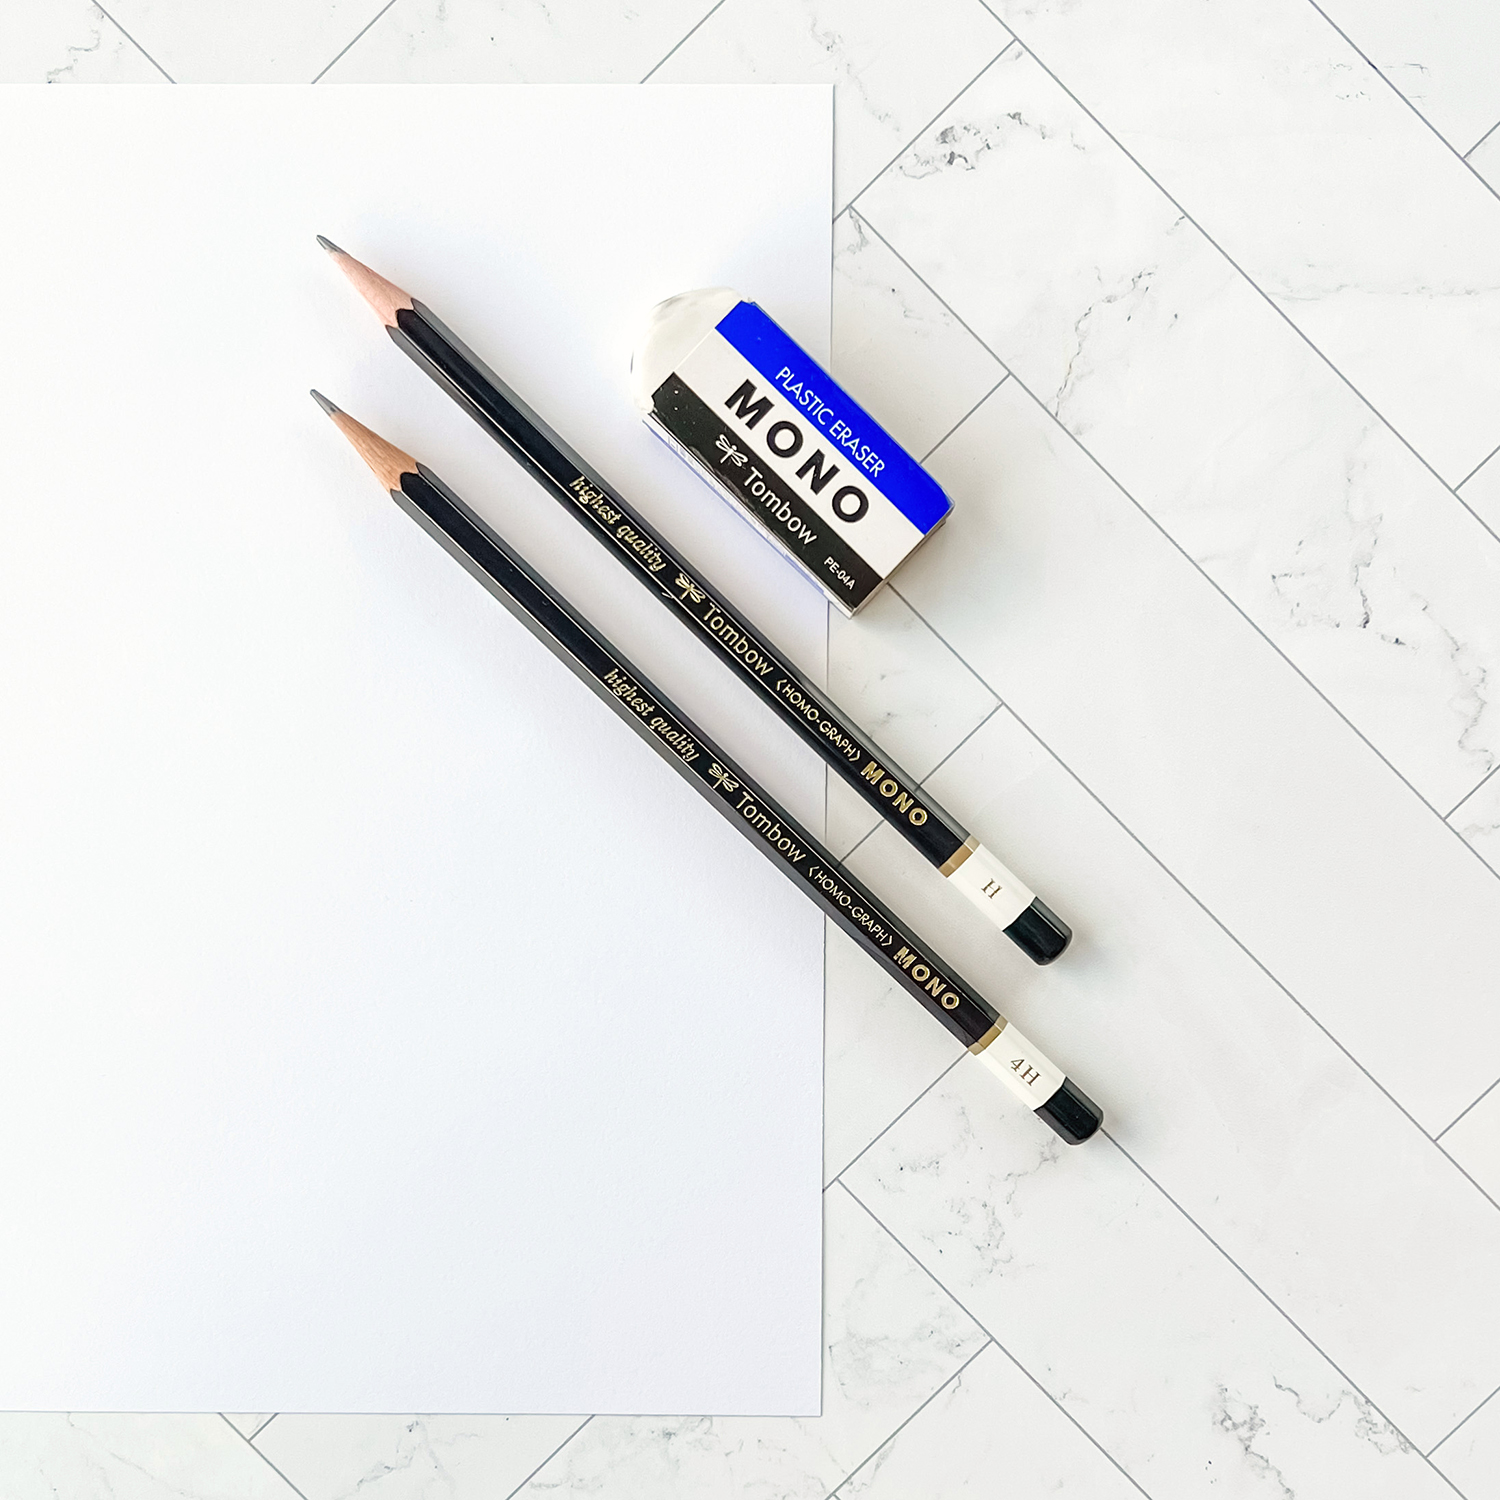
Supplies:
- Tombow MONO Drawing Pencils (4H and H)
- Drawing paper
- Tombow MONO Eraser
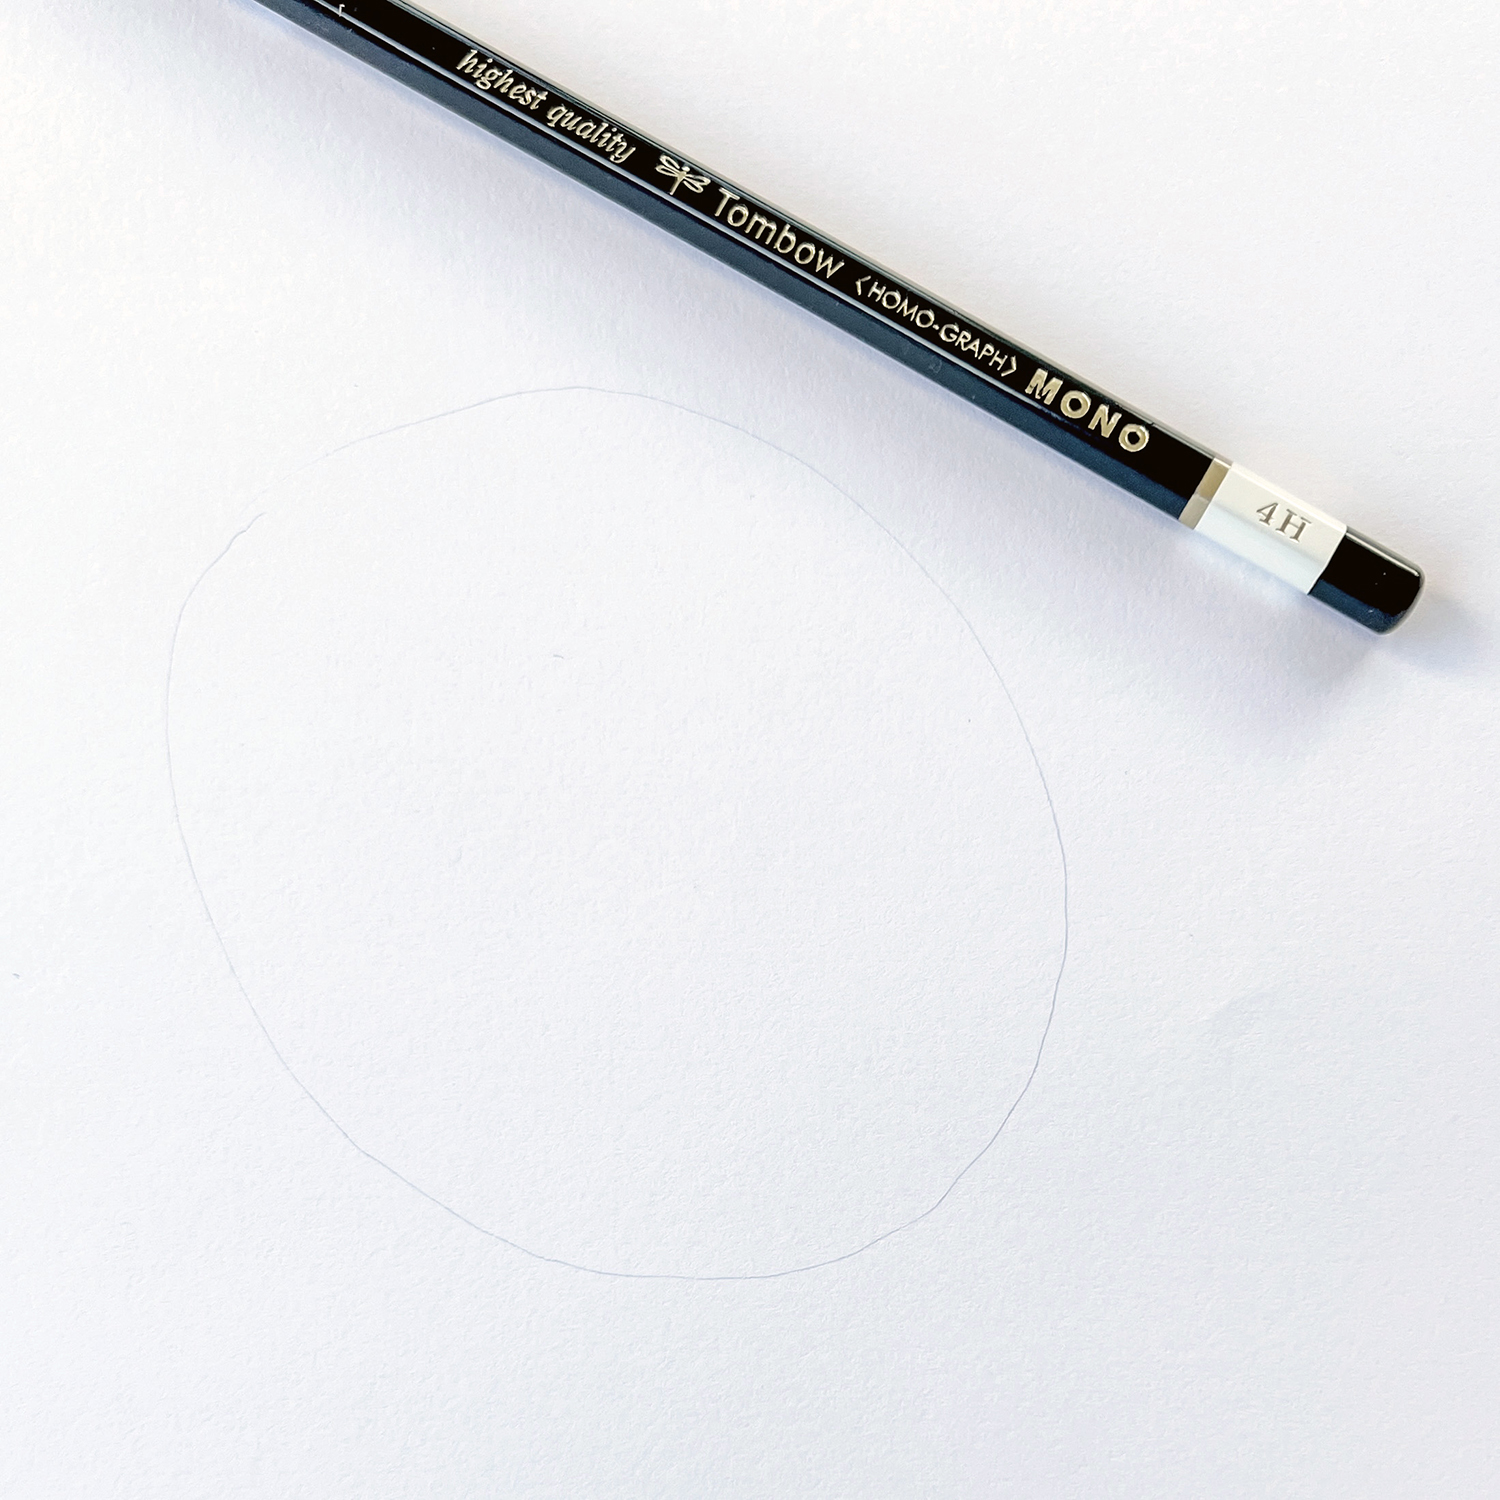
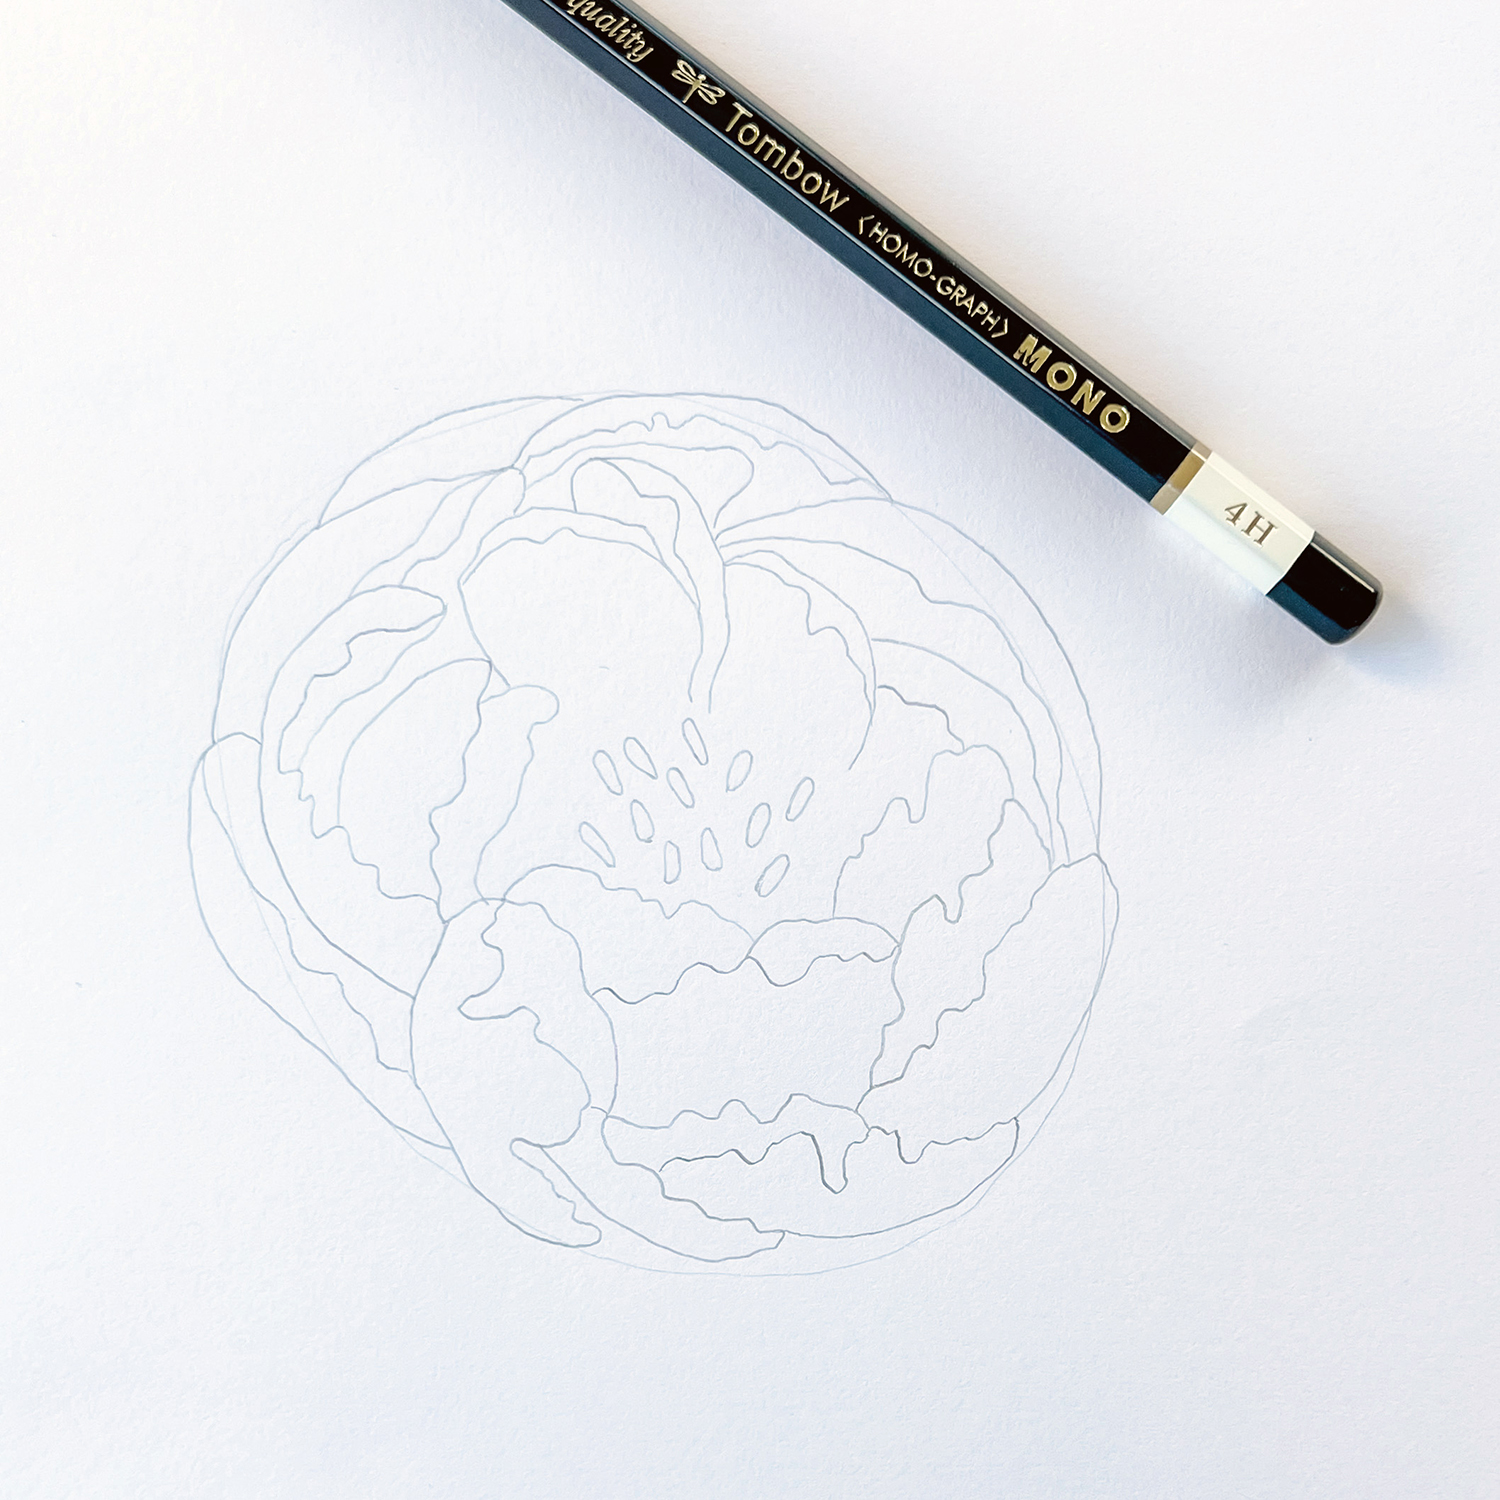
Step 1: Sketch an Oval
The first step is to lightly sketch an oval onto your drawing paper using your 4H MONO Drawing Pencil. The 4H is a very hard pencil, so it leaves a much lighter line, which is great for sketching guidelines. You might like to draw your oval on a slight tilt rather than completely horizontally.
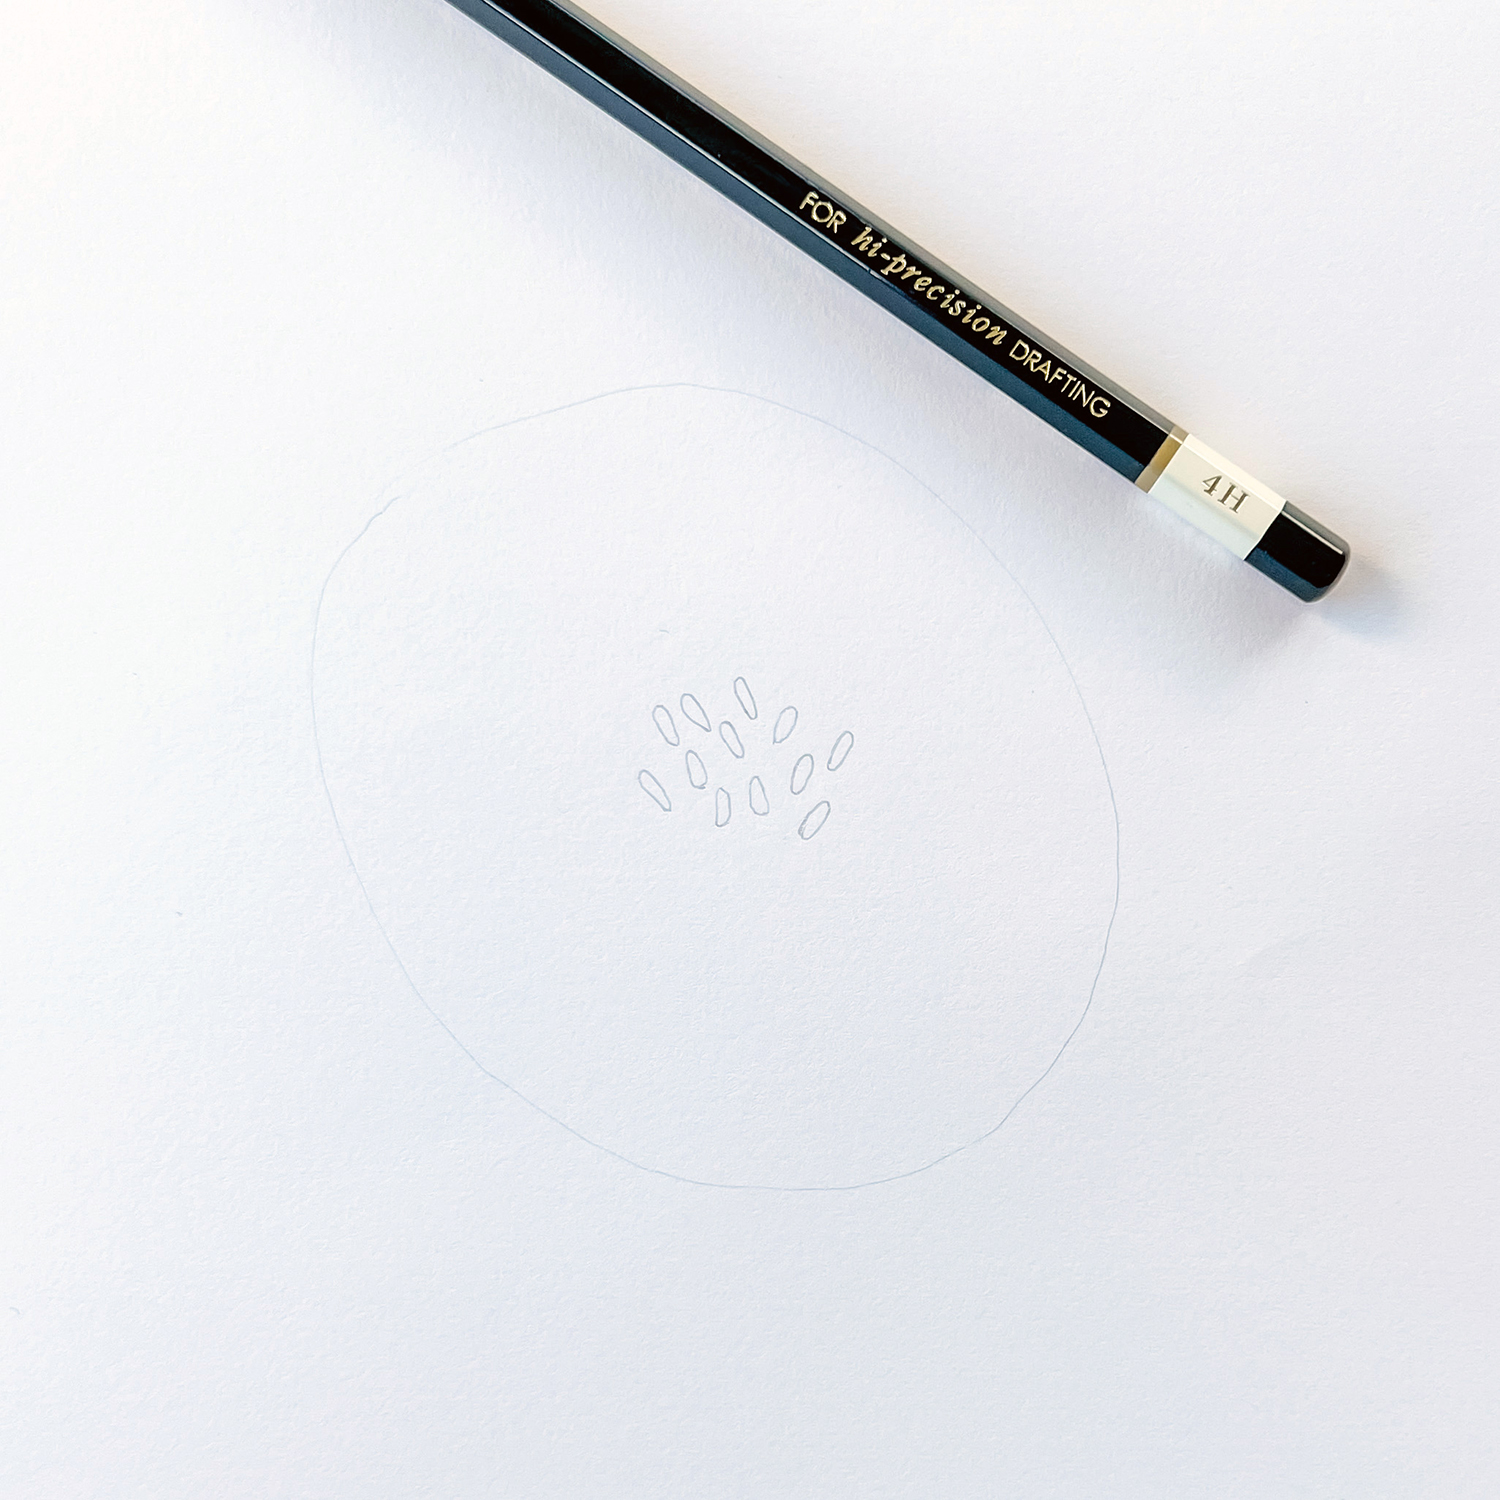
Step 2: Draw the Anther
Draw several smaller ovals in the center of your large one. These will be the peony’s anther (the part that makes pollen). They should look like little grains of rice.
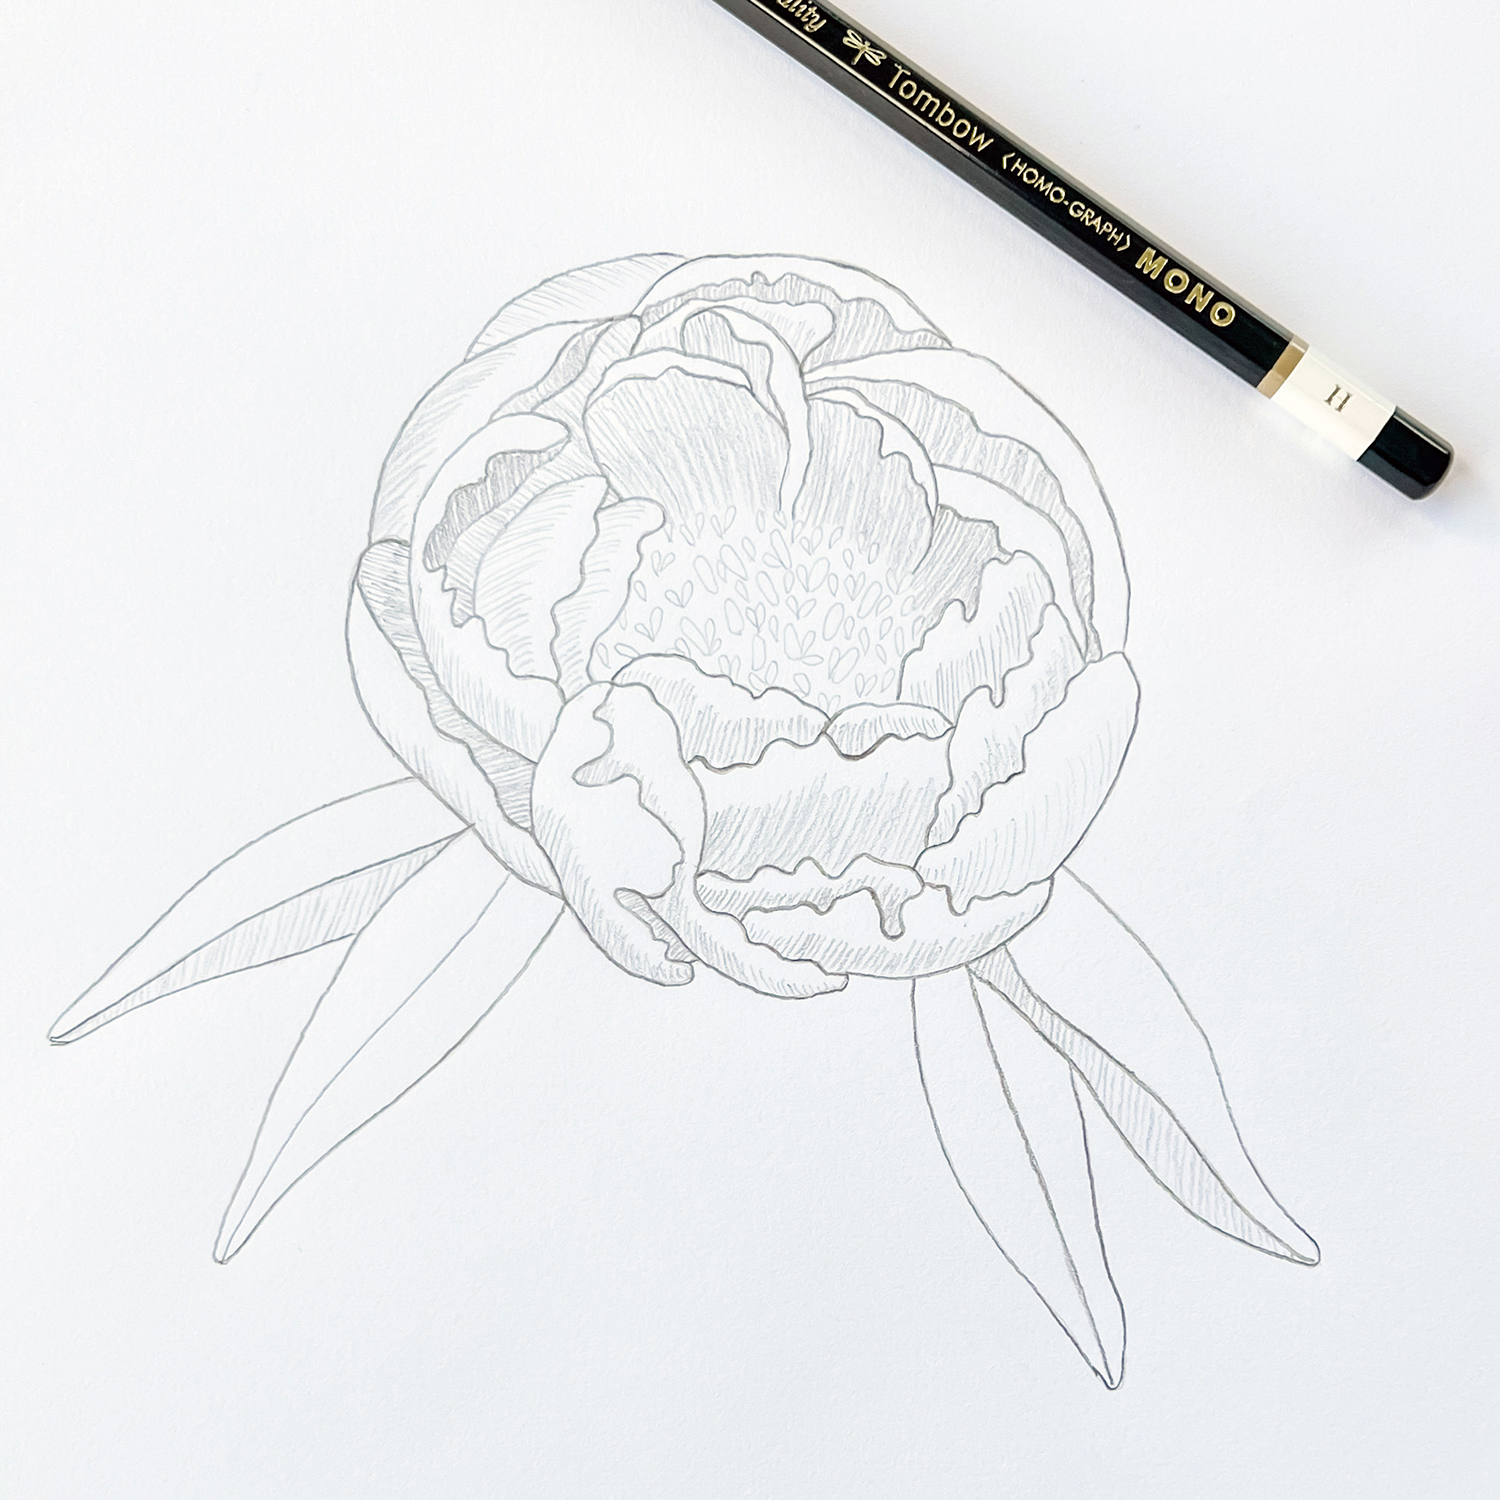
Step 3: Draw the Petals
This might seem like the tricky bit, but if you start drawing the petals from the center, it’s easier than it might look at first. The tops of the petals are wavy and the body of the petals all curve around towards the center of the peony. They all overlap one another.
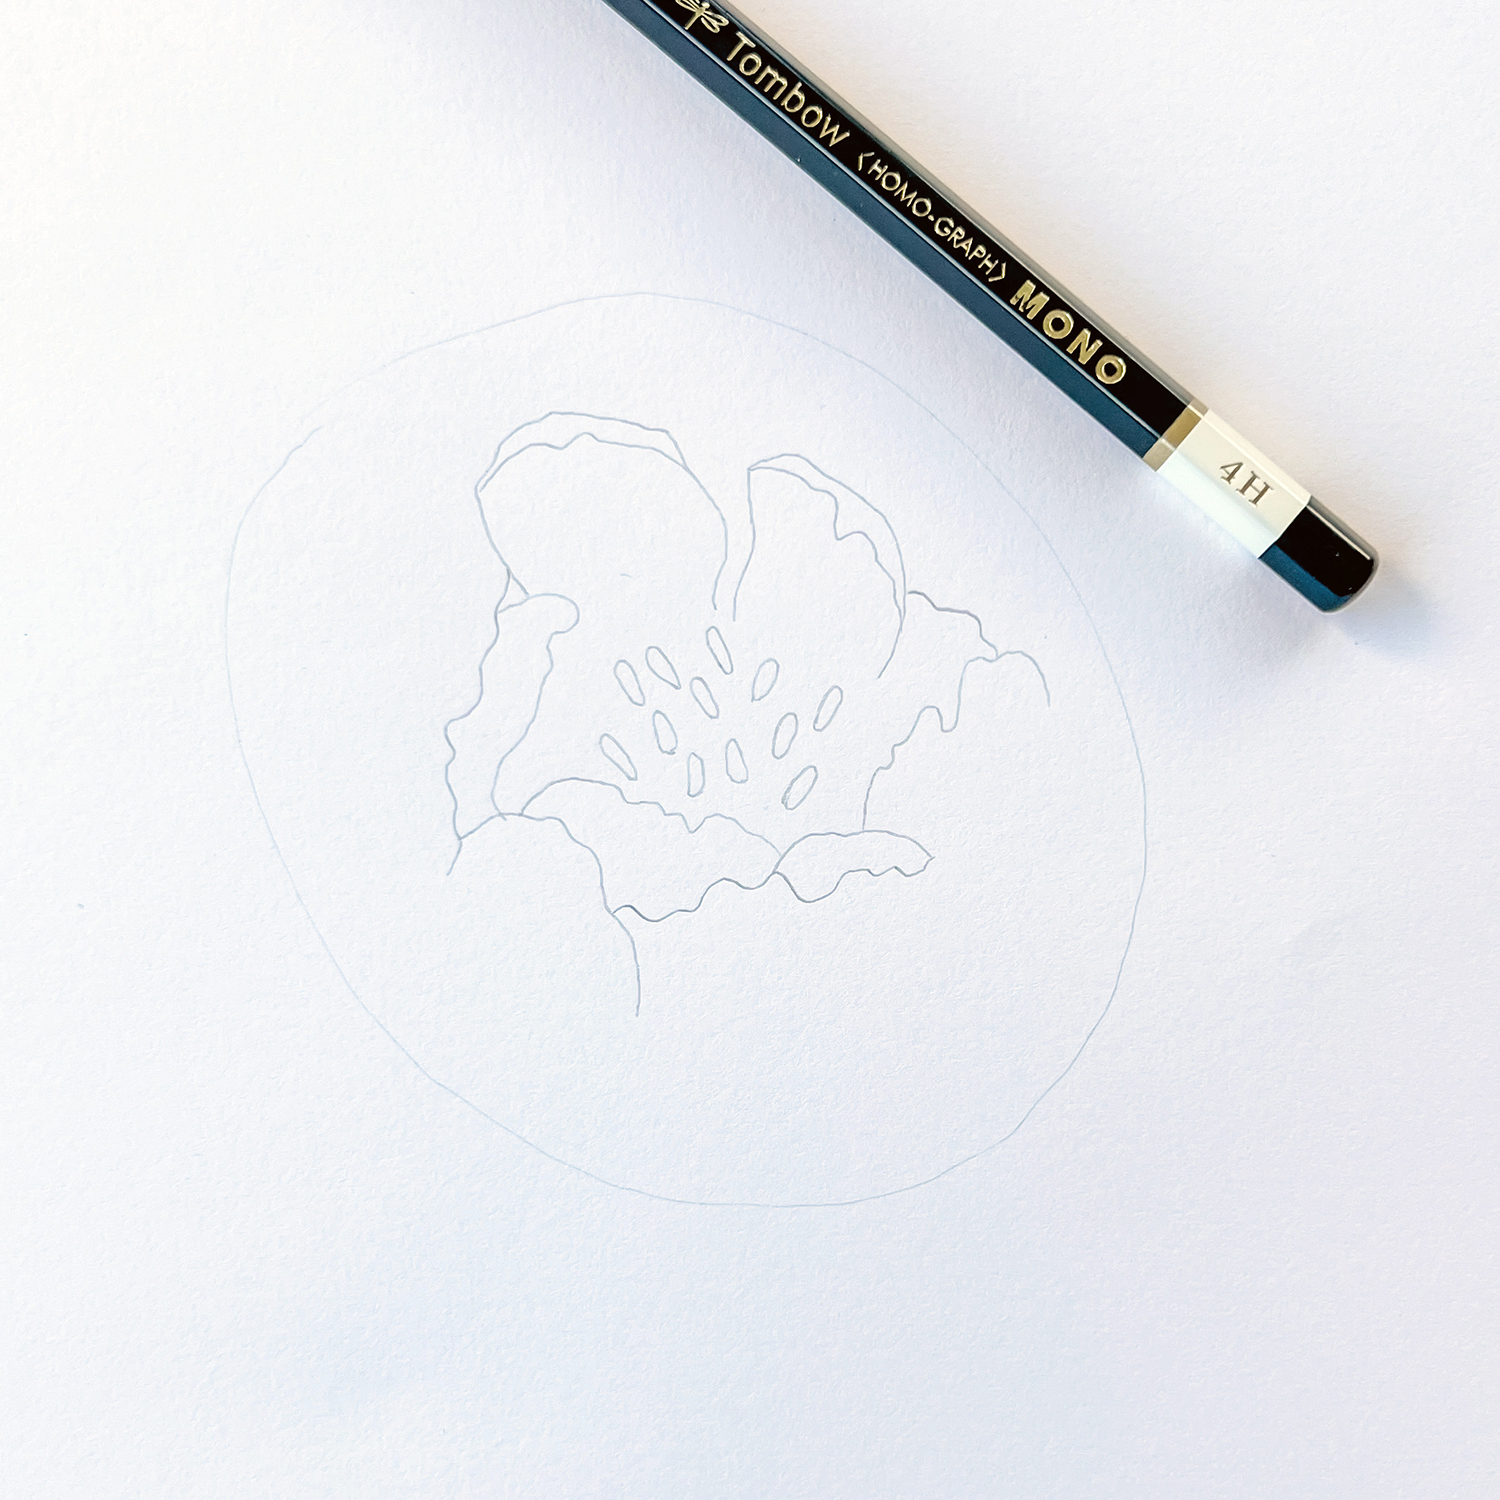
Once you’ve got your center petals started, you’ll be able to continue outwards until you fill your oval guideline.
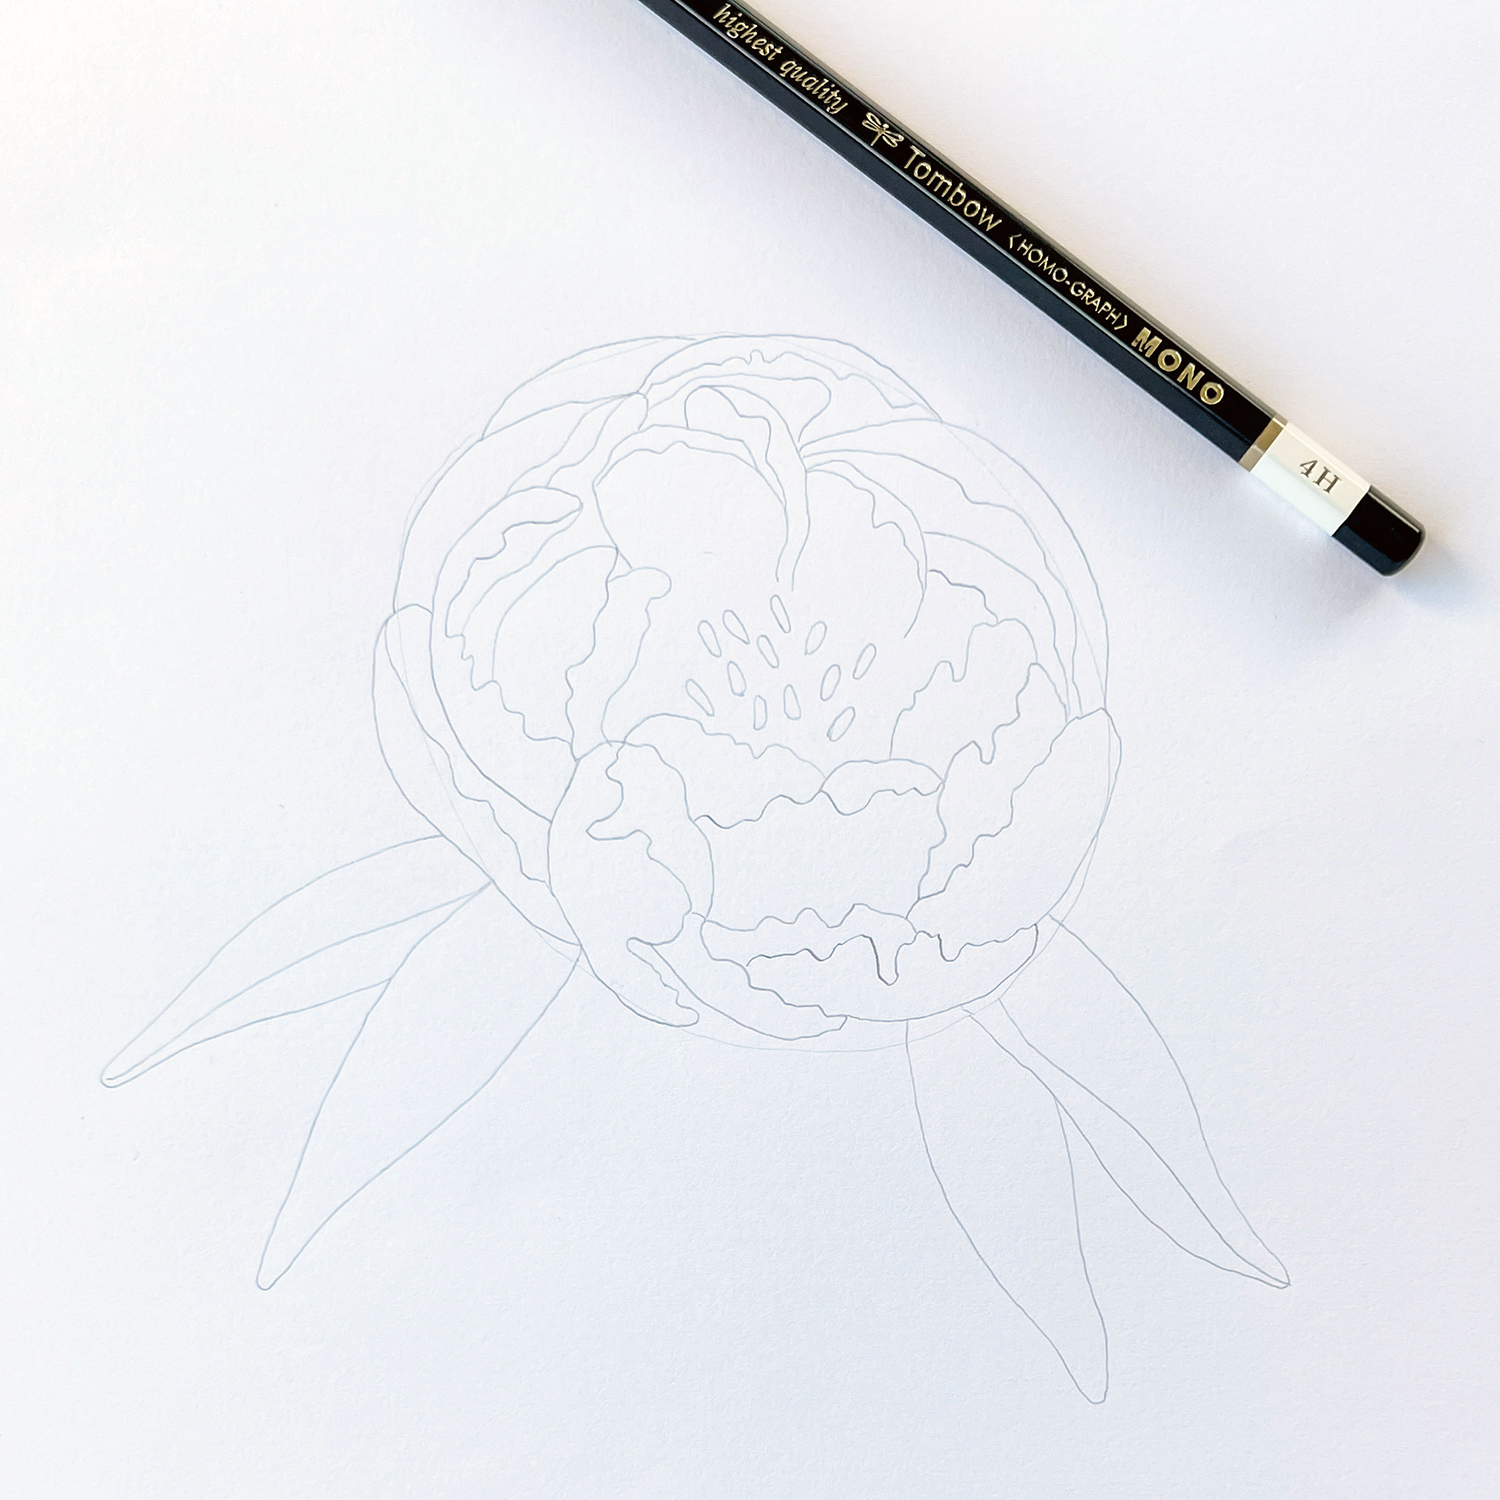
Step 4: Sketch In Some Leaves
What’s a flower without a few leaves. Different varieties of peonies have different-looking leaves, so look some up online and choose the ones you prefer. I’ve gone with longer and skinnier leaves in this example.
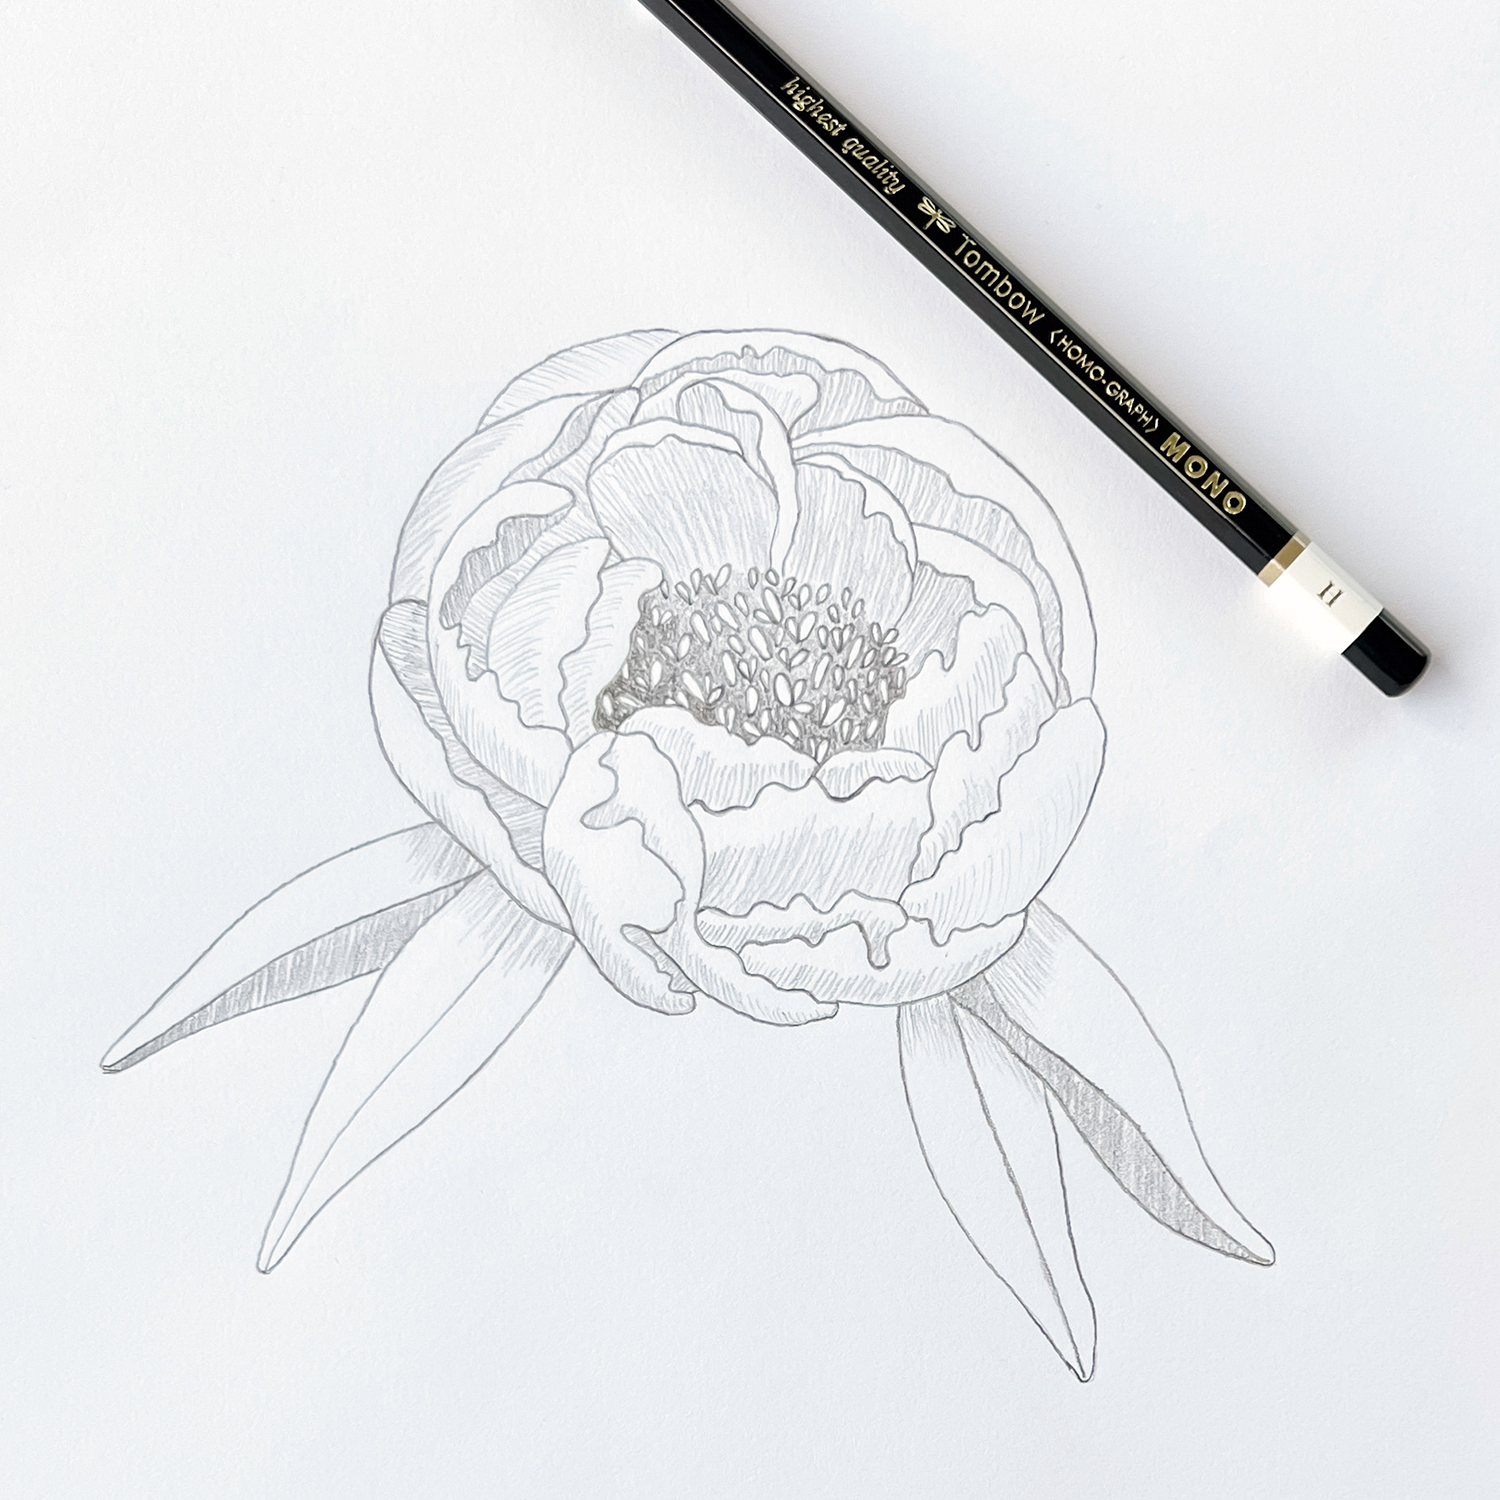
Step 5: Add Details
Now that all your petals and leaves are in place, it’s time to start adding some details. Begin by adding smaller anthers around the first ones you drew in the center of the flower.
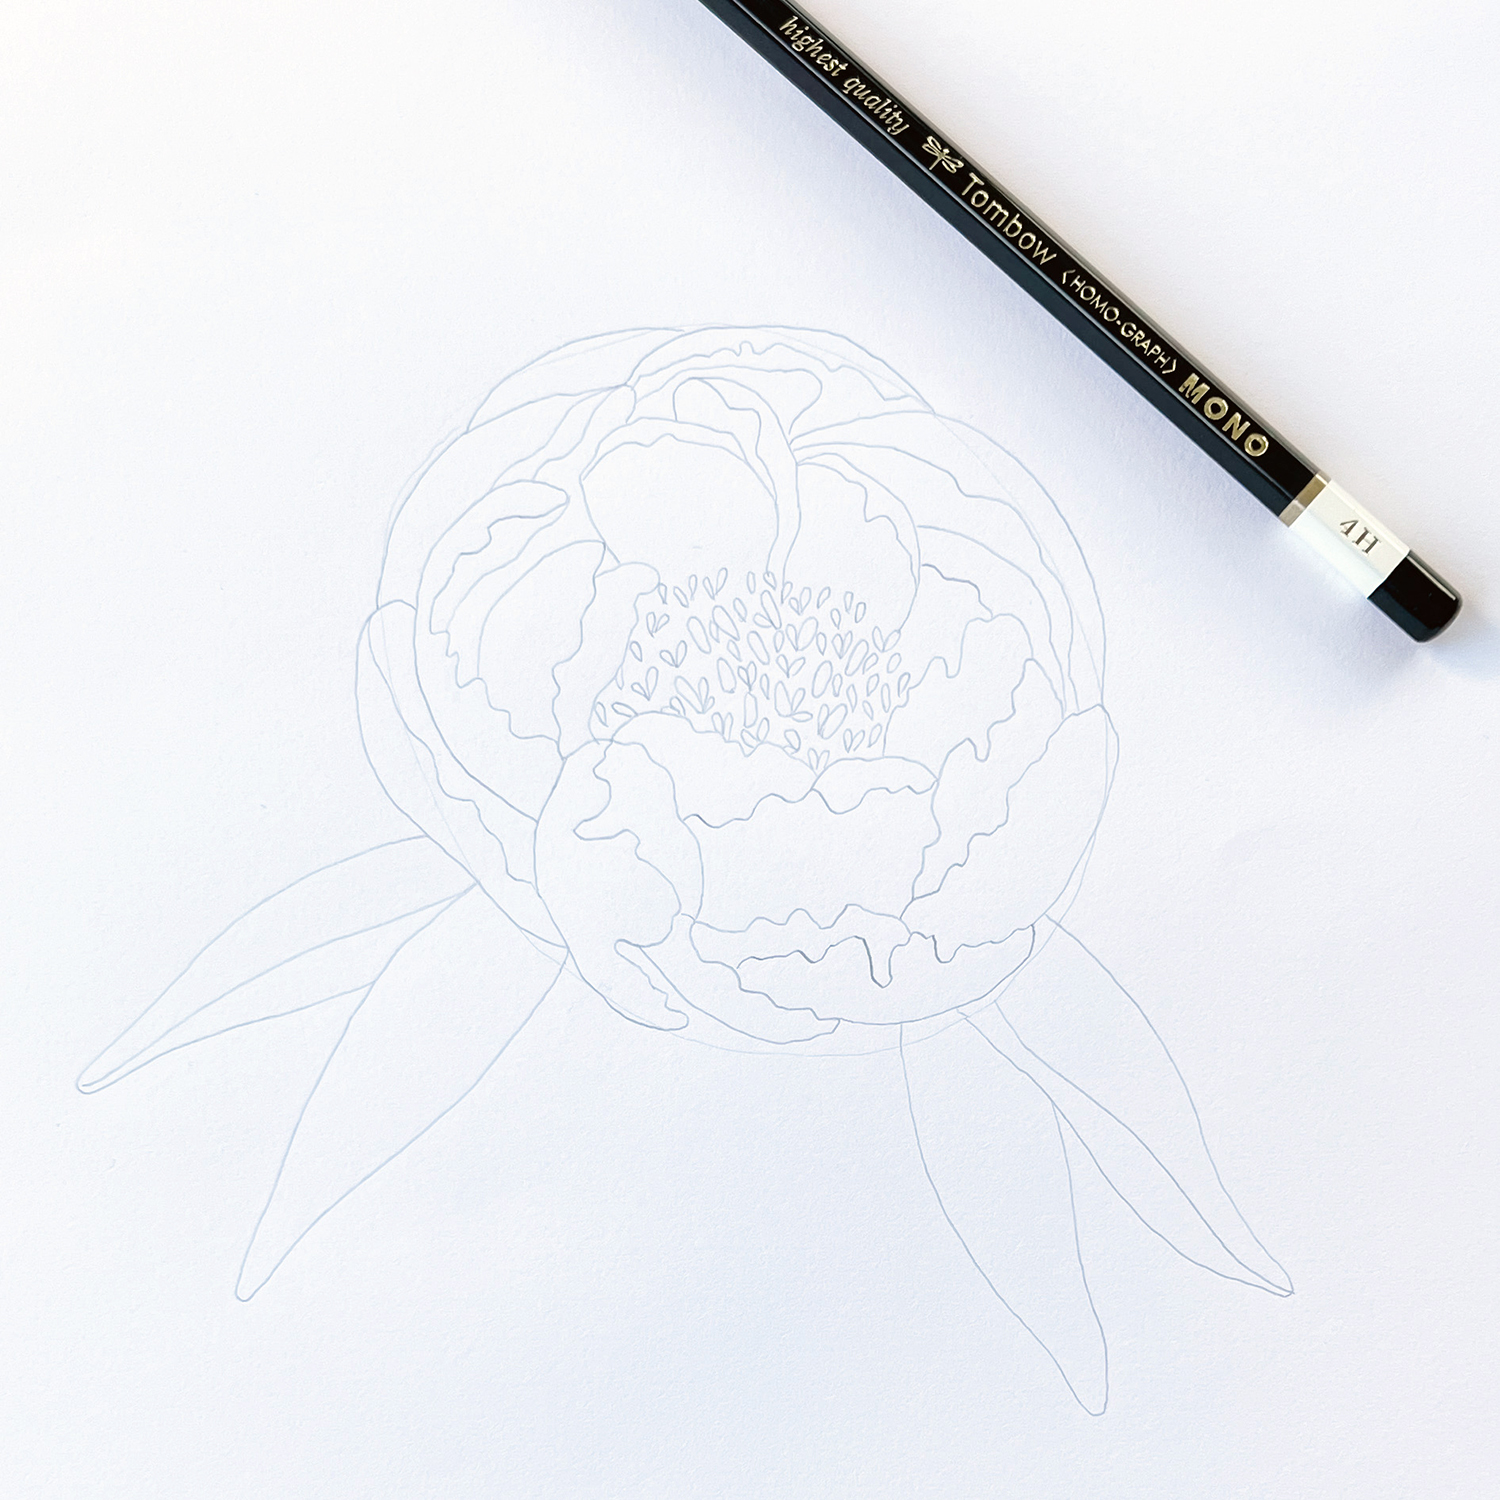
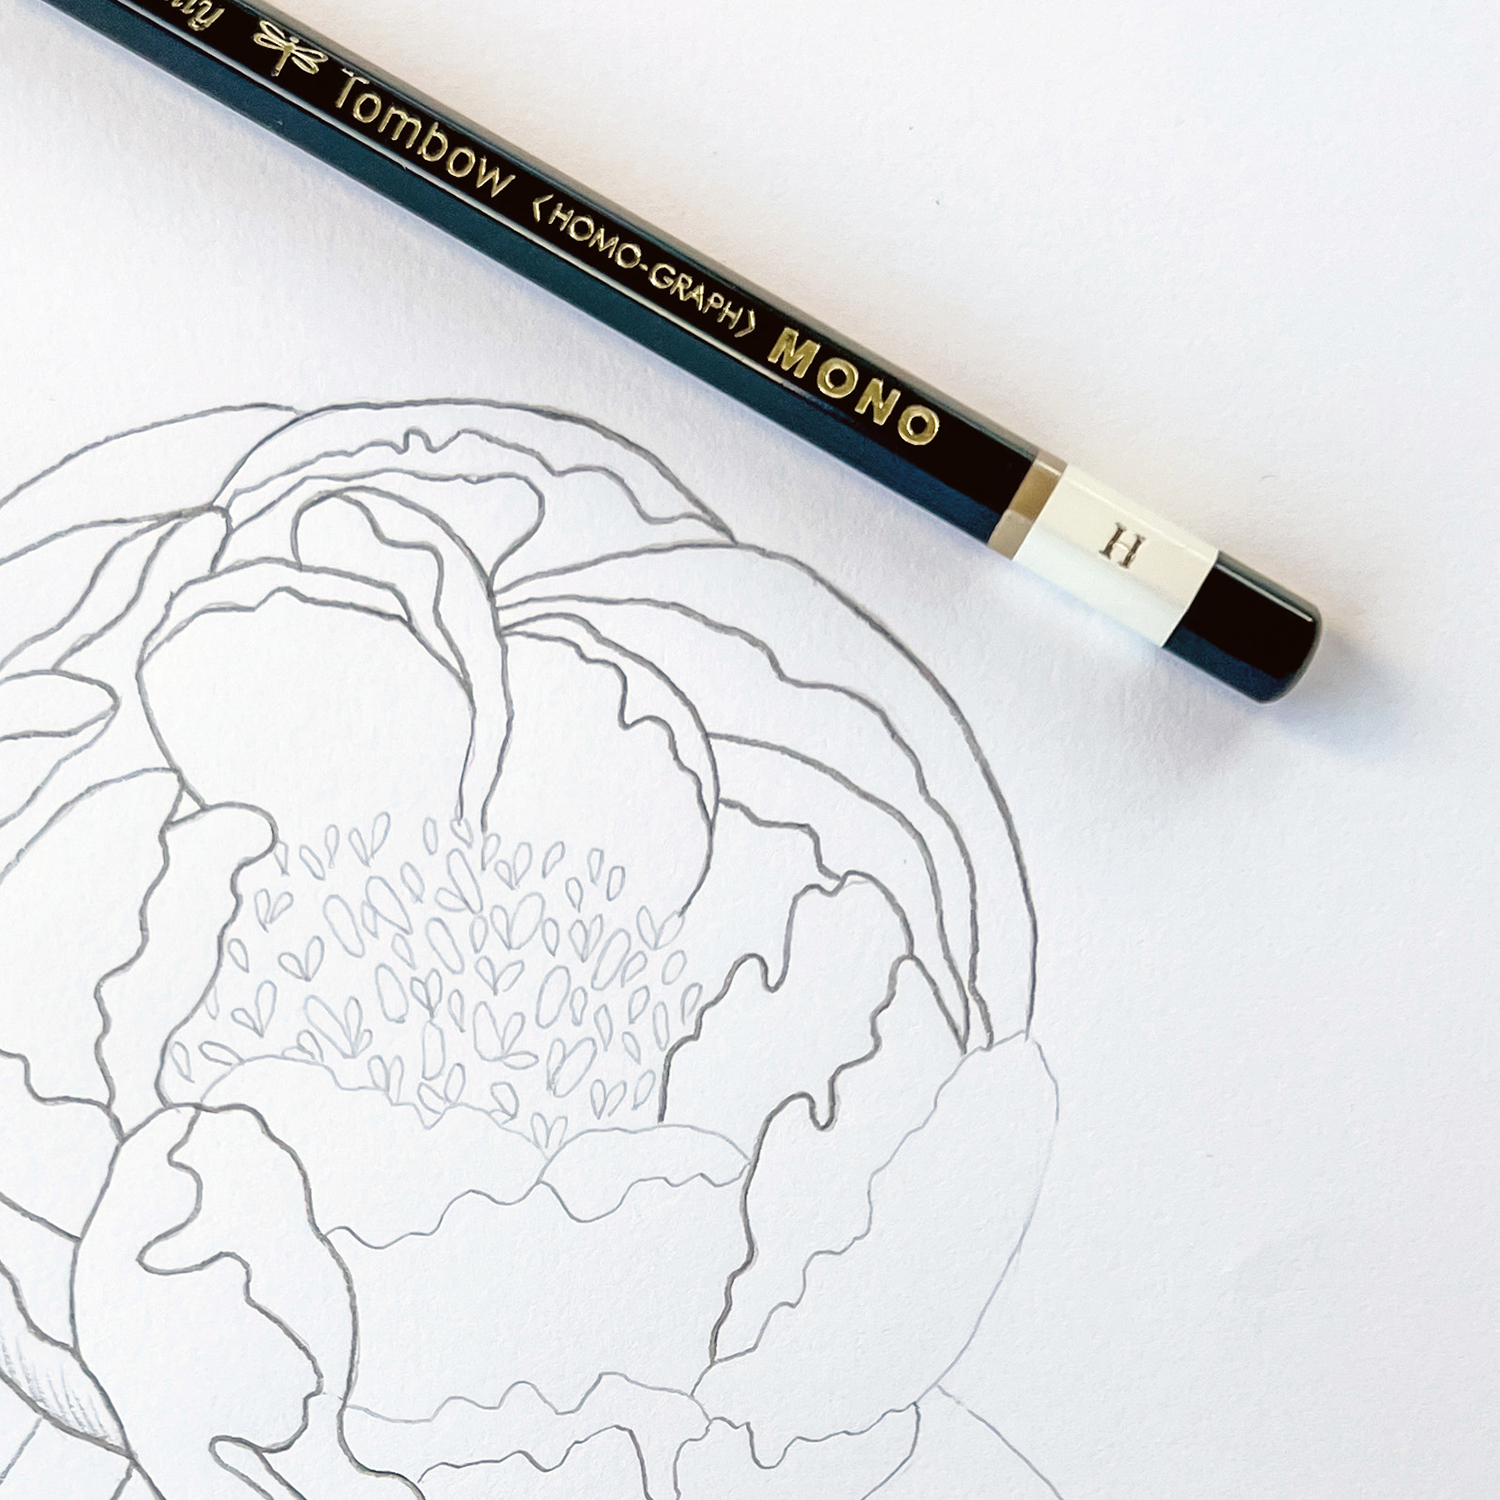
At this stage, if you’re happy with the lines you drew using your 4H pencil, you might want to go over them with an H pencil for greater contrast.
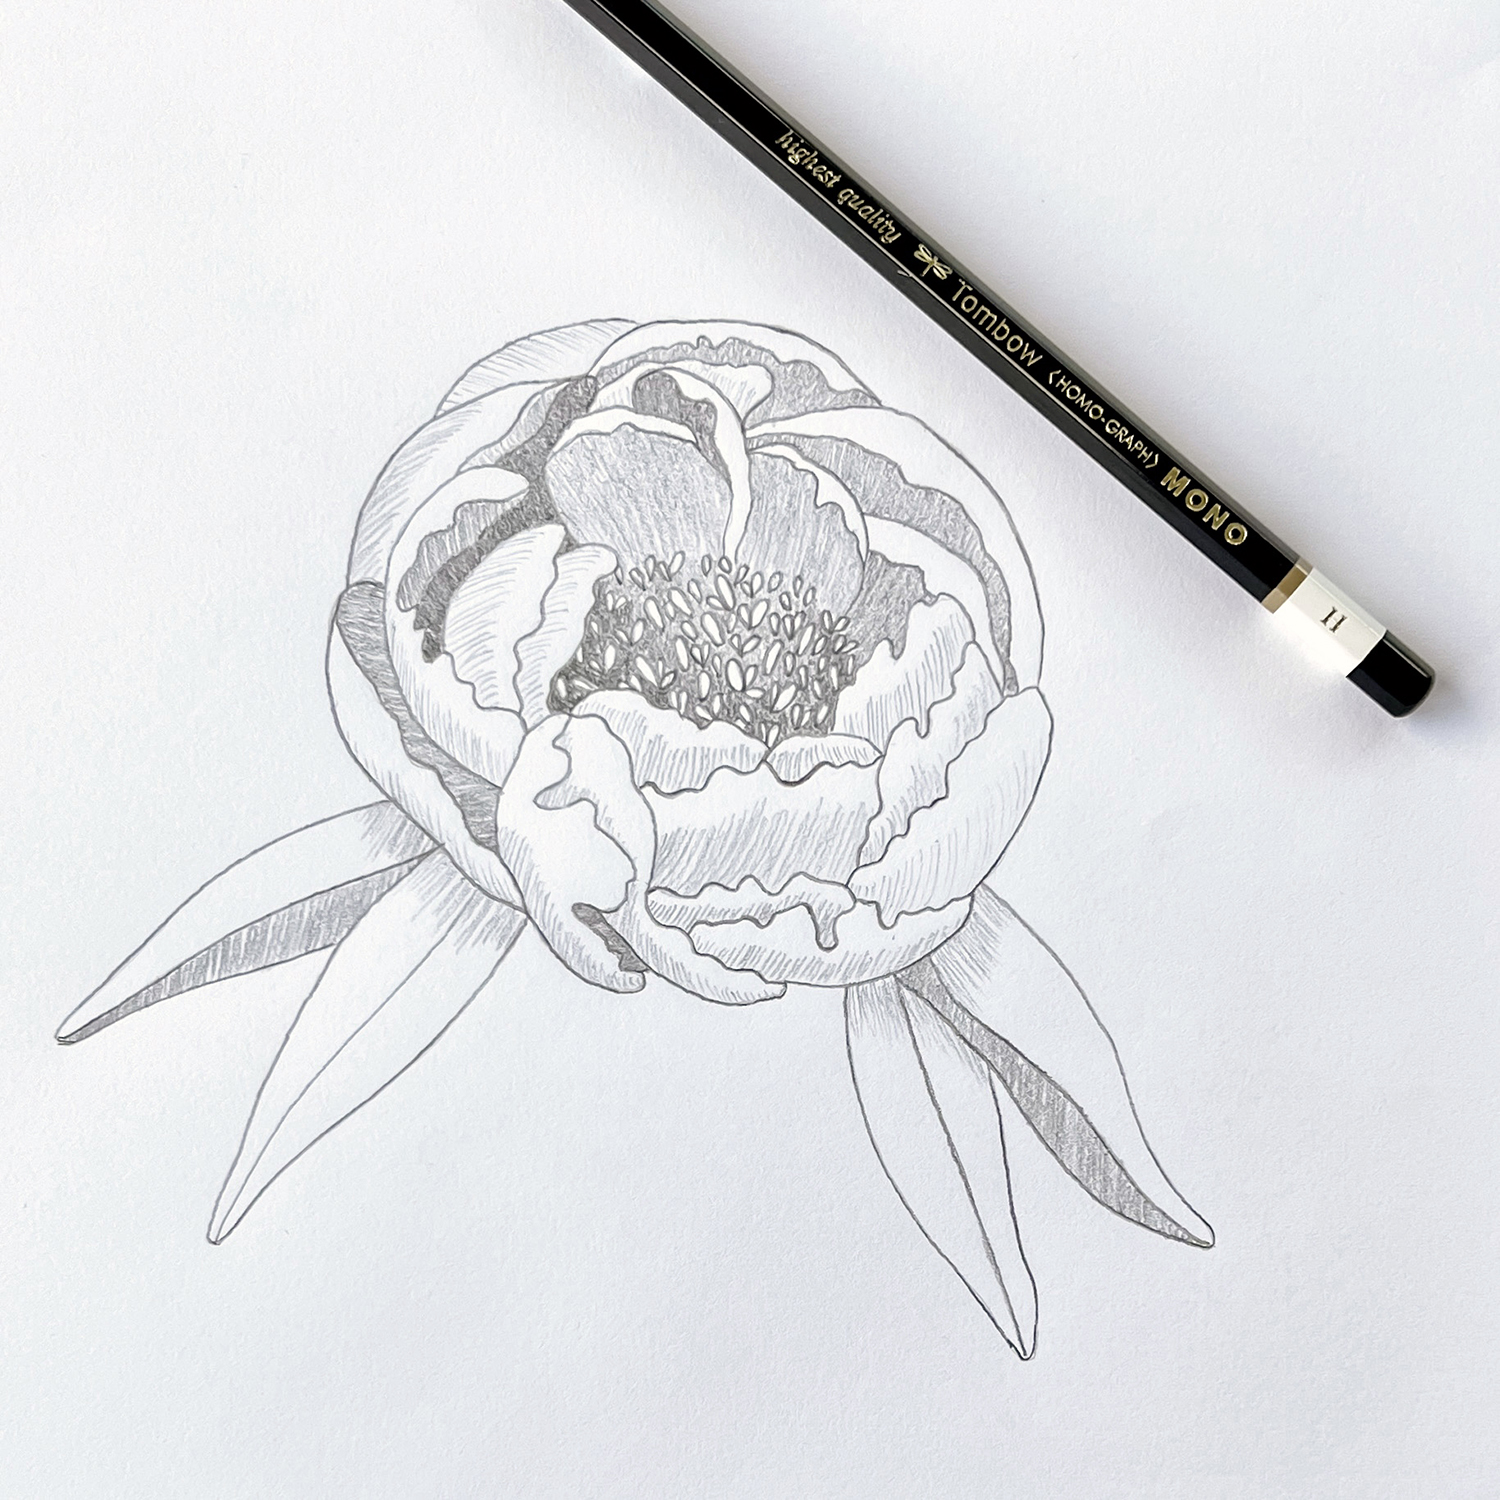
Step 6: Add Shading
To give your peony drawing a little more dimension, add some darker areas using your H pencil. You could color in these areas or just add thin lines to denote shadow. Darken the inside of petals or areas that would get less light.
Don’t forget to add shade around the anthers in the center too.
Keep adding to the shadows of your peony drawing until you’re happy with the level of contrast you have.
We’d love to see how your peony drawing, so if you share it on social media, tag @TombowUSA and @BrownPaperBunny so we can check it out!
And if you’re looking for more drawing tutorials, have a look at this one on Drawing a Cup of Markers or ABT PRO Marker Floral Illustration.
You made it look easy to follow! Love this!