a virtual bulletin board where you can “pin” all the things you want to buy; “pin” all the recipes you want to try; and “pin” all the wonderful craft ideas you want to make. when you find it on a blog, or online shopping site, or a website you save it so you can find it when you need it. well, i’ve had this idea pinned for a while and finally decided to make them. COASTERS from TILES! yes, and it is super easy. you will need a few supplies though, so grab a pencil jot down the few things you’ll need and let’s get to work. since this week we are talking about “PARTIES!” i thought i’d add a little twist to the coaster. we are going to personalize them! who wouldn’t want to go home from a party or get-together with a personalized gift from their hostess?!?
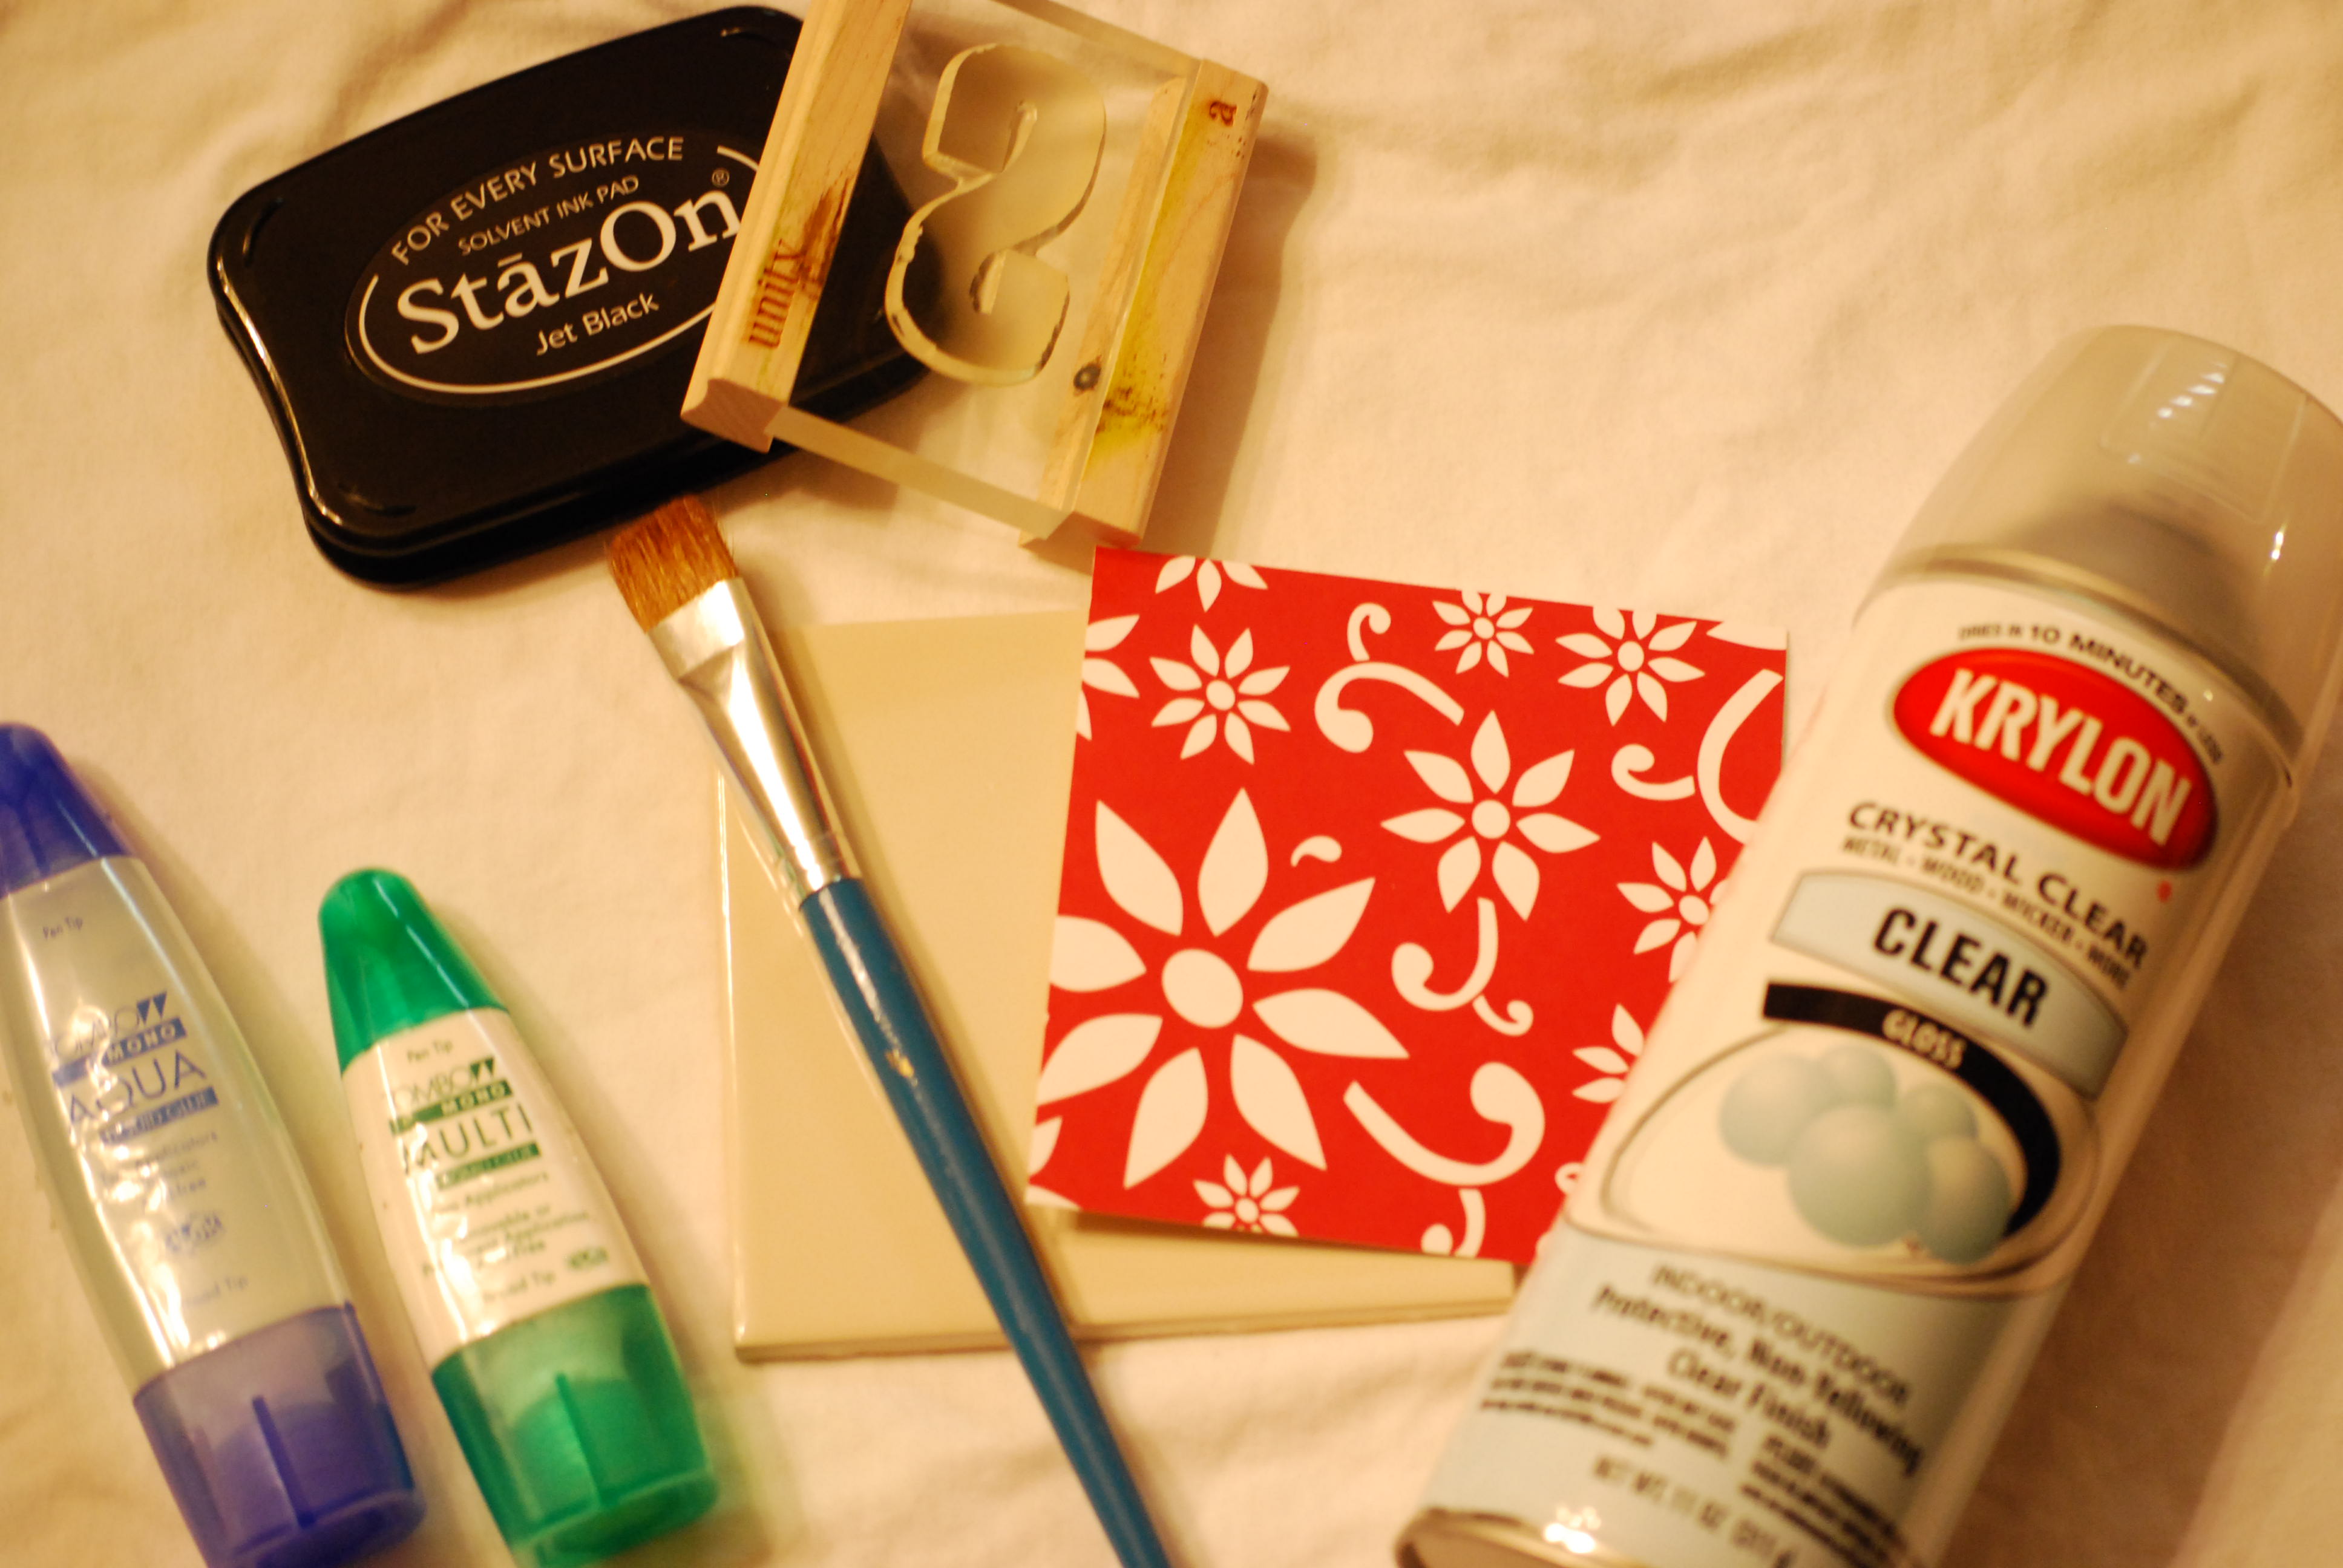
* ceramic tiles (i used 4×4) from home improvement store/hardware store
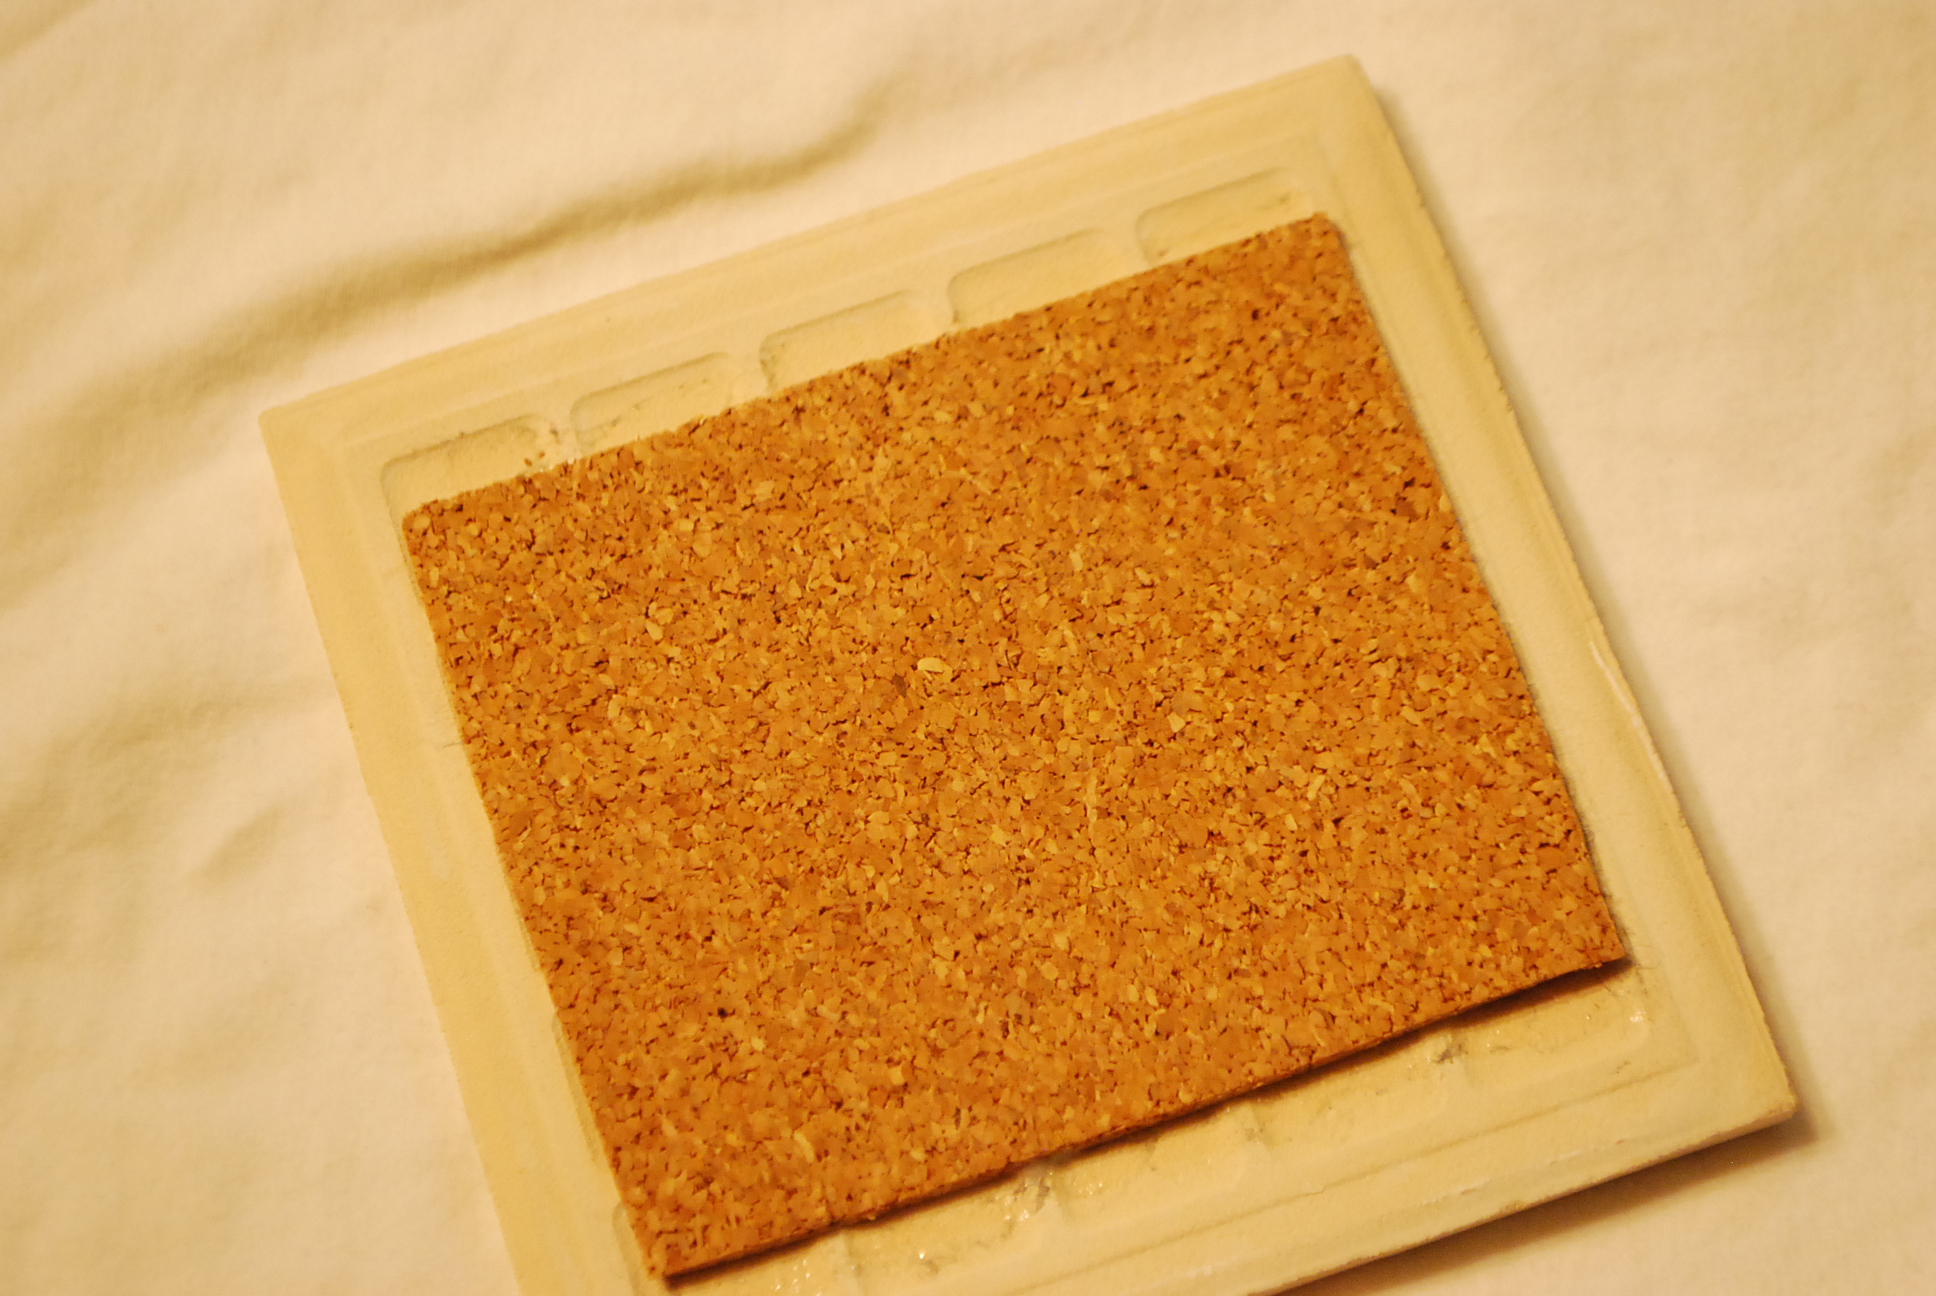
* felt or cork – for underside of tile
* paint brush
* Tombow MONO Aqua Liquid Glue
* Tombow MONO Multi Liquid Glue
* spray sealant
* something to decorate the top of the tile – pattern paper, photos, stamps & staz-on ink -so many possibilities!
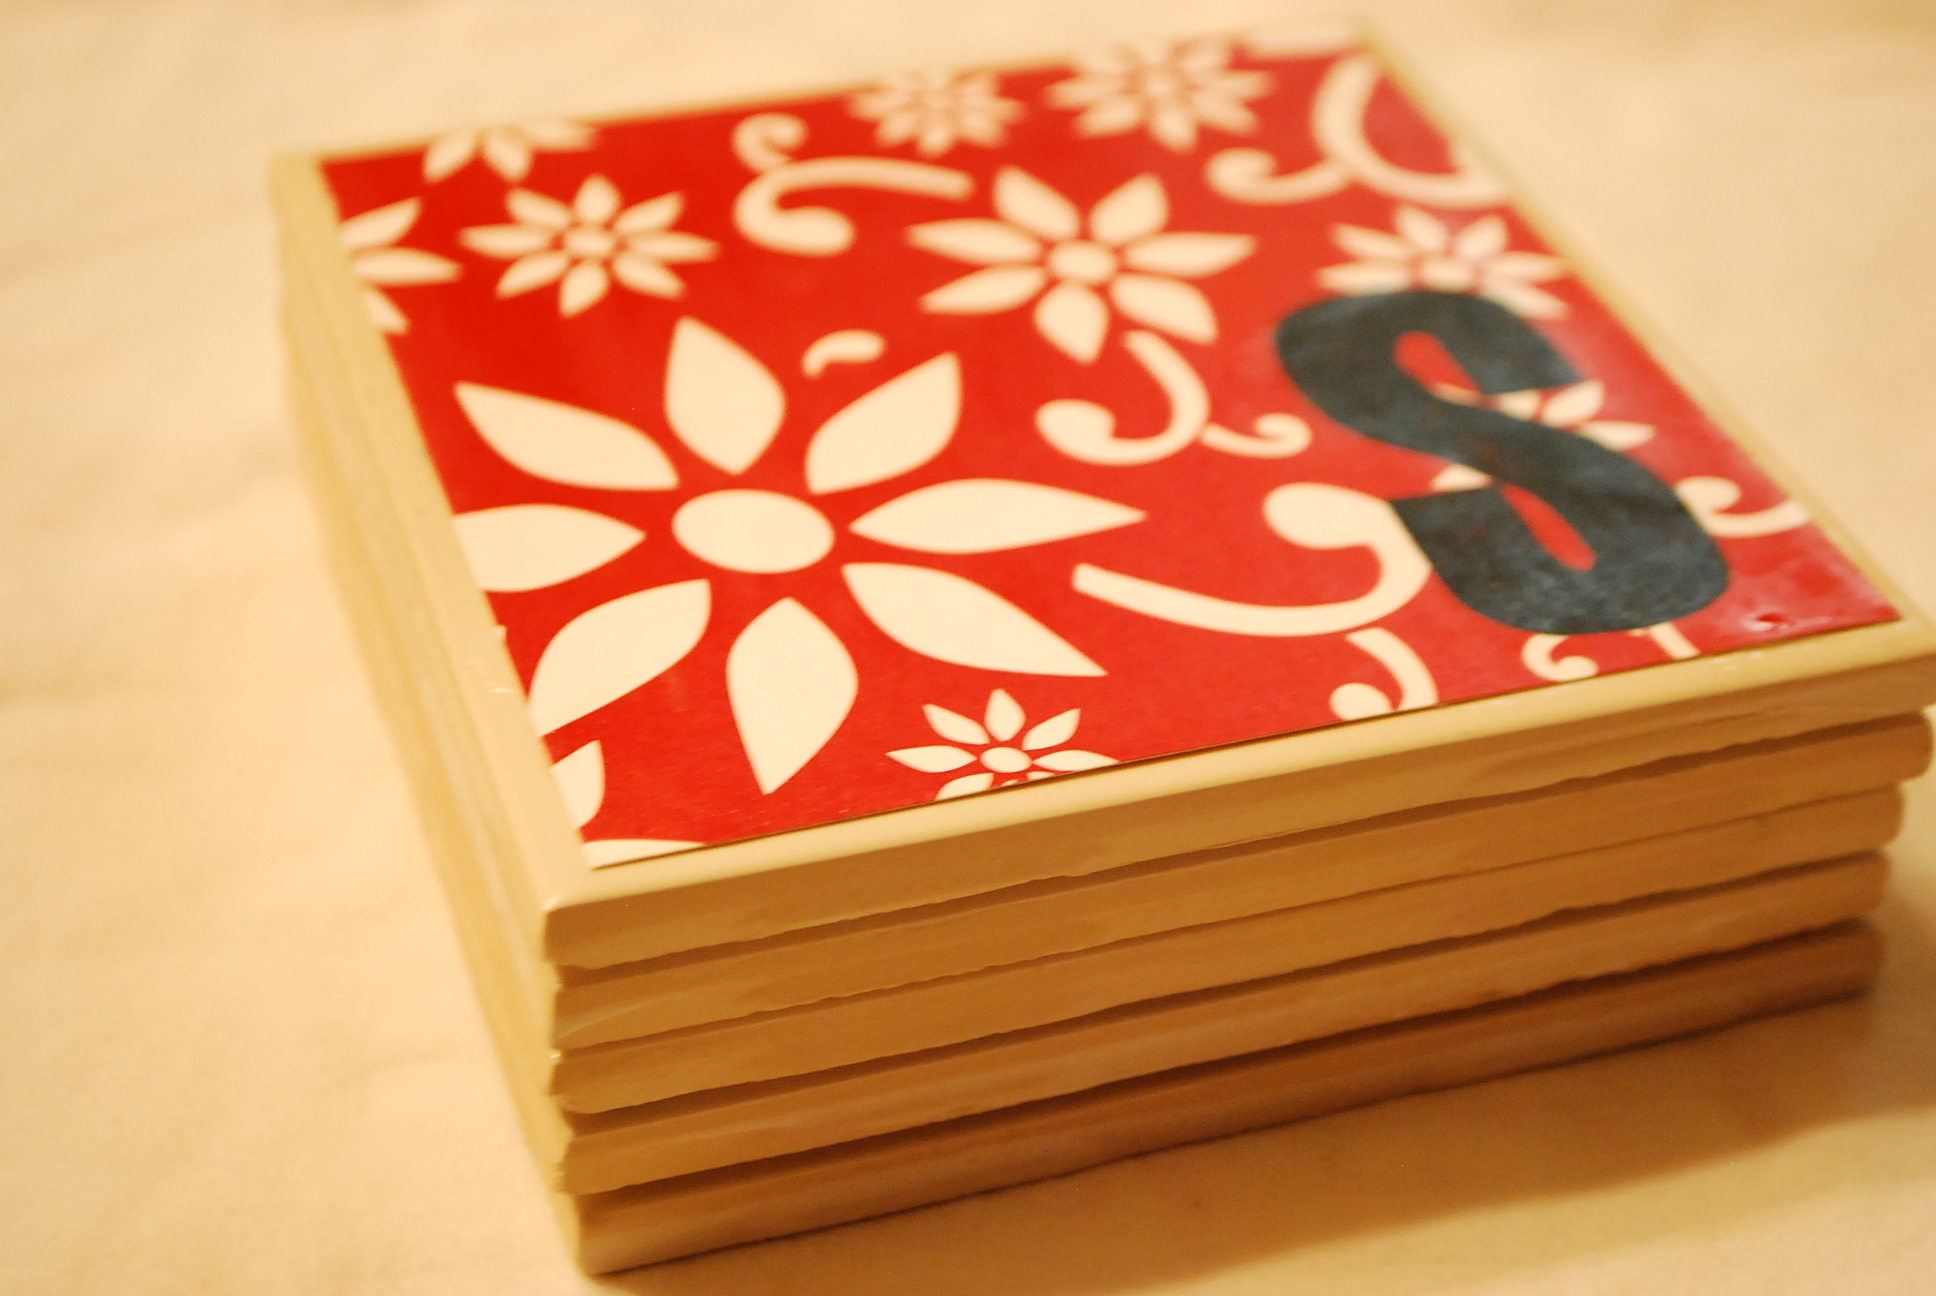
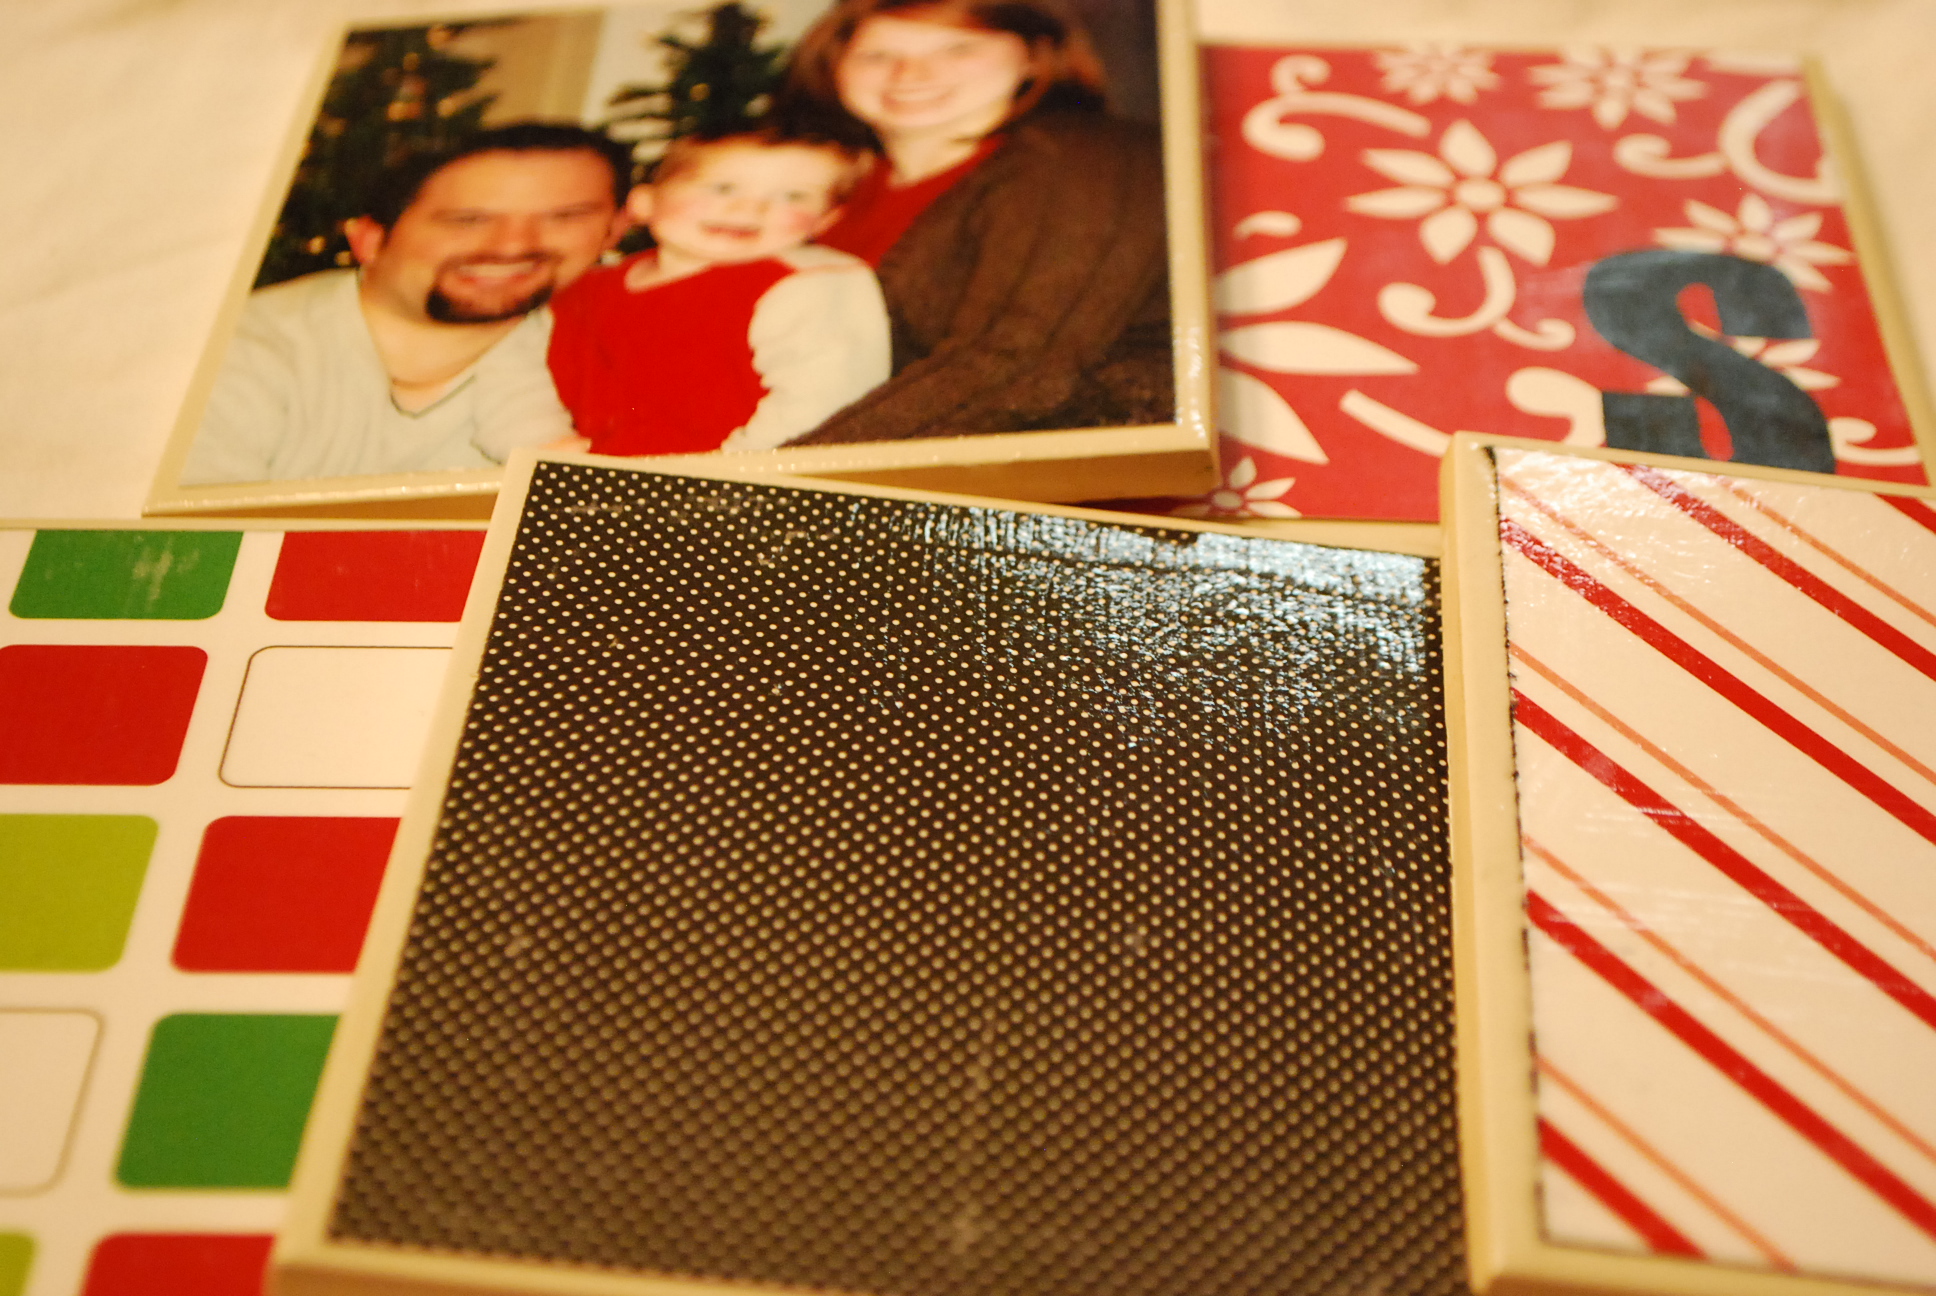
so my coasters are christmas themed (gearing up for that holiday season…)
1. i used Tombow MONO Multi to adhere a 4×4 piece of christmas themed pattern paper to a ceramic tile. i put the glue on the tile using the broad tip applicator and then smoothed the piece of paper over it. be sure to secure all the edges down.
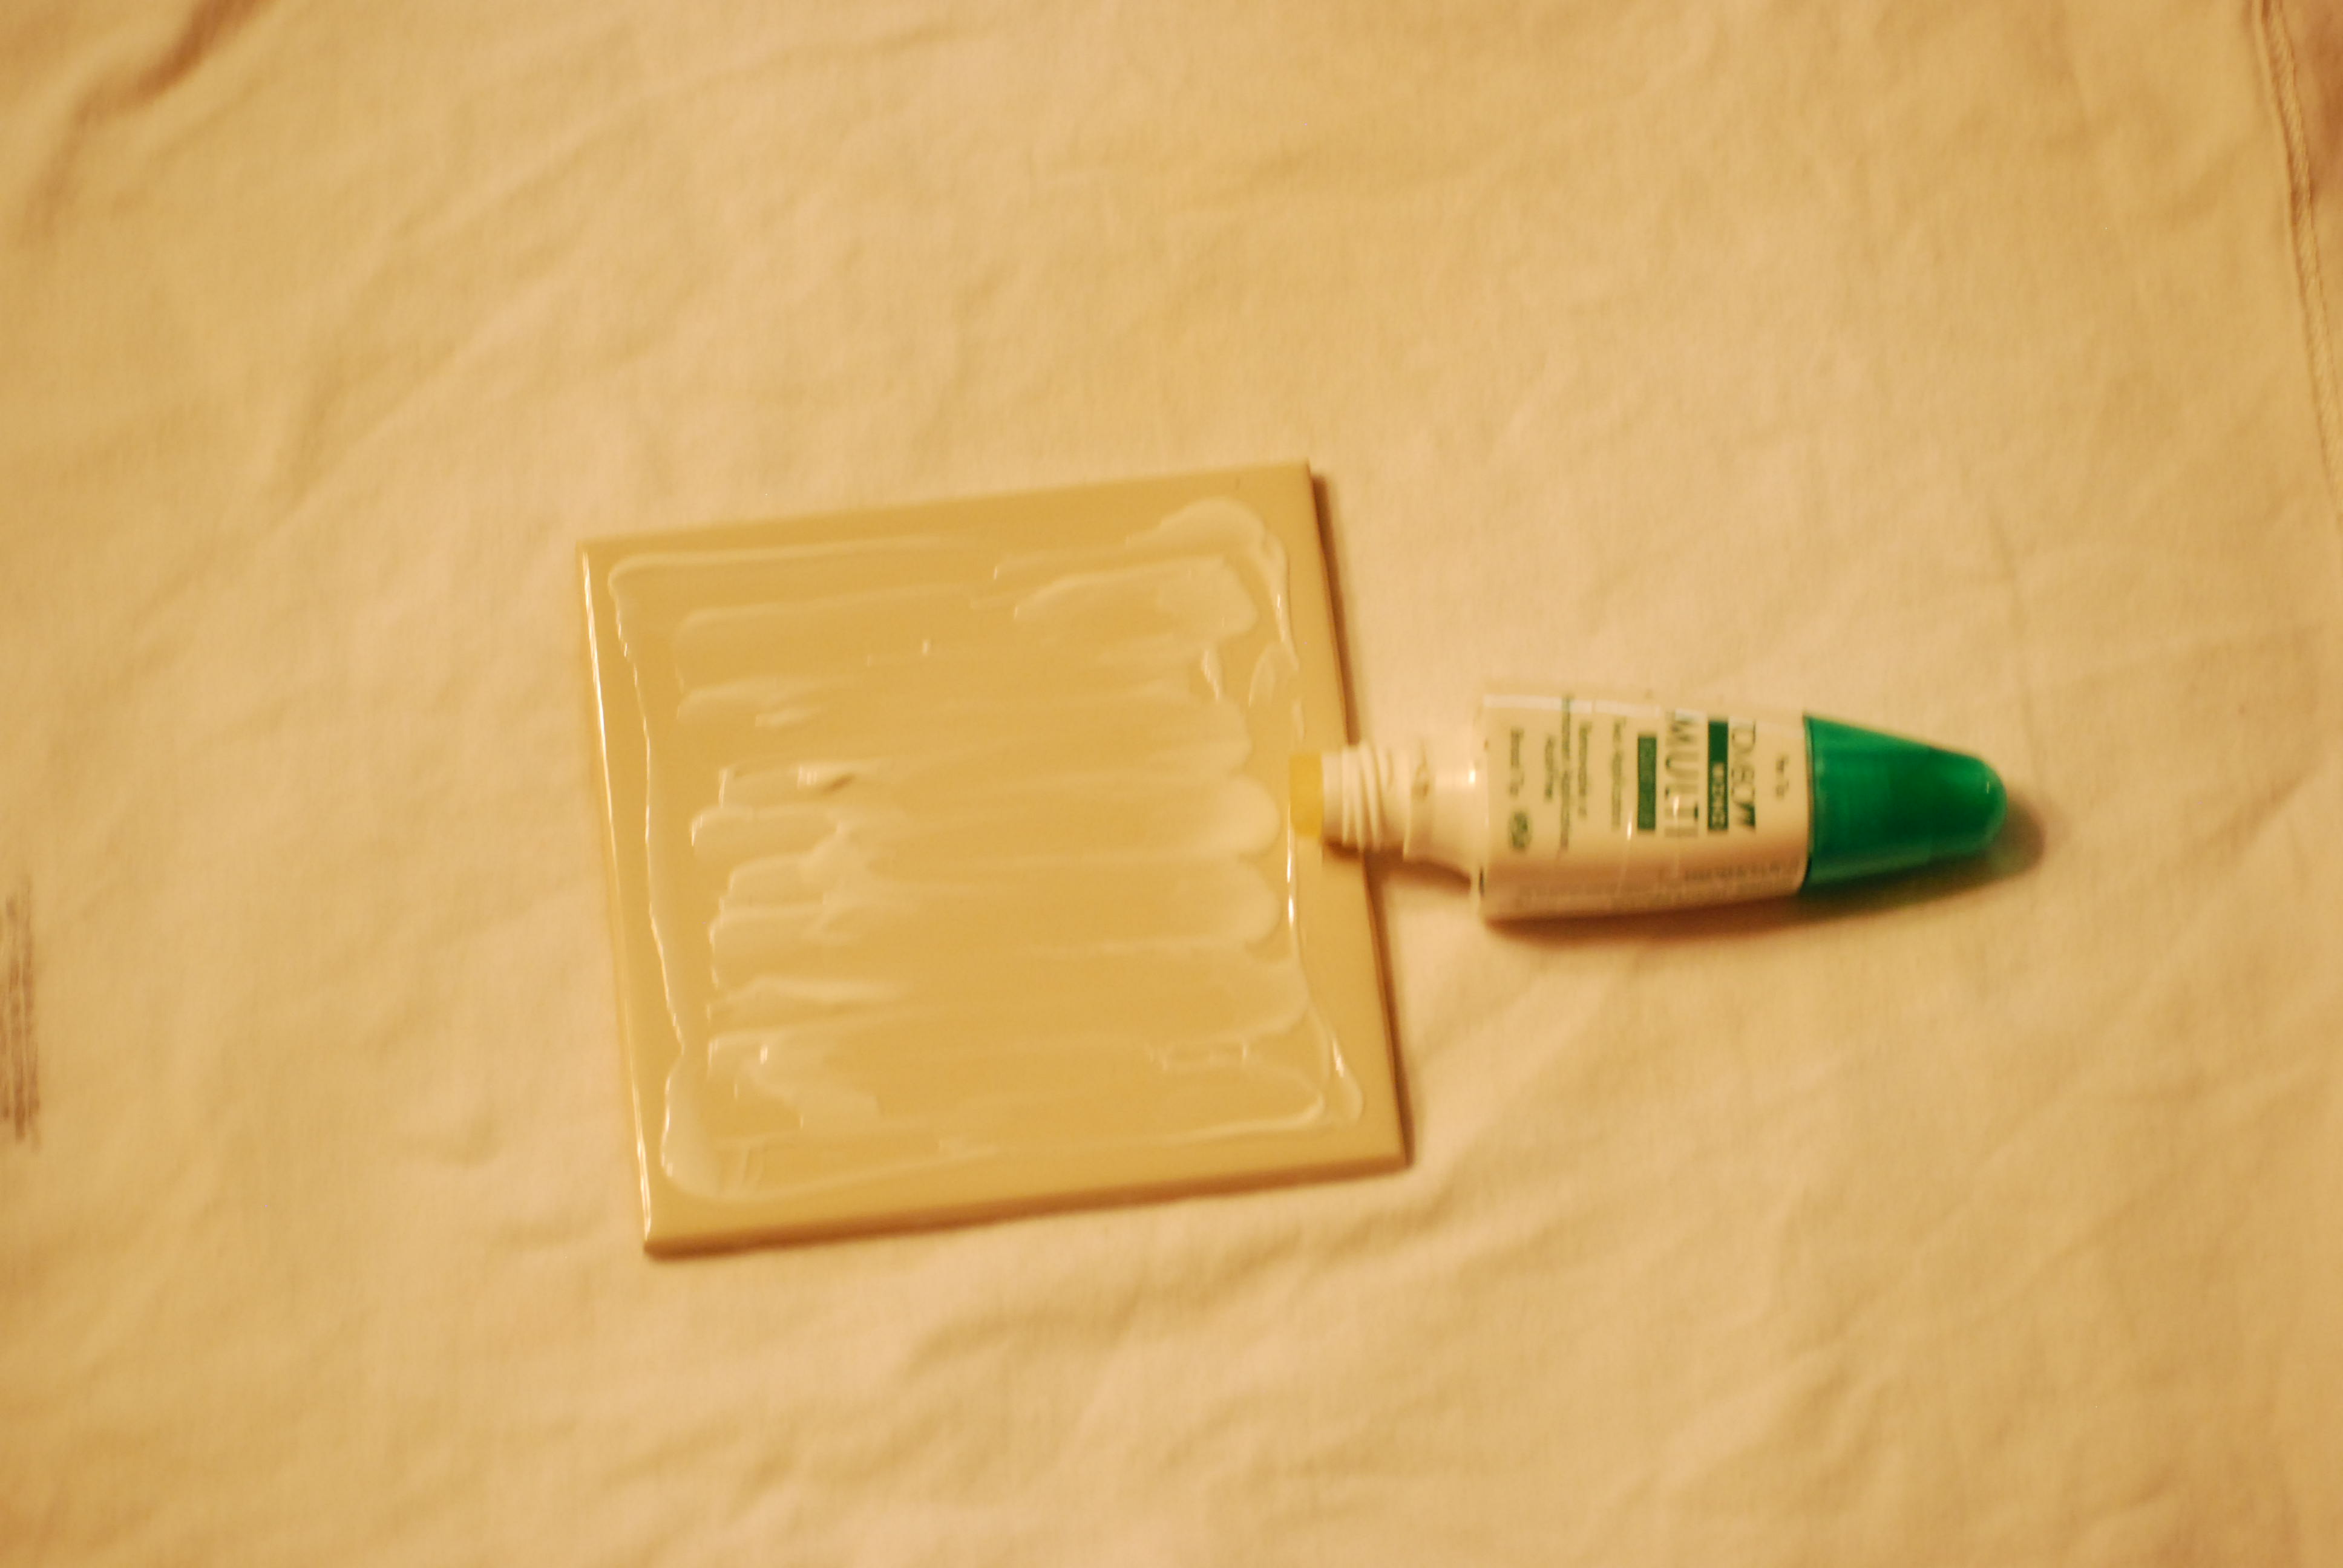
2. set aside to dry and move onto the next one.
3. when you finish adding the paper to the front of the tiles, this would be the point where you would personalize the tiles using a stamp (i did monograms) and staz-on ink
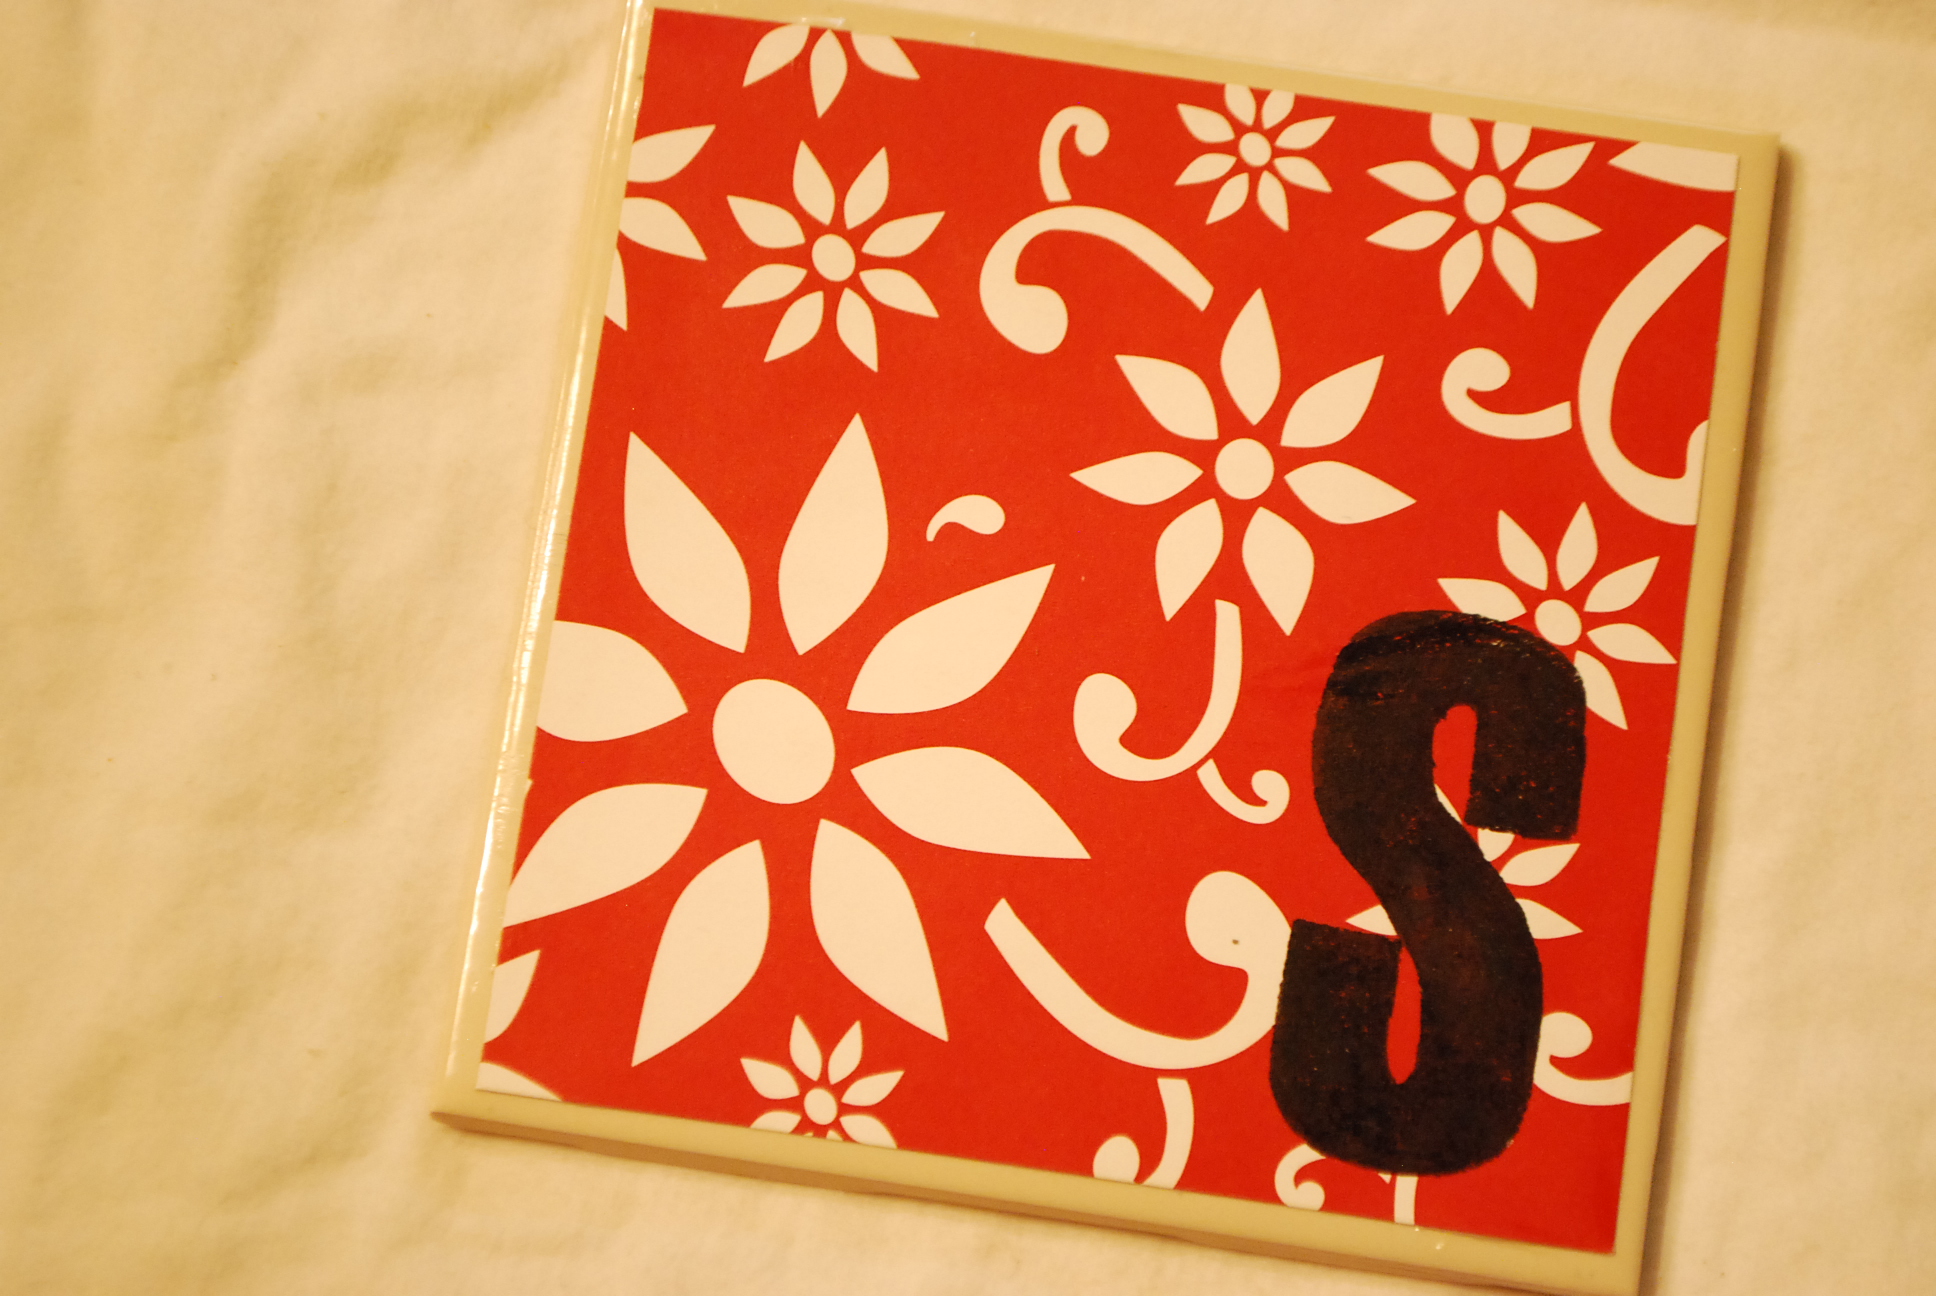
4. go back to the first tiles that should be dry now. use a small amount of Tombow MONO Aqua and squiggle a few lines of glue over the top of the pattern paper and the stamped image. use a paint brush to spread the glue around.

5. work with the edges and smooth them down. there will be a little bubbling, but as the glue drys most of the bubbles settle out.
the thicker the paper the fewer bubbles! photos do not tend to bubble at all when printed on photo paper.
6. set these aside to dry and wash your brush out
7. when dry, should be 10-15 minutes, take the tiles outside or to a ventilated area and spray with the sealant.
you need the sealant to keep the coasters protected. as condensation from glasses/cups touches an un-sealed coaster it will become sticky, as the MONO Aqua Liquid Glue is water-based.
8. allow these to dry.
9. cut felt or cork to fit the bottom of the tile and adhere with Tombow MONO Multi.
10. then use them at your party, each person gets their own coaster…and then they get to take it home!
so? are you going to try it? i hope these directions work for you as well as they did for me. drop me a line if you have any questions!
and thank you pinterest for being a place to gather so many ideas…and thank you to the many crafters in the world that share your work with all of us!
p.s. yes, you can use M.P. for this project…but sometimes you just don’t have that white stuff around when you are feeling crafty. it is good to know that other glues will do the work just as well or even better.
if you enjoyed this post then follow us on facebook and twitter! hop on over… ~Sarah~
![]() http://www.facebook.com/tombowusa
http://www.facebook.com/tombowusa ![]() http://twitter.com/#!/tombowusa
http://twitter.com/#!/tombowusa
These are super cute!