Hi lovelies, Lauren, here and ready to share how I upcycled some of my favorite items to make some pretty amazing projects with some simple DIY fun! As I tried to brainstorm my project for this week, I constantly was getting stumped. I was trying to think of projects to make using repurposed items, but I found nothing I fell in love with. Then I started to think of my favorite things. If you follow me on instagram (@renmadecalligraphy), you know that I have a major sweet tooth and am obsessed currently with mint chip ice cream. I have several containers that are completely empty that are cute, clear plastic jars, so that’s when it hit me to start with my favorite things and turn them into some of my own favorite projects by making them pretty and giving them a new purpose. So I gathered a few more of my favorite things, baker’s twine left over from packaging from my shop, issues of my go-to magazines, and scrap paper left over from my many instagram posts and lettering projects. So grab your coffee, sit back, and watch me breath some new life to some of my favorite things with a little #TOMBOWLOVE .
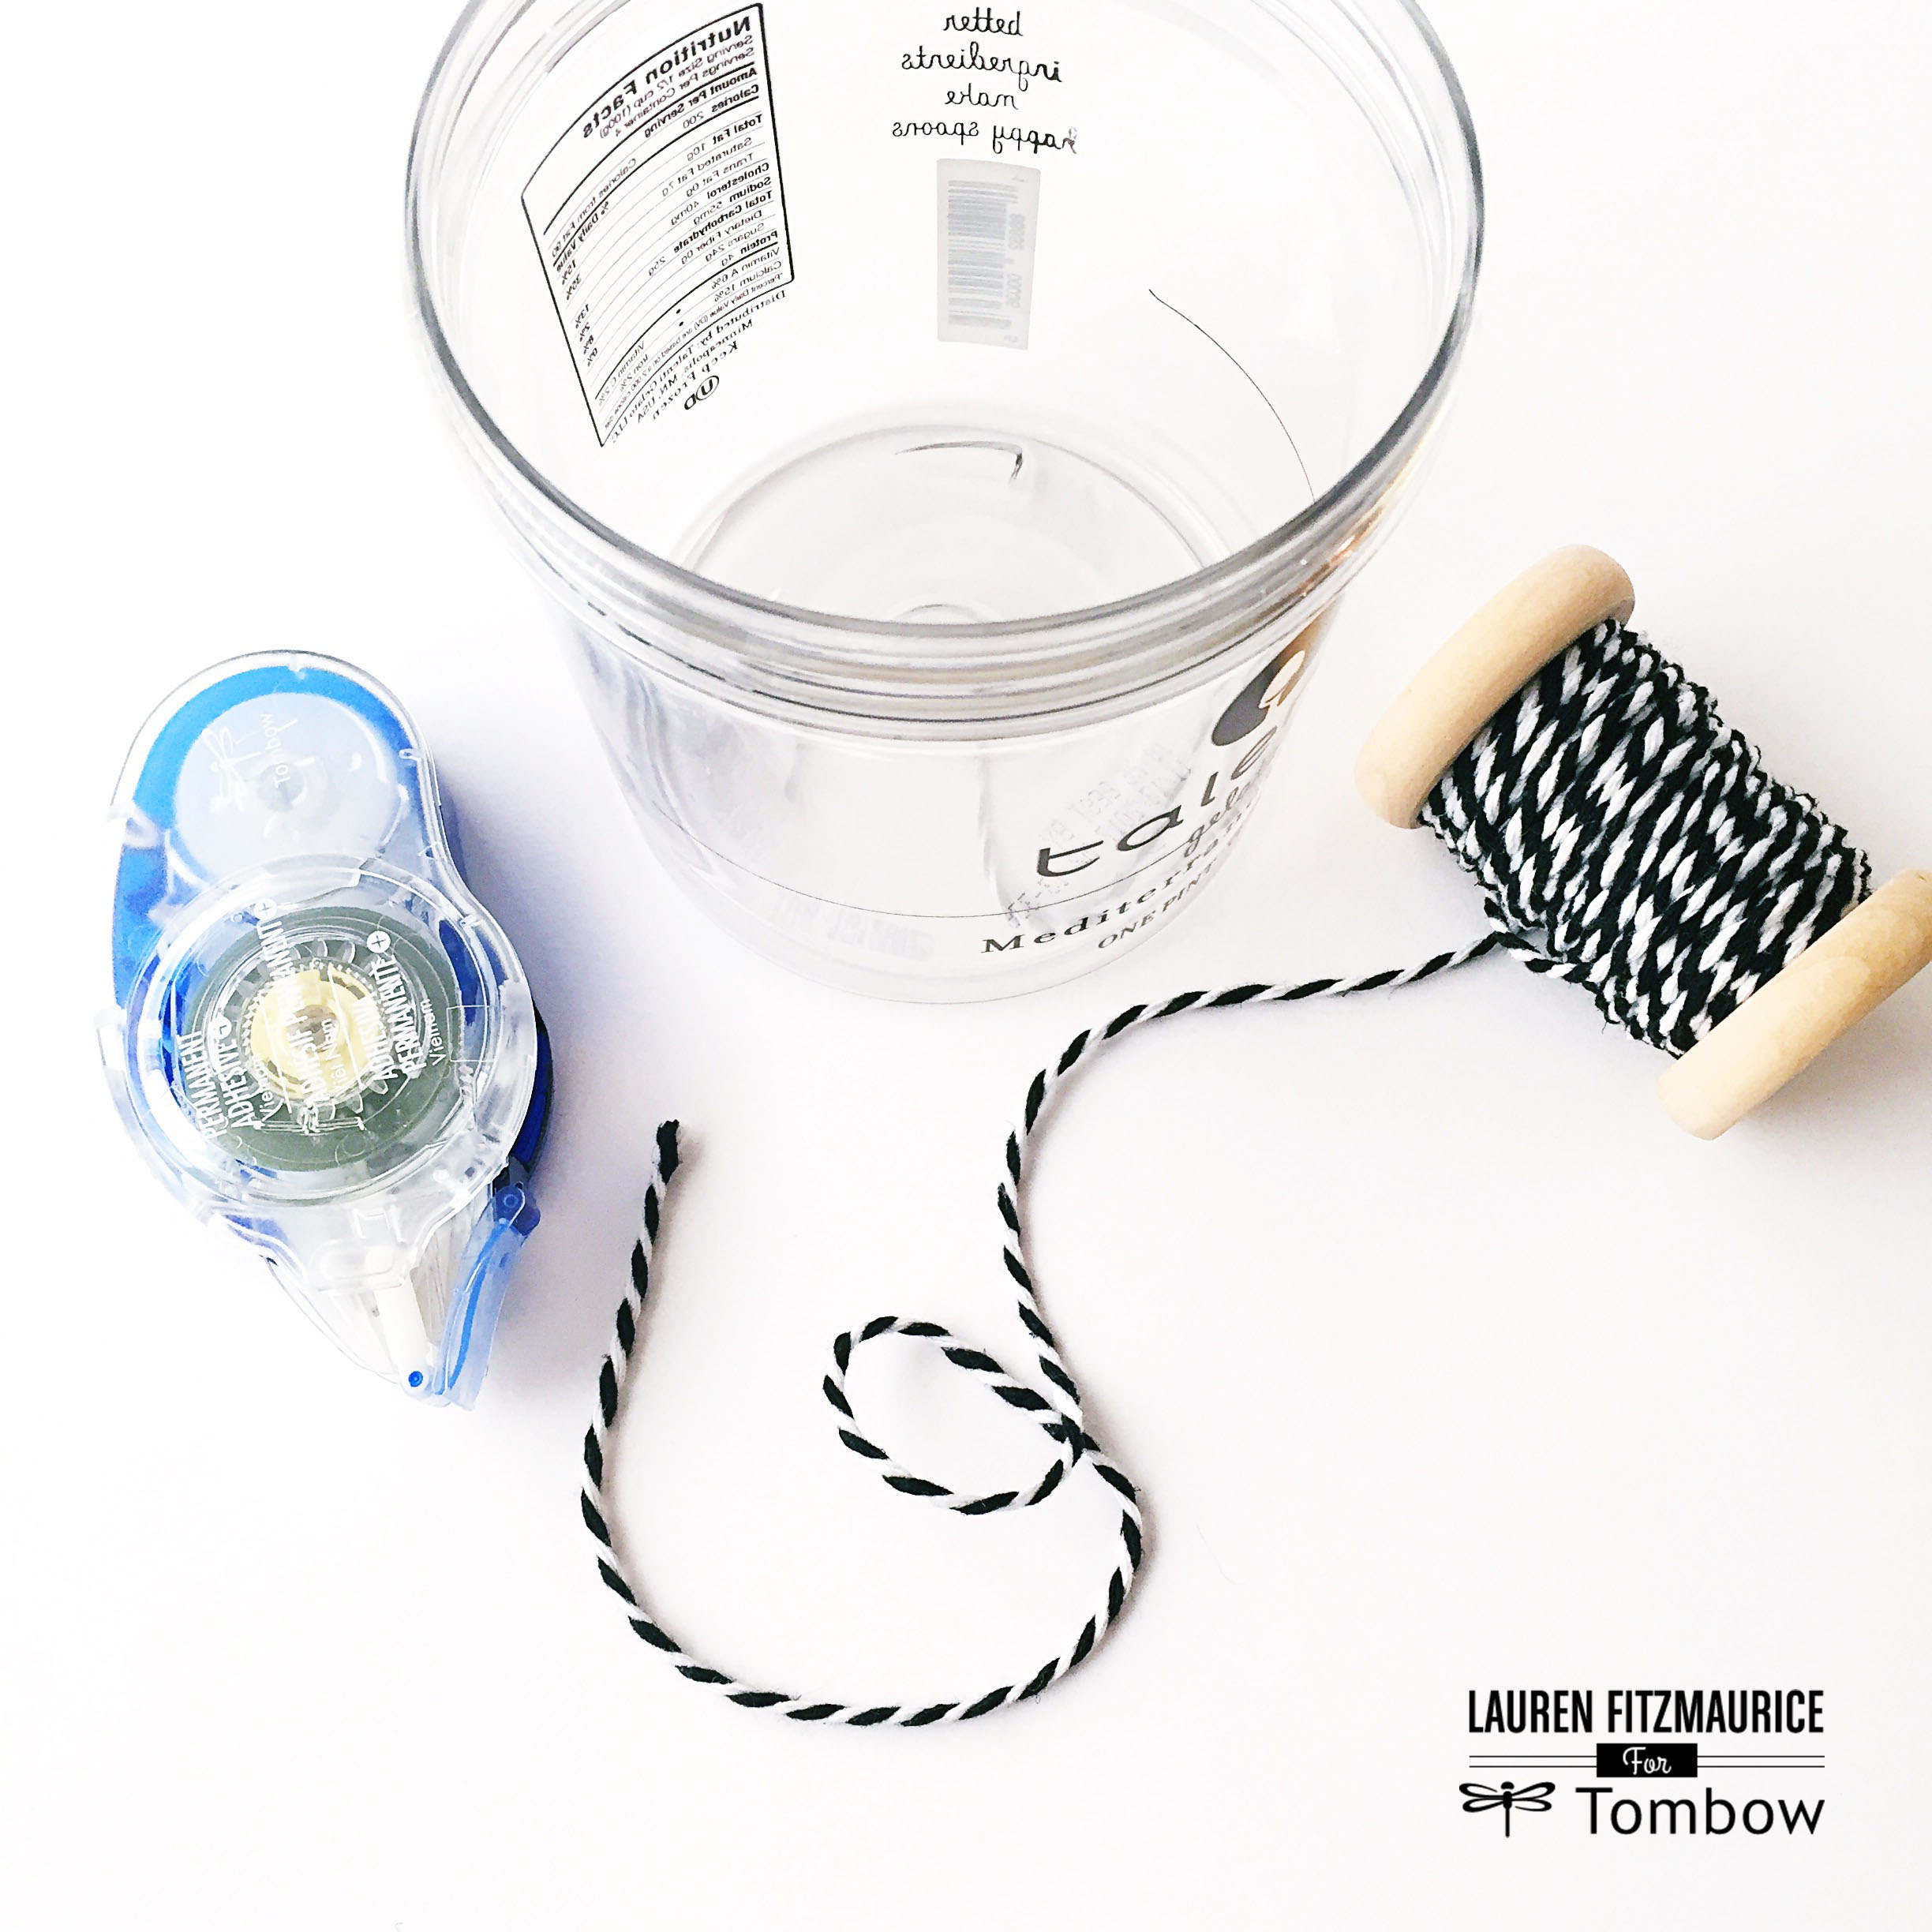
DIY FUN: ICE CREAM JAR to BAKERS TWINE PENCIL HOLDER
I don’t know about you, but when summer comes around, I have way too many helpings of yummy ice cream. It just so happens that I have way too many pens and pencils too, so it is perfect to turn a little ice cream container into a fun, twine-covered pencil holder. I made this specifically to hold all of my perfect Tombow Irojiten Colored Pencils.
MATERIALS NEEDED:
-small plastic container/jar ( I used a Talenti Gelato container… holy mint chip!)
-Baker’s twine ( it uses a significant amount but varies on the size of the container)
-scissors
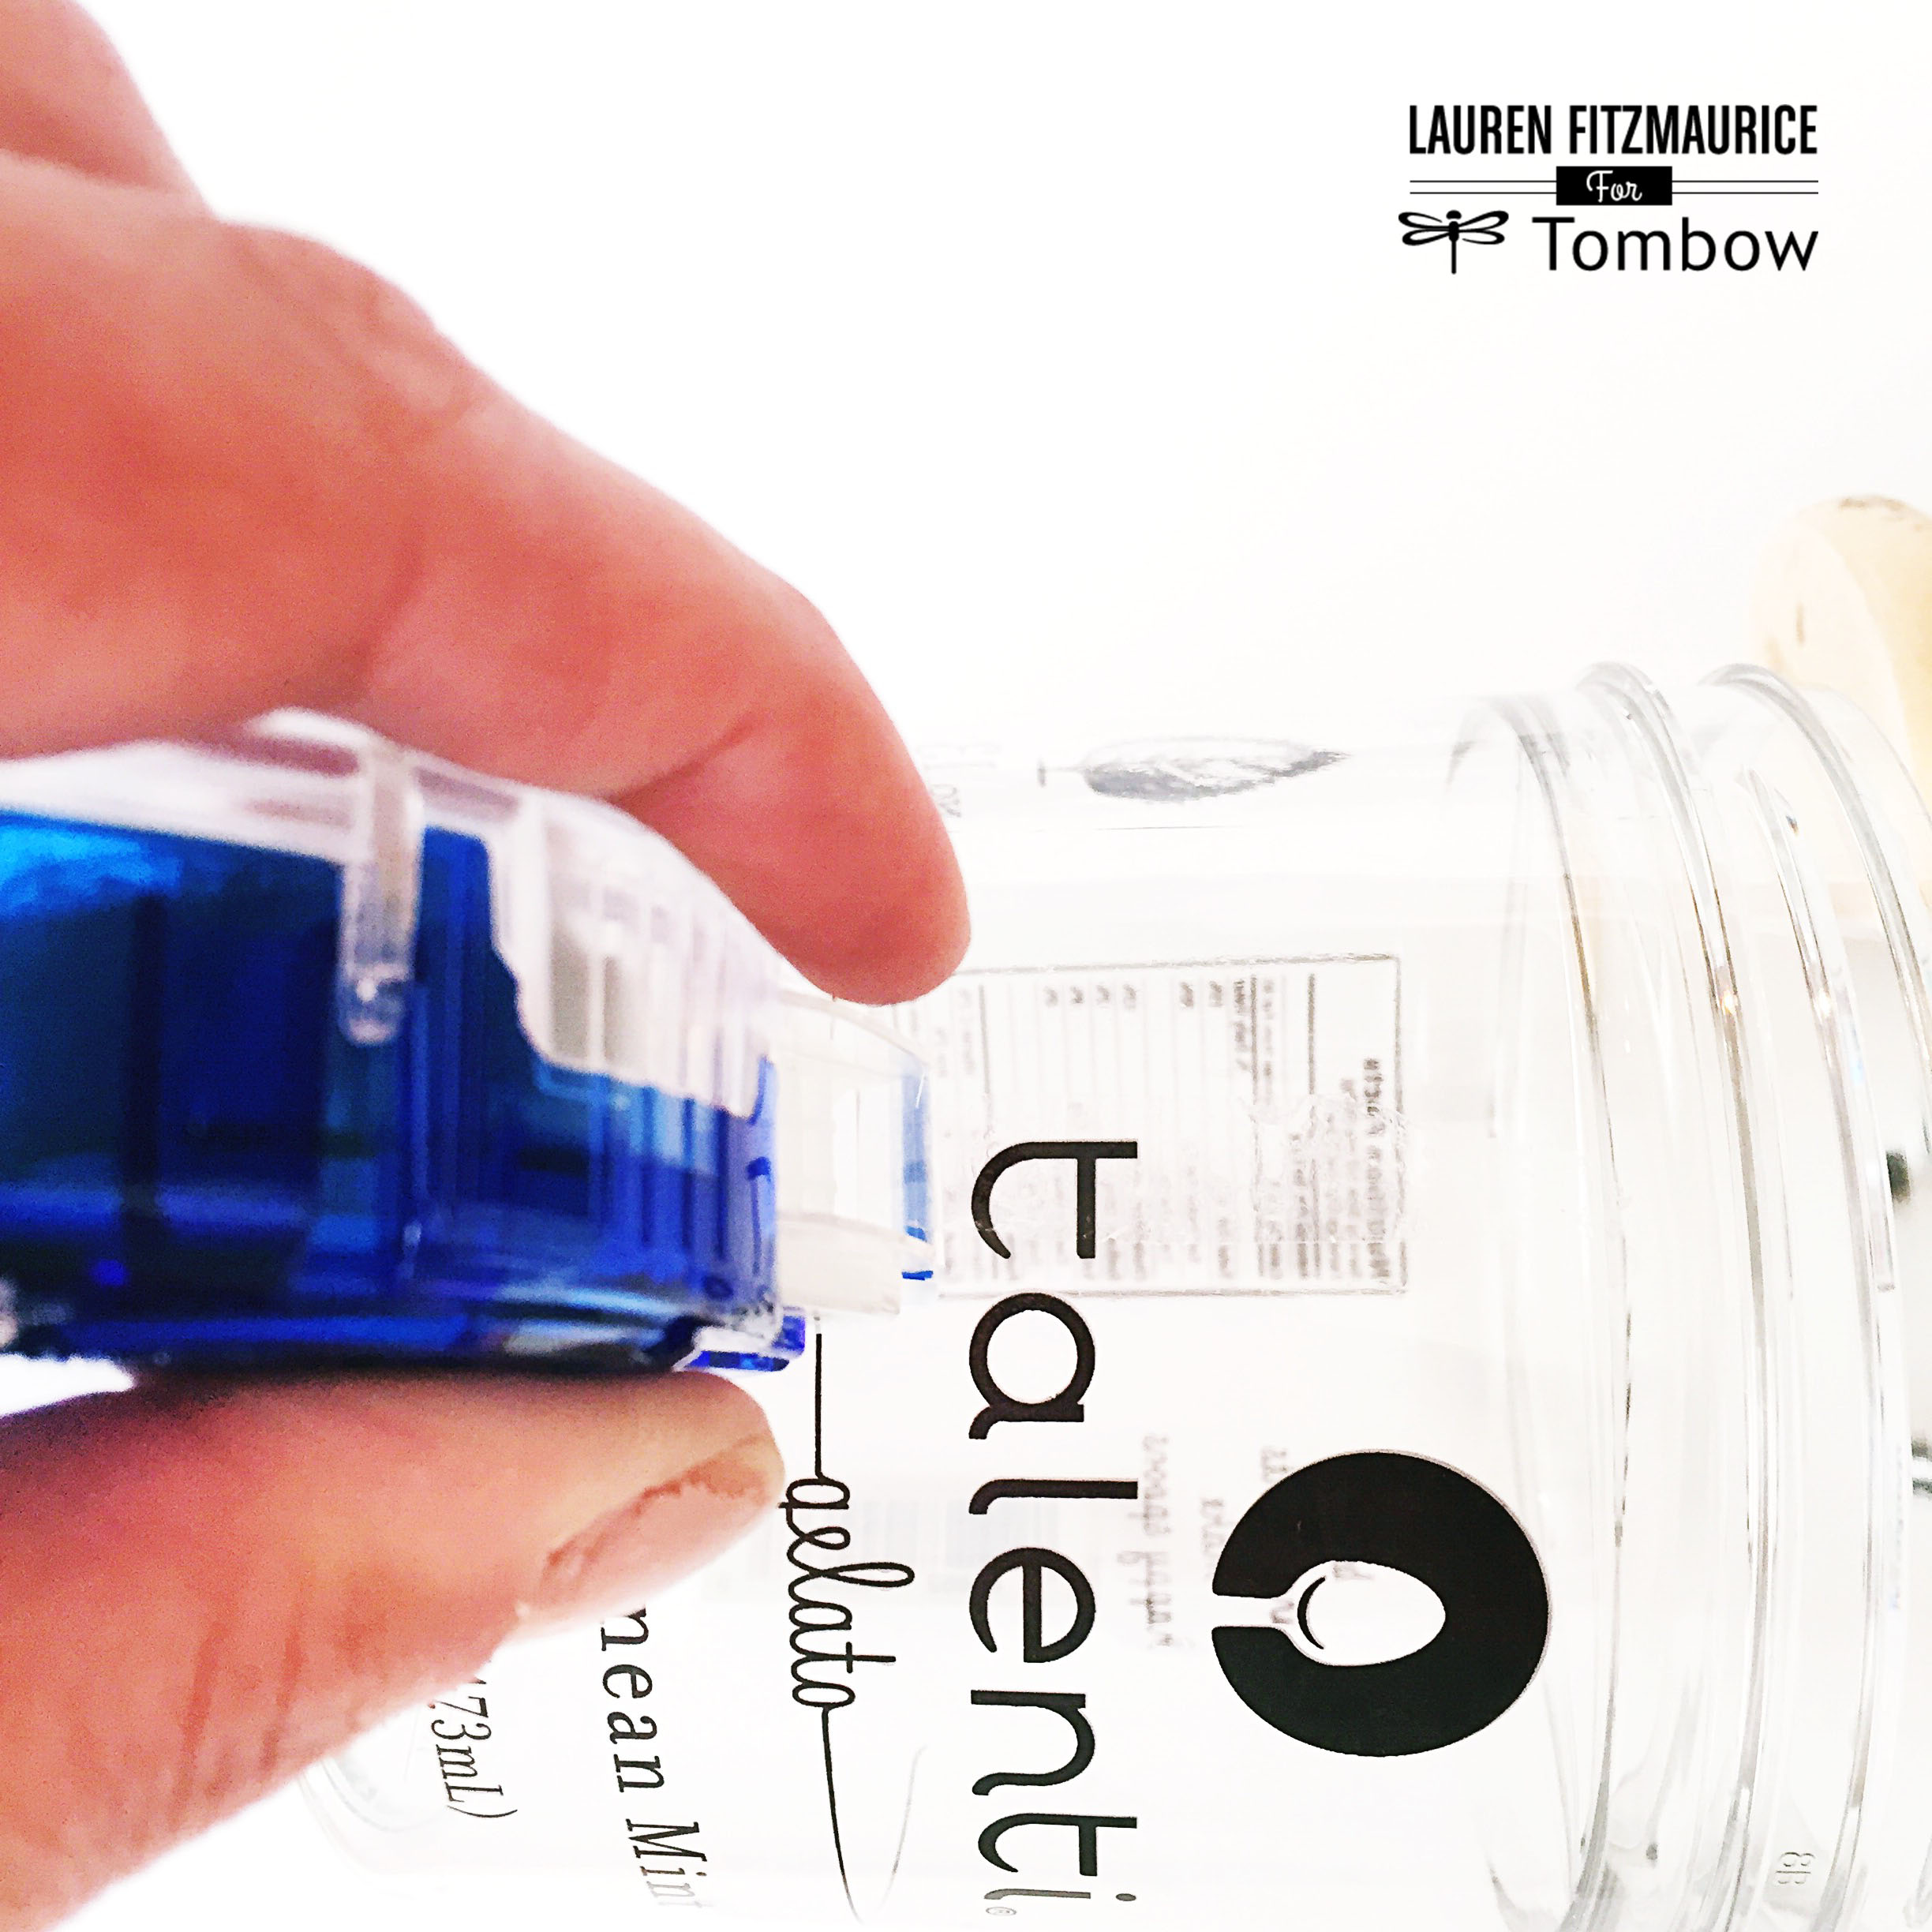
Begin by setting the container on it’s side and using the Tombow Permanant Adhesive + to draw stripes of adhesive around the outside of the container. I chose this adhesive, because this specific tape runner places adhesive exactly where you press down and start. It makes it super precise and easy to make sure the jar is evenly covered in stripes about a half inch apart.
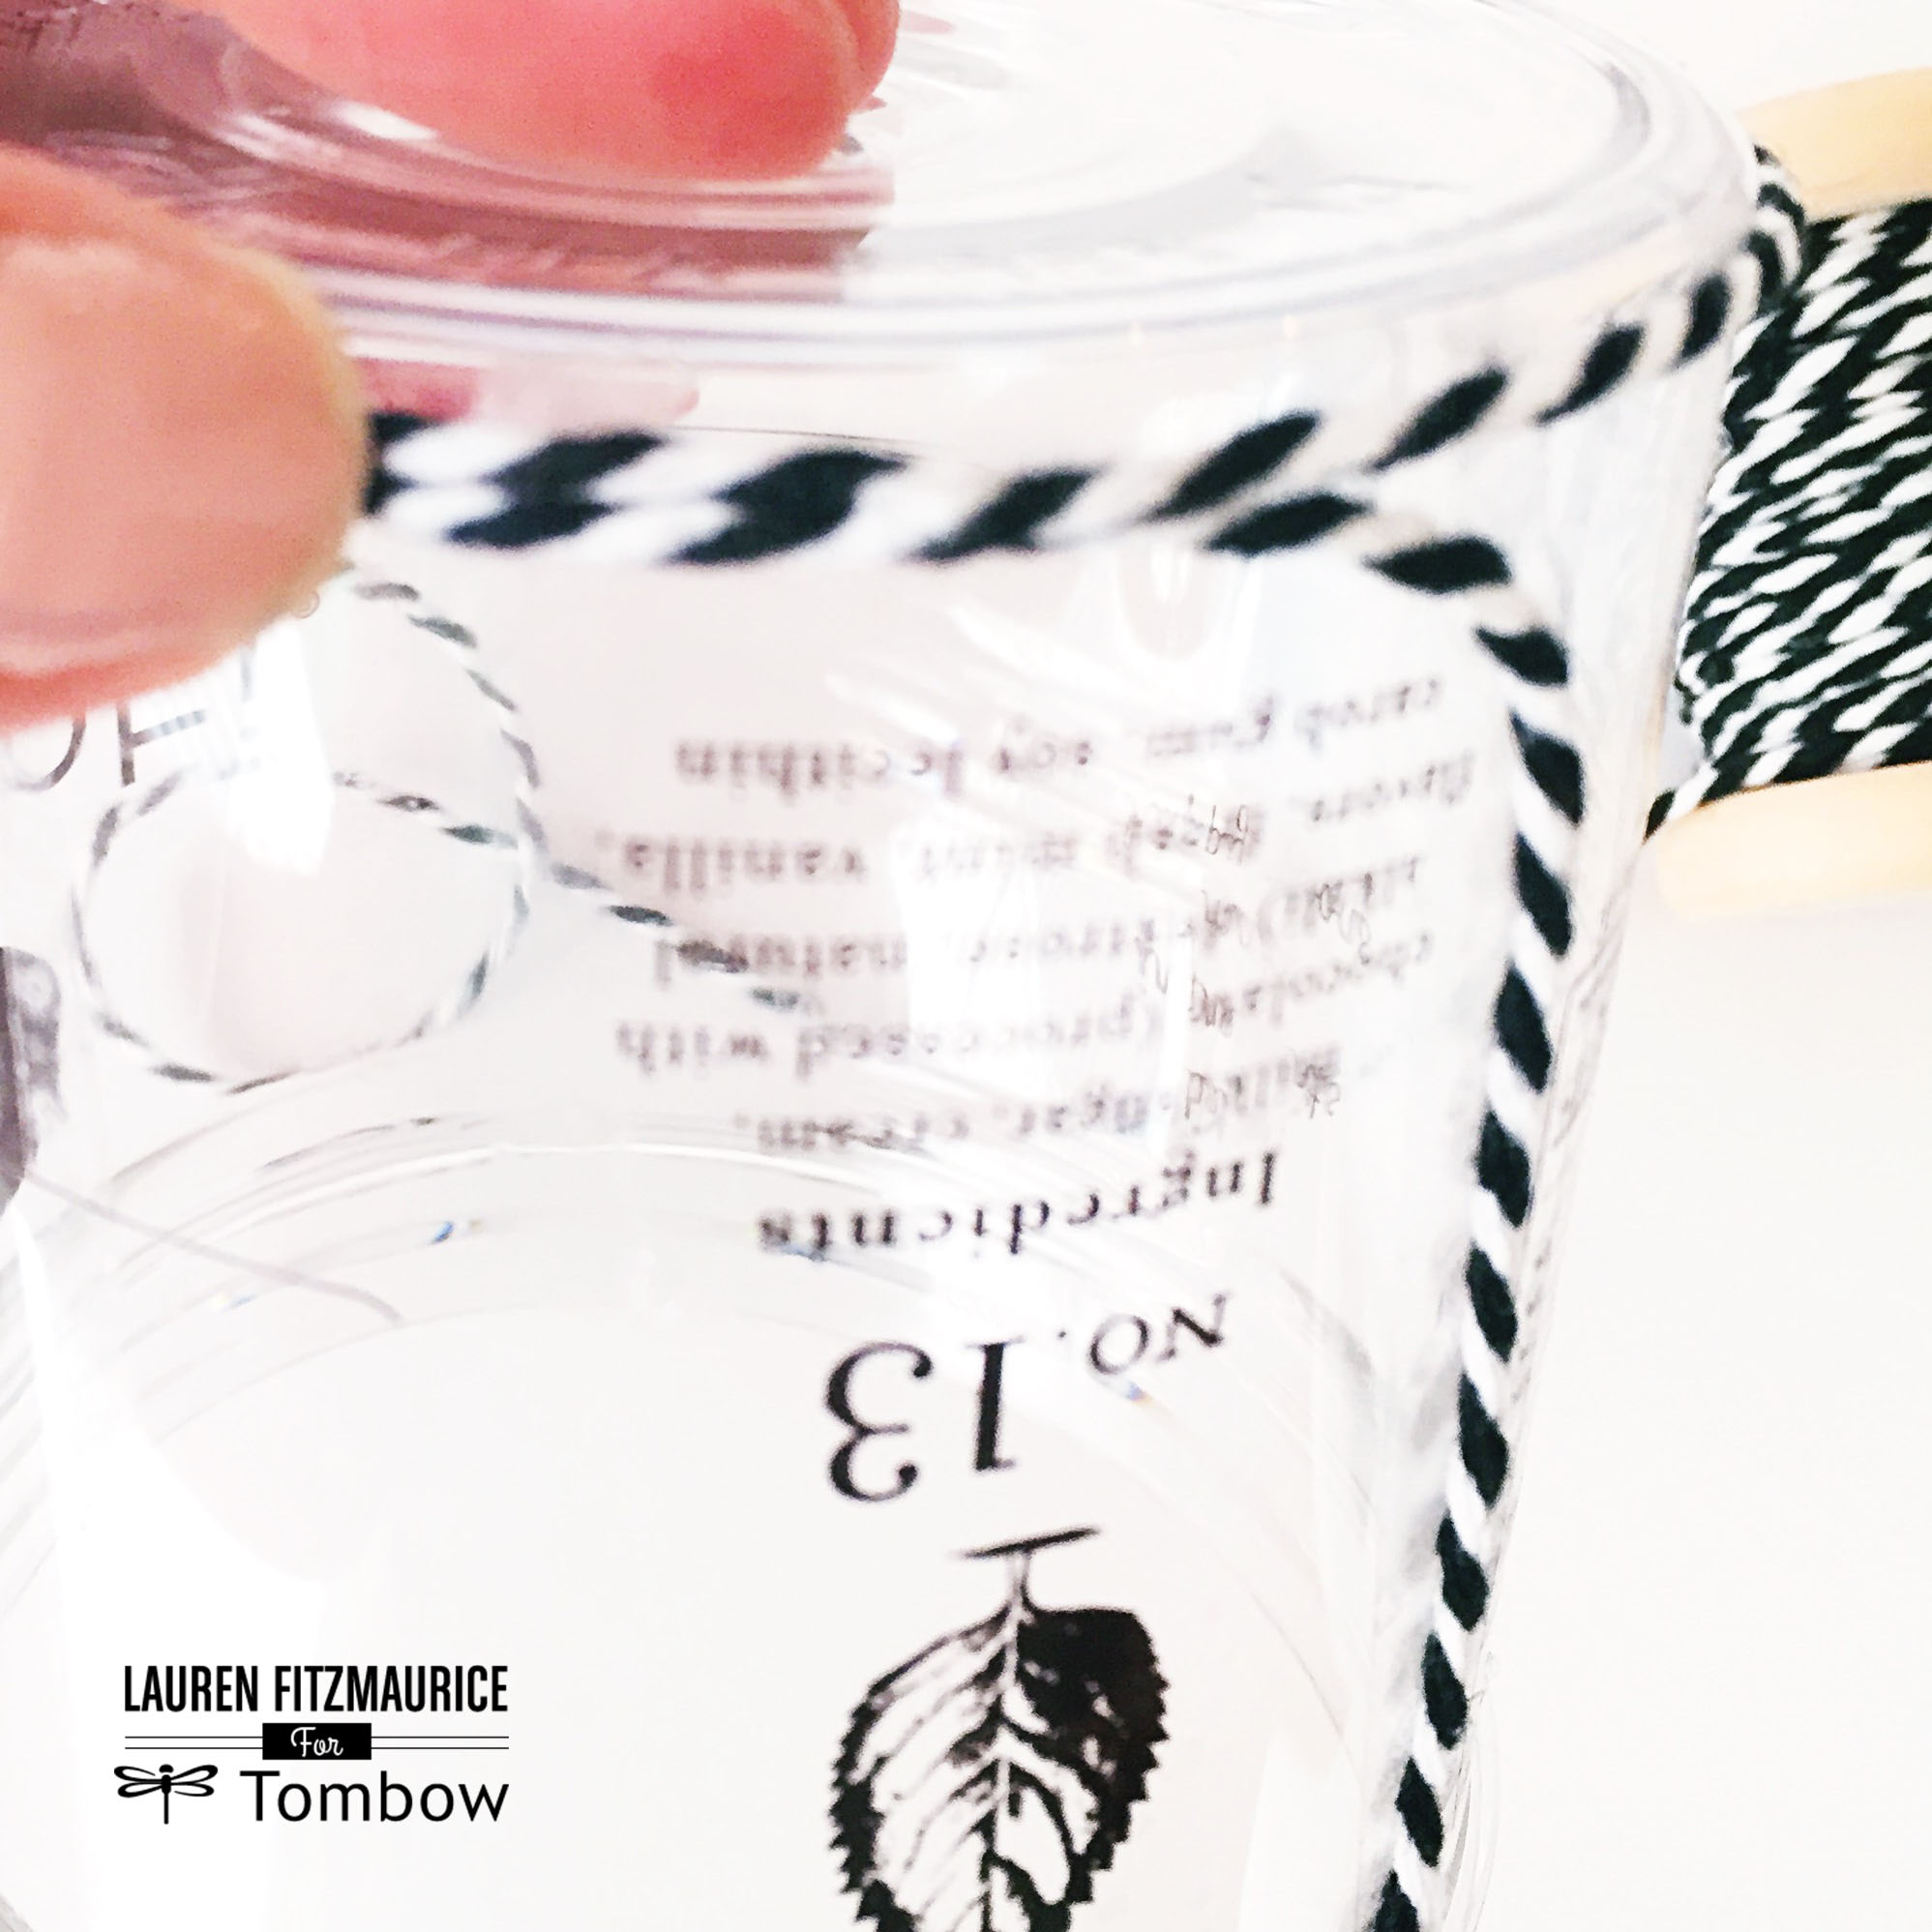
Then, on one of the stripes of Tombow Permanent Adhesive +, place the end of the twine to trap it inside of the wrapped twine. Then take the rest of the twine and wrap it around the jar making sure that you press firmly and make sure there are no gaps.
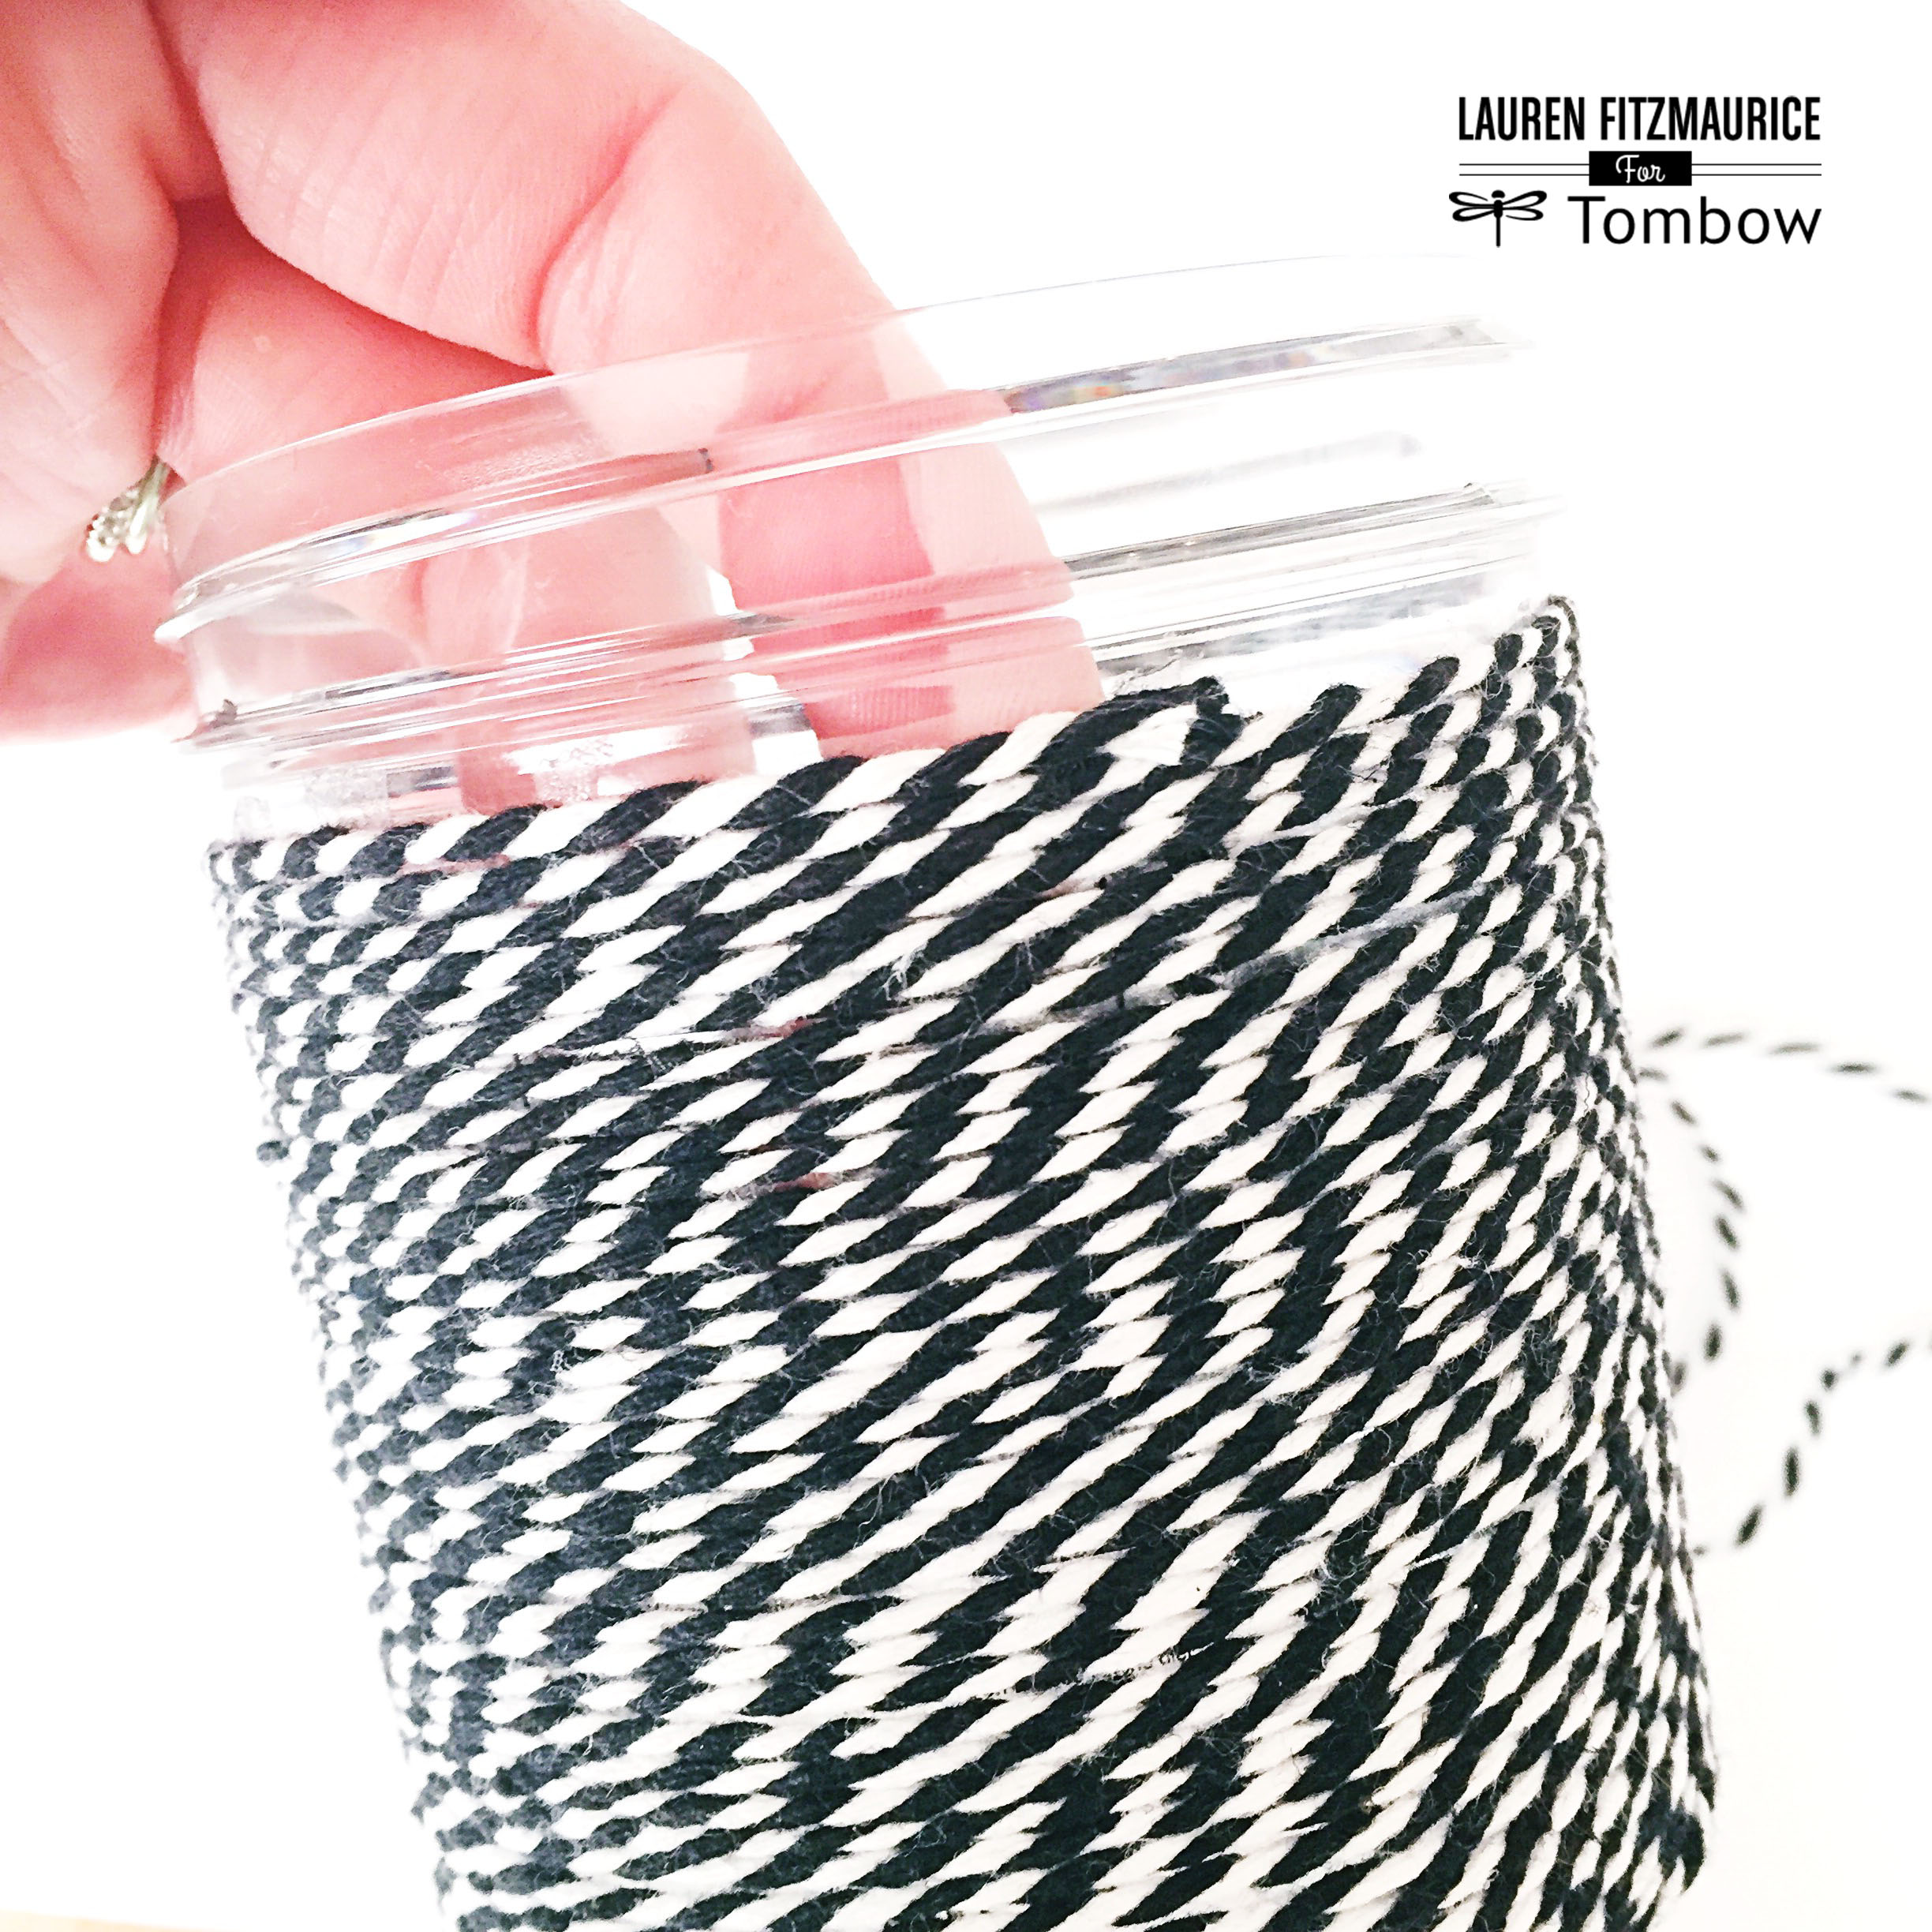
Once you are finished wrapping the entire container in twine, press the end down on adhesive and trip any excess twine so that the end stays down.
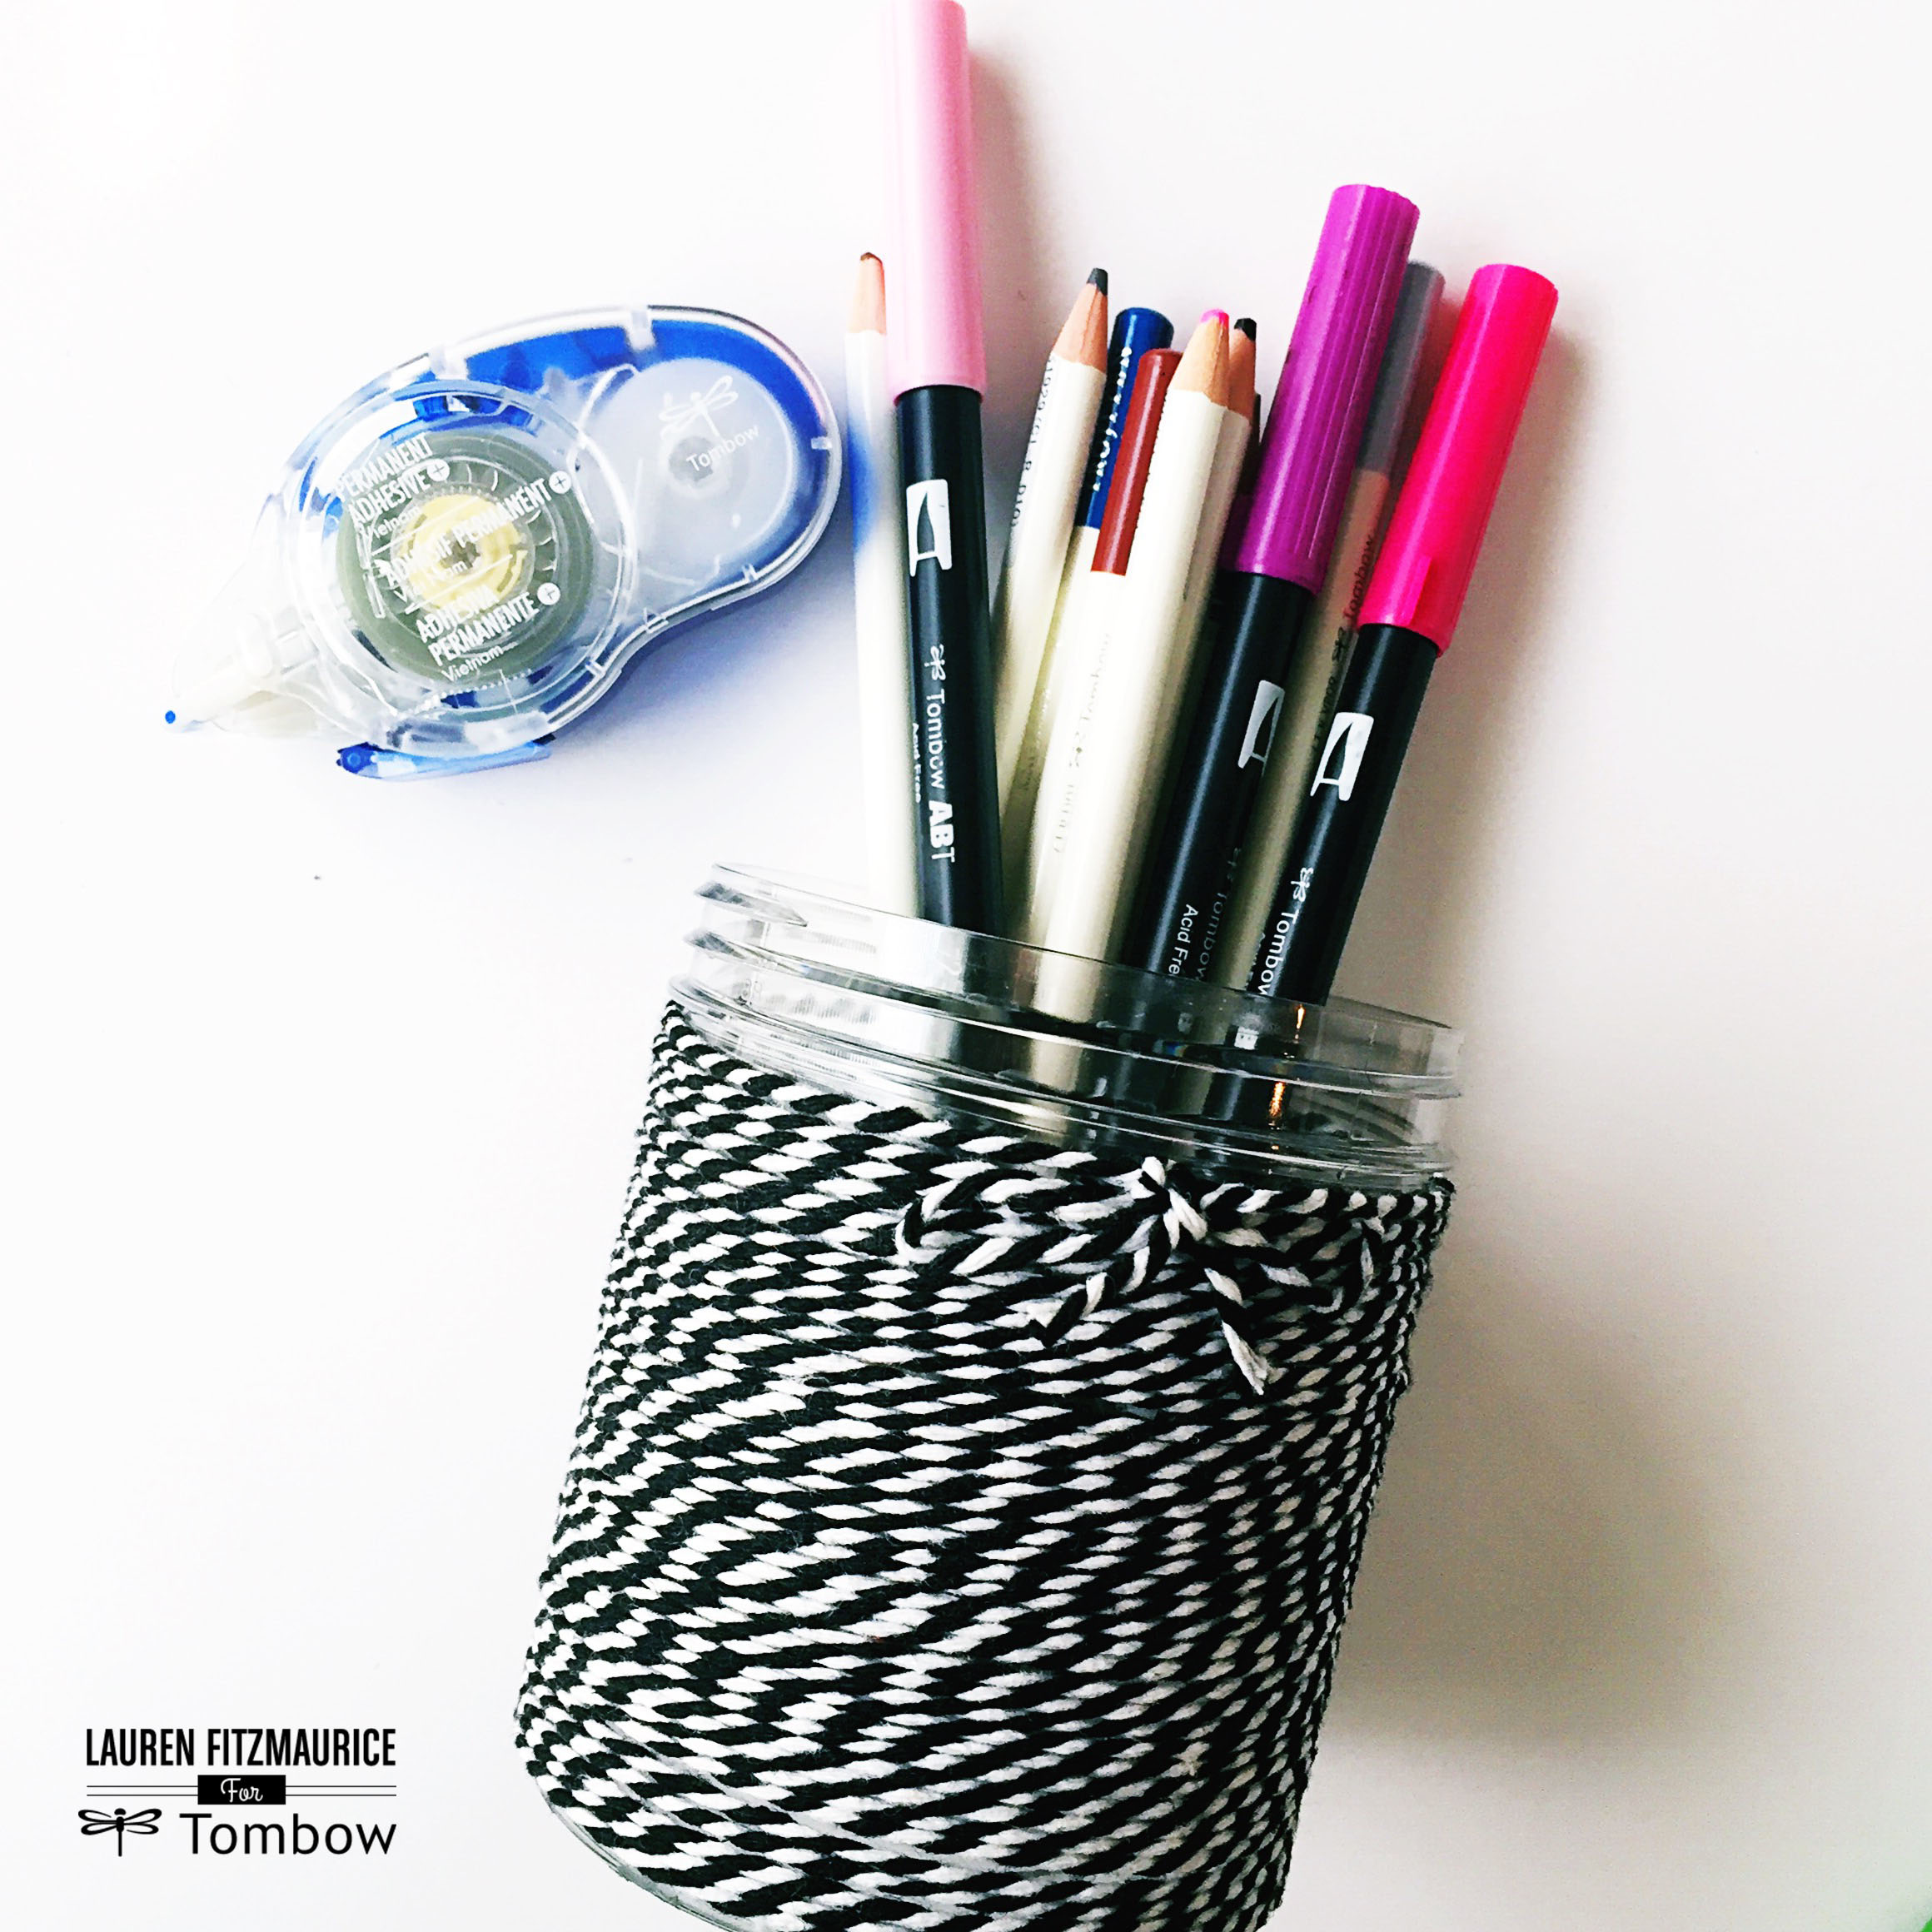
Take an extra piece of twine and finish off the adorable pencil holder by tying a bow around the top. Fill with your favorite art tools and place in your cute workspace. It’s almost as sweet as ice cream… right?!
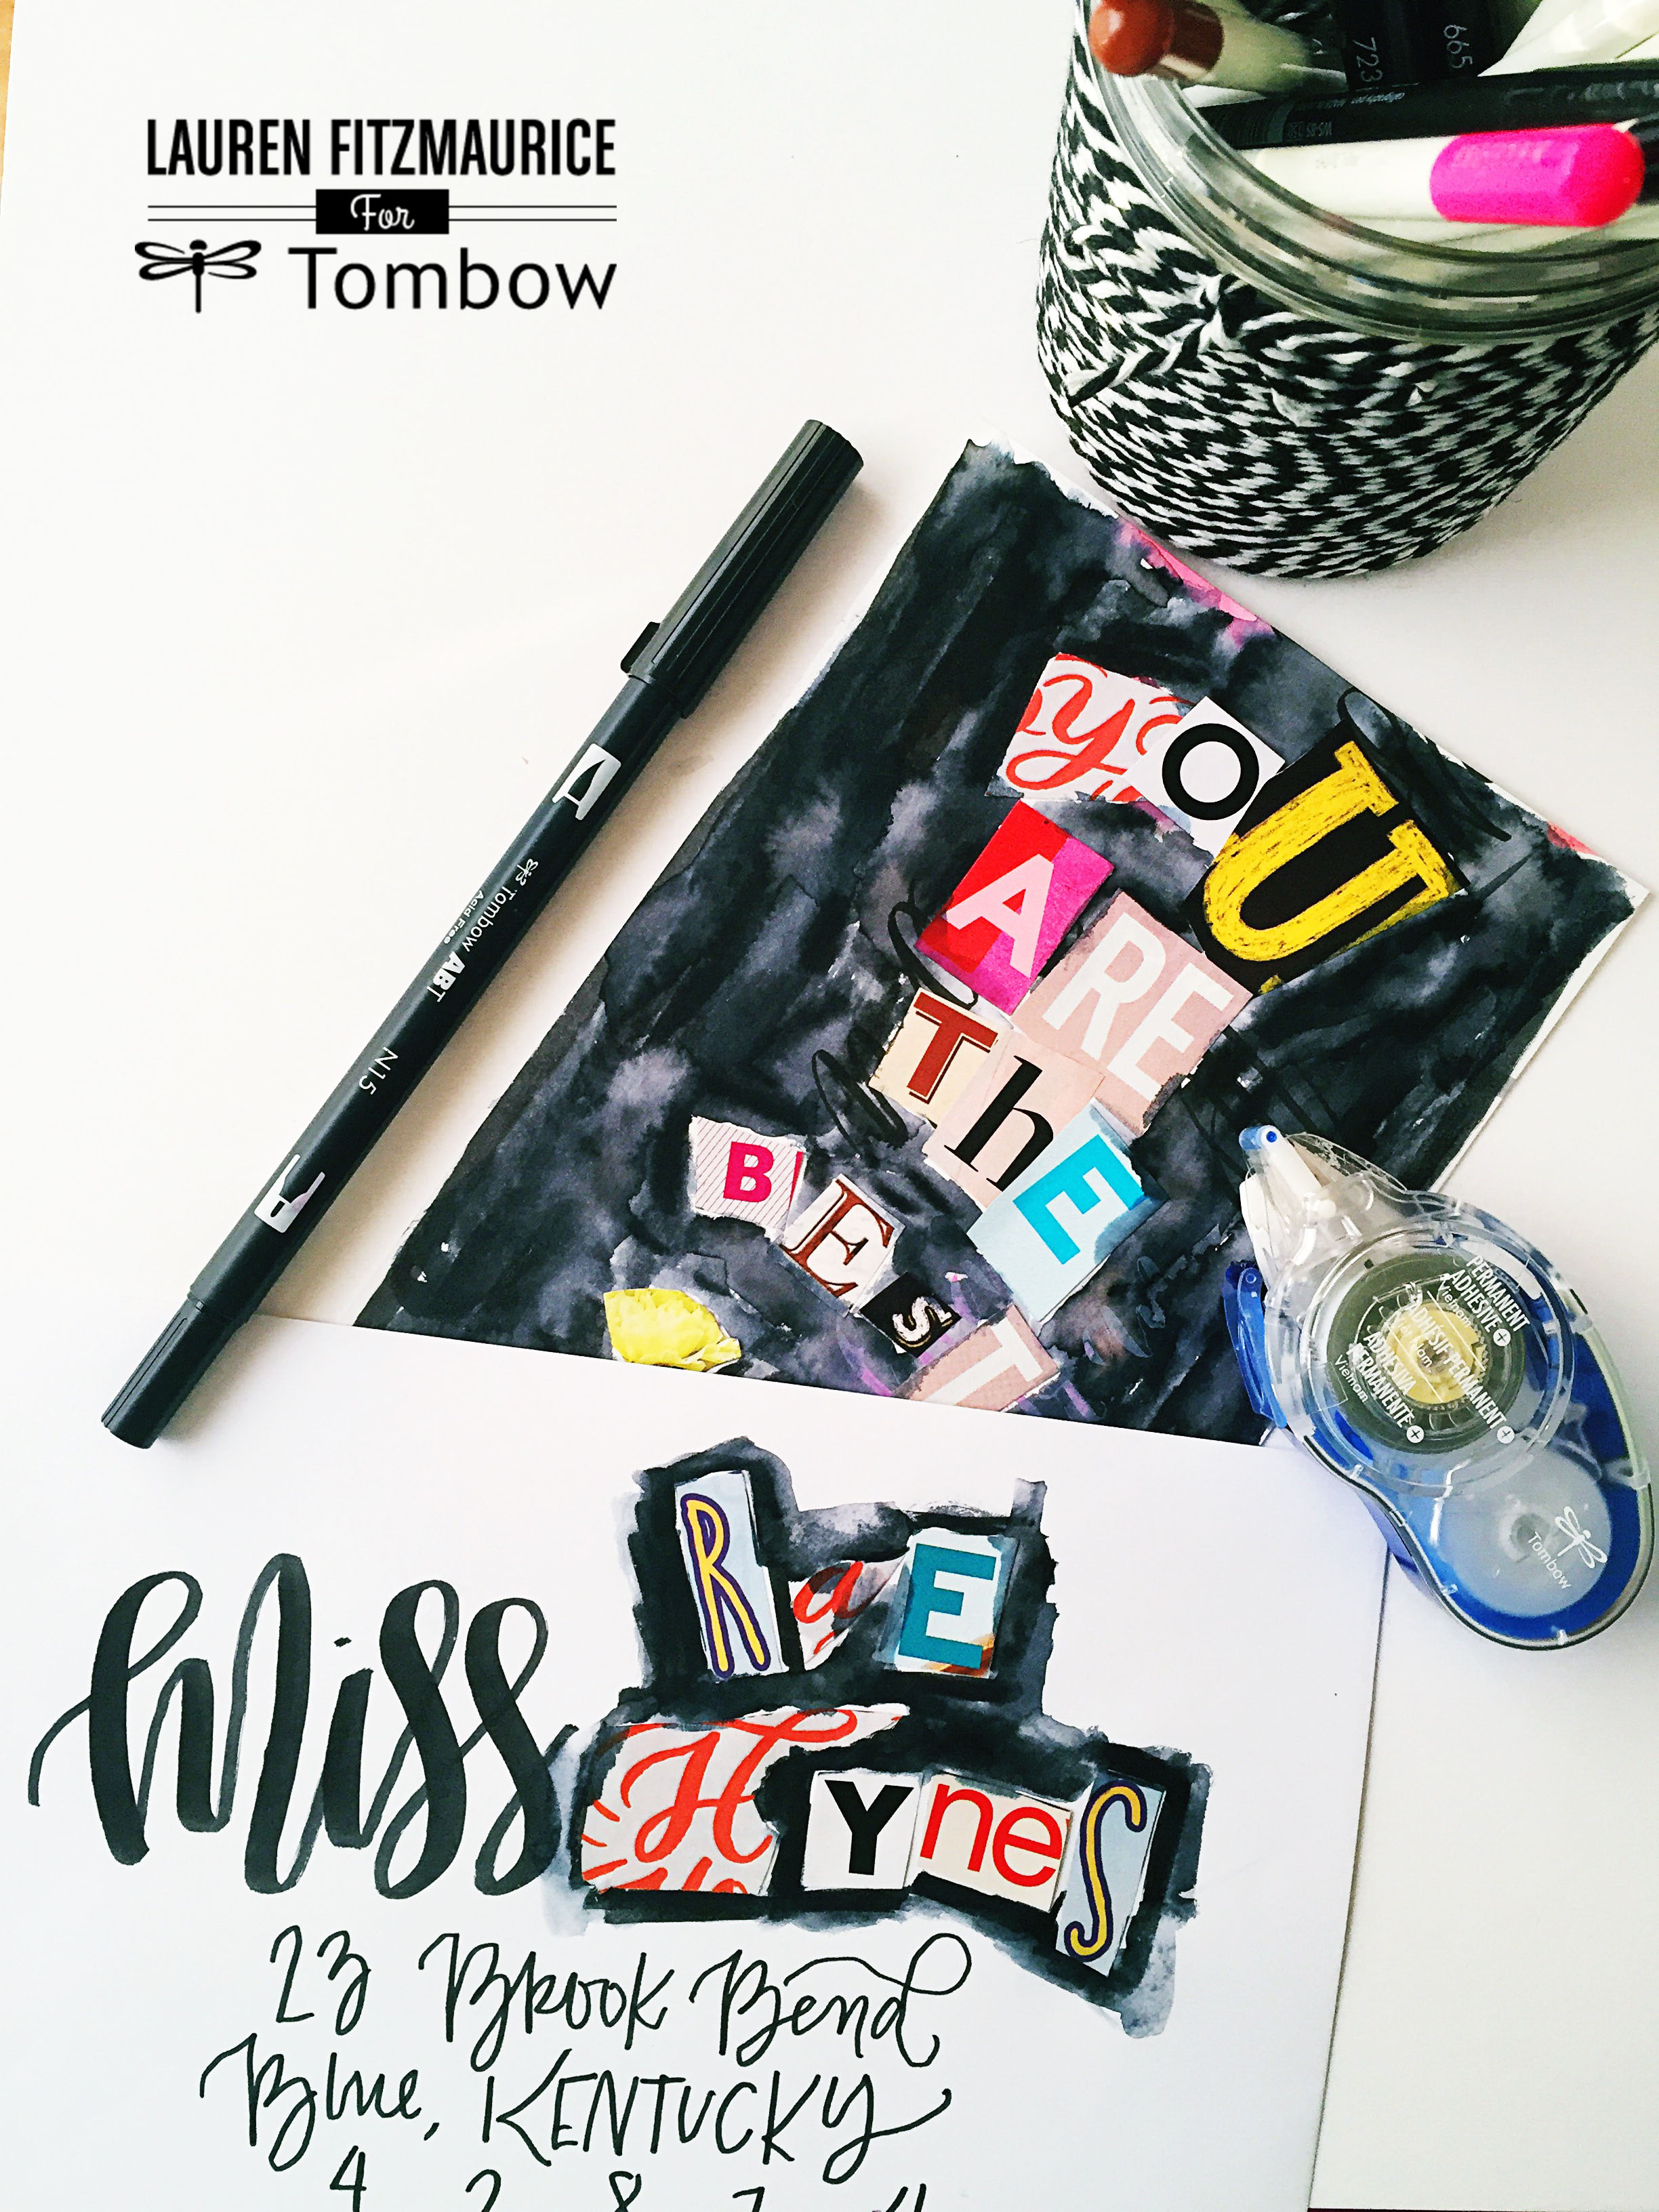
DIY FUN: MAGAZINES & SCRAP PAPER to RANSOM STYLE NOTE SET
I often find myself drawn to different kinds of fonts and letters that I find in magazines. I also have way too many pieces of paper covered in mistakes and doodles from my many posts on Instagram and commissioned projects. I decided why not blend the two in a super fun and bright project!
MATERIALS NEEDED:
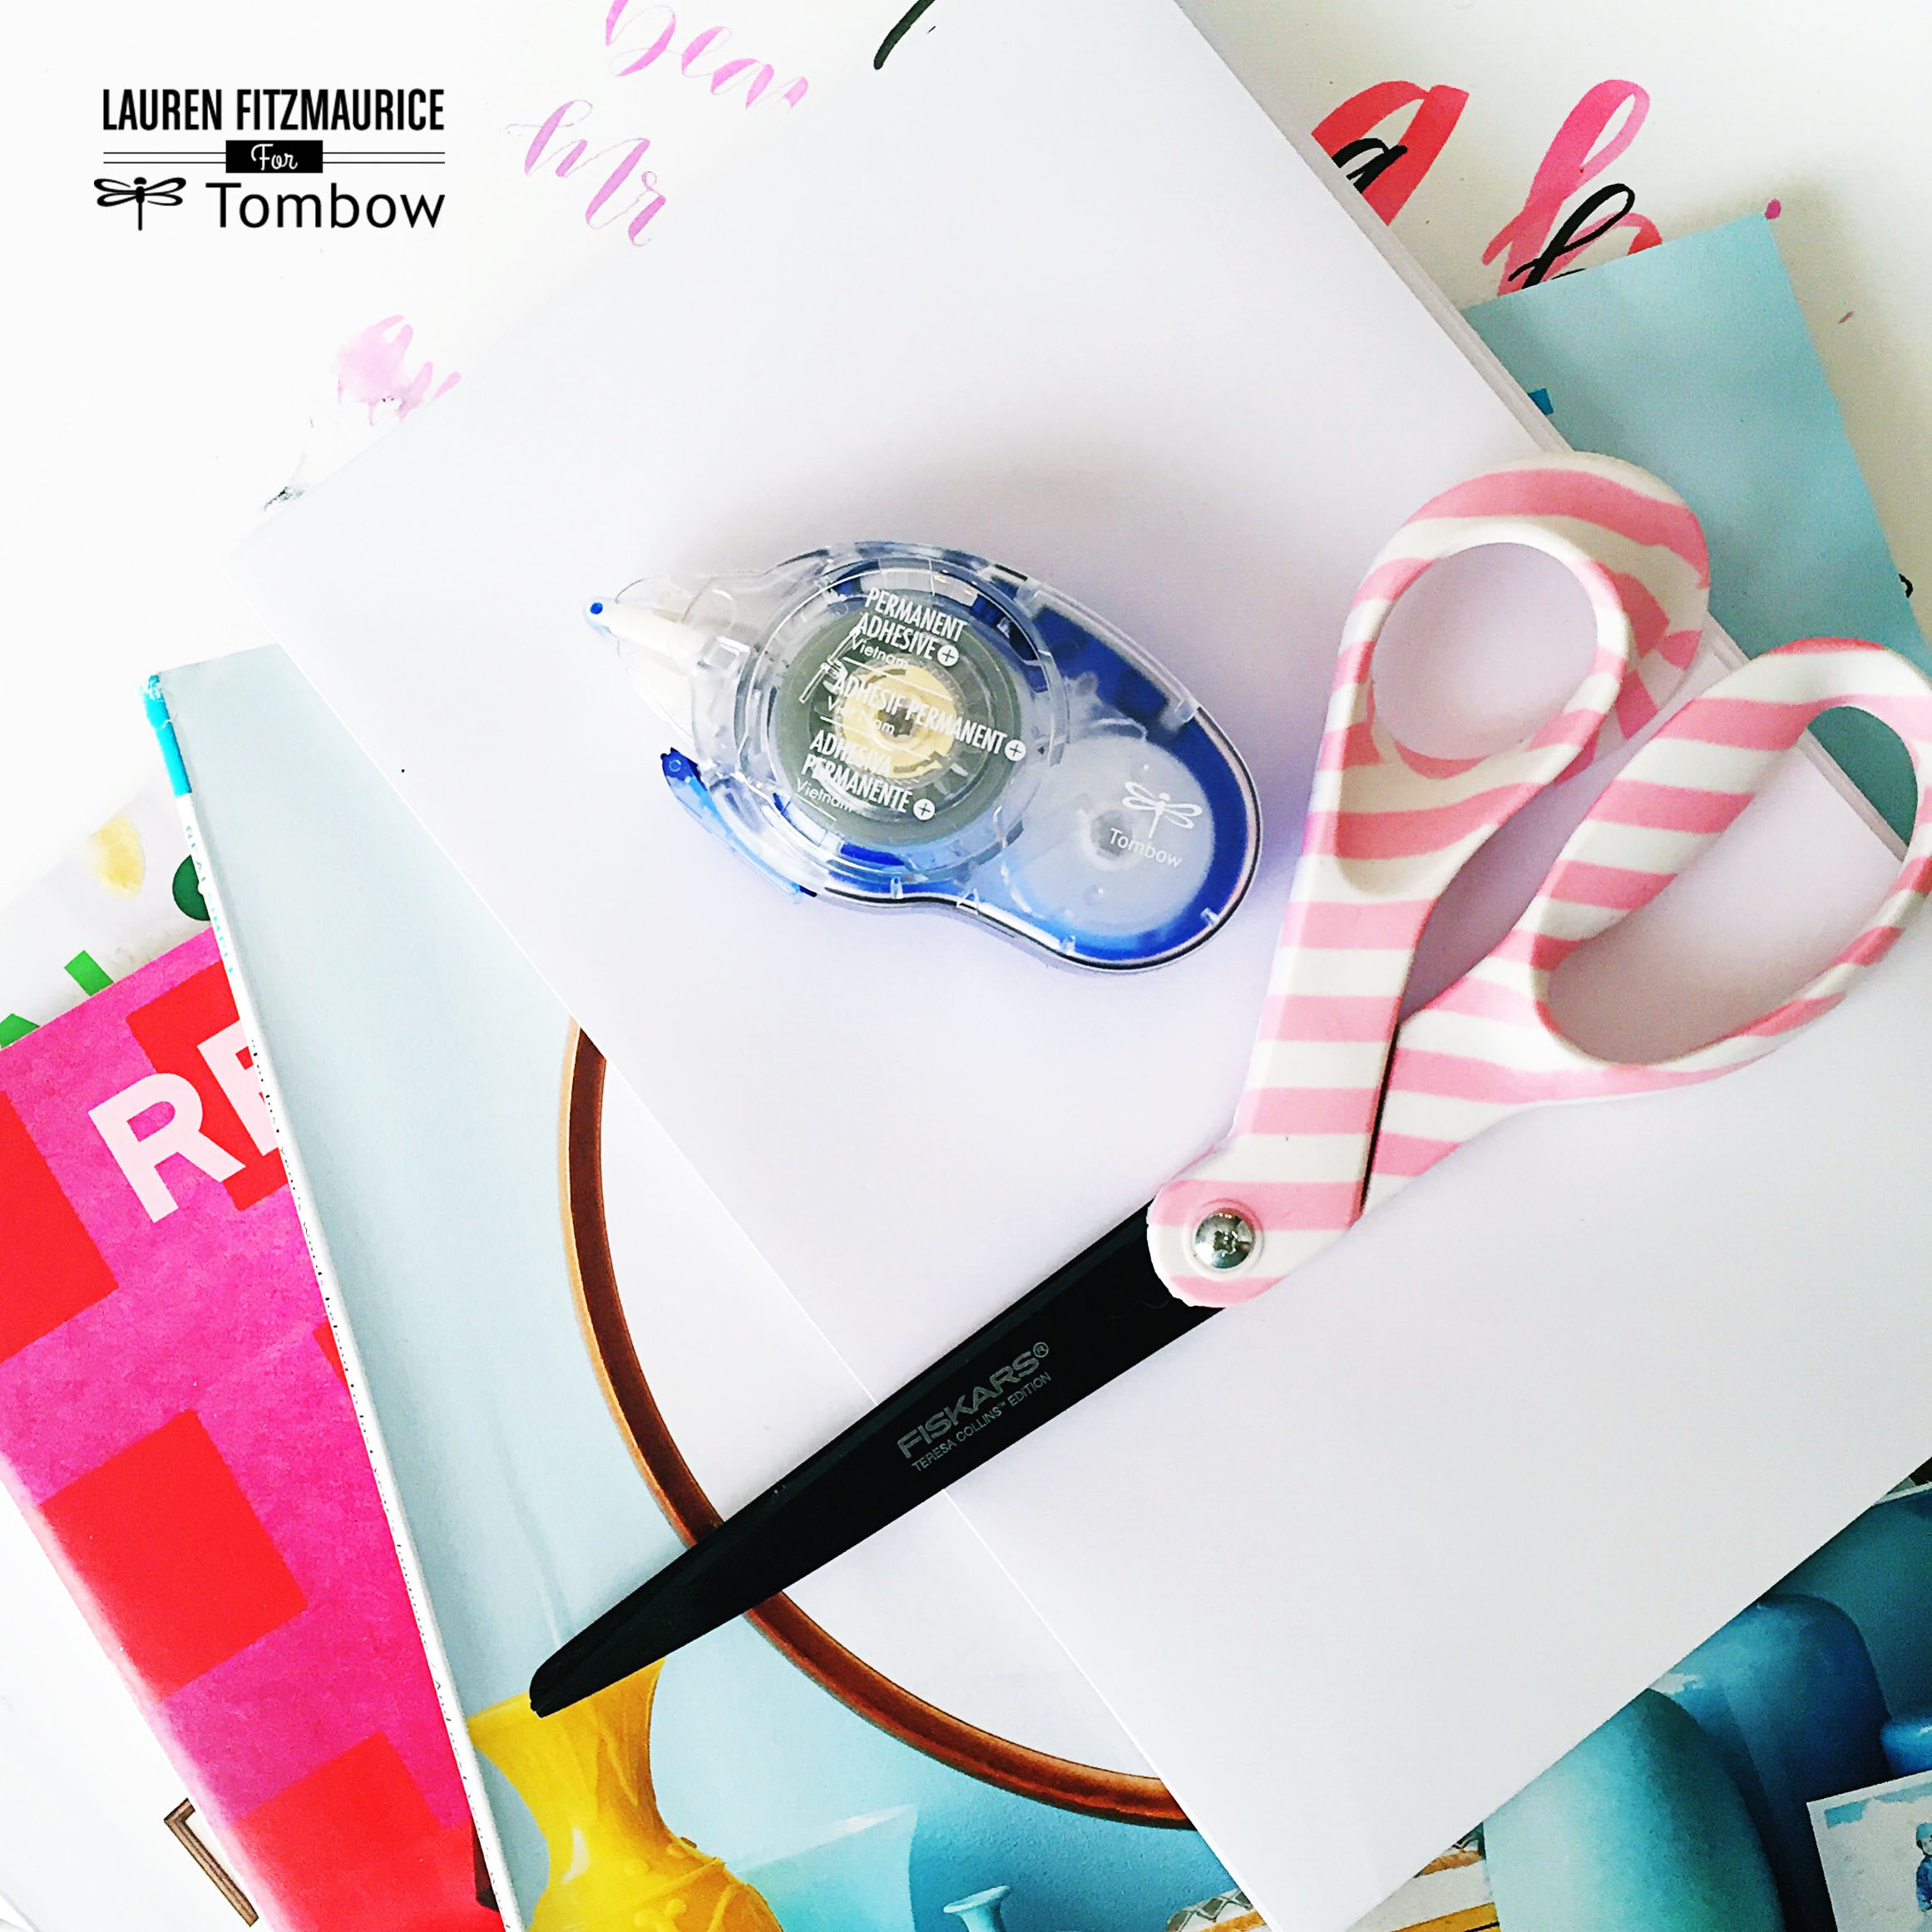
-scrap paper (it’s ok if it’s covered with doodles or Dual Brush Pen squiggles… they will give this project character!)
-Magazines (I used Real Simple Magazines because I love lots of the fonts they use and the style is very me! Use a magazine that you love and you are likely to be obsessed with how this project turns out)
–Tombow Dual Brush Pens ( in black or dark color)
-watercolor brush and water
-scissors
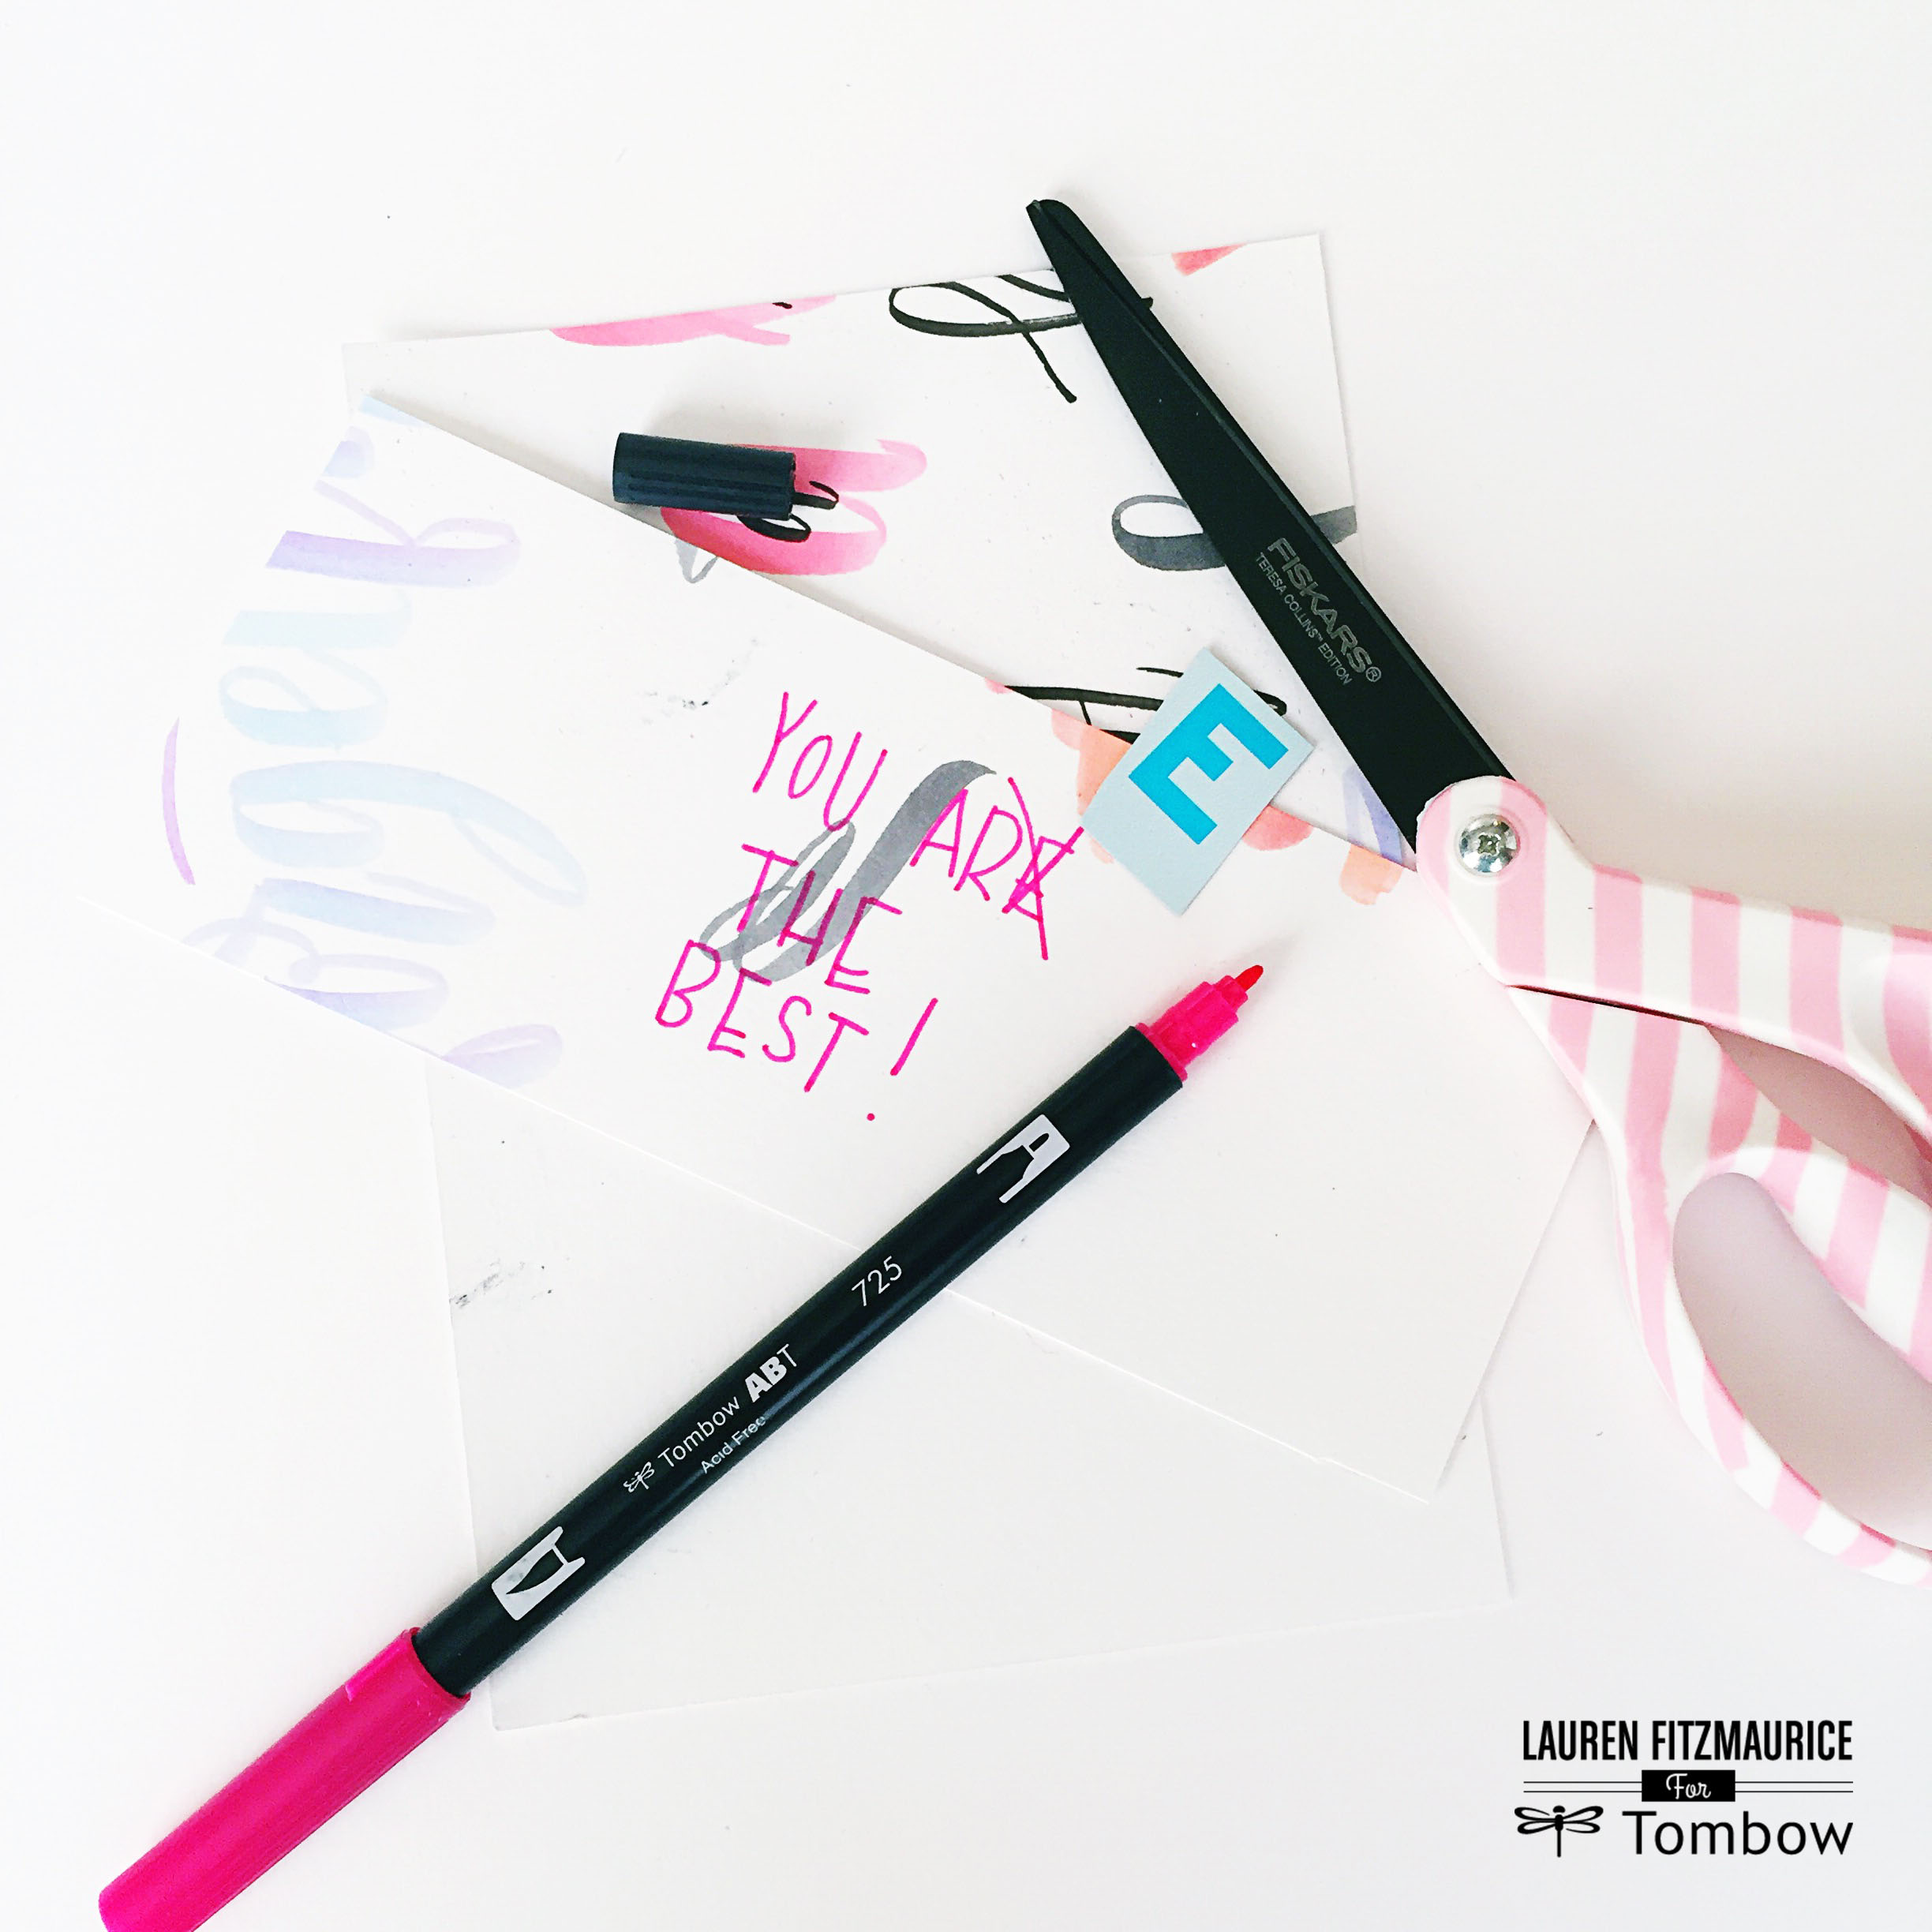
First, I like through all of my different pieces of scrap paper from all of my calligraphy adventures and pick my favorite pieces. There is something oddly beautiful about a messy, doodled up, and ink stained page. Once you pick a piece you love, cut it into a 5 by 7 so it can be a note card or framed artwork. Then write out the phrase you are wanting to feature on the card on an extra piece of scrap paper. As you cut each letter out, set them to the side of the paper so you can see how it will look. Then also cross off the letter on the extra sheet so you see what you have left to find.
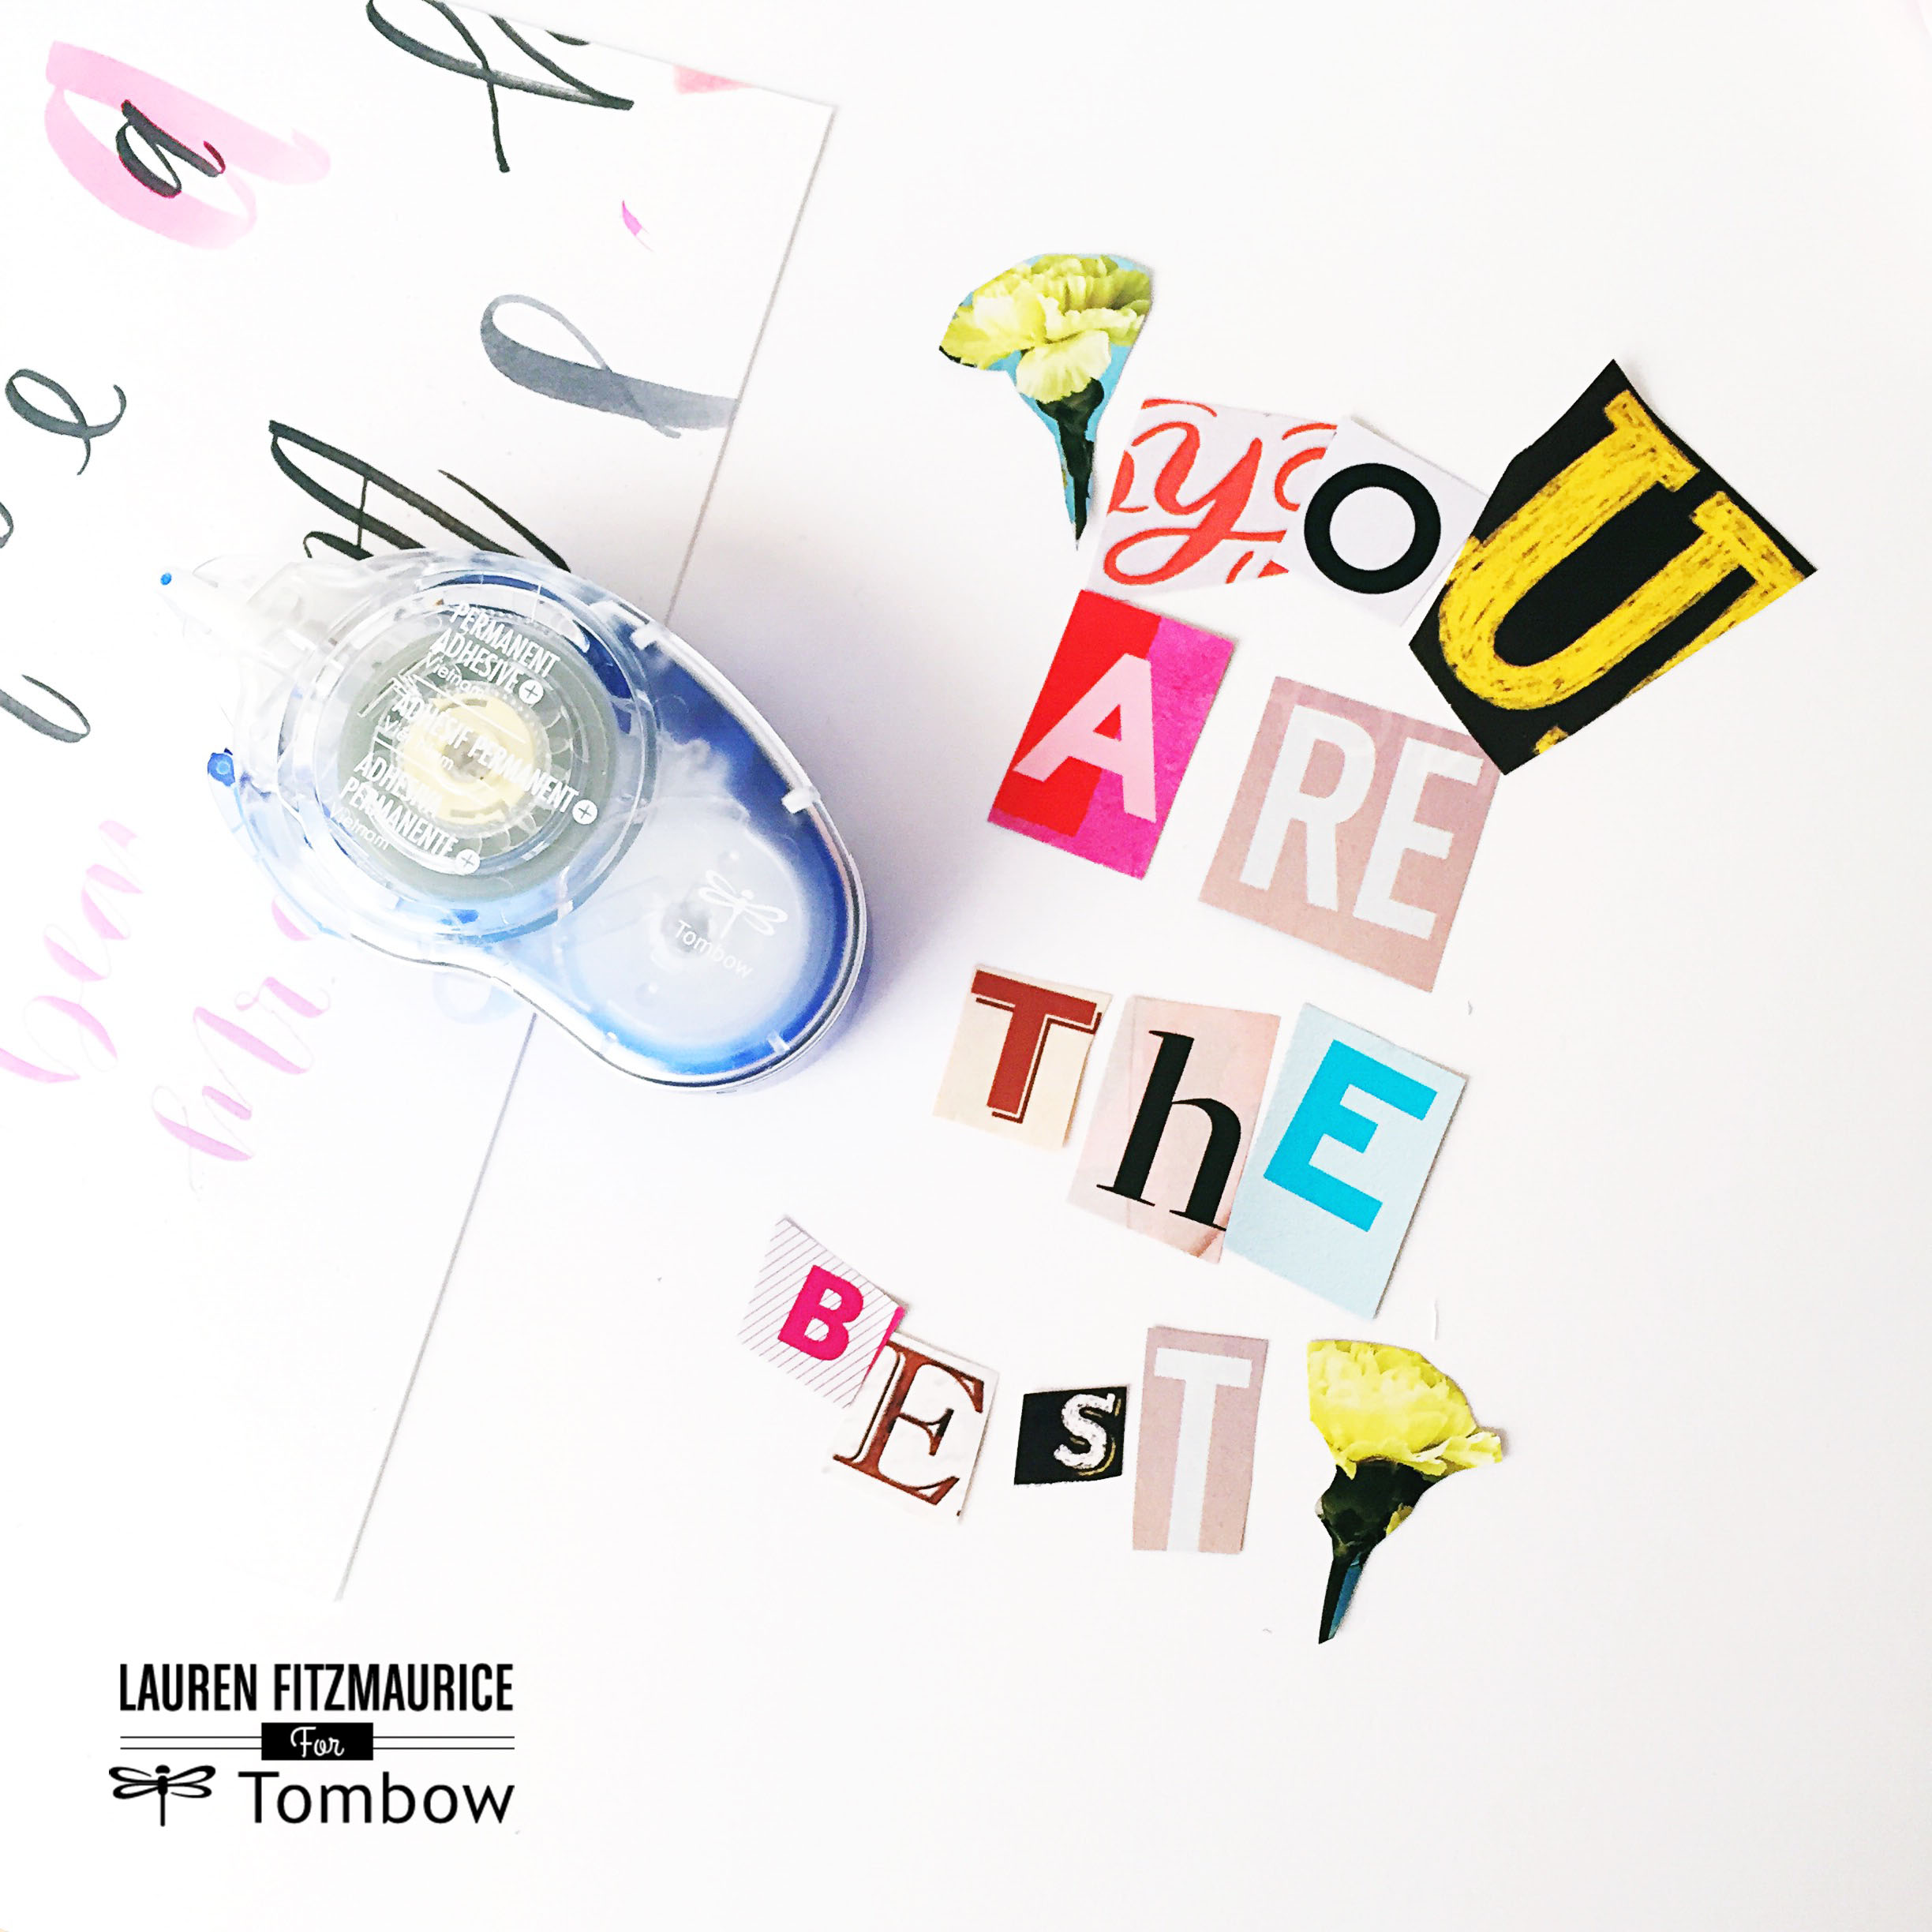
Once you cut out all the letters, place them in a way the is pleasing to the eye while also ensuring that the composition will fit on the page. Glue down the letters using the Tombow Permanent Adhesive +.
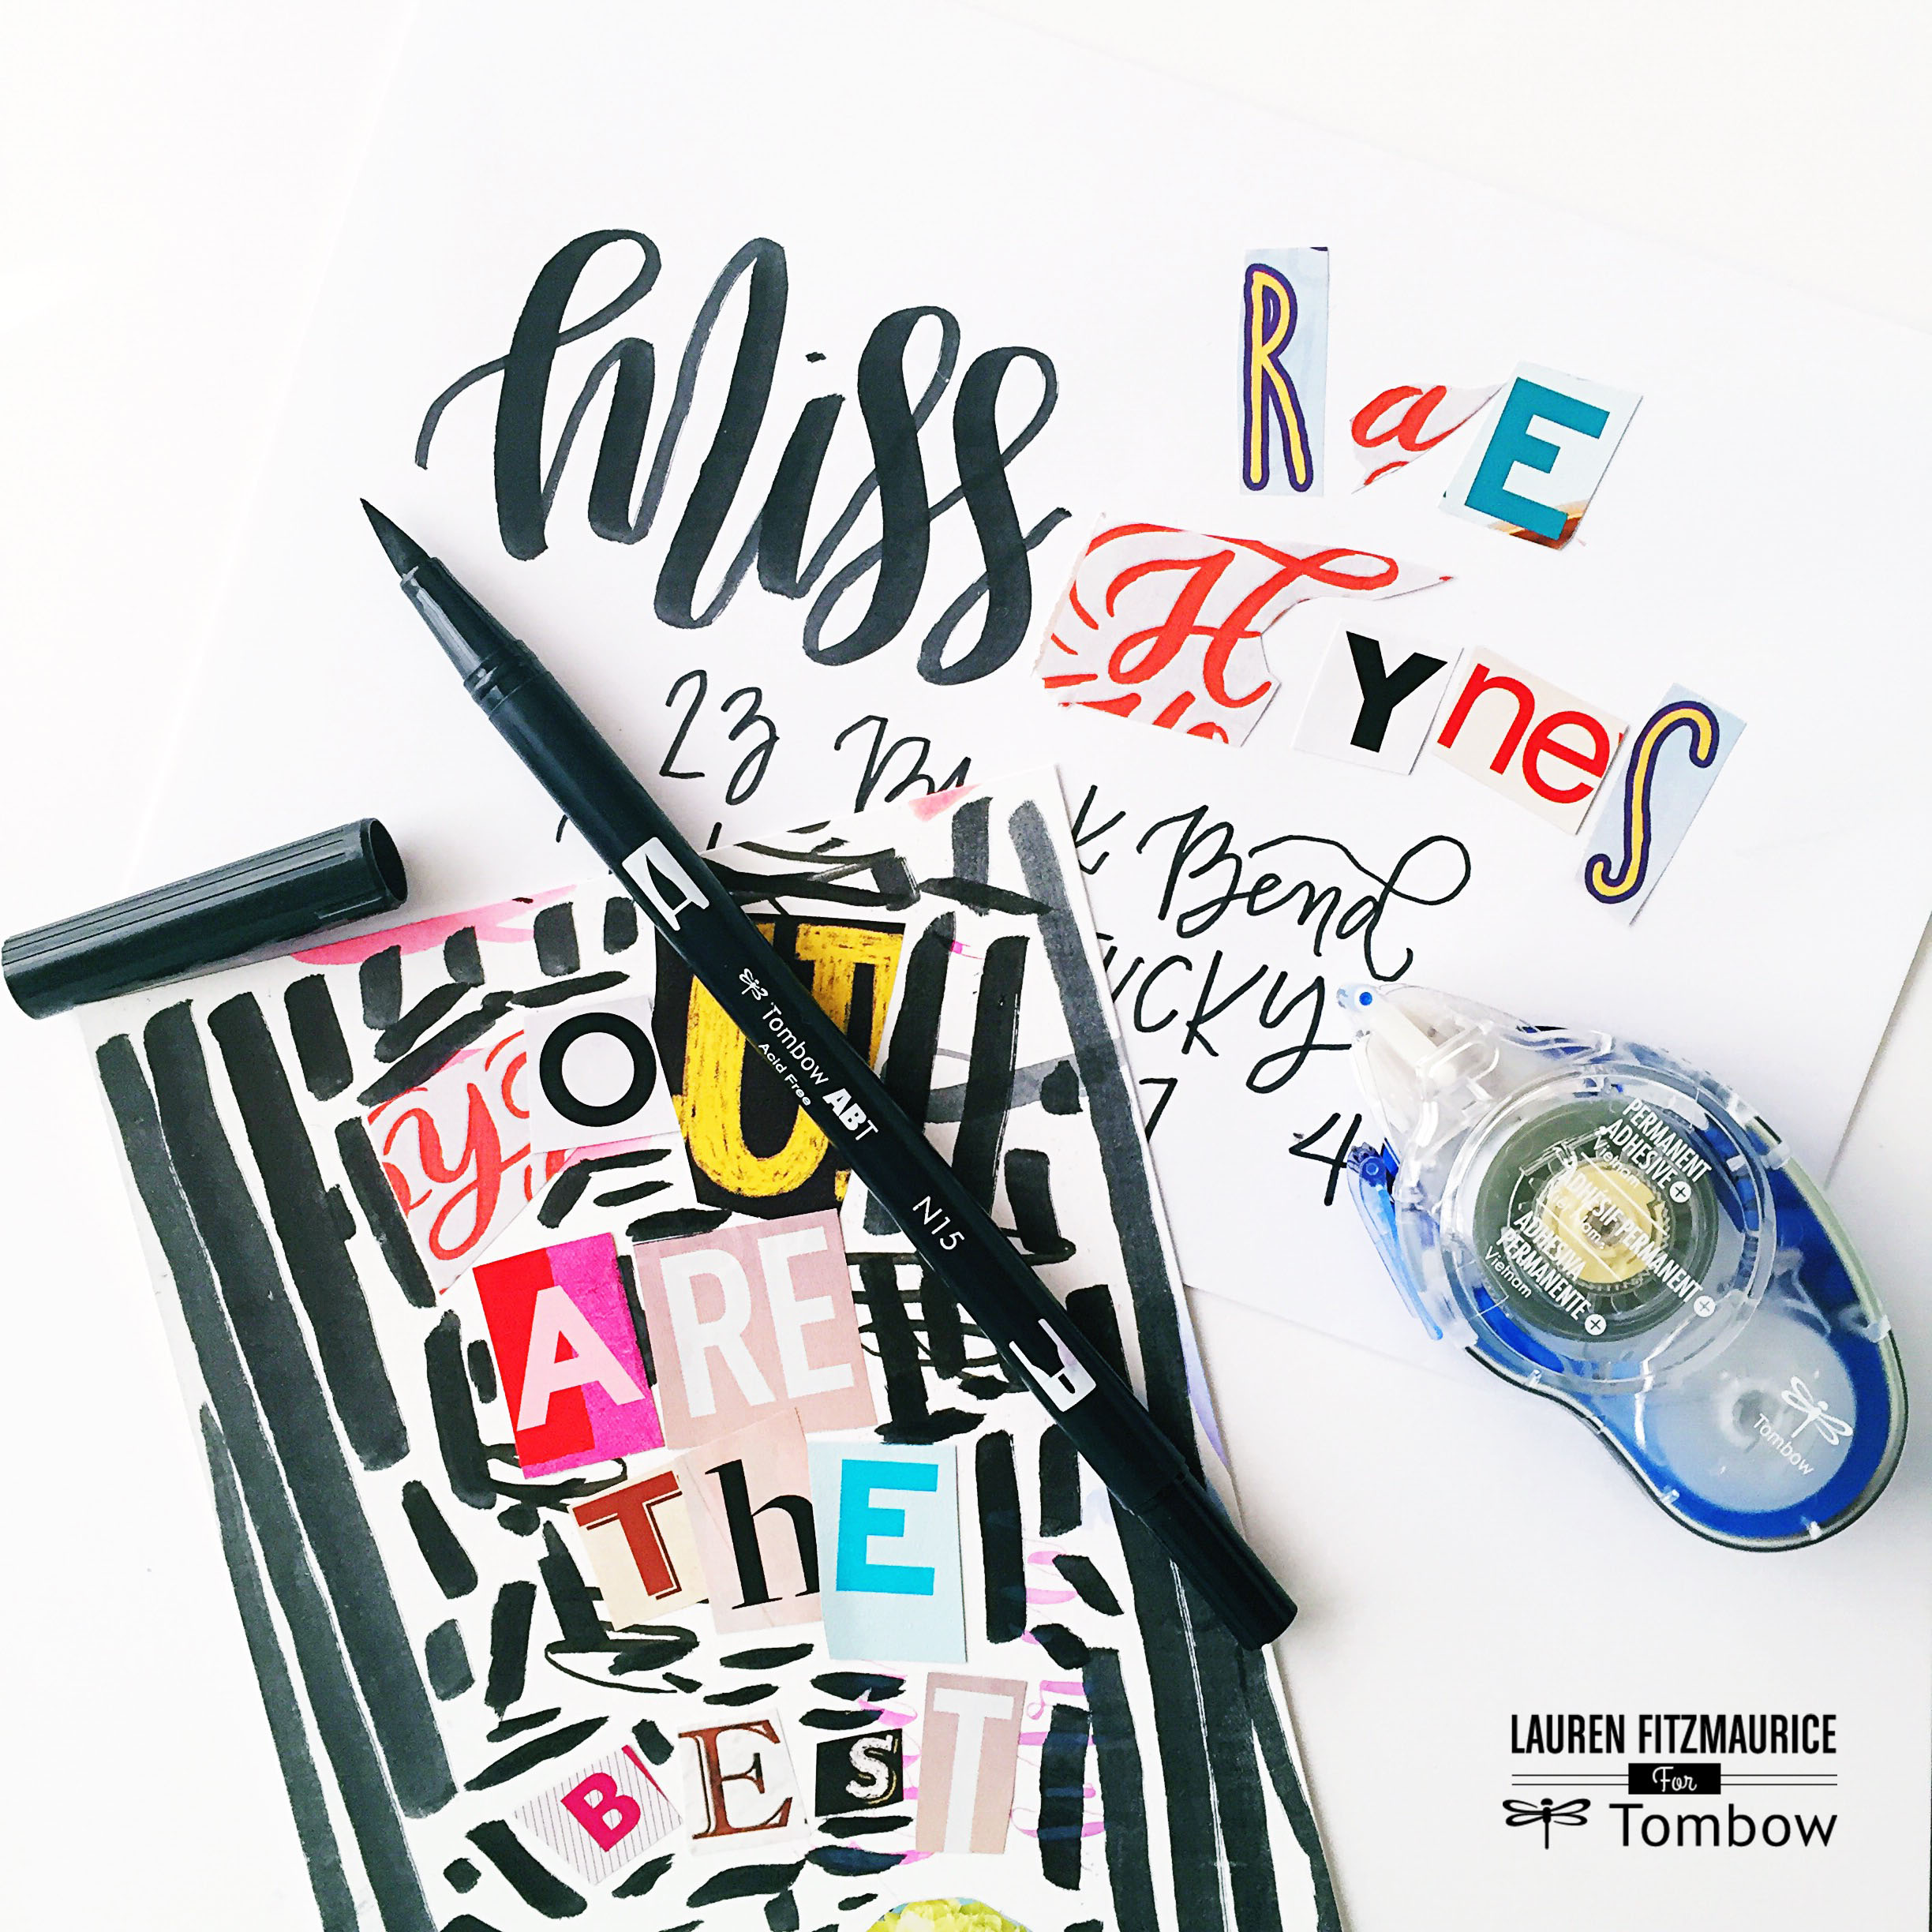
Next, do the same thing for part of the name on the envelope and finish the rest of the lettering in Tombow Dual Brush Pen. Using a Black Dual Brush Pen, draw little marks and stripes around the background of the card. Also outline around the magazine letters on the envelope.

Using a watercolor brush, create a watercolor effect that also makes the words boldly pop out. I love the way the colors underneath mix with the black. It looks so fun and super creative, but takes very little time or precise effort.
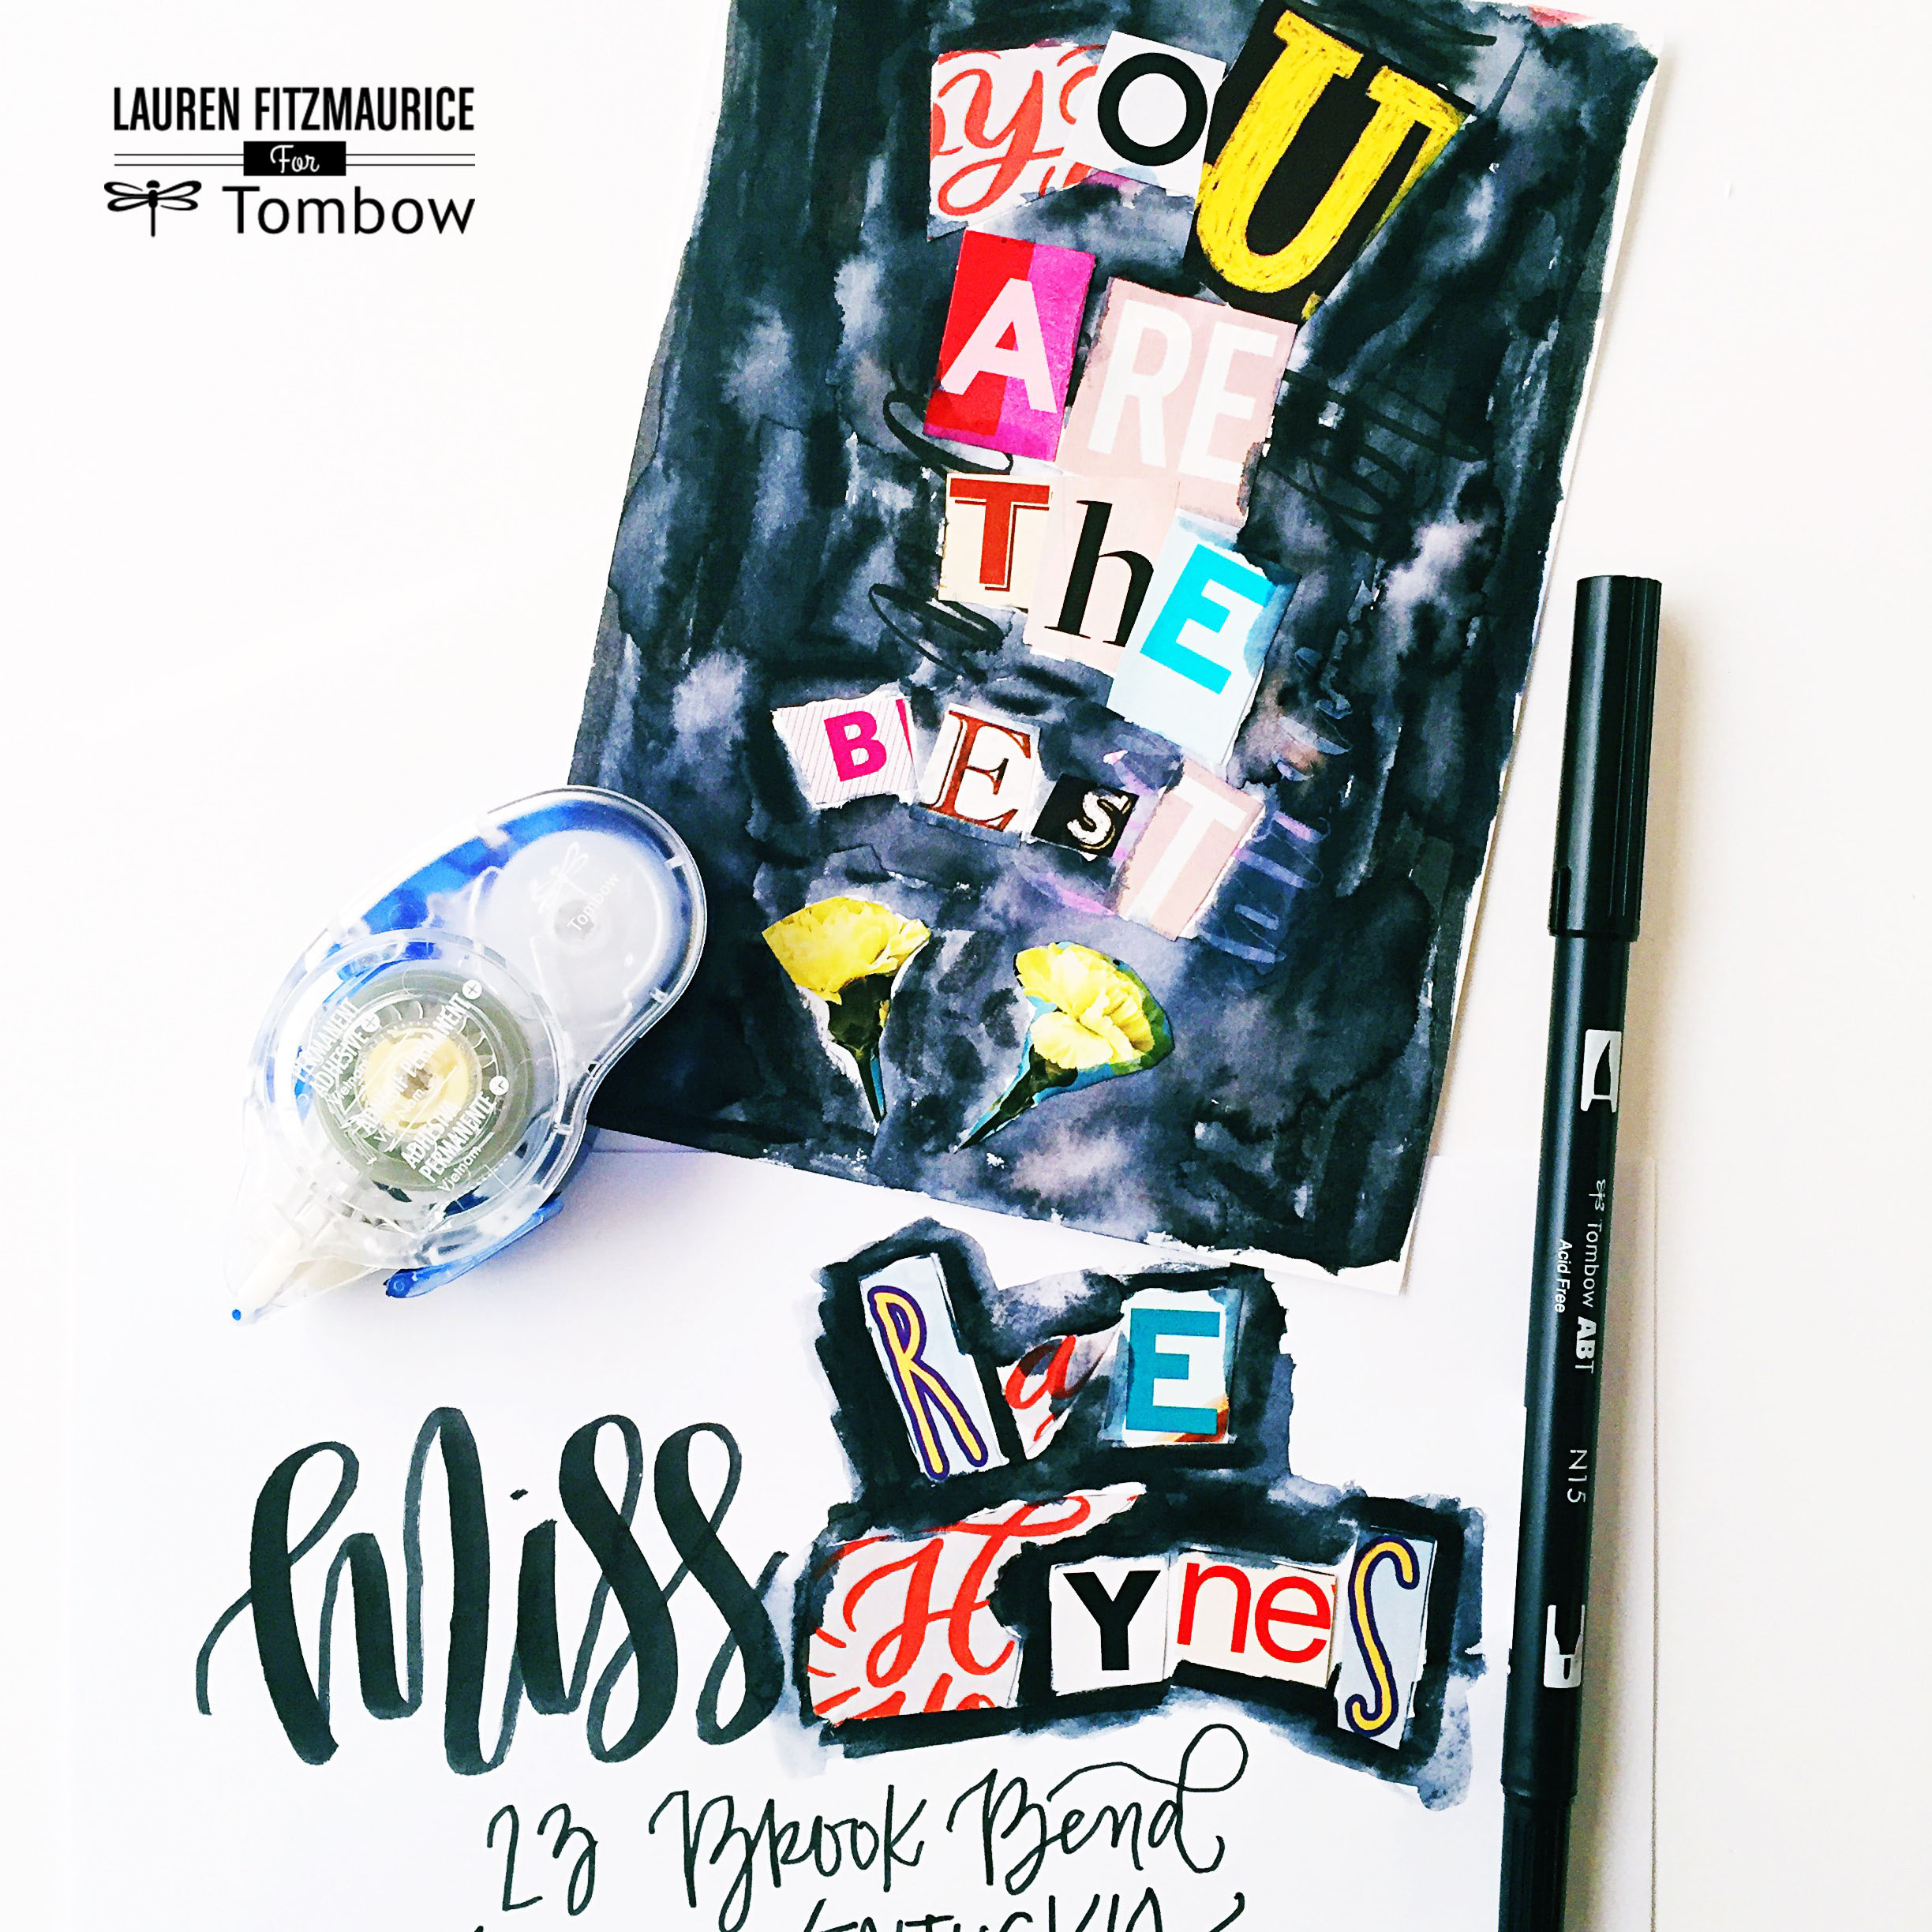
What a fun note to send to a friend! I also love the idea of creating the ransom effect on the letters of the name but writing out the address details just in case the piece of mail is handled roughly, though that Tombow Permanent Adhesive + was made to hold up very well.
IT’S YOUR TURN FOR DIY FUN: GIVE YOUR FAVORITE THINGS NEW PURPOSE WITH TOMBOW
When I finally took a step back and thought about my favorite things that could be made into something with a new and awesome purpose, I had a blast transforming them! Now, it’s your turn! What could you transform into something new and innovative! I’d love to see your idea come to a reality! Make sure to share your projects on Instagram with the hashtag #tombowlikealefty (even if you aren’t a lefty!) and tag me so I can see @renmadecalligraphy. I can’t wait to see what you come up with!
Happy lettering!
Lauren