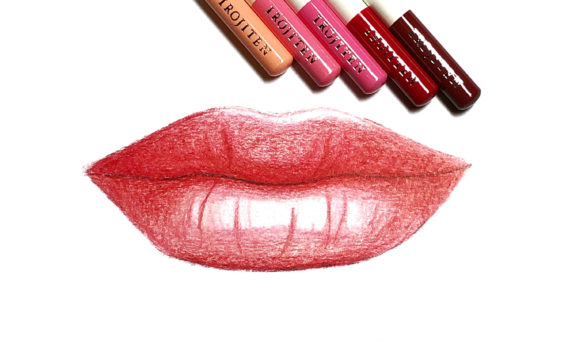
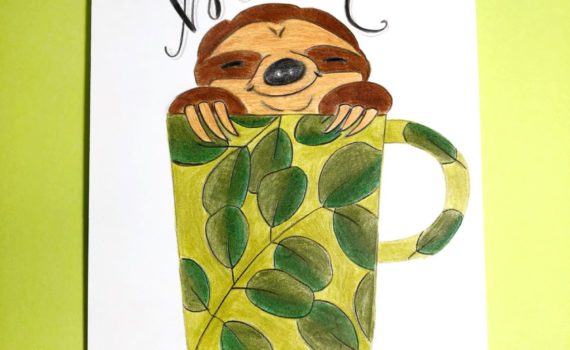
Posts Tagged ‘Irojiten Colored Pencils’

May
04
TGIF!
Today I am sharing a fun gatefold card with you.  The black gatefold card base is a pre-scored card from American Crafts, they come in a pack of 12 which makes it easy to quickly reproduce your cards.
I stamped the Magnolia image from Stampendous in Tuxedo Black Memento ink and then colored it in with my Tombow Irojiten Colored Pencils and added some Stardust Stickles
I added some Tombow Mono Dots Roller to one side of the die cut panel and adhered it to the left side of the gate fold.
Then I added some of the small Tombow Foam Tabs to the back of the image panel and popped it up onto the larger die cut panel.
For my final touch to this card, I tied a bow with some white satin ribbon and use a Tombow Power Tab to hold it in place.  I know I always say how much I love these power tabs, but they are so versatile and can be used virtually anywhere.
As always, I hope you have a fantastic weekend.  The weather here in Central CA is supposed to be perfect this weekend and I am looking forward to it.
If you enjoyed this post please follow us on
Apr
20
This week my Tombow teammates and I are sharing with you how we like to use Tombow Foam Tabs.  I am a big fan of lots of layers on my cards and therefore, I use alot of Foam Tabs.  
I created this card with a cute little image from Stampavie.  The image was colored with Irojiten Colored Pencils and Gamsol.  I layered the image to the peach panel with Tombow Mono Dots Roller and then attached it to the print panel with Foam Tabs.  The print panel was also popped up onto the light blue card with Foam Tabs.  See, I told you I like them!  Alot!  I used Tombow Mono Multi on the back of the flourishes and peach colored flowers, this is the perfect adhesive for these intricate die cuts and embellishments.  I used a Power Tab behind the yellow flower as I wanted it to sit up on top of the die cut greenery and the power tab does the trick!
Here is a view of the card lying flat on the table.  Can you see the height and dimension you get with the Foam Tabs?
Another view of the tab placement on the back of the peach panel.  I did go ahead and add another tab to the middle of this panel as well as I didn’t want it the panel to sag in the middle with the weight of layers on top.  KWIM?
Have a safe and happy weekend!  See you soon!
if you enjoyed this post follow us on facebook and twitter!
Mar
12

To easily transfer a pattern onto thick paper, such as watercolor paper, make your own graphite paper using Tombow Drawing Pencils.

Take a copy of your pattern (My favorite is source is copy-right free Clip Art from Dover Publications) and with a 5B Drawing Pencil, cover the backside of the pattern with graphite.

Use Removable Adhesive and adhere the pattern to the paper you will be working on. With a 4H or harder Drawing Pencil trace the pattern.

When you lift up the pattern, you will see the image transferred onto your paper. With this project I inked the traced image with a permanent pen. I then used a MONO NP Eraser to remove the traced lines.

I finished the artwork with a Dual Brush Pen splash background and colored the violets with Irojiten Colored Pencils.

It’s that easy! Try it the next time you need to transfer a pattern onto a surface! Join us again for more Tipniques!

Mar
09
Happy Friday!  I can’t believe how nice the weather has been this week, it really has me in the Spring mood.  

This week the Tombow team has been sharing “Hug” themed cards/projects with you and today is my turn. 

I chose this adorable image from the Our Craft Lounge Showers of Blossoms set.  I stamped the image with Adirondack Pitch Black ink and colored it in with Tombow Irojiten Colored Pencils and Gamsol.  These pencils blend beautifully and the colors are so vibrant.  I used Tombow Mono Dots Roller to adhere each of the layers together and Power Tabs on the two pink roses.  I wanted the aqua rose to sit a bit higher so I used a Foam Tab to give it a little extra lift.  I used Tombow Mono Multi to adhere the die cut leaves.   
if you enjoyed this post follow us on facebook and twitter!
Feb
17
This week on the Tombow Blog, the design team is focusing on working with some of the fine art pencils that Tombow carries.  I have created two cards using the Irojiten Color Dictionary Pencils.
These beautifully crafted pencils are grouped in nine different editions with subtle color ranges in each assortment. Available in 90 colors, these premium quality pencils have an elegant enamel finish and are packaged in unique paper booklets with three editions per set – Pale, Vivid and Deep Tone. Ten pencils per edition
For this card, I stamped the pretty outline flower/leaf from the Our Craft Lounge Pretty Petals set in Memento Tuxedo Black ink onto some Neenah Classic Crest Solar White cardstock and then colored them in using some of the green, yellow and orange pencils in the Irojiten Seascape set.  I blended the pencils out with some odorless mineral sprits and then glitzed the flowers up a bit with some Diamond Stickles. I stamped Happy Birthday from the Our Craft Lounge Big Birthday Wishes set in black ink onto a scrap of blue print cardstock and layered it to the front of the card using Tombow Foam Tabs.  I used Tombow Mono Adhesive Dots, Roller to adhere all of the layers together and a Tombow Power Tab to fasten the button to the front of the card.  

Using the same Irojiten Seascape set for this card I stamped the Classic Fabric Background from Hero Arts in Alabaster Fluid Chalk ink onto some black cardstock and then colored over the white areas with the pencils.  After I was finished coloring, I spritzed the black panel with some pearl shimmer spray.  It is so pretty in person!  The aqua panel is raised up with some Tombow Foam Tabs and the rest of the card was secured together with Tombow Mono Adhesive Dots, Roller


if you enjoyed this post follow us on facebook and twitter!
Feb
14

How do you like my sentiment? HAHA! I even thought of that myself. This week on Tombow we are focusing on the Irojiten colored pencils. My favorite way to color is using colored pencils and Gamsol, so this is a fun challenge for me.

This is a card I created for CHA and those that took the class loved it. They had alot of fun coloring the image and using the Irojiten pencils for the first time.

The colored pencils I used are:

Rain Forest: D03Autumn Leaf, D02 Chestnut Brown, P06 Ice Green, V06 Peacock Blue

Woodlands: P11 Rose Pink, P18 Celeste Blue, D15 Mustard, Lg02 Cork, D12 Maroon

Seascape: DL05 Verdigris

in addition:

Saddle Brown #977 was used to create the dots and dashes around the stamped image and Mono Adhesive Permanent to adhere all the pieces together.

I found out at CHA that the image from Stampavie is no longer available, but they do have a new owl image out. Patterned papers are by Echo Park.

Thank you for stopping by. I hope you have a wonderful day filled with love and surprises.

If you enjoyed this post follow us on facebook and twitter!       http://www.facebook.com/tombowusa  and http://twitter.com/#!/tombowusa

Jan
30

Keeping on the theme of color this January, here is another color combination using the 2012 Top Ten colors

With this project I have chosen both paper colors and Irojiten Coloring Pencil colors to create a muted floral combination using the following colors: (I have also Listed the matching Dual Brush Pen Colors.)

 
Irojiten V-7 King Fisher, Dual Brush Pen 528 Navy BlueIrojiten DI – 4 Sage Green, Dual Brush Pen 192 Asparagus Irojiten VP-1 Cameo Pink, Dual Brush Pen 723 Pink Irojiten P-20 Crocus, Dual Brush Pen 623 Purple Sage Irojiten Lg-2 Cork, Dual Brush Pen 992 Sand


I used the Dots Adhesive Stamp Runner to attach the ribbon and the torn colored panel onto the card front. I had a delicate piece of a paper wasp nest and added it to the corner by first applying the Dot Adhesive then laying down the wasp nest. I simply rubbed away the exposed adhesive. The bee charm was added using MONO Multi Liquid Glue.


This is a really fun and creative way to combine two differt coloring pproducts and achieve a great blending effect. I hope you enjoyed this project and learned a little more about Tombow’s products.   If you enjoyed this post please follow us we’re on   http://www.facebook.com/tombowusa  and http://twitter.com/#!/tombowusa
 
Jan
20
Hello!  This week on the Tombow blog we are continuing our journey through some of the past Pantone colors.  Today I am sharing the 2010 color which was Turquoise.  Tombow’s Dual Brush Pen #373 (Sea Blue) was a great match so I decided to use it along with some of the Irojiten Colored Pencils for today’s card.
I stamped this adorable Benton Heart Bear from Inky Antics and then colored the heart with Dual Brush Pen #373.  I then added some Tombow Glue pen and sprinkled glitter over it to make the heart really pop.
I colored Benton with Irojiten Chestnut Brown and Autumn Leaf colored pencils and blended them out with some odorless mineral spirits.  I used Tombow Mono Adhesive Dots to adhere all of the layers together.  The buttons were attached with the the small Tombow Foam Tabs.

TOMBOW Foam Tabs

These acid-free double sided adhesive tabs are great for adding dimension to many projects, the small tab is 1/5 x 1/5 and the large tabs are ½ x ½, they are also great for layering and can be stacked for added dimension.  They are suitable for most surfaces including paper, glass and metal.  They are also crush resistant and instantly bond and hold.


  http://www.facebook.com/tombowusa         http://twitter.com/#!/tombowusa

Jan
17

In case you haven’t guessed, this month is all about Pantone’s color of the year, present and past. This week the Design Team is showing off Turquoise, color of the year for 2010. I would say this is still a very “hot” color. I have seen so much of this color in clothing, homes and fashions of all kinds.

Not only do I love this color, but I love ice cream sundaes. My favorite is hot fudge, what is yours?

The card I have to share with you today is using Irojiten colored pencils. I like to use Gamsol to blend the colored pencils to get a soft look.

How fun is the inside?  (you can click on the pictures to get a larger view)

When using Honeycomb papers from Inky Antics (all the stamp images are by them as well) I prefer to use Tombow’s Mono Glue Stick. It is perfect for the thin papers and adheres so well to cardstock. The adhesive I used for the rest of the card was Mono Adhesive Permanent.

I hope you are enjoying our color month and will give these “colors of the year” a try in your papercrafting.

Thank you for stopping by,

if you enjoyed this post follow us on facebook and twitter!       http://www.facebook.com/tombowusa  and http://twitter.com/#!/tombowusa

Jan
16
This drawing style uses Irojiten colored pencils and a technique that marks impressed lines on the paper with an embossing stylus before applying the color.
 
 
For the paper, I used a smooth, hot press watercolor paper. I then transferred a design to a piece of tracing paper to make the pattern. Tape the pattern onto to the watercolor paper and with a heavy hand; trace the pattern with the embossing stylus.Remove the tracing paper pattern to reveal the impressed line outline of the design.
 
 After the main lines were impressed, I removed the pattern and added the filler design lines. I did this free hand without using a pattern and pressed hard to create the deepest impressed line possible.
 
I then start shading and adding color to the design. It’s kind of magical to watch the lines appear and stay white even with the hardest shading pressure. I go over the edges of the motif to make the lines show up best. It also adds a fanciful effect to the drawing.
 
The last shading uses darker colors and the heaviest shading to create the finished look. Do not be afraid to add lots of layers of different colors and darker hues for the most interesting drawings.
I hope you enjoyed this fun tipnique, please follow us on       http://www.facebook.com/tombowusa  and http://twitter.com/#!/