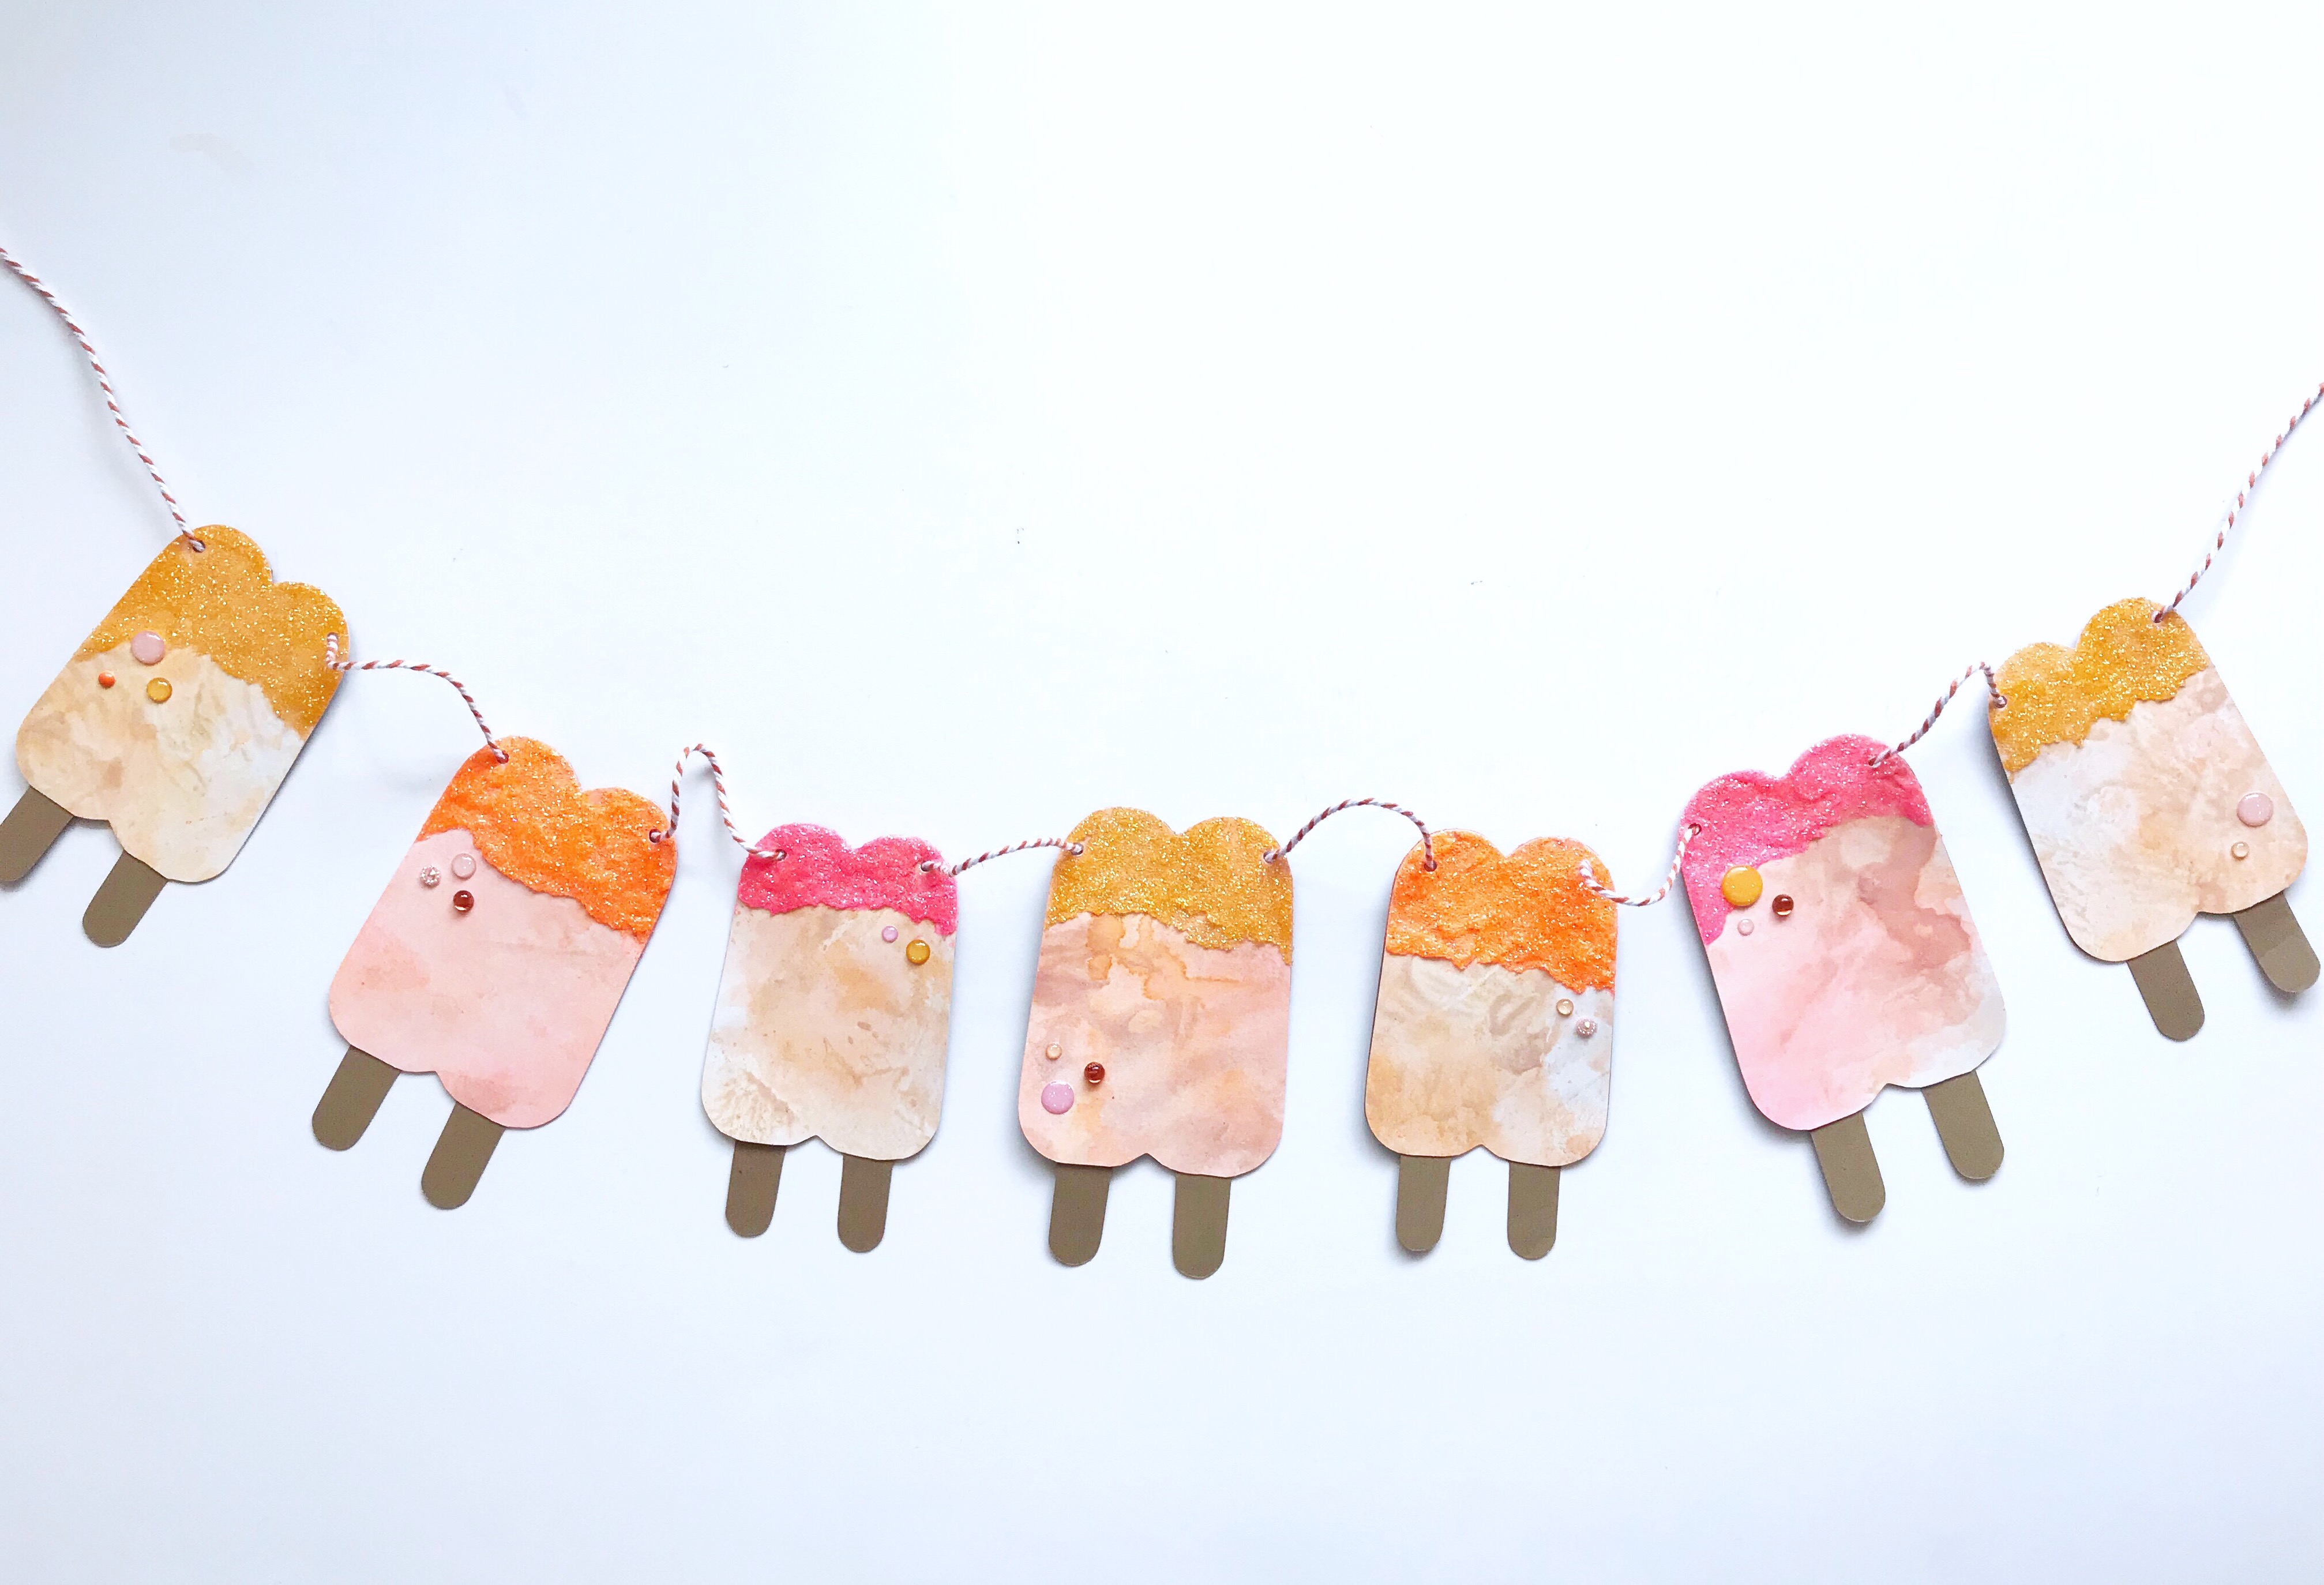
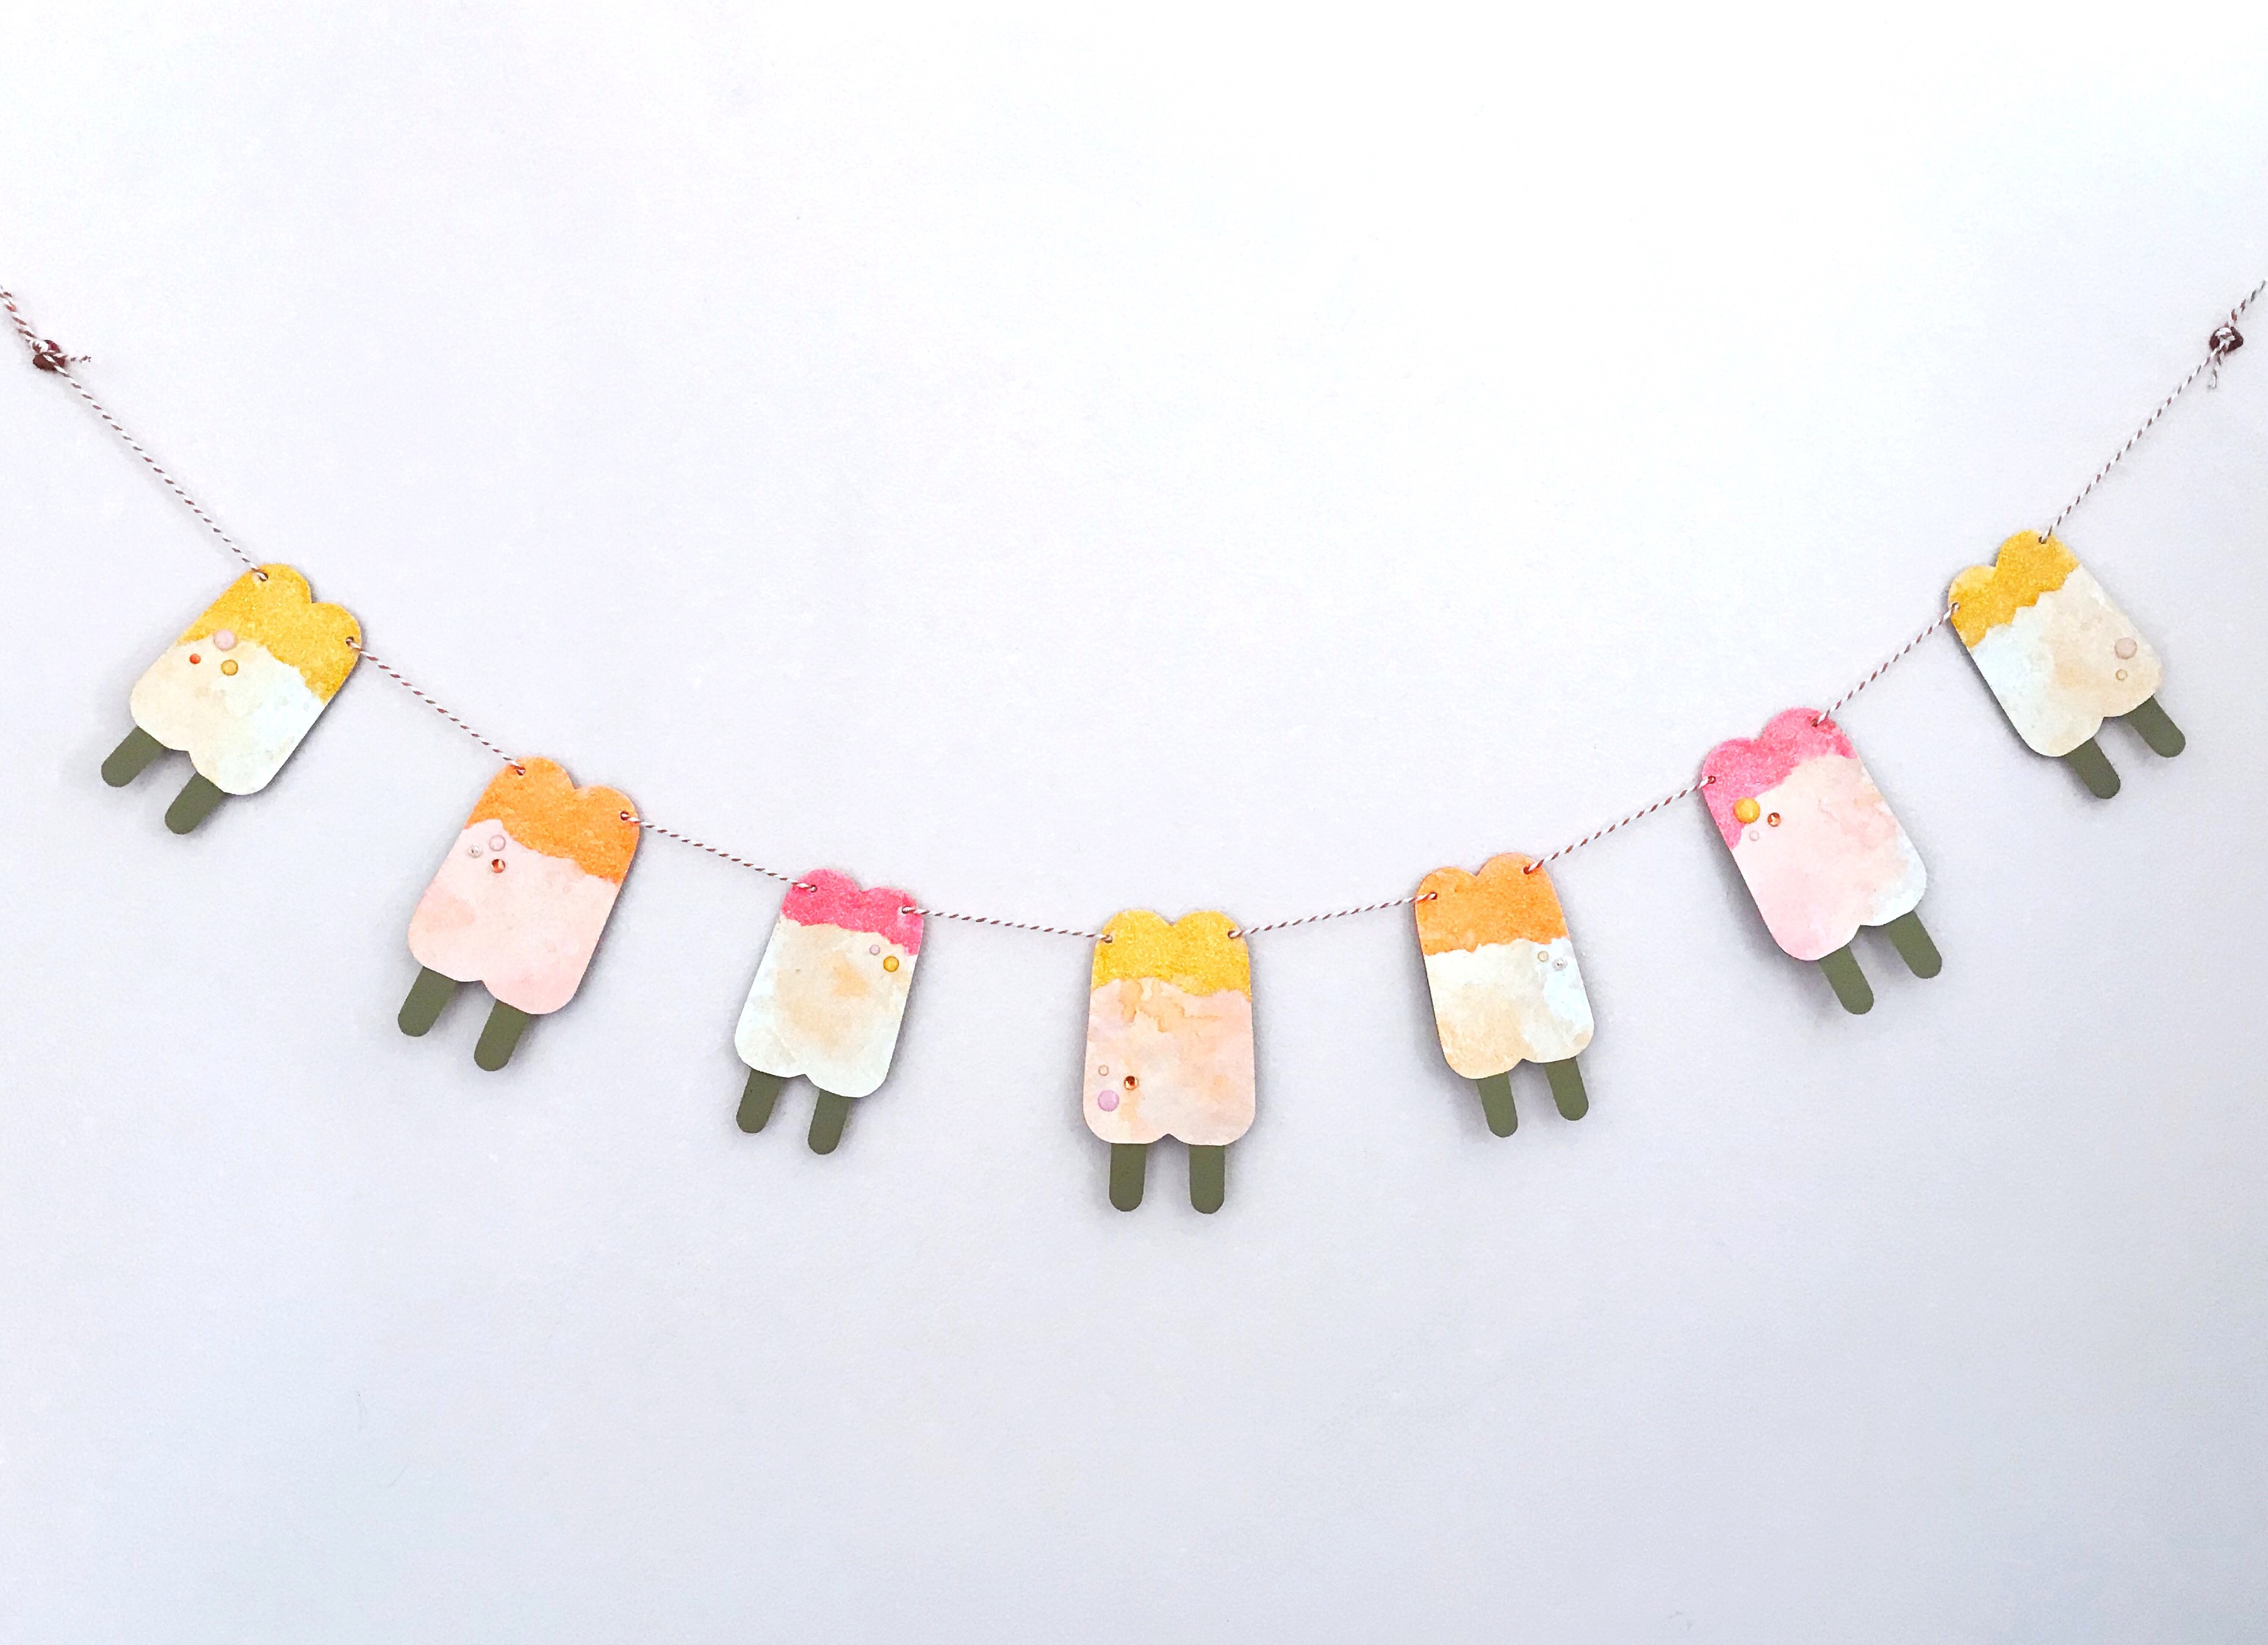
Hello everyone! Happy rainbow week! Serena Bee here with an orange project! The first thing that came to mind when I thought about orange and summer was creamsicles! So for my project I created an adorable popsicle banner. Using three different techniques, I’ll show you how I watercolor and create with the Tombow Dual Brush Pens.
What you will need:
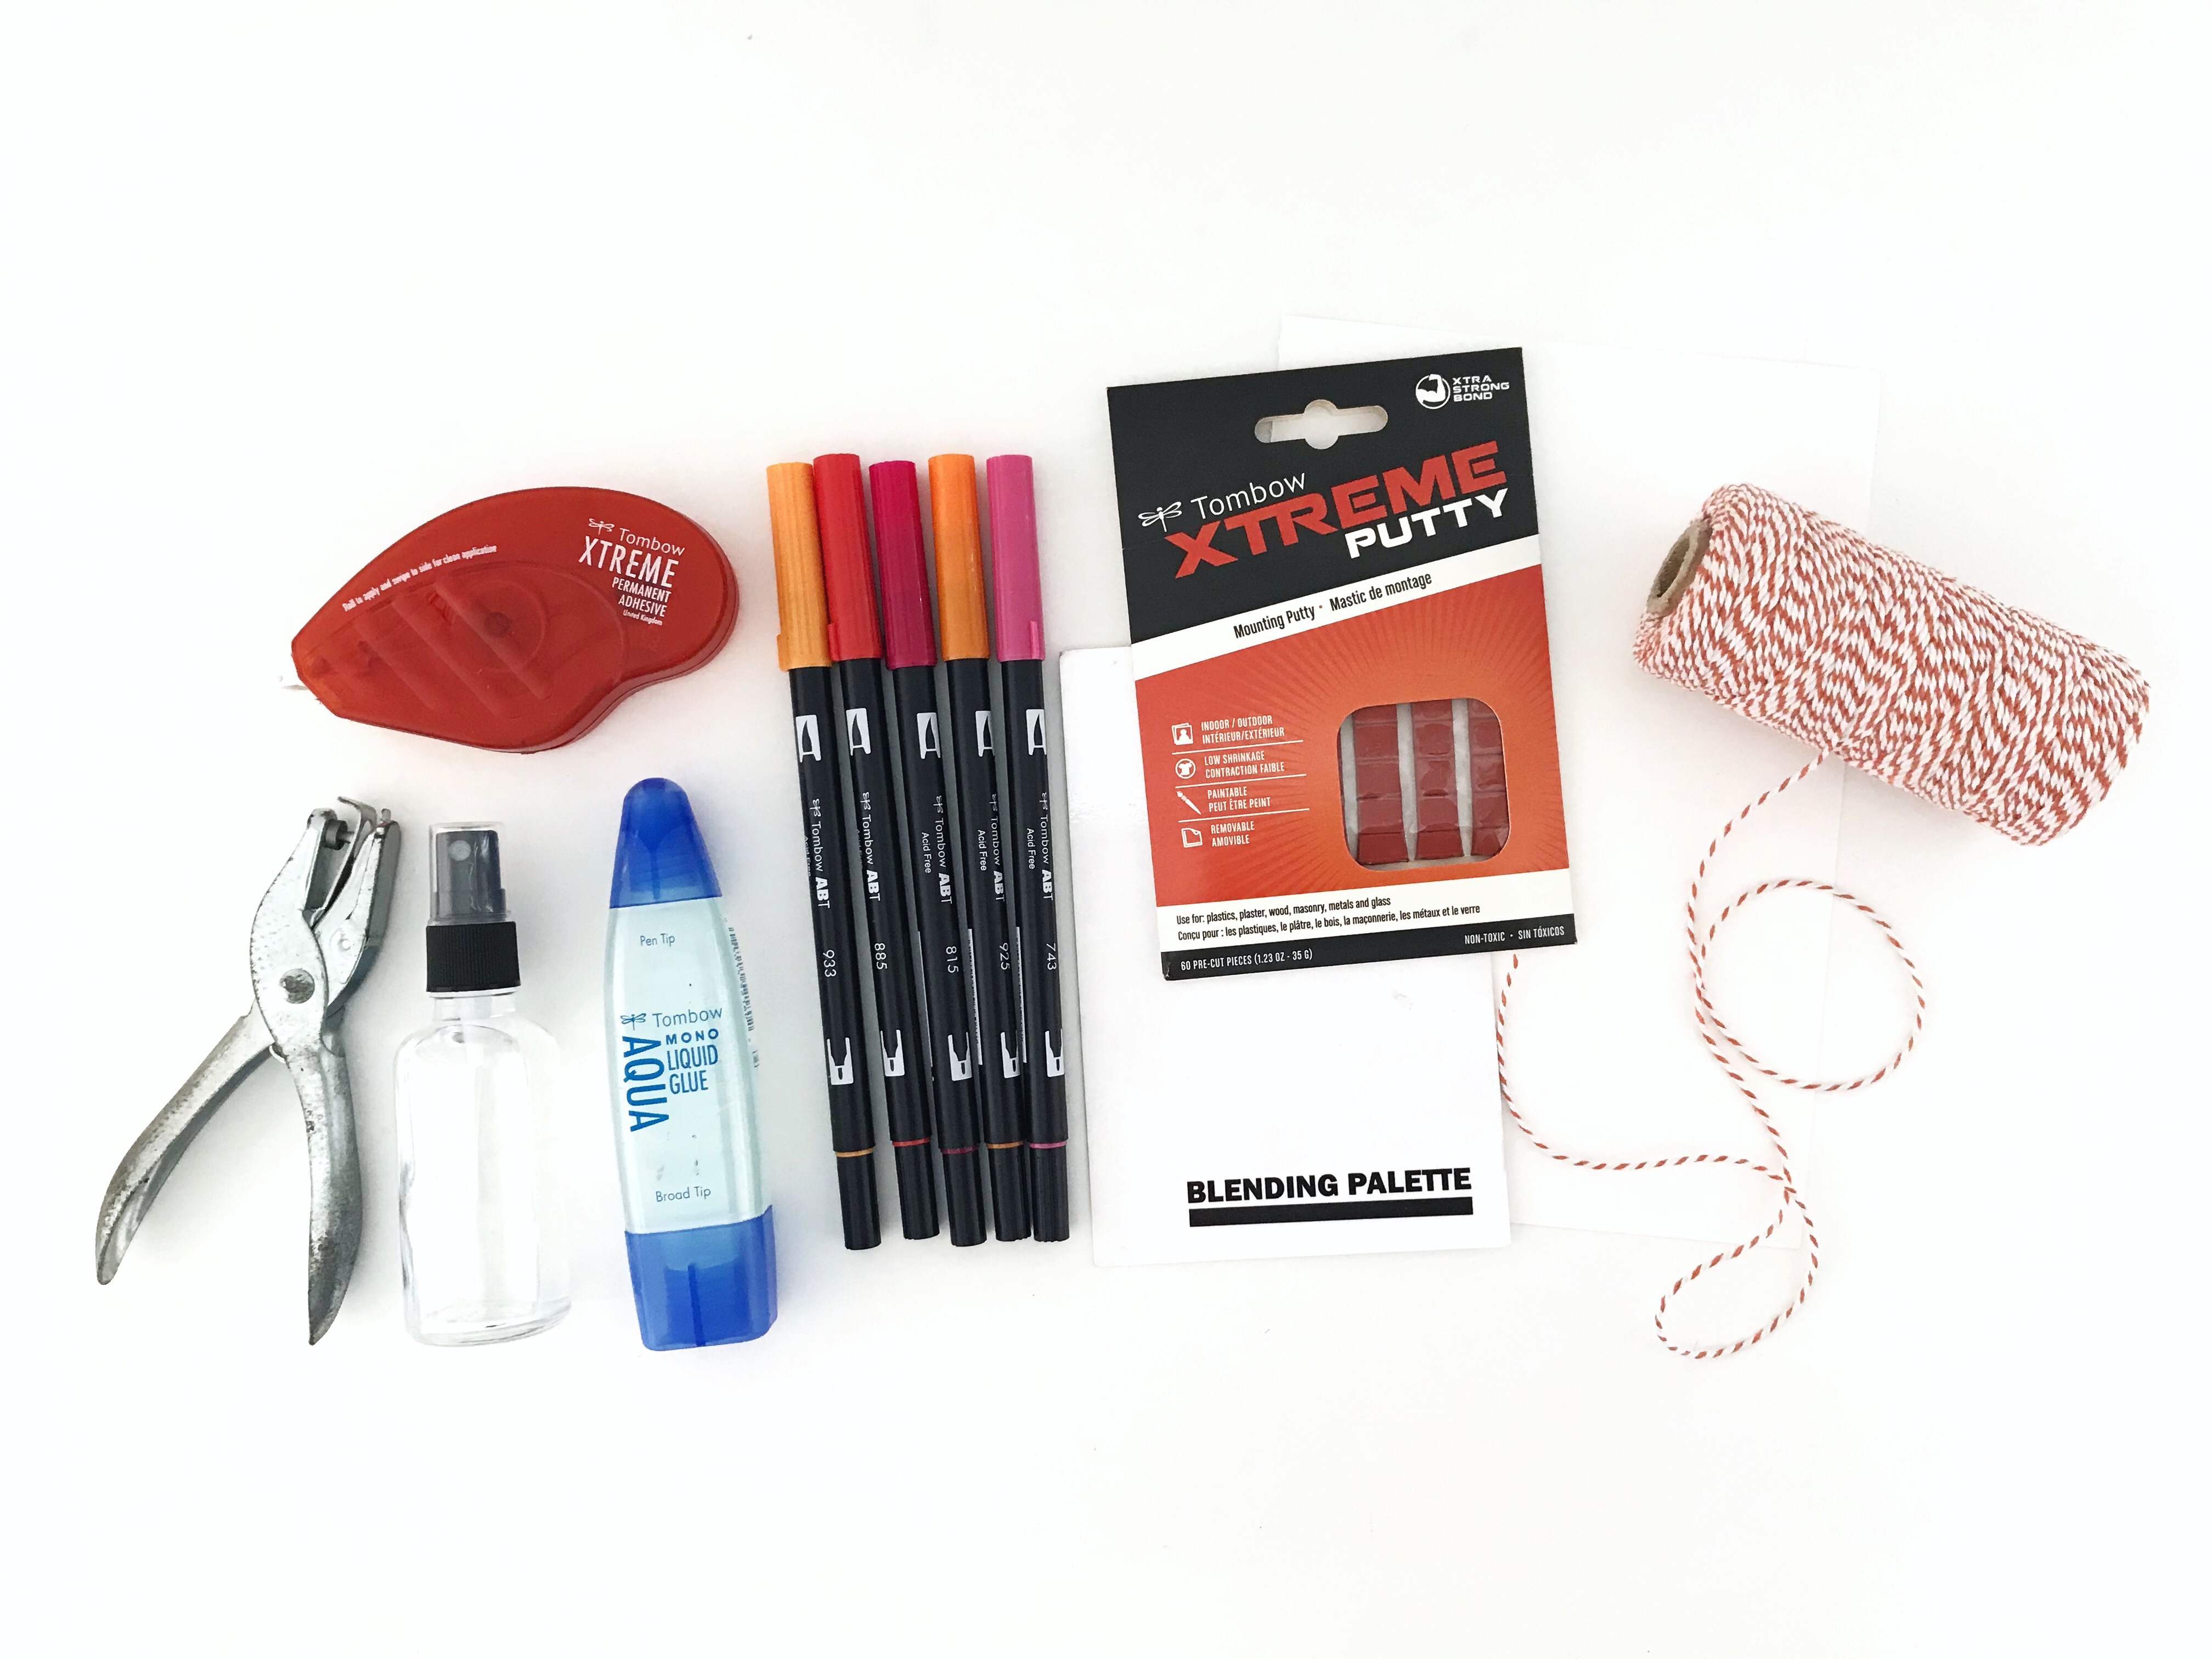
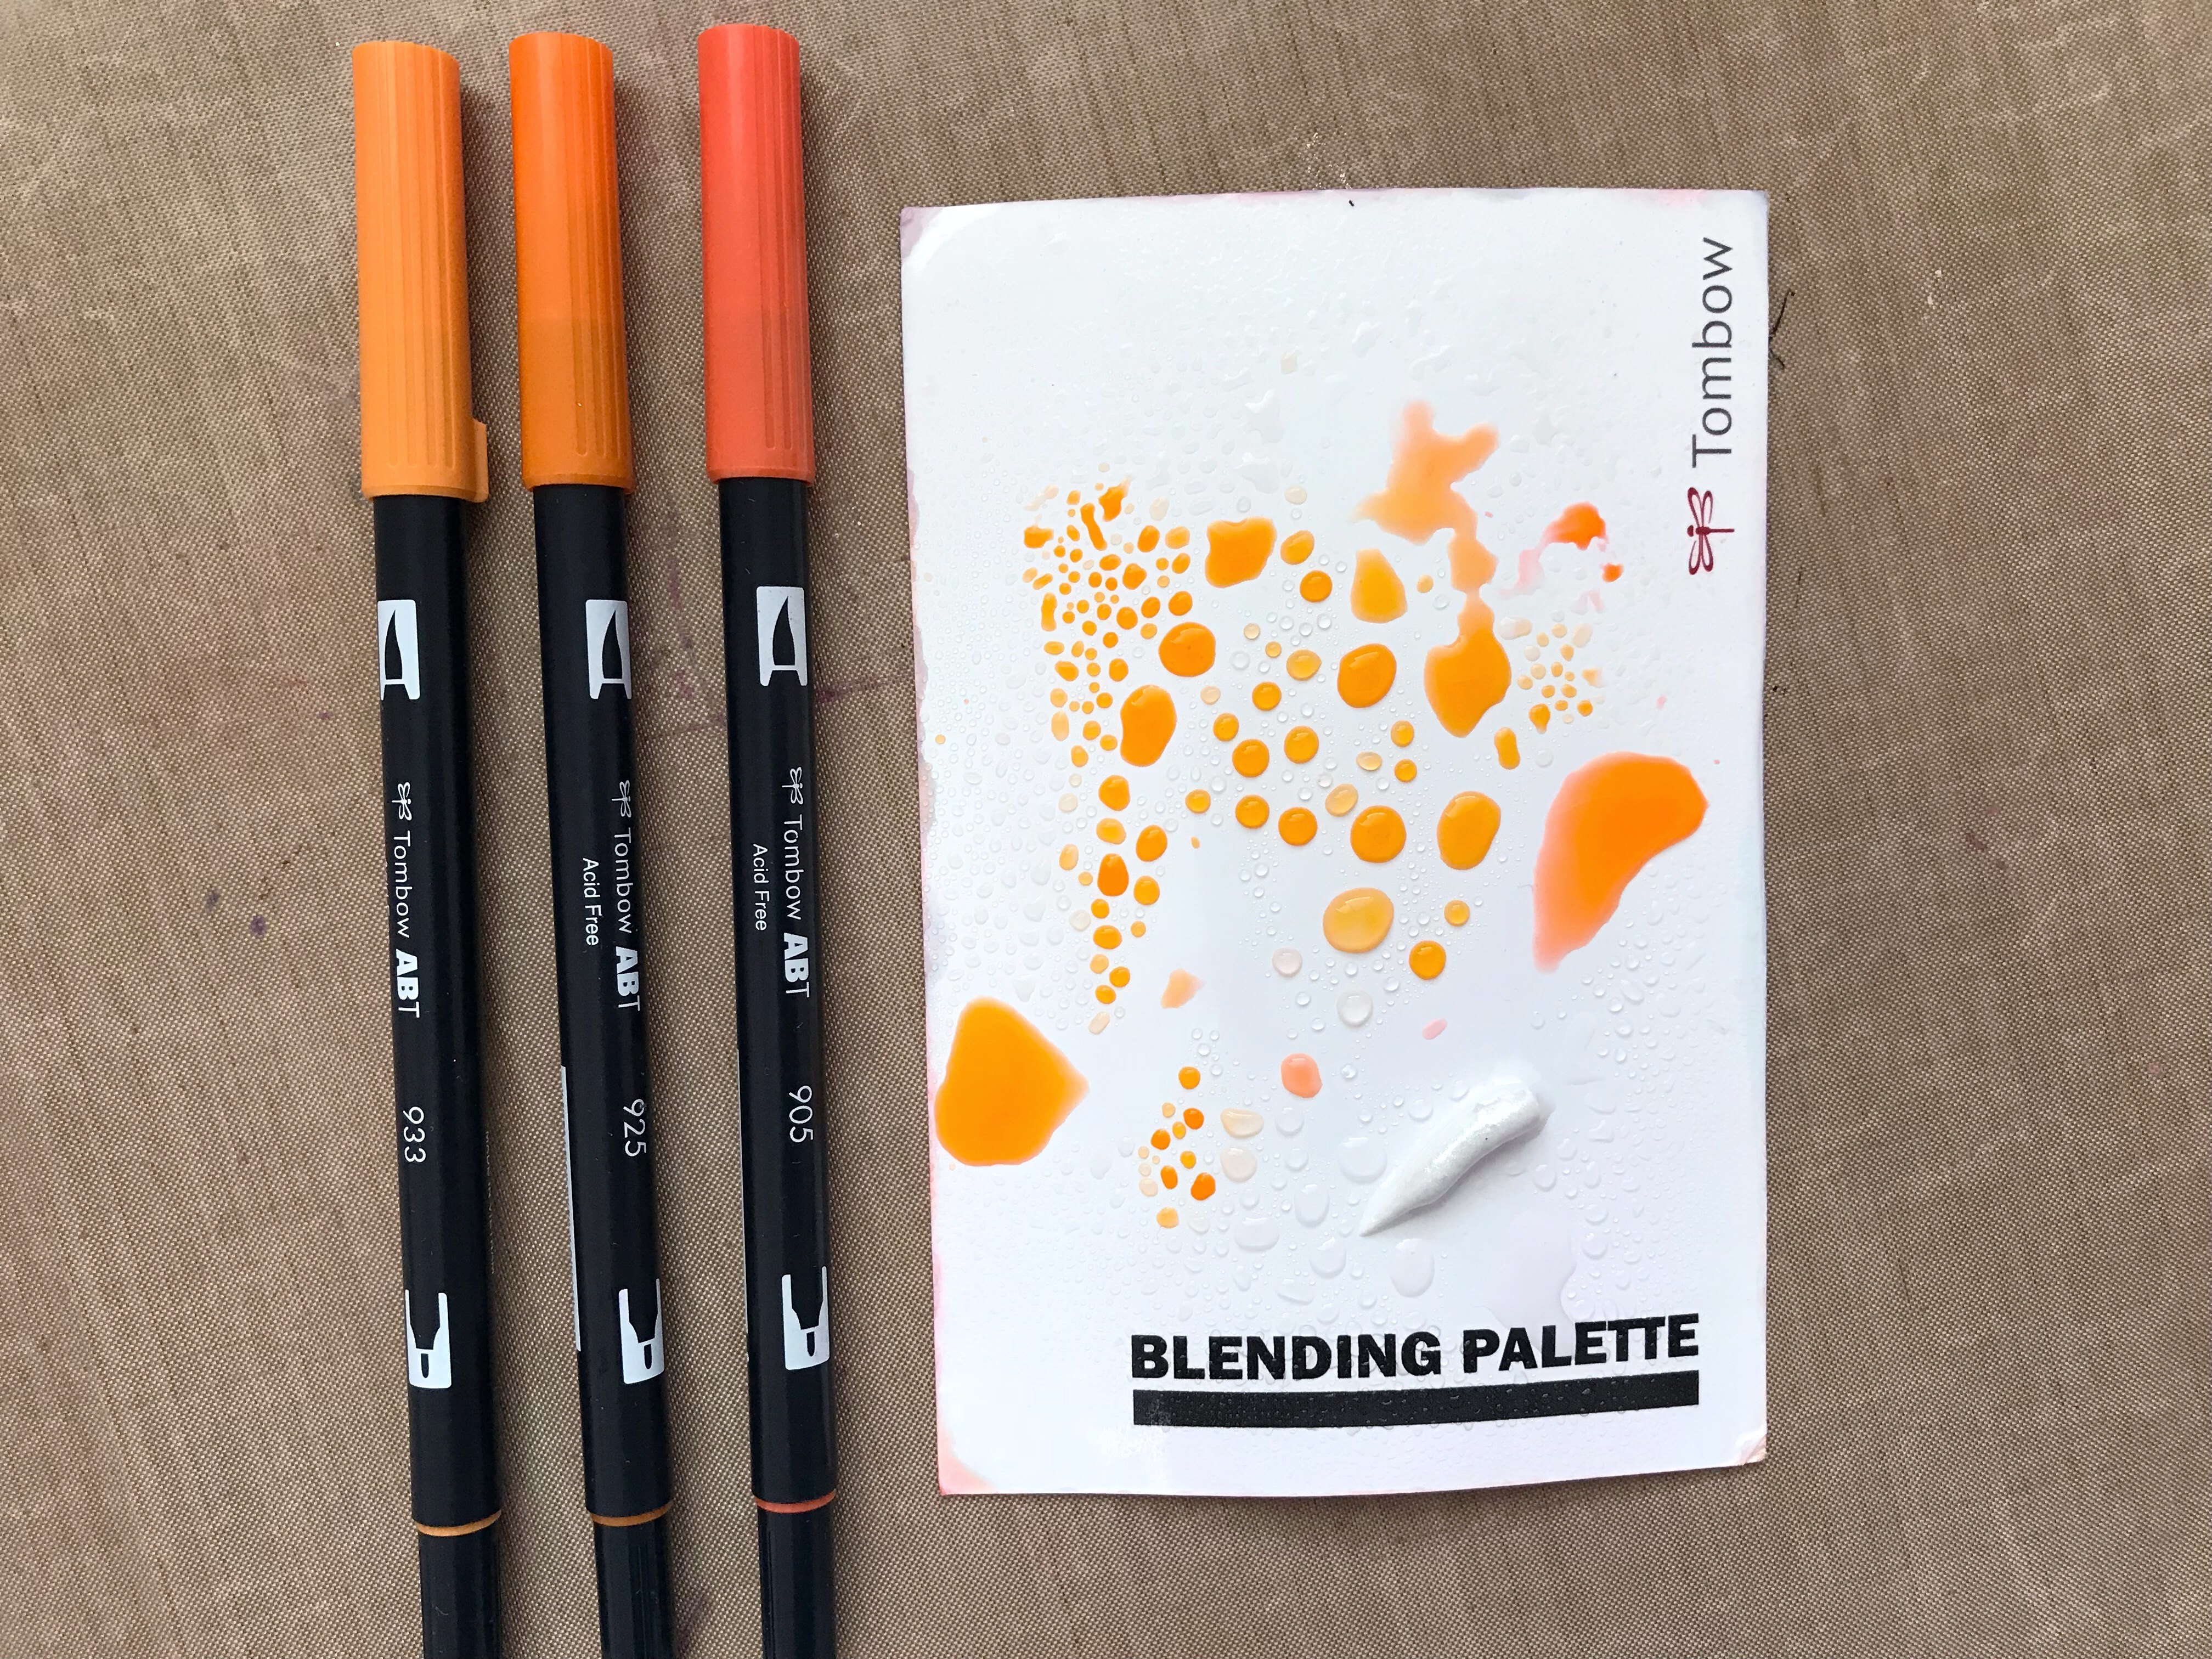
● Tombow Dual Brush Pens in colors: [Orange: 885,925 & 933] [Pink: 743 & 815]
● Tombow Blending Kit
● Mixed media cardstock
● Iridescent medium
● Bead gel
● Tombow Xtreme Adhesive
● Tombow MONO Aqua Liquid Glue
● Tombow Xtreme Mounting Putty
● Craft mat
● Hole punch
● Twine
Optional:
● Rhinestones/enamel dots to embellish
● Heat tool
Technique #1:
I love watercoloring with the Tombow Dual Brush Pens, for this technique scribble some color on a craft mat or the Tombow Blending Palette – I use both interchangeably.
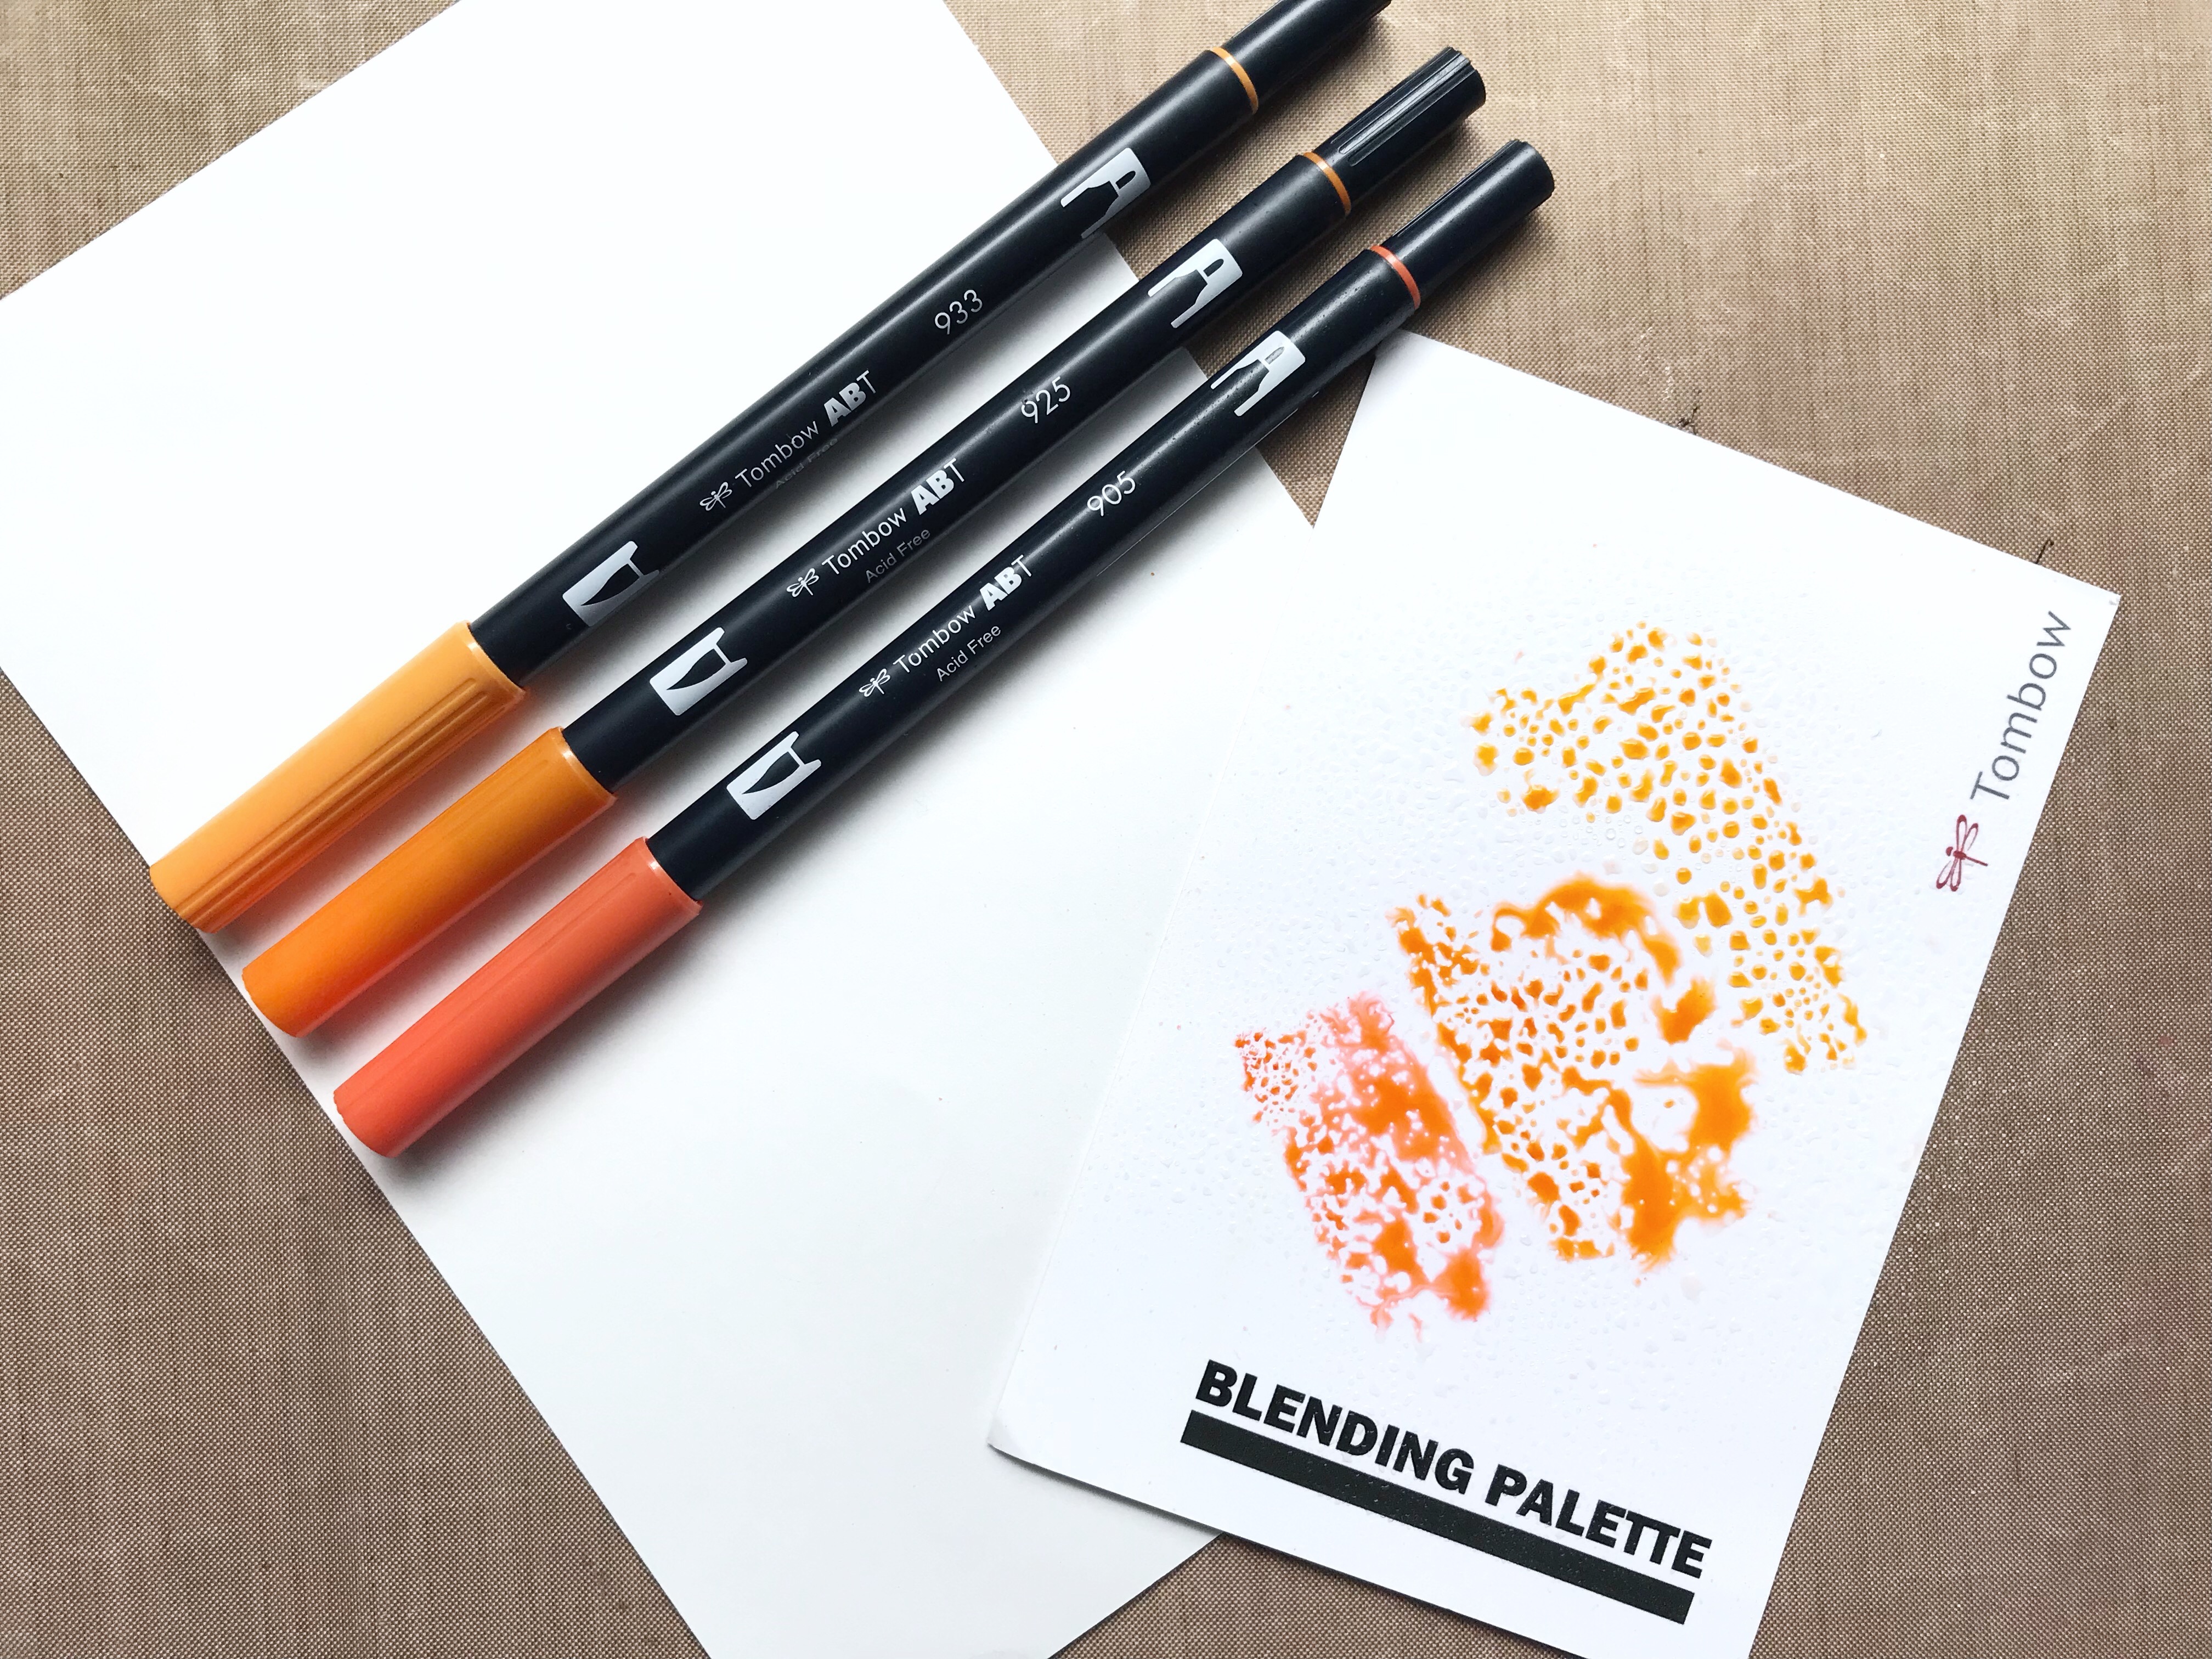
Spritz some water on your craft mat, take your mixed media cardstock and press down on the pool of color. You can have fun with this- drag the paper across or press the blending palette directly on the cardstock.
Repeat until you are satisfied with your pattern. Dry in between with a heat gun and add a second or even third layer of color!
Technique #2:
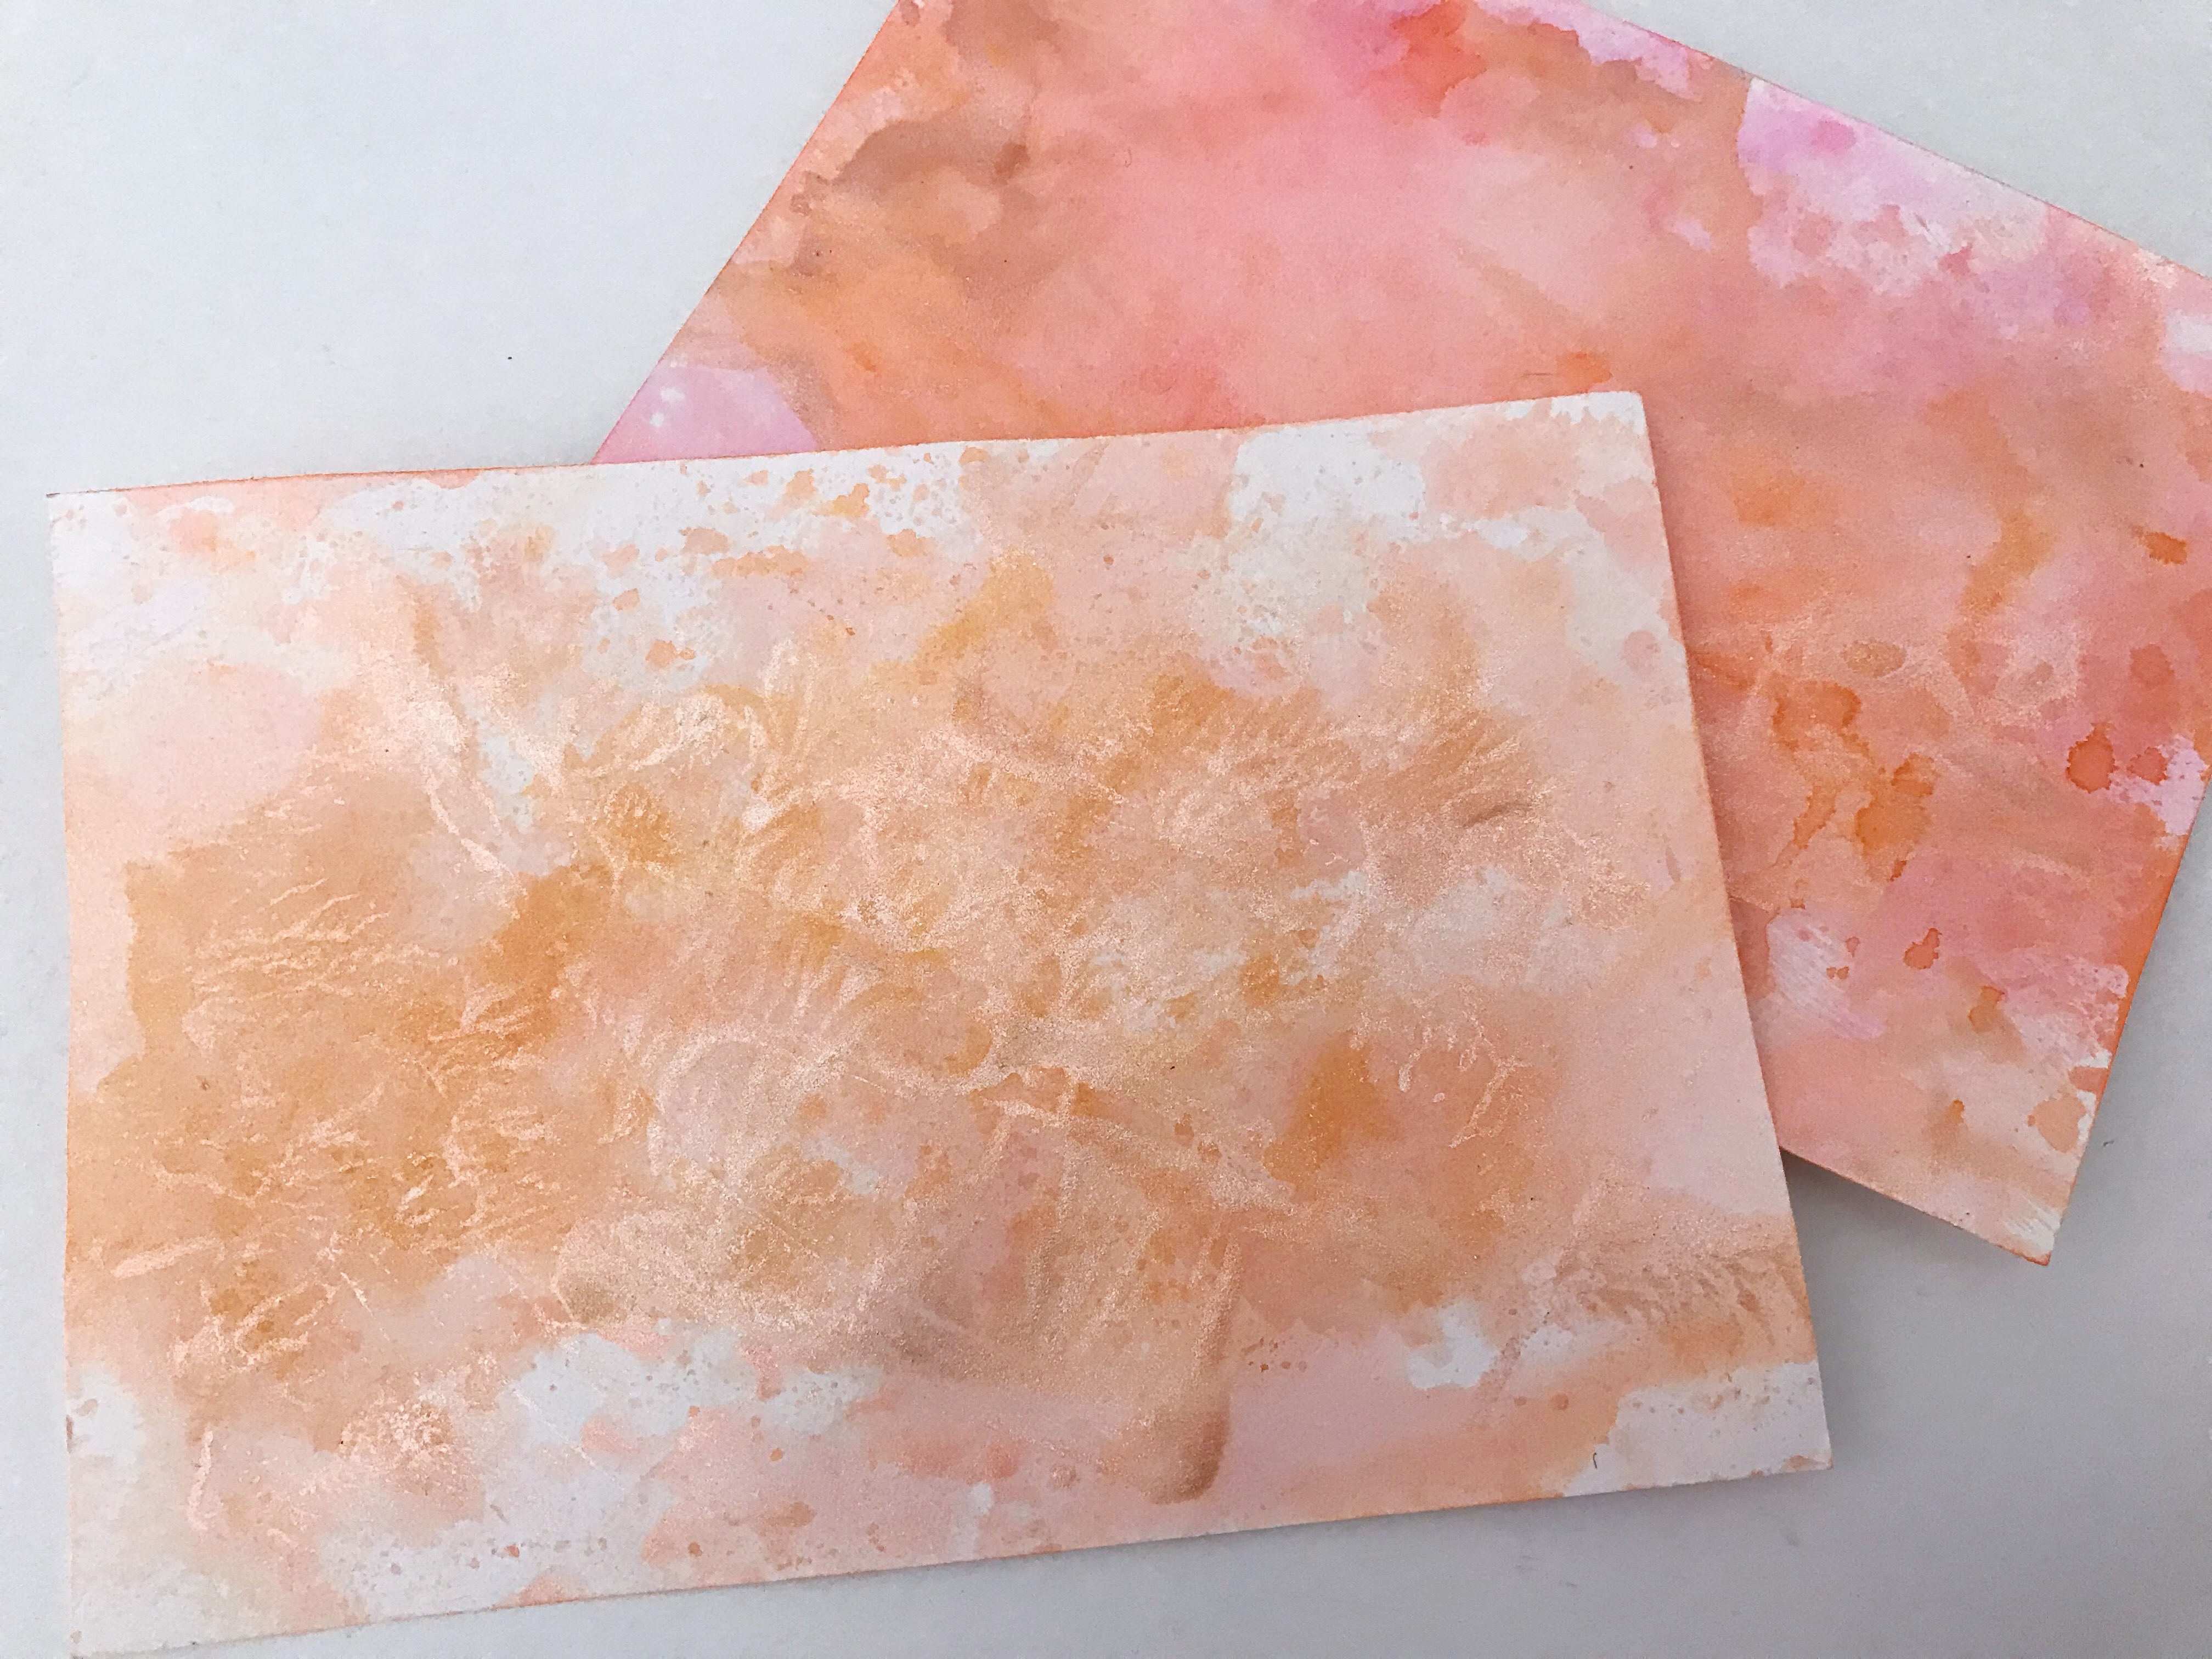
For this next technique we are going to color some mixed media medium, I’m using iridescent medium but you can also use modeling paste.
Scribble some color on your craft mat/blending palette, add your medium, and spritz with water. Mix together using a palette knife until all the color is blended nicely.
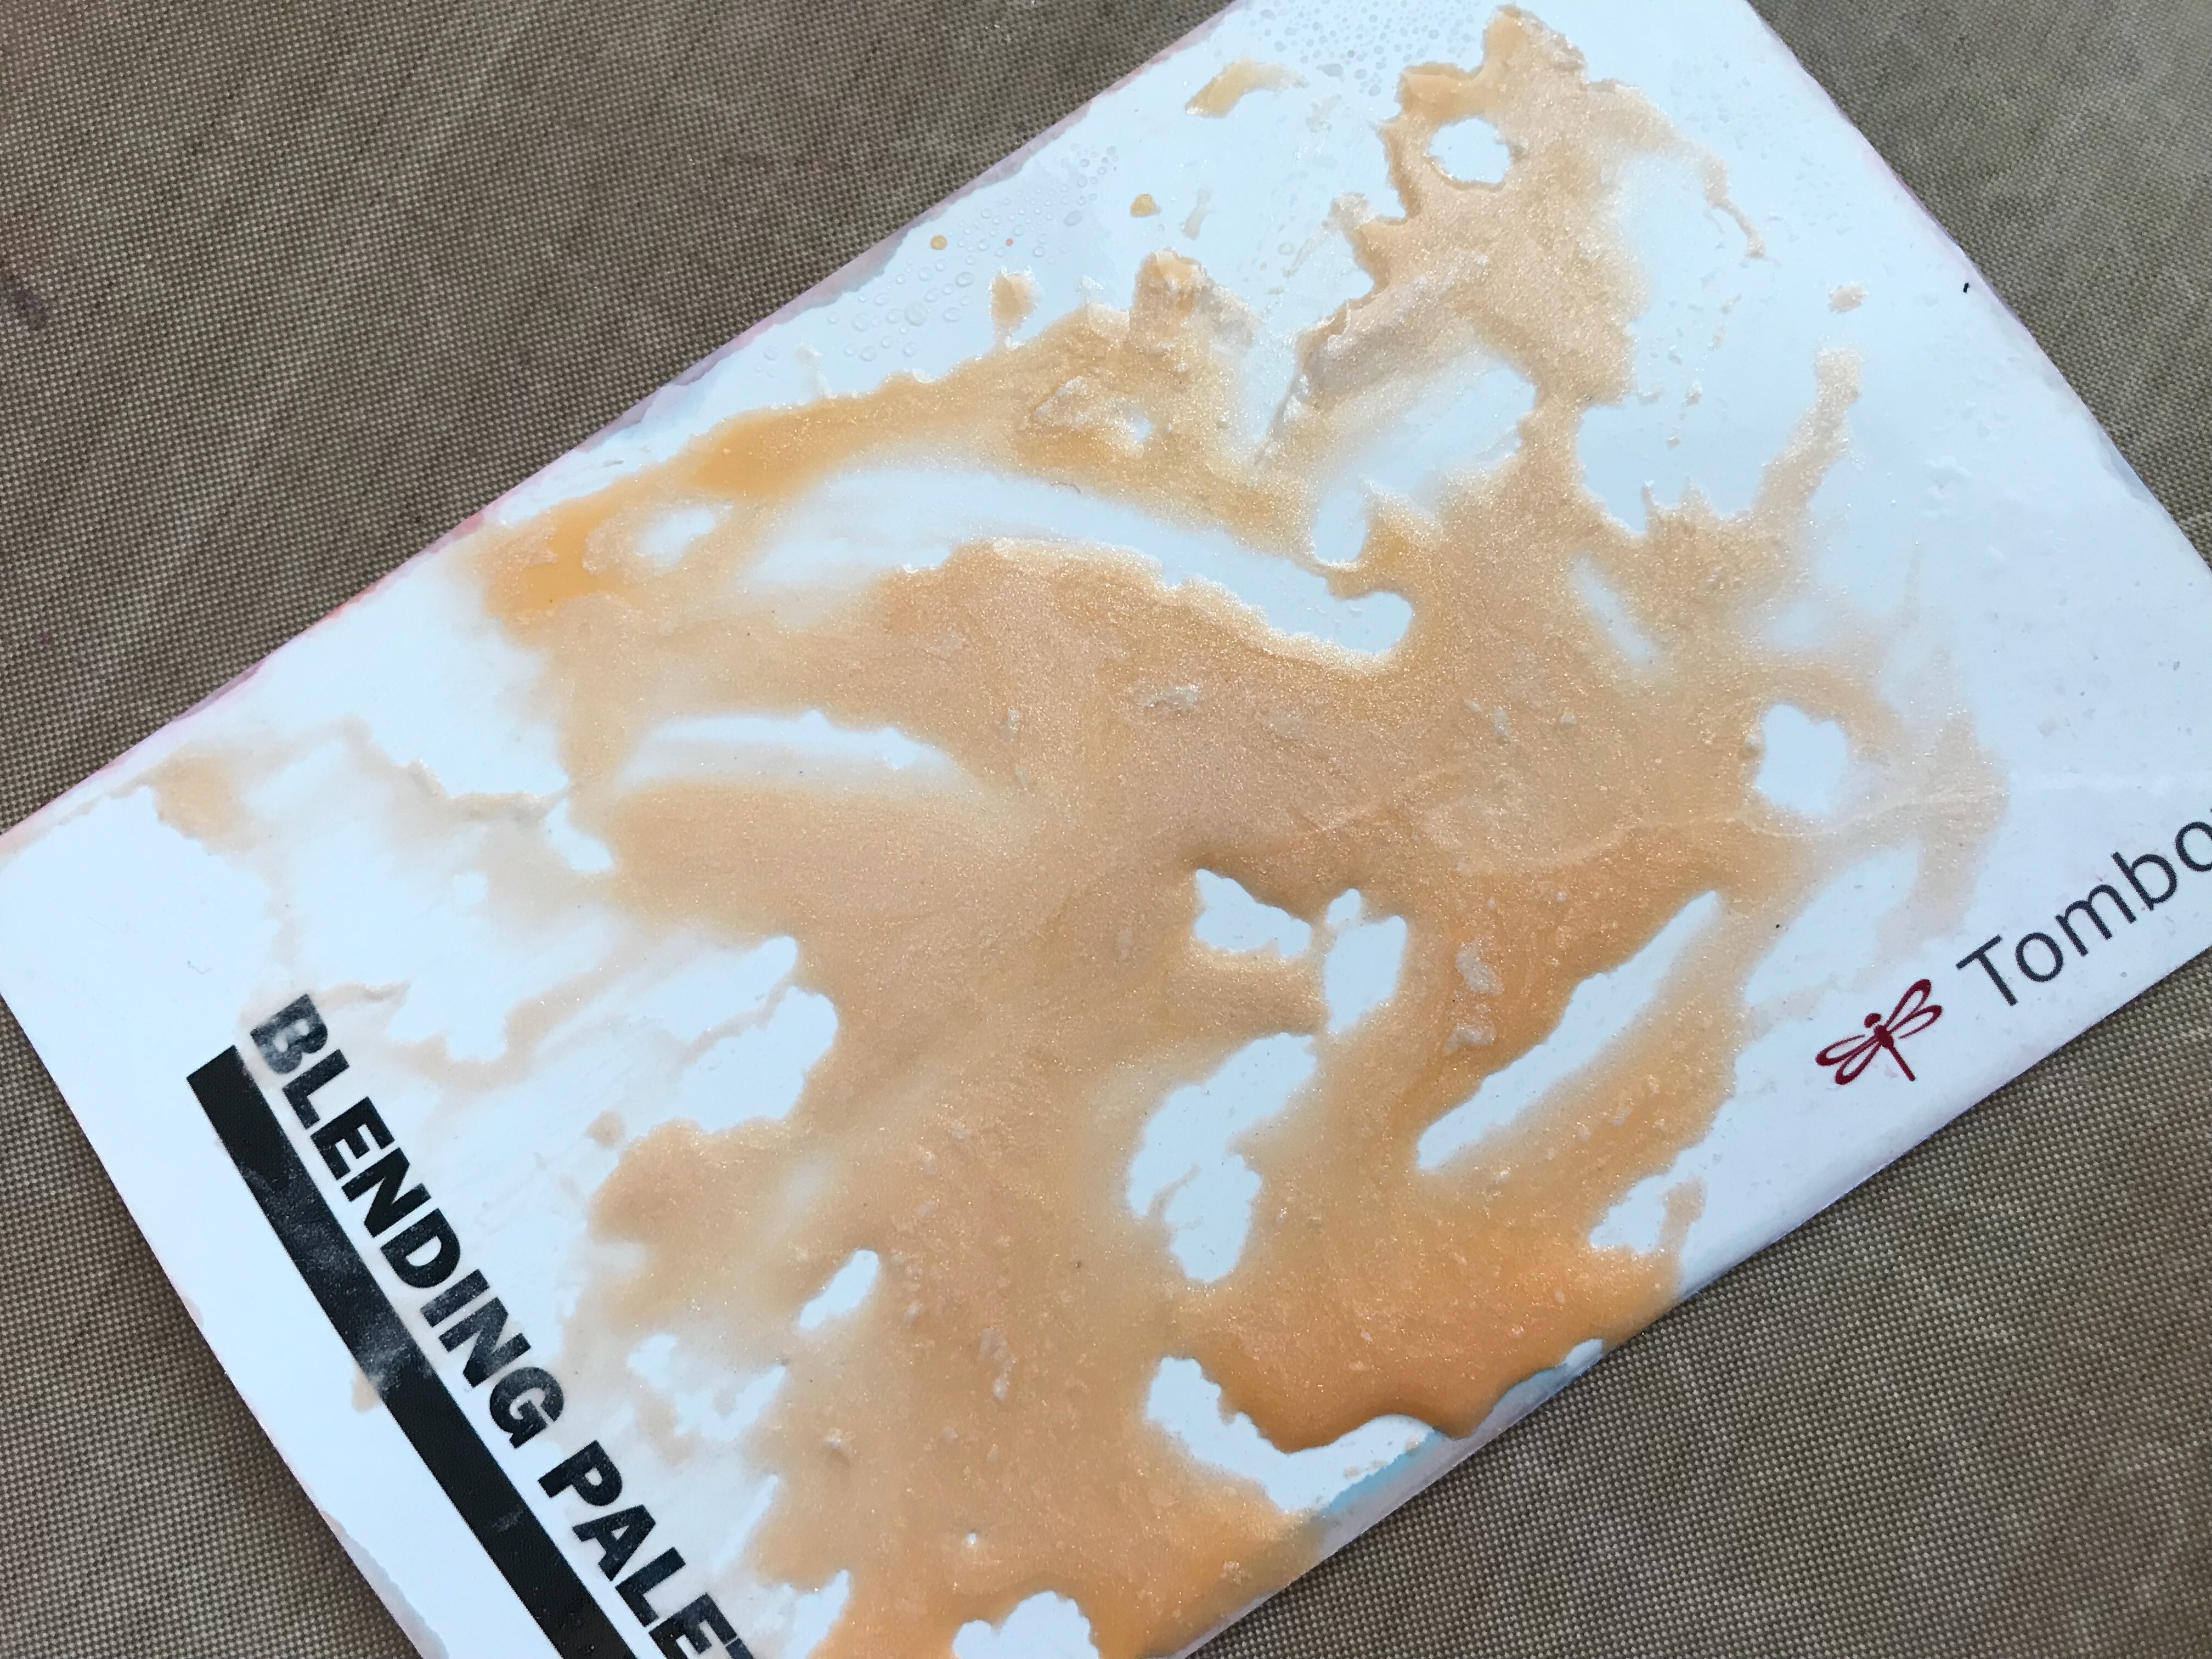
Next smush down the blending palette on your watercolor cardstock. This will add another layer of medium to the pattern you made. Let dry.
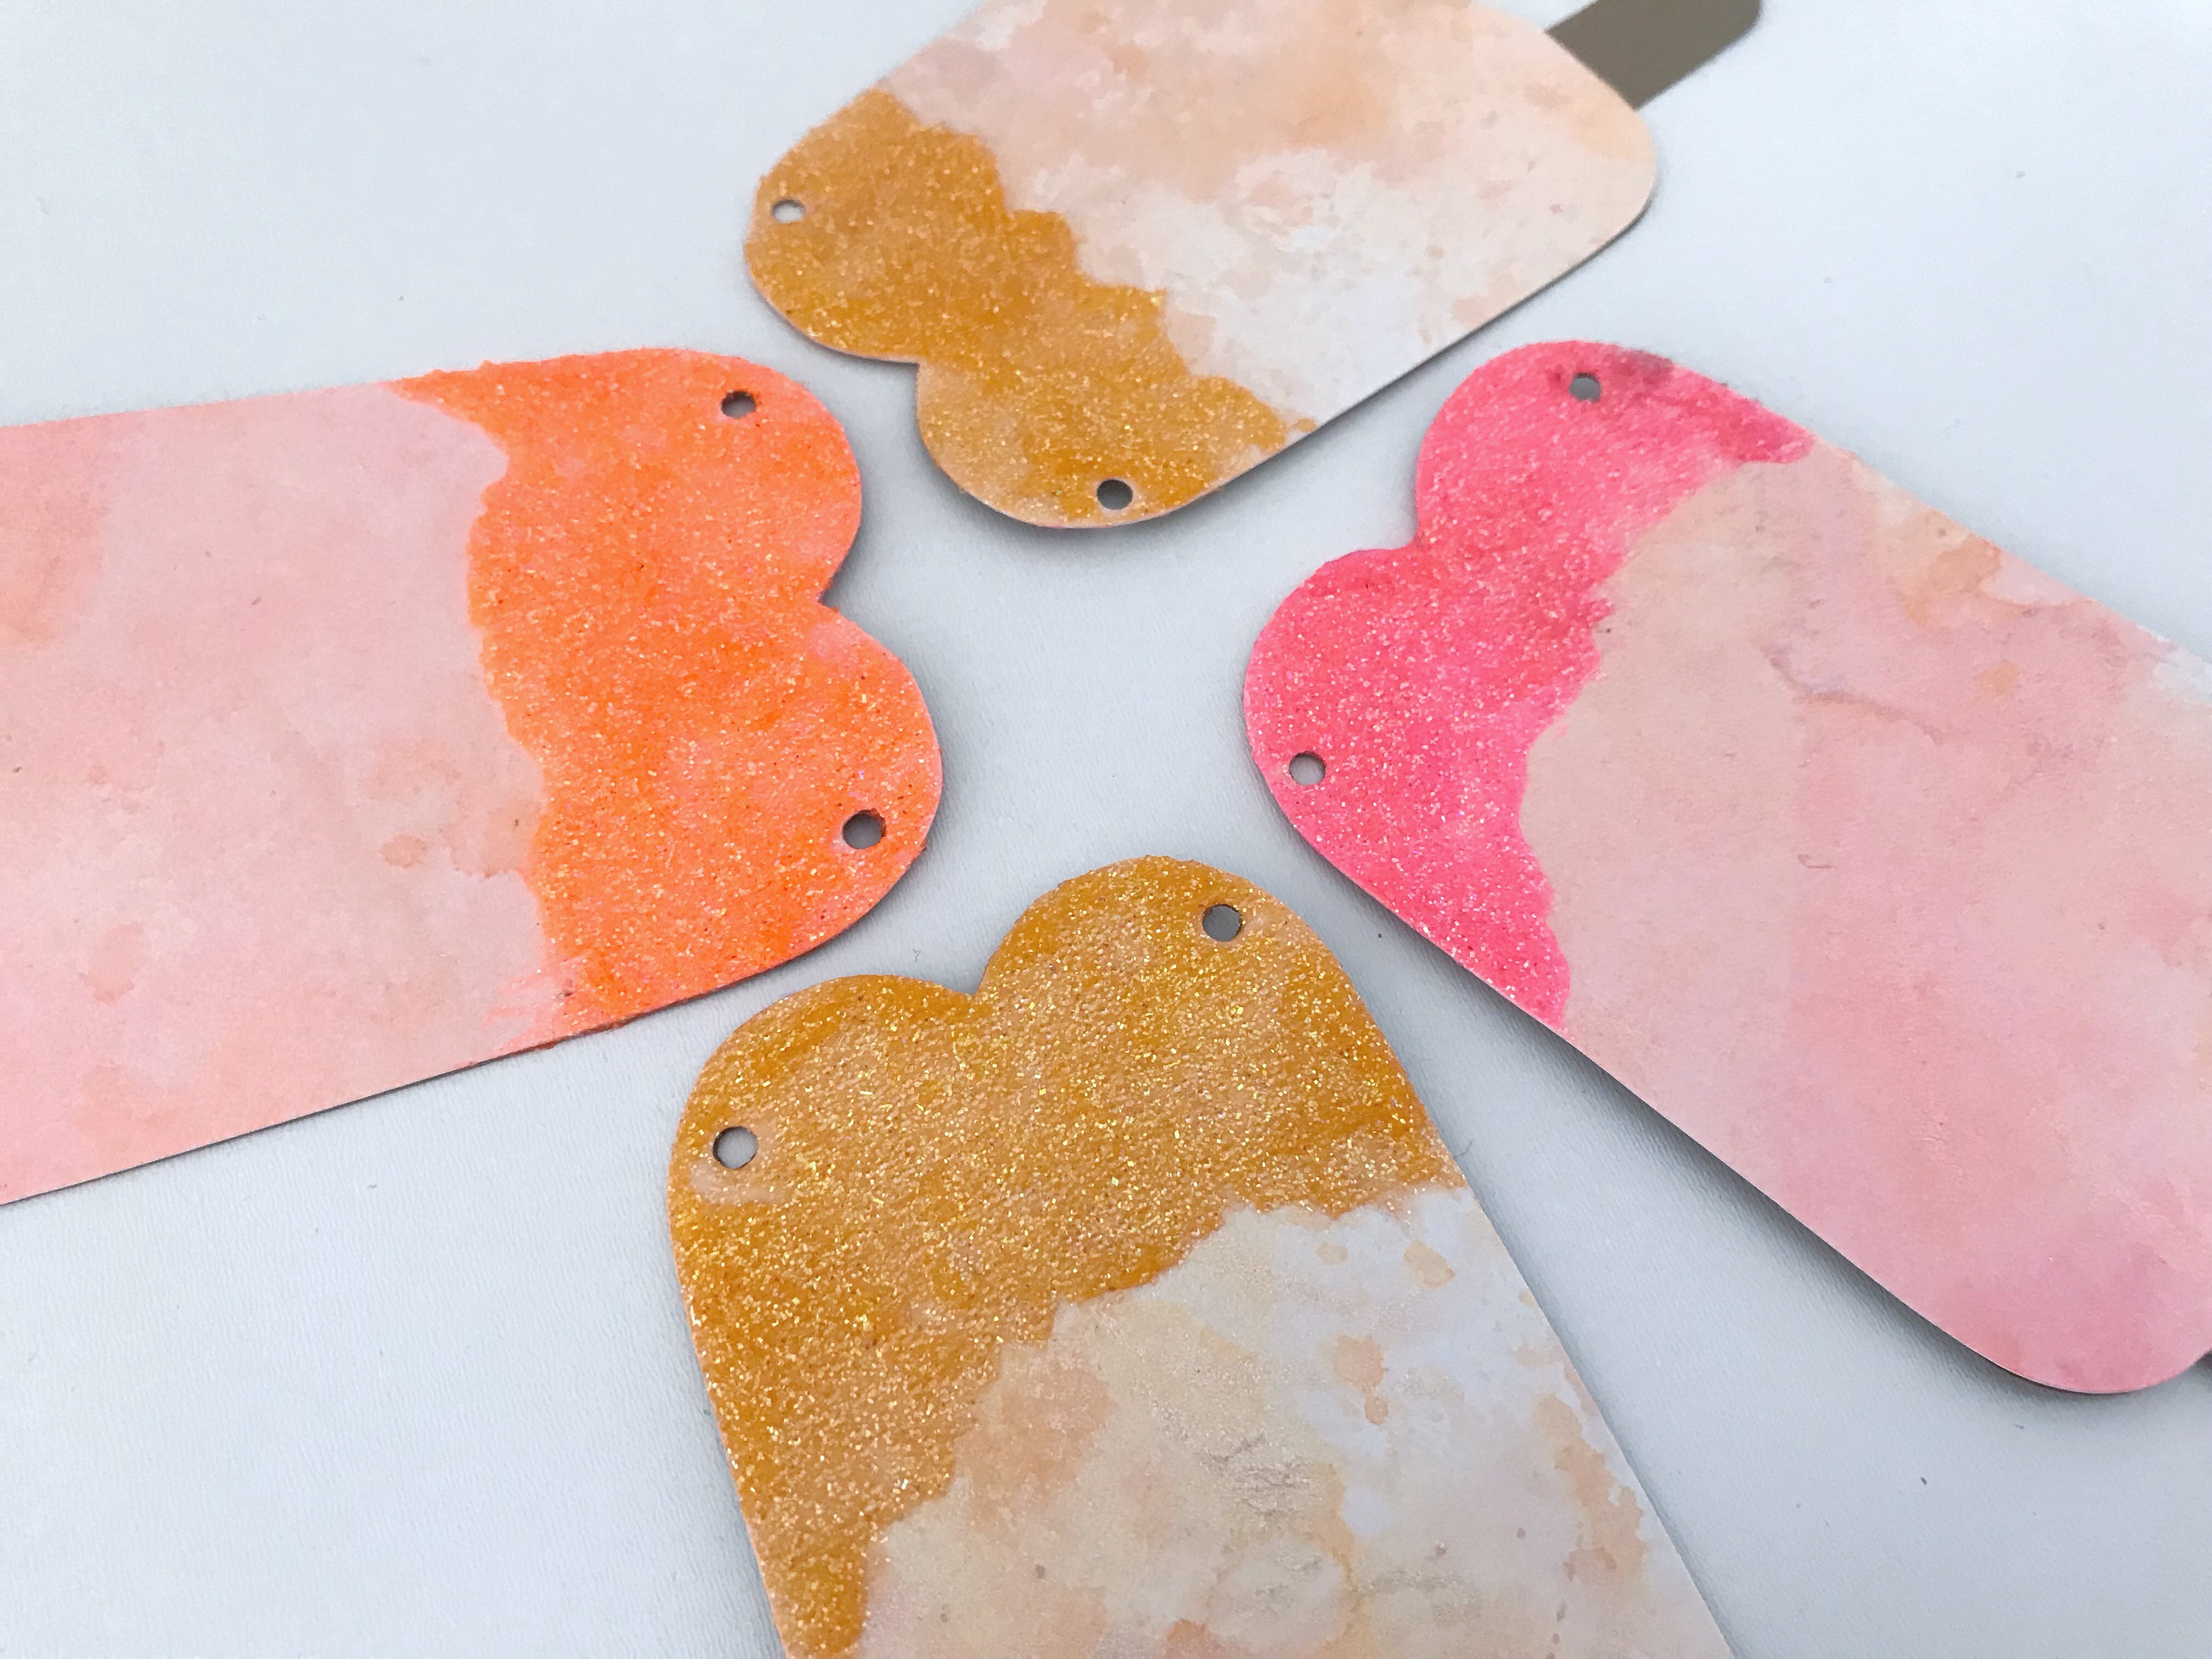
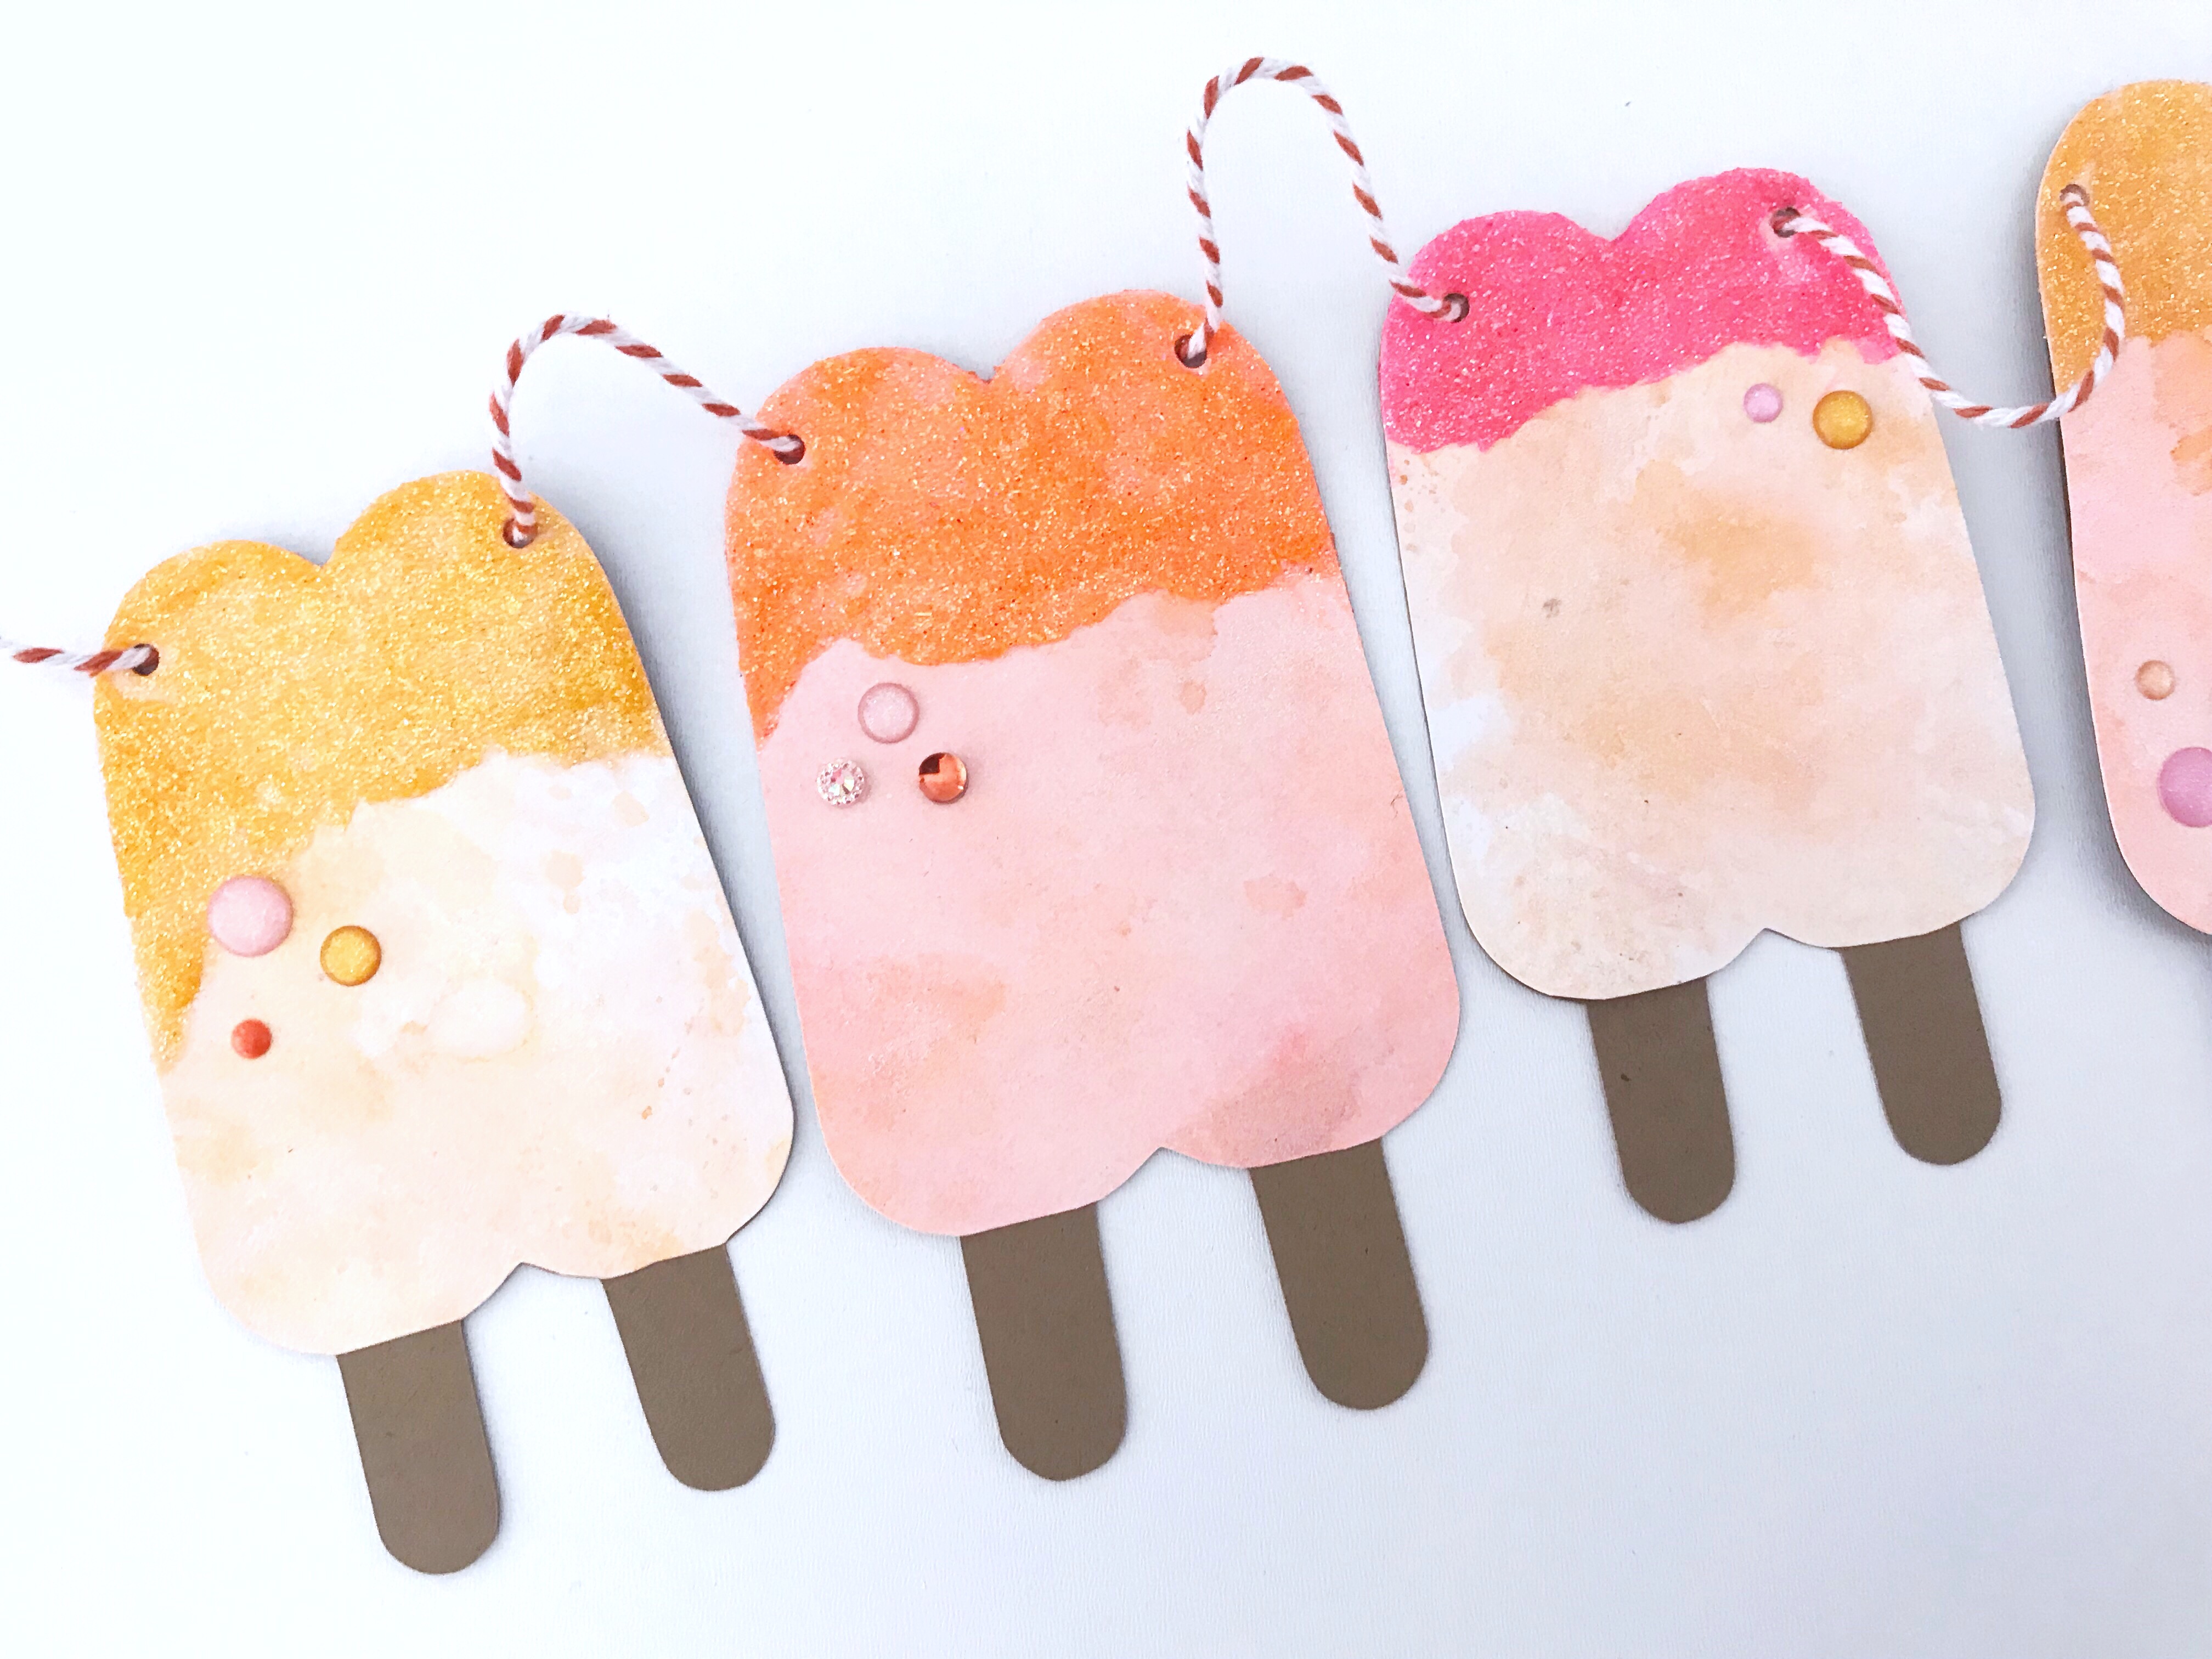
Next step is to cut out your shapes. I’m using a popsicle cut file. If you do not have an electronic cutting machine you can find a popsicle shape on Google images, print it and trace the shape on the watercolor cardstock you created then cut them out.
Assemble your popsicles using the Tombow Xtreme Adhesive. The cardstock will most likely be a little warped and the Tombow Xtreme Adhesive helps for a strong hold.
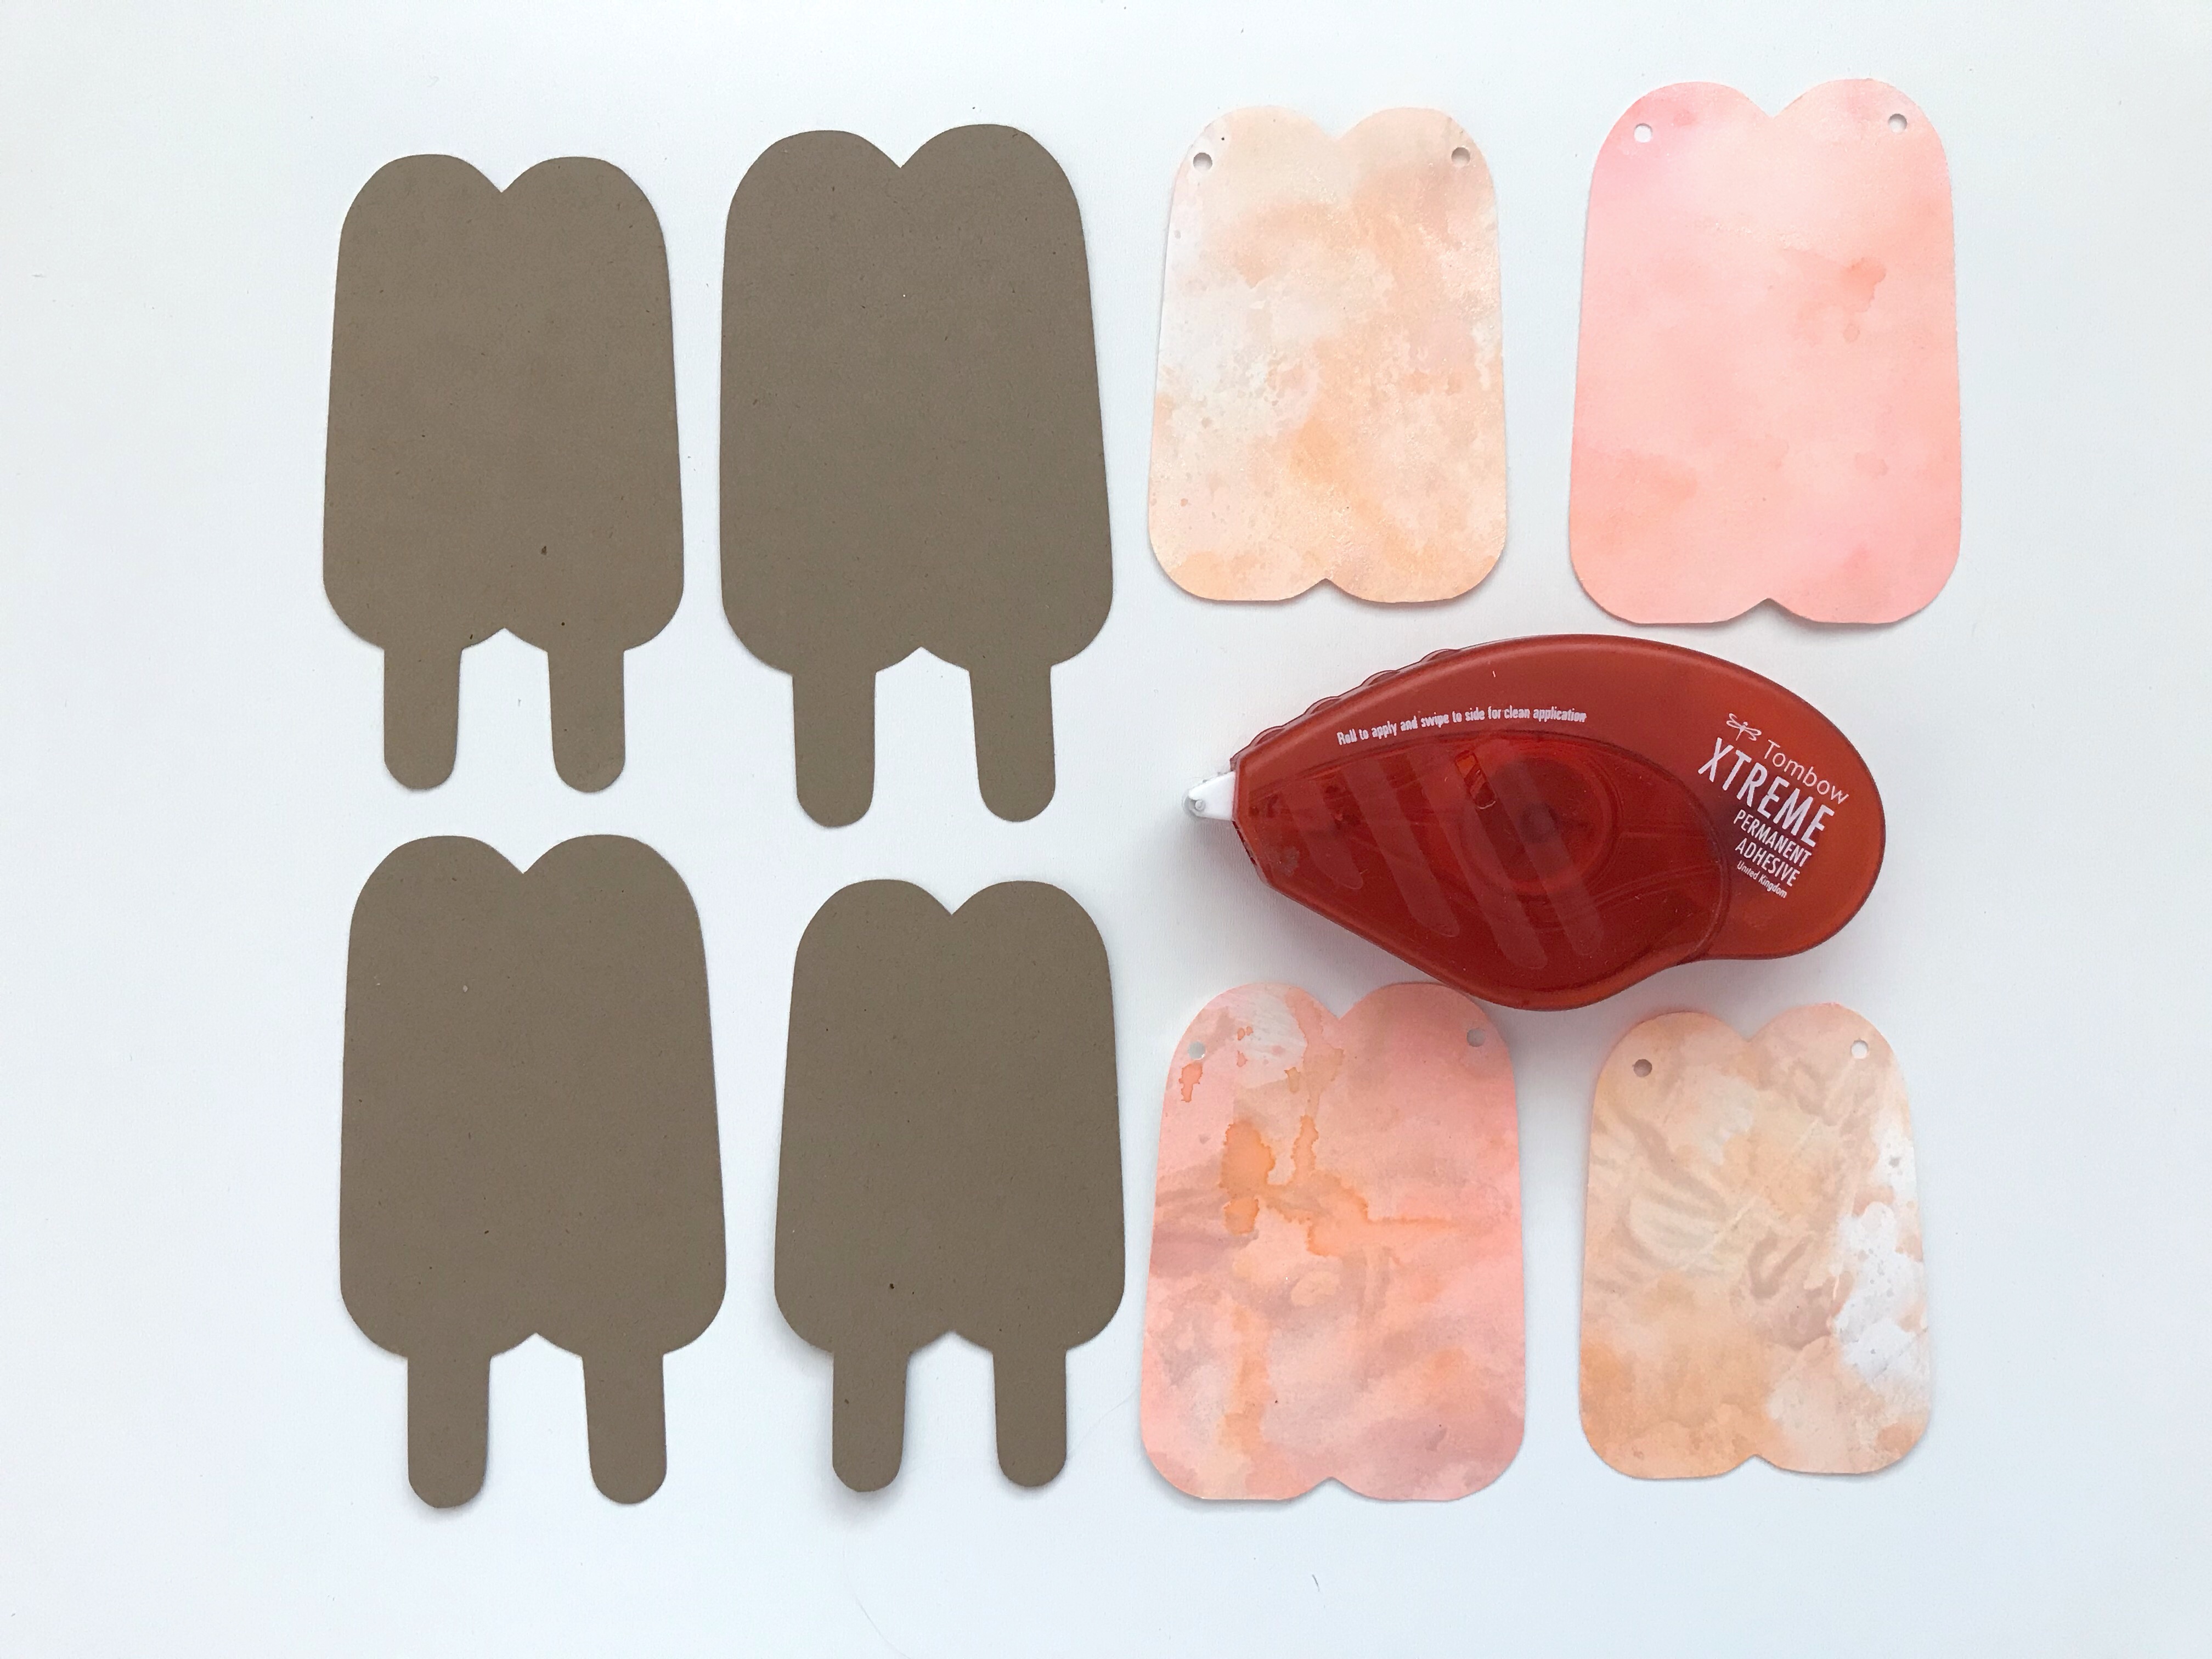
Next, using a small hole punch, punch holes on both top corners of your popsicles.
Technique #3:
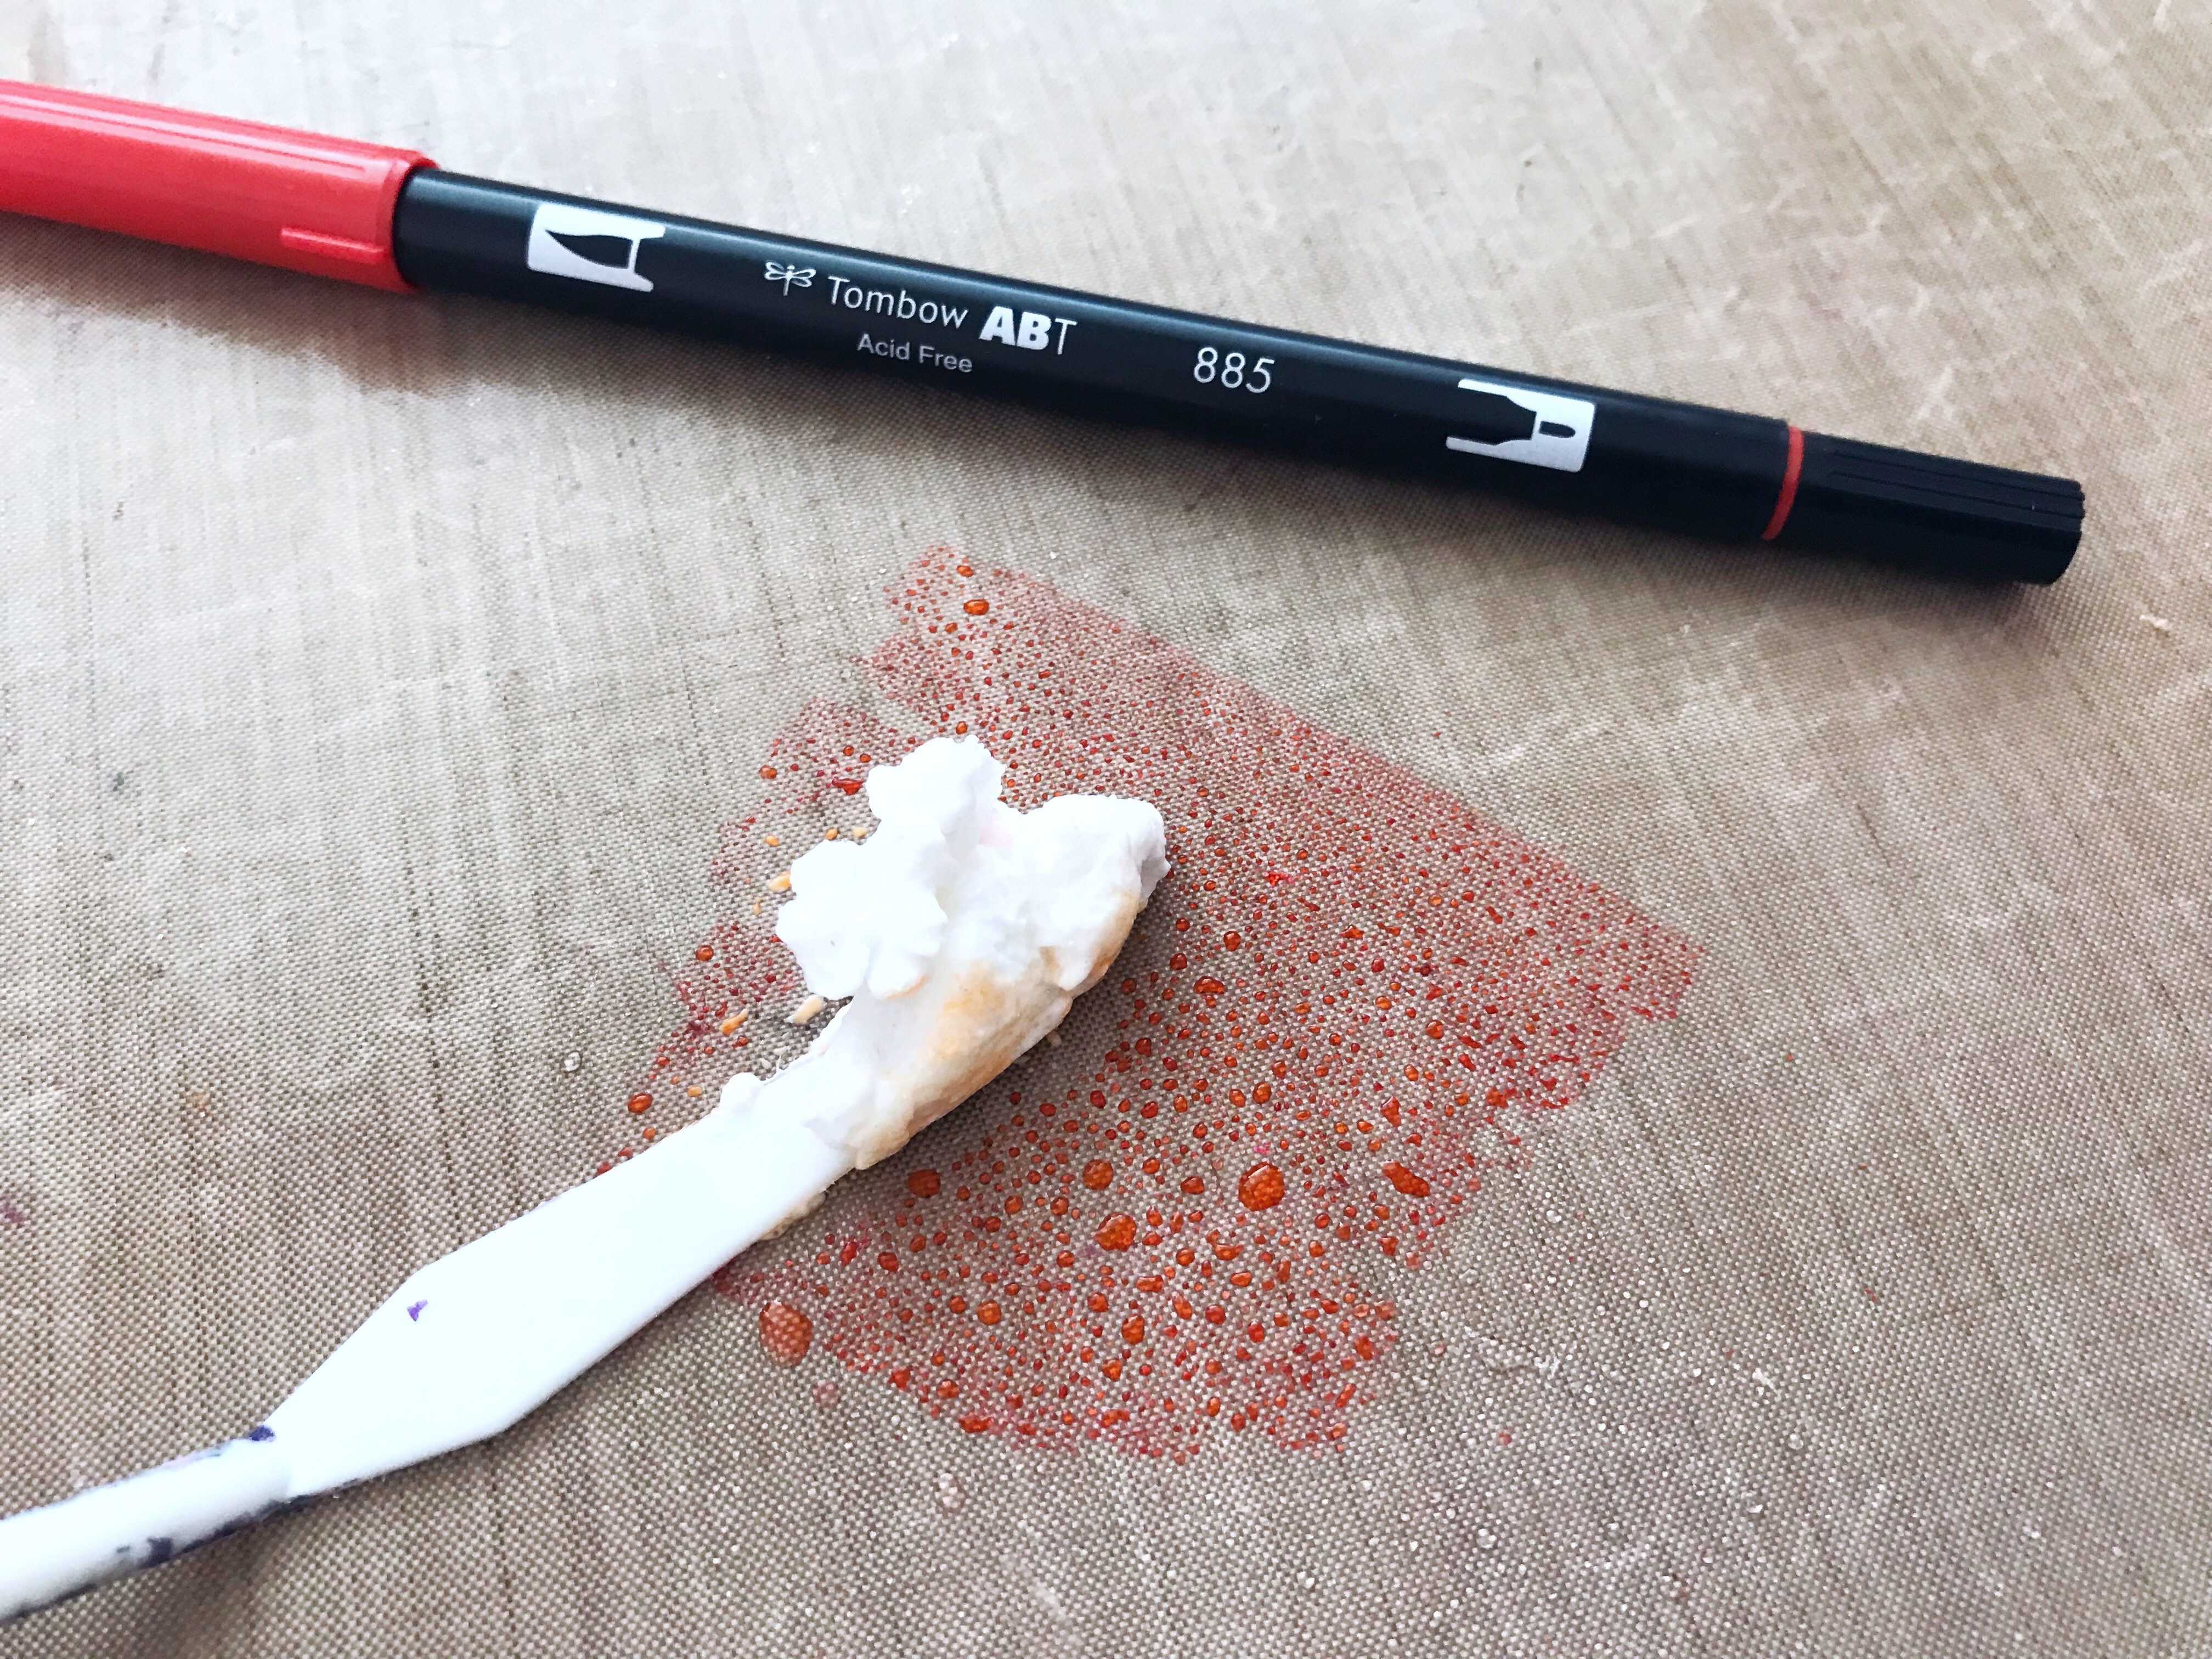
Next we are going to embellish our popsicles with some bead gel medium. You can also use modeling paste here.
Similar to technique #2, we are going to color the bead gel with the Tombow Dual Brush Pens. Using your craft mat/ blending palette scribble some color down.
Using your blending knife place some bead gel next to your color scribbles. Begin mixing. I did this step three different times to create 3 different colors of sprinkles.
Next using your palette knife, carefully place your colored bead gel on the tops of the popsicles.
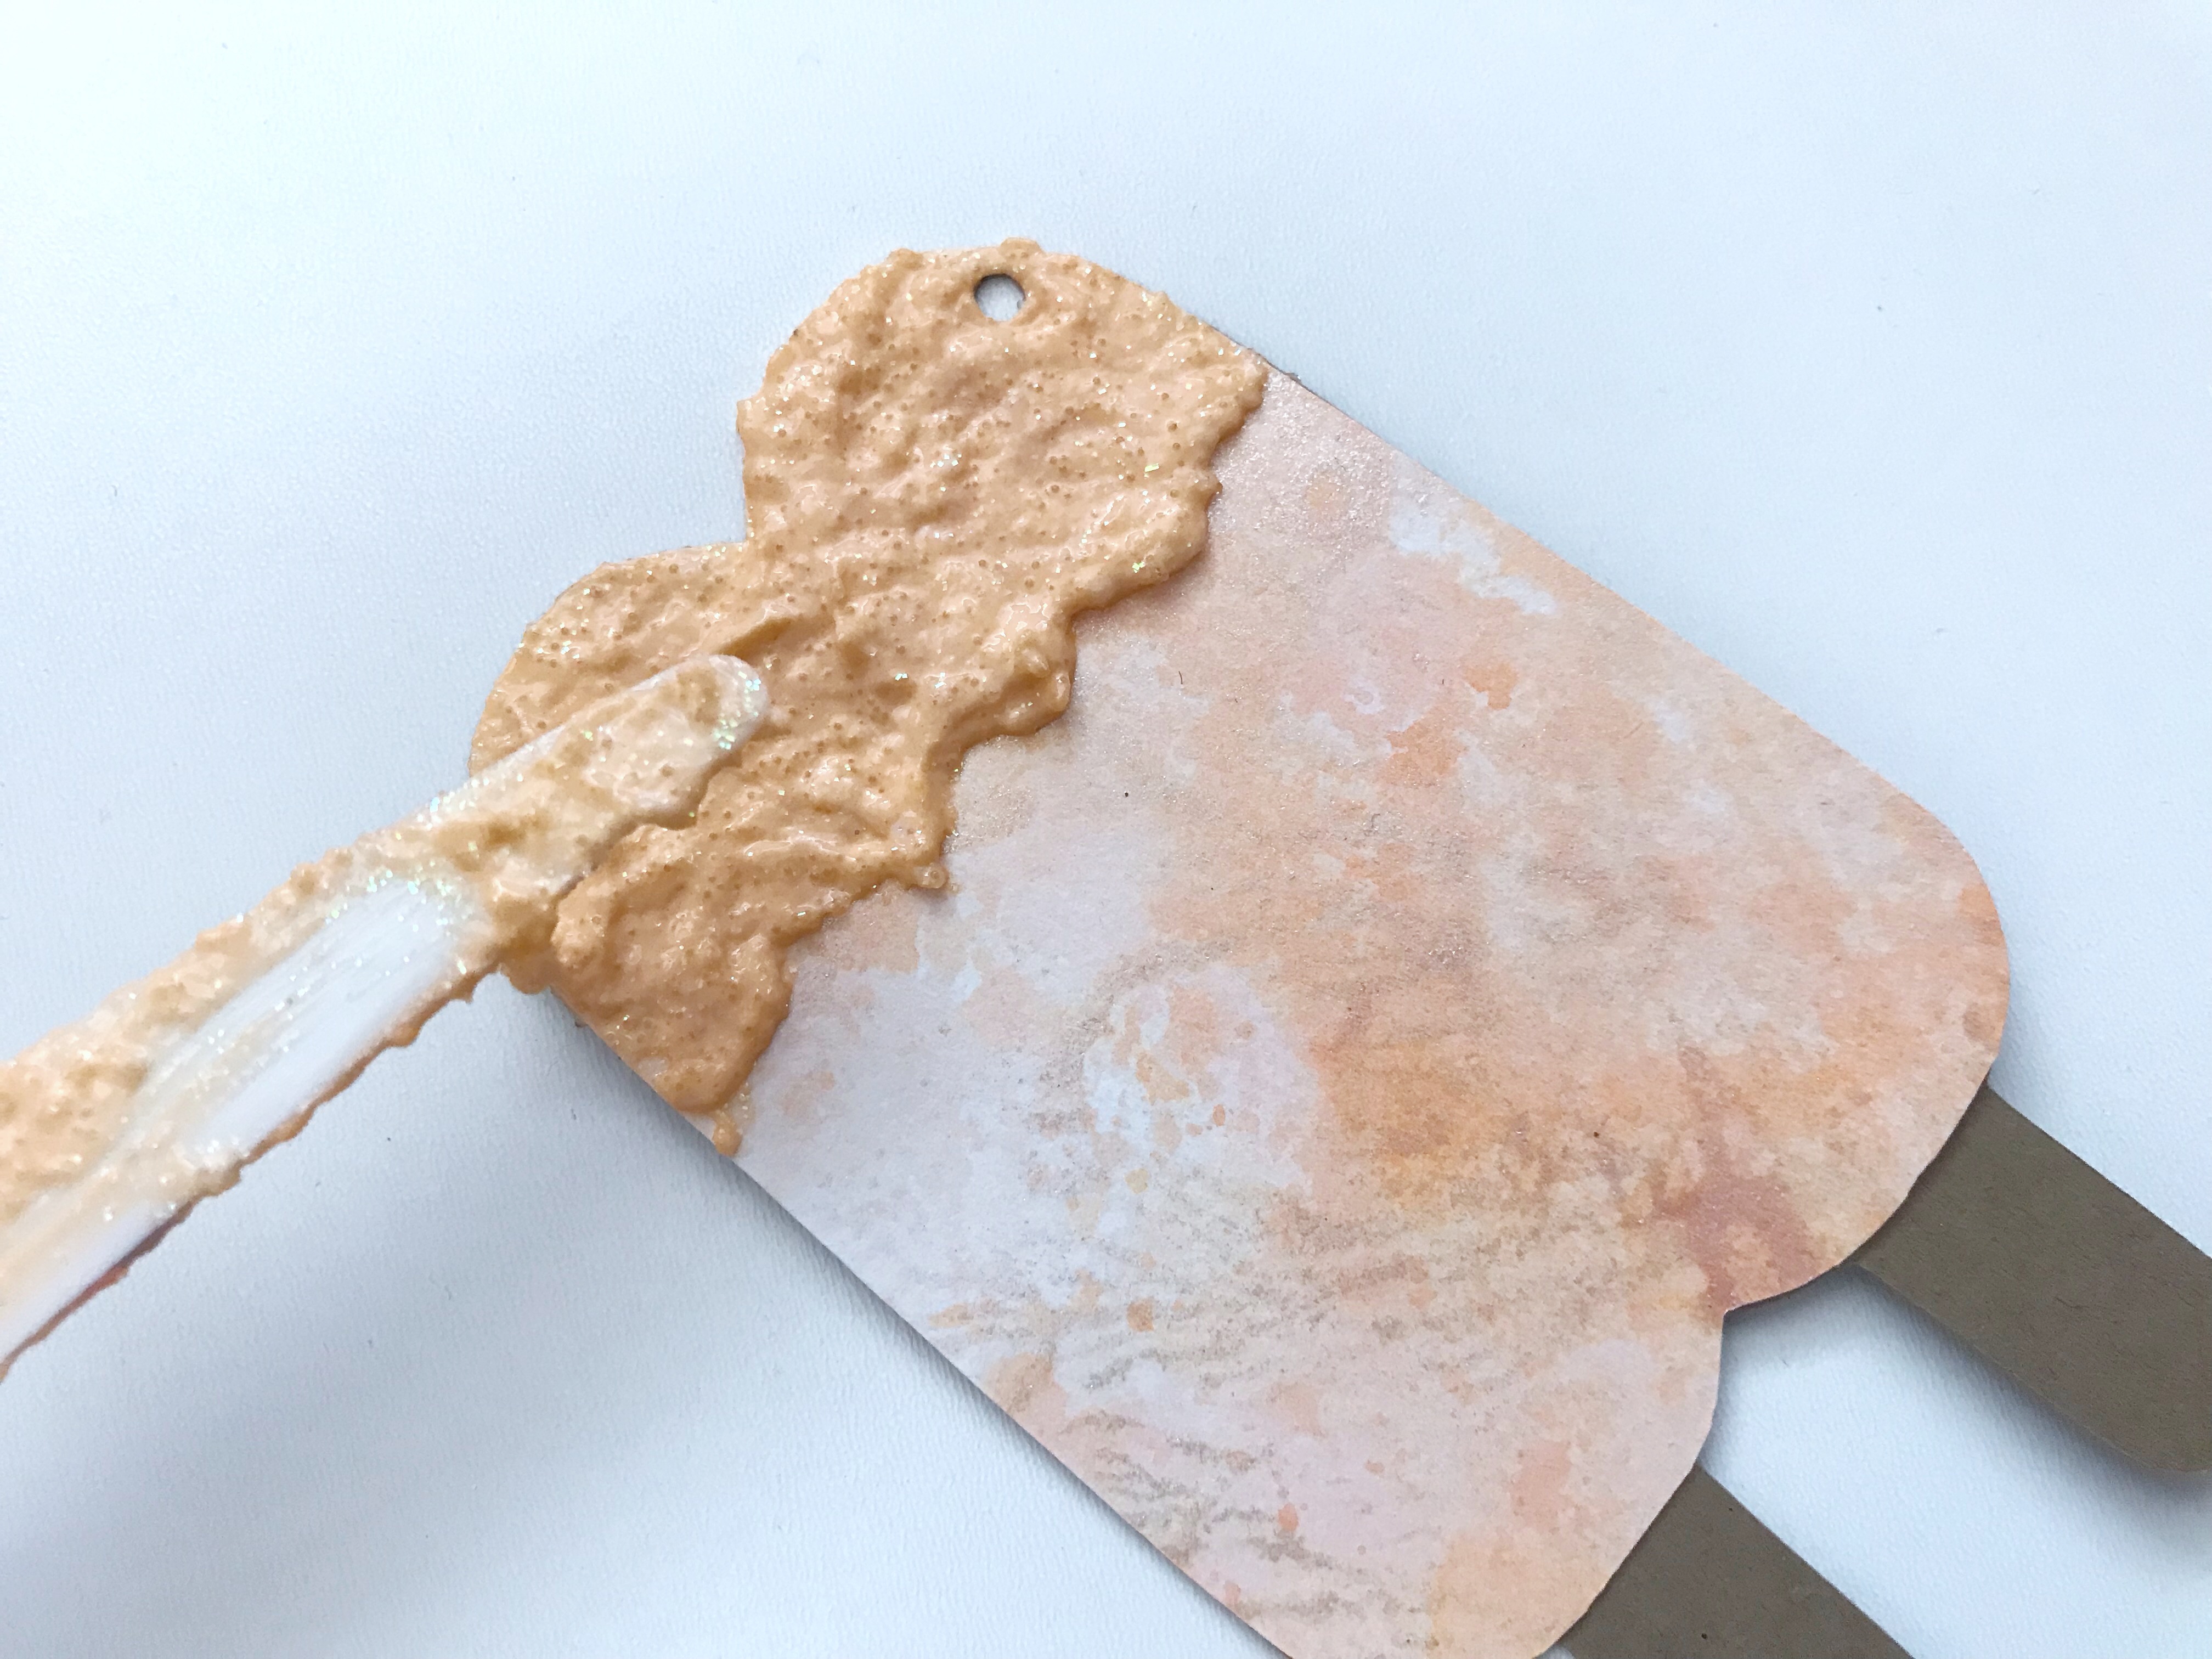
Set aside and let dry. I had to let them dry overnight.
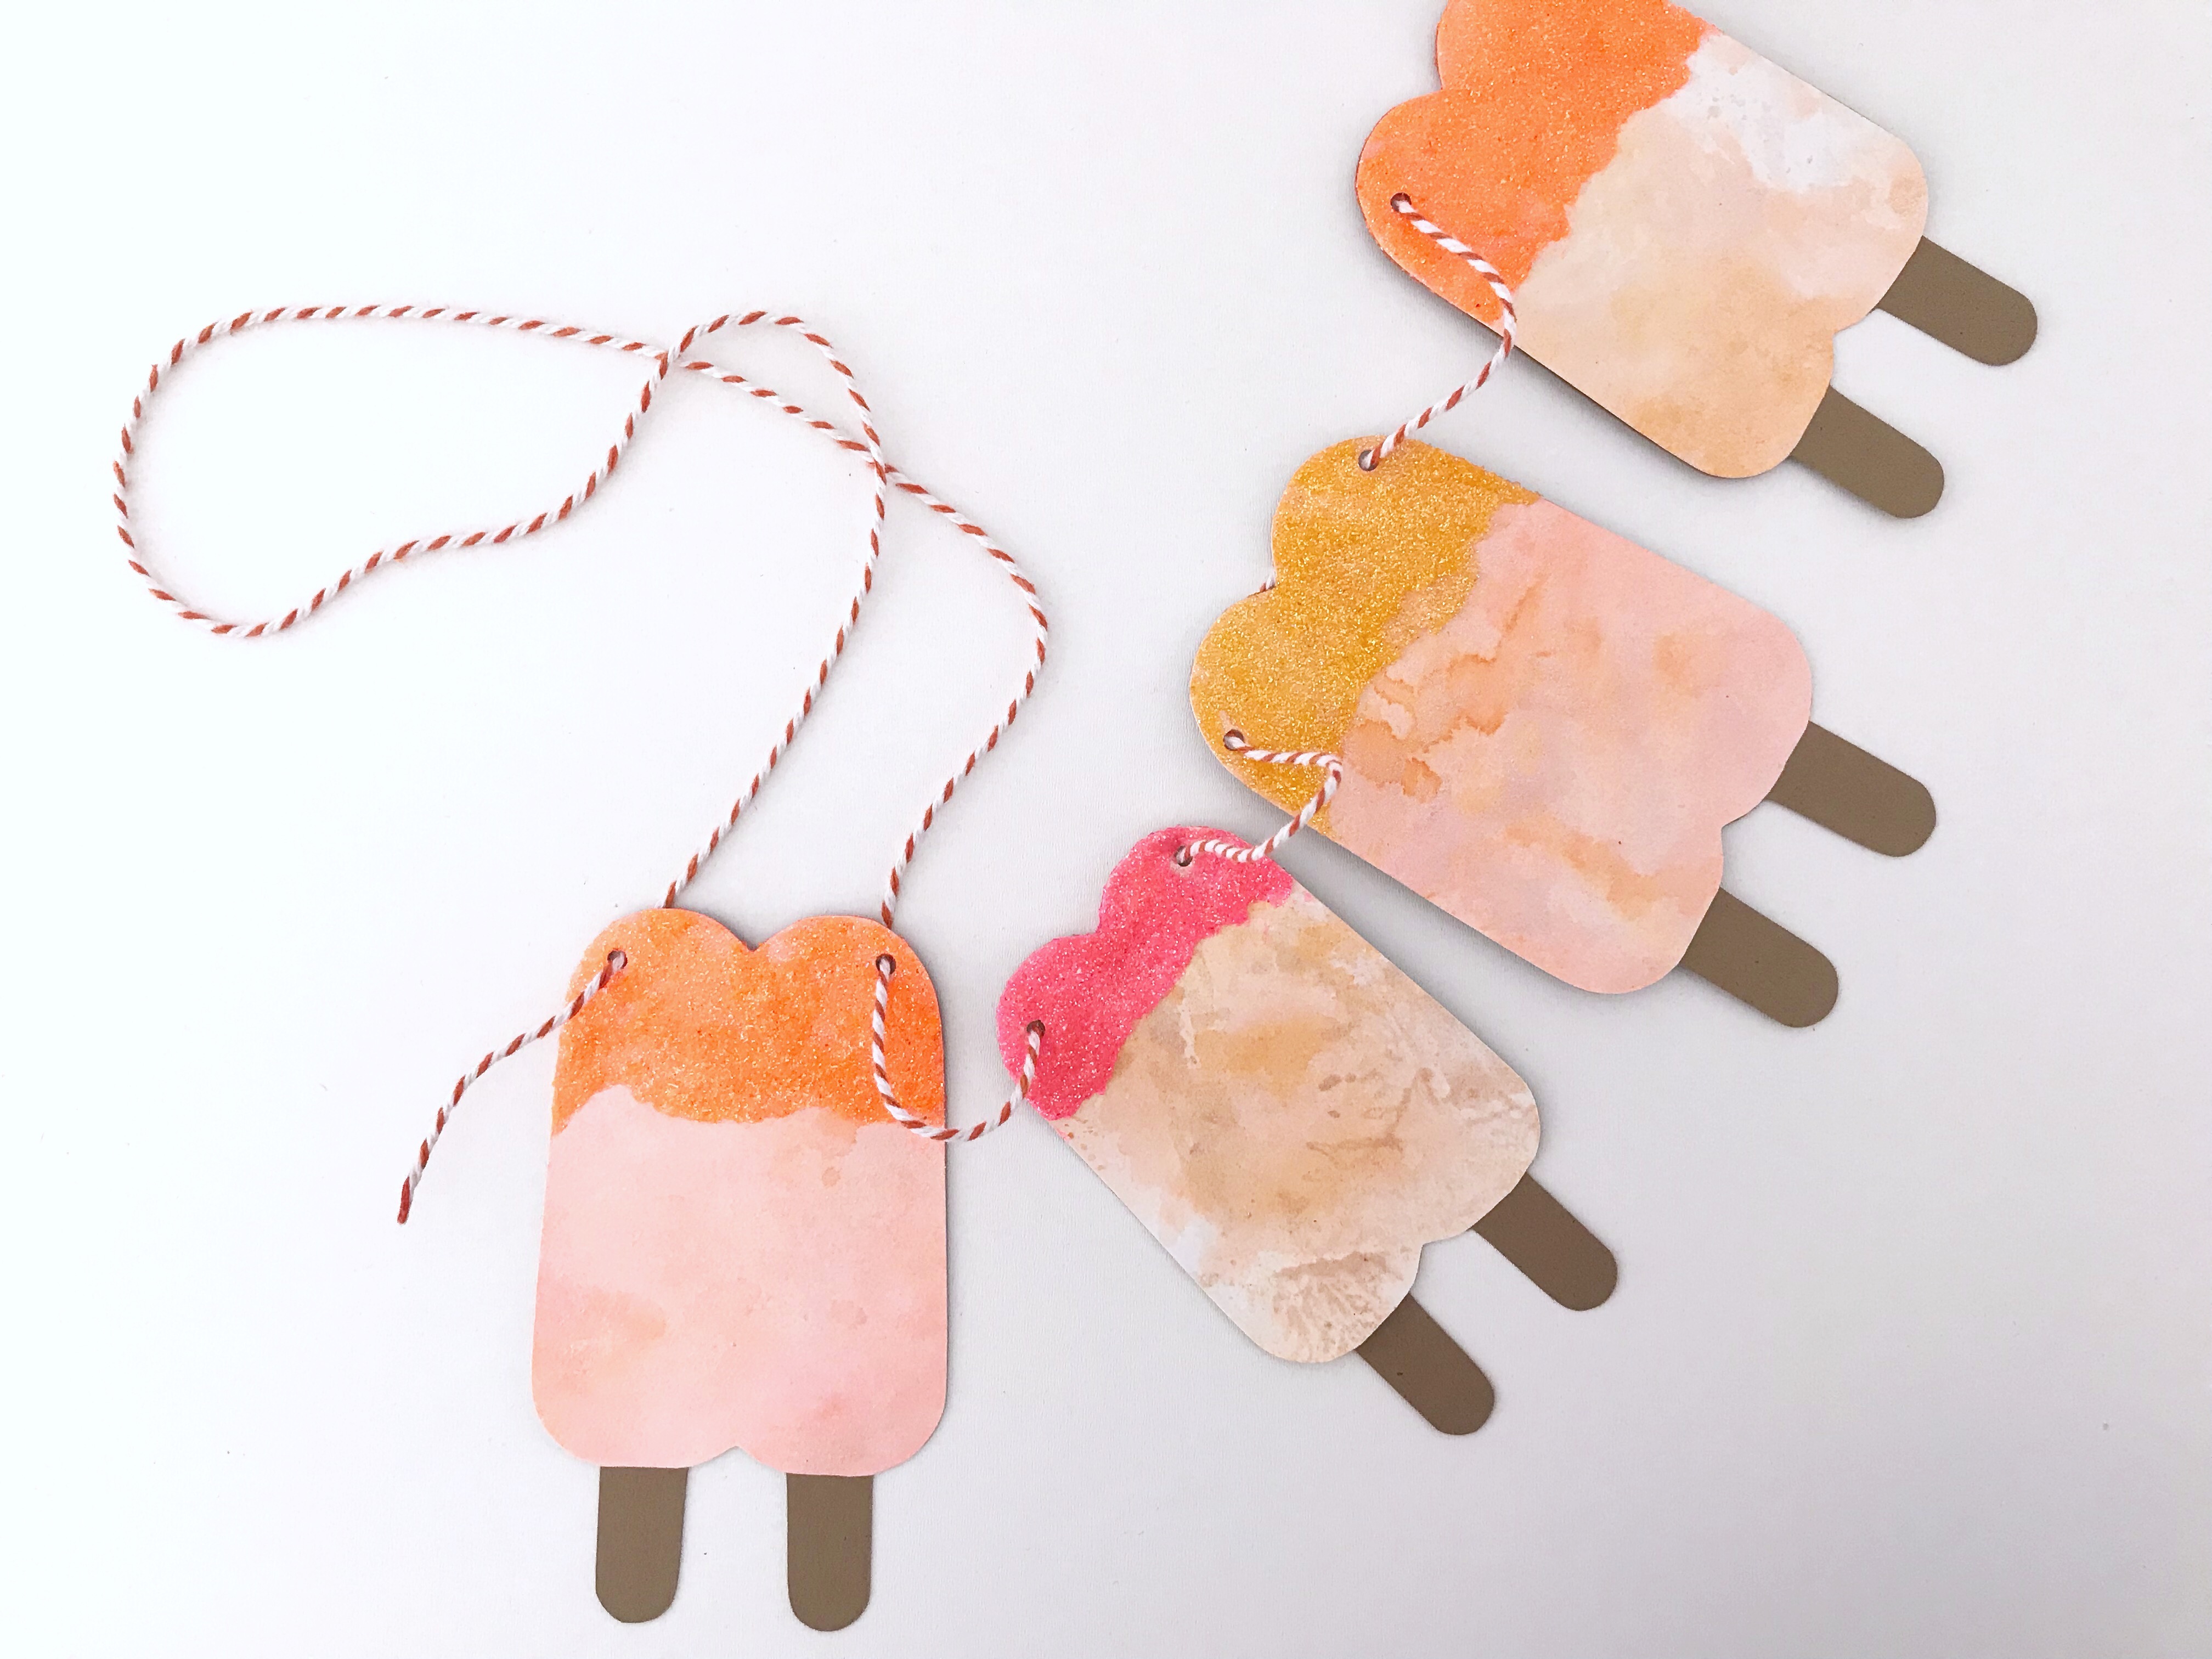
Once your bead gel is dry, take your twine and feed through the holes. Start feeding from the front to back so that the twine stays hidden behind each popsicle. This also helps the popsicles stay in place and not move around when hung.
Extra Tip:
Add a little Tombow MONO Aqua Liquid Glue to the ends of your twine to stop the ends from fraying while you place the popsicles on the twine!
Tie a hoop knot at both ends of your banner if you want to hang it from a nail. Alternatively, I use the Tombow Xtreme Mounting Putty to hang my banners. Add a little to both ends and apply directly to your wall. This makes it easier to remove the banner and add it anywhere you want without having to make holes or damage your walls!
This next step is optional– I decided to embellish one step further with rhinestones and glitter enamel dots using the Tombow MONO Aqua Liquid Glue to adhere them on to the popsicles. Because you can never have too much sparkle!
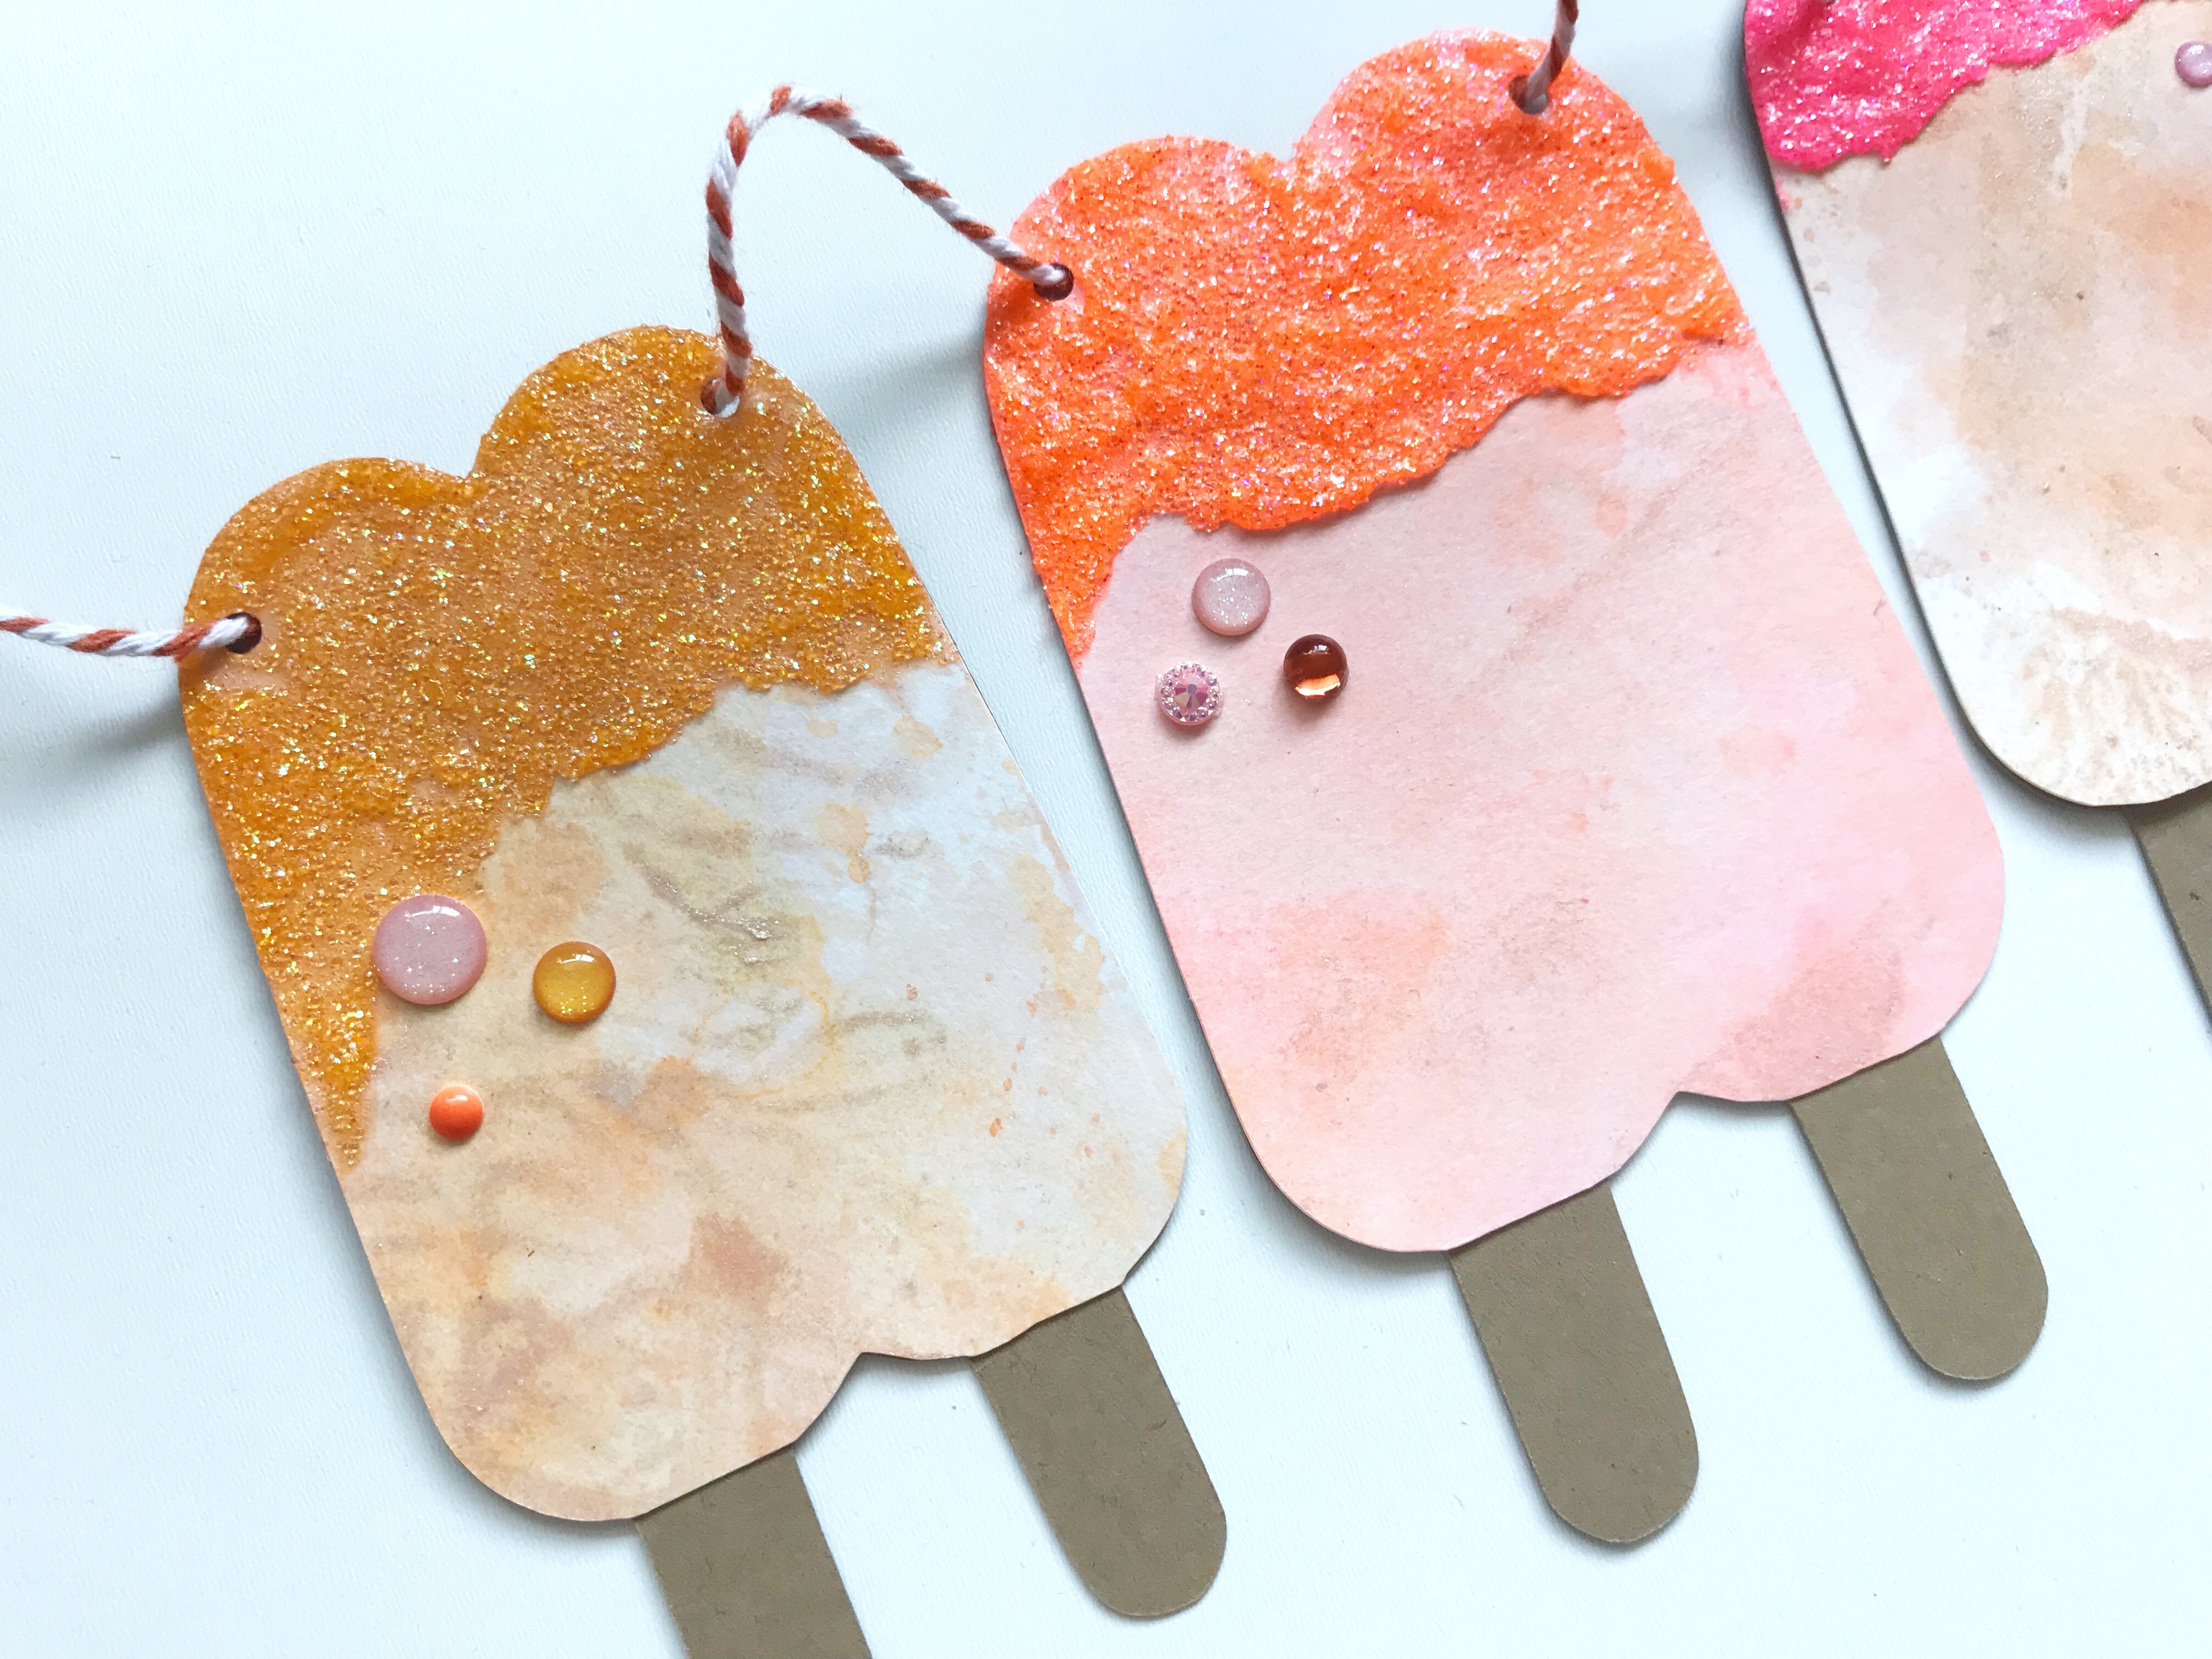
Voila! Your popsicle banner is complete! I hope you enjoyed these 3 different mixed media techniques using the Tombow Dual Brush Pens.
To follow me on social media and see what else I create, click the links below!
YouTube | Instagram | My Shop | My Facebook Group
Have a lovely Summer!
Serena Bee

Outstanding! Love the techniques.
Gonna have to try them.