Hi y’all, it’s Grace from Grace Anne Studio! This spring has been especially rainy here in North Texas. It’s made me want to draw all the rain boots. Here’s an easy way to draw rain boots and three ways to color using some of my favorite Tombow products.

Supplies*
- Tombow ABT PRO Alcohol-Based Markers: Any 5-Pack, but I used yellow
- Tombow Dual Brush Pens: Any 10-Pack, but I used Bohemian
- Tombow Fudenosuke Neon
- Tombow MONO Drawing Pens – 03
- Tombow MONO Twin Permanent Marker
- Tombow Fudenosuke Hard Tip
- Tombow MONO Graph Mechanical Pencil
- Tombow MONO Eraser
- Tombow MONO Zero Eraser
- Tombow Water Brush – Medium
- Smooth mixed media paper
- Small dish of water
*Please note, I know this is a LOT of supplies. I use them to draw the rain boots as differently as I could. However, you can absolutely use any of the products and adapt it to each style. You can go all out and try each one OR push yourself to create each style with the same medium. Both options offer unique challenges and I would love to see how you adapt them!

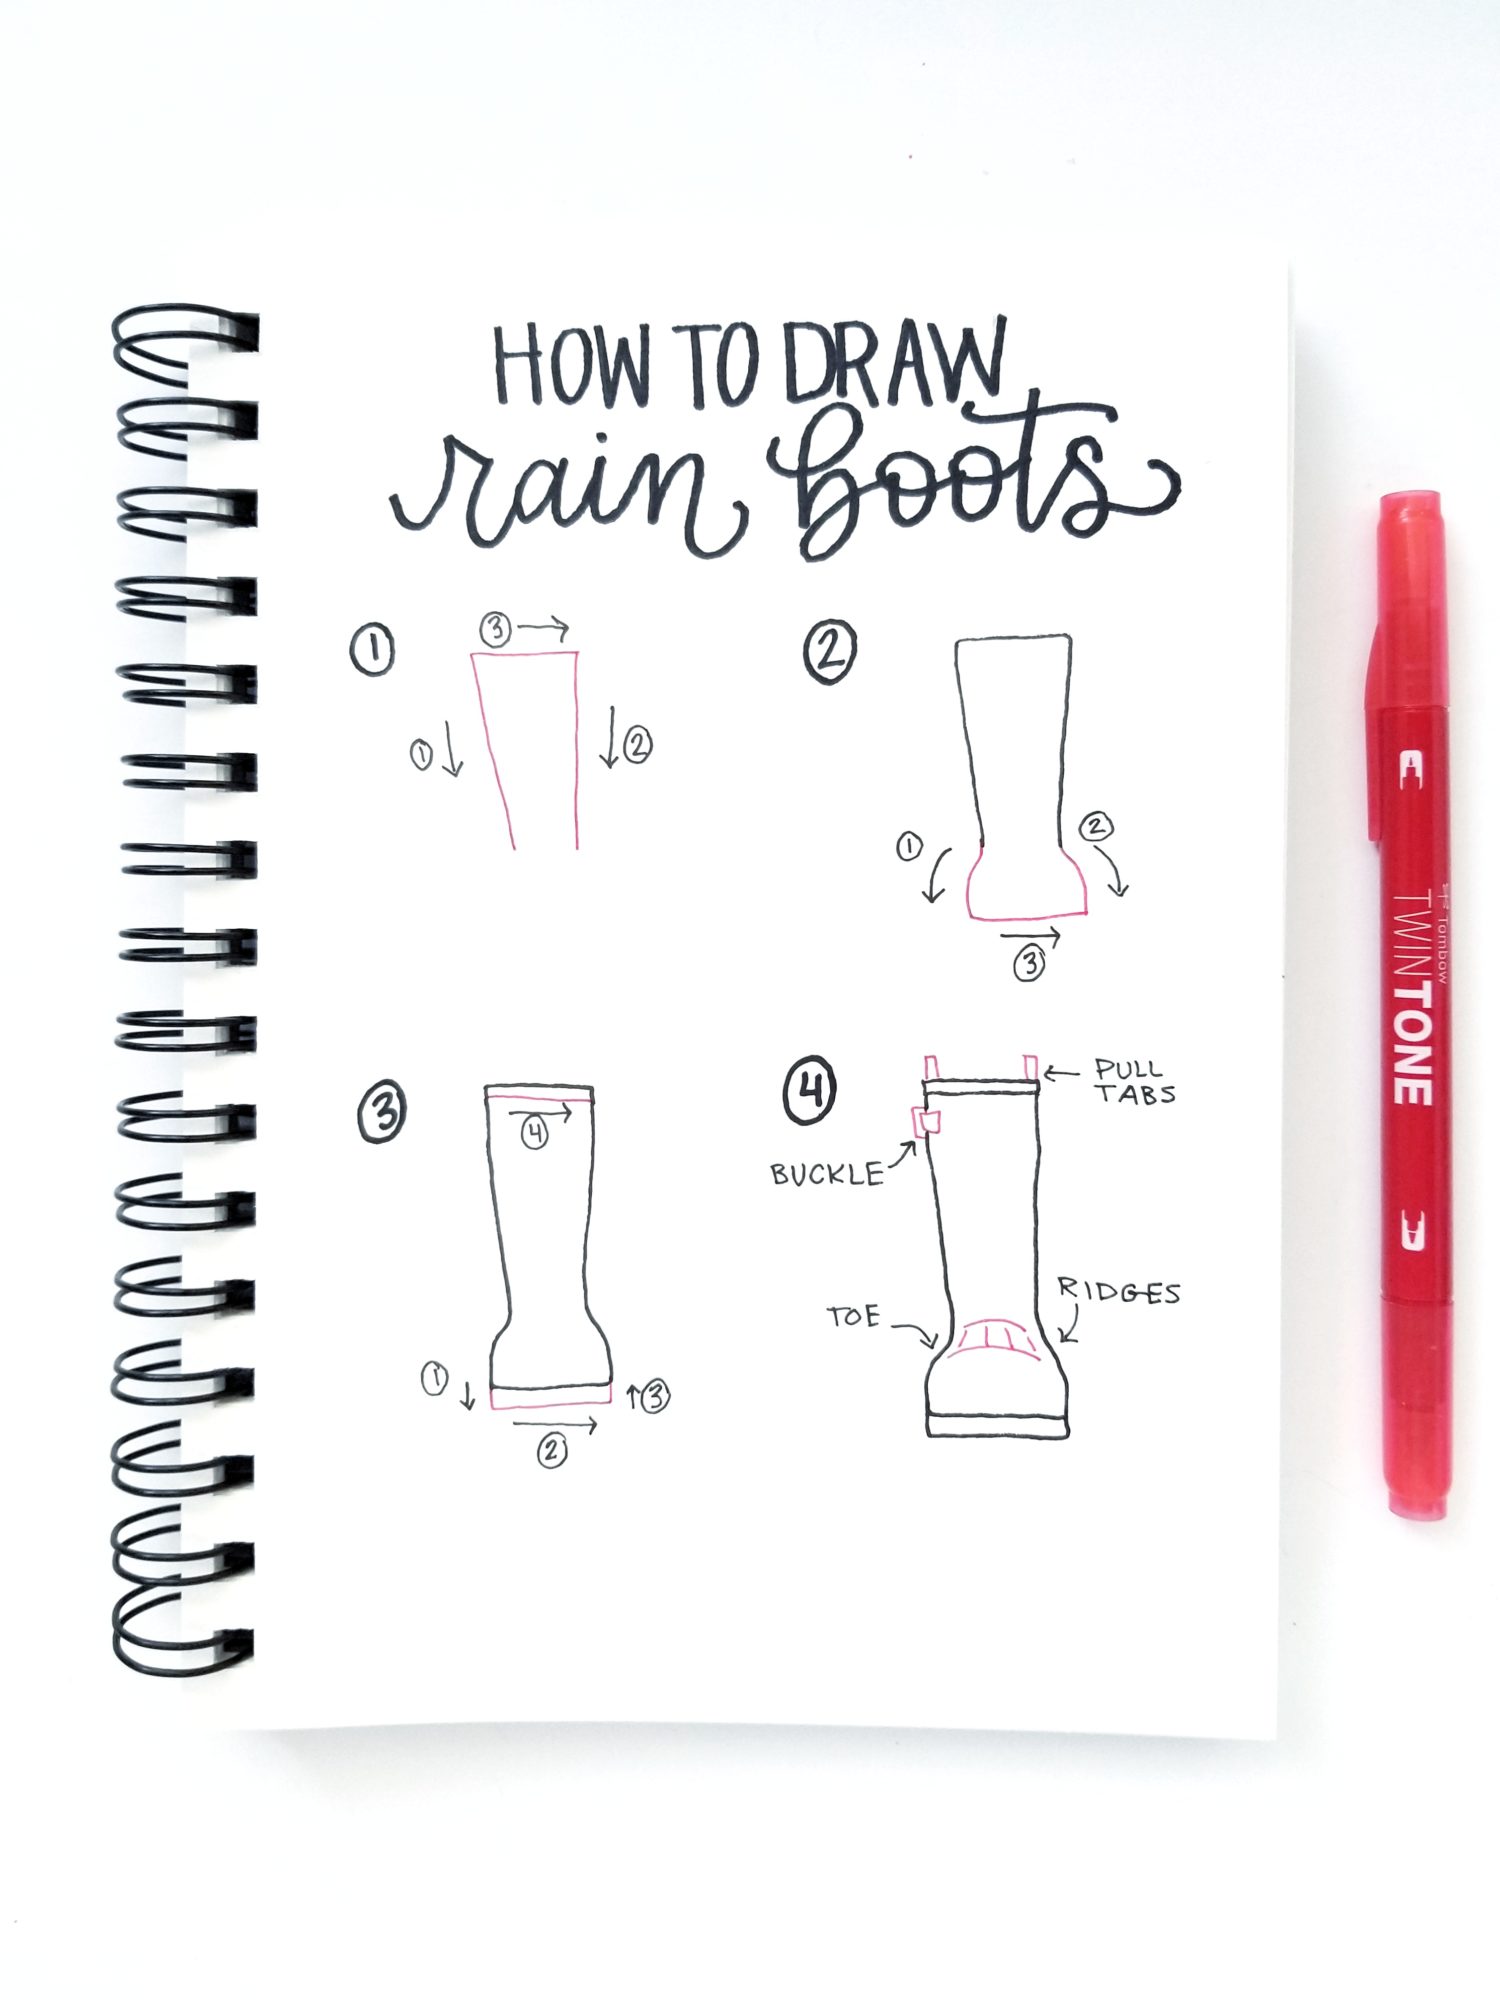
Step 1: The Basics
To draw anything, you need to be able to break it down and identify the shapes within. To draw rain boots, start by drawing three lines to make up the boot shaft. Then, add the base of the boot by adding two curved lines and connecting them with a line across the bottom. Next, add the sole by completing the rectangle at the bottom and draw a line at the top of the shaft to show the seam. Finally, give it shape and depth by adding two curved lines for the toe of the boot and customize it by adding pull tabs, buckles or elastic.
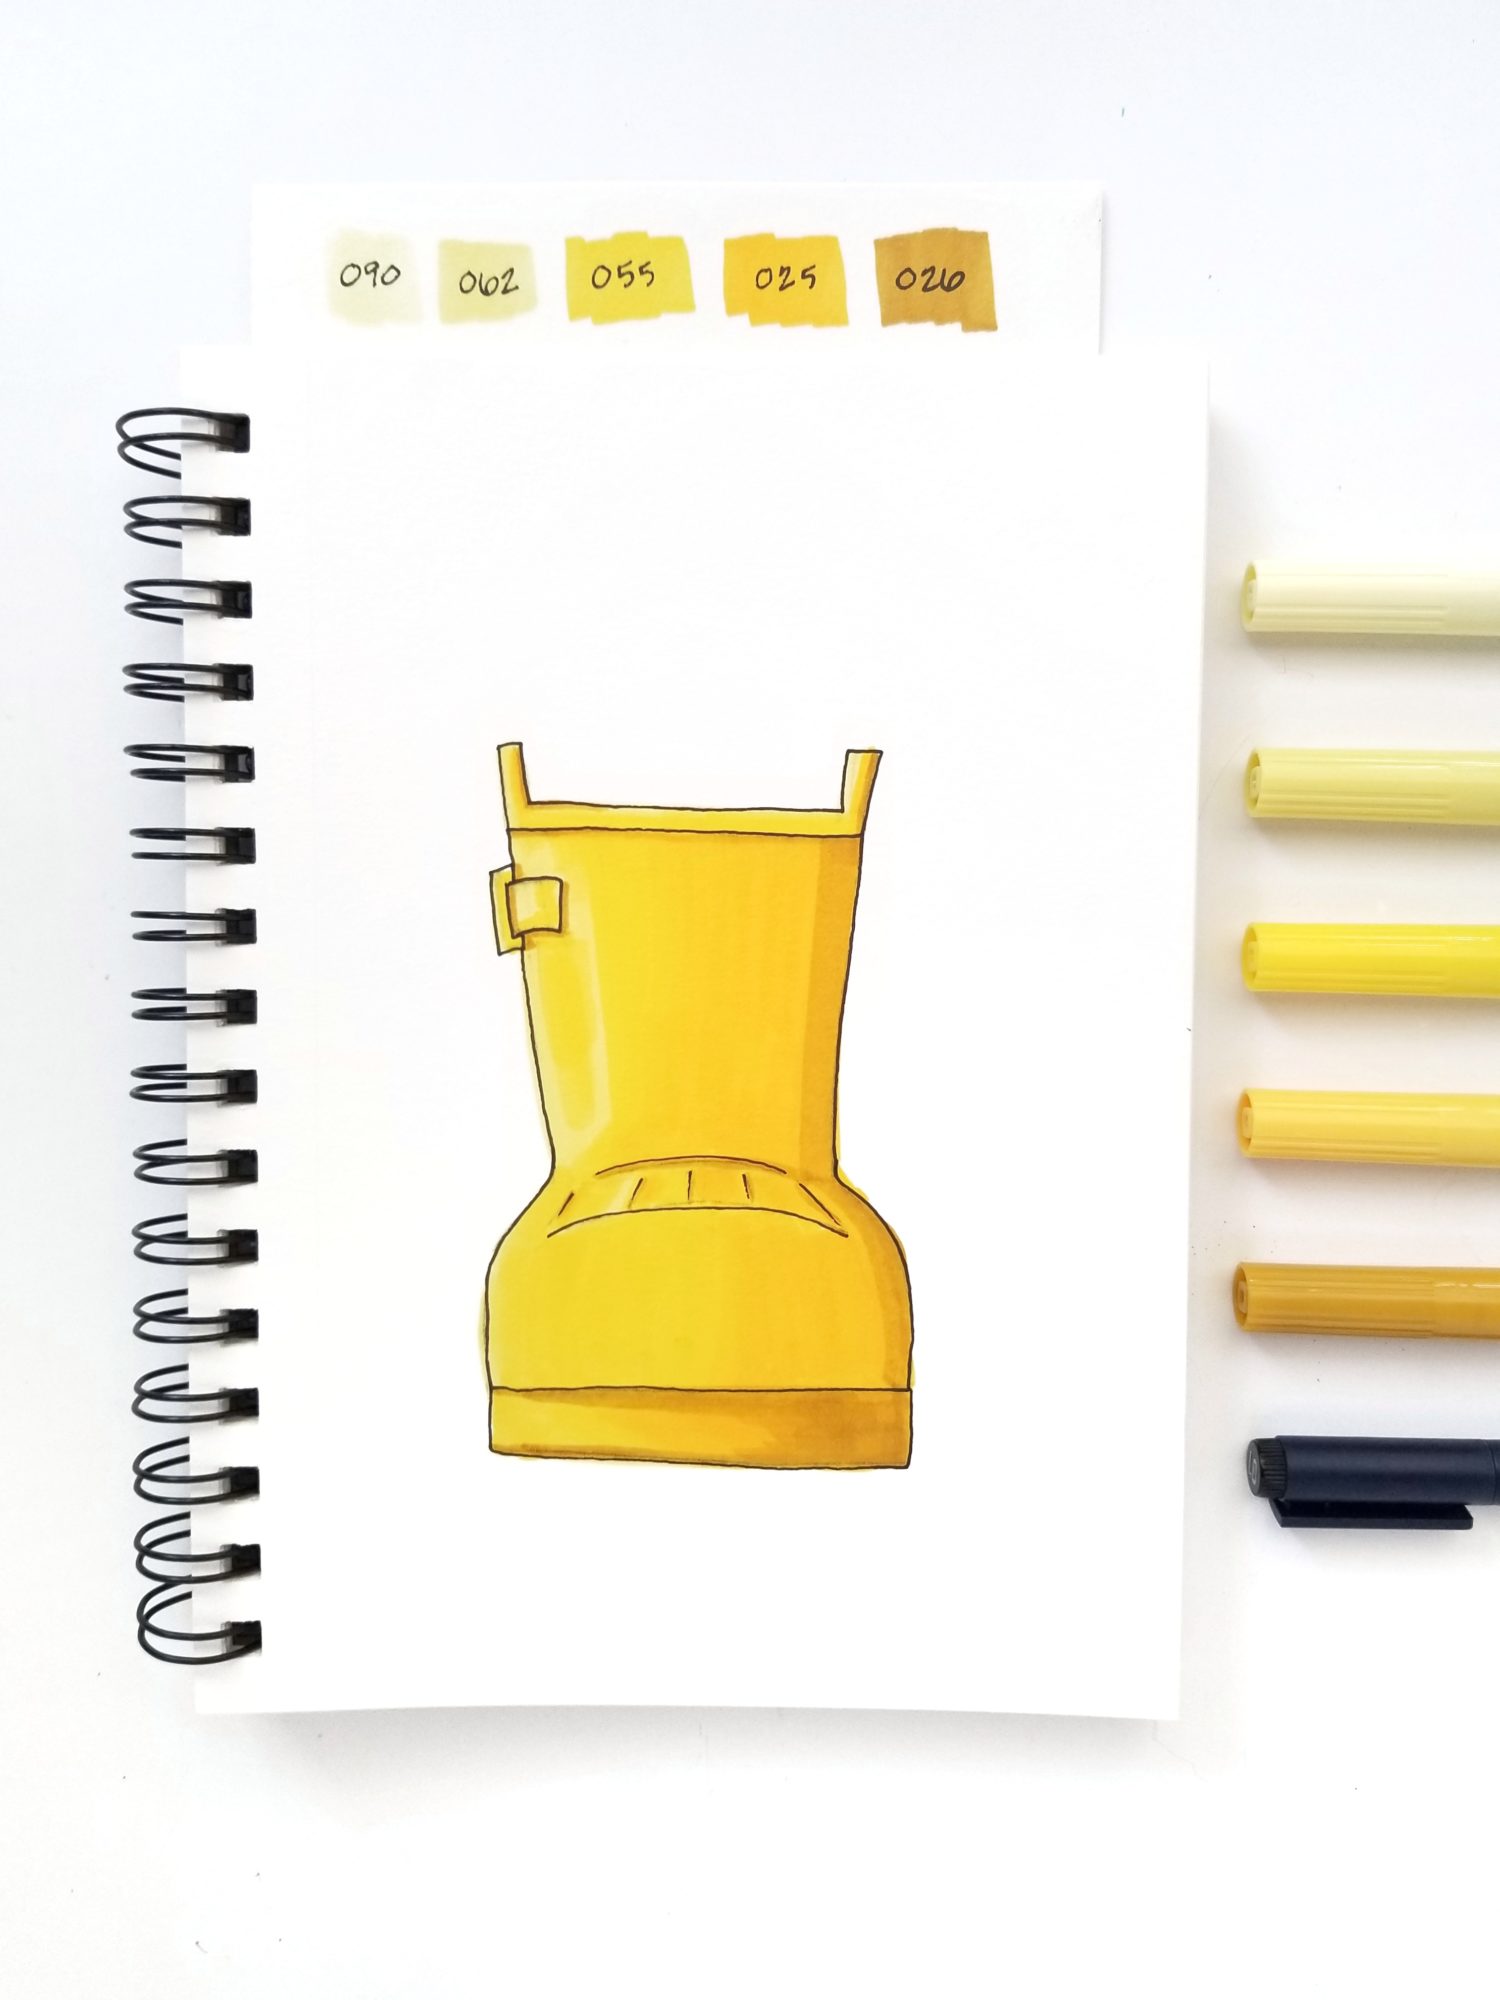
Step 2: Color Using ABT PRO Alcohol-Based Markers
One way to bring the rain boot to life is drawing a classic yellow boot using the ABT PRO Alcohol-Based Markers. First, draw a full size rain boot using your MONO Graph Mechanical Pencil. I customized this boot by shortening the shaft and adding a buckle and pull tabs. Then, trace the final sketch with MONO Drawing Pen 03. The water-based ink in the MONO Drawing Pen does not bleed or smear when colored over with the ABT PRO Markers. Next, erase the pencil marks using the MONO Zero Eraser or the MONO Eraser.
Then, use the ABT PRO Alcohol-Based Markers Yellow Tones 5-Pack to color the boot. I layered the colors from light to dark until I was happy with the outcome. Make sure to put a blotter sheet behind your paper as you work. Alcohol-Based Markers can bleed through depending on what paper you choose.
Remember to work slowly when you’re working with the ABT PRO Markers to take full advantage of the controlled ink flow! For more in depth tips on using the ABT PRO Markers, check out my post Getting Started with ABT PRO Alcohol-Based Markers.
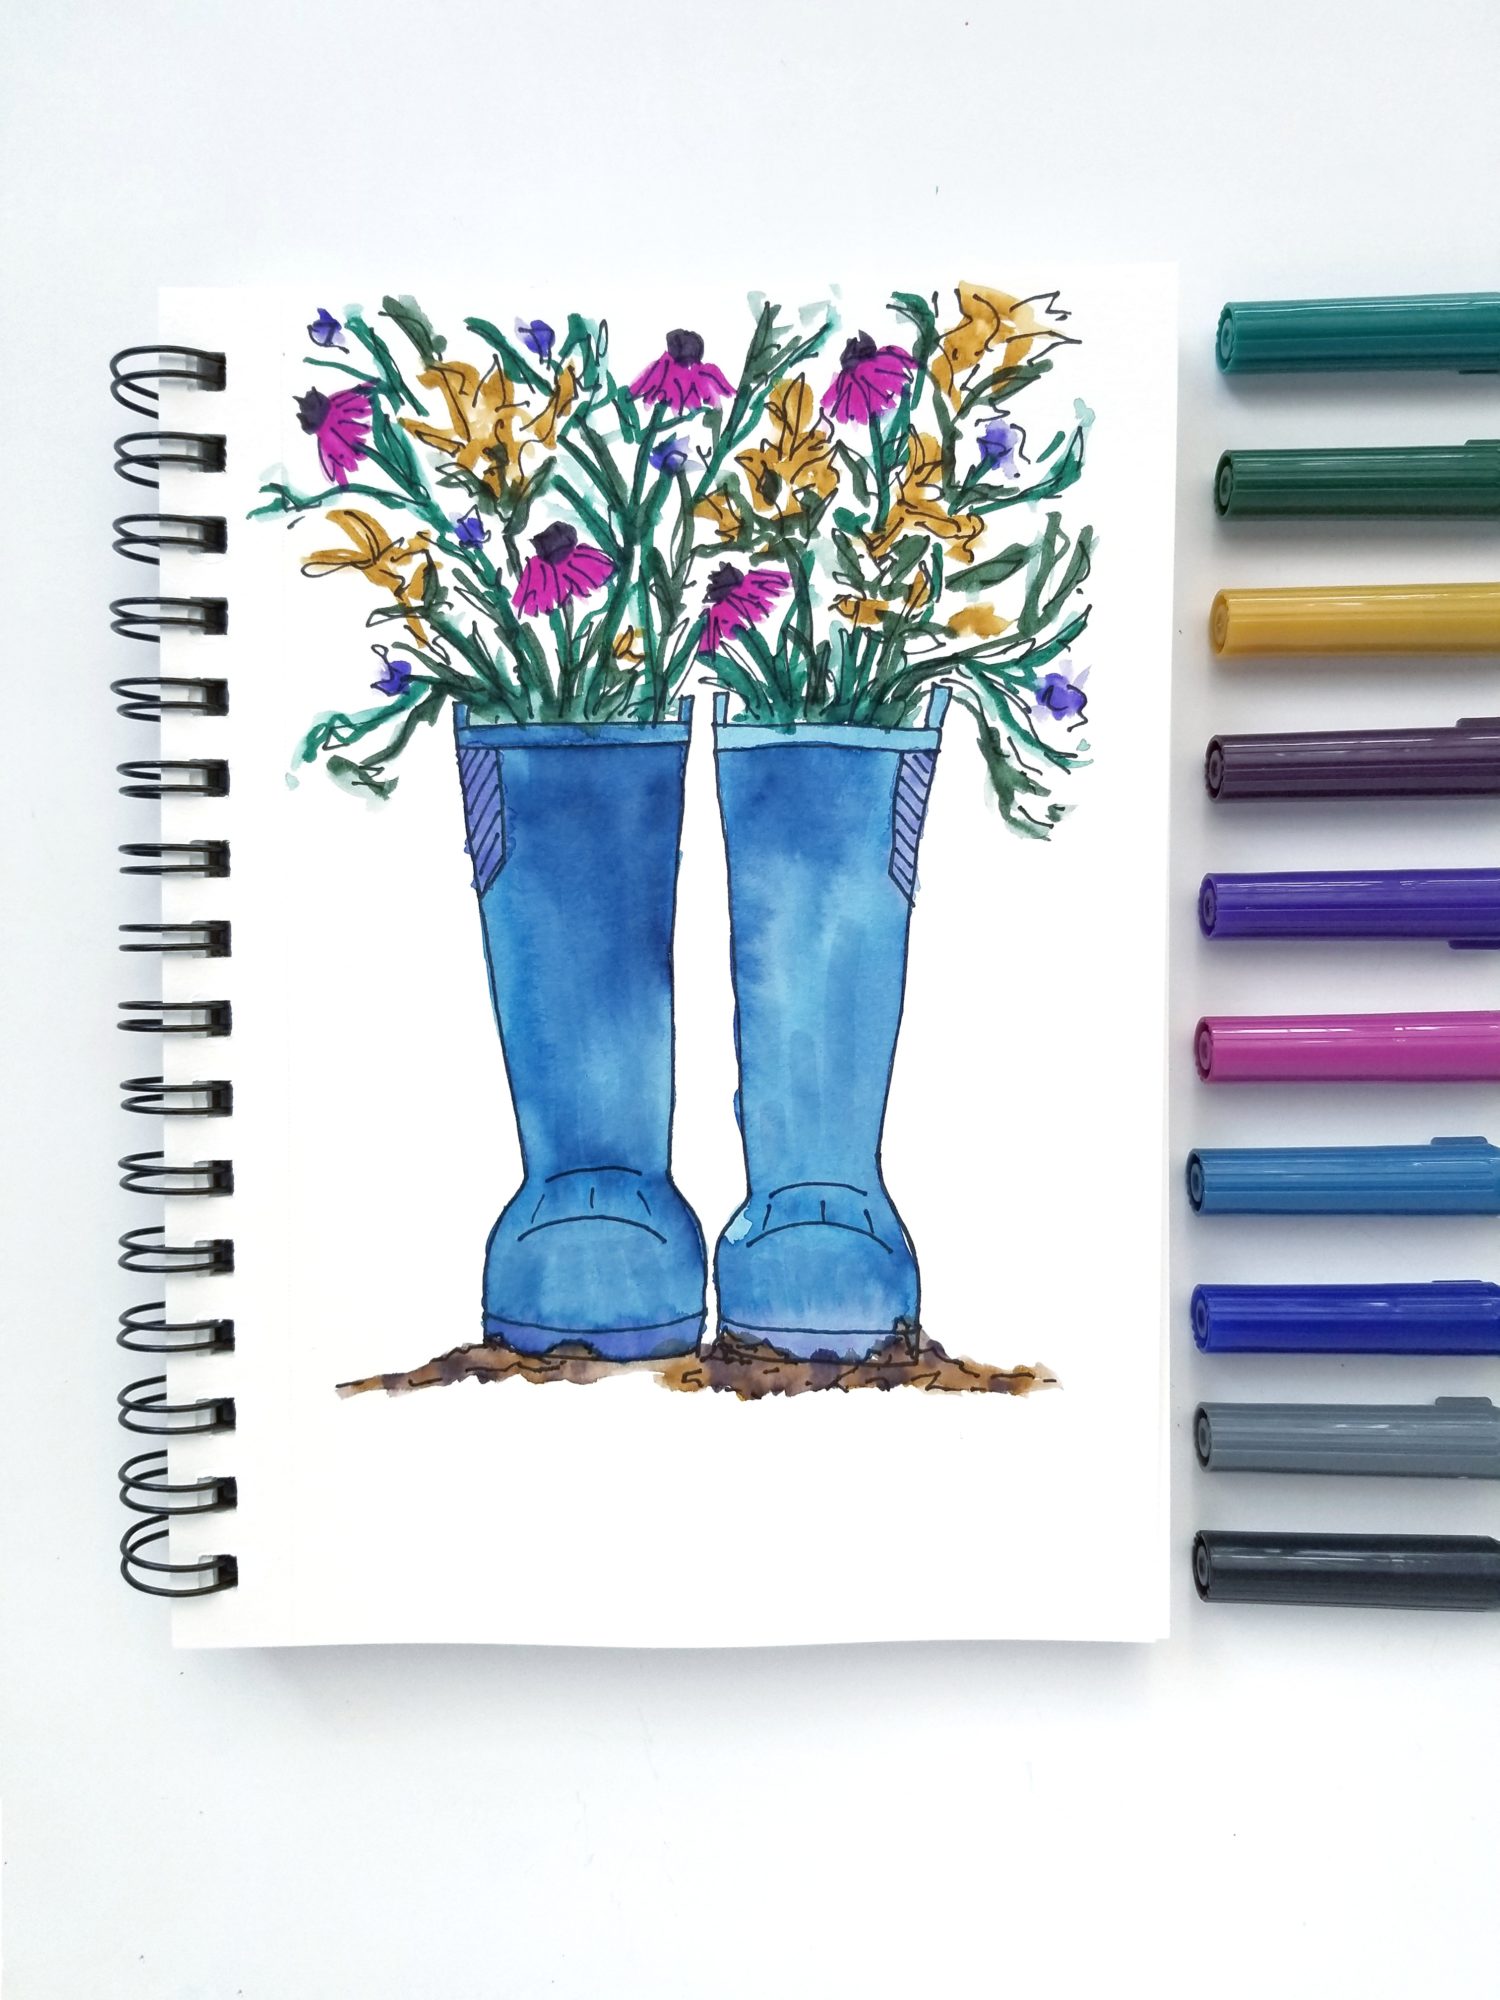
Step 3: Paint Using Dual Brush Pens
Another way to draw rain boots it to water color them using Dual Brush Pens. Start by drawing a rain boot and tracing it using the MONO Twin Permanent Marker. The ink in the MONO Twin Permanent Marker will not bleed or smear when colored over using the Dual Brush Pens or a Water Brush. I customized this boot by making it a pair and adding elastic to the shaft. I also added a bit of dirt below the boots. Do not draw the flowers yet.
Next, use the Dual Brush Pens to add some color to the boot. Use the Medium Water Brush to add a little water to the page and create a watercolor effect on the boots. While that dries, use the Dual Brush Pens to add flowers coming out of the boots. Then, use just a wet Water Brush to lightly hit a few spots on the flowers. I left some plain marker and some watercolor areas in the flowers for more texture. I also add color below the boots for some dirt at this point and added water to watercolor it. Once the watercolor is dry, use the fine side of the MONO Twin Permanent Marker to add a little more definition to the flowers.
For an in depth tutorial on painting just the flowers, check out my post Stress-Free Watercolor Florals.
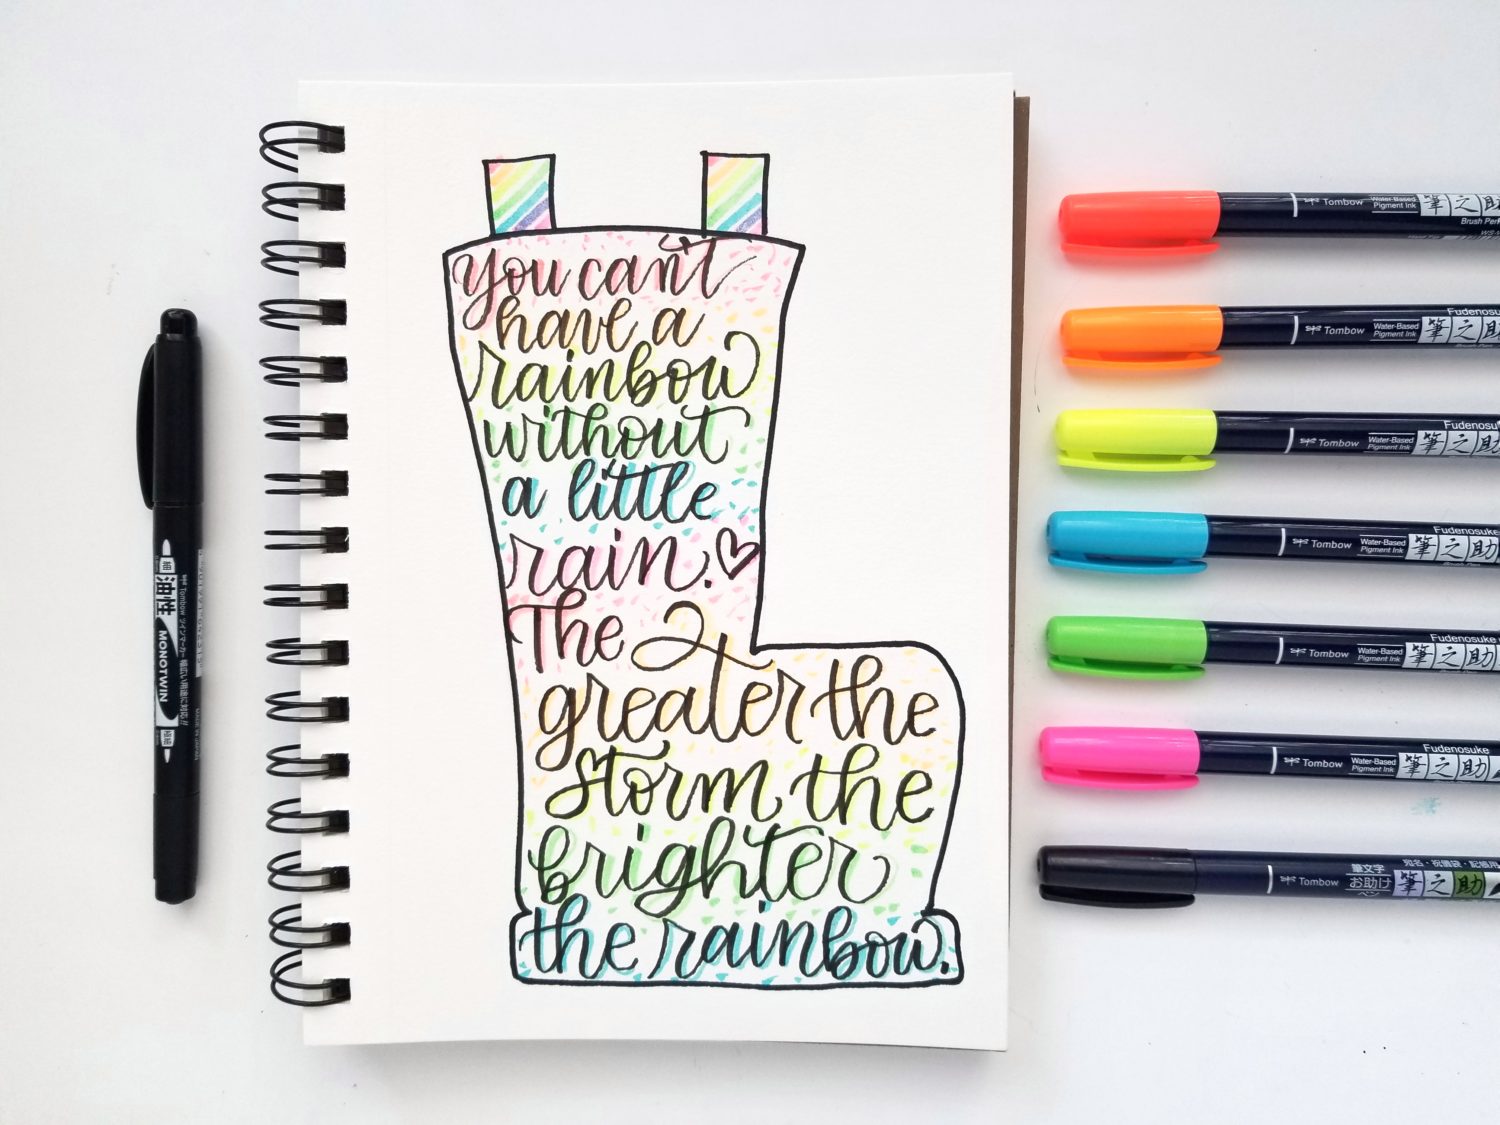
Step 4: Lettering Using Fudenosuke Neons
A third way to draw rain boots is to create a silhouette and fill it with lettering. To create this look, start by drawing the outline of a rain boot using the MONO Graph Mechanical Pencil. I customized this boot by angling it to give more room for lettering. Do not trace the pencil silhouette just yet.
Next, choose your text and letter it using the Fudenosuke Hard Tip Brush Pen. Then, add a neon shadow to the lettering by adding a neon stripe of color to the right side of each downstroke. This allows the lettering to pop while still using the fun Neon Fudenosuke Brush Pens. Next, use the Neon Fudenosuke Brush Pens to add embellishment and fill the rest of the boot. Finish by tracing the boot with a MONO Twin Permanent Marker and erasing any pencil marks.
For more beginner tips on lettering, check out by post 5 P’s of Brush Calligraphy and Hand Lettering.
Thanks for following along! If you use these techniques to create your own rain boots, be sure to tag @tombowusa and @graceannestudio so we can cheer you on! For more coloring and drawing inspiration, check out these posts:
- Create Your Own Coloring Pages with Back to School Supplies
- Mixed Media Coloring using Tombow Dual Brush Pens
- 5 Simple Tips to Improve your Drawing
Happy Drawing!
Grace