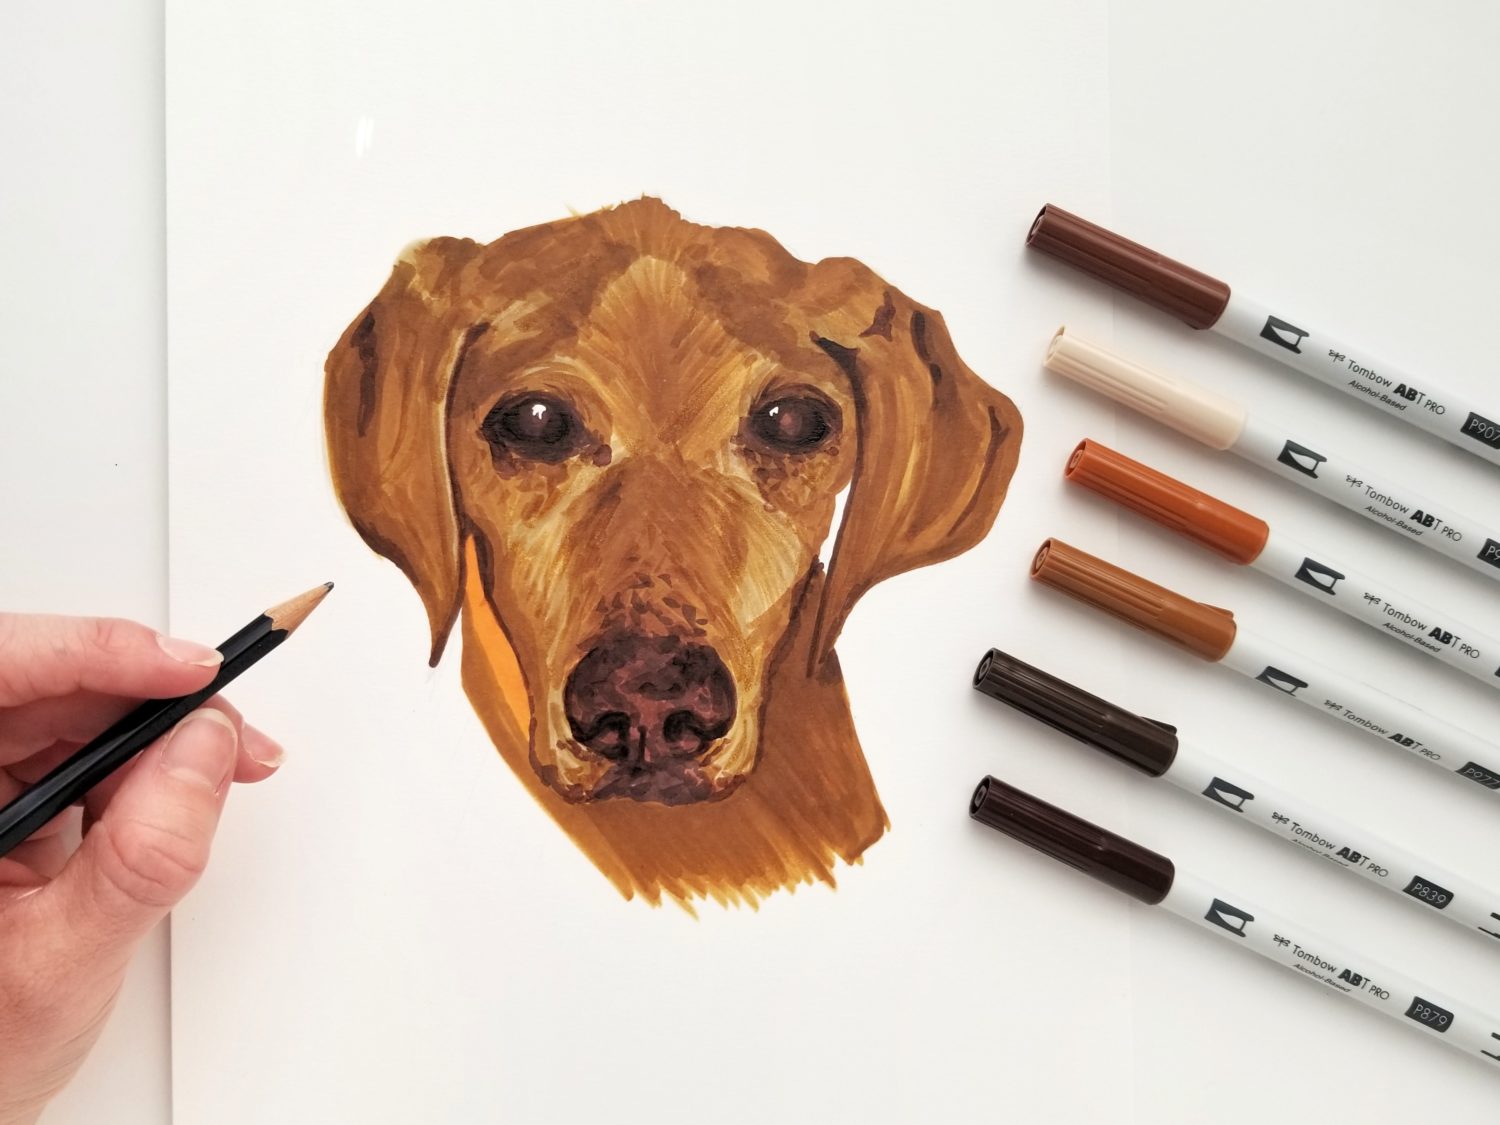
Hi y’all! It’s Grace from Grace Anne Studio. This week, the Tombow Design Team is celebrating our favorite new products from 2019. My absolute favorite is the new ABT PRO Alcohol-Based Markers. This is not only a new product for Tombow, but a new medium for me! Today, I’m going to share 5 lessons I learned when I started with using the ABT PRO. (And we’ll make a pet portrait while we’re at it!)
Supplies
- Tombow ABT PRO Alcohol-based Art Markers
- Tombow MONO Drawing Pencil – 4H
- Tombow MONO Eraser
- Tombow MONO Zero Eraser
- White gel pen
Lesson 1: Test Everything
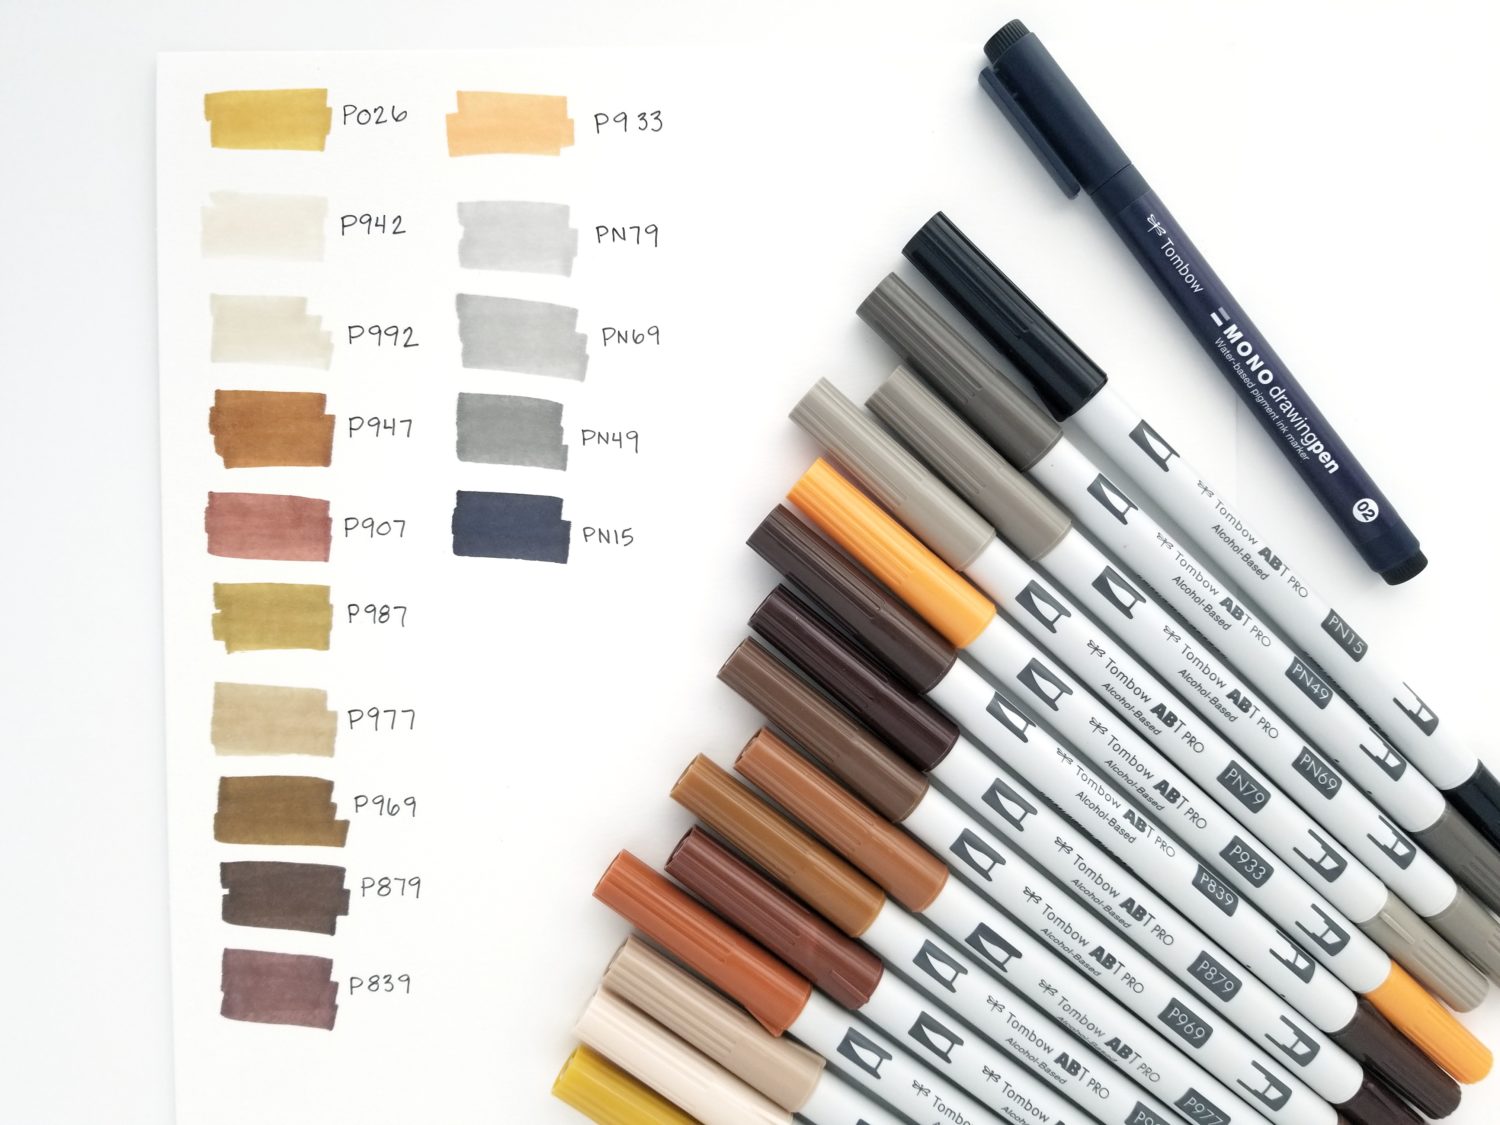
It is so important to test everything you use for a new project, especially when you are new to a medium! Always test your markers, paper, pens, erasers and anything else you plan to use. What works for one person may not necessarily work for your style or process. So, test everything to be safe!
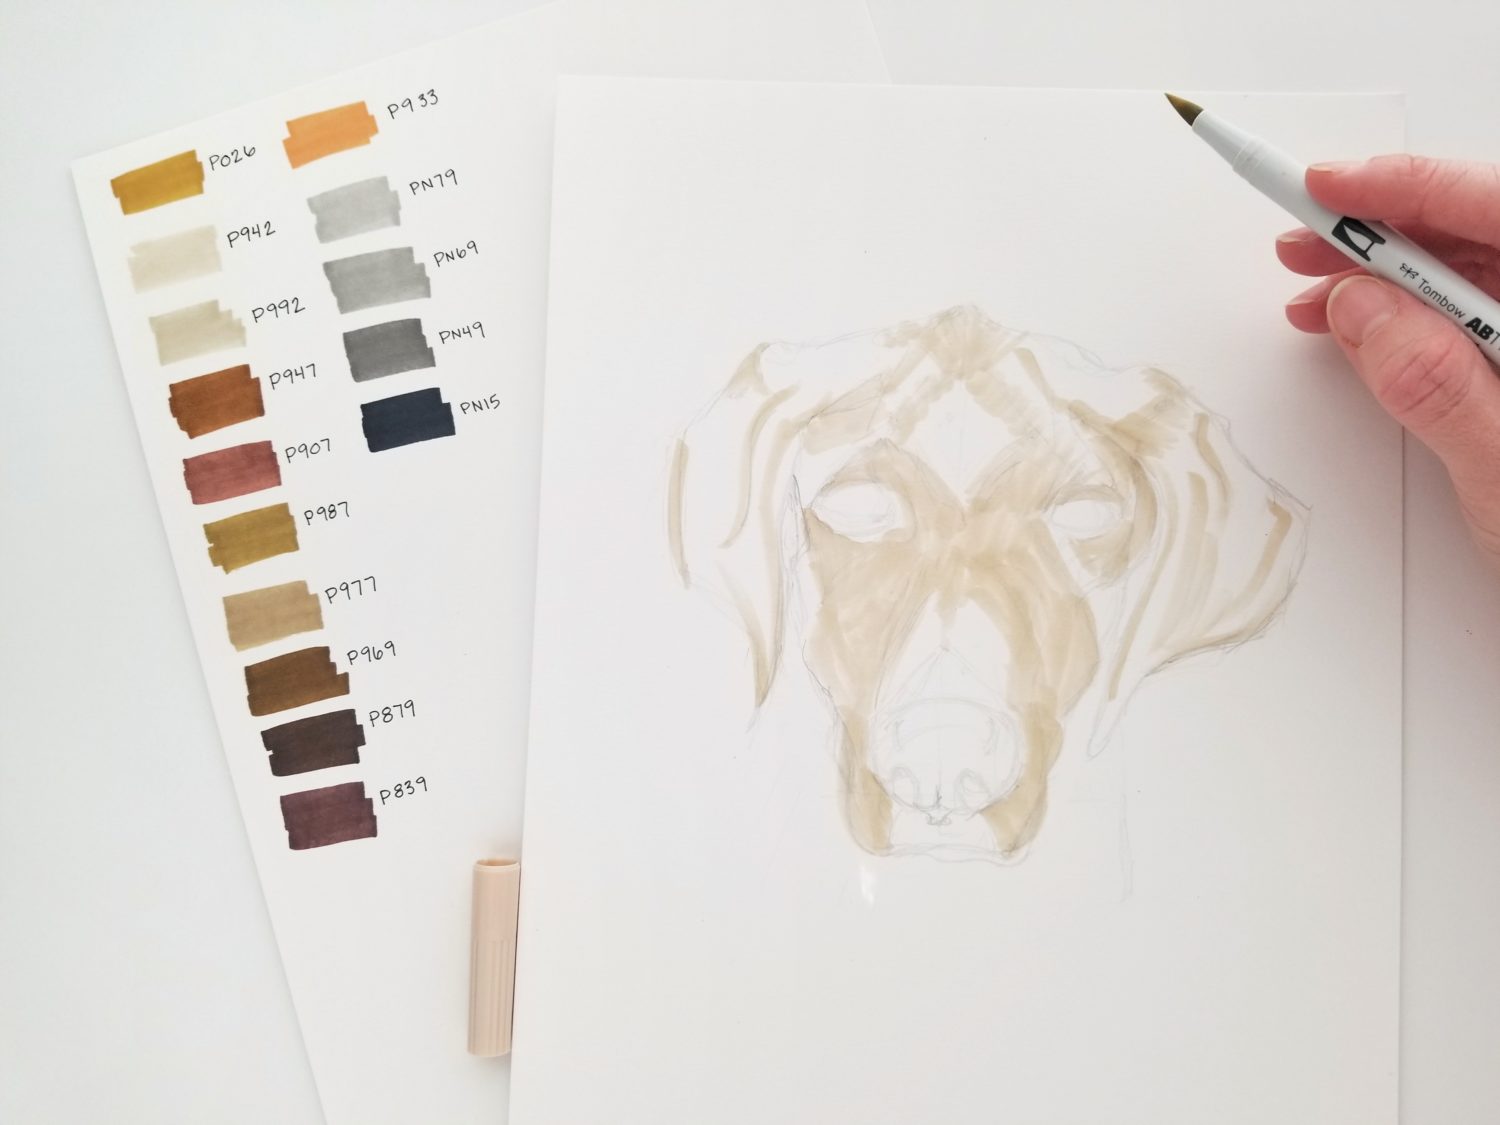
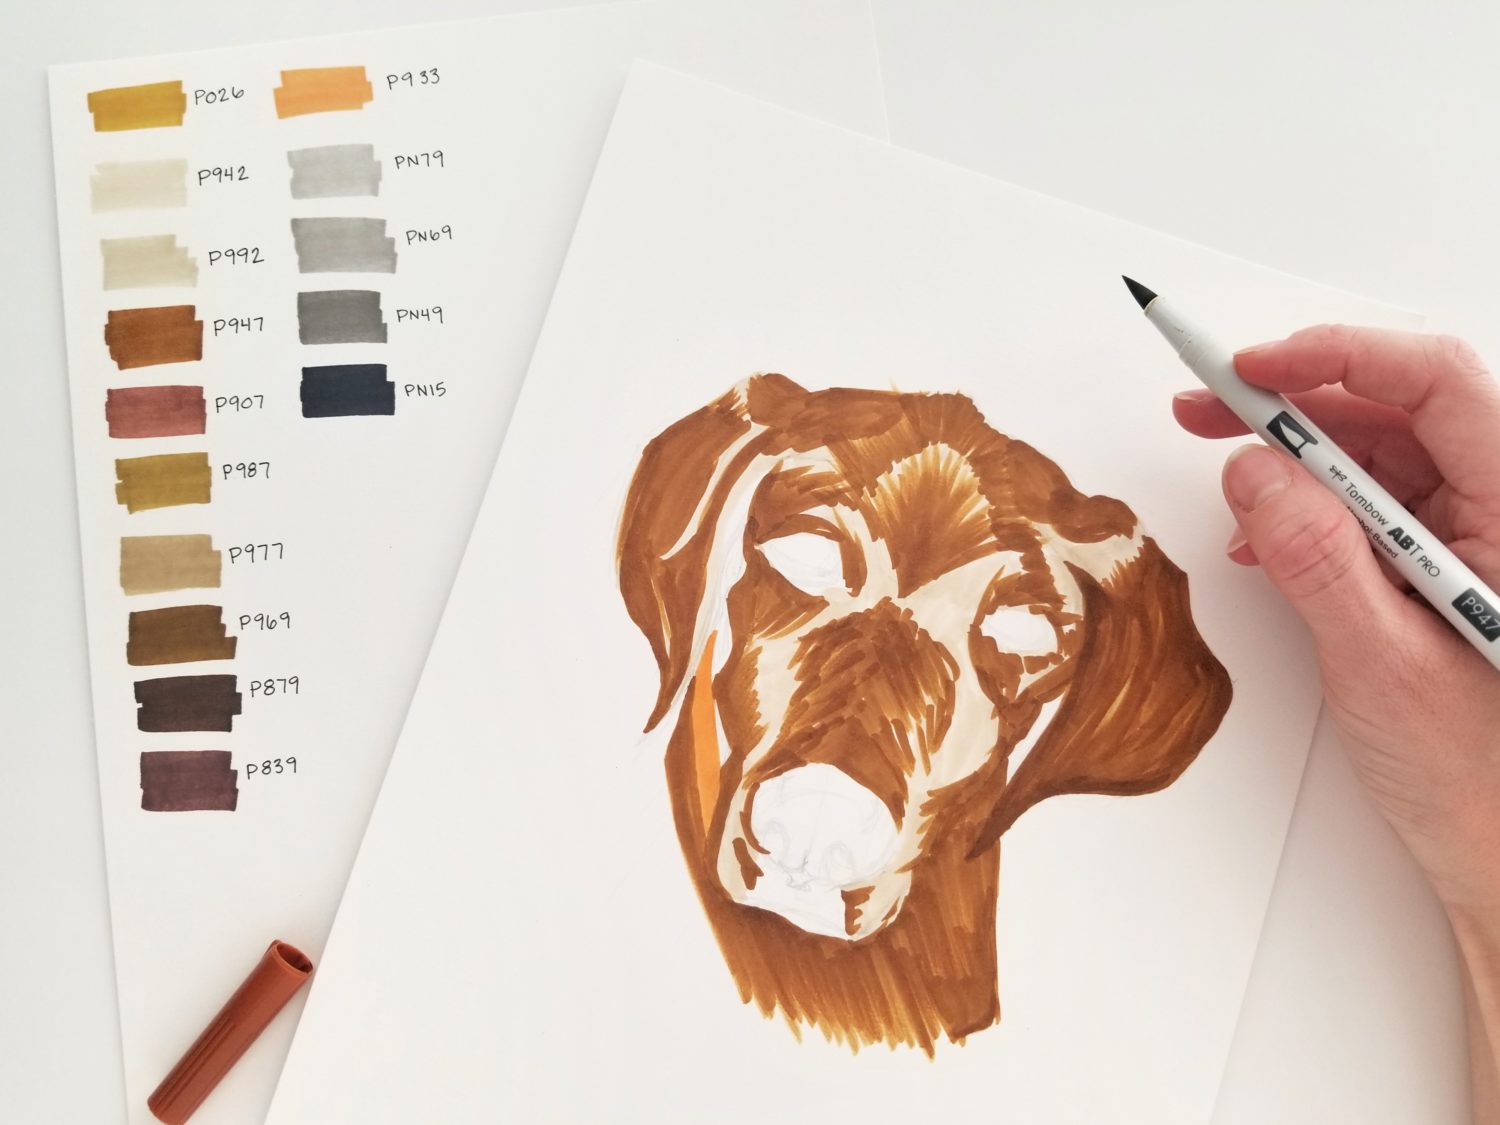
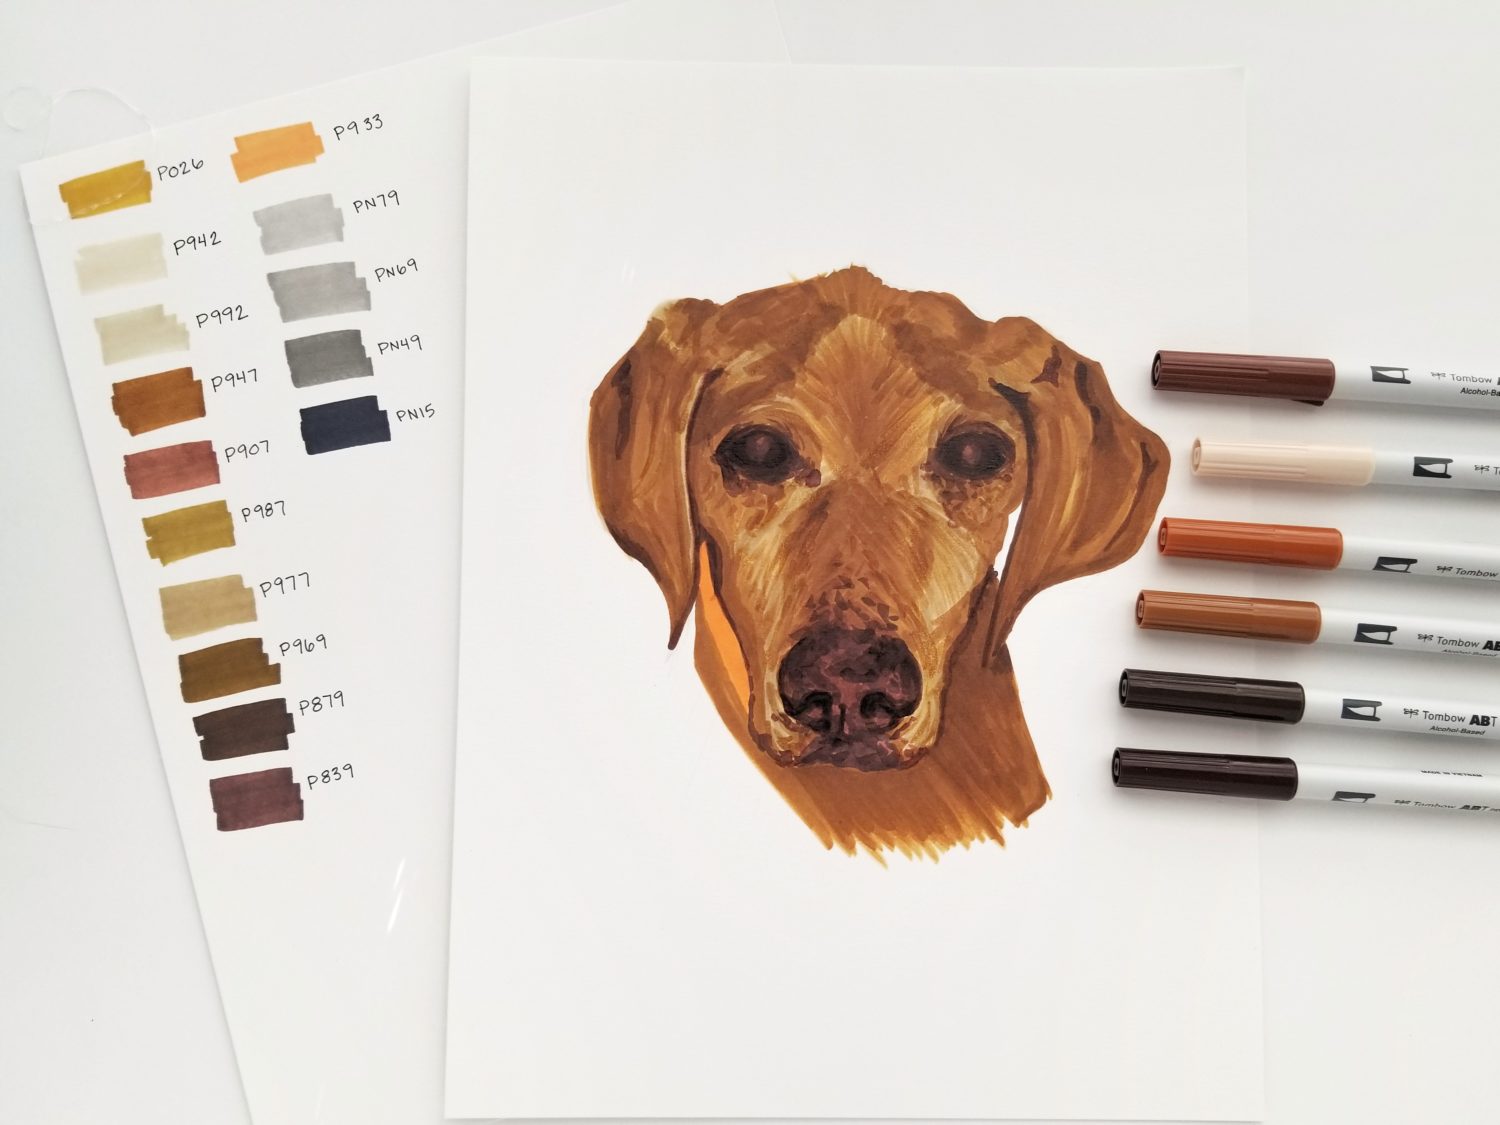
Here I swatched my colors for a pet portrait. I have all of the ABT PRO colors swatched on a large reference sheet, but I swatched them again for this project to see how different colors look right next to each other. I chose P942, P977, P947, P907, P933, P879 and P839.
Lesson 2: Layer with the Same Color
Alcohol-based markers can be layered without the paper piling. With that in mind, create more vibrant and saturated color by layering the same color on top of itself. This creates depth with just one marker! Be sure to lay another piece of paper behind your art. The markers will bleed through after lots of layering!
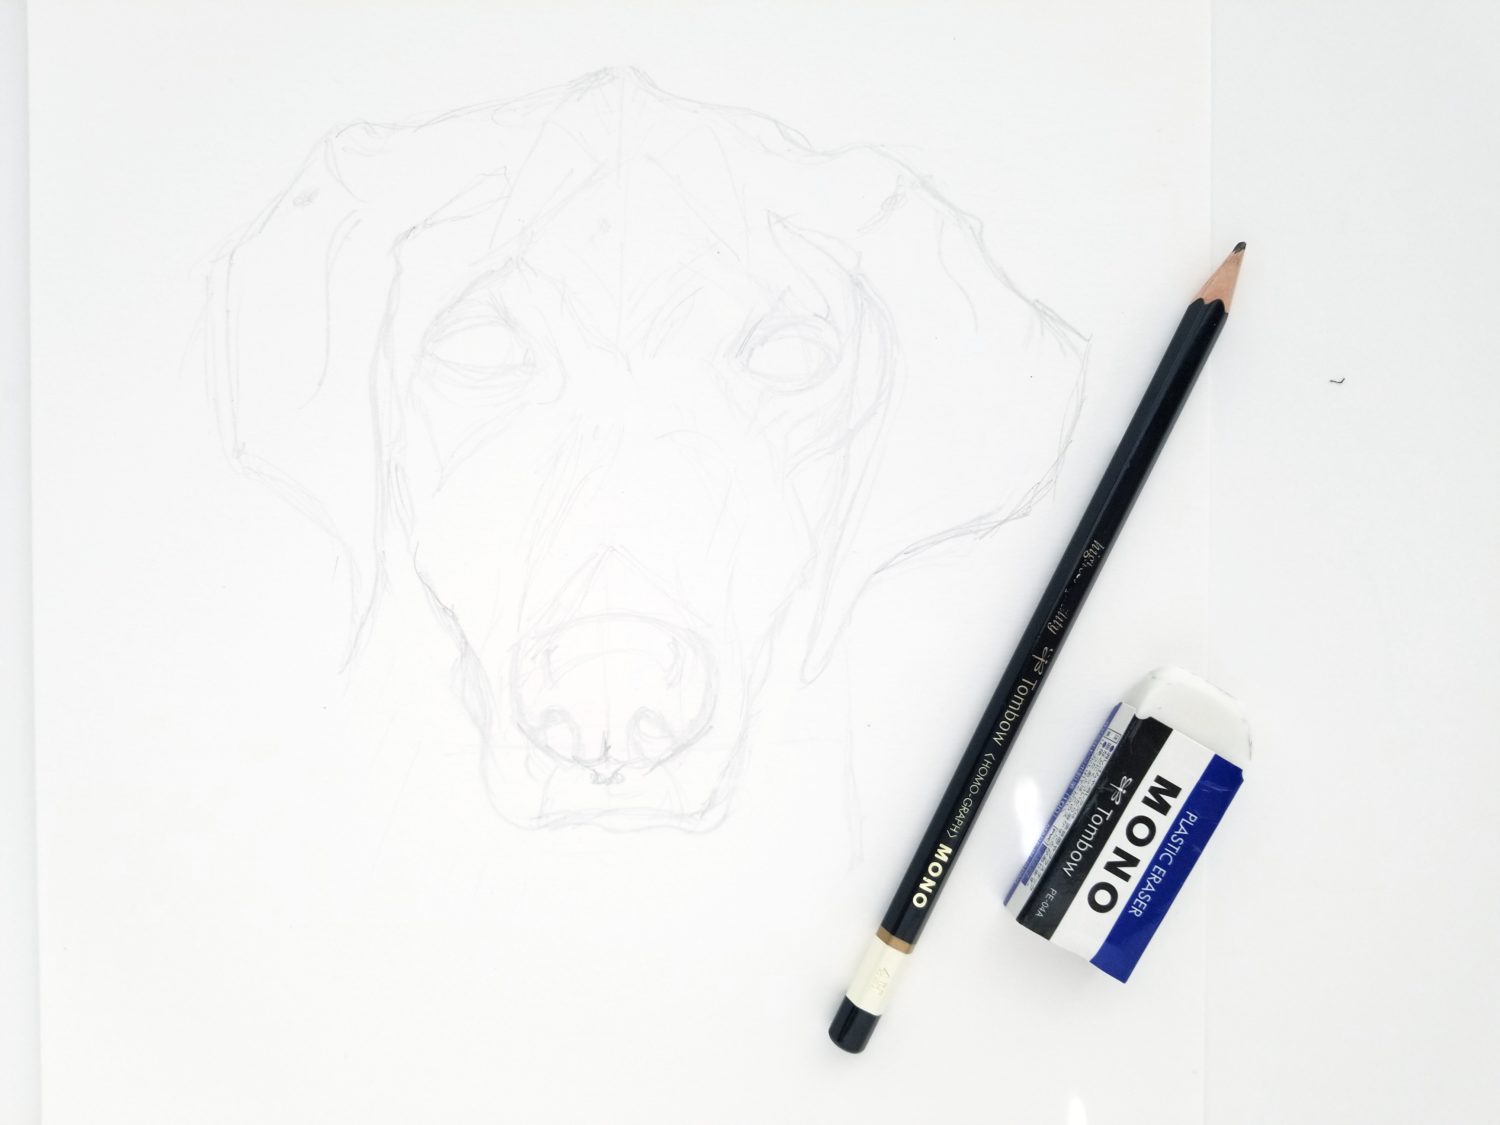
For this pet portrait, I started with a pencil sketch. In the sketch, I blocked in areas of light and dark to color in later. Then I used P942 to block in the lighest areas. I layered back over them with P942 to begin adding depth.
TIP: Pay attention to the direction of your pen strokes. While alcohol markers can produce seamless blends, this is best achieved by layering color in the same direction. For this pet portrait, I followed the direction of the fur.
Lesson 3: Layer Colors from Light to Dark
Once your light base layer is down, layer with a darker shade. This will start to give shape to the art, and when you’re creating shape, it’s best to work light to dark. You can always add color to darken it, but you cannot lighten it.
I used three main colors for this pet portrait. The light color is P942, midtone color is P947, and the dark color is P839. The other colors will be used for small details and blending. Here I layered P947 to shape the pet portrait.
Lesson 4: Blend by Layering
Once your shape is blocked in from light to dark, it’s time to blend! When you blend with alcohol markers, think layering, not mixing. Use lighter colors to layer and soften the edges. This may take several layers of lighter colors to be successful.
Next in the pet portrait, I layered P977 to blend P942 and P947. Then, I layered P942 to continue blending and shaping the portrait.
TIP: When you’re using the ABT PRO, use a light hand to layer. This will prevent the paper from getting too saturated too quickly.
Lesson 5: Work Slowly
When using the ABT PRO markers, work slowly; both in the initial application of the marker and in layering. The ink needs time to settle and blend. If you work too quickly, you can easily overwork and over-saturate your art.
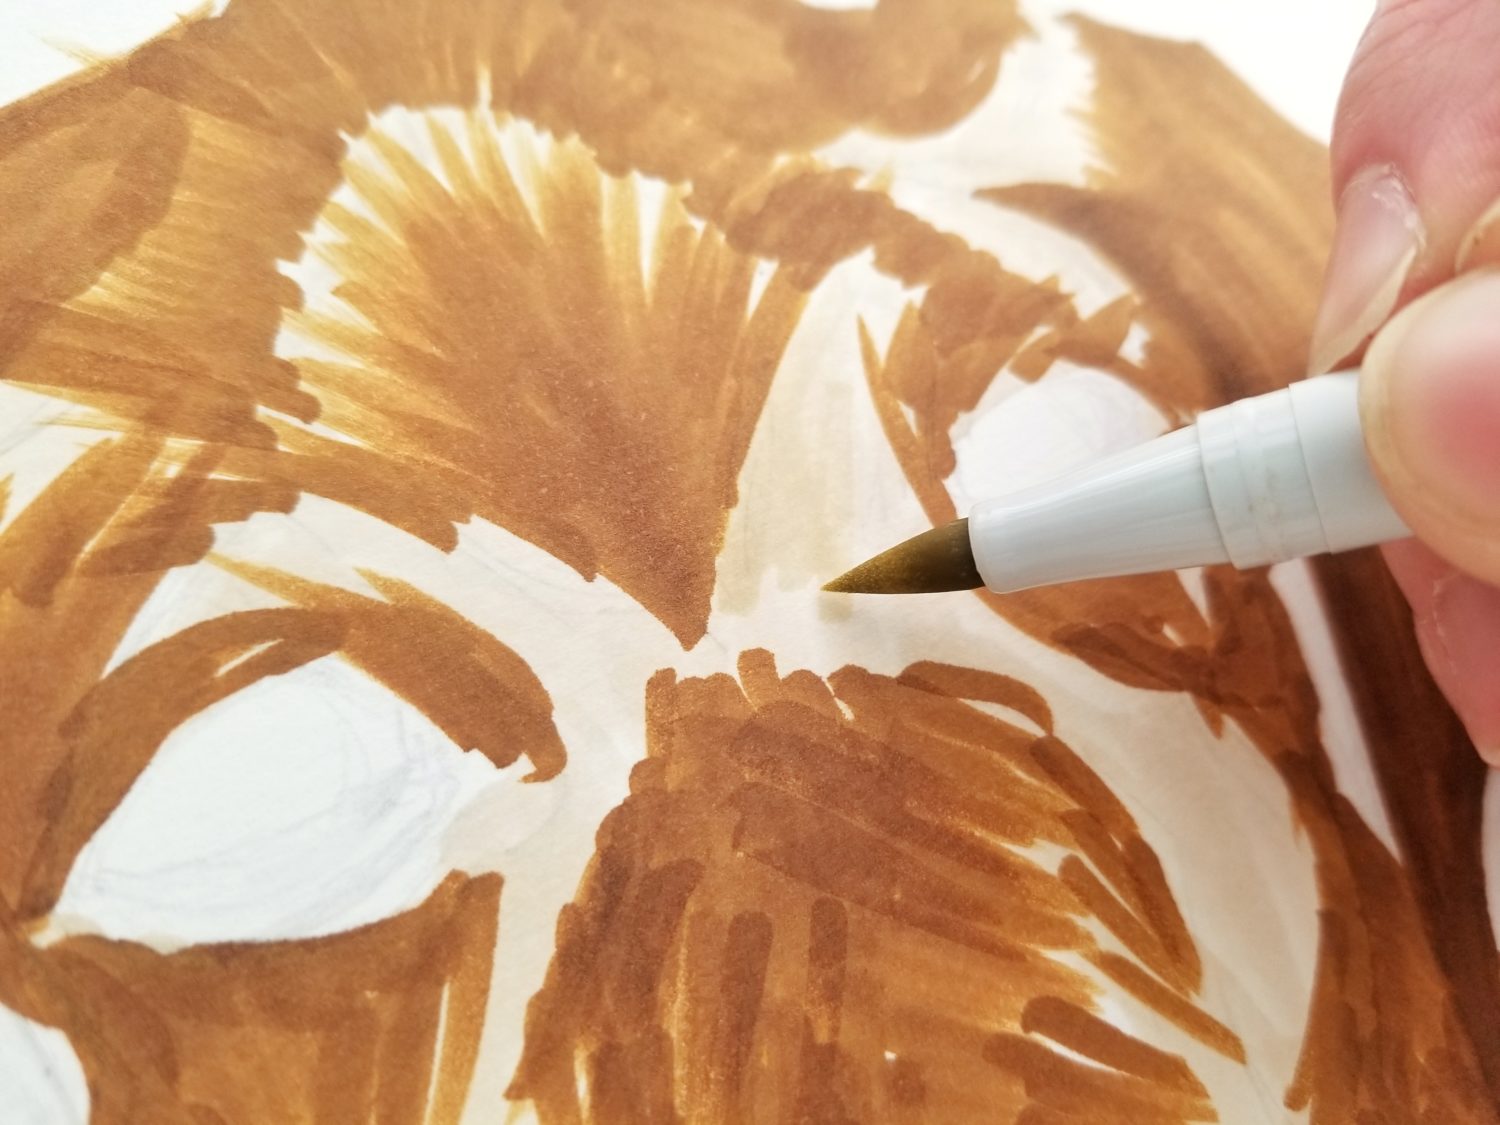
To finish this pet portrait, I used the fine tip of the brush tip to add details around the eyes and nose. I also used the remaining ABT PRO to add a few shadows and finish blending the fur. Finally, I used a white gel pen to add a reflection to the eyes. (finished portrait at the bottom of this post.)
TIP: The flexible brush tip allows for a huge range of brush strokes. It’s great for tiny details, but it can also take a lot of pressure. Don’t be afraid to experiment with using it in new ways!
Thanks for following along today! I hope these lessons learned help you get the best possible start with ABT PRO Alcohol-based Markers. If you use these tips to create with your ABT PRO MArkers, be sure to tag @graceannestudio and @tombowusa on social media so we can cheer you on! For more tips for creating with the new ABT PRO Alcohol-based Markers, check out these posts:
- Six Tips for Coloring Skintones with ABT PRO Markers
- Blending with the Tombow ABT PRO Alcohol Markers
- Create a Lily with the New ABT PRO Markers
Happy creating!

Pingback: Mirror Affirmation Cards for Sharing Art Matters - Tombow USA Blog
Pingback: ABT PRO Alcohol Based Markers 12pk Manga Palette Review - Tombow USA Blog
Pingback: Three Ways to Draw Rain Boots - Tombow USA Blog