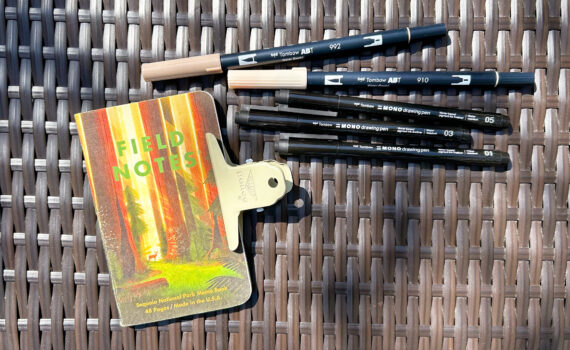
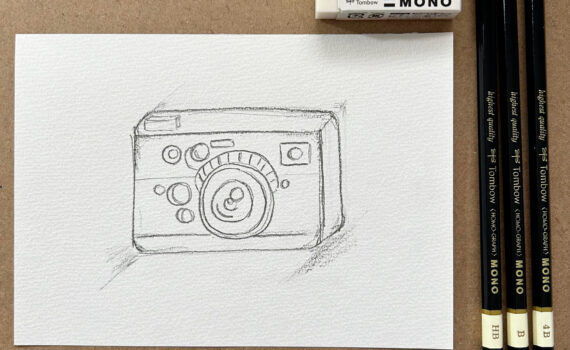
Take 2 Peanuts…By Debbie Fisher


I used Tombow’s Mono Adhesive Power Bond to adhere all the papers to the tin and Tombow’s Mono Adhesive Permanent to adhere paper to paper.
Thanks for looking!
This week we are showcasing the color Tangerine Tango, which is the color of the year!! Orange is my favorite color and this hue is my second favorite!! Some of my plans for this year is to do more Home Decor pieces. I moved to the US on October and a lot has happened since then, leaving me very little time to make more Home Decor. In my house back home my daughter had a mural and her room didn’t need much more to be cute. Now she has the whitest walls in the world and is kind of sad. One of my projects for this year will be to turn that plain white room into a nice and fun environment. I bought this birdhouse with the idea to turn it on a nice decoration.
The first thing I did was testing the Dual Brush Pens on the bottom of the birdhouse and I remember that last week, Sarah gave us a little tip about using the Mono Aqua Liquid Glue first, letting it dry and then using the Dual Brush Pens. She used chipboard but it was worth a try and it worked the same. Using the Mono Aqua Liquid Glue before coloring the birdhouse made it much brighter. I used the Mono Aqua Liquid Glue on the parts I was going to color with Dual Brush Pens and let it dry. I did super fun laundry while I waited so you probably don’t need to wait overnight. Then I colored the Tangerine and Green parts and let them rest for a few minutes and used a little bit more of the Mono Aqua Liquid Glue to seal it. After it was dry I measured as best as I could the parts that I was going to cover with paper leaving just a tiny tiny bit extra so I could sand it down later. I used my awesome Mono Multi Liquid Glue to glue the paper on the house. The broad tip helped me spread glue across the surface easily. If there was lots of excess on the paper I trimmed it down with a craft knife and then I sand it down. For the roof I used 7 layers of paper stripes and a scalloped border punch. For the front of the house I used a border punch to make a fence-like detail . I also used a die cut, a little detail to give the illusion of a tiny window and 3 handmade flowers that I made with felt, pearls and my Mono Multi Liquid Glue.
I loved using the Dual Brush Pens instead of paint, it looks more like a stain which makes it a little bit more realistic and shiny!! I loved all these bright colors together!! Hopefully the year 2012 will be bright
This was such a fun project!! It made me feel like a kid again!! I hope you’ll give Home Decor a try this year!!
I hope you liked this project!!
Take Care!!
the color of the year…tangerine!funny thing, i don’t have very much of this color! looks like i’m going to need to pick some up!
i liked using this color with these pictures from this past summer. they needed a bright vibrant color background to set them off.
i used a Tombow Dual Brush Pen to color in a title i printed. there is something therapeutic for me to sit and color, i don’t mind it at all.i went through the first time with #885 and then back over it with a blender pen to fill in the letter and soften the edges.
then using Tombow MONO Adhesive Removable Runner i adhered a stencil to a piece of cardstock. the cardstock was a few shades lighter than the background, and went over the edges of the stencil with Dual Brush Pen #885.
i used Tombow MONO Permanent Adhesive Runner to put the whole thing together.
if you enjoyed this post follow us on facebook and twitter!
Hi there! This week our theme is “What’s New”. Each year Pantone comes out with the new “in” color for the year and for 2012 it is Tangerine Tango. Today I am going to share a card with you that I created using a monochromatic color scheme and a pretty little flower. I used the Tombow Stamp Runner-Permanent Adhesive , Tombow Power Tabs and Dual Brush Pen #885 (Warm Red).
I inked up the sentiment with the Warm Red #885 Dual Brush Pen and stamped it onto some cream cardstock. I assembled the card layers using the Tombow Stamp Runner, leaving the top right corners adhesive free. You will roll these down for a little added dimension to your card. Next, you will use the stamp runner to apply adhesive to the backside of your ribbon/trims and lay them across the card. I didn’t have the right color of pearls, but no worries. I used the Dual Brush Pen (#885) to color them for a perfect match. Give it a try, you will be amazed at how easy it is to color match using the Dual Brush Pens.

Please join us on:
http://www.facebook.com/tombowusa and
http://twitter.com/#!/tombowusa

If you enjoyed this post please follow us on
i have lost count as to how many organizing ideas i have tried out. well, add this to the countless number.calendars are great, but they never seem to give me enough room to write what i need to. or more importantly what my family needs to see.
so i thought i’d give this a try. i made magnets for each day of the week. then i put them on my fridge with a piece of paper under each one. it is easier for everyone to see what is going on that day, who is going where, and what needs to be done.

crossing my fingers for an organized 2012 (while still using my organizational binder, and my bill sorter, and my kid’s daily schedule…i told you i have tried many ideas!) to make the magnets i used Tombow Dual Brush Pens to color raw chipboard. the colors seep in nicely to the chipboard textures leaving an even and soft color.with 96 colors it is easy to find a color to match the papers i was working with. with a circle punch i made 7 circles and inked the edges with a dark brown Dual Brush Pen. then using Tombow MONO Multi Liquid Glue i layered all the pieces together -raw chipboard circle, pattern paper, marker – colored chipboard, with a raw magnet on the back. the Multi is strong enough that even the force of raw magnets will not separate the magnet and the chipboard, and tacky so it holds the paper and the chipboard well without warping or bubbling because it is too wet.
as an experiment i wanted to see what would happen if i coated the raw chipbaord with Tombow MONO Aqua Liquid Glue before coloring it with a Tombow Brush Pen. the result was a slightly more vibrant color with a shine. see the difference between the flower with Aqua and the circle without?
wishing all a HAPPY NEW YEAR and HAPPY CRAFTING!
if you enjoyed this post follow us on facebook and twitter!
Is the last ABC Week of the year!! I hope you enjoyed this year with us as much as I enjoyed being on this awesome team!! For this project I felt like doing something a little more free and for me instead of making something that needed to be perfect for my daughter or someone else. I just came across a list call 33 Ways To Stay Creative and I just loved it!! This is a must project for every craftroom or crafty friend and I think we all need to take a little something of this awesome list. It helped me a lot!!
For this project I went simple green, meaning that I used Toilet Paper Rolls for the base of this mini and then used 6×6 patterned paper and Mono Multi Liquid Glue to cover the rolls. The Mono Multi Liquid Glue also work for embellishments like the felt flower I made, the feather and of course the paper butterfly. The great thing about a mini like this is that you don’t need to buy extra stuff to make it, so if your New Year’s Resolution is to hoard less paper or embellishments this is a great project. I just used whatever I had laying around my craftroom. I used 5 toilet paper rolls and on the inside I took a 2×8 piece of cardstock and fold it in half, that way each piece had 4 pages. That was a total of 20 spaces to write the 33 ways to stay creative. I picked my favorite ten and used them for the outside of the paper rolls and the rest were displayed on the cards. Instead of printing the list or using my handwriting I used lots of alpha stickers, punch outs and my label maker. I used my Tombow Dual Brush Pens to doodle, color stamps and stamp some of my images.
I used a lot of alphas and mixed some of them up because for some reason there are never enough vowels, r or s. I also used decorative tapes, border punches and paper scraps. I used my Stamp Runner for the scraps, the stamp feature of the Stamp Runner is great for those tiny pieces of paper. I also used some free downloads to print.
I loved making this kind of inspirational project, without a doubt I’ll be making a few of these in 2012. Well, I think this project takes care of #33. Do you think you are in the mood to try some of the things of this list?
I know some Tombow Products that can help you…
I hope you liked this project!!
Take Care and See Ya Next Year!!
Did you all have a Merry Christmas? If you have a large family like I do, you may still be celebrating. We have one more gathering at my cousin’s New Year’s Eve day and my youngest son’s birthday is tomorrow, so we will be having a party then as well.
With all the Christmas projects I’ve made lately, I decided to share with you a non-Christmas looking project, even though I made these as gifts. They are so quick and easy to do…altered mini composition note pads.
**A timesaver tip: I stamp a bunch of images onto cardstock, cut apart and keep in an envelope. I take them to work when I’m going to stay at school over my lunch break and color (we only get 30 minutes for lunch, takes me 5-10 minutes to eat, so I have plenty of time to color Ü). Then when I have time, I just match the colored images to paper and create whatever.
For this particular project, I just covered the notebook with papers using Mono Adhesive Power Bond and colored the images with Irojiten Pencils. These are so handy to have extra on hand so that you have a little something for someone when you need it.
I hope you enjoyed this quick and easy project. I would like to wish you a very Happy New Year! We have some fun things to share with you next year starting just next week. Be sure to come back and invite your friends too!
Thank you for stopping by,
If you enjoyed this post, we would love it if you would follow us on:
http://www.facebook.com/tombowusa
http://twitter.com/#!/tombowusa

If you enjoyed this post, we would love it if you would follow us on:
http://www.facebook.com/tombowusa
http://twitter.com/#!/tombowusa


