
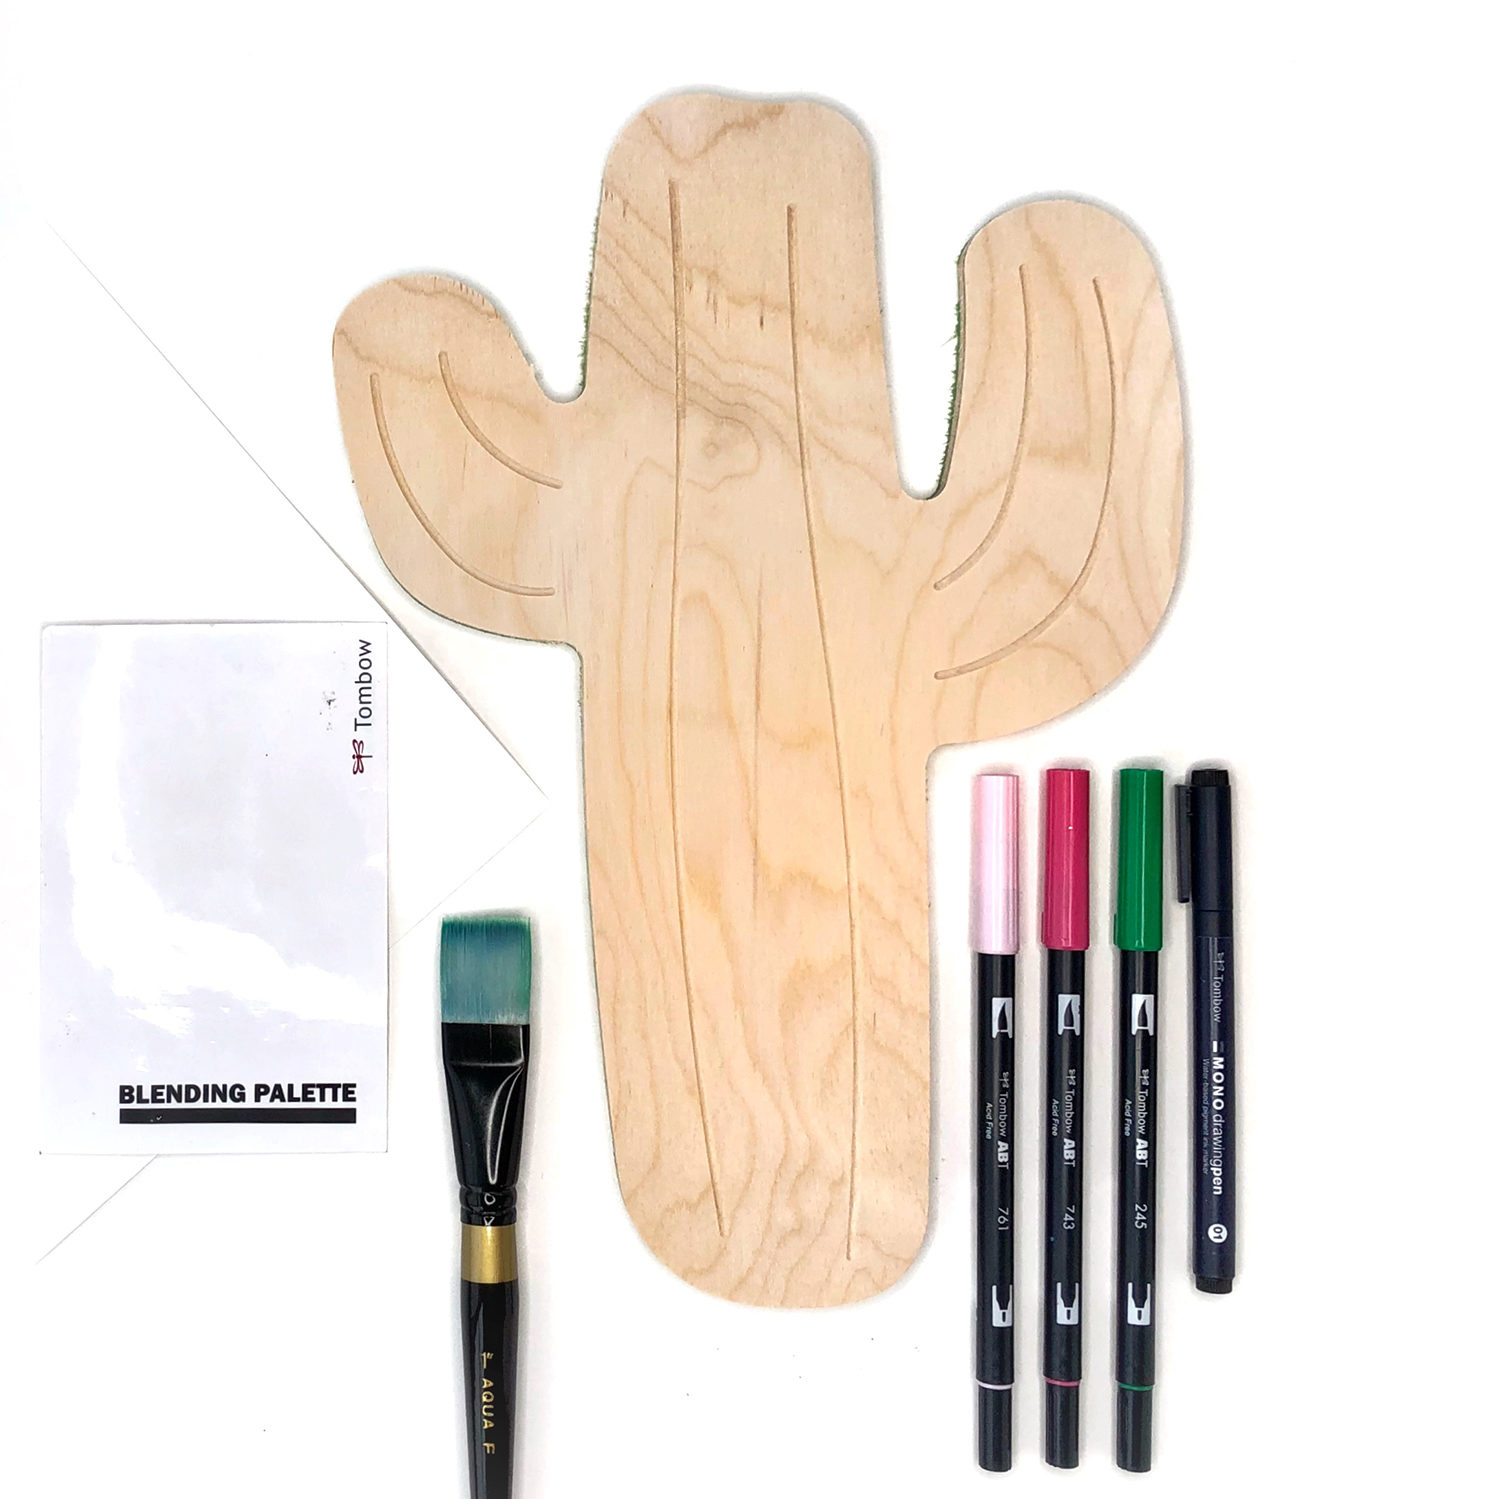
Hi, Jessica Mack from BrownPaperBunny here! This week I’m going to show you how I created these bright playroom decor pieces with Walnut Hollow and Tombow products. Here’s what you’ll need to get started:
Supplies:
- Cactus Shape from Walnut Hollow
- Trapezoid Shelf from Walnut Hollow
- Tombow Dual Brush Pens
- Paint Brush
- Tombow Blending Palette
- Watercolor Paper
- Tombow MONO Aqua Liquid Glue
- Scissors
- Tombow MONO Drawing Pen
- Tombow Xtreme Tabs
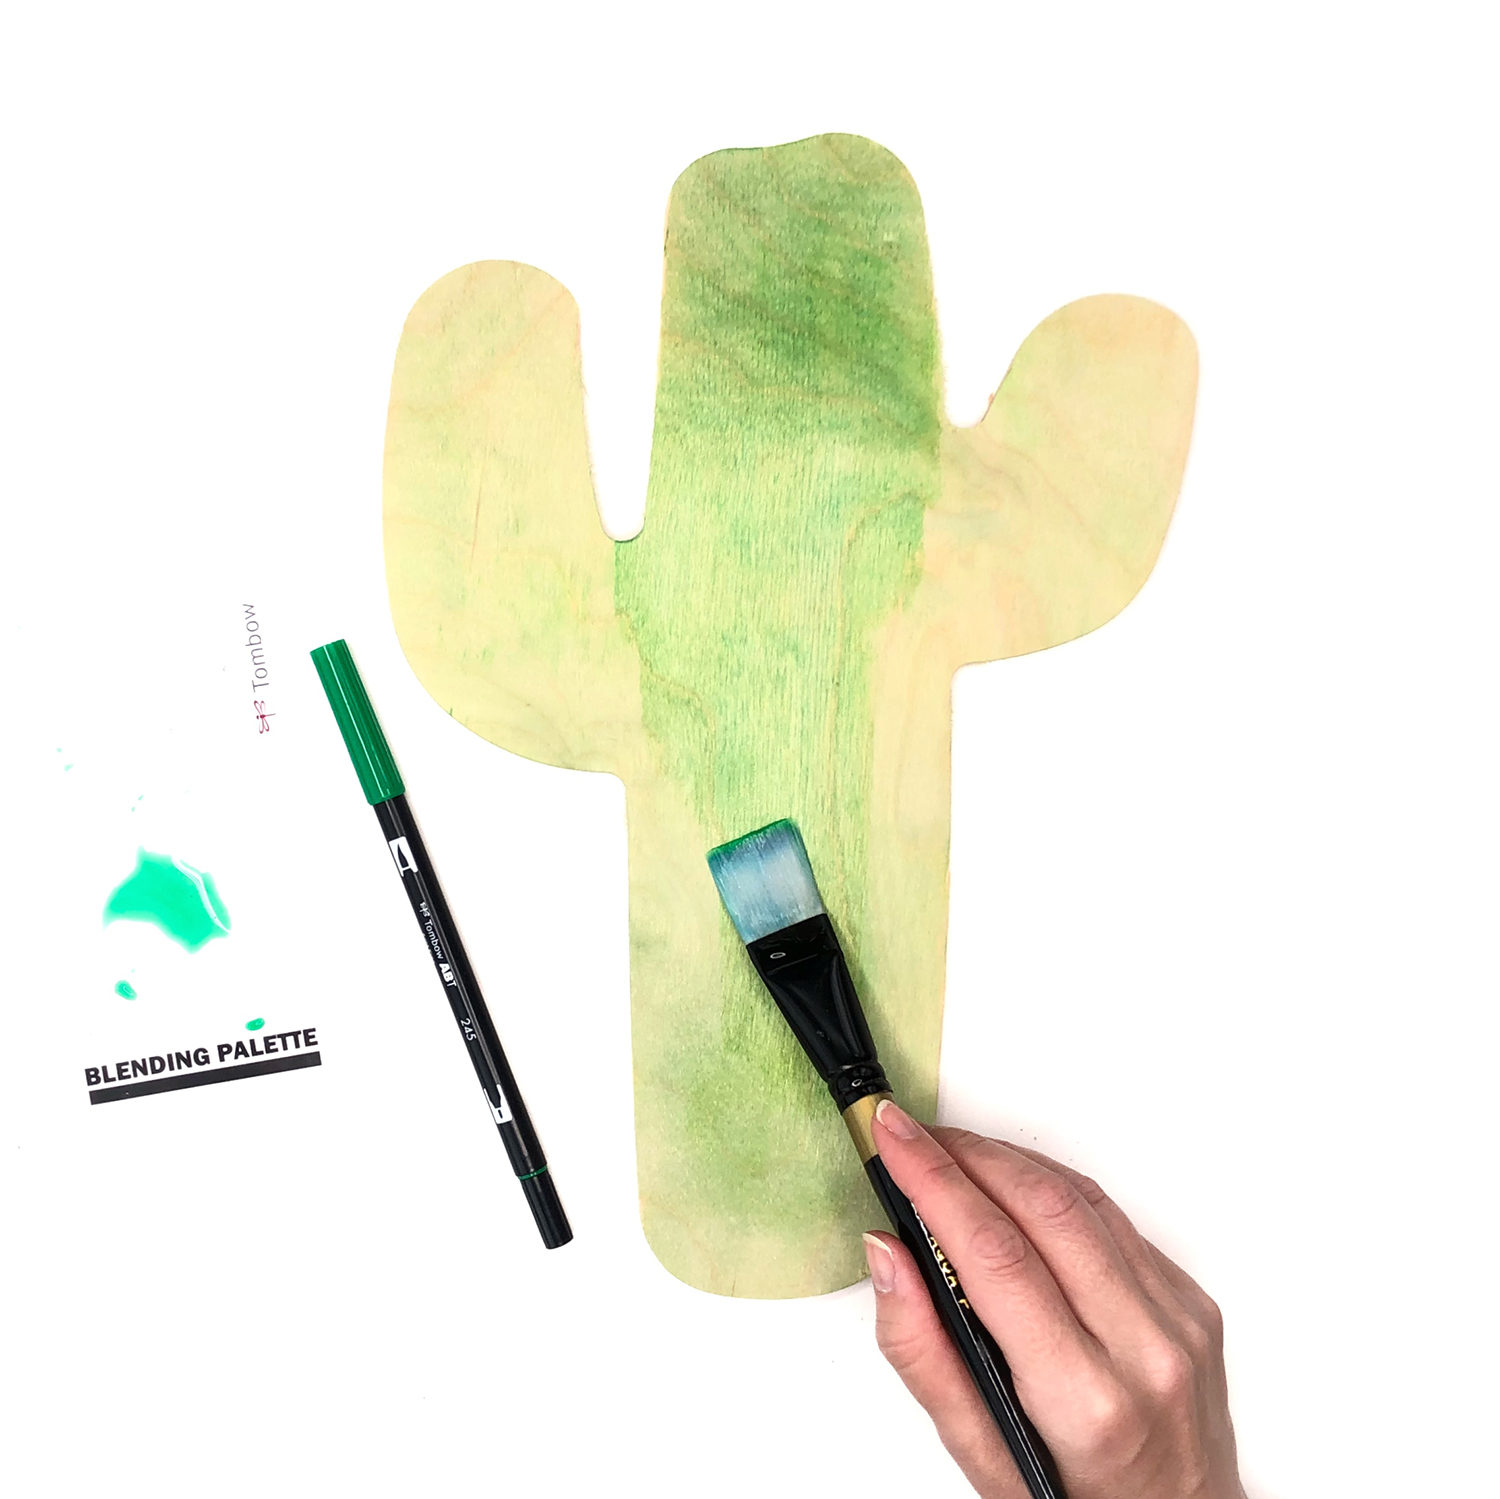
Step 1: Stain Your Walnut Hollow Pieces
I wanted to color my wooden pieces, but still preserve the tips on my Dual Brush Pens, one way to do that is to use a Blending Palette, water and a paintbrush to transfer the Dual Brush Pen ink onto the wood and create a colorful stain. Let each application of ink dry before adding another layer for a deeper color. To get the color shown here use Dual Brush Pen 245 (Sap Green) for the first two coats and 296 (Green) for the last two coats.
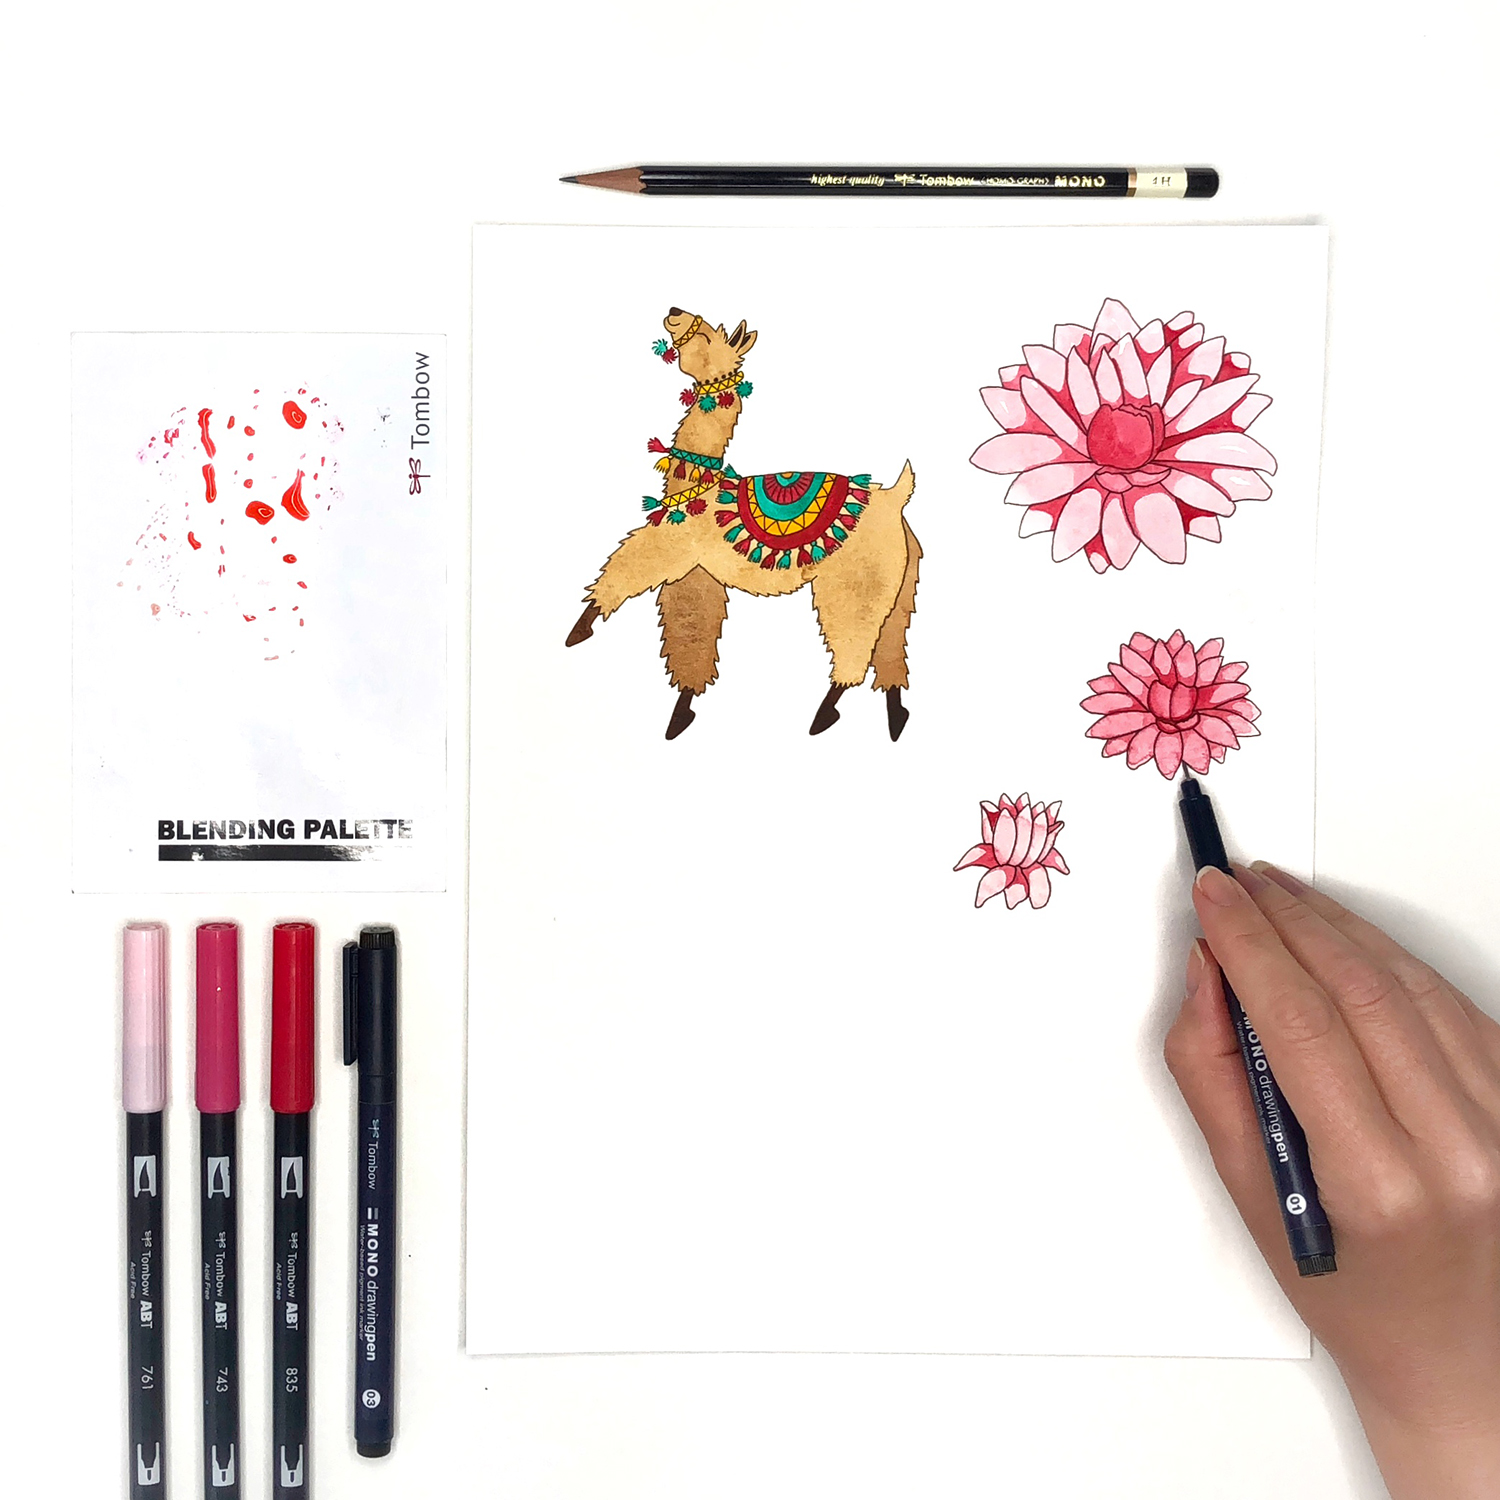
Step 2: Draw Your Decorations
Next draw some cactus flowers and a cute little llama (see Marie B’s llama tutorial and download here) to decorate your colorful wooden pieces. Start by applying Dual Brush Pen ink via the Blending Palette and a paintbrush. Then once the ink is dry outline them and add detail using MONO Drawing Pens.
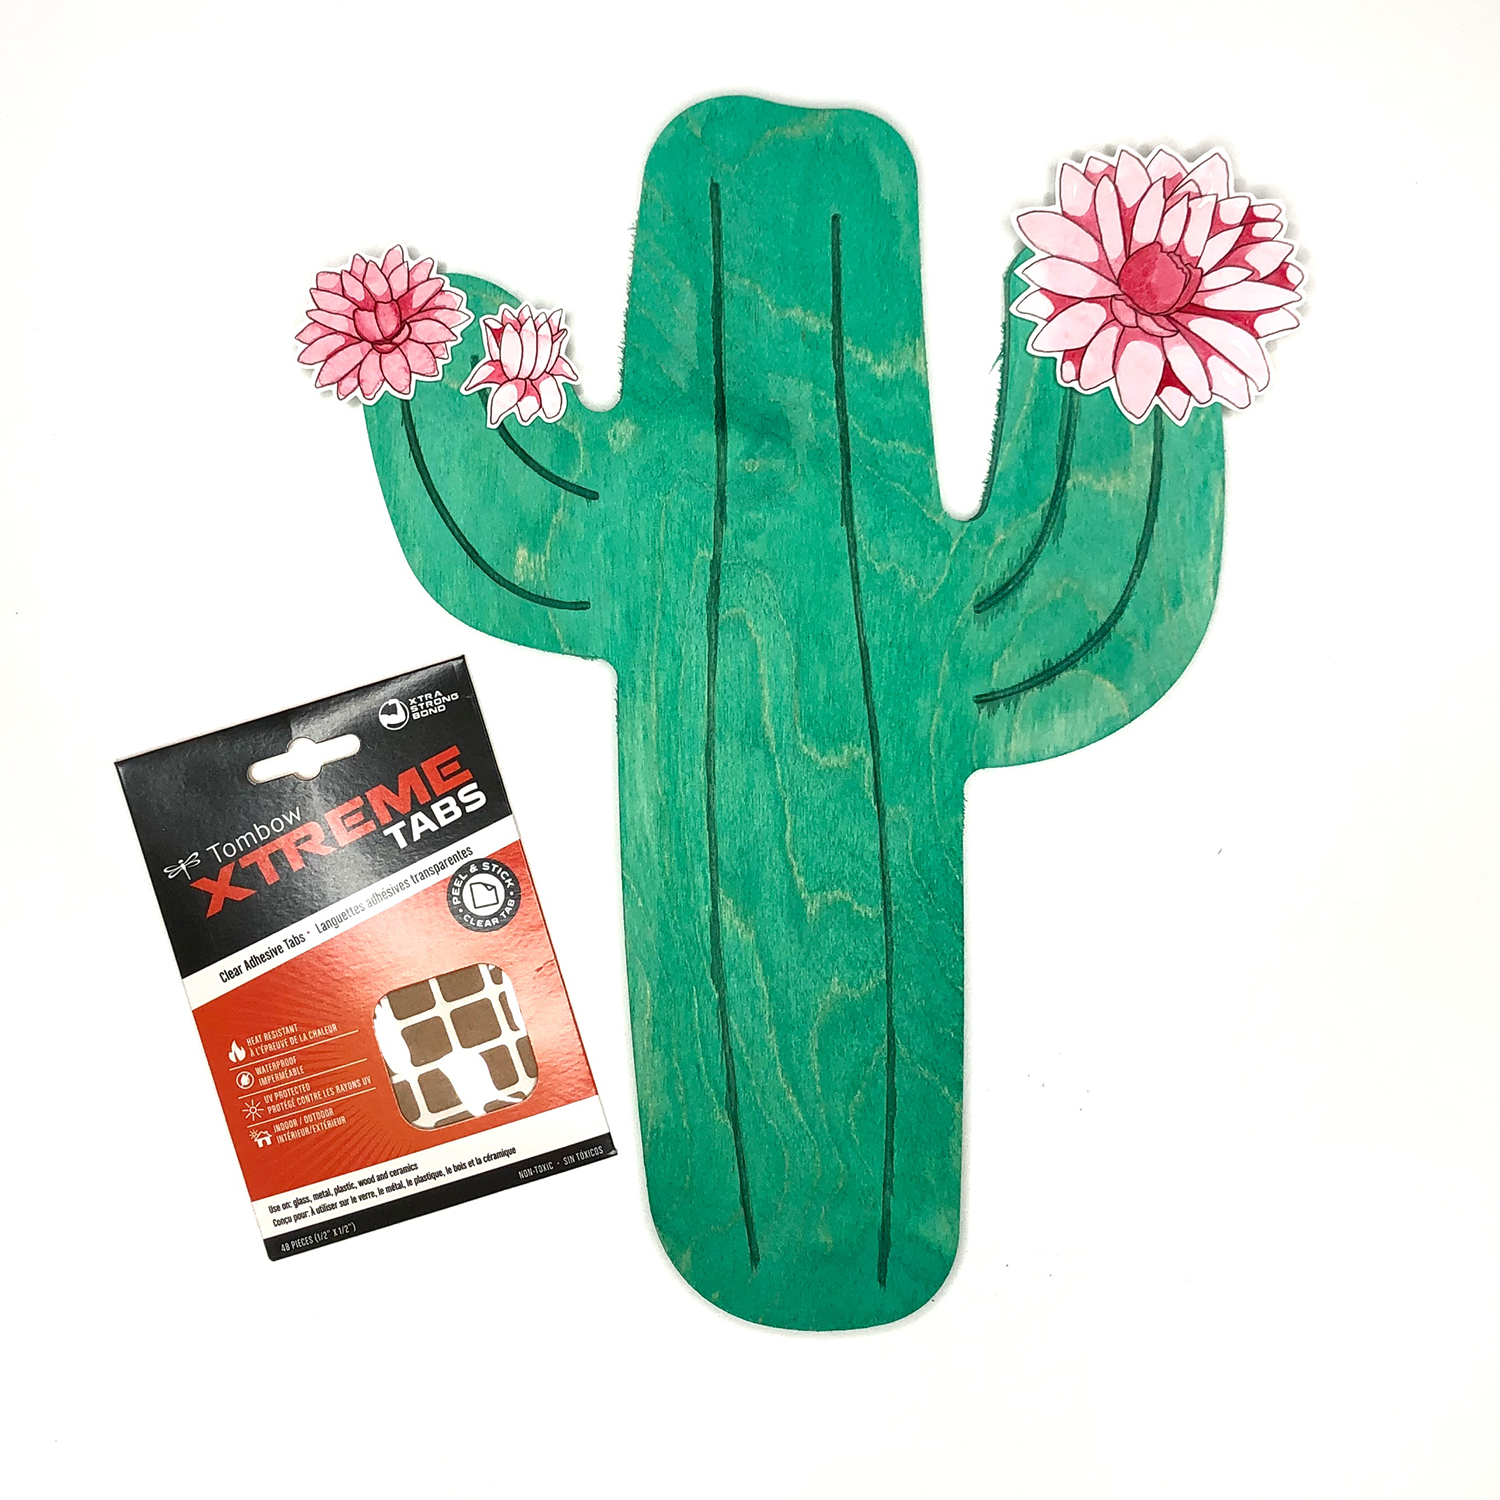
Step 3: Add Your Decorations
Once you’ve finished drawing your decorations, cut them out and stick them to the Walnut Hollow pieces using Tombow Xtreme Tabs. Now they’re ready for the playroom!
Show us your Tombow projects, tag @TombowUSA and @BrownPaperBunny on social media!