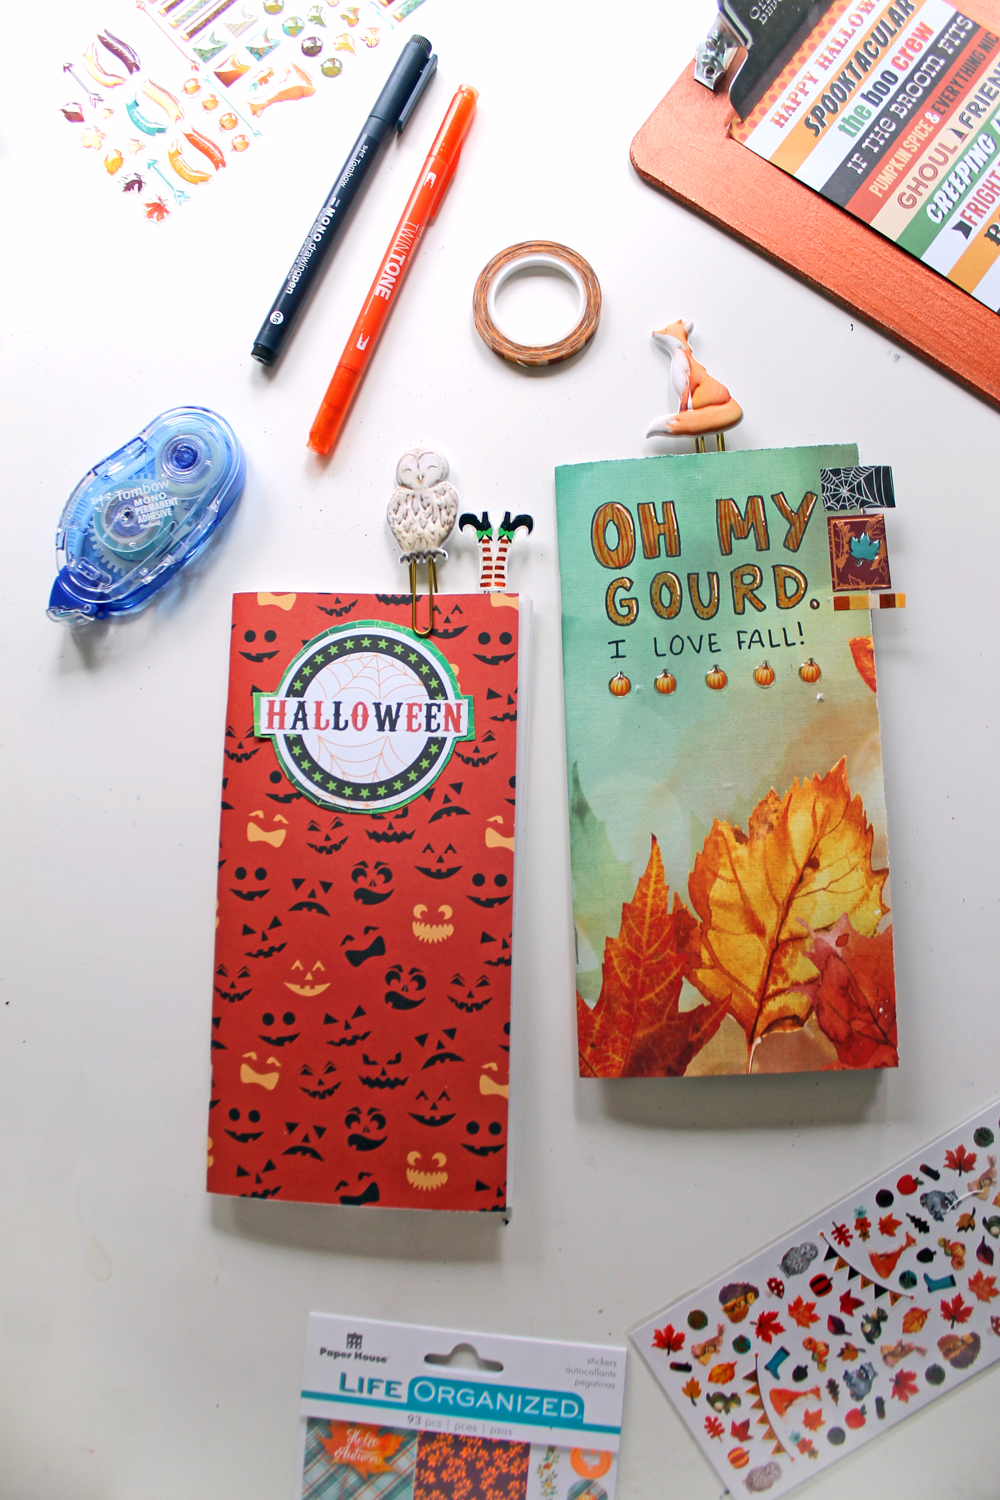
Hey Tombow fans, It’s Katie here! This week on the Tombow blog we are partnering up with Paper House Productions to bring you some really fun projects. They sent me some really beautiful Autumn and Halloween papers and embellishments (thanks!!) and I immediately knew what I wanted to create with them: Autumn Traveler’s Notebook Inserts!
A Midori Traveler’s Notebook is basically a simple leather cover with an elastic band to hold notebooks inside and a band to hold it closed. That may seem pretty basic, but they’re really really neat. You can purchase inserts, but you can also make your own, which is what I am doing here today!
How to Create Traveler’s Notebook Inserts:
Supplies:
- Autumn/Halloween Papers (I used papers by Paper House Productions)
- Paper Trimmer
- White Paper for the insides
- Stapler
- MONO Twin Permanent Marker
- Tombow Twin Tones
- MONO Permanent Adhesive
- MONO Aqua Liquid Glue
Step one:
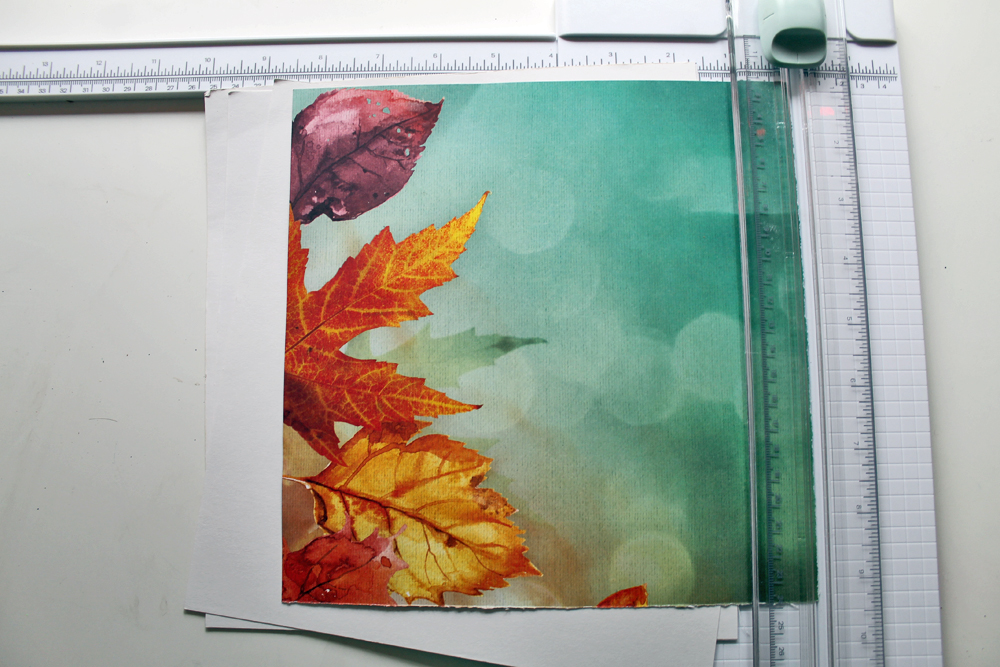
Start by trimming your paper down to size. To create a Traveler’s Notebook insert, you’ll want to trim all of your papers down to 8.5×8.25″.
Step two:
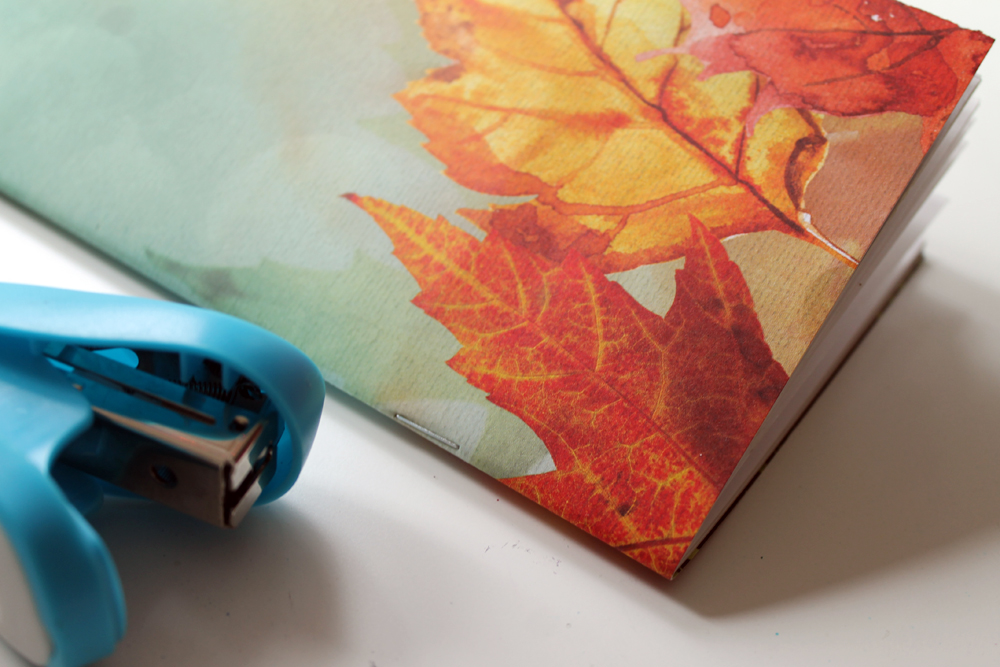
Fold all of your papers in half, stack them so that your cover is on top and all of your white paper is on the inside. For you insert you can use any sort of paper you’d like- printer paper, watercolor paper, etc. You’ll just want to include less pages if you use a thicker paper like watercolor paper so that it doesn’t get too bulky.
Next, unfold them but leave them stacked and bind the papers together by stapling through all of the layers along the fold you creased. I stapled twice, about an inch in from the top and the bottom.
Step three:
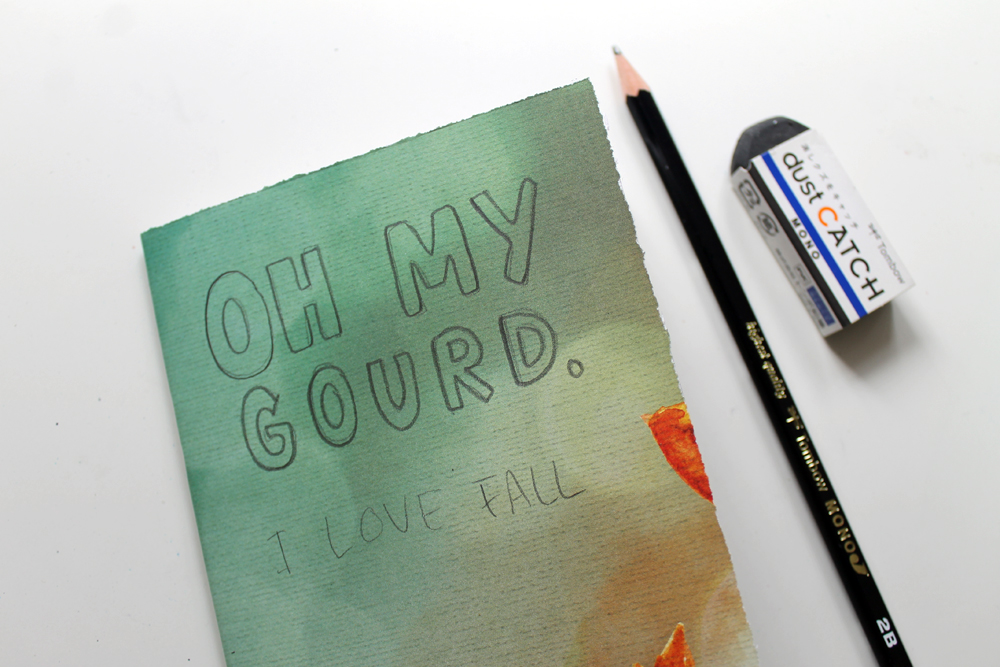
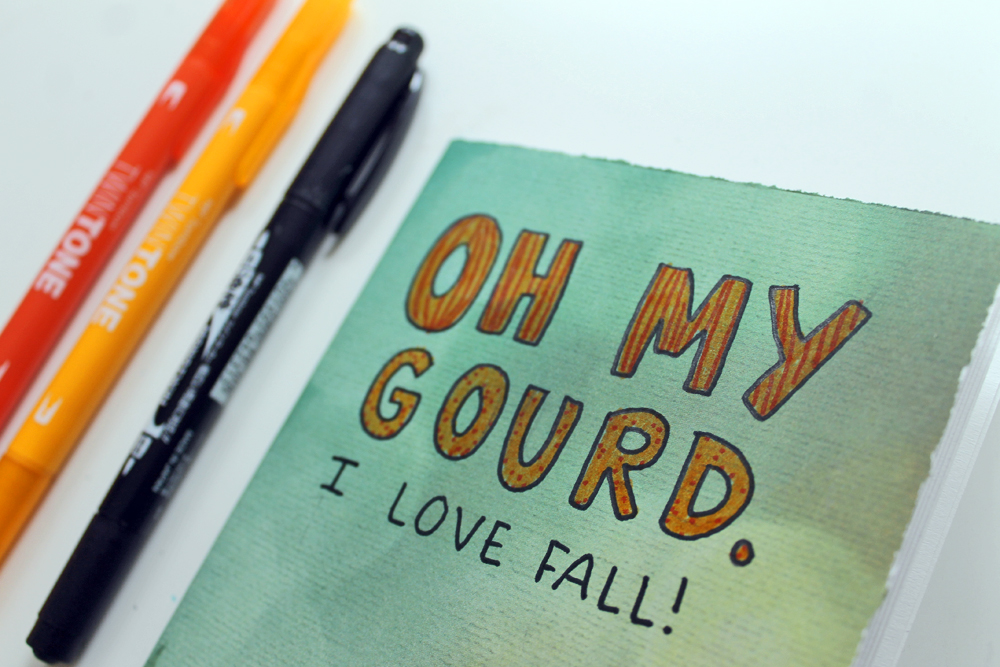
To embellish the cover of my Autumn insert, I sketched out a quote using a Tombow MONO J pencil and the MONO Dust Catch Eraser, which is my favorite. An eraser with no eraser bits left behind? Yes, please!
I colored in my bubble letters with Tombow’s new TwinTone Dual Tip Markers. These are perfect for adding little details like stripes and dots to your lettering. Here are 3 ways to Embellish Lettering using the TwinTone Markers!
Step four:
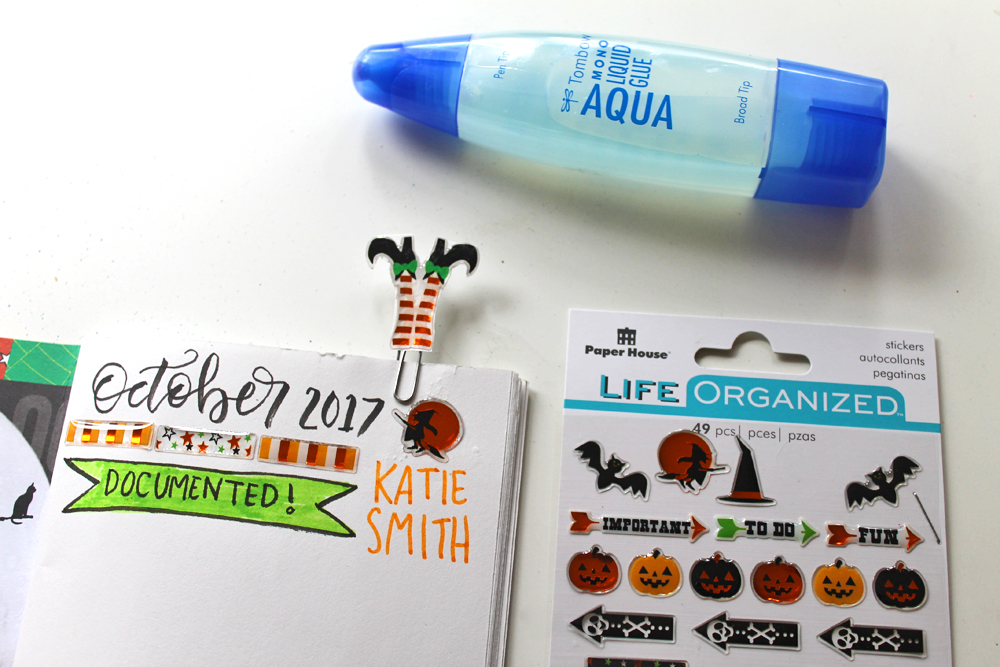
You can easily create little tabs on your insert pages by folding strips of washi tape or stickers in half along the page edges. Washi tape is not always super sticky, so to secure my tabs better I place a small line of MONO Permanent Adhesive where the washi tape will go.
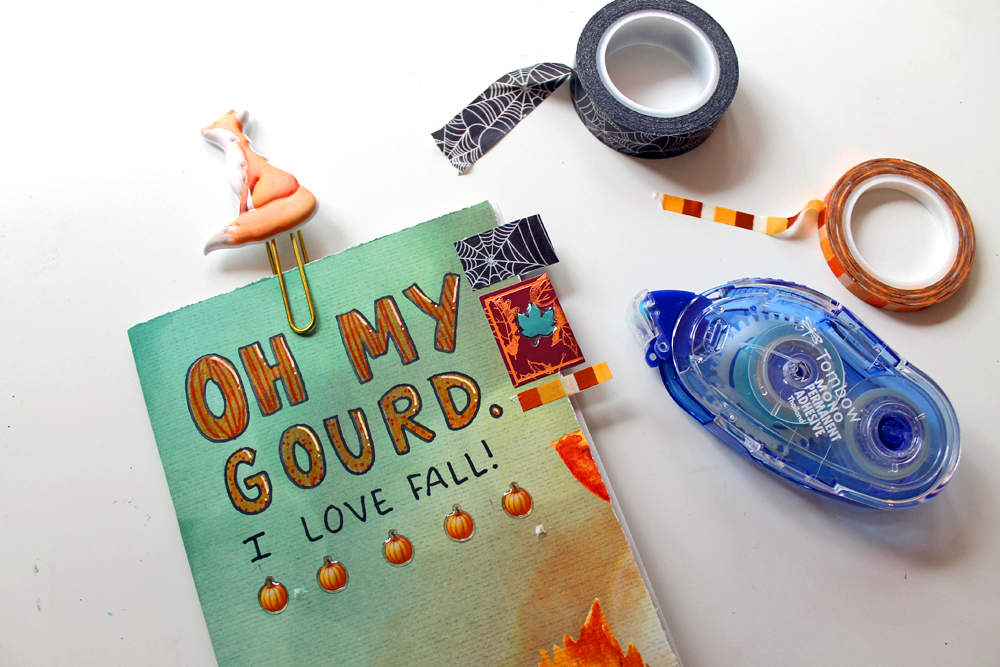
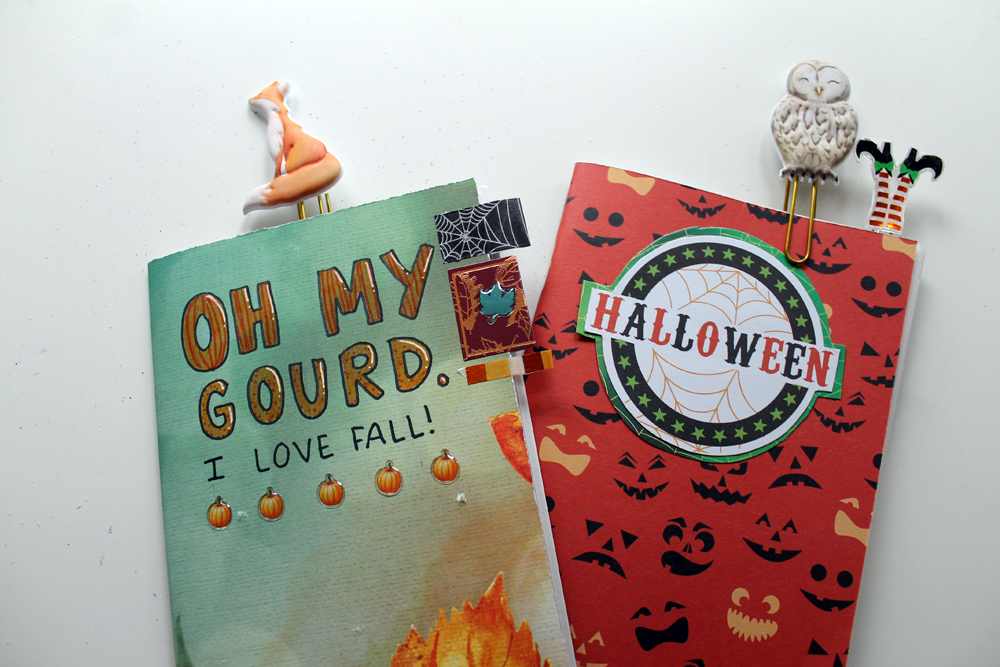
I fell in love with the little witch feet epoxy sticker below, so I used a bit of MONO Aqua Liquid Glue to adhere it to a paper clip, so I can easily mark my place!
Want more Traveler’s Notebook crafts? Check out these posts by my fellow Tombow Design Team members:
If you make your own inserts, please share them on instagram and hashtag #tombowusa. Be sure to tag both myself @studio.katie and @tombowusa, while you are at it! To shop the products in this post check out TombowUSA and Paper House Productions!
Happy Fall, Y’all!

Fun way to make
the journals. Love
the witchy feet hanging
out the top!
Carla from Utah
Love the decorated clips and the fun tabs! Great ideas!
Oh my gourd, these are simple darling.
I would use them as bookmarks for when
I’m reading. these are so pretty – they
would make great gifts.
thanks for the ideas.
That is awesome! I am saving my pennies for a Traveler’s Notebook. This is great and creative, in the meantime!
This is a great creation ! I love the foot-witch-paper-clip !
Pingback: DIY Fall Travelers Notebook Inserts – Studiokatie
Pingback: DIY Travelers Notebook Shaker Charms - Tombow USA Blog