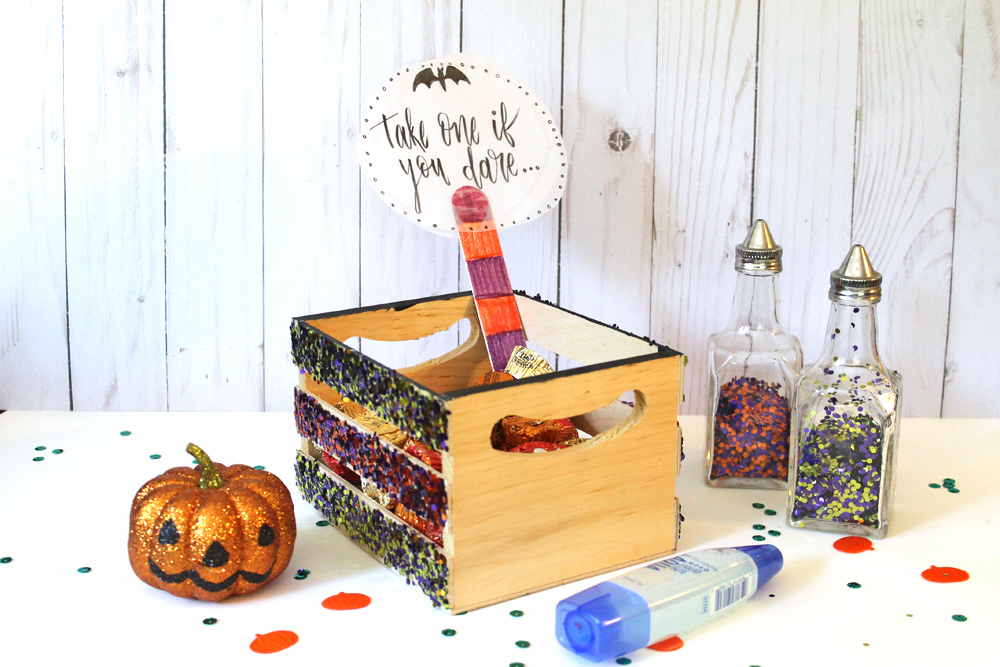
Happy Fall Y’all! It’s Katie here and today’s project is one that will take you less than 5 steps to create and is perfect for Halloween decor!
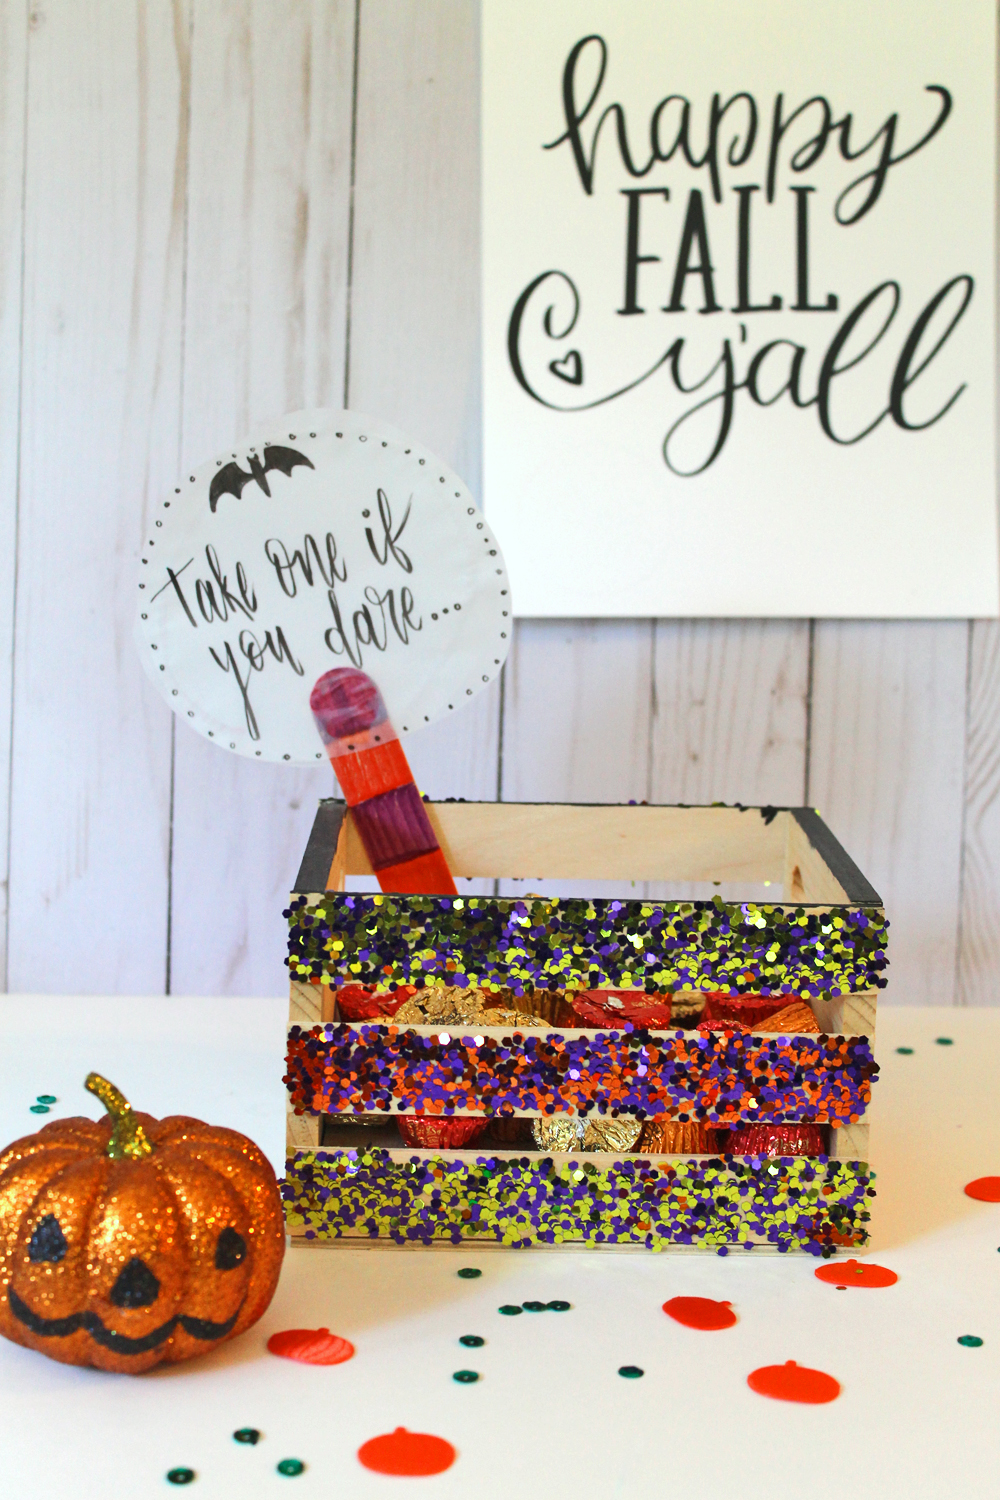
I created this little trick or treat candy crate to place on my desk (because I love having treats handy!) but I think it would also be super cute done on a slightly larger scale to hold candy for Trick or Treater’s on Halloween night!
Supplies:
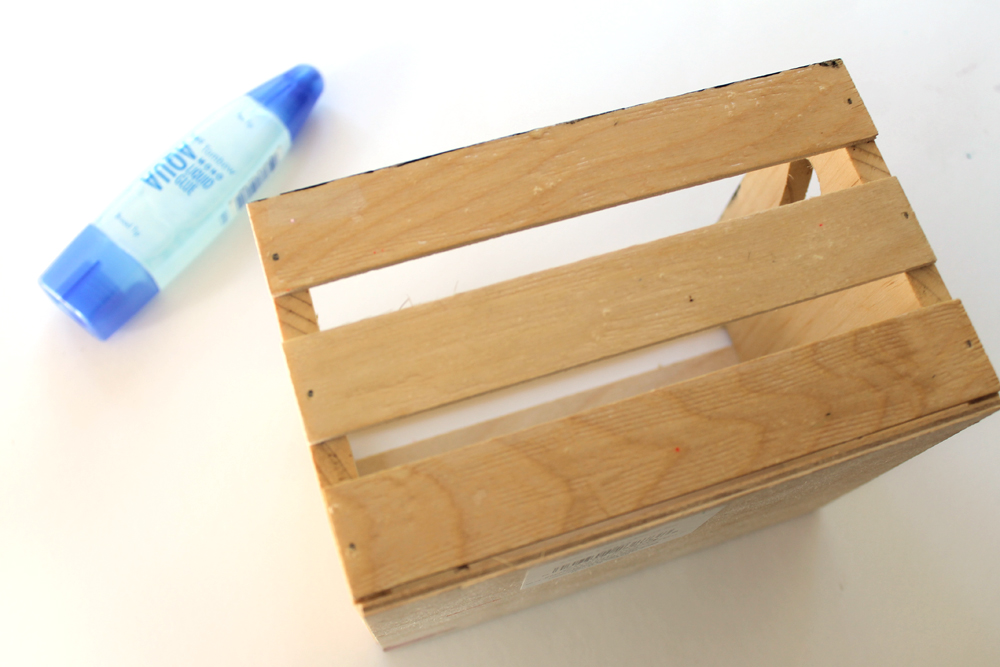
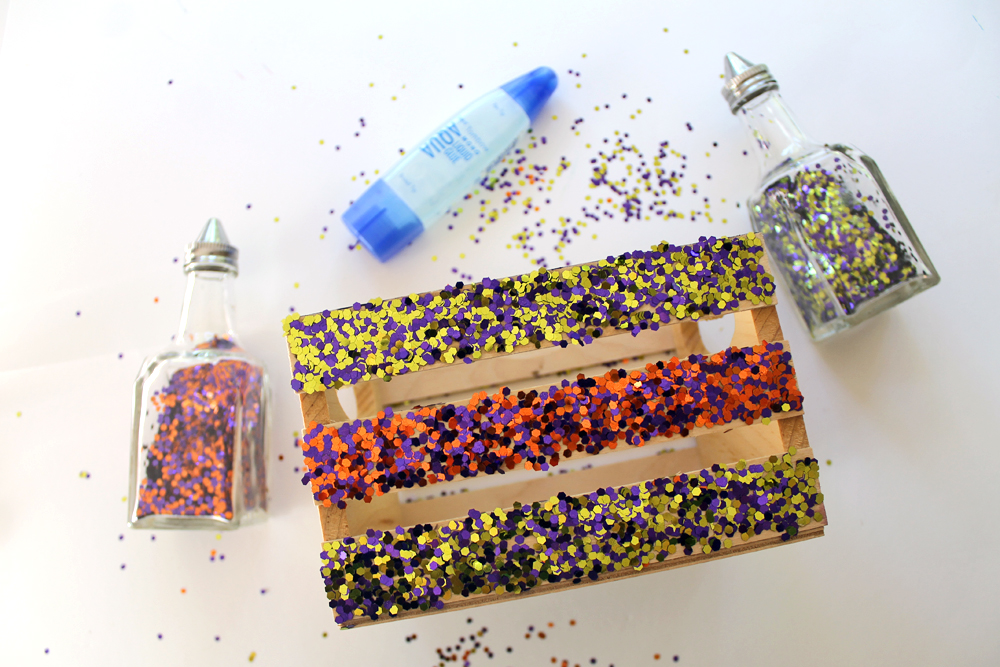
- Wooden Crate (I used a mini crate by Walnut Hollow)
- Tombow MONO Aqua Liquid Glue
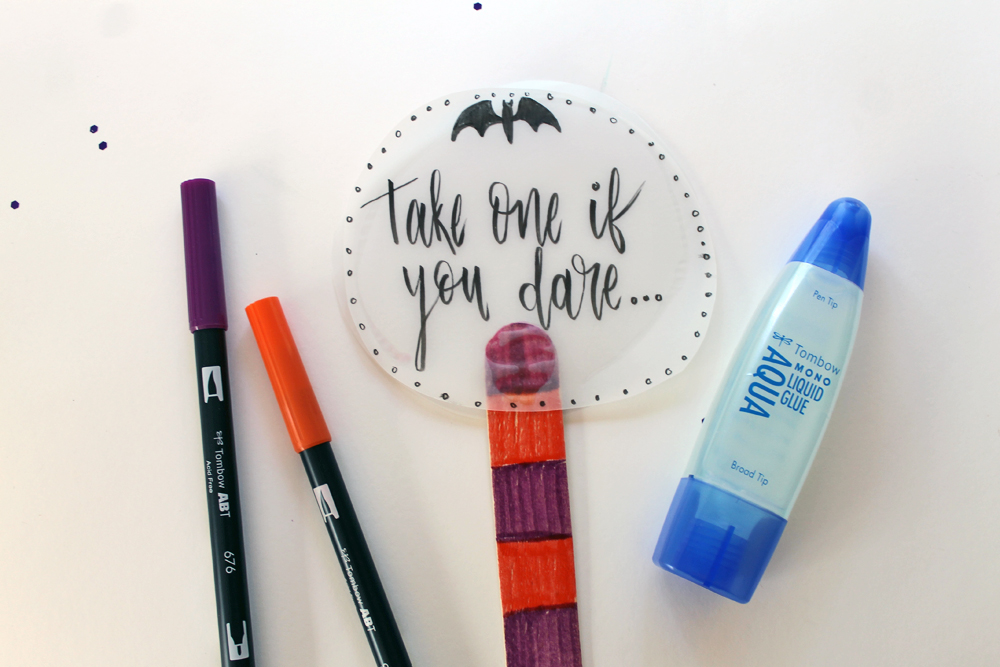
- Popsicle Stick
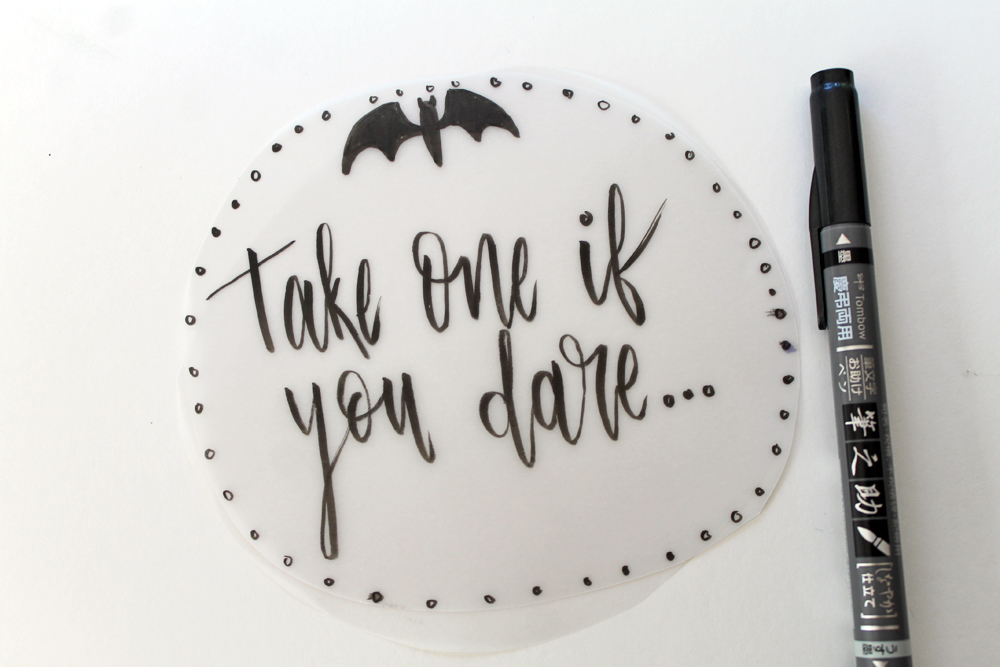
- Vellum
- Tombow Fudenosuke Brush Pen, Twin Tip
- Tombow Dual Brush Pens
- Chunky Glitter in Halloween Colors
How to make a Glitter Candy Crate:
Step one:
Use the broad tip of the MONO Aqua Liquid Glue to apply the adhesive to the side boards of the wooden crate. I love that the broad tip of this glue bottle makes it super easy to apply adhesive to larger areas like this.
Step two:
While the adhesive is still wet, sprinkle chunky glitter over top of it, mashing it down lightly with your fingers just to make sure the adhesive grabs all of the little glitter pieces.
Tip: It’s helpful to do this step over top of a piece of printer paper. Once you’ve applied the glitter, dust off any extra onto the paper & then use the paper to pour the extra glitter back into the bottle to save it for another project!
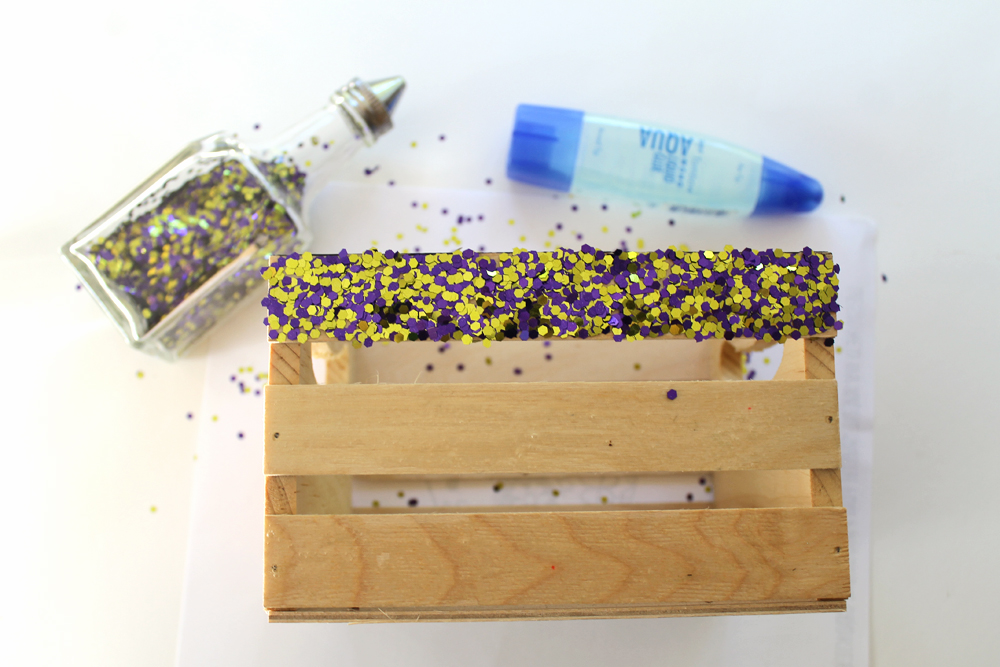
Step three:
Repeat the last step on both sides of your wooden crate, adhering the glitter to the side boards.
Step four:
While the glue is drying, we’ll make a cute little sign!
Cut 2 ovals out of vellum & adhere them together. I chose to use 2 simply so that my sign was a little more opaque but still had that spooky vellum look.
Use the Fudenosuke to write a little Halloween saying onto the vellum oval. To make my letters a little more spooky, I simply made them a little bit longer/taller than I normally would.
I also embellished mine with a dot border and cute bat doodle.
Step five:
To make a post for the little sign, color a wooden popsicle stick with Dual Brush Pens, and then adhere the vellum oval onto the end using a small dot of MONO Aqua Liquid Glue!
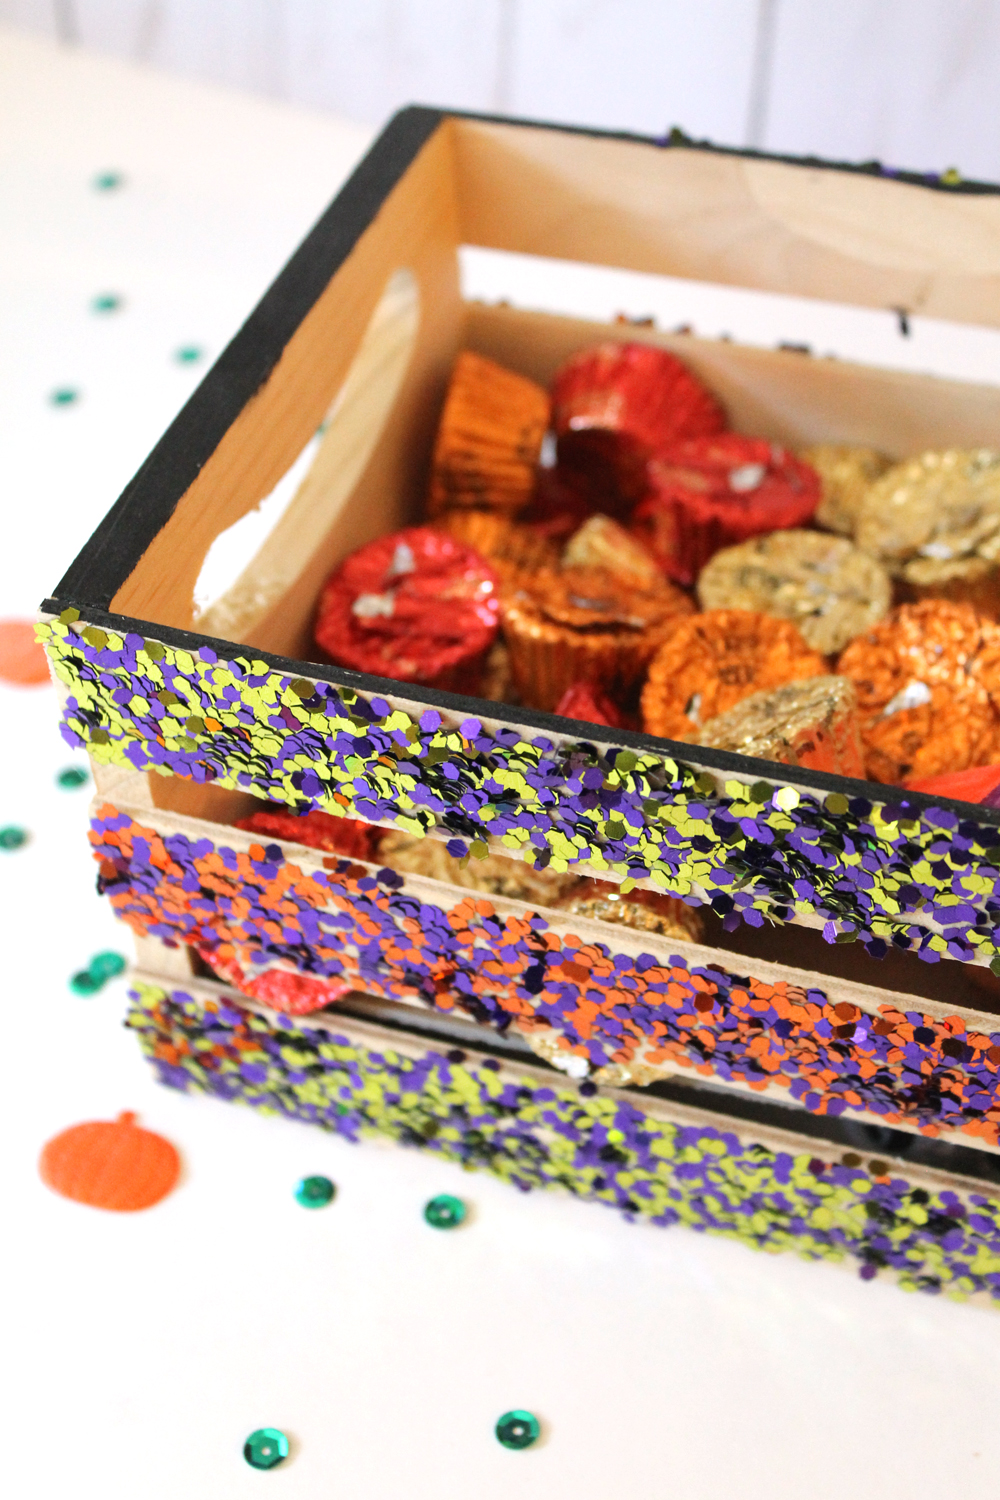
Once everything had dried, just fill your crate up with candy (Reese’s are my favorite!), and add in your sign! Then place on your desk/porch/wherever you need some extra treats!
I’ve decorated my studio desk for the season! I’ve got this glittery candy crate, a small pumpkin & that “Happy Fall Y’all” sign from a fellow letterer, Saralita.
If you’re looking for more easy Halloween decor pieces, be sure to check out all of the posts from this past week! I’m in love with Lauren’s “Front Porch Worthy” Lettered Pumpkin!
You can grab all of the products you nee dot make this easy project on the Tombow USA site here!

Really cute and
festive looking!
Carla from Utah
That looks super easy and fun to make …even with young ones.