Good morning y’all! Beth here and this week on the blog is all about adhesives! I’m going to share a tutorial on how to make gold foil and watercolor shamrocks using FIVE different Tombow adhesives!

Supplies to Make Gold Foil and Watercolor Shamrocks:
- MONO Aqua Liquid Glue
- MONO Multi Liquid Glue
- Tombow Xtreme Permanent Adhesive
- MONO Permanent Adhesive Runner
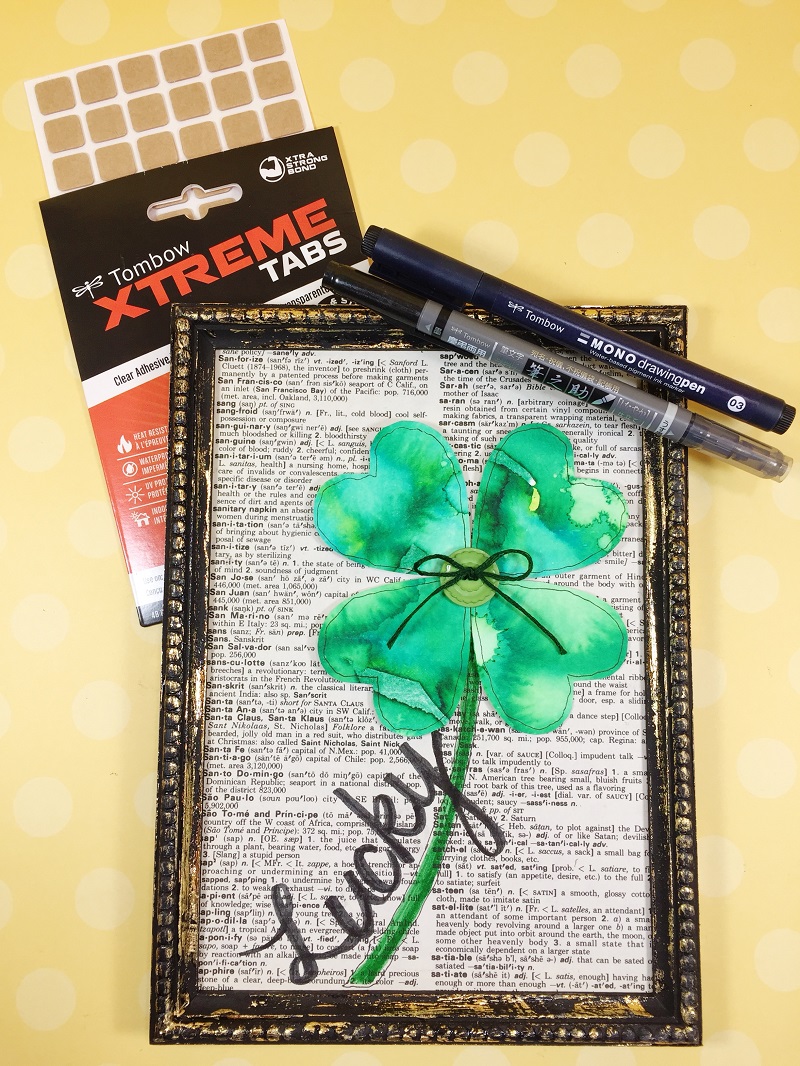
- Tombow Xtreme Tabs
- Dual Brush Pens – 133, 277, 373, 173, 245, 443 and N15
- Fudenosuke Brush Pen, Twin Tip
- MONO Drawing Pen 03
- MONO Drawing Pencil 4H grade
- Clearsnap Designer Foils – Goldmine
- Watercolor Paper (90 lb. or heavier); large Paintbrush; Heart Template; 5″ x 7″ Unfinished Wooden Frame; Kraft Cardstock; Vintage Dictionary Paper; Green Buttons (3); Scissors; Green Embroidery Floss; Paper Trimmer
Step One:
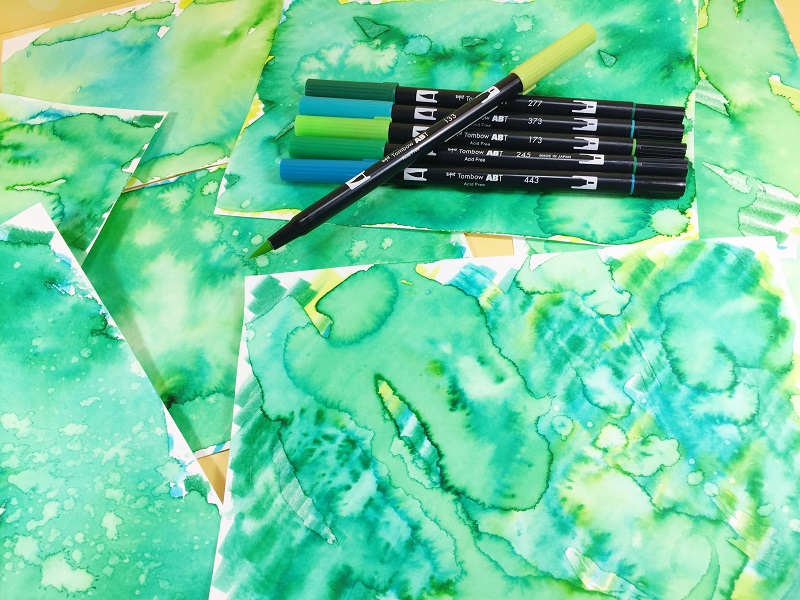
Pick a light, medium and darker tone of Dual Brush Pens in a variety of greens and scribble randomly on watercolor paper.
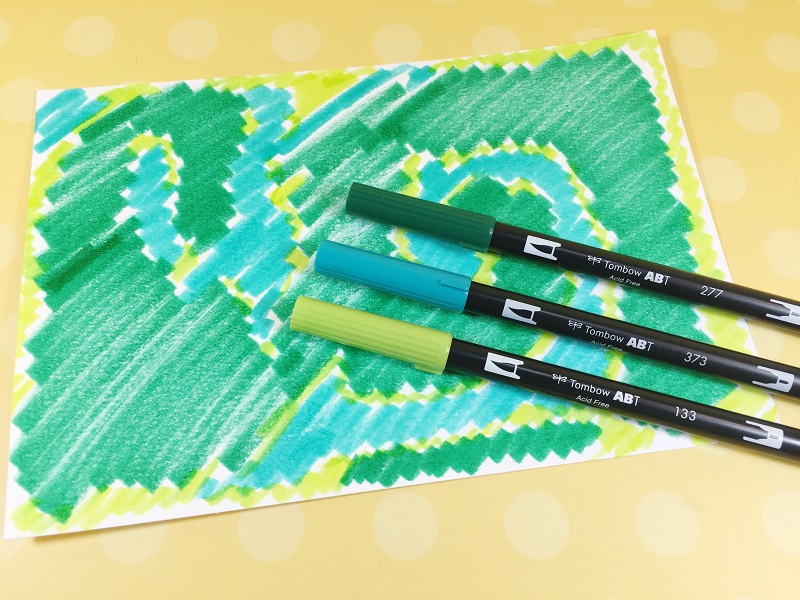
Add water with a large flat paint brush and watch the magic happen! You never know how your watercolor backgrounds are going to turn out, so I always cut at least 3-4 pieces of watercolor paper in half. This gives me 6-8 backgrounds to select from AND more for my stash!
Step Two:
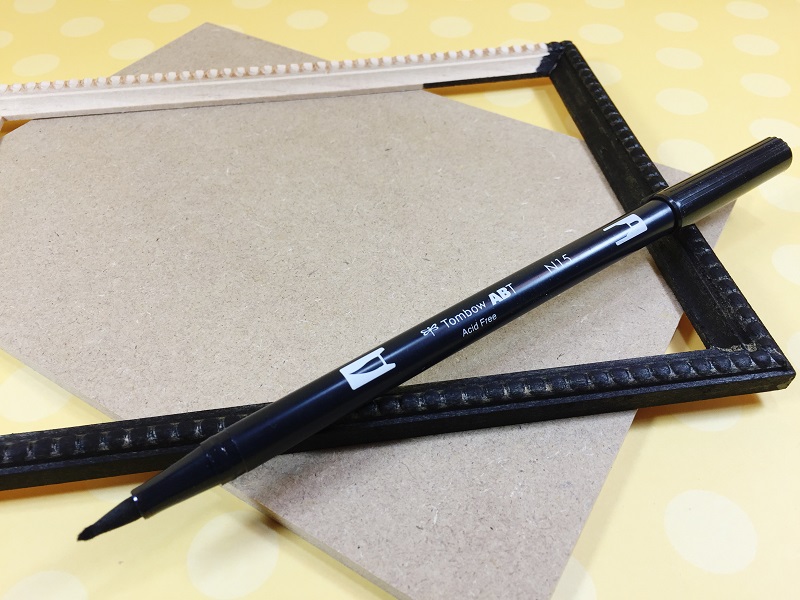
I am an impatient crafter, so when my Dual Brush Pens start to fray at the tips, I use them to color other things, like this unfinished wood frame! No waiting for paint to dry! You can see how frayed the brush tip of this N15 pen is, but it covers the wood beautifully! Then I wrap a piece of tape around the barrel, so I don’t use this one for lettering!
Step Three:
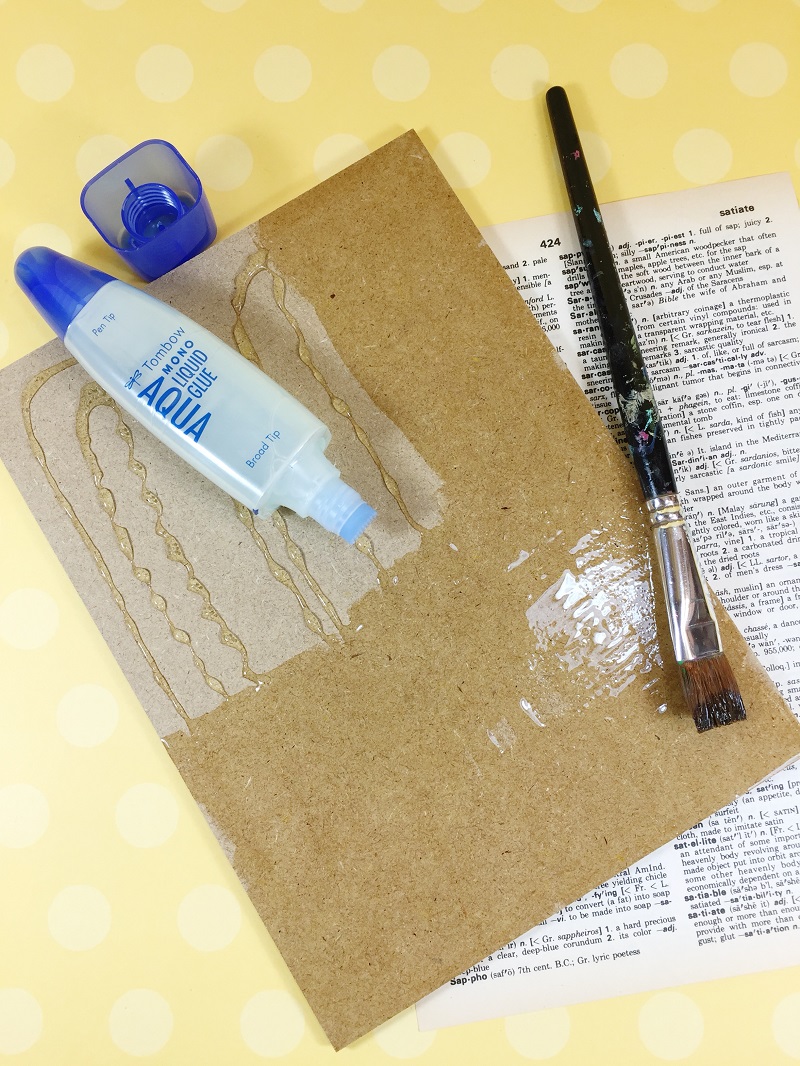
Apply MONO Aqua Liquid Glue to the back panel of the frame, spread evenly with an OLD paintbrush. Then lay out the vintage dictionary paper. MON Aqua makes the perfect decoupage medium (adhesive one).
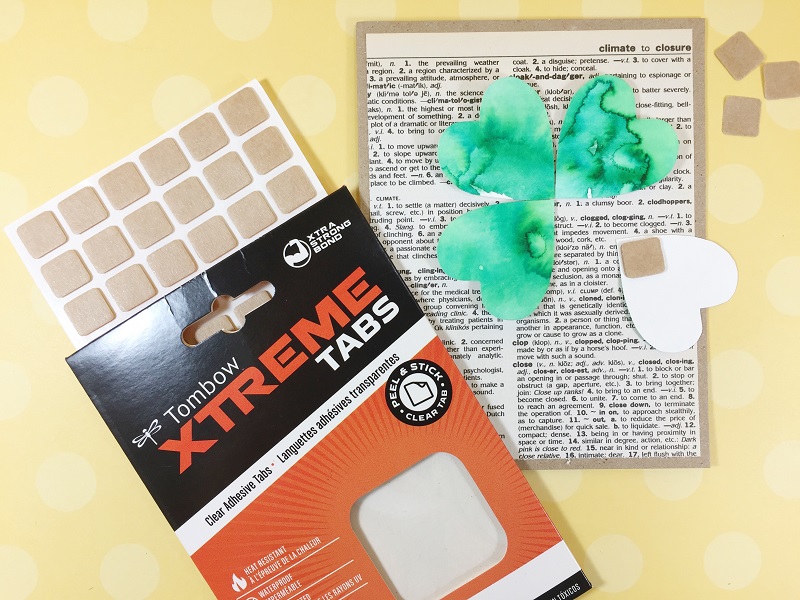
To assemble the cards, cut two pieces of vintage dictionary paper 1/4″ smaller than the measurements of your kraft cards, then attach with the MONO Permanent Adhesive Runner. This runner is perfect for all types of paper crafts (adhesive two).

Step Four:
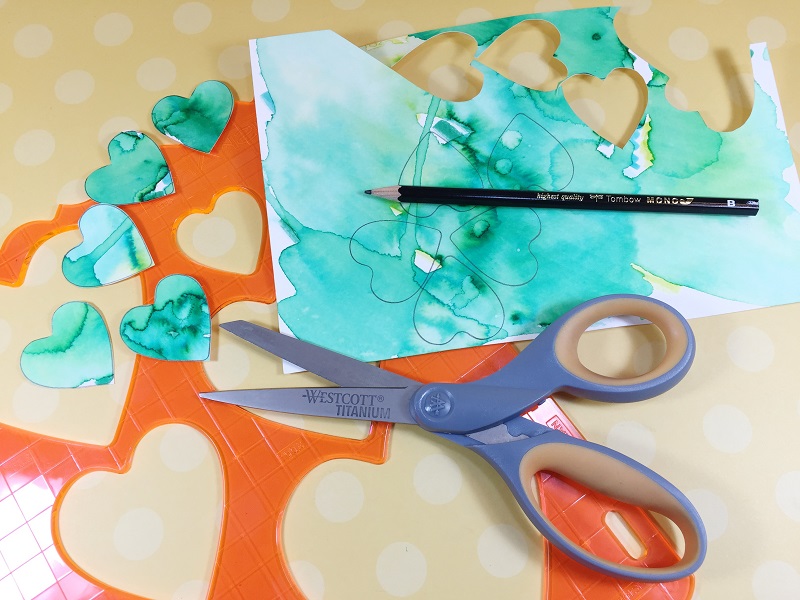
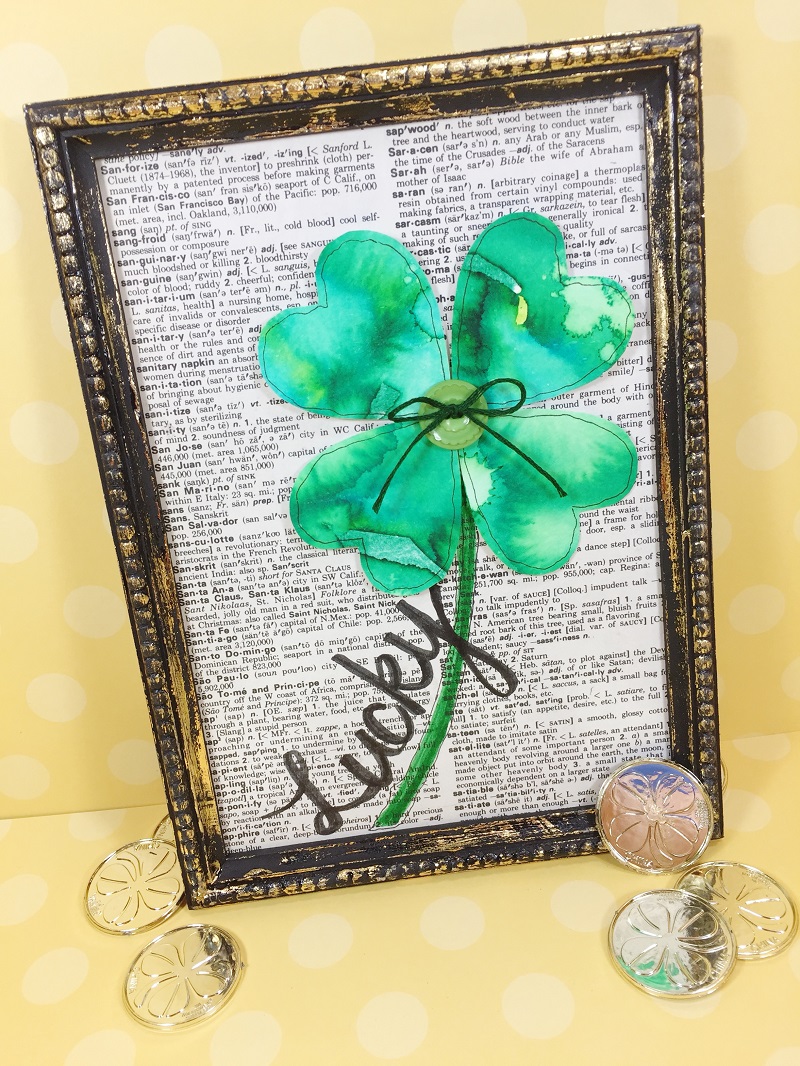
To create the shamrocks I got out my trusty template and traced eight 1.5″ hearts for the cards and four 2″ hearts for the framed art. For this photo I used MONO Drawing Pencil B, so you could see the lines, but I normally use 4H, because they are easier to erase. I like the template, because you can use it to frame the really interesting sections of the watercolor, which will create more texture and interest in the finished projects.
After the hearts are cut out, dry fit them on the front of your card to make sure you are happy with the placement, then attach THREE of the hearts with Xtreme Adhesive Tabs (adhesive three). They are clear, have a strong hold and will give a bit of dimension to the shamrocks! We are going to do something special with the fourth hearts below…
Step Five:
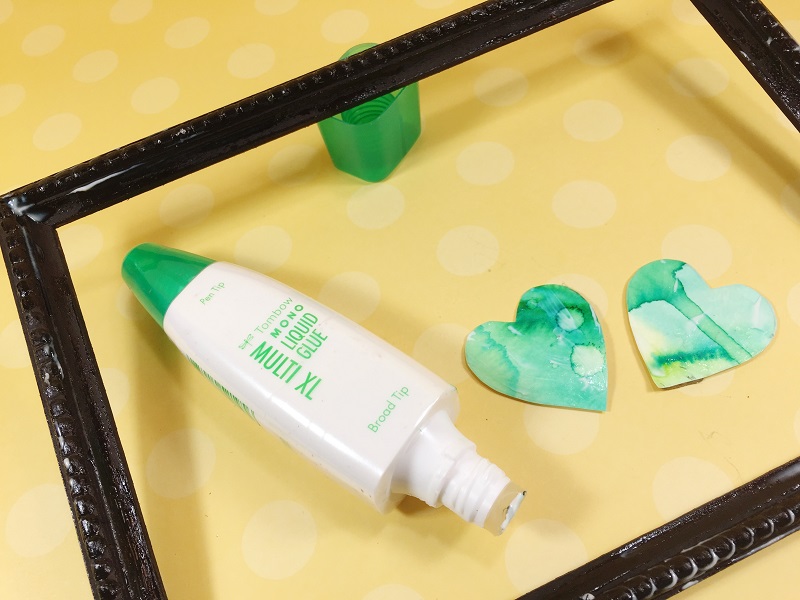
Gold foiling our projects is next because you can have shamrocks without some GOLD! Squirt out a small dollop of MONO Multi Liquid Glue on your finger and spread randomly over the frame and the two extra hearts for the cards. Let dry from white to clear. The MONO Multi always stays tacky, so it is the perfect adhesive for foiling (adhesive four).
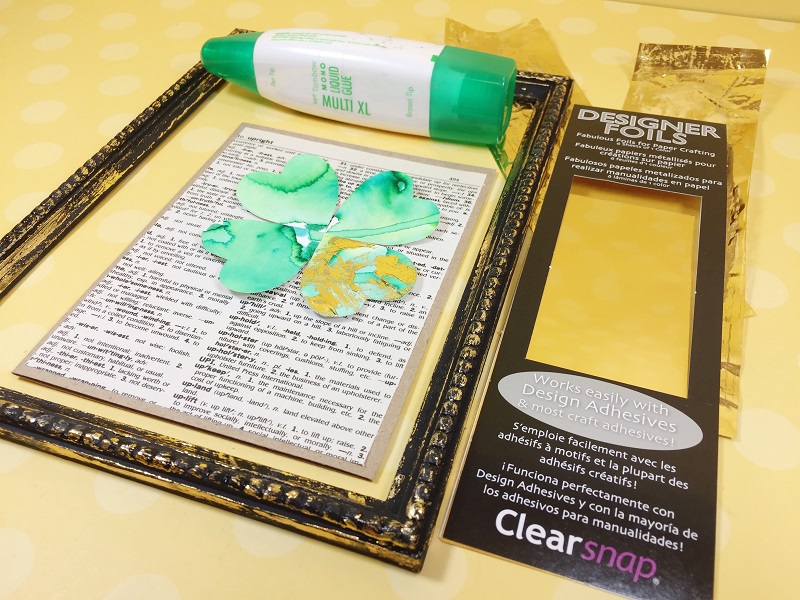
Once clear, place Designer Foils from Clearsnap over the areas covered in glue, rub gently with your finger, then peel back to reveal the magic! I added gold foil to one of the shamrock leaves on each of the cards and on the frame to give it a vintage look.
Step Six:
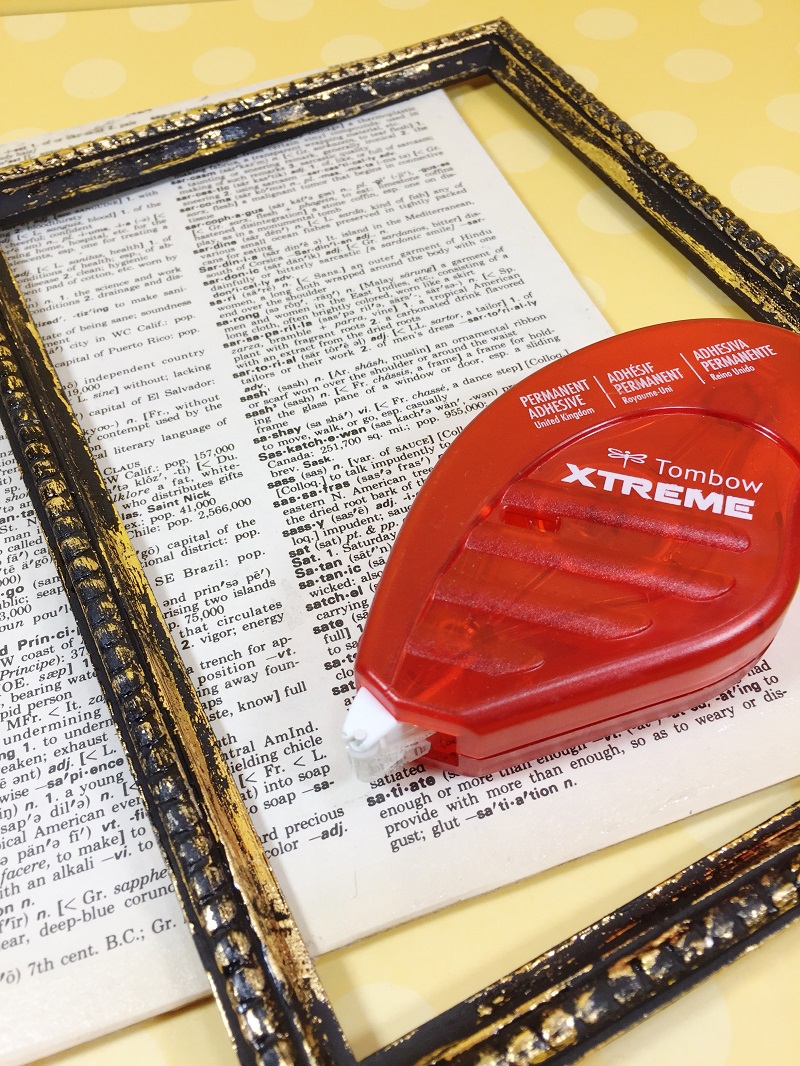
Attach the frame to the back panel with Tombow Xtreme Permanent Adhesive, by rolling to apply and swiping the tip to the side for a clean application. The Tombow Xtreme is five times stronger than traditional adhesive runners (adhesive five).
Step Seven:
Add a stem to your shamrocks with Dual Brush Pen and letter the word LUCKY with the black end of the Fudenosuke Brush Pen, Twin Tip. Outline the card with MONO Drawing Pen 03. Attach a button to the center of each shamrock with Tombow Xtreme Tab.
Attach hearts to inset of frame with Tombow Xtreme Tabs, draw a stem with Dual Brush Pen and letter the word LUCKY with the black end of the Fudenosuke Brush Pen, Twin Tip. Outline the card with MONO Drawing Pen 03. Thread a button with embroidery floss, tie in a bow and attach to center of shamrock with Tombow Xtreme Tab.
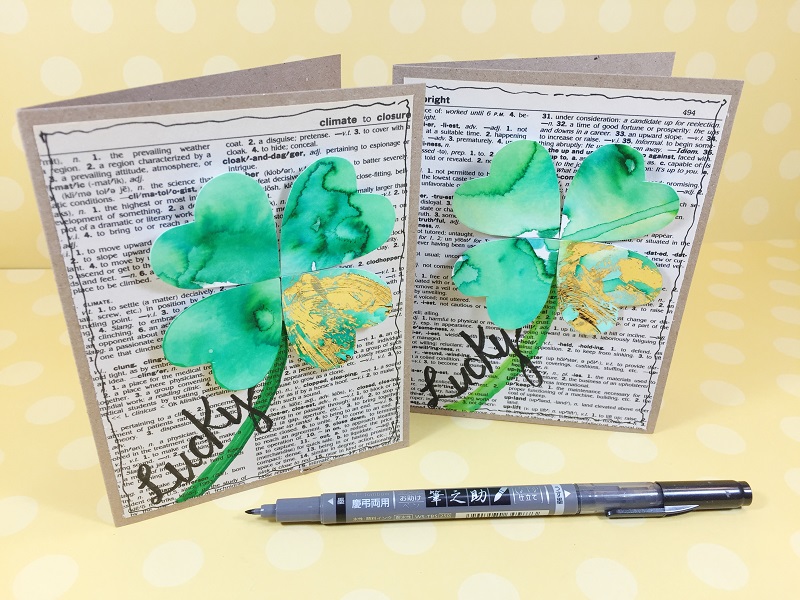
Here is a close up photo of the shamrock cards, so you can really see the detail in the watercolor!
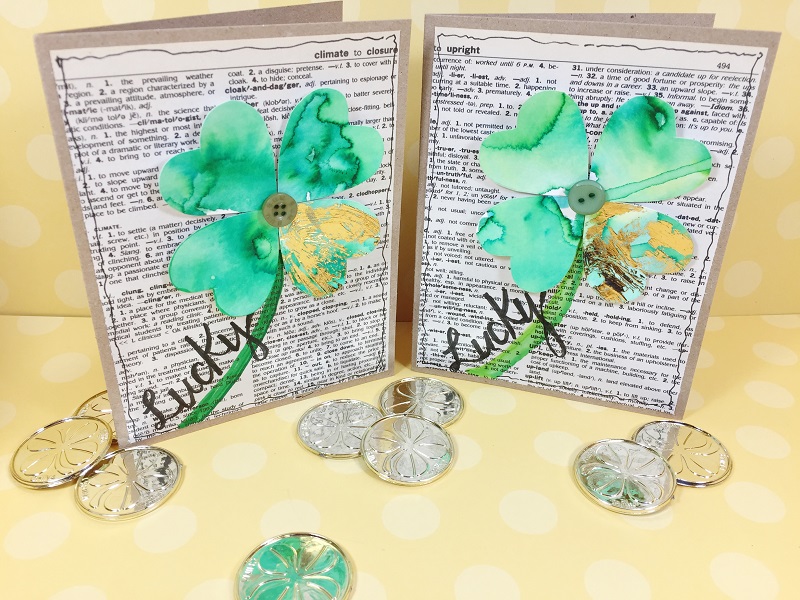
And here is a detail shot of the vintage inspired frame, so you can see the gold foiling.
I hope that you have enjoyed my Gold Foil and Watercolor Shamrocks tutorial today and that you will use my project as a jumping off point to showcase your Tombow creativity!
Thanks for stopping by!
Creatively, Beth

fantastique , beautifull and more