
Hi there Tombow friends! It’s Grace from Grace Anne Studio. One of my all time favorite fall trends is buffalo plaid. So, today we’re going to walk through how to easily create buffalo plaid lettering with Dual Brush Pens! Let’s get started.
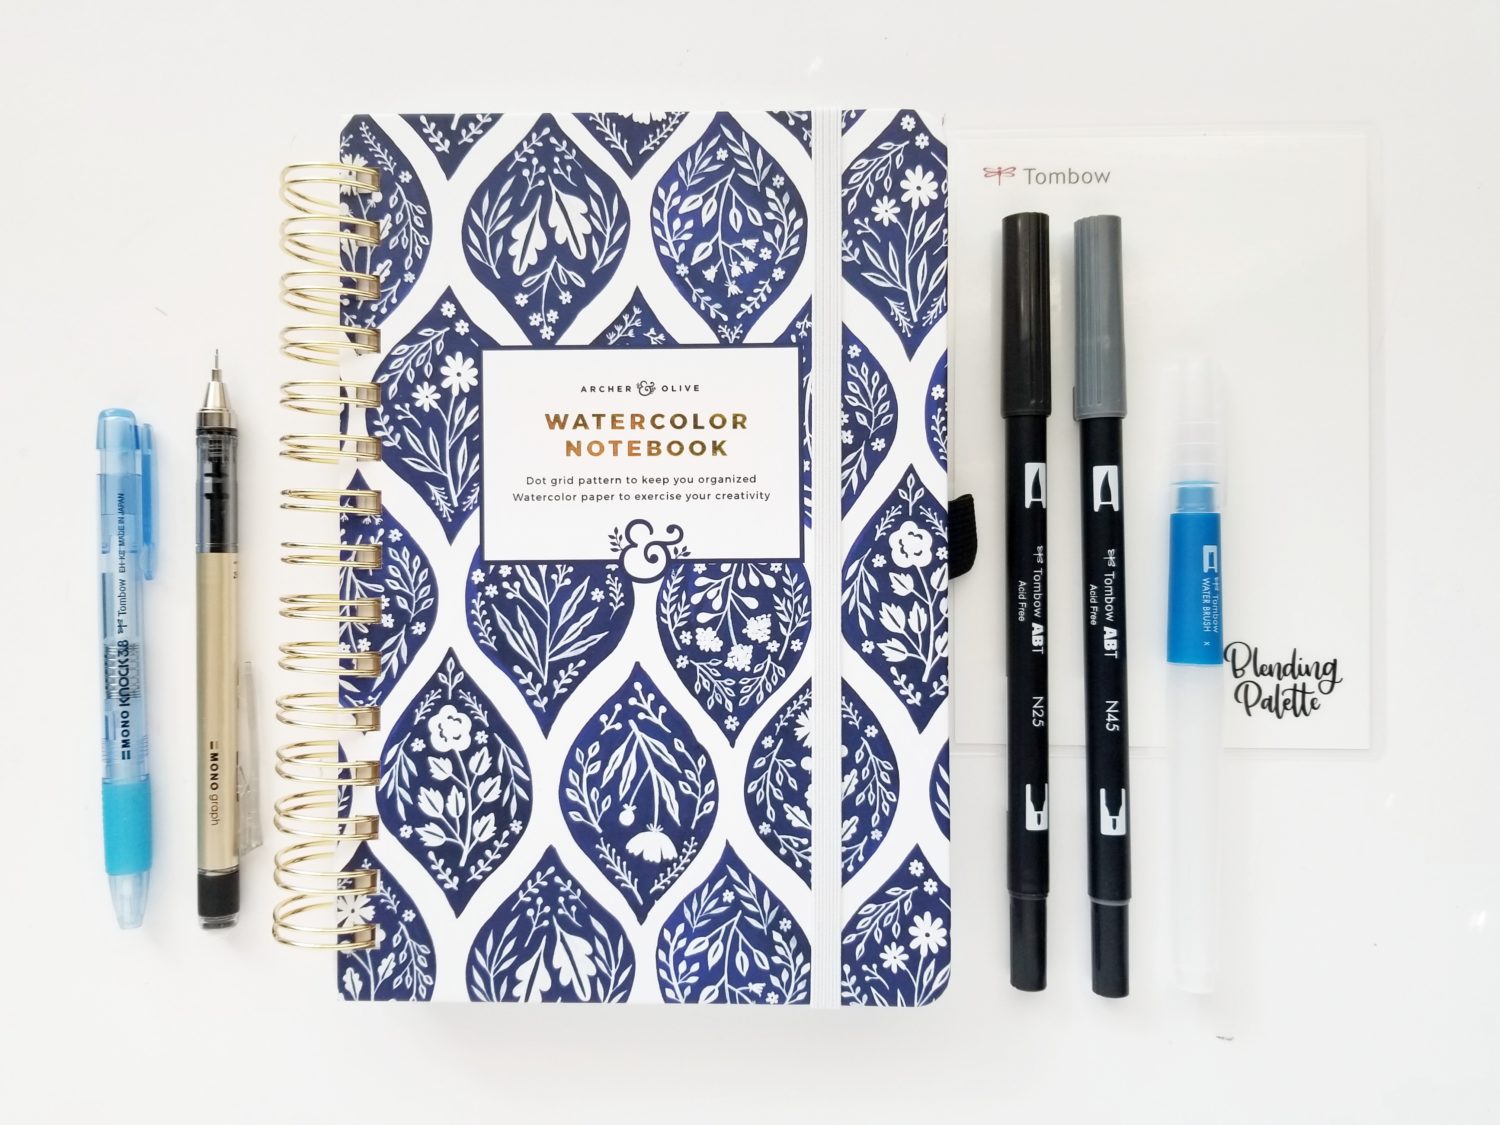
Supplies
- Tombow Dual Brush Pen (N45, N25)
- Tombow MONO Graph Mechanical Pencil
- Tombow MONO Knock Eraser
- Tombow Water Brush – Flat
- Tombow Blending Palette
- Watercolor Paper or Notebook (I’m using my Archer & Olive watercolor dot grid journal.)
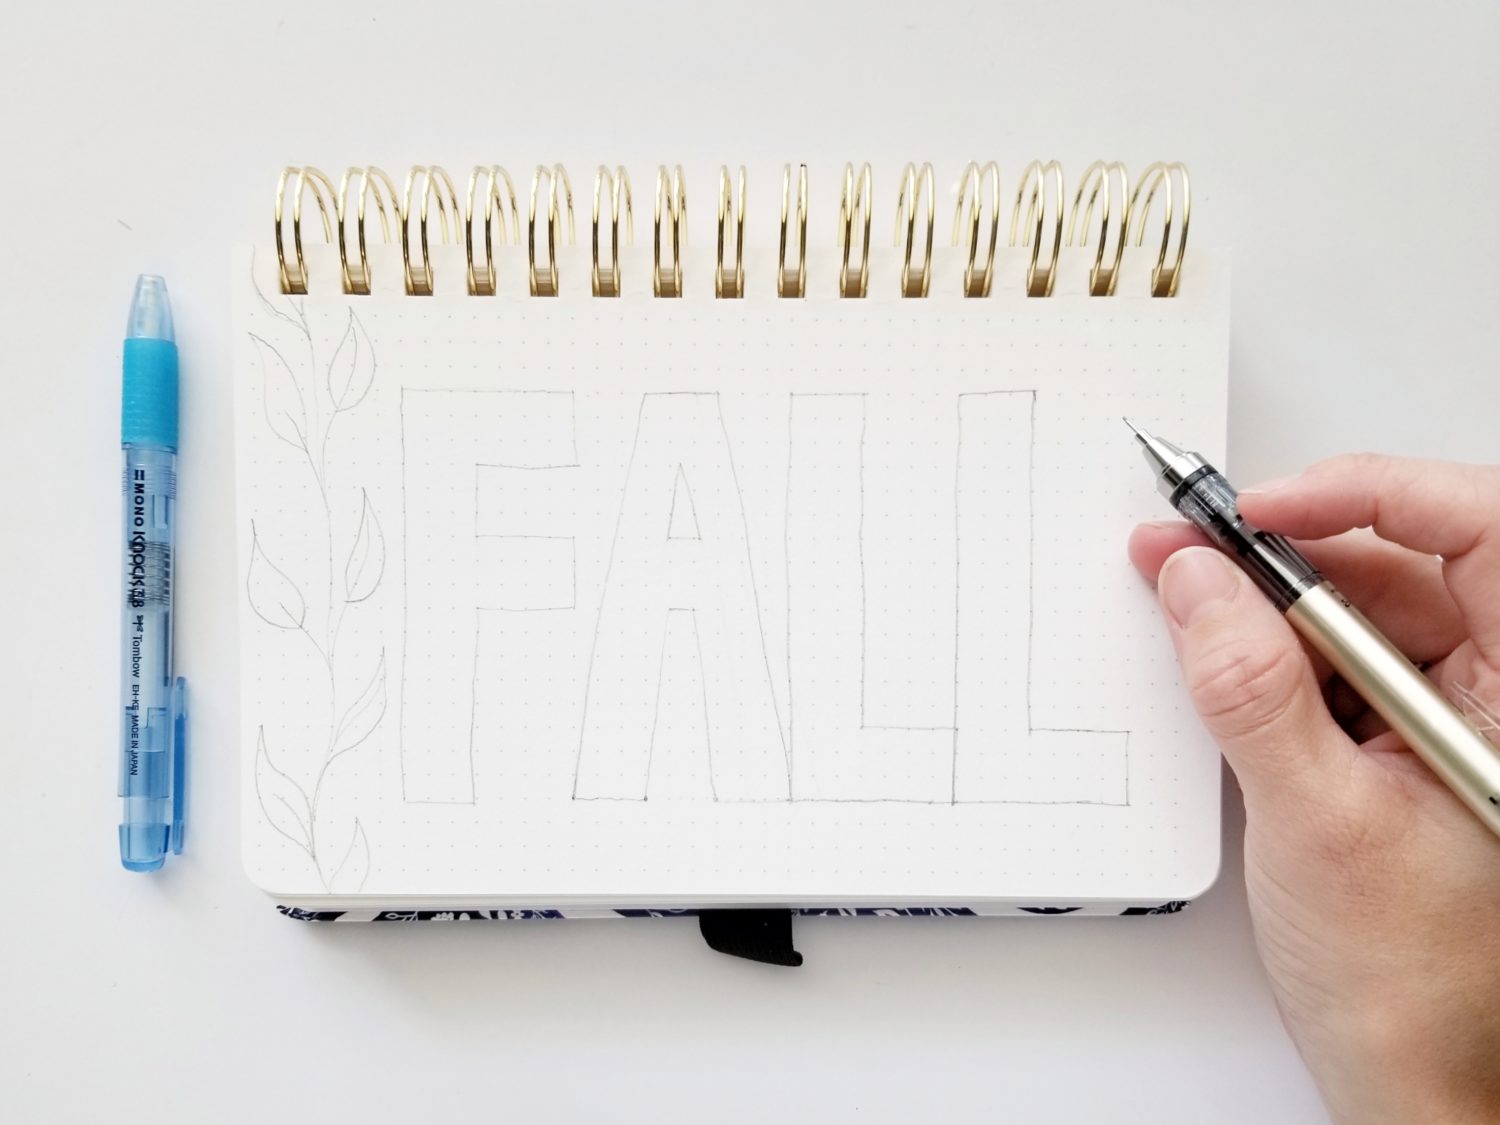
Step 1: Sketch Letters
First, use your MONO Graph Mechanical Pencil to sketch your lettering. I chose a sans serif style and made each letter three rows thick. Using a dot grid notebook helps me create even and consistent lettering with ease!
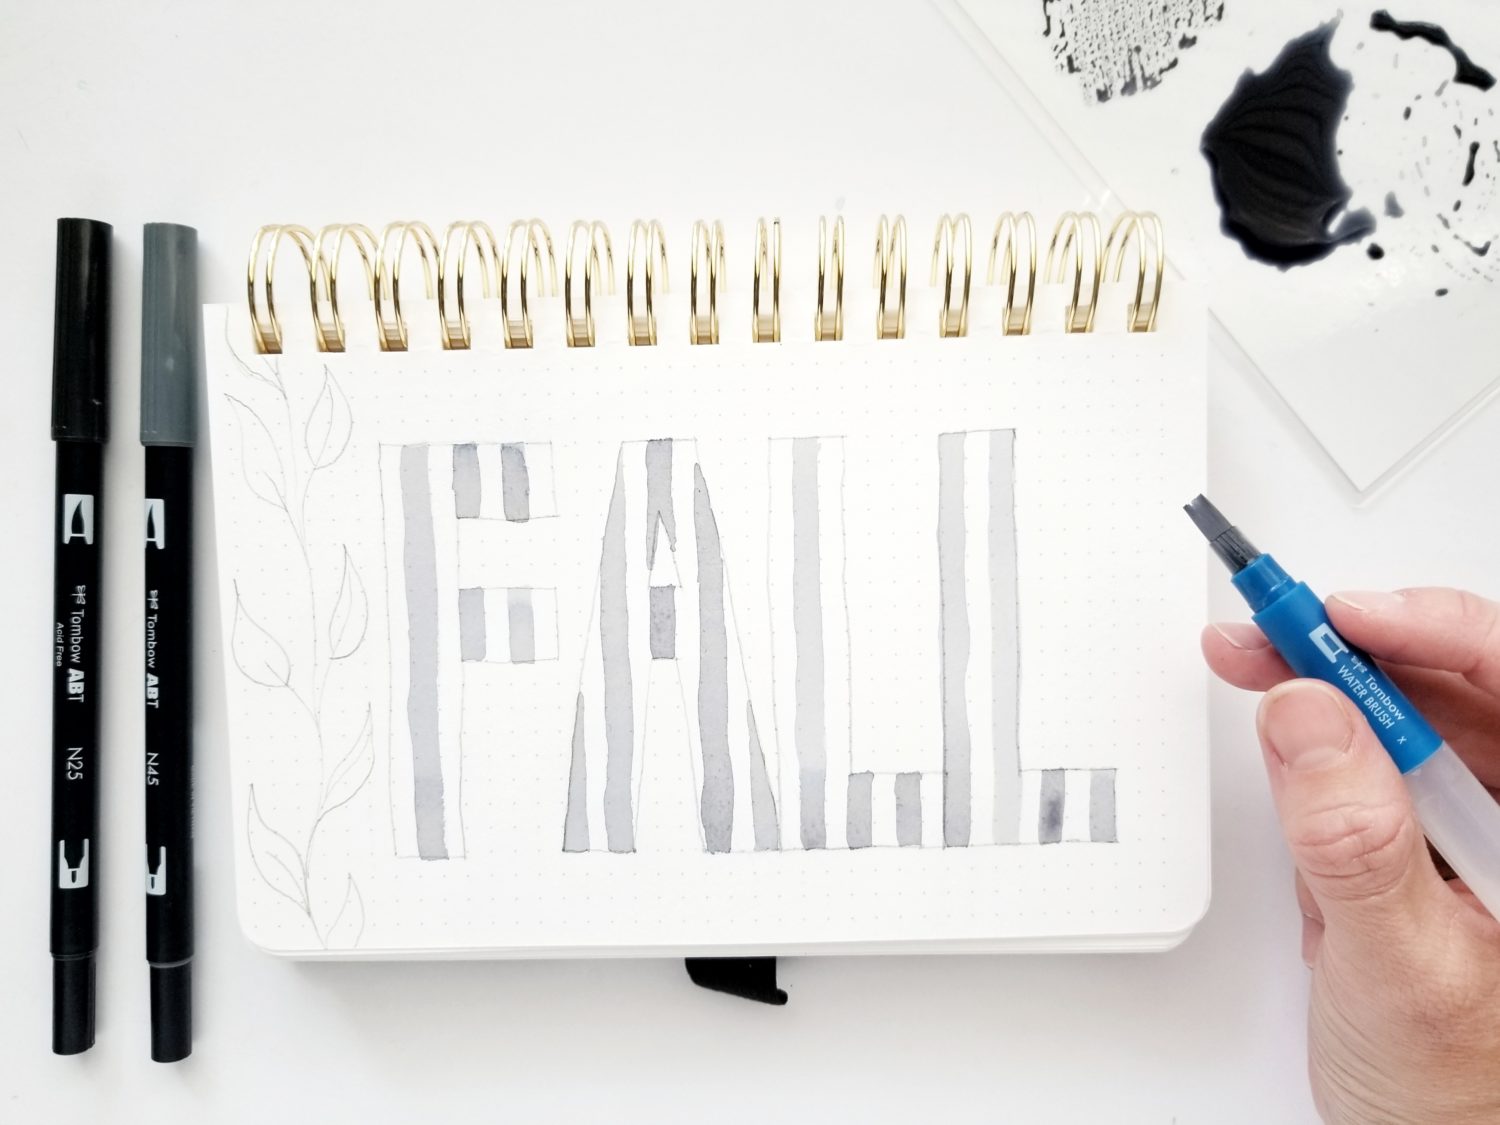
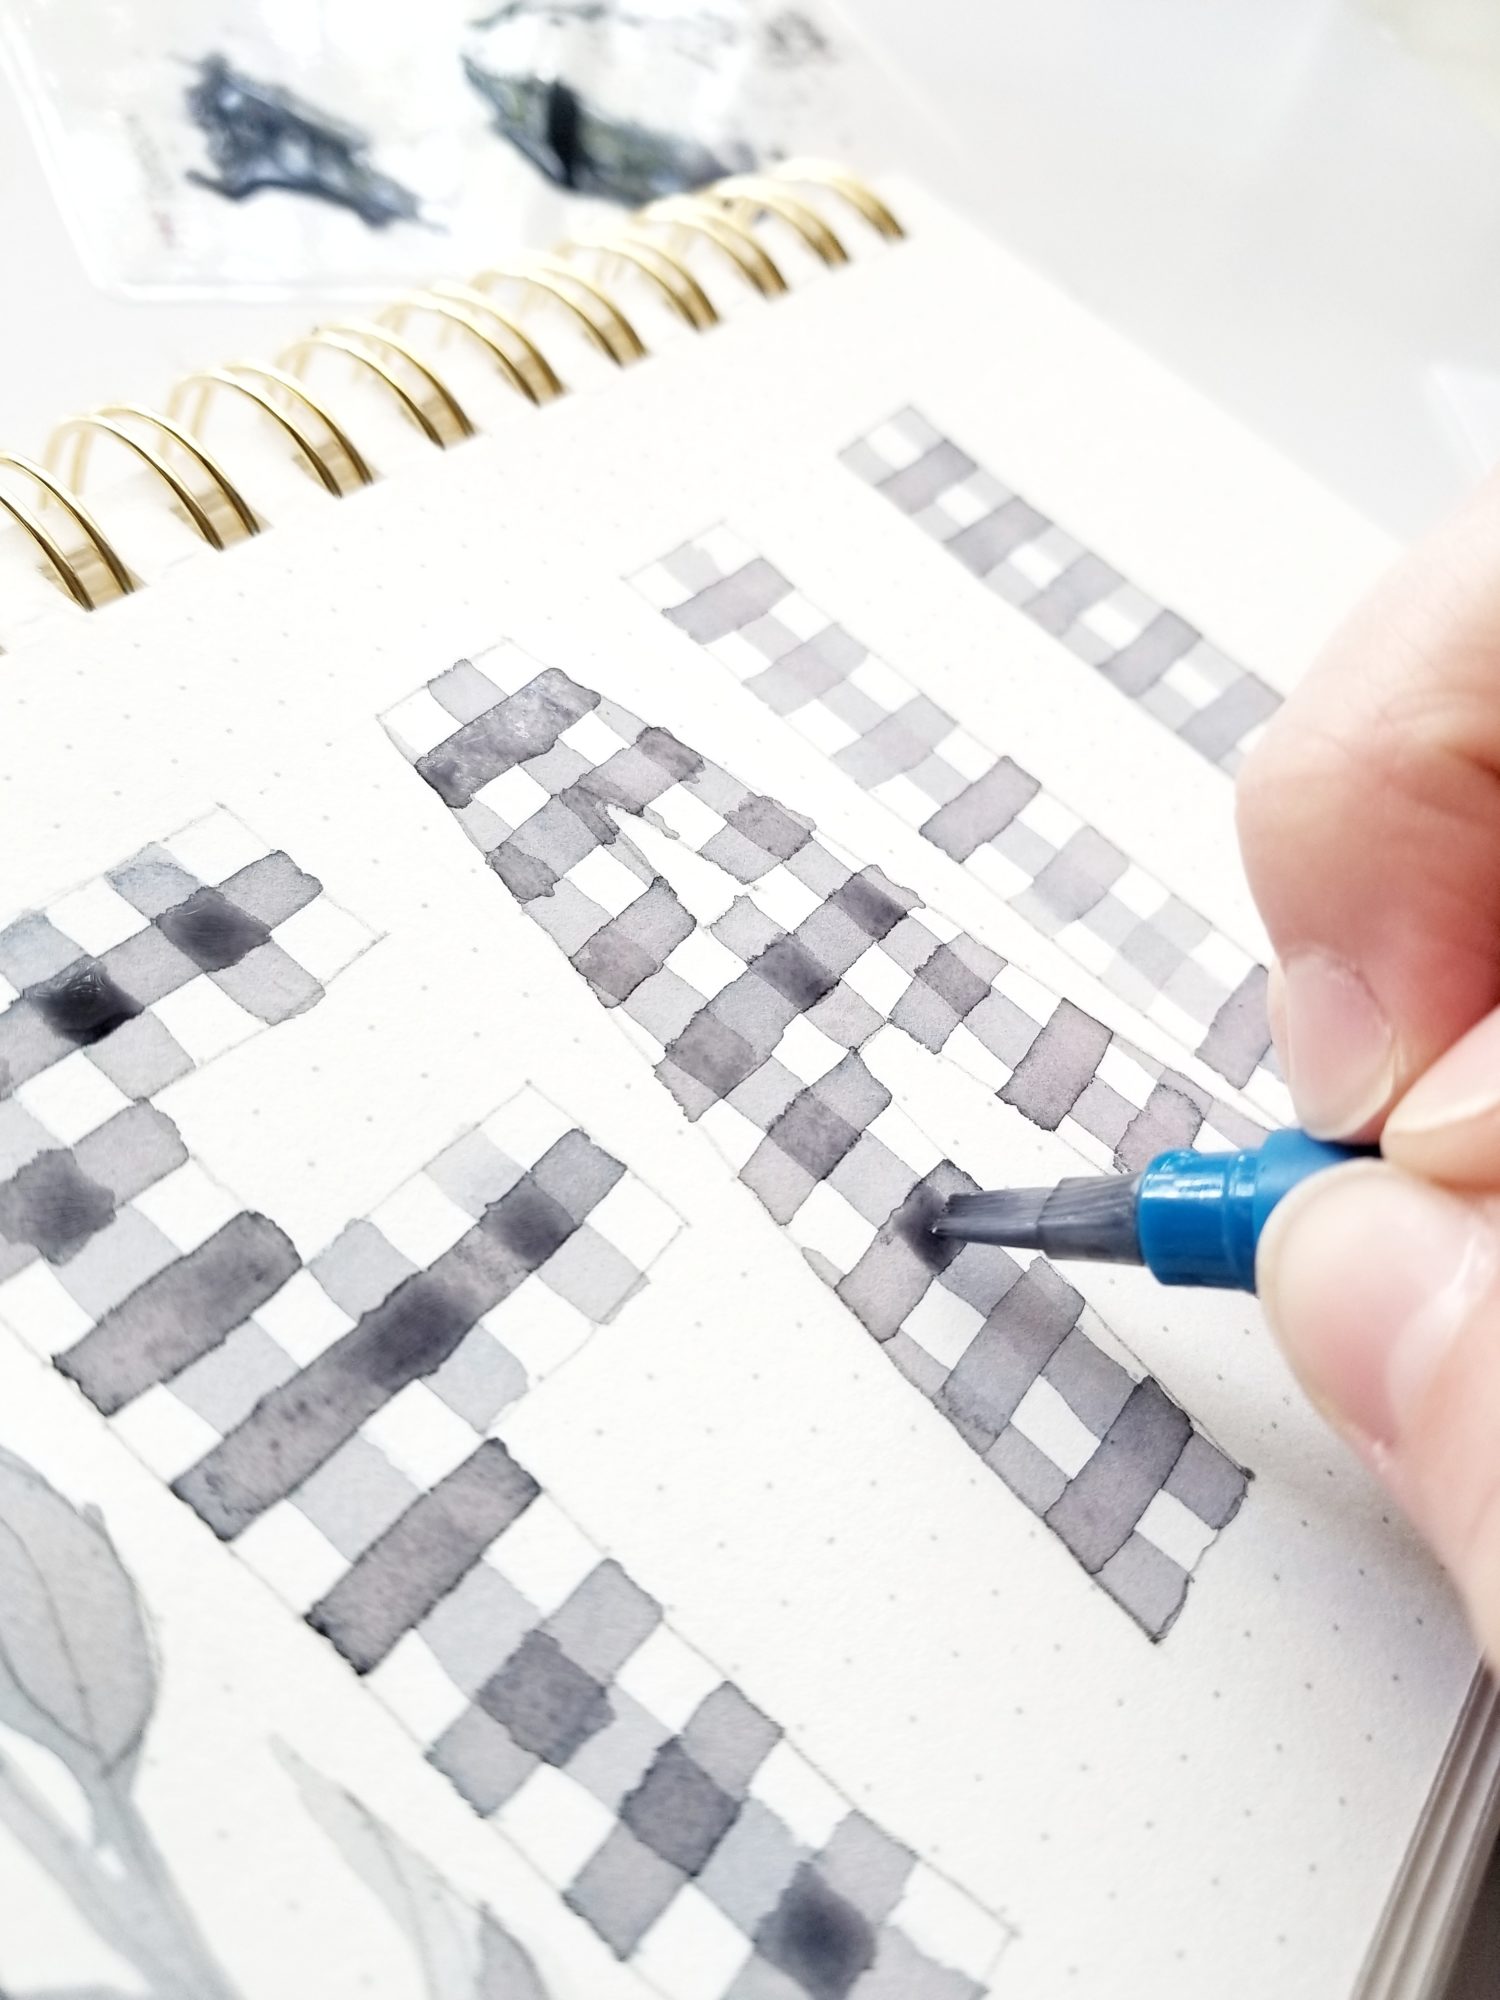
Step 2: Vertical Stripes
Next, scribble some of the Dual Brush Pen color onto the Blending Palette. Then, use your Water Brush to squeeze a few drops of water onto the color. This will dilute the color and create a watercolor you can paint with. Next, use your Water Brush to paint vertical stripes on your letters. The Flat Water Brush is the perfect thickness to create stripes that are the same size as the Archer & Olive dot grid notebooks! I painted them every other row. Then, let the stripes dry.
TIP: To paint the angled areas of the A, turn the Water Brush on its side to paint a thinner stroke.
Step 3: Horizontal Strokes
Next, use your Water Brush to paint vertical stripes. I painted them every other row again to create the buffalo plaid look.
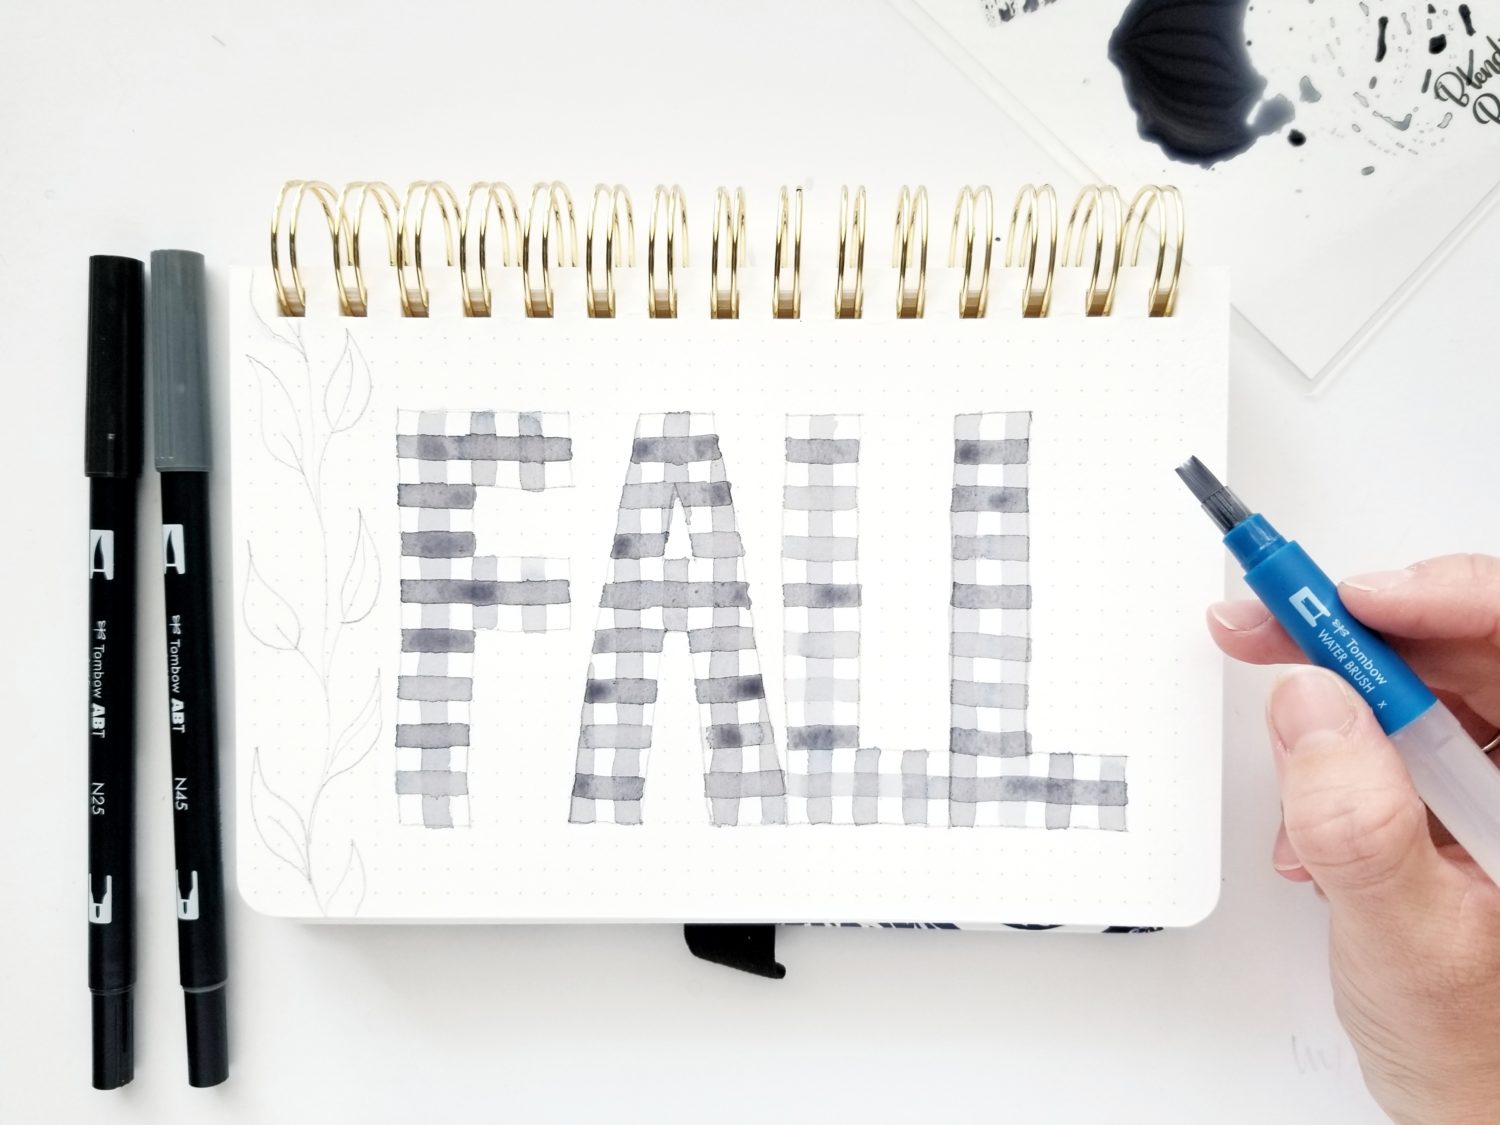
Step 4: Exaggerated Intersections
Once the paint is dry, use your Water Brush to add another layer of color to the stripes’ intersections. This will help exaggerate the plaid and really give it a buffalo plaid look! Let the paint dry completely.
Step 5: Erase & Outline
Next, use the MONO Knock Eraser to erase the remaining pencil marks. Then, use the bullet tip side of your Dual Brush Pen and outline each letter.

Step 6: Add a Shadow
Finally, use the brush tip side of your Dual Brush Pen to add a drop shadow to the letters. To decide where to draw a shadow, chose a light source and draw the shadow on the opposite side. I chose a light source in the top left corner, so I shaded the bottom and right sides.
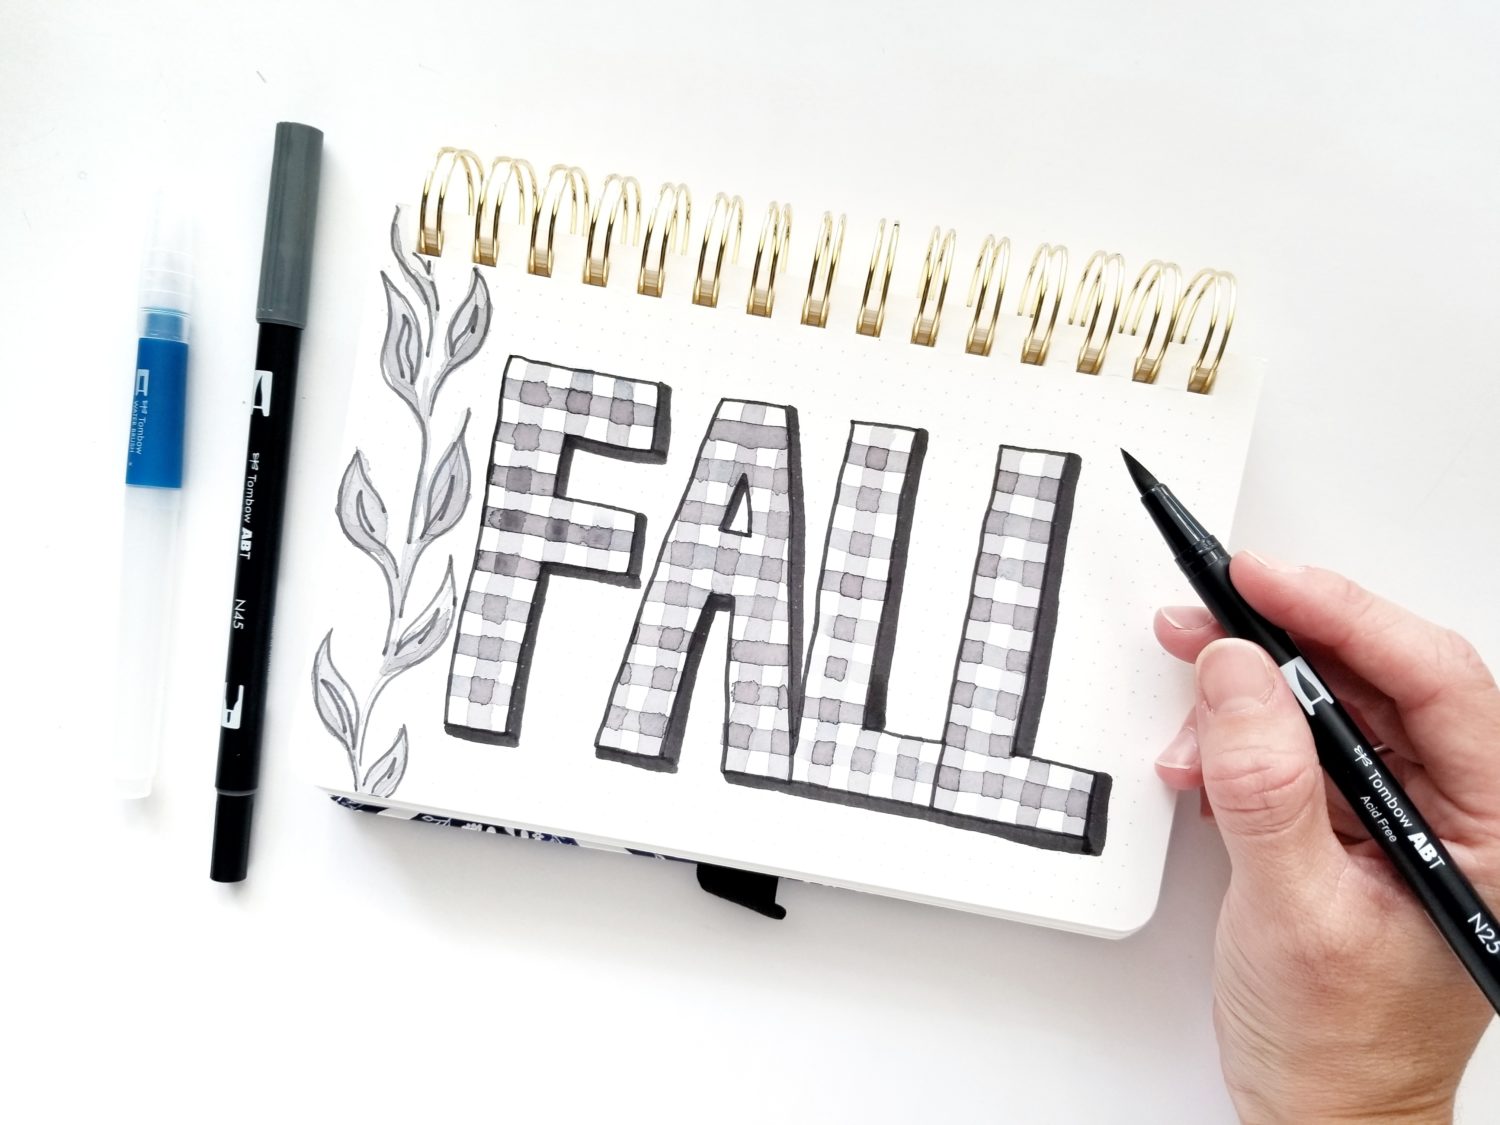
And that’s it! I added a little gray foliage to my lettering, but I love the look of it on it’s own also! If you use this tutorial to create your own buffalo plaid lettering with Dual Brush Pens, be sure to tag @tombowusa and @graceannestudio on social media so we can cheer you on! For more lettering tutorials, check out these posts:
- Pop Art Inspired Lettering
- Blended Lettering with Colored Pencils
- 5 P’s of Brush Calligraphy and Hand Lettering
Happy Lettering!
Pingback: 3 Lettering Fill Styles with Fudenosuke Neon Brush Pens - Tombow USA Blog
Pingback: Create Cow Print Lettering - Tombow USA Blog
Pingback: Beveled Lettering in Five Easy Steps - Tombow USA Blog