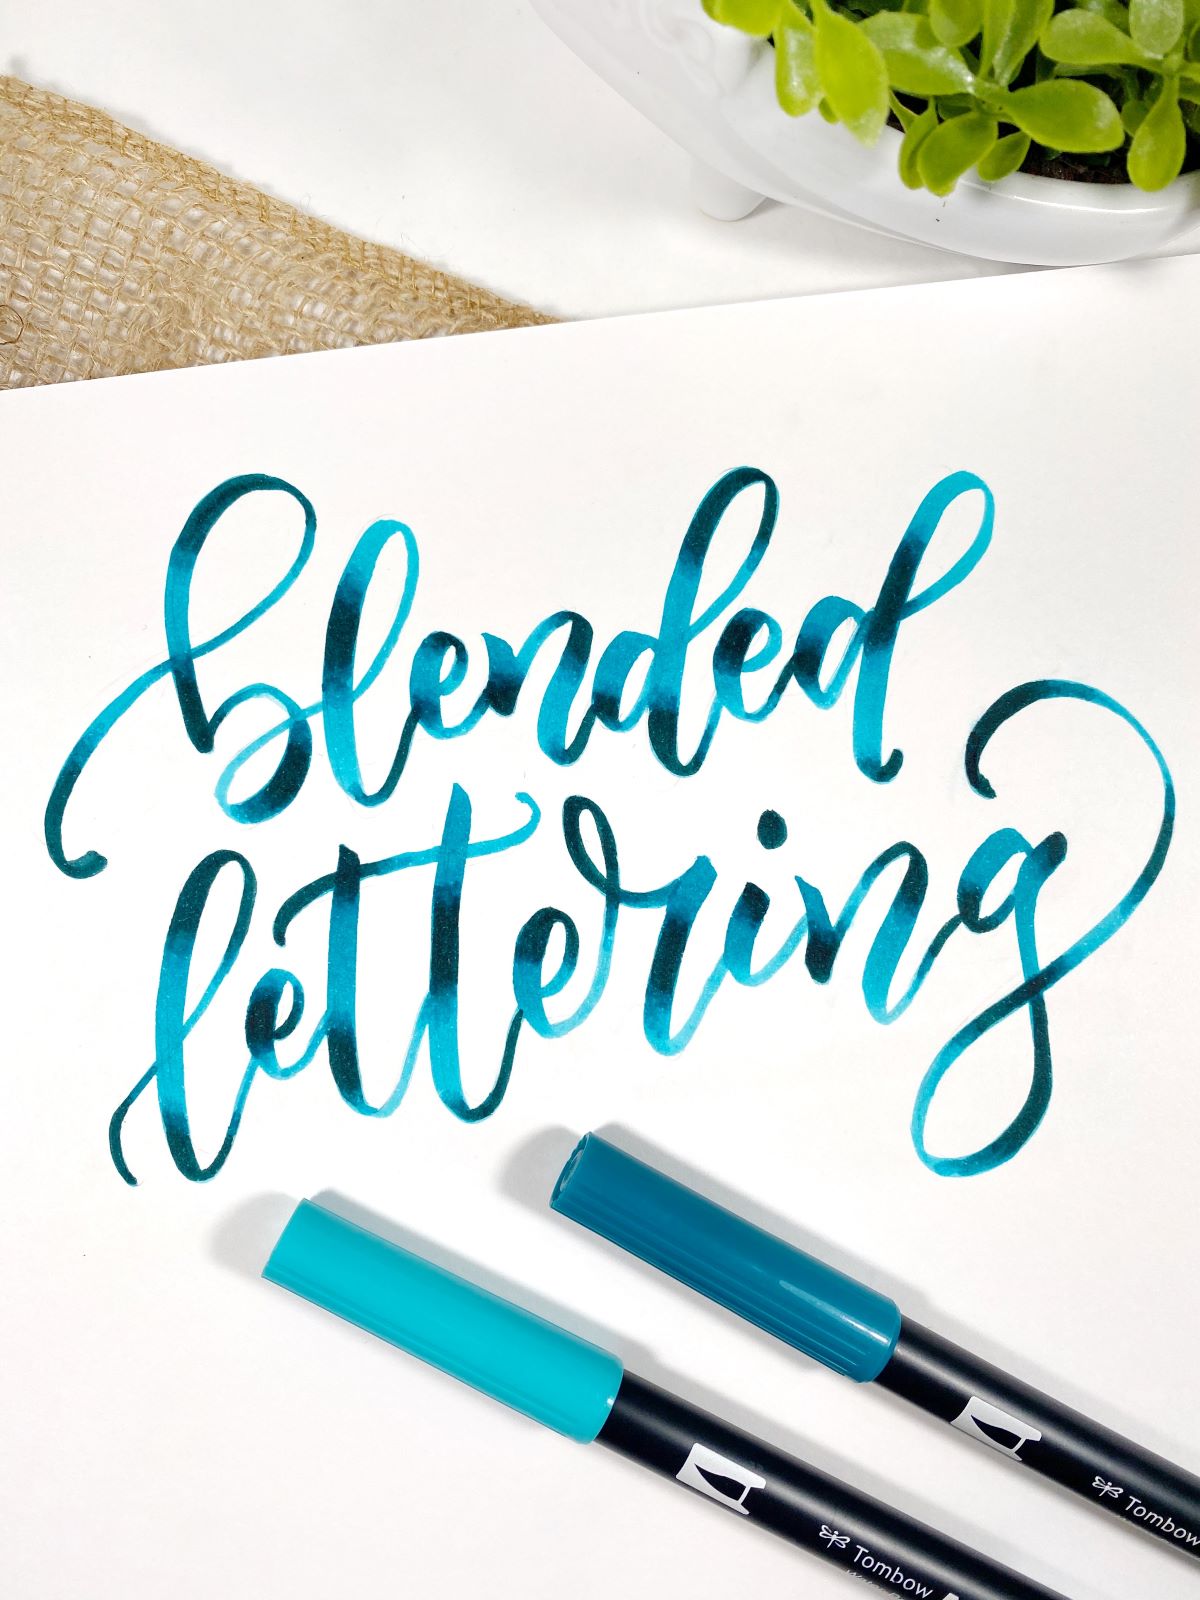
Have you seen artists create blended lettering and are wanting to learn how to do it? Hi Tombow fans, it’s Mandy from @thebrewtifulword and I’m showing you how to create those beautiful blended letters with Dual Brush Pens! It’s not as hard as you think! Practicing and a couple of pro tips will help you create perfectly blended letters. I’ll be sharing different ways to create blended lettering using some of my favorite color combinations. These combinations are just some of the colors you can combine. With 108 choices of Dual Brush Pens there are many more you can create! Spend some time practicing with different colors. Some won’t work, but you may be surprised and find some that work amazingly well together!
Let’s gather our materials and get started!
MATERIALS
- Mixed Media and watercolor paper
- Tombow Dual Brush Pens
- Tombow Blending Palette
- Tombow Water Brush
2 COLOR BLEND COMBO
The easiest way to create blended lettering is by using two colors. So, let’s look at this technique first. You’ll need Dual Brush Pens 725 and 873 for this combo and a piece of mixed media paper. I use mixed media paper only for blending because it can handle many layers of color. Bristol paper can also work well.
For the first step, add a base of Dual Brush Pen 873 to the paper. Then add Dual Brush Pen 725 to the top half of the letter.


Next, use Dual Brush Pen 873 to bring the Dual Brush Pen 725 color down just a little bit. Start a little higher than where the pink meets the coral (note first pic below). This will help give you a more seamless look. Bring the color down just a little bit. You don’t want to bring it all the way down the whole letter. This helps keep the coral its original color.


PRO TIP #1: When trying to blend a darker color into a lighter color, your pen will pick up a lot of the ink. Use a scrap piece of paper to scribble off that darker ink. Then, return to blending it into the lighter color. Some Dual Brush Pen colors are very dark and you may need to scribble off the ink after just one stroke.
PRO TIP #2 – To get a more seamless look, use the Colorless Blender (N00) to quickly smooth out the bottom edge of the blending you just did. The Colorless Blender does remove ink, so you want to be sure to use it sparingly. A couple of quick light strokes will help get rid of that blending line where the two colors meet!
3 COLOR BLEND COMBO
For this technique, we are going to use three colors, Dual Brush Pens 401, 476 and 555. To start, use Dual Brush Pen 401 to add a base on your paper. Next add Dual Brush Pen 476 to the top half of your letter.


Using Dual Brush Pen 401, bring just a little bit of Dual Brush Pen 476 down. Scribble off extra ink on a scrap piece of paper if needed. Next, add Dual Brush Pen 555 to the top third of your letter. Using Dual Brush Pen 476, bring some of Dual Brush Pen 555 color down just a bit. Then use Dual Brush Pen 401 to bring the color down just a tad again. Lastly use the Colorless Blender to smooth out the blend.


RANDOM PLACEMENT BLENDING
This technique is a little more difficult. With practice and patience, you’ll have the hang of it in no time! To make it easier, we will only use two colors for this technique: Dual Brush Pens 379 and 403. The trick here is to randomly place your darker color in each letter. You don’t want to place the darker color in the same spot in each letter, rather put it in the opposite areas in each letter.
To start, use Dual Brush Pen 403 as a base and add lettering to the paper. Then use Dual Brush Pen 379 to add color in either two or three random areas.


Next, use Dual Brush Pen 403 to blend into Dual Brush Pen 379 the same way we did up above. Be sure to scribble off any extra ink you picked up, so you’re not spreading too much color. Lastly, use the Colorless Blender to smooth out the blending line. Repeat for the next letter, but placing the darker color in a different area in the letter.


For more of a challenge try three or even four colors! Below I used 991, 909 and 847 to create this lettering:


While these techniques are the main way I create blended lettering, did you know there are also more ways to blend Dual Brush Pens? Here are three more ways you can create blended lettering!
BLENDING PALETTE
Scribble ink from two different Dual Brush Pens directly onto the Blending Palette. I used Dual Brush Pens 725 and 873 below. Use Dual Brush Pen 873 to pick up Dual Brush Pen 725 getting as much ink on the tip of 873 as you can. Then letter out your word.


You can also use the Colorless Blender Pen to letter out a word. Scribble ink from 725 and 873 onto the Blending Palette. Then, use the Colorless Blender to combine them together and saturate the tip with ink. Letter out your word, reapplying more ink as the Colorless Blender runs out.


TIP TO TIP BLENDING
Using two different Dual Brush Pens (one light and one dark), add ink from the darker color onto the tip of the lighter color. Cover the whole tip with color a few times to get enough ink onto the tip. Then, letter out your word. I used Dual Brush Pen 725 and 873 here:


USING A WATER BRUSH
Use a light Dual Brush Pen color to letter out your word first. Then add ink from a darker Dual Brush Pen in random places. Use the Water Brush to add water to each letter combining the two colors and creating watercolor lettering. I used Dual Brush Pens 401 and 555 below:


Are you ready to create your own blended lettering? Be sure to tag us at @tombowusa and @a_heartened_calling if you do so we can see your awesome work!
For more Dual Brush Pen inspiration, be sure to check out these posts!
- Animal Print and Blending Tutorial with Ali
- Blending Dual Brush Pens with Water with Jessica
- Blending Techniques for Dual Brush Pens with Marie
Thanks for following along today, I hope you enjoyed learning how to create blended lettering!
Till next time,
Mandy
Pingback: Three Tips for Basic Flourishing - Tombow USA Blog
Pingback: 5 Exercises to Improve Your Hand Lettering - Tombow USA Blog
Pingback: How to Choose and Use Brush Pens for Dynamic Ink Drawings – YouTalent® Educational Blog