Hi y’all, it’s Grace from Grace Anne Studio. When I started calligraphy, the idea of adding flourishing was very overwhelming. I’m here to tell you, it’s not! If you’re looking to enhance your calligraphy with flourishing, read on for three tips for basic flourishing. With patience and practice, you’ll master it in no time!
Supplies
- Tombow MONO Drawing Pencil 2B
- Tombow Hard Tip Fudenosuke Brush Pen
- Tombow Dual Brush Pen
- Smooth paper
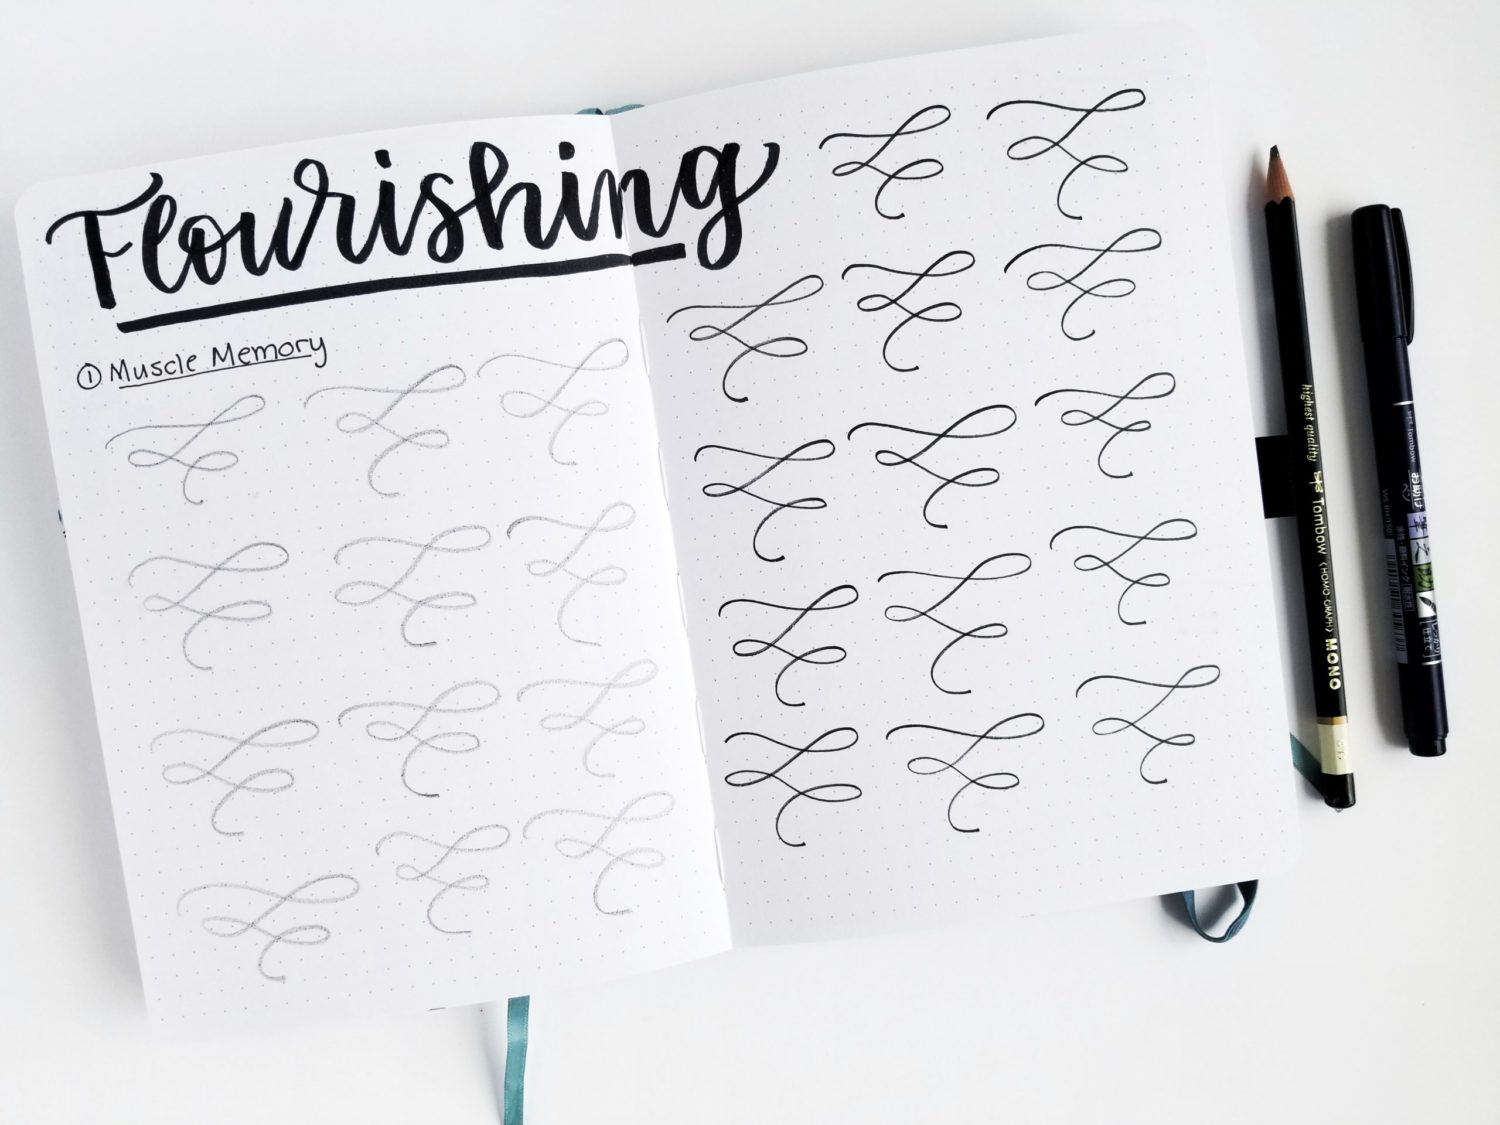
Tip 1: Muscle Memory
First and foremost, let’s talk about what flourishing is. Flourishing is adding embellishments to calligraphy. It’s all the beautiful swoops, swirls and fancy loops that we see added to dress up a word. Flourishes should be added using a lighter touch than upstrokes. It’s THAT light! They should add to a piece without overwhelming the word and rendering it illegible. Legibility should always be a major focus in calligraphy and hand lettering, especially when adding flourishing.
The first key to mastering flourishing is muscle memory. To build muscle memory, choose a basic flourish and use a pencil to practice it over and over again. I like MONO Drawing Pencil 2B because it holds a point. It is also soft enough that you have to use a light touch for consistent lines. A light touch is so important when you’re flourishing and building muscle memory.
Once you can fill a page with consistent flourishes with a pencil, practice the same technique with a Hard Tip Fudenosuke Brush Pen. The lines should be consistent with little to no variation in the thickness. This takes lots of practice, but it’s a great opportunity for mindless doodles! Practice filling pages each day and the muscle memory will develop. This step cannot be rushed. It’s all about consistent practice and a light touch.
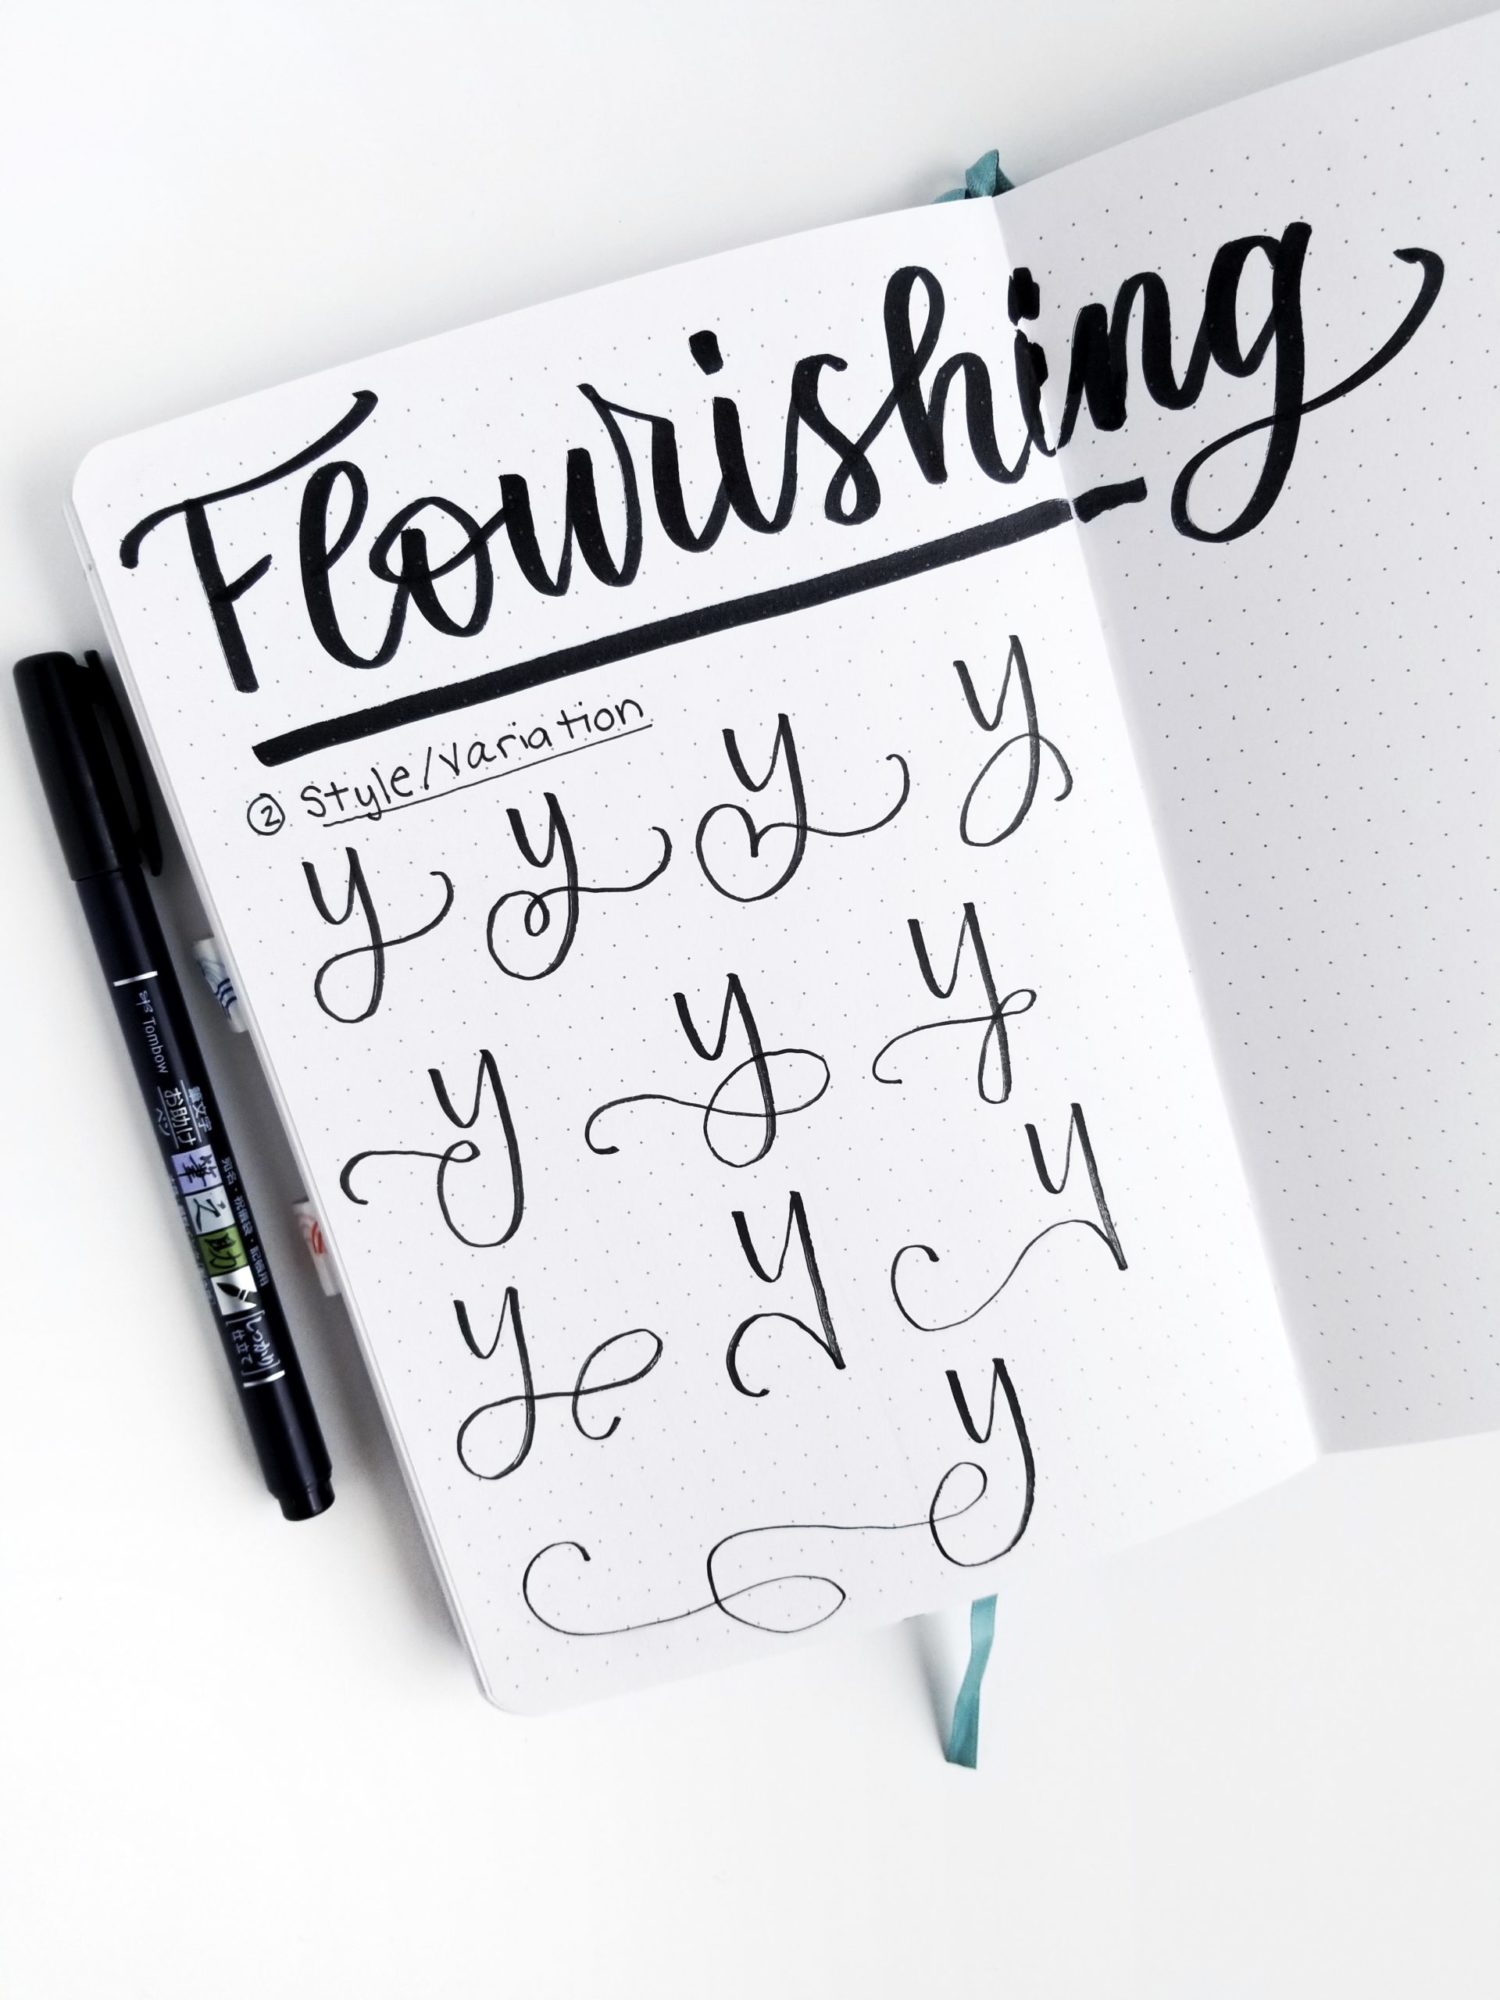
Tip 2: Style and Variation
After building muscle memory for a basic flourish, it’s time to start trying other styles and adding them to letters. I suggest filling a page with different styles of flourishes that you like. This helps you practice, but it also serves as a reference when you’re adding flourishes later. Keep in mind that when adding flourishes to words or quotes, a consistent style is key. Using variations of one flourishing style keeps a cohesive design for the overall piece. Flourishes should enhance a piece, not distract from it.
Tip 3: Opportunity
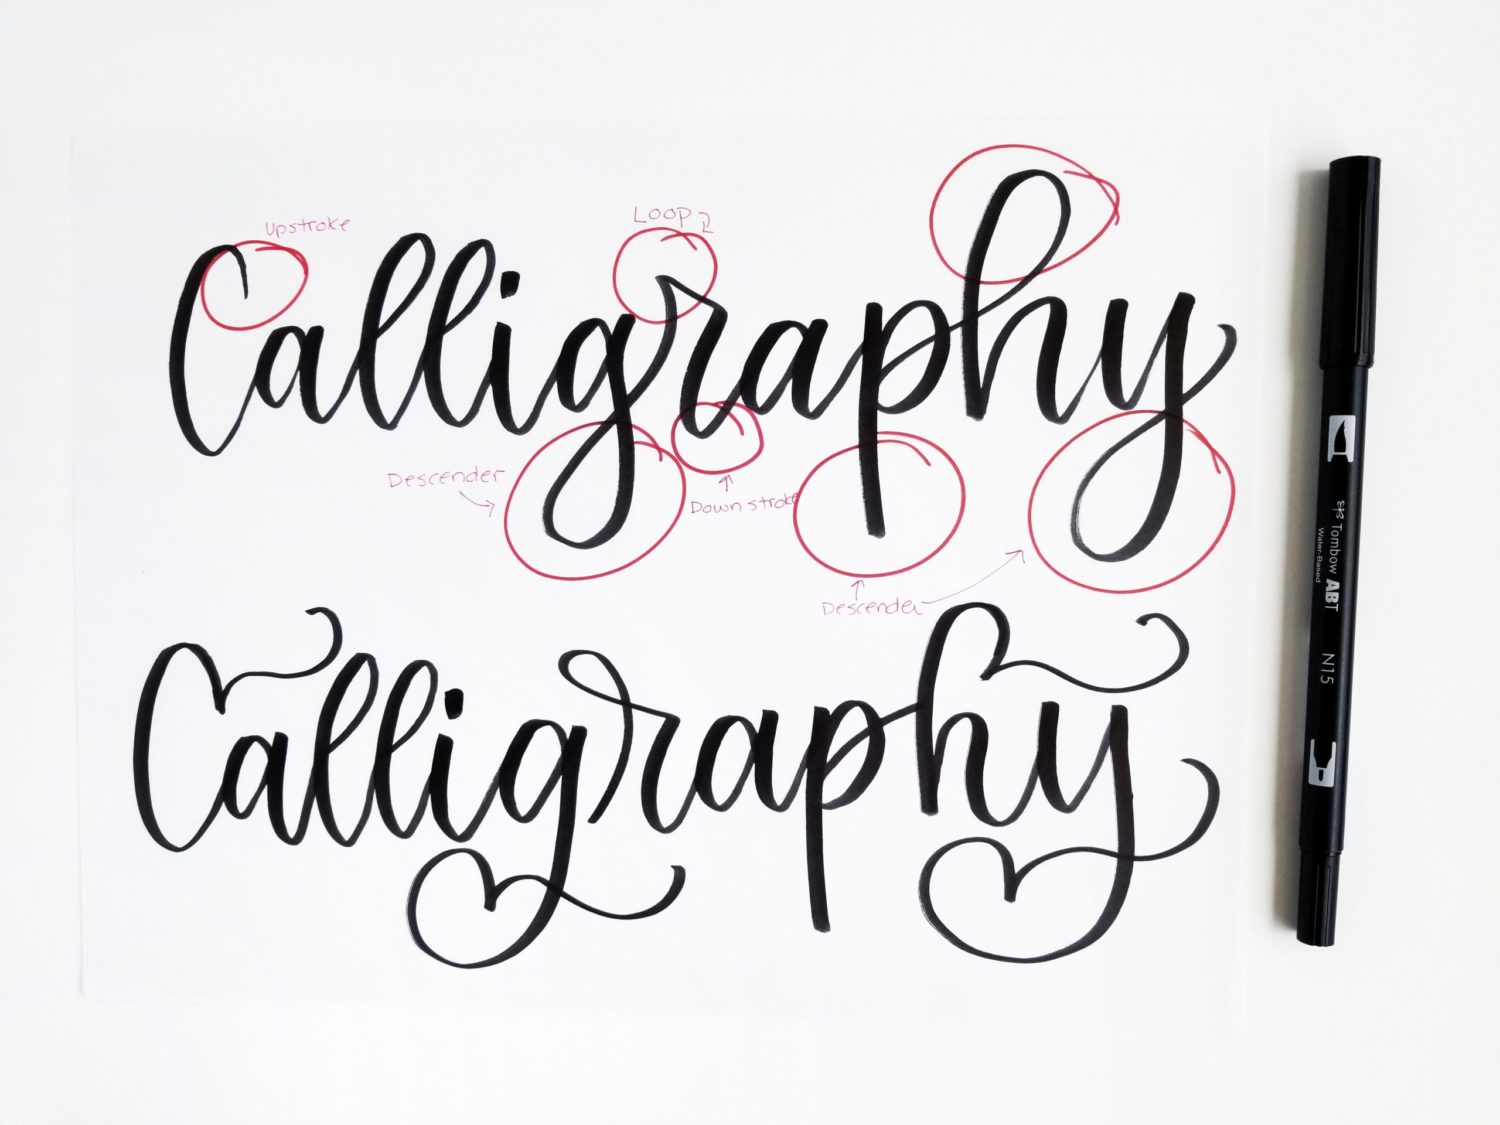
Knowing when and where to flourish is as important as knowing how to flourish. Opportunities to flourish depend on the overall piece and individual words. Flourishes can be added to descenders, ascenders, downstrokes, upstrokes, cross bars, loops and even print letters.
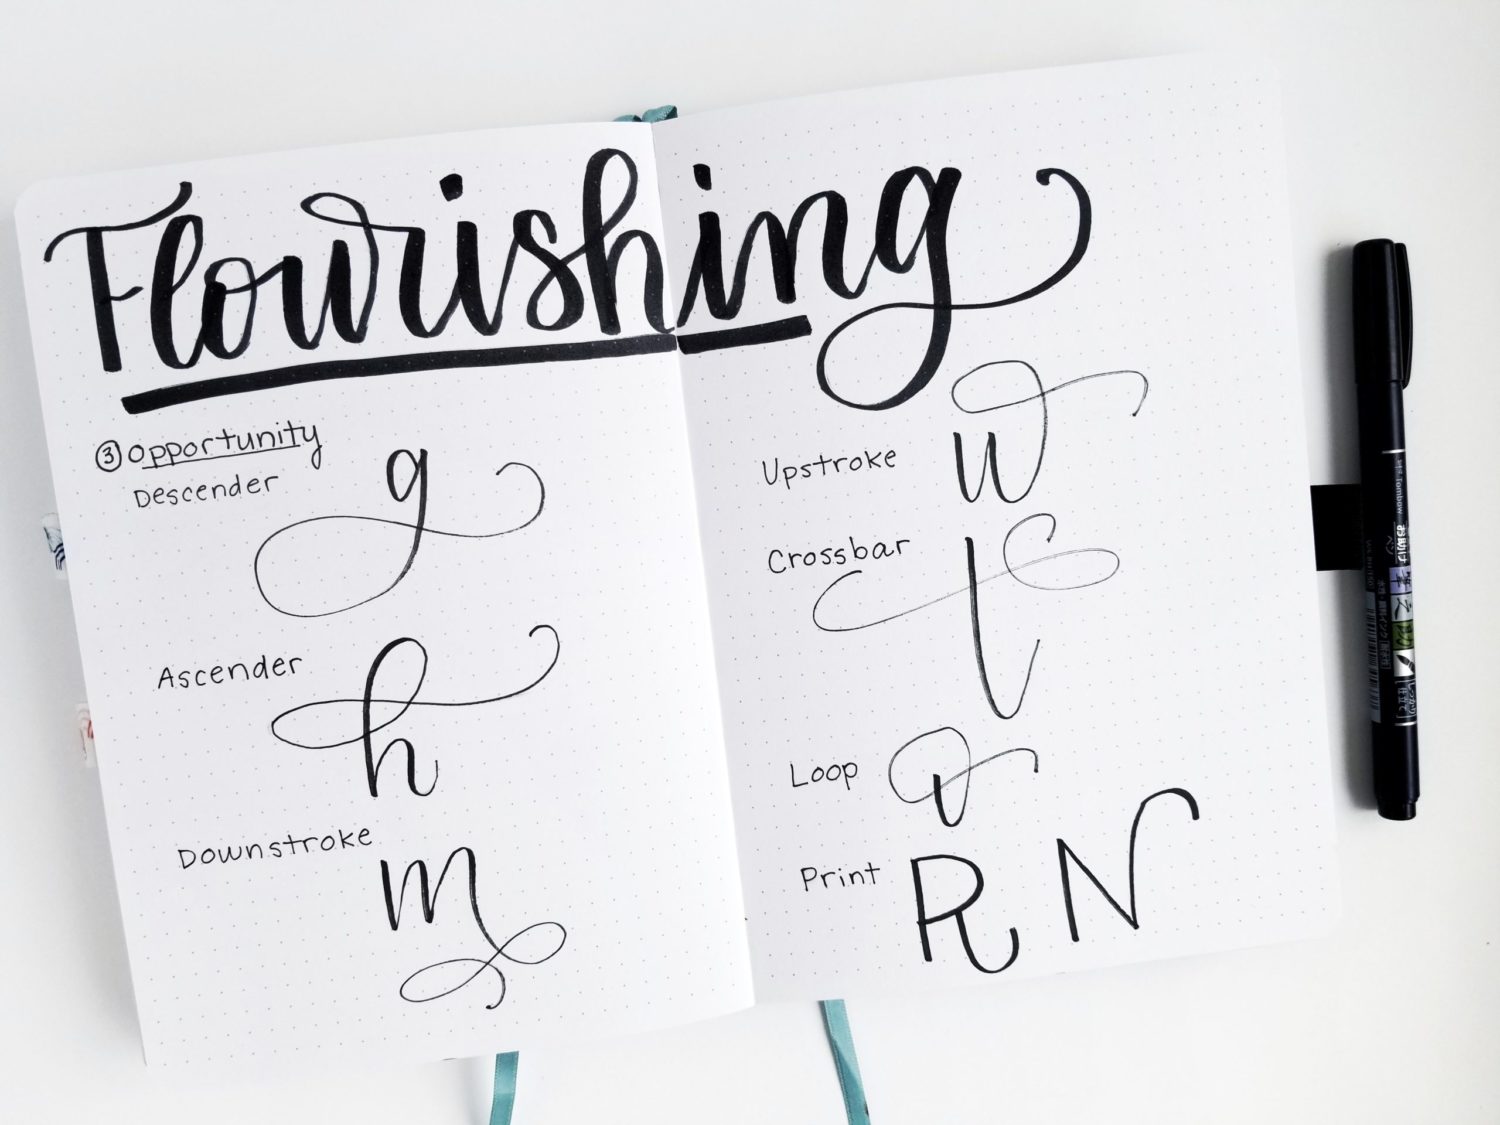
When you’re deciding on how to flourish a word or composition, look at the piece as a whole. Then, use these three steps for basic flourishing. Identify the flourishing opportunities, decide on a style and add use muscle memory to add flourishes. Notice that in the example below, I did not flourish at every opportunity. I used a consistent style, but each letter is slightly different. Always keep in mind that flourishing should enhance the calligraphy, not distract from it.
Using these three tips for basic flourishing, you’ll master it in no time! If you post your work from this tutorial, be sure to tag @graceannestudio and @tombowusa so we can cheer you on! For more calligraphy and lettering tutorials, check out the posts below!
- Blended Lettering with Dual Brush Pens
- Harry Potter and the Basic Lettering Tips
- 3 Ways to Master Pencil Calligraphy
- 5 P’s of Brush Calligraphy and Hand Lettering
Happy lettering!
Grace
This is very helpful. When I try to flourish my writing it looks like a kindergartener scribbled on it. I am interested in embellishing family names. Looking for a sight which demonstrates how to add dots or swirls to a name to decorate it.