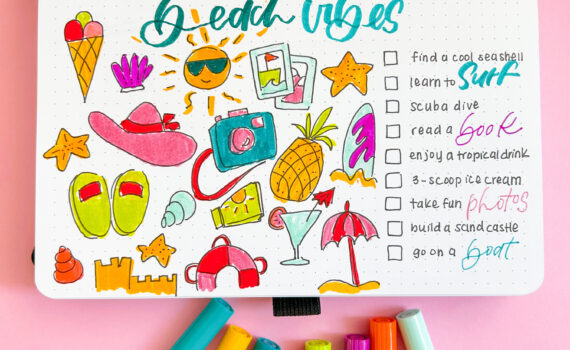
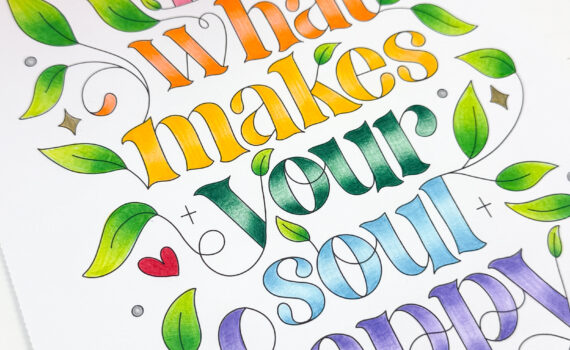
Posts from ‘Design Team’
honeysuckle butterfly…..by melissa cash
This month the Tombow team has been sharing projects created using colors that coordinate with the Pantone “in” colors for the last few years. Today I am sharing a card that I created using the 2011 color, Honeysuckle.

This week we are showcasing the color Honeysuckle, which was the color of the year 2011. This is the perfect color for that special day when we declare our love to that special person in your life. Is also a good time to start preparing our kiddies treat boxes, cards and other gifts, so pay attention to these weeks posts because we will be filling you with awesome ideas for Valentine’s Day.
This mailbox cost me only $1 and dressed it up with 4 x12 patterned paper, ribbons and some stickers. For gluing the cardstock I used the Tombow Stamp Runner and for the embellishments I used the Mono Multi Glue. I also made a coordinating card with the cutest cherub which I colored with my Tombow Dual Brush Pens. I paper pierced the cloud and used Tombow Foam Tabs. The card is size 3 1/4 x 4 1/2 which fits perfectly in the mailbox.
I can’t believe how cute this cherub looks with Honeysuckle hair!! I love how bright my Tombow Dual Brush Pens are and not to mention how incredibly easy they are to use for beginners like me.
I hope you liked this romantic project!!
Take Care!!
i never really paid attention before to “the color of the year” or even “Pantone colors” before… but this month’s challenges have had me digging to find the perfect shade of paper or embellishment to match said colors. in the end i’ve come up short and needed to create something to finish the project. in addition to the color challenge i challenged myself to create a scrapbook layout for each of them, to jumpstart the 2012 year, when i will get more layouts done!
i have had these pictures of my daughter and one of her best friends (this one we’ve known since we said their ages in months!) i have even scrapbooked a few of these pictures before. but i had more pictures and the paper already picked out and i was looking forward to getting another layout done. i needed to add in some embellishment and struggled to find something the right color in my stash.
i found some white paper flowers and grabbed my Tombow Dual Brush Pen #743. i colored around the edges of the flowers. then with a q-tip dipped in water i dragged the color in towards the center of the flower. once the color was blended it was the perfect embellishment for my layout. (wait til the flower is dry before adhering it to your project.)
to finish putting the layout together i used Tombow MONO Adhesive Permanent Runner for the pictures and paper, Tombow Dual Brush Pen #743 to ink the edges of the pages and write a portion of the title, Tombow MONO Aqua to set the rhinestones in the center of the flowers, and Tombow Power Tabs to set the flowers. WOW, 4 Tombow products on one layout. i love that each of them have a purpose, but work so well together.
I hope you enjoyed my attempt at using HONEYSUCKLE. check back tomorrow for another very pink project!
If you enjoyed this post follow us on facebook and twitter!
http://www.facebook.com/tombowusa and
http://twitter.com/#!/tombowusa
What did you all think of the new Pantone color of the year last week? I love the tangerine color. This week we have another color challenge that was Pantone’s color of the year 2011…Honeysuckle. This color matches Tombow’s Dual Brush Pen 743 (hot pink).
With Valentine’s Day sneaking up on us, I thought this color would be perfect for a candy box. I found this tutorial here. The tutorial shows to use Hershey Nuggets, but I had some raspberry Ghiradelli’s on hand and they fit perfectly! I can get 2 into each little matchbox. The matchboxes were cut with SU!’s die that my friend had and I cut a bunch of them over a year ago. They are now coming in handy as I plan to make more of these boxes for friends and family.
Tip: One of the wonderful things about markers and rubberstamps is that the markers are less expensive and you can have so many more colors. I colored Our Craft Lounge’s new Every Heart Beat stamp set (the zig zag image) with the 743 Dual Brush Pen and stamped it on a label that also was on the die that I cut. I then stamped the sentiment with black ink.
I used Mono Adhesive Power Bond to put the whole box together. I prefer using a stronger adhesive for projects like this.
I hope I inspired you to start working on your Valentine projects. I have a couple more I will be sharing with you this month as well.
Thank you for stopping by,
http://www.facebook.com/tombowusa and
http://twitter.com/#!/tombowusa


I used Tombow’s Mono Adhesive Power Bond to adhere all the papers to the tin and Tombow’s Mono Adhesive Permanent to adhere paper to paper.
Thanks for looking!
This week we are showcasing the color Tangerine Tango, which is the color of the year!! Orange is my favorite color and this hue is my second favorite!! Some of my plans for this year is to do more Home Decor pieces. I moved to the US on October and a lot has happened since then, leaving me very little time to make more Home Decor. In my house back home my daughter had a mural and her room didn’t need much more to be cute. Now she has the whitest walls in the world and is kind of sad. One of my projects for this year will be to turn that plain white room into a nice and fun environment. I bought this birdhouse with the idea to turn it on a nice decoration.
The first thing I did was testing the Dual Brush Pens on the bottom of the birdhouse and I remember that last week, Sarah gave us a little tip about using the Mono Aqua Liquid Glue first, letting it dry and then using the Dual Brush Pens. She used chipboard but it was worth a try and it worked the same. Using the Mono Aqua Liquid Glue before coloring the birdhouse made it much brighter. I used the Mono Aqua Liquid Glue on the parts I was going to color with Dual Brush Pens and let it dry. I did super fun laundry while I waited so you probably don’t need to wait overnight. Then I colored the Tangerine and Green parts and let them rest for a few minutes and used a little bit more of the Mono Aqua Liquid Glue to seal it. After it was dry I measured as best as I could the parts that I was going to cover with paper leaving just a tiny tiny bit extra so I could sand it down later. I used my awesome Mono Multi Liquid Glue to glue the paper on the house. The broad tip helped me spread glue across the surface easily. If there was lots of excess on the paper I trimmed it down with a craft knife and then I sand it down. For the roof I used 7 layers of paper stripes and a scalloped border punch. For the front of the house I used a border punch to make a fence-like detail . I also used a die cut, a little detail to give the illusion of a tiny window and 3 handmade flowers that I made with felt, pearls and my Mono Multi Liquid Glue.
I loved using the Dual Brush Pens instead of paint, it looks more like a stain which makes it a little bit more realistic and shiny!! I loved all these bright colors together!! Hopefully the year 2012 will be bright
This was such a fun project!! It made me feel like a kid again!! I hope you’ll give Home Decor a try this year!!
I hope you liked this project!!
Take Care!!
the color of the year…tangerine!funny thing, i don’t have very much of this color! looks like i’m going to need to pick some up!
i liked using this color with these pictures from this past summer. they needed a bright vibrant color background to set them off.
i used a Tombow Dual Brush Pen to color in a title i printed. there is something therapeutic for me to sit and color, i don’t mind it at all.i went through the first time with #885 and then back over it with a blender pen to fill in the letter and soften the edges.
then using Tombow MONO Adhesive Removable Runner i adhered a stencil to a piece of cardstock. the cardstock was a few shades lighter than the background, and went over the edges of the stencil with Dual Brush Pen #885.
i used Tombow MONO Permanent Adhesive Runner to put the whole thing together.
if you enjoyed this post follow us on facebook and twitter!
Hi there! This week our theme is “What’s New”. Each year Pantone comes out with the new “in” color for the year and for 2012 it is Tangerine Tango. Today I am going to share a card with you that I created using a monochromatic color scheme and a pretty little flower. I used the Tombow Stamp Runner-Permanent Adhesive , Tombow Power Tabs and Dual Brush Pen #885 (Warm Red).
I inked up the sentiment with the Warm Red #885 Dual Brush Pen and stamped it onto some cream cardstock. I assembled the card layers using the Tombow Stamp Runner, leaving the top right corners adhesive free. You will roll these down for a little added dimension to your card. Next, you will use the stamp runner to apply adhesive to the backside of your ribbon/trims and lay them across the card. I didn’t have the right color of pearls, but no worries. I used the Dual Brush Pen (#885) to color them for a perfect match. Give it a try, you will be amazed at how easy it is to color match using the Dual Brush Pens.

Please join us on:
http://www.facebook.com/tombowusa and
http://twitter.com/#!/tombowusa

If you enjoyed this post please follow us on
i have lost count as to how many organizing ideas i have tried out. well, add this to the countless number.calendars are great, but they never seem to give me enough room to write what i need to. or more importantly what my family needs to see.
so i thought i’d give this a try. i made magnets for each day of the week. then i put them on my fridge with a piece of paper under each one. it is easier for everyone to see what is going on that day, who is going where, and what needs to be done.

crossing my fingers for an organized 2012 (while still using my organizational binder, and my bill sorter, and my kid’s daily schedule…i told you i have tried many ideas!) to make the magnets i used Tombow Dual Brush Pens to color raw chipboard. the colors seep in nicely to the chipboard textures leaving an even and soft color.with 96 colors it is easy to find a color to match the papers i was working with. with a circle punch i made 7 circles and inked the edges with a dark brown Dual Brush Pen. then using Tombow MONO Multi Liquid Glue i layered all the pieces together -raw chipboard circle, pattern paper, marker – colored chipboard, with a raw magnet on the back. the Multi is strong enough that even the force of raw magnets will not separate the magnet and the chipboard, and tacky so it holds the paper and the chipboard well without warping or bubbling because it is too wet.
as an experiment i wanted to see what would happen if i coated the raw chipbaord with Tombow MONO Aqua Liquid Glue before coloring it with a Tombow Brush Pen. the result was a slightly more vibrant color with a shine. see the difference between the flower with Aqua and the circle without?
wishing all a HAPPY NEW YEAR and HAPPY CRAFTING!
if you enjoyed this post follow us on facebook and twitter!


