Hi, friends! I’m Andrea Lake, and I’m getting ready for summer by diving into one of my favorite creative activities—scrapbooking! I grabbed a few of my go-to Tombow adhesives and a MONO Drawing Pen to create a colorful 12×12 scrapbook layout documenting last year’s trip to Puerto Rico with my […]
Stamp Runner Dot Adhesive
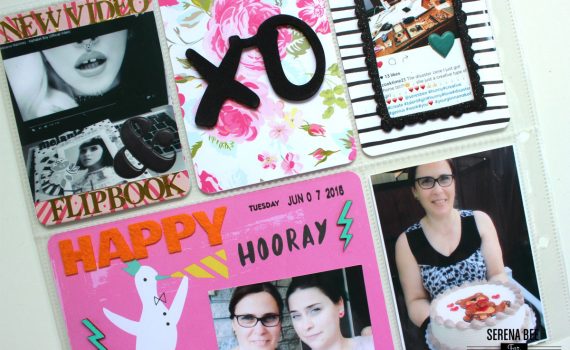
Hello lovelies! Serena Bee here and this week we at Tombow USA have teamed up with Freckled Fawn to bring you a week filled with inspiration! For today I would like to share my Project Life tutorial featuring Freckled Fawn embellishments, made for my 9×12 album. I love making my own […]
Project Life Tutorial Featuring Freckled Fawn | Serena Bee
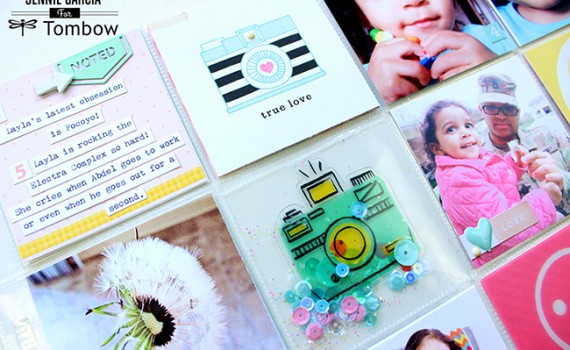
Hello Tombow Fans! This is Jennie. This week the Design Team will be inspired by this Spring Moodboard I put together. I made a Project Life Spring spread and my main inspiration for my project was the color palette but I also used other elements from this image. I used pastels […]
Project Life Spring By Jennie Garcia
 4
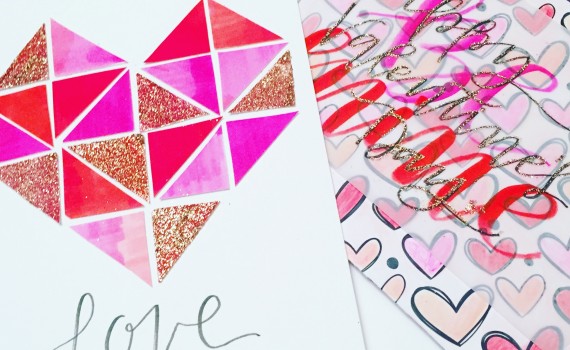
4 It’s almost that special day… Be mine, valentine… or should I say… make my valentine! This colorful project is the perfect handmade gift for your valentine, whether is be a friend, family member, the love of your life, or yourself! Glittery, Geometric Heart Art This piece is the perfect valentine, […]
Valentine DIY: Glittery, Geometric Heart Valentine | By Lauren Fitzmaurice
 4
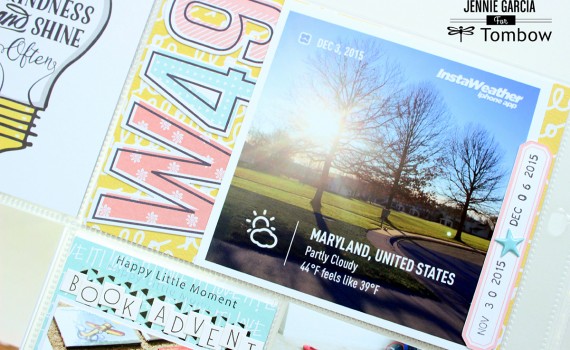
4 Happy Monday! This is Jennie and this week the Tombow Design Team are sharing projects to show you who they are! I am the scrapbooker and project lifer from the group. In this post I’m offering you tips but I’m also giving you a look into my life! I know that […]
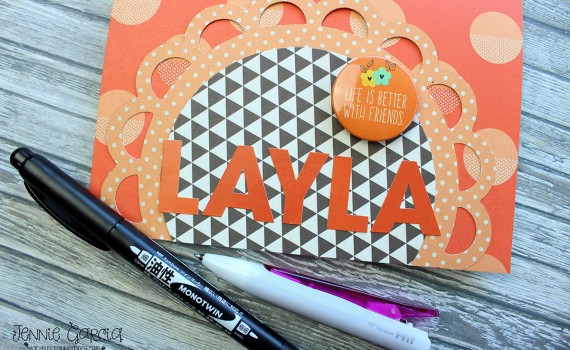
15 Pocket Pages Tips to Document 2016 Meaningfully By Jennie ...
November 15th is America Recycles Day. In that spirit, we decided to have a whole week of recycled projects! I’m Jennie and I have two little girls. I also have a husband in college that can’t read from the computer, so he has to print all the material to be […]
Recycled Notebook By Jennie Garcia
 10
10 Hi everyone, Beth Watson here! Welcome to day two of the Tombow USA and Simple Stories Week here on the blog! Simple Stories provided me the Pumpkin Spice collection, which is PERFECT for me since I live in Florida and don’t get seasonal weather. Instead I can craft up some […]
AUTUMN Banner featuring Tombow USA and Simple Stories
 19
19 Hello and welcome to Tombow USA and Simple Stories week! All week the Design Team will WOW you with AMAZING projects using Tombow and Simple Stories products! I’m Daniella Hayes am I am sooooo excited to share my project with you!! I made this SN@P-Book, using the “We Are Family” collection […]
Tombow USA and Simple Stories Week!
Happy Friday Everyone! This week our design team had been inspired by the Summer Trends of 2015. If you want to take a peek at some trends check out this Pinterest Board. I was inspired by handwritten type, patterns and iconic imagery like hearts and smiley faces. For photos and labels […]
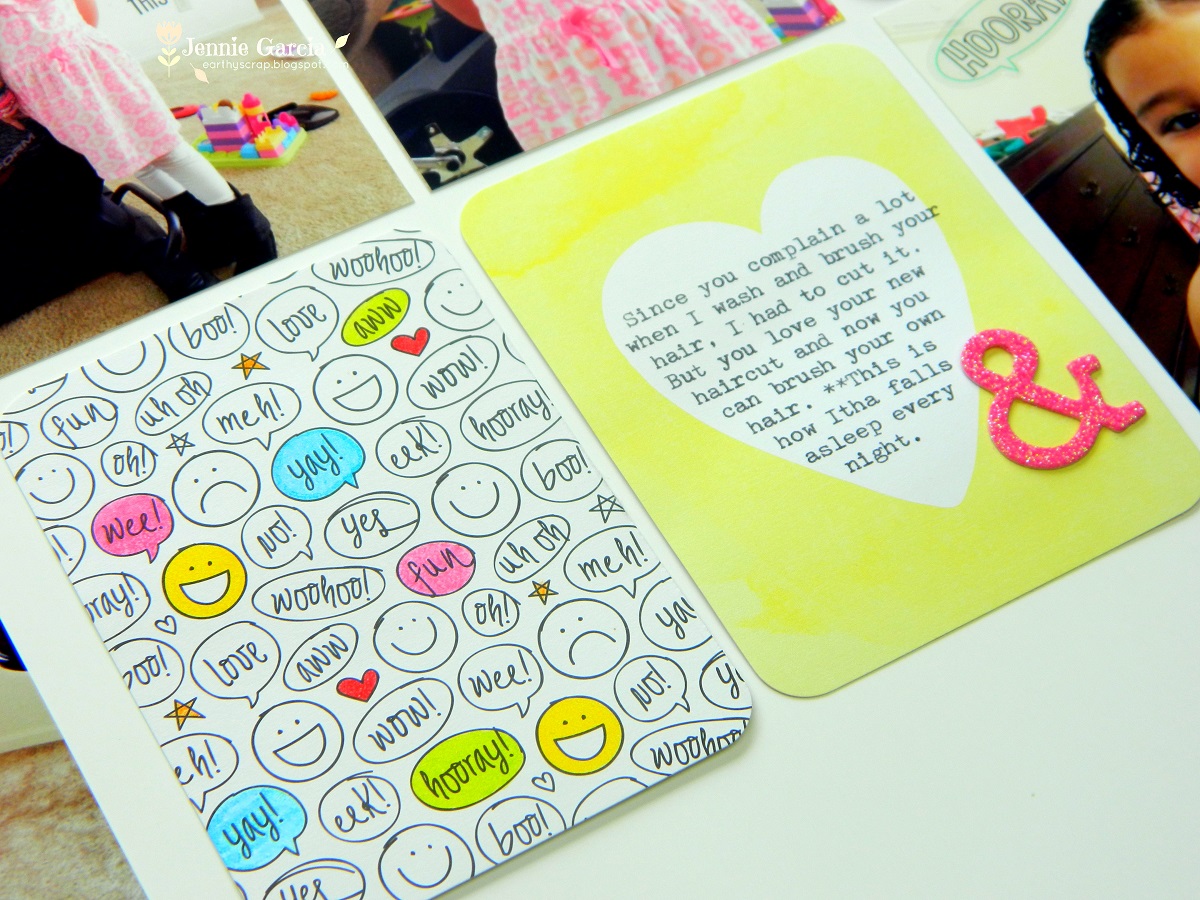
Summer Trends of 2015 for Scrapbooking By Jennie Garcia
For Christmas, I created this Birthday Book for my DIL to be and added an address section at the back. Benjamin and Kassy’s wedding colors are plum and turquoise, so I used designer paper in those colors. She loved it. YAY! Ü I cut 2 chipboard (cracker boxes) 4″ x 8.75″ and […]
Birthday/Address Book by Debbie Fisher
 1
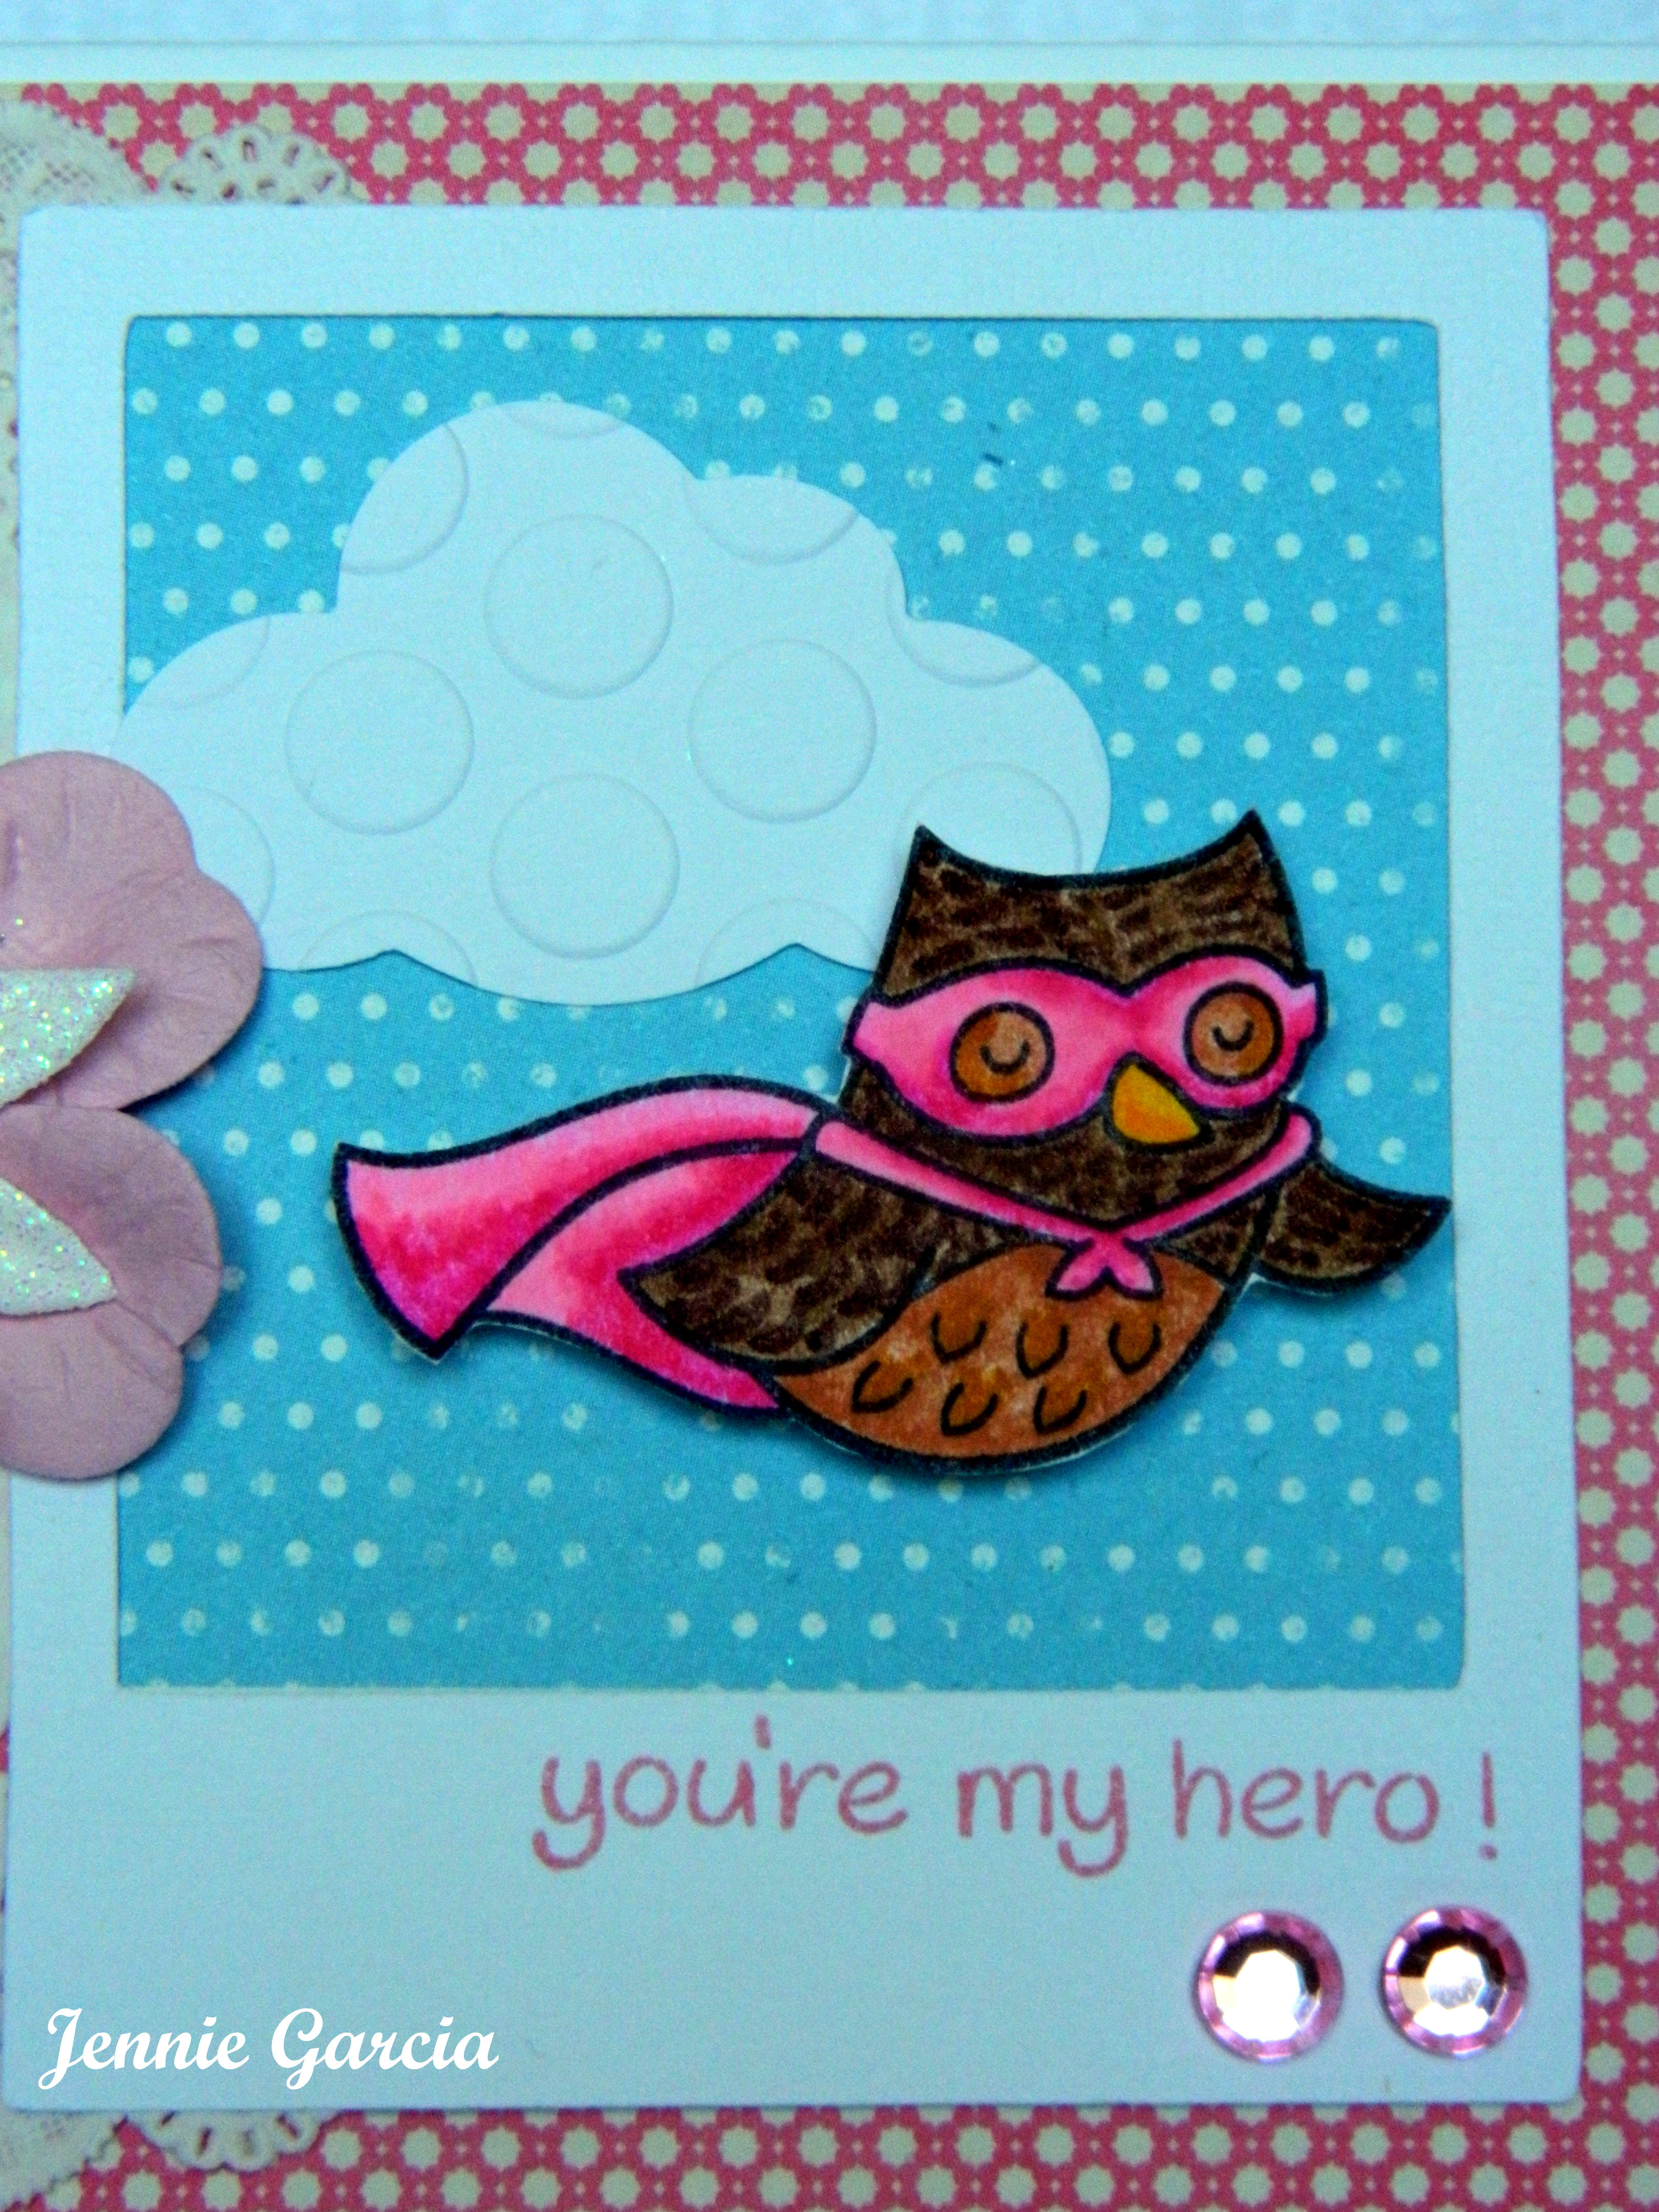
1 Hello!! This week Debbie has a super fun challenge for you! In honor of Breast Cancer Awareness Month the challenge is Think Pink!! To glue the flower I used Tombow Power Tabs. I used Lawn Fawn Stamps with the Tombow Dual Brush Pens to color the cute owl. I used […]
Pink Hero Card By Jennie Garcia
For this card I used the Composition and Color Collection from Webster’s Pages. I also used twine from The Twinery and Thickers from American Crafts. I used my Epiphany Crafts Shape Studio Tool Round 25 with the paper to make this embellishment and I used the Tombow Power Tabs to […]