
i wanted a quick card i could send to a friend…
marie has shown these techniques before, and she is the expert, but little ole me decided to give it a try for this card i was envisioning.
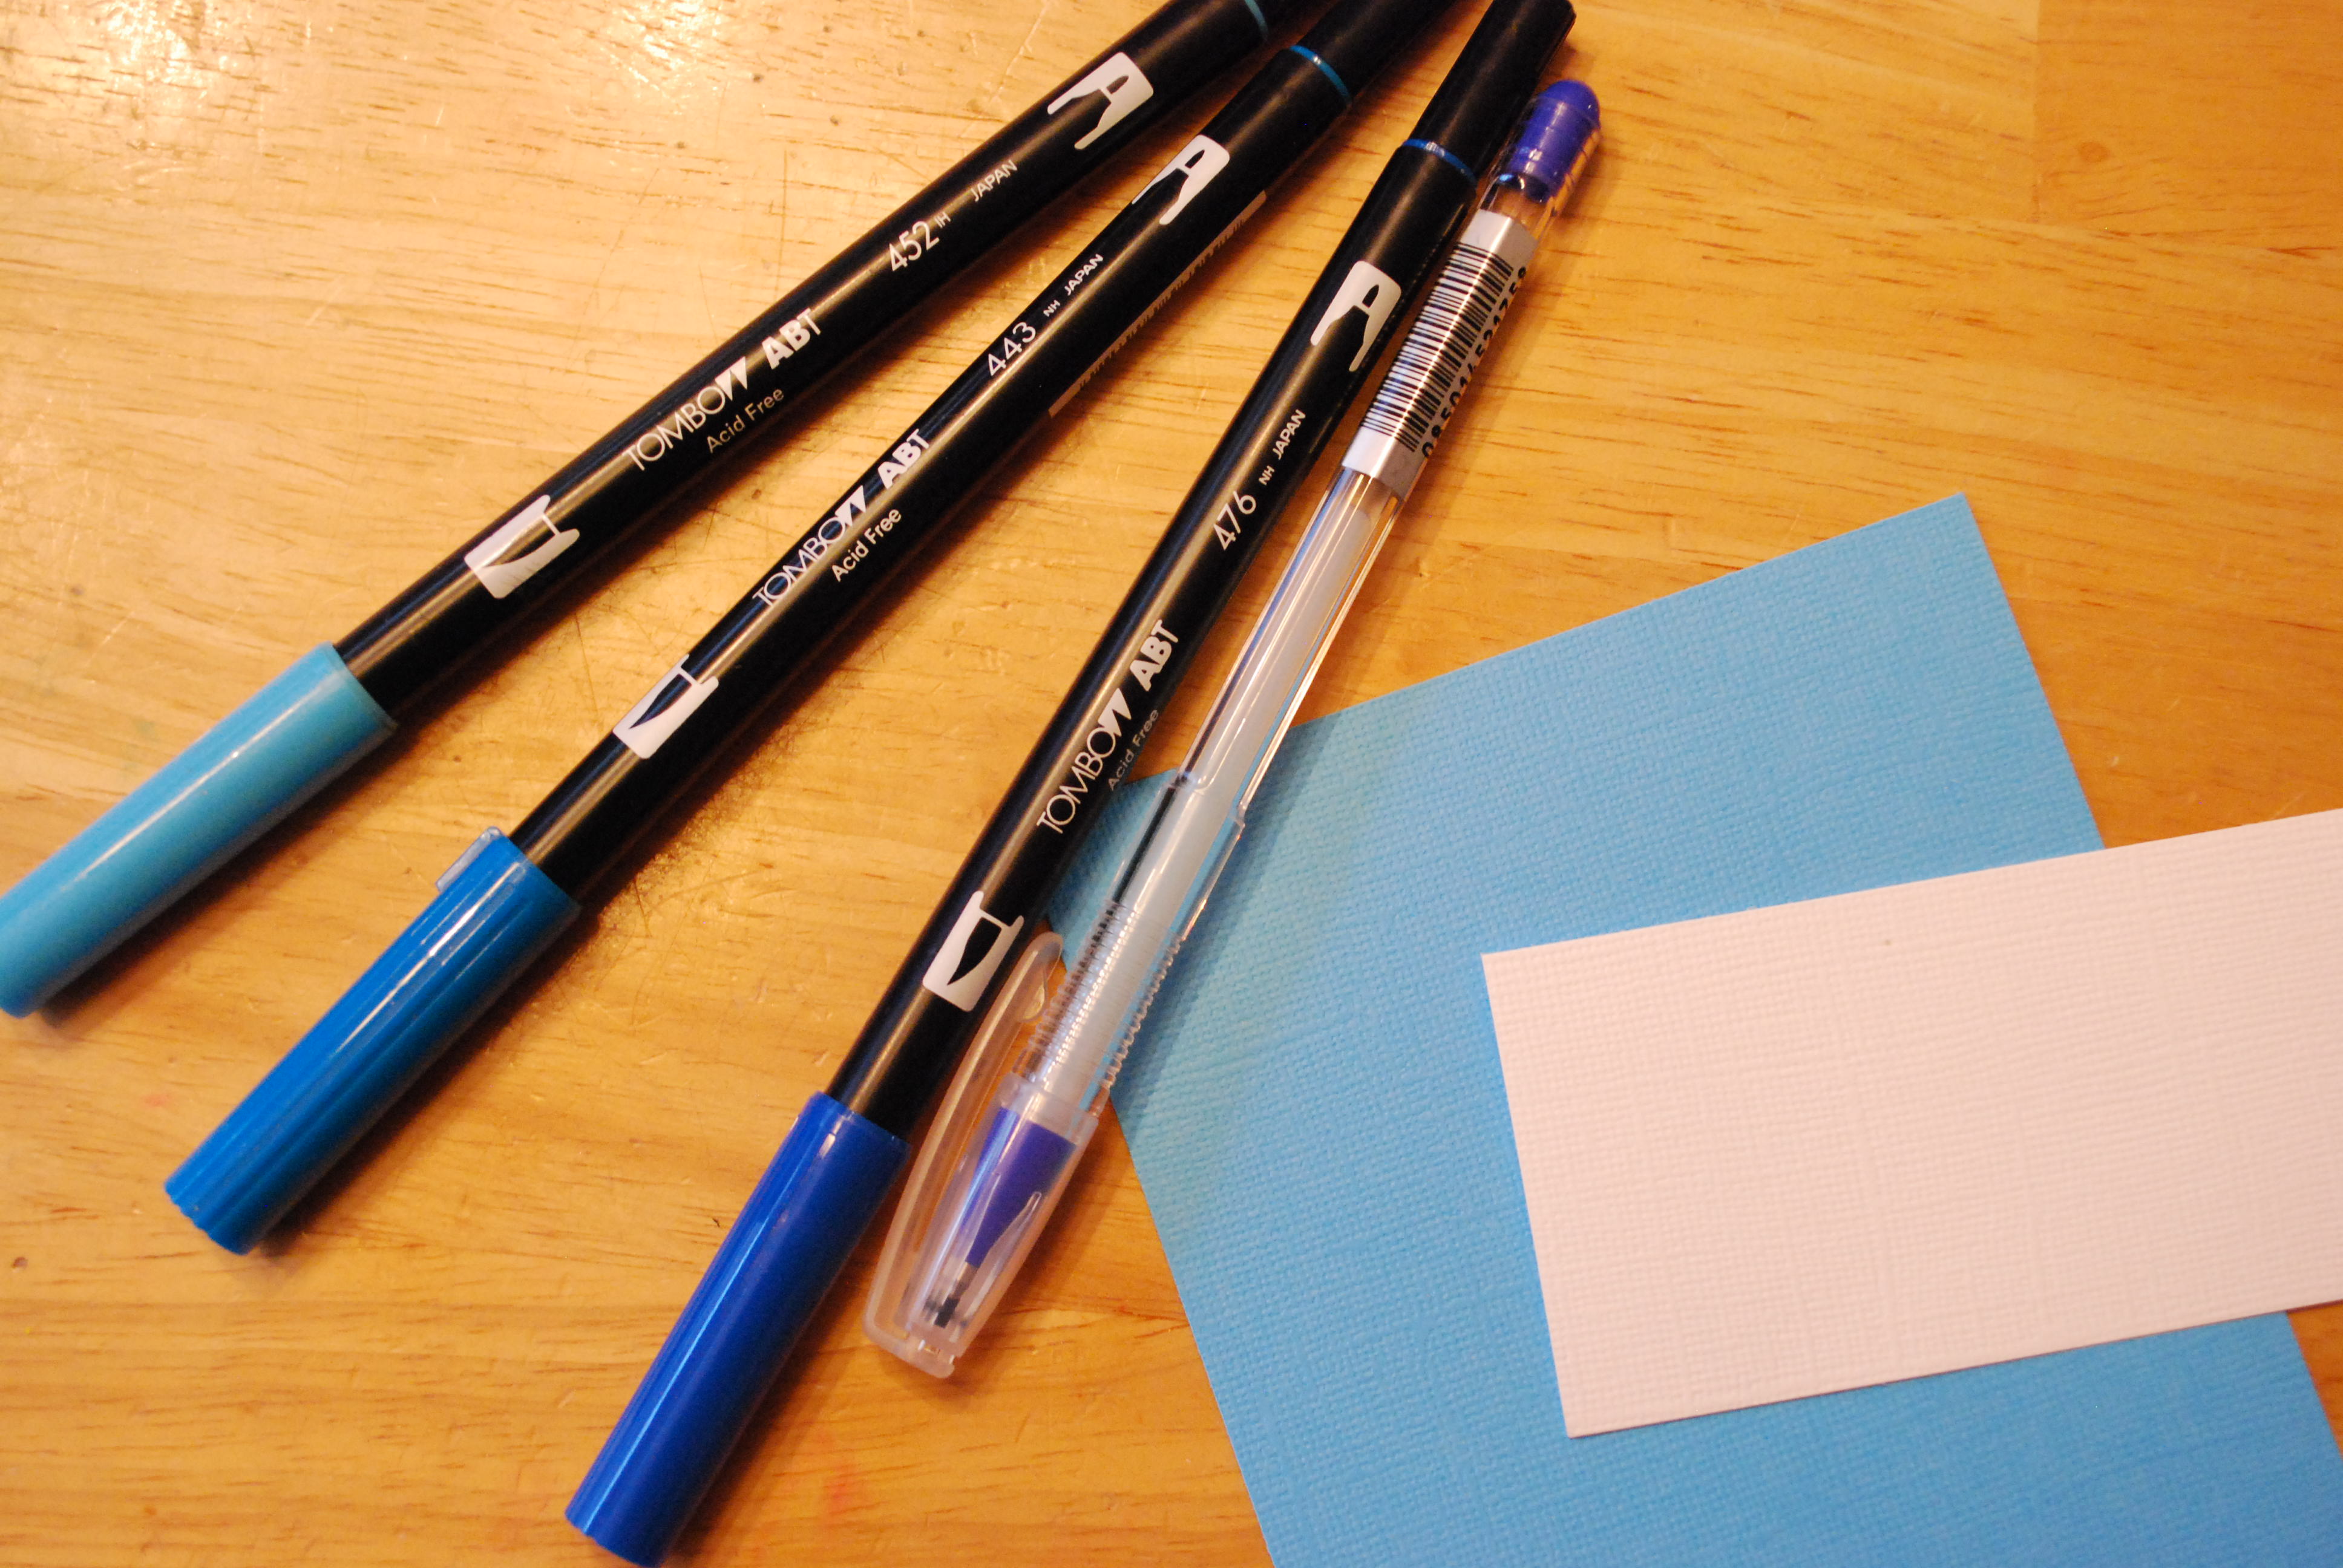
i used the TOMBOW MONO GLUE PEN for a great resist technique.
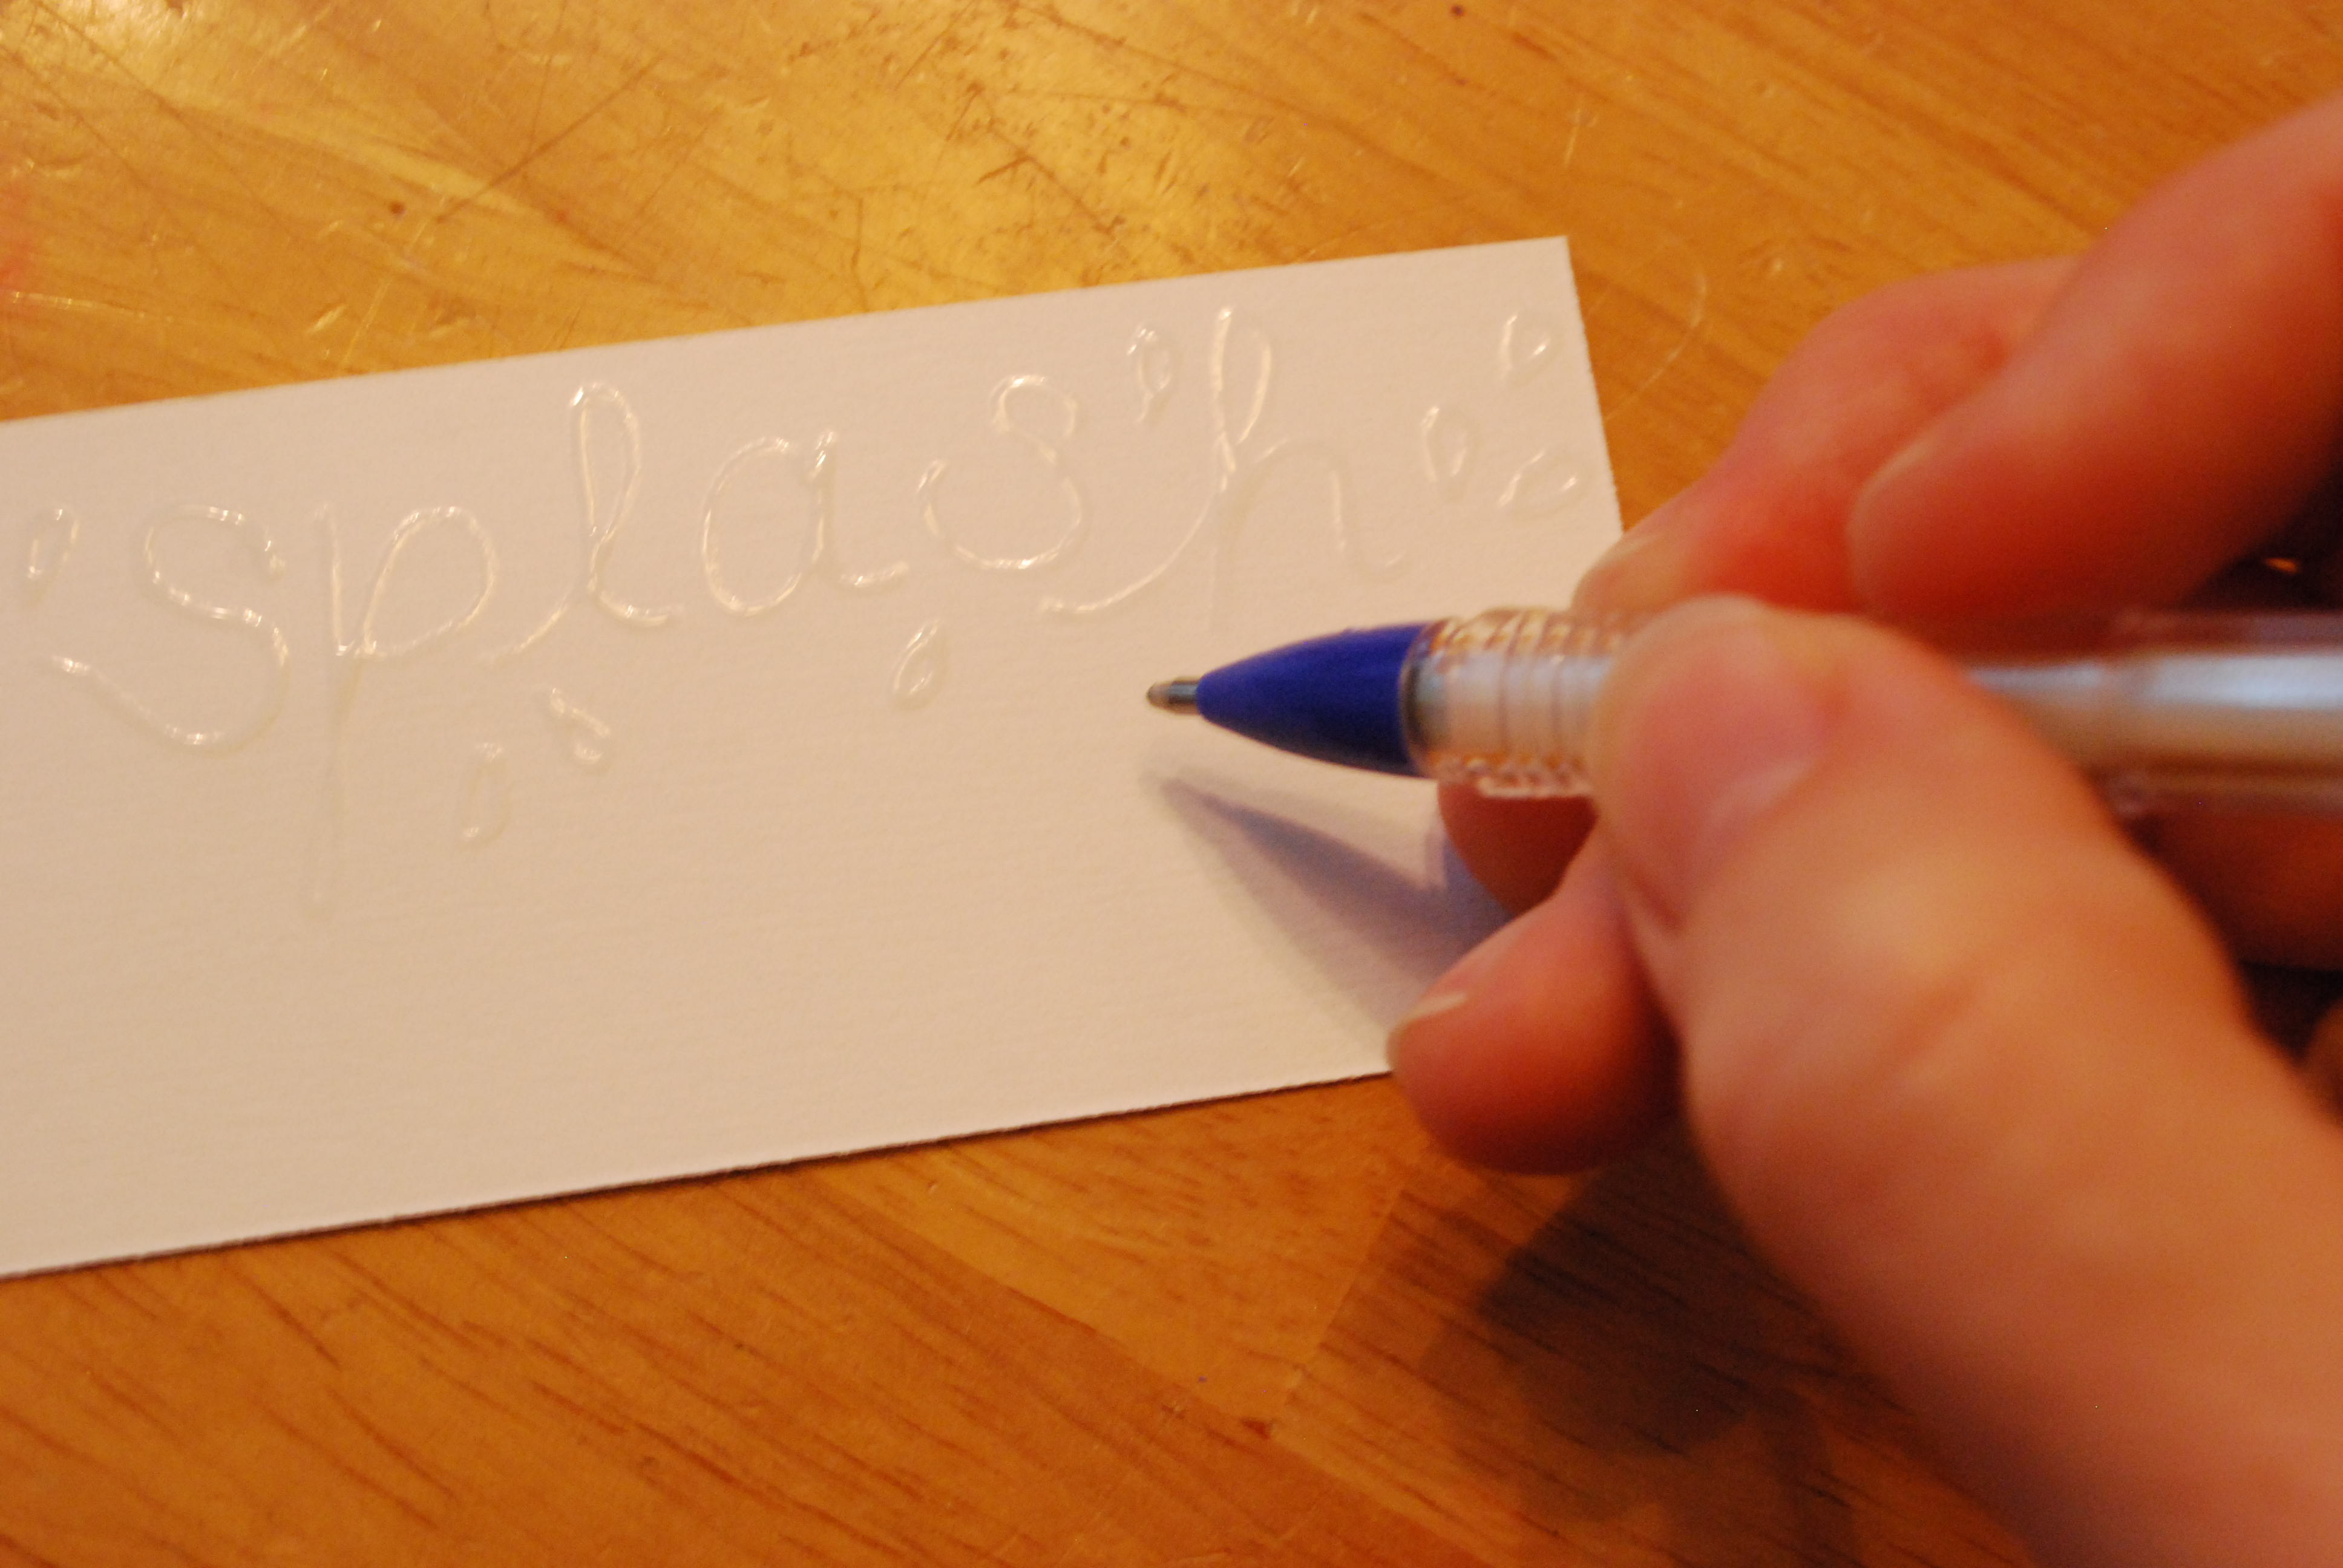
i wrote with it on a piece of white card stock. in the tip of the glue pen is a little roller ball. just push down on the tip til you see the flow of glue coming out, then write. slow and steady! then set that aside to dry completely.
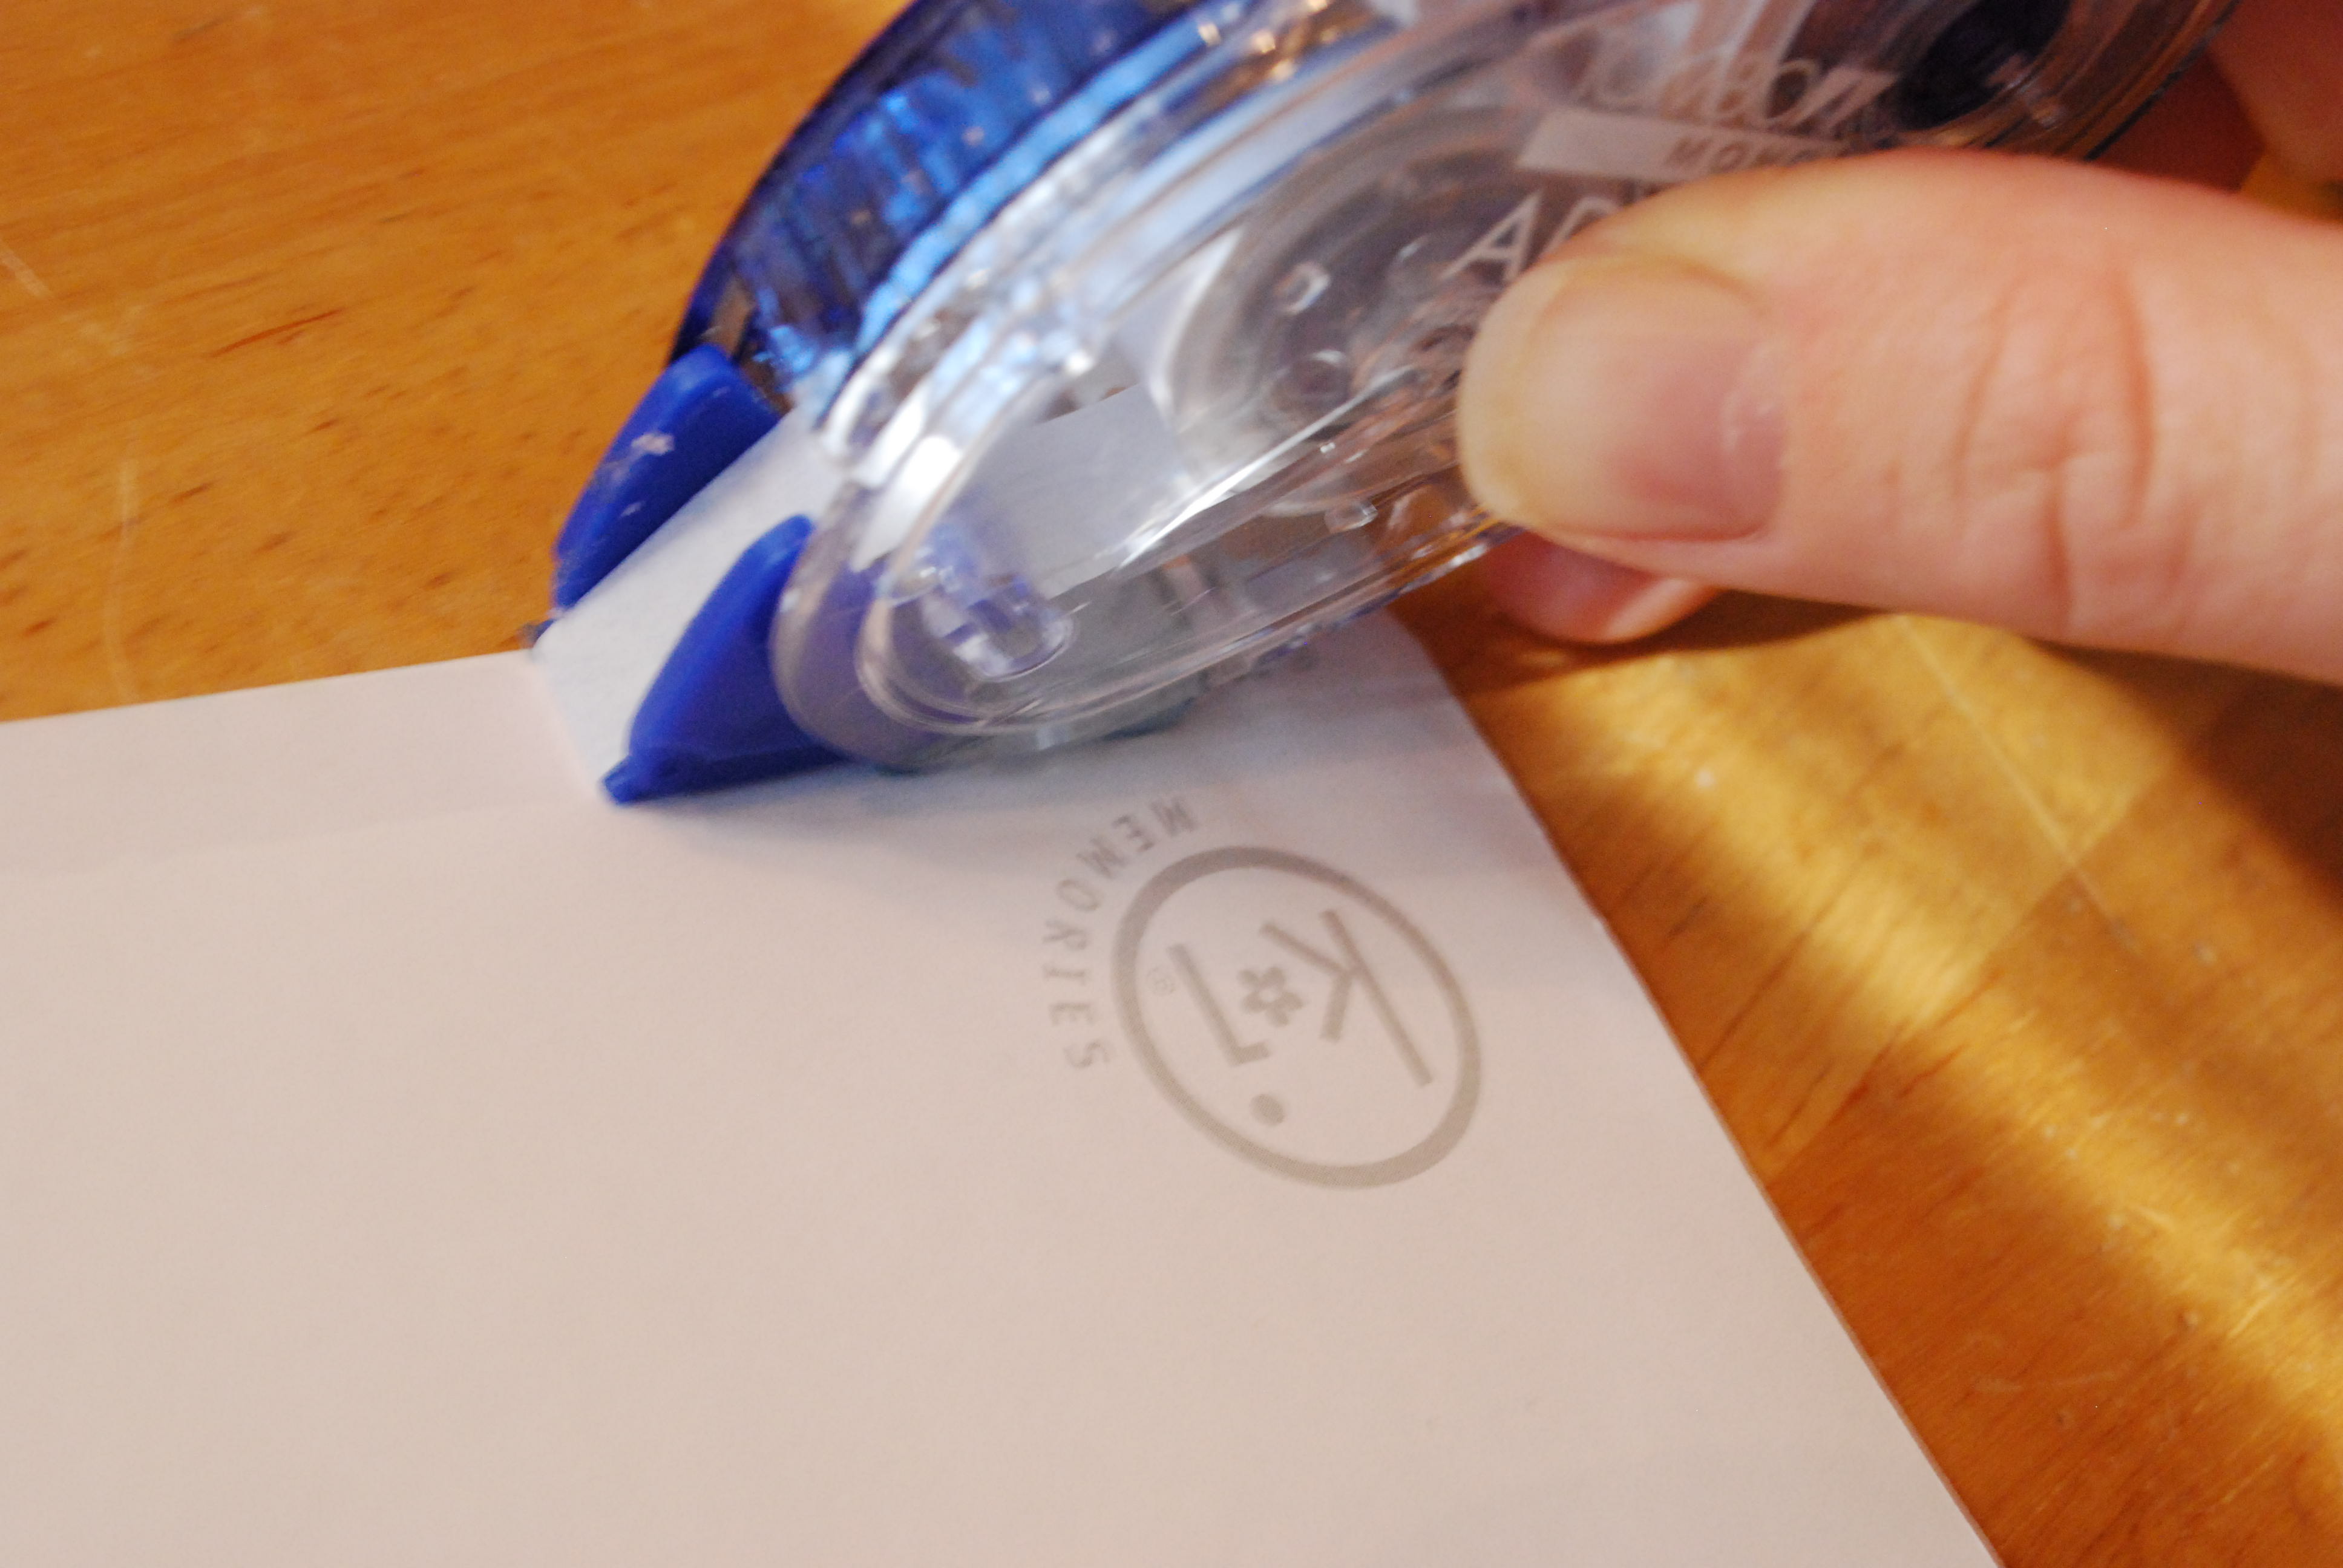
then i cut a standard A2 card size (4 1/4 x 5 1/2) pattern paper front and then a slightly smaller cardstock piece to fit over it. i layered these together with the TOMBOW MONO PERMANENT ADHESIVE RUNNER. i really like how i can get right up to the edge of the paper and get around curves with this applicator.
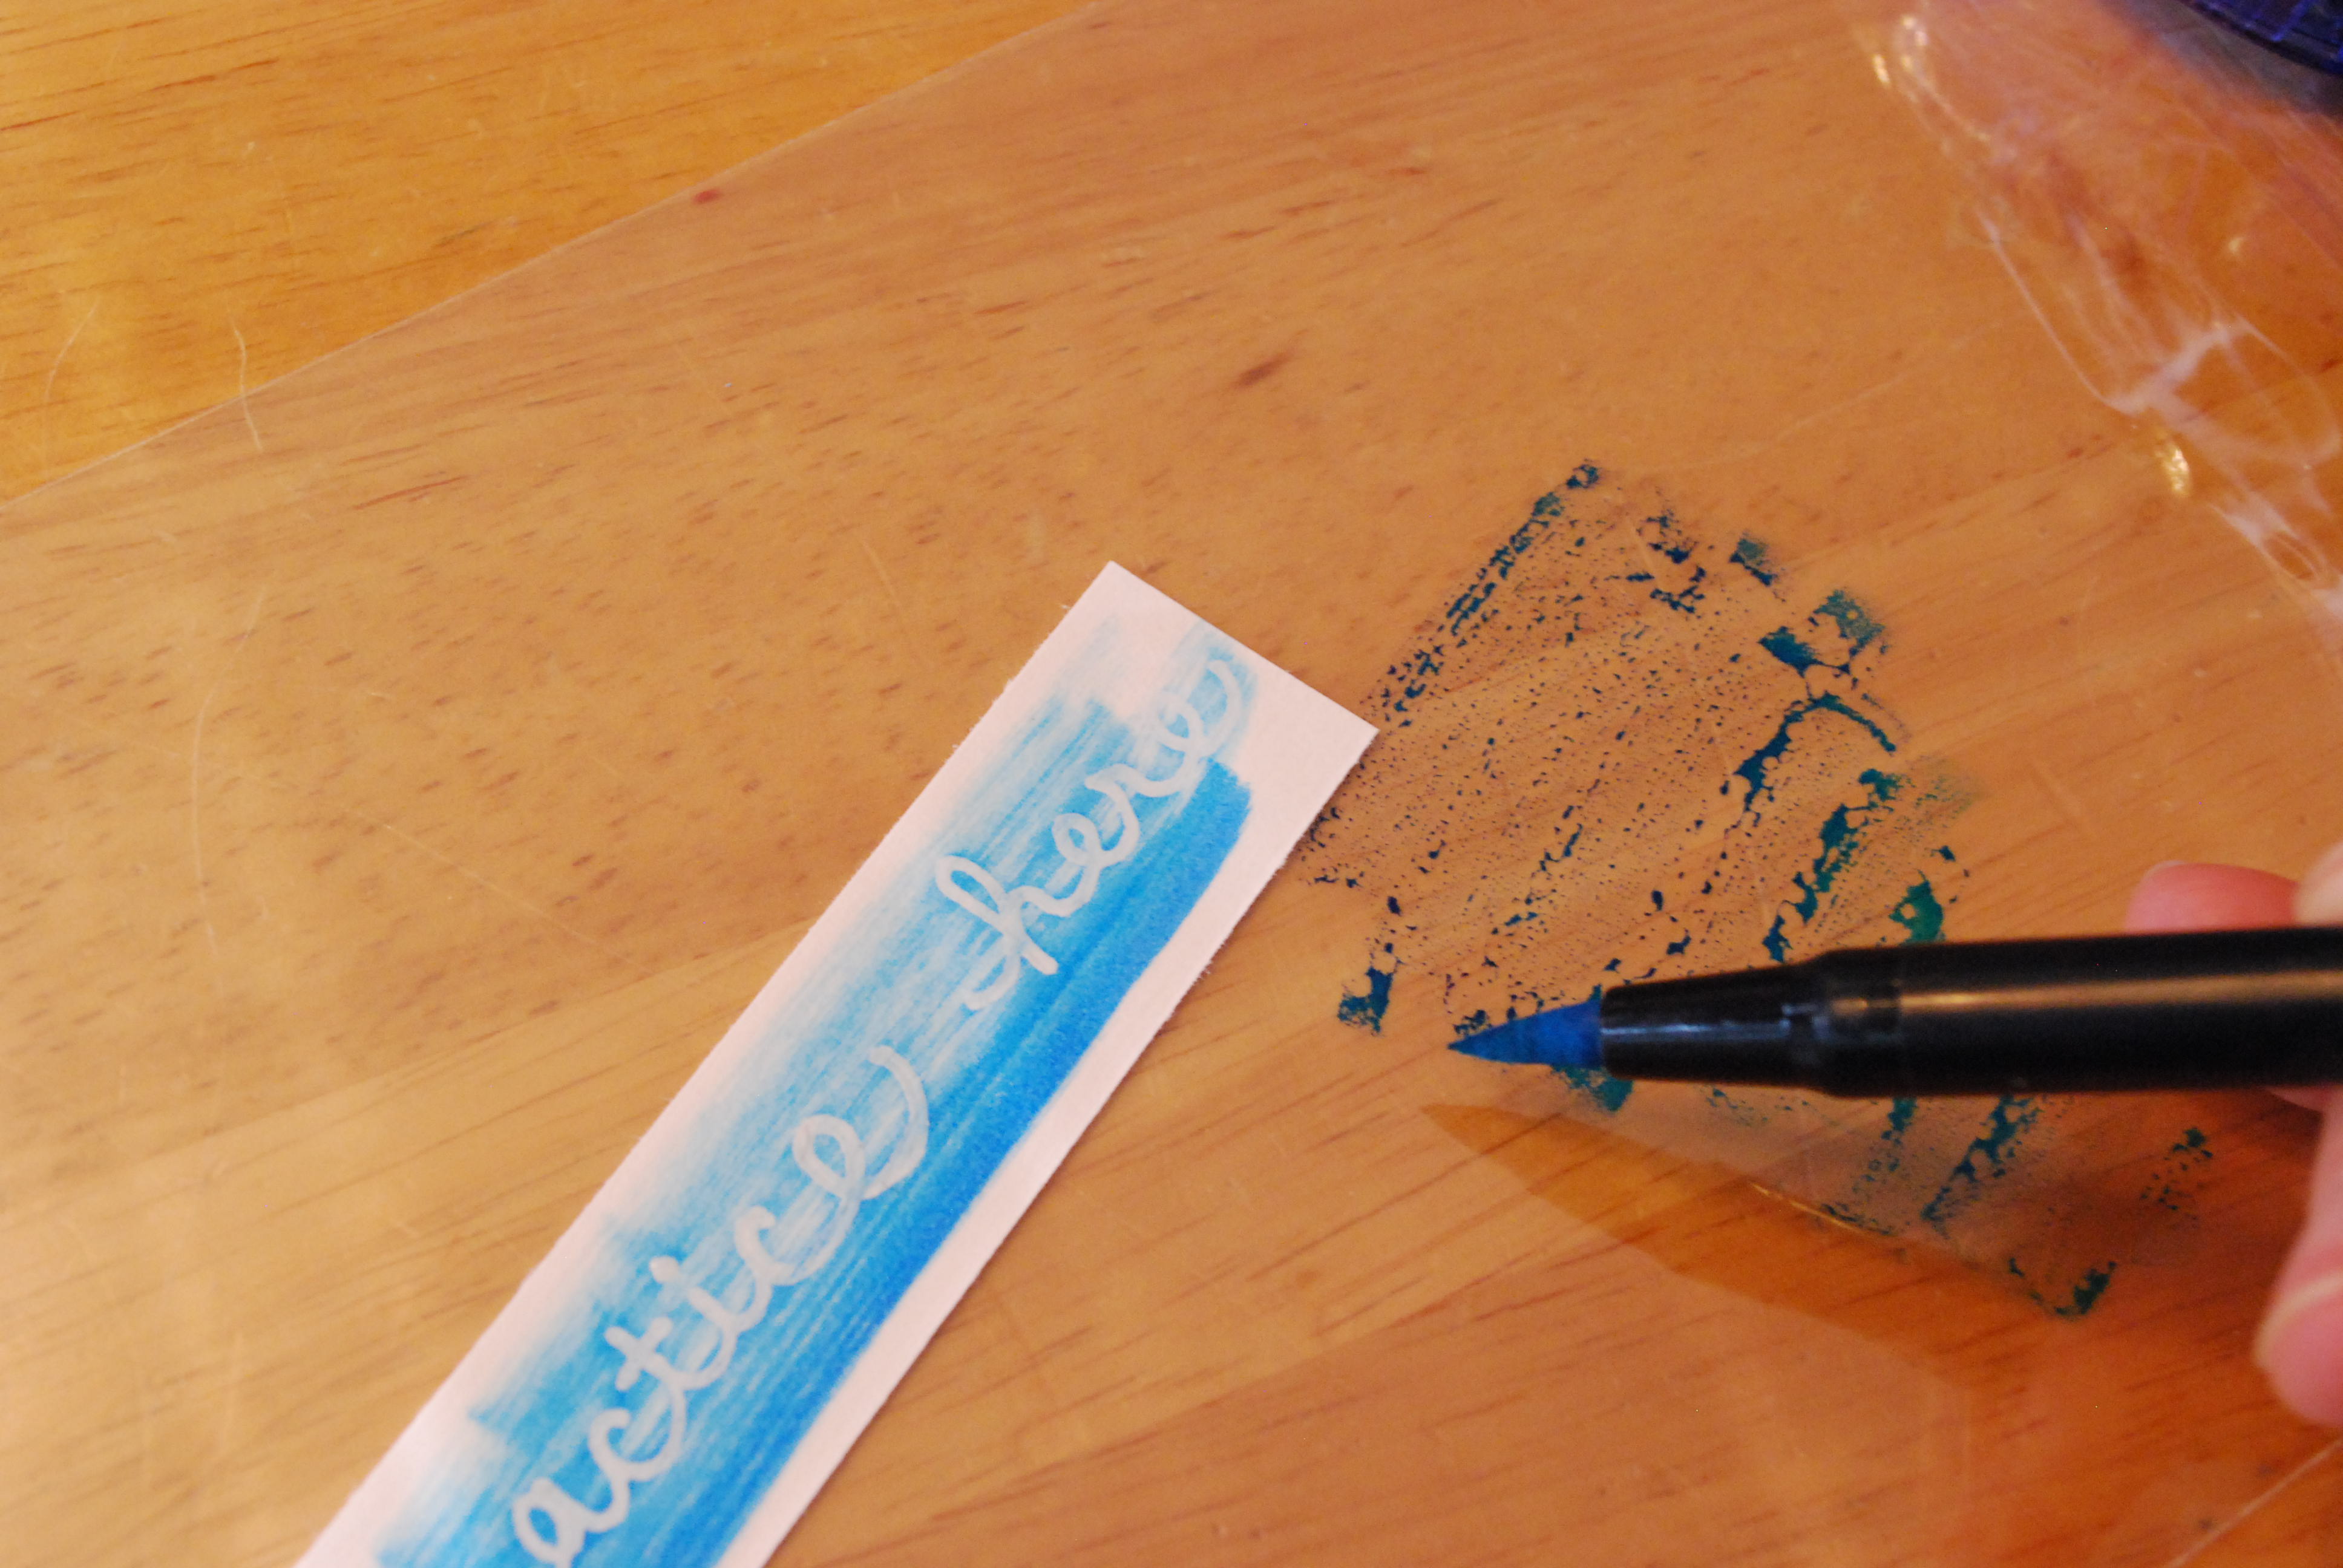
once the word written with my glue pen had dried i grabbed a piece of plastic and three shades of TOMBOW DUAL BRUSH PENS and colored on the plastic with the two darkest shades. using the third and lightest color “pick up” the color from the plastic by coloring through it with the brush tip.
draw over the glue drawn image with the third pen, with the color on the tip, and make sweeping strokes starting at one side or top or bottom and move to the opposite side. the darkest colors will come off first and eventually the lightest shade will be the color you are using last. and you end up with a gradual color effect. once it is done you can even take a slightly damp paper towel and wipe the color off the glue pen/resist. keep in mind that the Dual Brush Pens are water based and will blend if they get too wet. i am sure marie explains it a little better…but hopefully you’ll give it a try so you can see for yourself!
or better yet, if you ever have a chance to take a class from TOMBOW jump on it! marie will teach you some amazing techniques!
Sarah, it was YOU that came up with this great technique with the Glue Pen! I thought it was sheer genius – Love the project, especially the ‘practice here’ sheet – always good to try out a new technique!
this idea makes a splash with me!
great idea Sarah!
well thank you marie….and i love that it has become part of your workshop!
Pingback: Ranger Party Blog