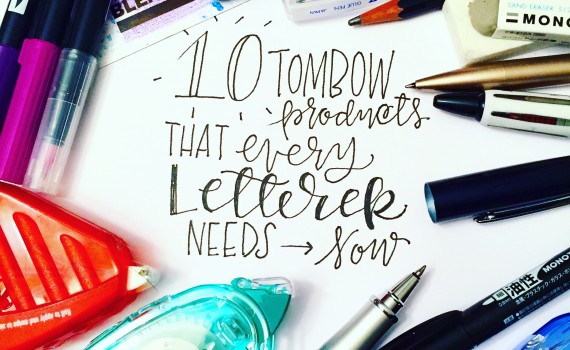
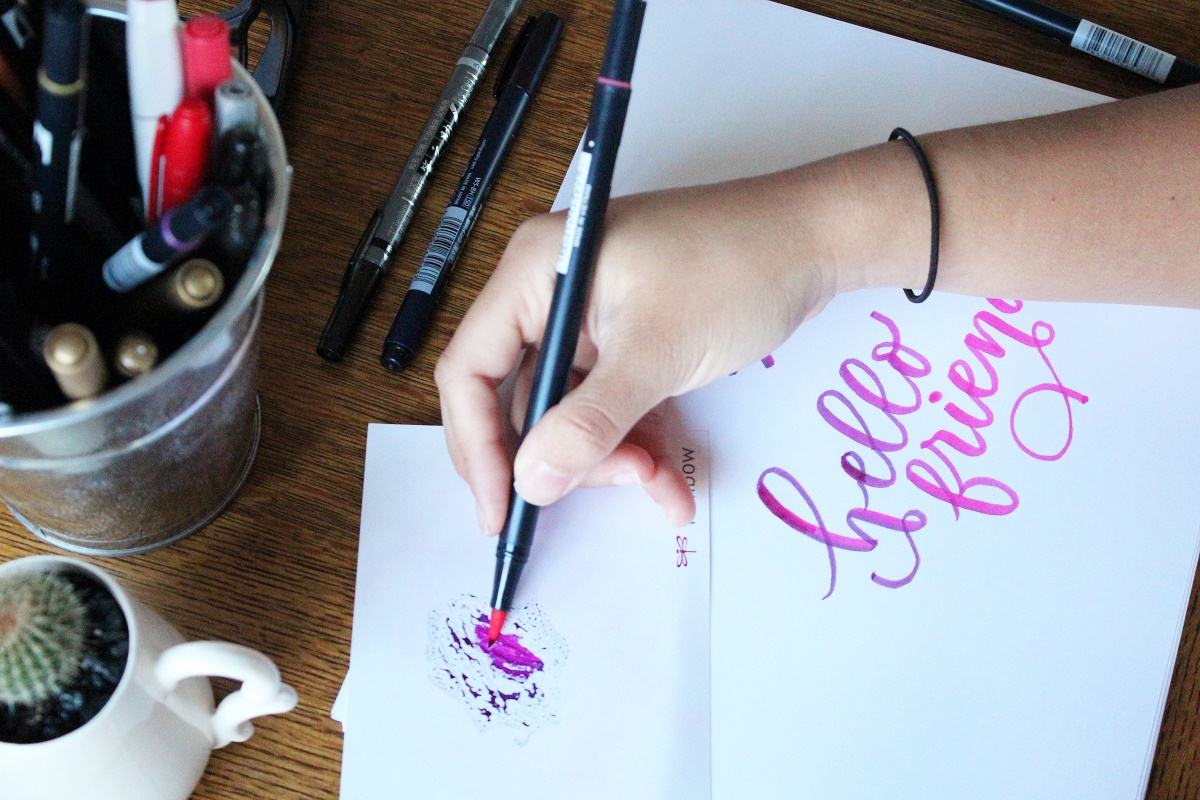
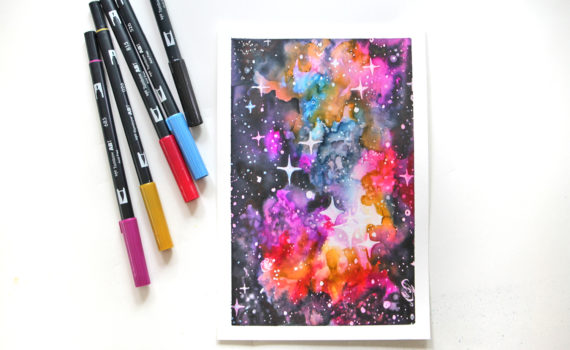
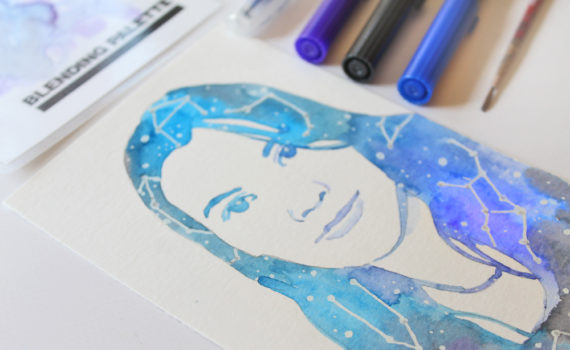
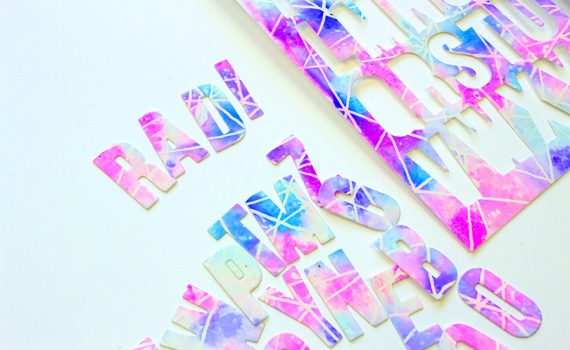
Posts Tagged ‘MONO Glue Pen’

Jan
20
Hello!  This week on the Tombow blog we are continuing our journey through some of the past Pantone colors.  Today I am sharing the 2010 color which was Turquoise.  Tombow’s Dual Brush Pen #373 (Sea Blue) was a great match so I decided to use it along with some of the Irojiten Colored Pencils for today’s card.
I stamped this adorable Benton Heart Bear from Inky Antics and then colored the heart with Dual Brush Pen #373.  I then added some Tombow Glue pen and sprinkled glitter over it to make the heart really pop.
I colored Benton with Irojiten Chestnut Brown and Autumn Leaf colored pencils and blended them out with some odorless mineral spirits.  I used Tombow Mono Adhesive Dots to adhere all of the layers together.  The buttons were attached with the the small Tombow Foam Tabs.

TOMBOW Foam Tabs

These acid-free double sided adhesive tabs are great for adding dimension to many projects, the small tab is 1/5 x 1/5 and the large tabs are ½ x ½, they are also great for layering and can be stacked for added dimension.  They are suitable for most surfaces including paper, glass and metal.  They are also crush resistant and instantly bond and hold.


  http://www.facebook.com/tombowusa         http://twitter.com/#!/tombowusa

Jan
18

here we go…another layout! these color challenges have been great! isn’t great to feel accomplished!?!

this layout used the color TURQUOISE, which is quite possibly my favorite color. one thing i love about turquoise is that it can be so many things… summer time when paired with oranges and blues, winter when paired with silver and white, spring with pinks and reds, and fall with browns and greens. it can be used for boys or girls. it is the color to use for tropical pictures and even baseball pictures…okay, if you are a Marlins fan.

anyway, it worked perfectly for these pictures of my daughter dancing in a (extremely cold) winter festival performance.

i used the Tombow Dual Brush Pen #343 to doodle a few snowflakes. i looked back on some of Marie’s instructions on using the pens for doodling and attempted some of those techniques.

the pictures were adhered with Tombow MONO Adhesive Permanent Runner, the snowflakes were popped up with Tombow Foam Tabs, the metal letters were glued down with Tombow MONO Multi Liquid Glue, and lastly i used the Tombow Glue Pen to “draw” over each of the snowflake doodles. push the roller ball tip down until glue starts to flow, and then trace the lines previously drawn. when the glue from the Glue Pen dries it is clear, but leaves a slight shine or wet look.

one more color challenge to go this month. hope you’ve been playing along!


if you enjoyed this post follow us on facebook and twitter!       http://www.facebook.com/tombowusa  and  http://twitter.com/#!/tombowusa

Dec
23
Hi there!  This week the Tombow gals and I are using fabulous peel-off stickers from Elizabeth Craft Designs.  Els sent us several sheets to play with and here are two of my favorites. 
Watercolor Technique

I love whimsy and decided to take these elegant gold ornaments and give them a touch of whimsy.  I started by placing the ornament stickers on some 140# cold press watercolor paper and then I colored them with my Dual Brush Pens.  I colored the different areas of the ornament with the following Dual Brush Pens colors: 093, 133 and 847 and then blended the color with a waterbrush. I used Mono Adhesive Dots to attach the layers together and a couple of Foam Tabs to pop up the ornament that is in the front.  To finish off this card I added a wee bit of Mono Glue Pen to a few areas and sprinkled them with Elizabeth Craft Designs Warm Highlights glitter.
Stained Sticker Technique

 For my next card, I used one of the beautiful floral stickers that Els sent.  I had never seen the Dual Brush Pens used to color the solid portions of the sticker, but I wanted to give it a try.  I am happy to say that I really like the way this turned out.  Because the stickers have a slick, shiny surface I knew that the markers were going to resist the ink so as soon as I colored in the flower,  I wiped off the ink with a dry cloth and created a stained effect on the gold portions of the stickers. I had to use darker markers for this technique and apply a few layers of each color.  For the interior of the flower I used #847 and for the leaves I used #249.  I used more of the Mono Adhesive Dots to hold all of the layers together and a few Foam Tabs behind the image panel to pop it up and add some dimension.  I finished off the center of the flower with some Mono Aqua Adhesive and ECD Warm Highlights glitter.


If you enjoyed this post, we would love it if you would follow us on:

  http://www.facebook.com/tombowusa               http://twitter.com/#!/tombowusa


Dec
14

This is the other challenge I was telling you about that had me stumped. The only thing I could think of was organ donation and Sharron said “no” to that. Ü So it was back to the drawing board….what to do.

I came across these free printables and thought that this gift “keeps giving” (fresh breath for every mint) LOL! Well, it works doesn’t it? Ü

For the front I wrapped cardstock around the Tic Tacs and used Tombow’s Mono Adhesive Permanent. I colored the image with Dual Brush Tip Pens: 977, 856, 905, & 491. To make the polka dots on the hat and scarf, I made the dots with the Glue Pen and let it dry then colored the images. The glue acts as a resist and is fun to add designs to an otherwise plain image.

Here is the cute saying on the back:

I hope you enjoyed this little treat.

Thanks for stopping by,

If you enjoyed this post, we would love it if you would follow us on:

  http://www.facebook.com/tombowusa               http://twitter.com/#!/tombowusa

Dec
07
as my kids are getting older and we are being torn in so many directions with activiites and holiday parties i wanted a way to keep FAMLY as an important part of this Christmas season.

we have several countdowns in the house, but i wanted one that helped us spend time together each day. i had a few requirements for my new countdown. i wanted it to be a decoration that could be left up the whole season. so something that was torn or cut down wouldn’t do. i wanted something that could be used again next year, so it needed to have the ability to be changed.
 
i decided on a banner, with each activity attached to the flags. then i created a hinge that would allow for the attachment of numbers 1-25 on top of the activity. i gathered my supplies:
5-6 different pattern papers
scallop circle punch
circle punch
paper trimmer
cardstock – i used three colors (black for scallop punch, red for die cut numbers, and white for punched circles and hinges)
Tombow Adhesives – MONO Glue Pen, MONO Adhesive Permanent runner, MONO Aqua Liquid Glue, Fastener Tabs
 
after cutting the flags from pattern paper, decorate each one using paper or embellishments. i used Tombow MONO Adhesive Permanent runner to attach a strip of paper to the top of each.
 
the numbers were created by layering a punched scalloped circle and a punched circle, again using Tombow MONO Adhesive Permanent runner. the numbers were cut with an electronic die cut machine and then glued to the top circle with Tombow MONO Glue Pen. I’ve said it before, and i’ll say it again….my  favorite thing about the Glue Pen is that the adhesive formula does not adhere to your skin! when working with small items you don’t have to worry about your hands getting sticky and making marks on your project.
 
the activities were all written on more punched circles. hinges were created by cutting small strips of cardstock, approx 1″ x 2″. fold the strips in half and glue one half to the back of the punched circles with the activities. i used Tombow MONO Aqua Liquid Glue.
 
next i took a sheet of Tombow Fastener Tabs and cut them in half while still on the sheet. then i attached a Fastener Tab on the other half of the hinge. keeping the punched circle with hinge face up pull off the backing from the Fastener Tab then center the scalloped number over the hinge and the punched circle.
 
once the two-piece hinge is complete apply Tombow MONO Adhesive Permanent to the back of the punched circle with the activity written on it and adhere one to each flag.
 
tie the flags together with ribbon. i chose to punch holes on both corners of the flag, then cut short lengths of ribbon and tie knot between two flags, and then continue it all the way down.
 
as the days pass the numbers can be removed, revealing the activity underneath OR can be left on and flipped up to look at the activity.
 
because the numbers are fastened onto the activity with the hook and loop Fastener Tabs they can be rearranged for next year. our activities include parties we have to go to, performances the kids are dancing in, and other events that have a specific date. most likely we will be participating in the same or similar events next year, so i will be able to move the numbers around accordingly.
 
do you have a countdown with activities? i’d love to see what other people are doing. post them to our facebook page so i can take a look!


If you enjoyed this post please follow us on

  http://www.facebook.com/tombowusa  and  http://twitter.com/#!/tombowusa

Nov
16


raise your hand if LOVE the autumn season like i do?!?

and i am sure just like me, many of you enjoy a few crafts to spruce up your home this time of year?!?

for the last few years i have made place cards for the thanksgiving table.

to keep with my new crafty tradition, i have made the set for this year.

come see how i did it!

i used:

Tombow MONO Aqua Liquid Adhesive

Tombow MONO Permanent Adhesive Runner

Tombow Dual Brush Pen

circle punch

off-white cardstock – cut to 3 1/4 x 4 1/2

kraft colored cardstock – cut to 3 x 4 1/4

assorted orange pattern paper and cardstock

green cardstock scraps

dark brown cardstock scraps


first brush the Tombow Dual Brush Pen along the edges of the kraft cardstock pieces and the off-white cardstock pieces.
then fold the off-white pieces in half, and adhere the kraft piece to the front with the Tombow MONO Permanent Adhesive Runner

punch circles from orange pattern paper.
each pumpkin will need 4-5 circles.

fold all of the circles in half.

use Tomobw MONO Permanent Adhesive Runner and attach the folded circles together, back sides together.
i love the Tombow runners when i am doing a curvy project…the runner just follows the curves to make for a full coverage adhesive!

in between two of the circles sandwich a thin strip of green cardstock. these will become the vines.

use a pencil or other small cylinder to curl the green stripes. it is easier to curl them with the pencil and then work the curl into it by twisting the spiral into it.

then using theTombow Permanent Runner again, put adhesive on the back panels to adhere it to the front of the place card.

i  used a thin line of Tombow MONO Aqua Liquid Glue along the back seam of the pumpkin, where it touched the placecard.

and i also used the Aqua on the backside of the pumpkin to attach the brown cardstock scrap to create the stem. once it was glued down i gently worked the paper to twist it.


the last thing i’ll do, when we finalize who is coming to our thanksgiving feast, would be to cut out some lettering with my die cut machine and use the Tombow MONO Glue Pen to adhere them to the front,
or use the Tombow Dual Brush Pens to write the guests names.

i know it is early…but happy thanksgiving! i truly appreciate all our blog followers and tombow lovers!

sarah


If you enjoyed this post please follow us on

  http://www.facebook.com/tombowusa  and  http://twitter.com/#!/tombowusa


Oct
28
 Hi there!  Today is my turn on the Tombow blog to hop along with the gang at Fancy Pants.  Fancy Pants sponsored us by sending each of the Tombow DT tons of goodies from the Oct 31 line to play with.  I was thrilled when I received my goodies as I hadn’t started my Halloween cards yet and this gave me the perfect opportunity to get started.
 For my first card I used the adorable Frankie digi image from By Lori Designs.  Isn’t he cute?  I  colored him in using Irojiten Colored Pencils and Gamsol.   These pencils really blend so easily with this technique.
In addition to the polka dot print from the Oct 31 line, the word “spooky” is from the Oct 31 Chipboard Elements pack.  I used Tombow Foam Tabs to attach the image panel and spooky chipboard to the card.  All  other layers were affixed with Tombow Mono Permanent Stamp Runner.
 For this card I started with a base of Gina K. Designs Sweet Mango cardstock.  It is perfect with the Oct 31 line.  I created the flower using some of the circles from the Filter Embellishments pack and the flourish from the Chipboard Elements pack to represent the leaves.  I stamped Happy Halloween from Inkadinkado in black ink and colored in with a Tombow Dual Brush Marker.  The sentiment and  flourish were given a bit of sticky with the Tombow Glue Pen and then sprinkled with lime green glitter.
For my final card, in addition to the cool Oct 31 papers, I used Buttons and Glitter Cuts.  I attached the striped  panel and the Tricks or Treats glitter cut with with Tombow Foam Tabs, the buttons with Tombow Power Tabs. The buttons were tied with a wee bit of black/white twine.
I hope you have enjoyed your visit with me today.  I  would love to hear which card was your favorite and why.
Oct
18

There are so many quotes out there that I love that I had a hard time choosing one to  create with. Since this month is Breast Cancer Awareness Month, I decided to choose one of my favorites that I could make a card around honoring this month. My g’ma, 2 friends, DH’s aunt, as well as others we have known, have courageously battled this cancer.

I can only imagine the amount of faith it takes to deal with cancer and each on the ones we know had to take that first step, even when they couldn’t see the whole picture.

The card I chose to create uses a new image from Designed2Delight to honor Nat’l Breast Cancer Awareness Month. It is called Hope 2011 Cancer Awareness Set. The nice thing about this set is that you can color the ribbon to match the cancer. Here is a link that tells you which cancer each color represents.

I used My Mind’s Eye papers, Tombow’s Glue Pen to add Cotton Candy Sparkly Fluff (from Our Craft Lounge) to the ribbon and dots image, Foam Tabs to raise up the butterfly image, and Dual Brush Pens (761 & 800) for coloring and Mono Adhesive permanent.

Thank you for stopping by,

If you enjoyed this post please follow us on

  http://www.facebook.com/tombowusa

and http://twitter.com/#tombowusa

Oct
17

Flocking, or adding a soft, matte textured effect to paper, can be applied in ultra fine detail with
Tombow’s Glue Pen. I especially like it for adding fur on stamped animals!

For the sample I have used green flocking, a piece of printed cardstock and Tombow’s Glue Pen
 
 
 Apply the glue where you want the flocking. The glue is transparent so good overhead light and holding your head just right will allow you to see the glue. I do small areas at a time. However, the glue does not set up immediately and allows you do a decent sized area before drying.


Sprinkle on the flocking and let the glue set up for a few minutes before tapping off the excess. 


Add more flocked areas until you are satisfied with the results. When completely dry, use a soft, clean brush to remove any excess flocking. The flocking gives a nice soft texture to the cards
that can be felt. Perfect for children’s cards, cards for sight-impaired recipients or for recreating soft, matte accents on vintage cards.
 
 
Sample of a monster image with flocked fur.
 
Enjoy your new Tip-nique, I’ll see you again next Monday with more fun projects.

If you enjoyed this post please follow us on   http://www.facebook.com/tombowusa  and   http://twitter.com/#tombowusa

Oct
14
Whew wee it’s been party time on the Tombow blog this week.  Today is my turn to share in the party fun!  So let’s get started!
 I have created this little party ensemble of a card, gift box and of course a little sweet treat as a thank you for coming to my party :)
For each of the projects I used stamps from Printworks. I created the card starting with a Seaglass notecard     from Memory Box and layering with a scrap of glittery striped paper from my stash using Tombow Permanent Stamp Runner.  The balloons were colored with Tombow Dual Brush Markers and then added a layer of Tombow Mono Aqua to each of the balloon tops and sprinkled them with glitter. I  dabbed the gifts with the Mono Glue Pen  and used a scrap of My Mind’s Eye paper to paper piece the gifts.  A few rhinestones and a little ribbon and our card is done and we are ready to party!
For the gift, I used another Seaglass notecard to create this little slider gift box.  I used the same method as above to adhere all of the layers, create the balloons and paper piece the gift.  The image panel was added to the box using Tombow Foam Tabs.
Here is the box opened just a bit……..hmm I wonder what kind of beautiful bauble is hidden inside?
So now our party is coming  to an end and why not send our guests home with something sweet.  I wrapped two candies with a bit of the striped glitter paper and  then cut a piece of  Seaglass notecard big enough to wrap around them and come together at the top.  A little ribbon holds this sweet treat closed.
Hoping your next party is as fun as this one was!

  http://www.facebook.com/tombowusa  and  http://twitter.com/#!/tombowusa