
Hi y’all! Dani from @popfizzpaper here with a tutorial showing you how to make a DIY Kindle case (or for any eReader)! I love swapping out my cases, but they can get pretty pricey over time. However, I can DIY a bunch of my own using one silicone sleeve that I can swap between them. Let’s get started!
Supplies (per case):
- 2 pieces chipboard cut to 5″x7″ (for front and back covers)
- 1 strip of chipboard cut to 0.5″x7″ (for spine)
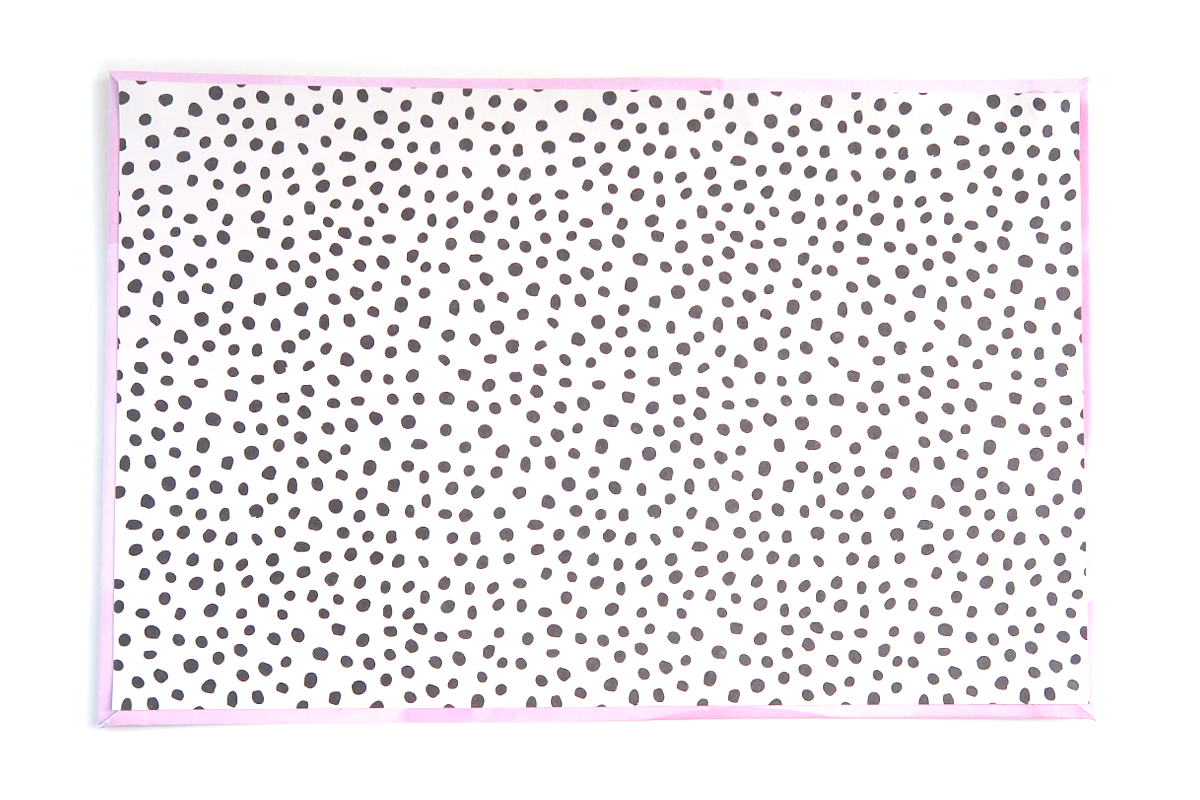
- 1 piece of decorative paper cut to 8.25″x12″ (for exterior)
- 1 piece of decorative paper cut to 6.75″x10.5″ (for interior)
- Tombow MONO Multi XL Liquid Glue
- Tombow Xtreme Permanent Adhesive Runner
- Tombow Xtreme Adhesive Tabs
- Scissors
- Bone folder
- Awl (or piercing tool)
- 12″ elastic
- 4 pairs of hook and loop fasteners
- eReader silicone soft sleeve (I used a MoKo Soft TPU Case for Kindle Paperwhite) – you only need one of these for infinite cases!
- Embellishments, die-cuts, markers, stickers, foiling to decorate if desired
NOTE:
I’m creating a DIY Kindle case for my Paperwhite, but you can size this project up or down for your specific eReader with a bit of experimenting. For the chipboard sizing, adding a quarter of an inch to the length and width measurements of your reader in its soft sleeve should do the trick. Just size up or down the decorative paper accordingly. You can always make a quick tester case to nail down the correct measurements (which is totally what I did!).
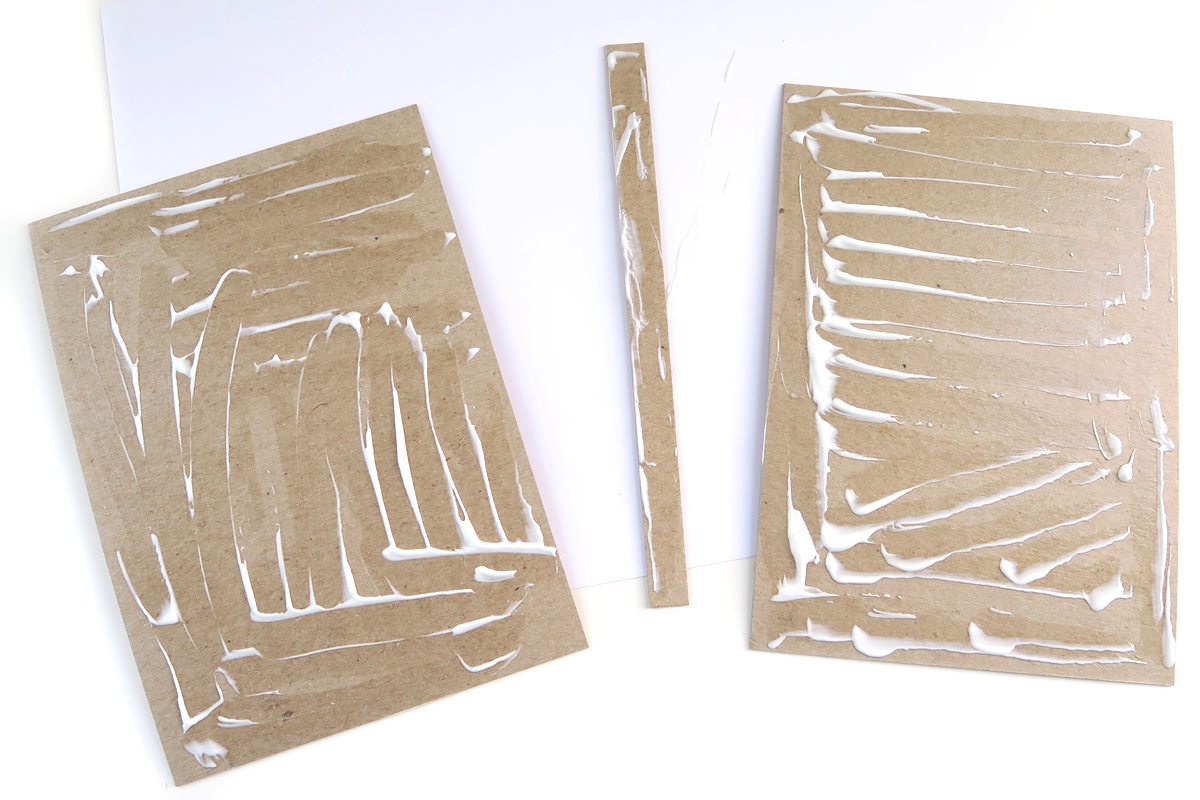
To start, coat one side of each of the chipboard pieces with a thin layer of the Tombow MONO Multi XL Glue.
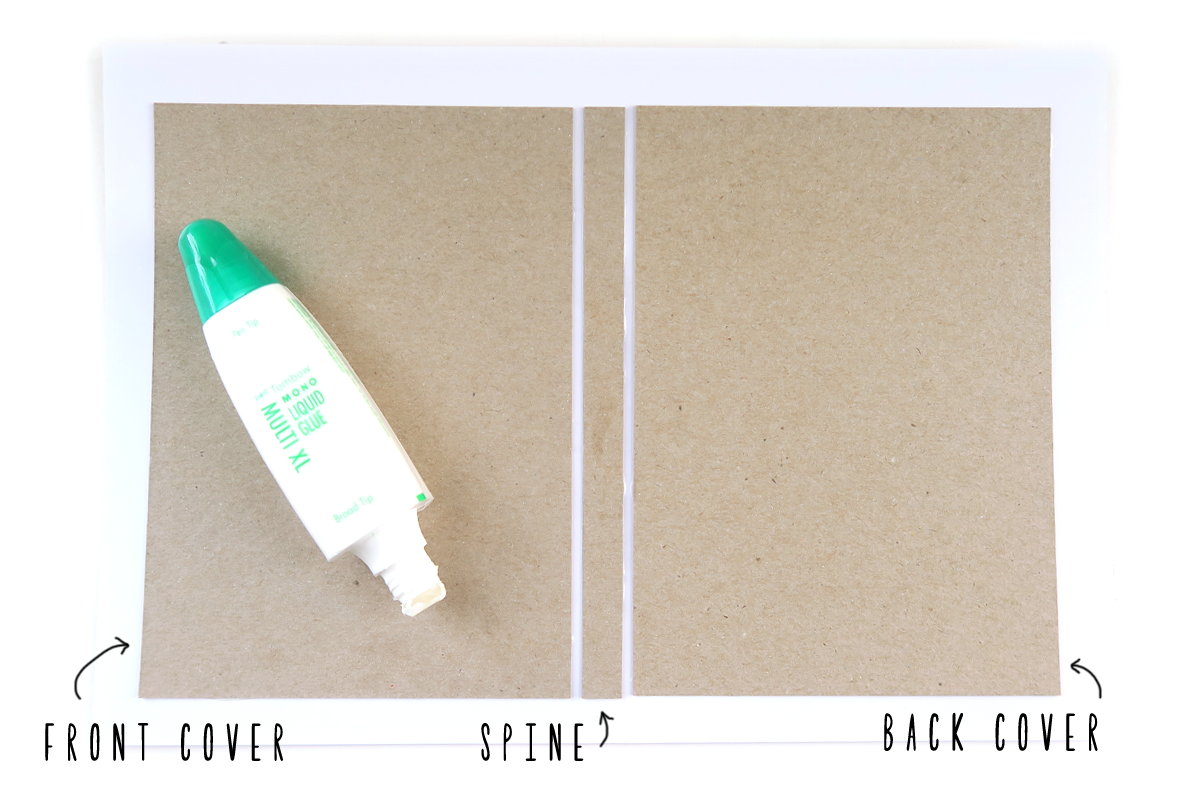
Next, flip over your 8.25″x12″ piece of decorative paper so that that pretty side is facing down. You want the plain side facing up. Position the glued sides of the chipboard down like shown above. It’s really important to leave about 1/8″ of an inch of paper showing between the edges of the spine and the front and back cover pieces. Space your chipboard pieces evenly and make sure the straight edges line up.
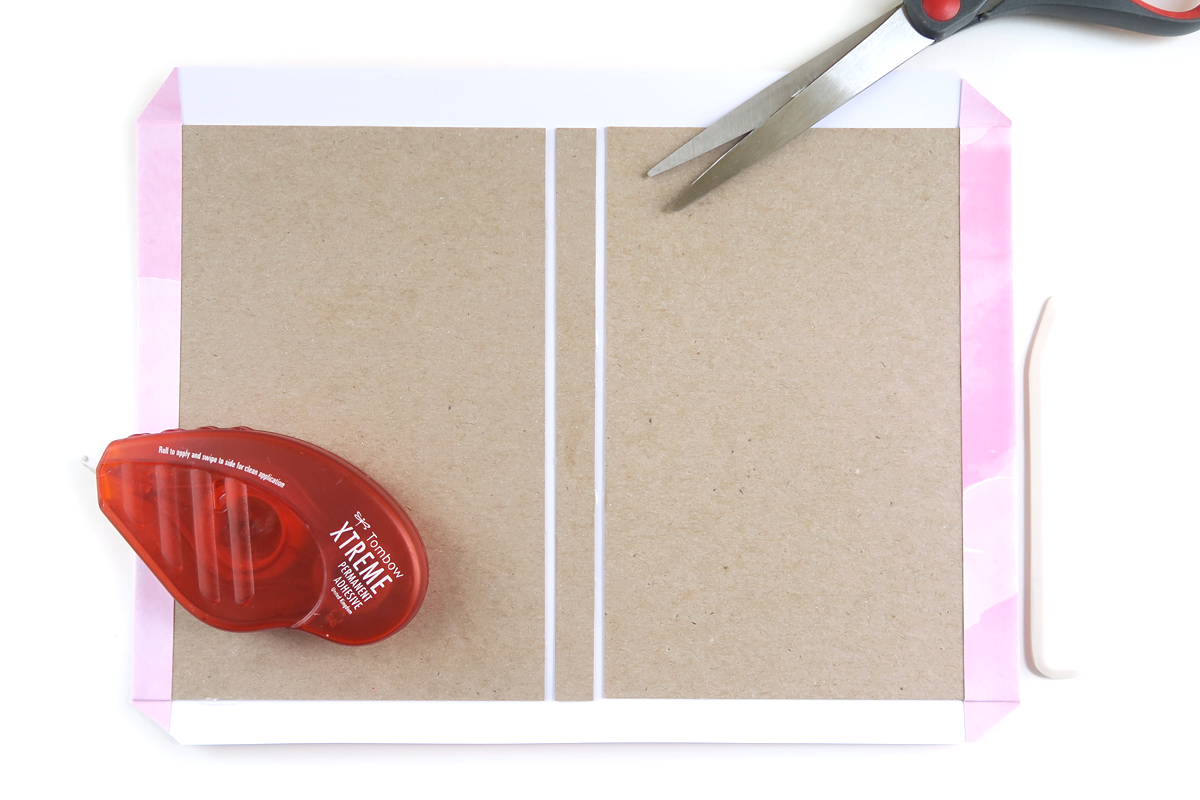
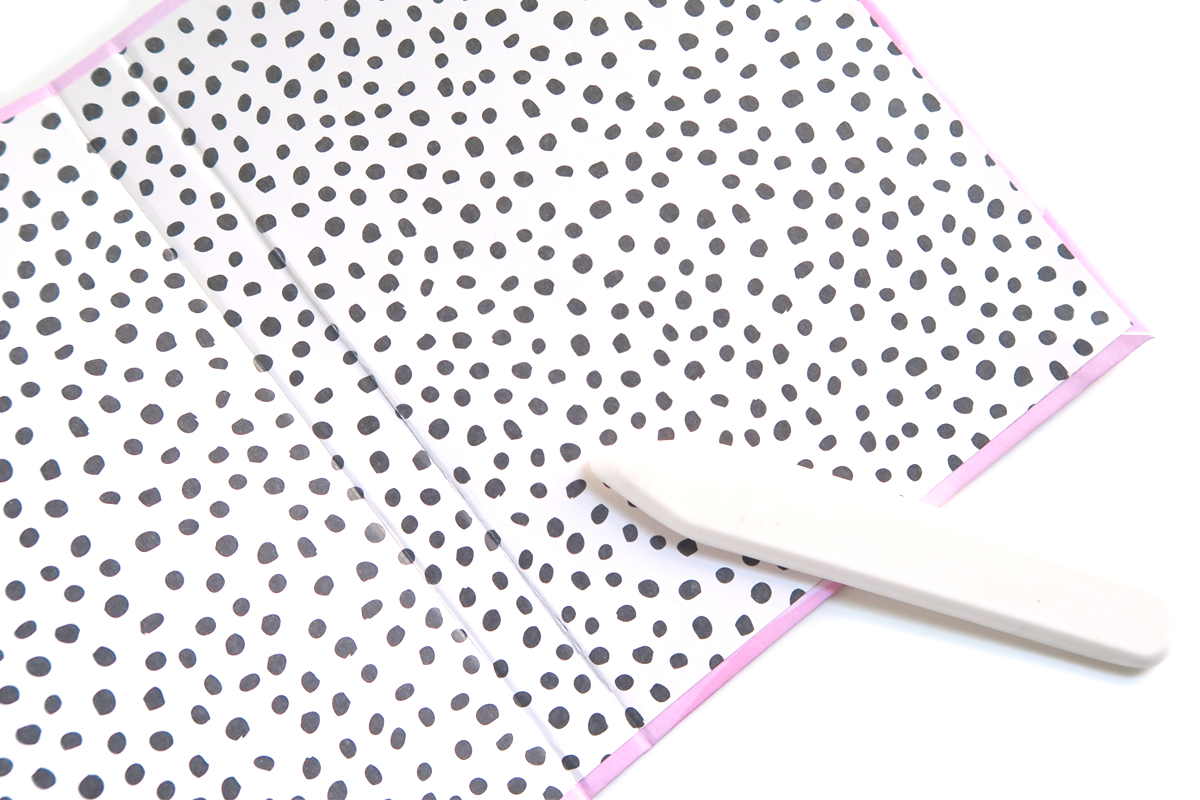
Fold over the side edges of the paper, using the bone folder to make sure the folds are nice and crisp. Adhere these side edges of paper down on the covers with the Tombow Xtreme Permanent Adhesive. Press down again with the bone folder to make sure things are adhered really well. Snip off the corners with scissors.
Similar to the previous step, now fold over the top and bottom excess edges of paper, adhere with the Tombow Xtreme Adhesive Runner, and press down with the bone folder. Don’t worry if the corners and edges of the paper aren’t perfect, we’re about to make things look awesome.
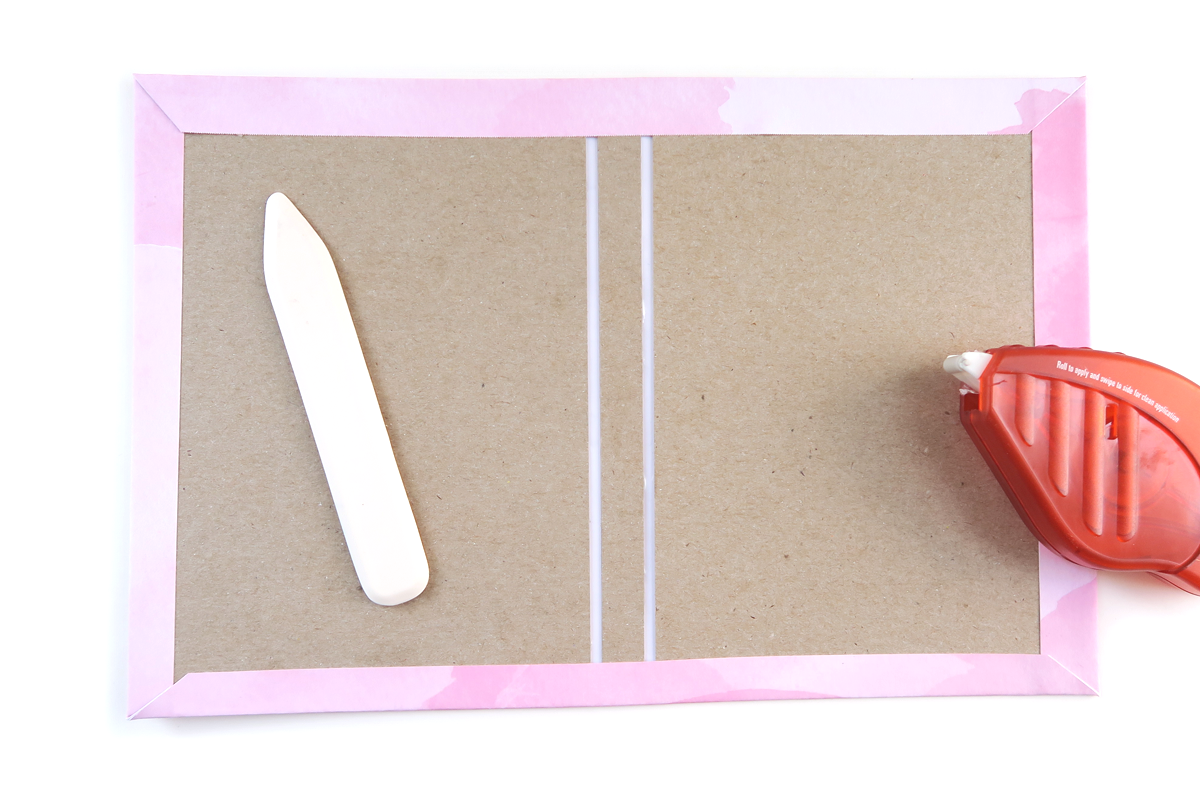
Next you’ll take your 6.75″x10.5″ piece of decorative paper and apply MONO Multi XL Liquid Glue to the side that you don’t want to show. Make sure to get the edges well! Flip over and adhere to the interior of your case. Use the bone folder to press everything down really well and let dry. So far, your case should resemble the one above.
With the inside of your case still facing up, use the bone folder once more to score on either side of the spine. Only score the spine on the interior of your case. Press gently, but make sure the score is fairly deep. Your decorative papers are acting as binding, so you want them to be adhered well to each other with your pressing.
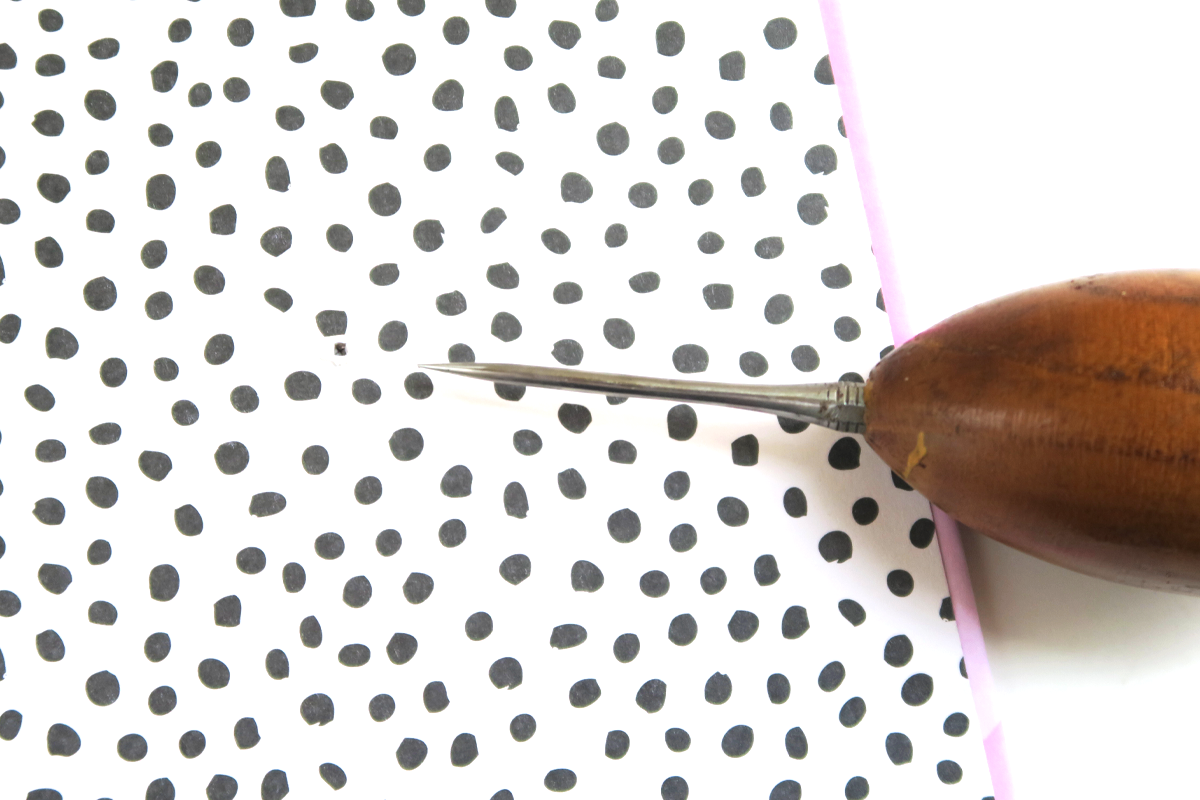
If you don’t want any type of closure on your DIY Kindle case, you can skip ahead a little bit. However, if you want to make sure it will stay closed when not in use, keep reading. With an awl or piercing tool, make a hole in the middle of your back cover piece. You want the hole to go all the way through, but try to keep it neat.
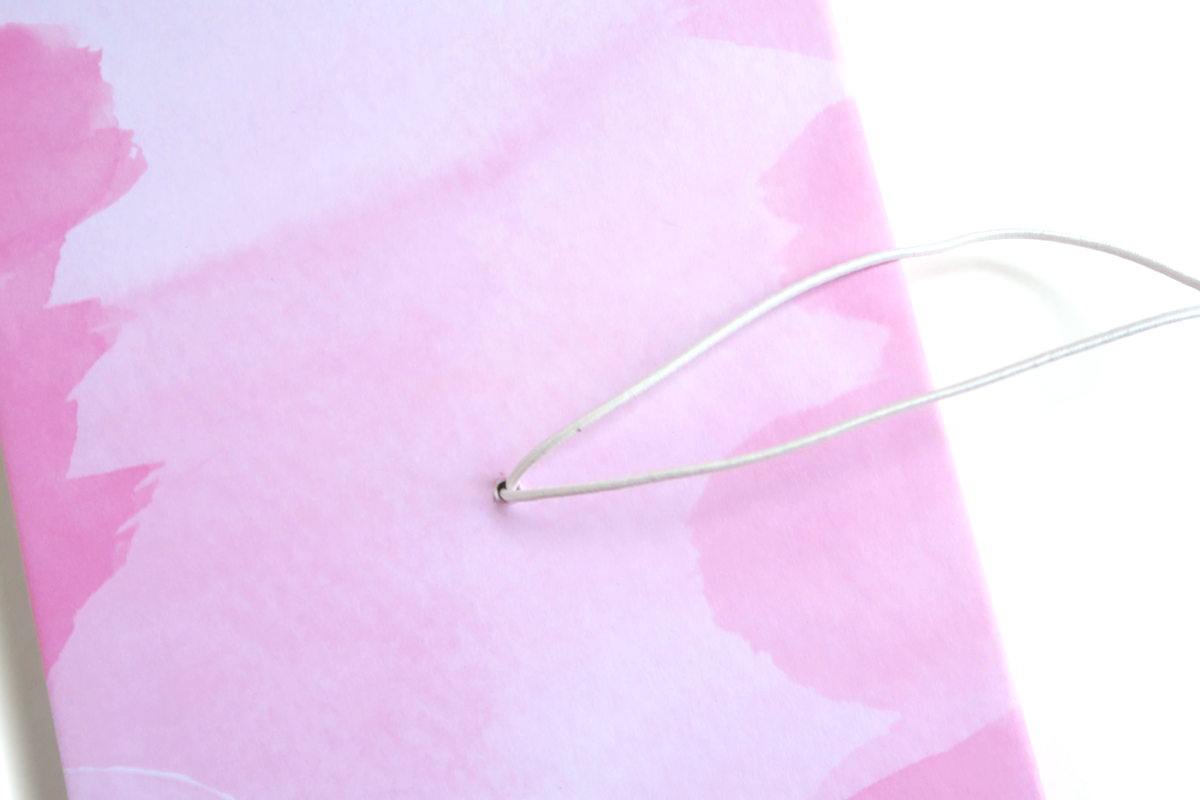
Next, take your elastic piece and tie a knot with the two ends. Push the looped end through the hole in the interior side of the back cover piece and out the back. It’ll look like a loop of elastic sticking out of the back of your case. Your knot will be in the inside.
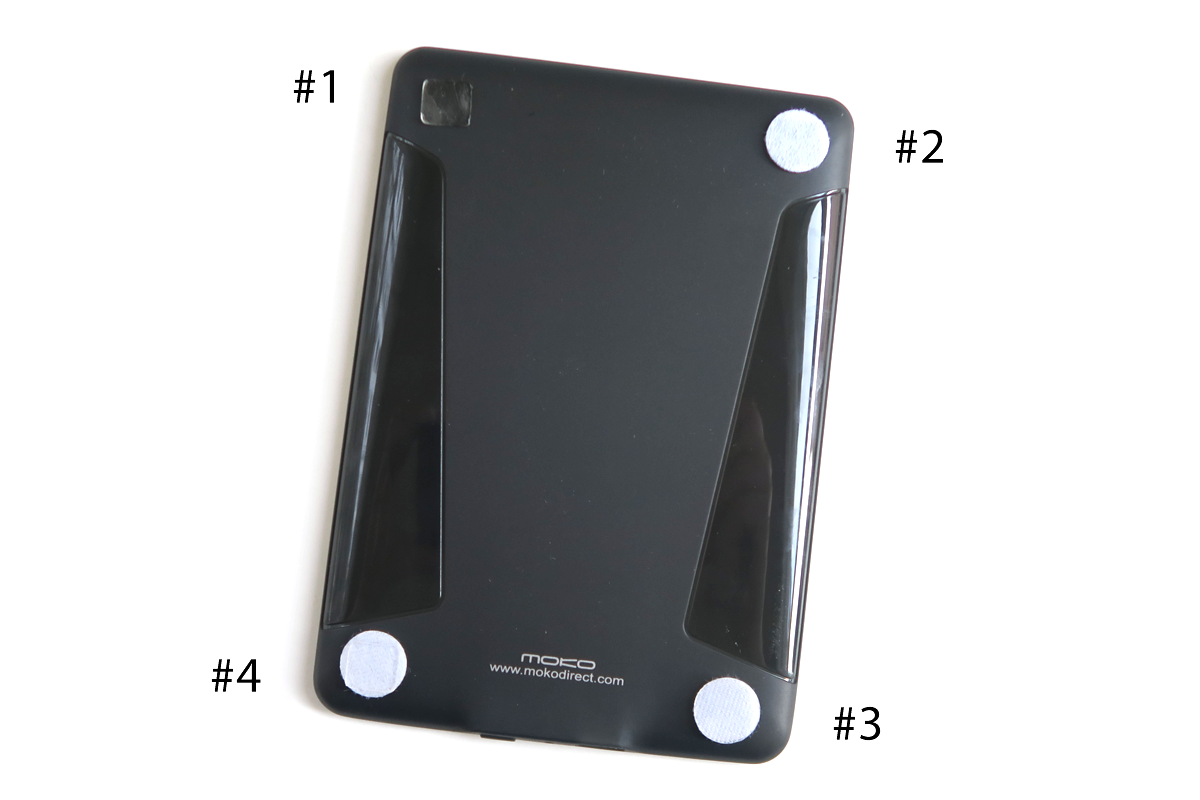
To make sure these cases are interchangeable, I’m using hook and loop fasteners and the Tombow Xtreme Adhesive Tabs. For this part, make sure your silicone sleeve is face/open side down. You want the back, solid side facing up.
- Apply a tab to the corners of your silicone sleeve. Peel off the backing.
- Attach the soft “loop” piece to the tab with the loopy side facing up.
- Press the “hook” piece face down on the loopy bit so that they fasten together.
- Apply a tab to the back of the “hook” piece you just placed, then peel off the backing.
- Repeat on all four corners of your silicone sleeve.
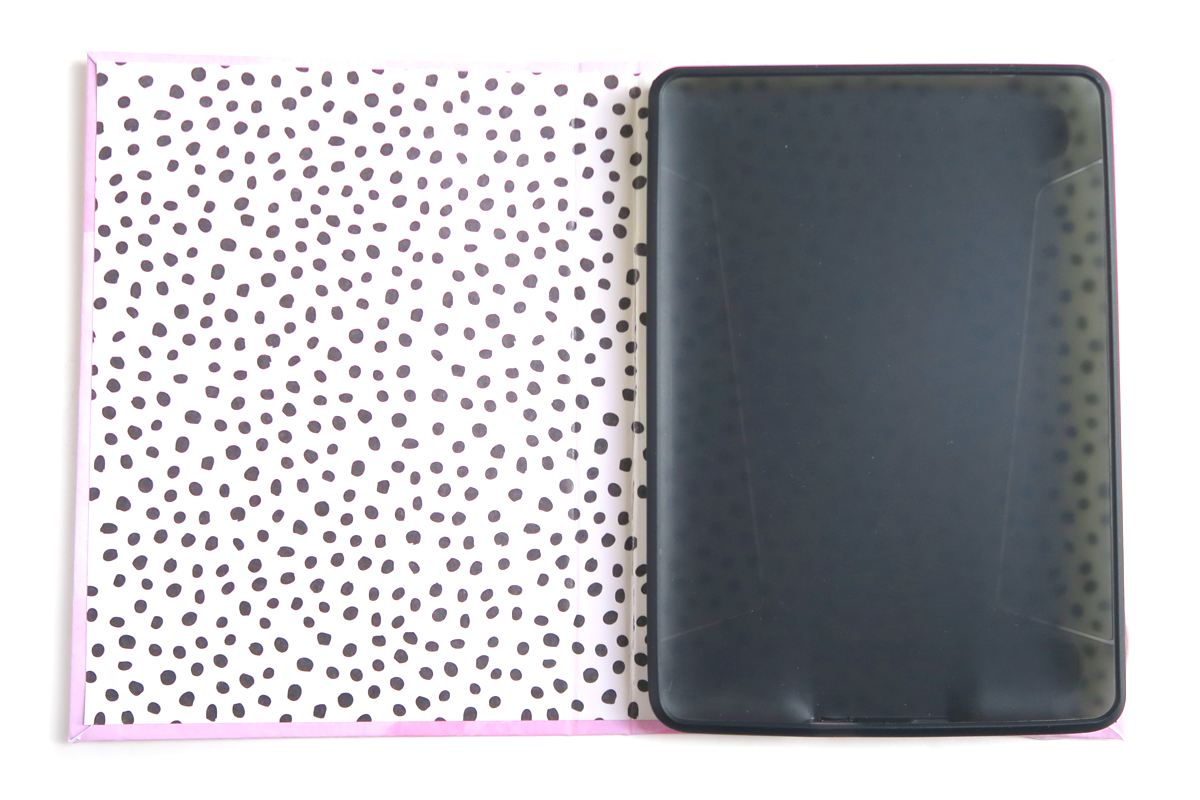
Finally, when each corner has a tab-loop-hook-tab applied, flip over your silicone sleeve so that the open side is now facing up. Making sure the charging port is at the bottom, center the silicone sleeve over the interior back cover of your case and press down. Make sure you press down really well over where the tab-loop-hook-tabs are.

The awesome thing about the Tombow Xtreme Adhesive Tabs is that they are truly extreme! You can now remove your silicone sleeve, but the hook and loop bits stay exactly where they need to. The soft loopy pieces are on the silicone sleeve and the hook parts are attached to the case. Woo!
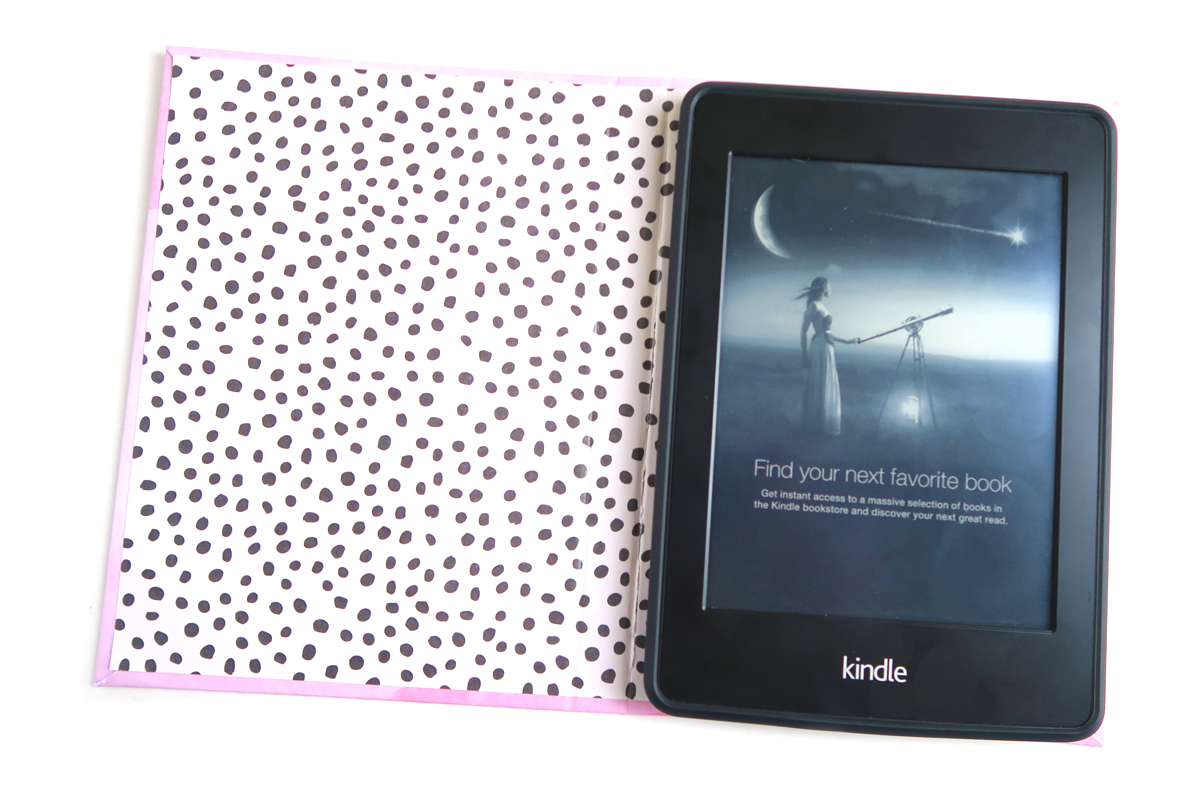
All that’s left is to insert your Kindle (or eReader) into the silicone sleeve and reattach it to your case. The hook and loop fasteners should line up nicely, and your sleeve will stay in place thanks to the Tombow Xtreme Tabs! If you want to attach the sleeve to more cases, just repeat the mini-steps 3-5 above with the same silicone sleeve and place it the same way in any cases you make.
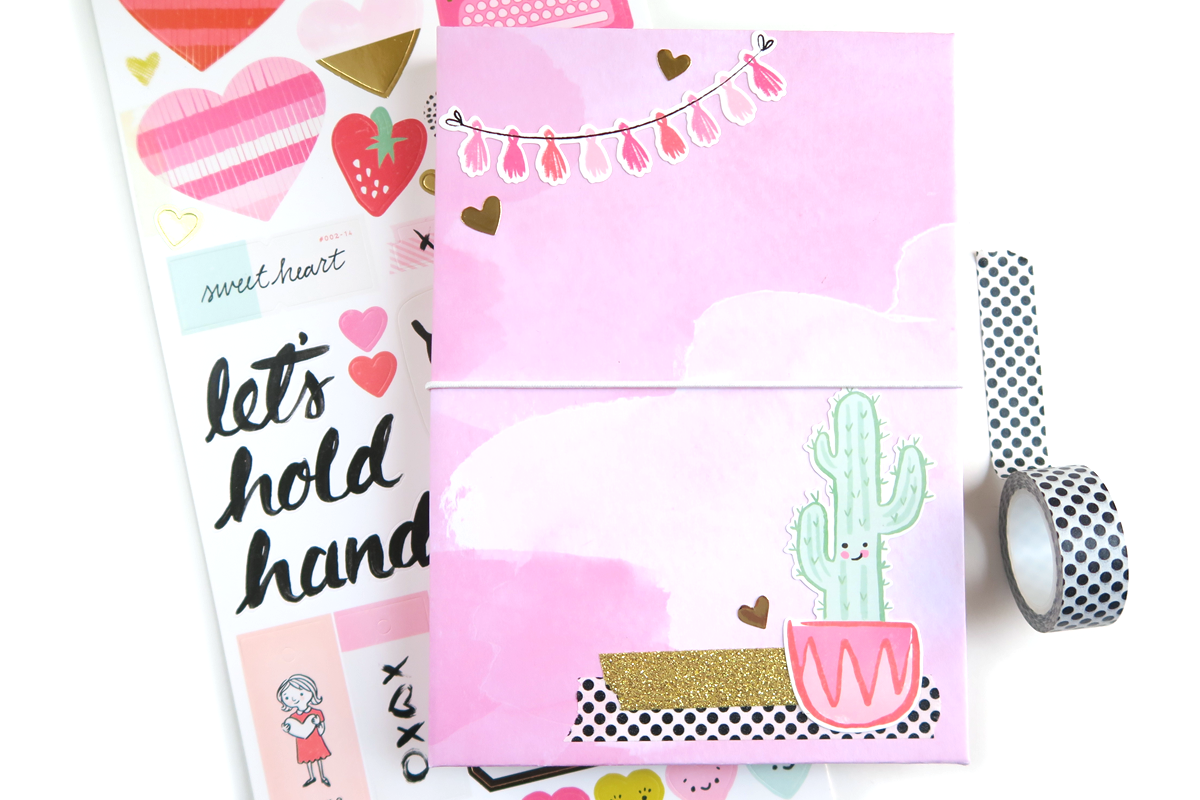
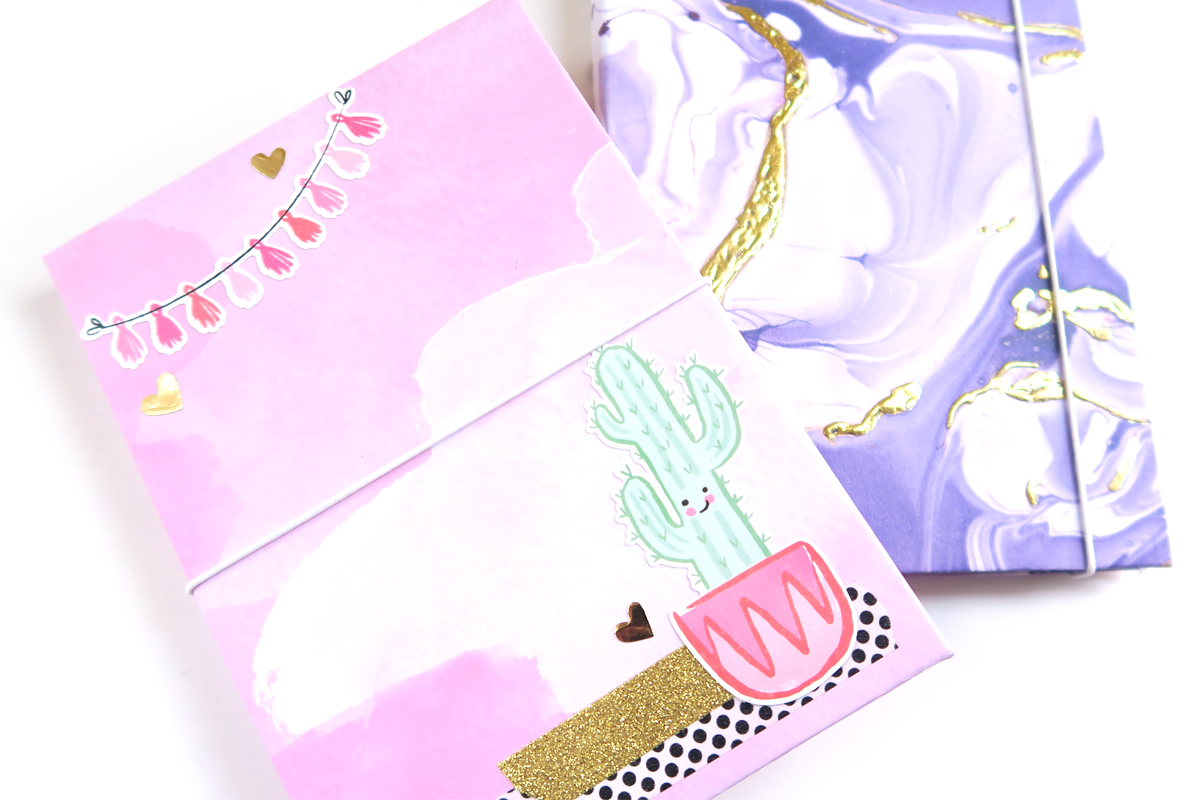
Besides using pretty papers, you can also add embellishments! On the pink DIY Kindle case, I added washi and some stickers. For the purple one, I added gold foiling by using this technique. You can also switch up the placement of your elastic, even adding charms or danglies! I love how you can totally personalize them and use papers and embellishments that are your own style. They would also be really fun to give as gifts!
And that’s it! A fun way to make your own DIY Kindle case (or for any eReader)! I know there were a lot of steps, but make it once and you’ll totally get the hang of it. It really does go much quicker than you’d think, I promise! Make sure to tag me on INSTAGRAM or YOUTUBE if you make one (or several!) – I would love to see!
Happy crafting (and reading!) and I’ll see you next time, friends!
Dani
I love love this tutorial, Dani!
love it!! Thanks for sharing!!
Great idea Dani!!