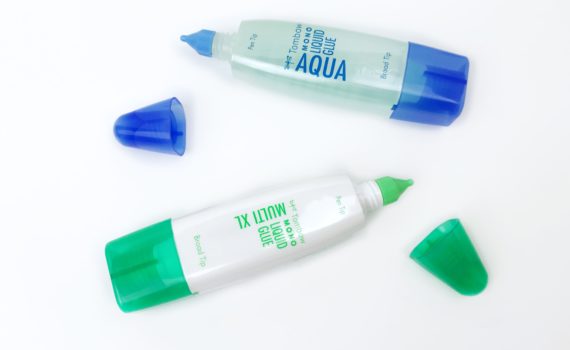
Posts Tagged ‘MONO Aqua Liquid Glue’
thank you …..by melissa cash
![]() |

Is ABC Week at Tombow so this week cards are on vacation. We are also working with the color Blue Iris so I wanted to make a really blue layout and I found this picture of my husband and what is more blue than an Aquarium.
The original base is just white cardstock that I misted with homemade mist and on the right I stamped Georgia Aquarium. On the corner I used a brad, a piece of fabric, ticket stub, paper clip, and bling. The staples are just decorative because I used my Mono Multi Liquid Glue to glue everything together. I used my Tombow Dual Brush Pen to draw a line around the page. In the mat of the picture I left a little bit extra to use a border punch. Then with my Tombow Dual Brush Pen I outlined the mat and then did the same with a white pen. Lately I am really into banners and I just used the scraps of my black, white and blue section. I also doodled them all. On the top of the banners I used tape and some rope that I glued with my Mono Aqua Liquid Glue which I love because you can’t see where the glue is at all. For my handmade embellishments I used the Mono Multi Liquid Glue. Felt could be tricky to glue you can’t use any glue because the embellishment might come off but the Mono Multi Liquid Glue works perfect. This kind of creepy mouth sheet is from a pad but I cut of the blank part around the image and did some matting with blue and black. For all the matting I always use my Stamp Runner Dot Adhesive. No project of mine is complete without Tombow Foam Tabs so the whole journaling piece has some dimension.
Working with Blue Iris this week was fun. I can’t get enough of the Mono Multi Liquid Glue for my embellishments.
I hope you like my blue project!!
Take Care!!
I think I speak for all the scrapbookers and crafters out there when I say that most of the time the projects or layouts we make are for other people. We work so hard to tell all the stories about our children and family that we often forget about ourselves. Once in a while we should make a page about ourselves, that way when future generations see them they can get an idea of who we were. I am the first one to run away from a camera, always behind them, never in front of them, but I HAD, not wanted, HAD to take a picture of myself. Since it came out pretty decent I made a layout about things I currently love. This week we had to use turquoise, one of my favorite colors!!
After I gather all my supplies for a layout I start by matting the picture, but instead of using just white cardstock, I used Tombow’s Dual Brush Pen to draw some stripes and then added the photo to do some doodling around it. Before I assemble I everything I doodled the base, the 8 1/2 x 11 patterned paper and the strips of paper with the things I like. Before gluing everything I like to lay everything down to see where it looks better. After I decided, I stamped the heart and the eye so I could use the last one instead of the letter “I”. I also used some die cuts that I assembled using the Mono Multi Liquid Glue, it was great to use the fine tip specially for the black piece of the bird. The fine tip of the Mono Multi Liquid Glue allowed me to glue these detailed parts easily without making a mess. I made some embellishments with my Spirograph and the Dual Brush Pens and glued other embellishments in the center with my Mono Multi Liquid Glue which works great with paper and embellishments like the rose I made. The 8 1/2 x 11 paper, the octagons on the corners, the doily, the mat and the photo were glued with the the Stamp Runner Dot Adhesive. For the turquoise rope I used the Mono Aqua Liquid Glue since it dries completely clear you won’t notice where is the glue, the staples on the corners are just for decoration because there is no way that it will keep the shape without glue. The rest of the embellishments were glued with the Mono Multi Liquid Glue or with Tombow Foam Tabs for a little extra dimension. I used Tombow Foam Tabs for the shadow in the die cuts to make them stand out.
I really love the vibe of this layout!! The Dual Brush Pens help the page feel like it’s moving. This was a nice idea, maybe I’ll make one once a year so future generations can make fun of our likes.
I hope you love my loving project!!
Take Care!!
i never really paid attention before to “the color of the year” or even “Pantone colors” before… but this month’s challenges have had me digging to find the perfect shade of paper or embellishment to match said colors. in the end i’ve come up short and needed to create something to finish the project. in addition to the color challenge i challenged myself to create a scrapbook layout for each of them, to jumpstart the 2012 year, when i will get more layouts done!
i have had these pictures of my daughter and one of her best friends (this one we’ve known since we said their ages in months!) i have even scrapbooked a few of these pictures before. but i had more pictures and the paper already picked out and i was looking forward to getting another layout done. i needed to add in some embellishment and struggled to find something the right color in my stash.
i found some white paper flowers and grabbed my Tombow Dual Brush Pen #743. i colored around the edges of the flowers. then with a q-tip dipped in water i dragged the color in towards the center of the flower. once the color was blended it was the perfect embellishment for my layout. (wait til the flower is dry before adhering it to your project.)
to finish putting the layout together i used Tombow MONO Adhesive Permanent Runner for the pictures and paper, Tombow Dual Brush Pen #743 to ink the edges of the pages and write a portion of the title, Tombow MONO Aqua to set the rhinestones in the center of the flowers, and Tombow Power Tabs to set the flowers. WOW, 4 Tombow products on one layout. i love that each of them have a purpose, but work so well together.
I hope you enjoyed my attempt at using HONEYSUCKLE. check back tomorrow for another very pink project!
If you enjoyed this post follow us on facebook and twitter!
http://www.facebook.com/tombowusa and
http://twitter.com/#!/tombowusa
This week we are showcasing the color Tangerine Tango, which is the color of the year!! Orange is my favorite color and this hue is my second favorite!! Some of my plans for this year is to do more Home Decor pieces. I moved to the US on October and a lot has happened since then, leaving me very little time to make more Home Decor. In my house back home my daughter had a mural and her room didn’t need much more to be cute. Now she has the whitest walls in the world and is kind of sad. One of my projects for this year will be to turn that plain white room into a nice and fun environment. I bought this birdhouse with the idea to turn it on a nice decoration.
The first thing I did was testing the Dual Brush Pens on the bottom of the birdhouse and I remember that last week, Sarah gave us a little tip about using the Mono Aqua Liquid Glue first, letting it dry and then using the Dual Brush Pens. She used chipboard but it was worth a try and it worked the same. Using the Mono Aqua Liquid Glue before coloring the birdhouse made it much brighter. I used the Mono Aqua Liquid Glue on the parts I was going to color with Dual Brush Pens and let it dry. I did super fun laundry while I waited so you probably don’t need to wait overnight. Then I colored the Tangerine and Green parts and let them rest for a few minutes and used a little bit more of the Mono Aqua Liquid Glue to seal it. After it was dry I measured as best as I could the parts that I was going to cover with paper leaving just a tiny tiny bit extra so I could sand it down later. I used my awesome Mono Multi Liquid Glue to glue the paper on the house. The broad tip helped me spread glue across the surface easily. If there was lots of excess on the paper I trimmed it down with a craft knife and then I sand it down. For the roof I used 7 layers of paper stripes and a scalloped border punch. For the front of the house I used a border punch to make a fence-like detail . I also used a die cut, a little detail to give the illusion of a tiny window and 3 handmade flowers that I made with felt, pearls and my Mono Multi Liquid Glue.
I loved using the Dual Brush Pens instead of paint, it looks more like a stain which makes it a little bit more realistic and shiny!! I loved all these bright colors together!! Hopefully the year 2012 will be bright
This was such a fun project!! It made me feel like a kid again!! I hope you’ll give Home Decor a try this year!!
I hope you liked this project!!
Take Care!!
i have lost count as to how many organizing ideas i have tried out. well, add this to the countless number.calendars are great, but they never seem to give me enough room to write what i need to. or more importantly what my family needs to see.
so i thought i’d give this a try. i made magnets for each day of the week. then i put them on my fridge with a piece of paper under each one. it is easier for everyone to see what is going on that day, who is going where, and what needs to be done.

crossing my fingers for an organized 2012 (while still using my organizational binder, and my bill sorter, and my kid’s daily schedule…i told you i have tried many ideas!) to make the magnets i used Tombow Dual Brush Pens to color raw chipboard. the colors seep in nicely to the chipboard textures leaving an even and soft color.with 96 colors it is easy to find a color to match the papers i was working with. with a circle punch i made 7 circles and inked the edges with a dark brown Dual Brush Pen. then using Tombow MONO Multi Liquid Glue i layered all the pieces together -raw chipboard circle, pattern paper, marker – colored chipboard, with a raw magnet on the back. the Multi is strong enough that even the force of raw magnets will not separate the magnet and the chipboard, and tacky so it holds the paper and the chipboard well without warping or bubbling because it is too wet.
as an experiment i wanted to see what would happen if i coated the raw chipbaord with Tombow MONO Aqua Liquid Glue before coloring it with a Tombow Brush Pen. the result was a slightly more vibrant color with a shine. see the difference between the flower with Aqua and the circle without?
wishing all a HAPPY NEW YEAR and HAPPY CRAFTING!
if you enjoyed this post follow us on facebook and twitter!

If you enjoyed this post, we would love it if you would follow us on:
http://www.facebook.com/tombowusa
http://twitter.com/#!/tombowusa
I wanted to share a quick, easy and cheap idea for a gift. Since I just moved to the States I wanted to send our family photos of our daughter and I made a photo book (that can be easily made with any kind of binding system). I just clustered some embellishments, most made by me like that felt flower that I made using my Tombow Mono Multi Liquid Glue. I also used the Mono Multi Liquid Glue for gluing the doily and the ribbon. For my background mat I used my Stamp Runner Dot Adhesive. I love using Tombow’s runners that way, they look super smooth without any lines or wrinkling. 
I used my Mono Aqua Liquid Glue for the Clear Dew Drops. In like all my projects I used the Foam Tabs for the butterflies and for the brad since I didn’t want to pierce the book I folded the prongs and stuck a foam tab there and it worked like a charm! But I have to say that the star of this project was my loopy embellishments that I made with… are you ready to go back in time… My Spirograph and the Tombow Dual Brush Pens!!! I am officially hooked, the fine tip of the *Tombow Dual Brush Pens fit perfectly in the holes, you can mix colors, you can use the blender pen and they are acid free so they work amazingly for your scrapbooks and paper crafts. Plus you have over 90 colors to choose from, that makes a lot of loopy embellishments!!
The Tombow Dual Brush Pens are a must in every crafter’s room. They are so versatile, you can use them for coloring images, calligraphy, doodling and Spirograph-ing (if that is even a word). If you don’t have them, now you know what you can ask Santa to bring you this Christmas.
I hope you liked my retro inspired project as much as I loved making it!!
Take Care!!
i decided to look up the origin of the saying. did you know that it was coined to promote “talking machines”, “talking machine records” in 1924, which was a phonograph.
who knew???? i certainly didn’t.
but that didn’t help me with my idea. and then i got to thinking, the gift idea i had found for my husband for this year is a gift that will keep on giving…at least until December 2012!
my gift is a year’s worth of dates. my husband is very supportive of my creative projects, so i know he will appreciate the time that i am putting into this. so as the scrapbooker that i am, i wanted to make a place to keep pictures or our thoughts about the dates. i created a little book to present to him on christmas morning.
SHHHHH!!! it is supposed to be a secret! i won’t even let him look at this post!
i found these mini folders at the teacher supply store. by binding them together i turned them into a book. i wanted a place to keep ticket stubs, notes and/or pictures, so i used Tombow MONO Aqua Liquid Glue and glued the bottom of each of the folders together. when i give it to him some of the pockets will have gift certificates inside.
Aqua is the best option for making pockets because it dries clear and it dries completely…so no sticky residue that papers in the pocket would get stuck to.
i printed off descriptions of the dates in text boxes from a word document and used Tombow MONO Adhesive Dots to attach one to each of the folders/pockets.
this is the bare bones without too much embellishment, i may save that for later, or let the dates speak for themselves.
i found several of my ideas around the internet, so not all are original. but i thought i’d share some of the ones i have planned… *lunch @ Atlanta Bread Company to work out yearly budget – (i know…this is FUN one!)
*bucket of balls – driving range and donut holes from Krispy Kreme
*make calzones @ home and watch a movie
*dollar date – dollar store, dollar menu, dollar theatre
*movie theatre
*walk in the park with italian ice
*Gwinnet Braves baseball game well then, i’ll be giving for a whole year!
If you enjoyed this post please follow us on
http://www.facebook.com/tombowusa and
http://twitter.com/#!/tombowusa


