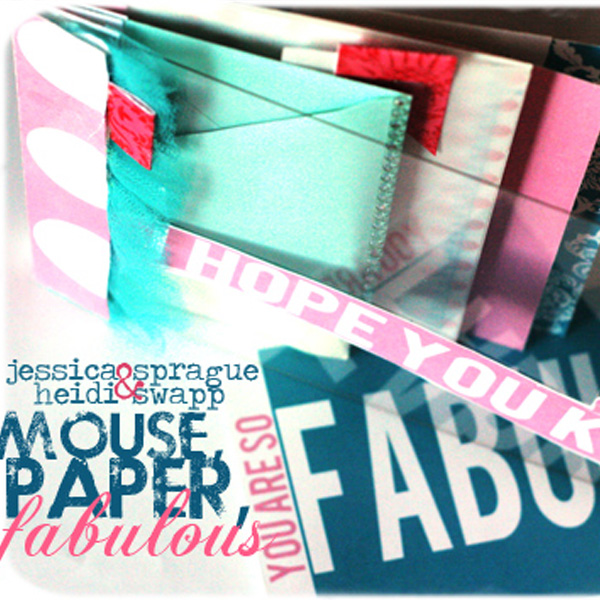
Posts Tagged ‘MONO Vellum Adhesive’

Jul
09

Hambly Screen Print Overlays can sometimes be overwhelming to work with because it comes with it’s own level of stress just for adhering it. I have seen so many people rework their initial designs just to cover/hide the adhesive. Oh you know you’ve seen it… the random flower placed over the glue dot or the  picture placed just right to cover the sticky tabs… and then the edges flap a little tooo much and you hope and pray  the layout doesn’t get touched much because your sheet protector just might not hold it all together the way it was in your mind. You know you’ve been there. It’s funny cause, it’s true! At the same time it’s sad because there is a simple solution! Your design shouldn’t be compromised just because of logistics. Seriously, for a few dollors save yourself the headache and go out and get a little Tombow’s MONO Vellum Adhesive. Then stock up on all the Hambly your desk can handle, I promise that it’s worth it.


So if you happened to have a little Tombow’s MONO Vellum Adhesive and a few Hambly Screen Print Overlays… What would you make without worrying where to

Jul
07

i have been using hambly with my tombow products for several years…since the invention of Tombow MONO Vellum adhesive.


there are many fun projects that can be created with their clear screen prints…clear cards, clear favor boxes, cutting up the screen prints to use as individual embellishments and using the screen print as a background for a layout, which is what i did with this project. because the layout was about a dress my mother made by hand i sewed through the screen print and the cardstock for the detailing around the scalloped edge piece and the title “dress”. i used the Vellum adhesive to hold it in place. then i cut up another screen print sheet that had several frames and used one over the focal picture and another to frame around the title. i used Vellum adhesive to put those down too.

i have several more ideas and lots of hambly product to play with, i’ll be working on a few more projects to post in the next few months. so many ideas, so little time. what about you? any hambly projects you have in the works?

-Sarah

Jul
06

Yes, this summer seems to be taken over by dolls at my house and I have a love-hate relationship with them. I love that she can be so creative and entertained by just a few toys, I’m hating the picking up of teeny- tiny little papers, shoes and hair bows. That being said, when the Hambly Happiness box came to my house I knew what I was going to do with it and I knew that it would be my daughters favorite Tombow Tots project ever (even if it added to the doll drama).

These just started out as the cheap little 1.99 chalkboards from the craft store and with a little paint on the edges, a BEAUTIFUL Hambly screen print on the back (put in with MONO PowerBond adhesive), a few Clips (put on with MONO MULTI Liquid Adhesive)and of course some butterflies to add to the magic (put on with MONO Adhesive Vellum — perfect for all those overlays)  it’s turned into the ultimate set-up for a miniature classroom. She even went above and beyond making miniature notebooks and ‘scrapbooks’ for the dolls. Now her summer school set-up is complete. She can’t wait to play with it and I am dreading the picking of up it… I guess that’s the way it goes, right? The creative circle of life.


Remember to check out Hambly’s new DT on their blog and make sure to add  Tombow to your Facebook account too… we’re sooooo close to 1000 friends and we need your help. We’ll have a HUGE giveaway as soon as we reach the magic number so keep an eye out there too. Happy Tuesday!

-Joanna

Apr
26

Another fun partnership this week and trust me, if you aren’t already in love with Pink Paislee, you will be after this week is over!! They have absolutely beautiful designs and the embellishments are creative, and full of life. As always, make sure to leave your thoughts and comments for a chance to be entered into one of this weeks giveaways. The Pink Paislee Blog is giving away a few prize packs as well so be sure to pop in over there often. Trust me, it won’t be a waste of time, they have so much mojo over there that it leaks out of your computer the more you scroll through their archives. And show your love by becoming a fan of theirs on Facebook too!

As I’ve posted earlier, this year I’m doing Project Life and as I was working on it this month I noticed that the colors from Pink Paislee’s 365 Degrees and Bayberry Cottage Collection match perfectly. I’m making every month in my Project Life album has it’s own color scheme to keep the look coherent so this realization was perfect for me. I was able to use a BUNCH of Pink Paislee products to pull together the month of April. Since we had a big holiday this month (Easter) I wanted to really showcase that one day so I made an 8 1/2×11 -2 page Layout complete with Pink

Paislee Papers and Embellishments, PL page protectors and some hidden pictures. What makes cutting up the PL page protectors work is Tombow’s MONO Vellum Adhesive Roller. I can literally cut anywhere I want and attach it to my photos- and it’s still just as protected and strong. It was liberating to scrapbook with NO BOUNDARIES! I’m loving the Project Life concept, I’m loving the colors and Pink Paislee matching it and I’m loving the currently caught-up finished project! Have a creative Monday!


Apr
01

This is a quick project that you can place into a lunch bag or briefcase; a gift of a silly moment on April Fool’s day!

Tombow vellum adhesive, Dual Brush Pens and Imaginisce paper and embellishments were used along with some paper punches and vellum.

The card is to be hanged on your nose to view the scripted message on the other side – and to look silly while doing it! It will be fun to do, but also to share with others!

I liked the paper from the Imaginisce ‘Scooter’s Vacation’ and also added stickers, a stamped image and flowers from the same collection so everything matched.  The Tombow Dual Brush Pens that match the Imaginisce Scooter’s Vacation Line:

837 Wine Red. 969 Chocolate. 373 Sea Blue. 991 Light Ochre. 126 Light Olive

Everything was put together with Mono Adhesive Vellum.

I use an upside down vase punch for the nose opening, but cutting a triangle from the paper would also work well. On the front of the card place the following message:

To view your message, go to a mirror and hang this on your nose…

For the flip side, write this message on a piece of vellum:

Wishing you a goofy, funny and silly day! Love from Lirpa Sloof

Turn the vellum over and copy the letters. Adhere this side up on the card.

I decorated the card to make it look as goofy as I could – you could really go to town with this idea, big ears maybe? Silly hair?…have fun!

Have you figured out who Lirpa Sloof is yet? April Fools spelled backwards!

What about you? Do you play any April Fool’s day pranks at your house?


Mar
19

Somehow in the last 9+ years of parenting I’ve left myself out of the Easter Basket equation. This year I vowed to change that. After all, Easter candy is really my FAVORITE candy of the year, and why should the kids get all the fun? So I made myself an Easter basket yesterday, and I’m quite happy because I can pretty much guarantee that the Easter Bunny is going to leave me EXACTLY what I love!
I used the Lucy Bird line from Imaginisce…I have all boys so I don’t pull out birds and girly flowers very often, but let me say that I was SO excited this week to have a reason to scrap in pink!! This line is so cute and whimsical, and the coordinating stickers, flowers, and chipboard are adorable.

After I had the basket finished, I decided I needed some cute flowers coming out of it. So be sure to keep reading, I included a tutorial at the end to show just how easy it is to make these. I only made a few since I needed to leave some room for the candy, but these are so cute in a glass vase with LOTS of them in a variety of lengths.

Continue Reading

Mar
15

I am so glad the aged/antique look is really coming back. I’ve always liked it but, this technique turned my like into LOVE! Seriously, if you haven’t aged with paint you are missing out on a whole new wonderful world! I just painted the edges and accents, sanded it up a bit and loved the result. I also had WAY to many pictures to really fit on a 2 page layout so I had to create a pocket for a mini album… Continue Reading

Mar
12

This weekend is one of my favorite weekends of the year. Daylight Savings!! Spring Forward! With the change up- I always feel like my daily schedule can’t handle the confusion! I made up this layout last week- just trying to remind myself that I may be busy but it all adds up to a lot of great moments! The circular transparency is from Heidi Swapp and I used MONO Vellum Adhesive on all pictures. Enjoy your weekend and don’t forget to set your clocks back!

Mar
09

Marie’s fun chick-a-dee containers were so cute last week I thought it’d make the perfect St. Patty’s handout’s for my son’s kindergarten class. I was worried they might be too complicated for him but boy was I wrong! They are SOO ADORABLE but just as easy to create as they are cute!

Supplies;
Sheet Protectors,  Clear Paper or Vellum (I used leftover Sheet protectors from an odd sized album I gave away.)
Green Patterned Paper (again, I used whatever was in my scraps drawer)
TOMBOW MONO Vellum Adhesive (this is the white roller)
Scissors
Paper Clips
Ribbon
Candy, Notes, Small Toys to fill.

Follow Marie’s easy step by step directions with your kids… they’ll love making their own tiny little candy pockets! Happy Tuesday!


Feb
03

This one’s for my baby sister. 22 last week! The card turned out beautifully. I have always loved the gated look but sometimes it ends up feeling really bulky and heavy so this is a gated card using transparent paper. MONO Vellum adhesive and a few rub-ons. You can’t see the adhesive and it’s strong enough to hold up to the continuous opening and closing of the card. I’m sure I’ll be making more like this, I love how quick it came together and how different it feels. What have you created lately using your Mono Vellum Adhesive?