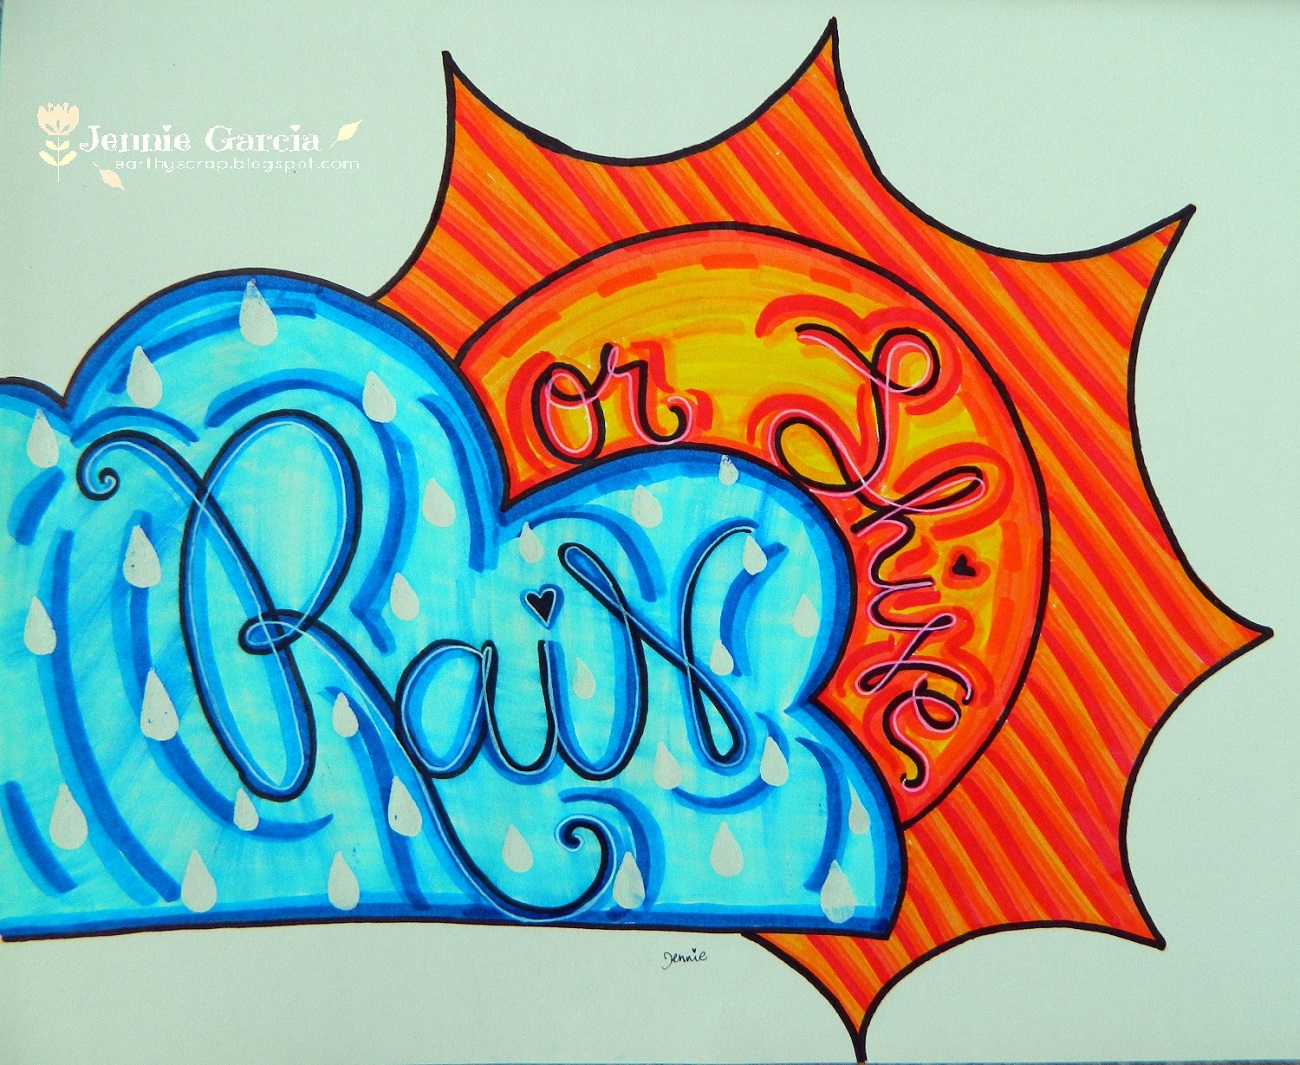
Posts Tagged ‘MONO Glue Pen’
“It’s party time”…..by melissa cash

http://www.facebook.com/tombowusa and
http://twitter.com/#!/tombowusa
paper and stickers that are coordinated for me are the perfect solution for getting scrapbook layouts done quickly and effortlessly. Echo Park’s papers did not disappoint! i loved creating so many different looks with the same paper line. sometimes, pictures just need to be scrapped and when that sometime happens, i hope you have Echo Park around to play with. i had some time, and in 3 days i managed to complete 5 layouts…. take a look!
here’s a closer look at some of the details and the Tombow adhesives i used… on the “easter” layout i took the yellow sticker frame from the Echo Park letter sticker sheet, added Tombow Foam Tabs all the way around, sprinkled it with baby powder (to neutralize the adhesive on the sticker), then cut it at the corners and reassembled it to create a border around my pictures. once i had it where i wanted it i took the backing off the Tombow Foam Tabs and stuck it down.
on the “chinese tea” layout I used Tombow PowerBond to create a pleated border for the main picture. I also used the Tombow Glue Pen to place a few gems that needed to be strategically placed as well as adding pattern paper to the back of clear buttons. and to add a button to the center of one of the flower stickers.
for all the other layouts I used Tombow MONO Permanent Adhesive Runner.
Thanks Echo Park! Check out their blog this week…and follow these links to their designer’s blogs as well!http://scrapbookpatty.blogspot.com/
http://wendysueanderson.blogspot.com/
http://www.mycreativetreasury.blogspot.com/
http://shauntewadley.blogspot.com/
http://happylifecraftywife.typepad.com/
If you enjoyed this post please follow us on
i wanted a quick card i could send to a friend…
marie has shown these techniques before, and she is the expert, but little ole me decided to give it a try for this card i was envisioning.
i used the TOMBOW MONO GLUE PEN for a great resist technique.
i wrote with it on a piece of white card stock. in the tip of the glue pen is a little roller ball. just push down on the tip til you see the flow of glue coming out, then write. slow and steady! then set that aside to dry completely.
then i cut a standard A2 card size (4 1/4 x 5 1/2) pattern paper front and then a slightly smaller cardstock piece to fit over it. i layered these together with the TOMBOW MONO PERMANENT ADHESIVE RUNNER. i really like how i can get right up to the edge of the paper and get around curves with this applicator.
once the word written with my glue pen had dried i grabbed a piece of plastic and three shades of TOMBOW DUAL BRUSH PENS and colored on the plastic with the two darkest shades. using the third and lightest color “pick up” the color from the plastic by coloring through it with the brush tip.
draw over the glue drawn image with the third pen, with the color on the tip, and make sweeping strokes starting at one side or top or bottom and move to the opposite side. the darkest colors will come off first and eventually the lightest shade will be the color you are using last. and you end up with a gradual color effect. once it is done you can even take a slightly damp paper towel and wipe the color off the glue pen/resist. keep in mind that the Dual Brush Pens are water based and will blend if they get too wet. i am sure marie explains it a little better…but hopefully you’ll give it a try so you can see for yourself!
or better yet, if you ever have a chance to take a class from TOMBOW jump on it! marie will teach you some amazing techniques!
Materials from Tombow: Dual Brush Pens, Jelly Bean 10-set, (761 Carnation, 992 Sand, & 493 Reflex Blue) Permanent Stamp Runner, Foam Tabs, Glue Pen
Using a dye-based inkpad, stamp multiple images of the balloons. The sample used had 5 stamped balloon images. You will also need an extra tote bag stamped out.
For the green swirl design on a blue background for the tote, color the tote with the green Dual Brush Pen. Using the Glue Pen as a resist, draw on the swirls. When dry, color the tote blue using a blended technique. Cut out the tote bag and the flower, apply permanent adhesive to the top and a small foam tab at the bottom. When adhered in place, the tote will have a dimensional flair at the bottom.
The balloons were done in a similar fashion using the glue pen as a resist. Some of the balloons are colored yellow and a simple design added with the Glue Pen. Add some designs on some uncolored balloons and leave some blank. Use the warm pinks, oranges and corals from the Jelly Bean set to color the balloons. Cut the balloons out and use the Permanent adhesive and Foam Tabs to adhere to the card. Add tiny rhinestones as the highlights using the Glue Pen.
from the time i got my box filled with penny black stamps and “eye-popping” cardstock i knew what i wanted to do….
so i grabbed my Tombow Dual Brush Pens and set out to see if i could get the image from my mind onto paper.
i am not a big stamper and the only stamp pads i own are black, or brown to use for inking paper edges. what i wanted was a tone-on-tone monochromatic look with the vintage looking stamps i had just be privileged to work with. using my DBP i inked up a stamp, and using a scrap corner of the paper, stamped a little of the image to see if the colors would come out the way i envisioned. it didn’t take long… it seems that Tombow has a marker that coordinates with each of the beautiful shades i received. what i got was a wonderful monochromatic, barely there, image.
i made a set of 3 bookmarks….
the first one used #837 on the red cardstock with the butterfly suite stamp. i used Tombow Powerbond, Tombow Glue Pen, and fine dust glitter, along with the cardstock and the ribbon.
the second one i used #703 on the pink cardstock and #837 on the red cardstock and the sparkle and letter background stamps. i used Tombow Foam Tabs and Powerbond with the addition of some ribbon. also, using #879 I went back over the details of the stamped flower and gave it some definition. using a blender pen i ever so slightly blended the lines to make them a tad softer.
the third bookmark i used #879 layered over the pink and red cardstock strips with the reverie stamp, along with Tombow Powerbond and Glue Pen, cardstock, circle punch and a button.
Thanks for stoppping by…Sarah
www.elizabethallan-blog.blogspot.com
Supplies: Tombow Dual Brush Pens: 026, 055, 685, 725, 835, 985, N15, Tombow Glue Pen, Tombow Foam Tabs, Tombow Power Adhesive Tabs, Tombow Dot Adhesive Stamp Runner, Rubber Stamps: Penny Black – 4183K Sparkle, 40-049 Majestic Composition, Penny Black Mix & Match Cardstock: Fuchsia Fantasies 13-003. Other Materials: Watercolor Paper, Black Pigment Ink, Clear Embossing Powder, Crystal Glitter, Magnet, Heat Tool, Paintbrush, Scissors
Stamp flower twice with black pigment ink on watercolor paper and heat emboss with clear powder. Trim one complete flower and the center of the second flower.
Color images by applying marker ink to a plastic palette and transferring with a damp paintbrush. After the coloring has been completed, run a black (N15) Tombow Dual Brush Pen along the cut edges.
Stamp the flower on the white side of the fuchsia cardstock and trim.
Turn the flower over and stamp the decorative background by applying ink from the Dual Brush Pen (685) directly to the rubber stamp. Lightly “huff” on the ink, stamp the image and trim. Lay the trimmed flower fuchsia side down and use the stamped image facing up as a guide to align the water colored flower on top. Apply adhesive from the Stamp Runner and adhere the two images together. Apply Foam Tabs to the center embellishment and attach to the flower. Add dots of adhesive from the Tombow Glue Pen to the center of the flower and sprinkle with crystal glitter. Tap off excess glitter.
Attach a Power Adhesive Tab to a magnet.
Attach the magnet to the back of the flower.
Elizabeth
The DT received new products from Tombow to try out and play create with and I love it ALL!!!! Super duper stuff!
My first project is a card using Tombow’s Dual Brush Pens, (not new) New Foam Tabs, and New Stamp Runner Permanent Adhesive.
I used Designed2Delight’s Simple Valentine Birdcage digital image. I colored with Tombow’s Dual Brush Pens
left to right: blender pen, #243, #192, #985, #905, #885, #452, #N65
I forgot to take a picture, but I used #977 a caramel color in my air art gun to spritz the splattered color on. I used to do that alot and saw my air art gun in the drawer when I was looking for something else, so decided to play with it again.
I made the card front with scraps from my scrap pile and layered the image in the center with the Foam Tabs.
For my second project I created this cute little gift bag using Tombow’s Dual Brush Pens, Mono Glue Pen, New Stamp Runner Permanent Adhesive, and New Fastener Tabs.
I printed this cute digital image (Chloe from Baby Bud Designs) on watercolor paper. Since I wanted to watercolor it, I needed to seal the ink. I don’t know if this has been done before, but I came up with the idea to draw over all the lines with Tombow’s glue pen and then emboss with clear embossing powder. Love how it turned out!
I used the following Dual Brush Pens:
#725, #755, #925, #173, #850, the blender pen and #879 for her hair (forgot to put that in the picture)
Here is a little tutorial of how I made the bag.
1. cut a lunch sack the same height as the width
2. cut solid cardstock 1/8″ larger than the width and height for the front and an additional 2″ for the back to create the flap
3. cut patterned paper 1/8″ smaller for the front and 1 7/8″ by 18″ smaller length for the flap
4. score the pack solid cardstock piece at 2″ on one short end
5. punch a hole from each end on the scored line
6. add ribbon thru the holes and adhere with adhesive
7. apply adhesive to one side of the cut paper bag and center it on the inside back piece of the solid cardstock
8. apply adhesive to the other side of the paper bag and line the front piece to the back edges (it will look like this)
9. apply adhesive to the patterned papers and adhere to the front panel and front flap
10. Use Tombow’s Fastener Tabs (these are ULTRA thin and so awesome!!) to
adhere to the inside flap.
11. Decorate front of bag as wished and fill with goodies for someone special. Ü
I hope you enjoyed the projects I shared with you today and will give Tombow’s new products a try. I know you are going to love them as much as I do.
is it cliche to say that i love my family…. and they are who i love creating for?
well, it is true. i love the anticipation of creating something and hoping that they are going to love it. i love taking the time to create handmade projects. i love putting myself into something for someone else.
here are some i’ve posted on the blog – christmas ornament, christmas traditions scrapbook, recipe scrapbook, and the framed daddy decor.
i love the line from the chorus of “you spin me round” – right round baby right round, like a record baby, right round, round round!
that is how i feel about my family, they spin me… spin my world…and mostly in good ways. (we all have our moments!)
when i take pictures i start to scrapbook them in my head. i contemplate color schemes and whether i’ll use them on a layout or altered piece or create a mini book to show them off. last fall we visited the pumpkin patch. i was so anxious to scrapbook with my pictures that i created a circle album. i couldn’t wait til all the pictures were printed so i grabbed a few pictures and kept it simple.
these three people are the most important things in my life.
let’s keep on spinning!
gather your adhesive. and to answer your question, yes, i used each of these. i’ll explain…
gather anyhing you think you might want to use. my theme was “you spin me” so i gathered any tools or embellishments that were circular.
here is the title page.
circles cut with the creative memories circle cutting system. lettering is hand cut from an old EK Success lettering template. each letter is also “inked” by using a Tombow Dual Brush Pen N15 (black). the brush tip is great for getting in the little corners of the small letters.
i cut large circles from several pieces of paper, cardstock and patterns and glued them back-to-back with the Tombow MONO Multi Glue. it adds stability to the pages.
i used the Tombow MONO Glue Pen to attach the letters and small embellishments. and Tombow MONO Permanent runner to add the paper embellishments and Tombow MONO Adhesive Dots Roller to glue down the pictures. my reason for this would be because i am indecisive and i like the ability to move my pictures around til i get it just right.
this page is glued to the back of the title page – pattern paper to cardstock. it holds up really well, and the glue doesn’t get the papers too wet, therefore – no warping!
my son’s page – name, pictures and a few embellishments
here is my daughter’s side – again, name, pictures and embellishments
on this page i wanted to use the conchos, but because that pages are back-to-back i didn’t want to set them all the way through. (that would be a little unsightly on the back). so i cut off the prongs that wouldn’t be going though paper (much like i did here with the back of a brad) and used the glue pen to hold them in place. the conchos go through the green paper strip, but the other sides have a bit of glue under them to keep them from sliding.
here i am using the glue pen on the letters. so easy and fast. and because the formula in the glue pen does not adhere to your skin, when picking up little letters to put them on your project they will not stick to you! the glue flows pretty easily, just push the roller ball in by putting the tip on your project and applying pressure. when the glue starts to flow trace around your letter (embellishment).
how about a button? yup, the glue pen works on that too!

while we are talking about love…
my love for tombow was sealed with the introduction of the glue pen. don’t get me wrong, it wasn’t that i didn’t love the other adhesives before, but the glue pen just sent my heart a-flutter! so many uses. so many projects. so versatile!
however, we all know that i really do love the adhesive dots too, so much that i carry them around with me.
can a girl love two adhesives at the same time? leave a comment today and later this week Joanna will pick winners to receive a fun package of everything the design team loves!
sarah


