Hi there! I must be thinking of warm Spring days by the colors I chose for today’s card. Lately, I have been fascinated with all of the things you can do with background stamps. Sometimes, I think they get overlooked. I know I have quite a few and don’t […]
MONO DOTS Adhesive Runner

Holiday Season flew by and the stores are already full of Valentine’s Day stuff. So I caved into peer pressure and started making Valentine’s Day cards. I hope you liked this one. I used the Mono Dots Adhesive Runner to put the card together and for the little bling and […]
Feb 14 Card By Jennie Garcia
 3
3 Today I have Smash Book page I made while I was on vacation. I took one day to crop with my friends and used my Mono Adhesive Dots and a few things to get creative. If you want to include some crafting items in your vacation kit I would suggest […]
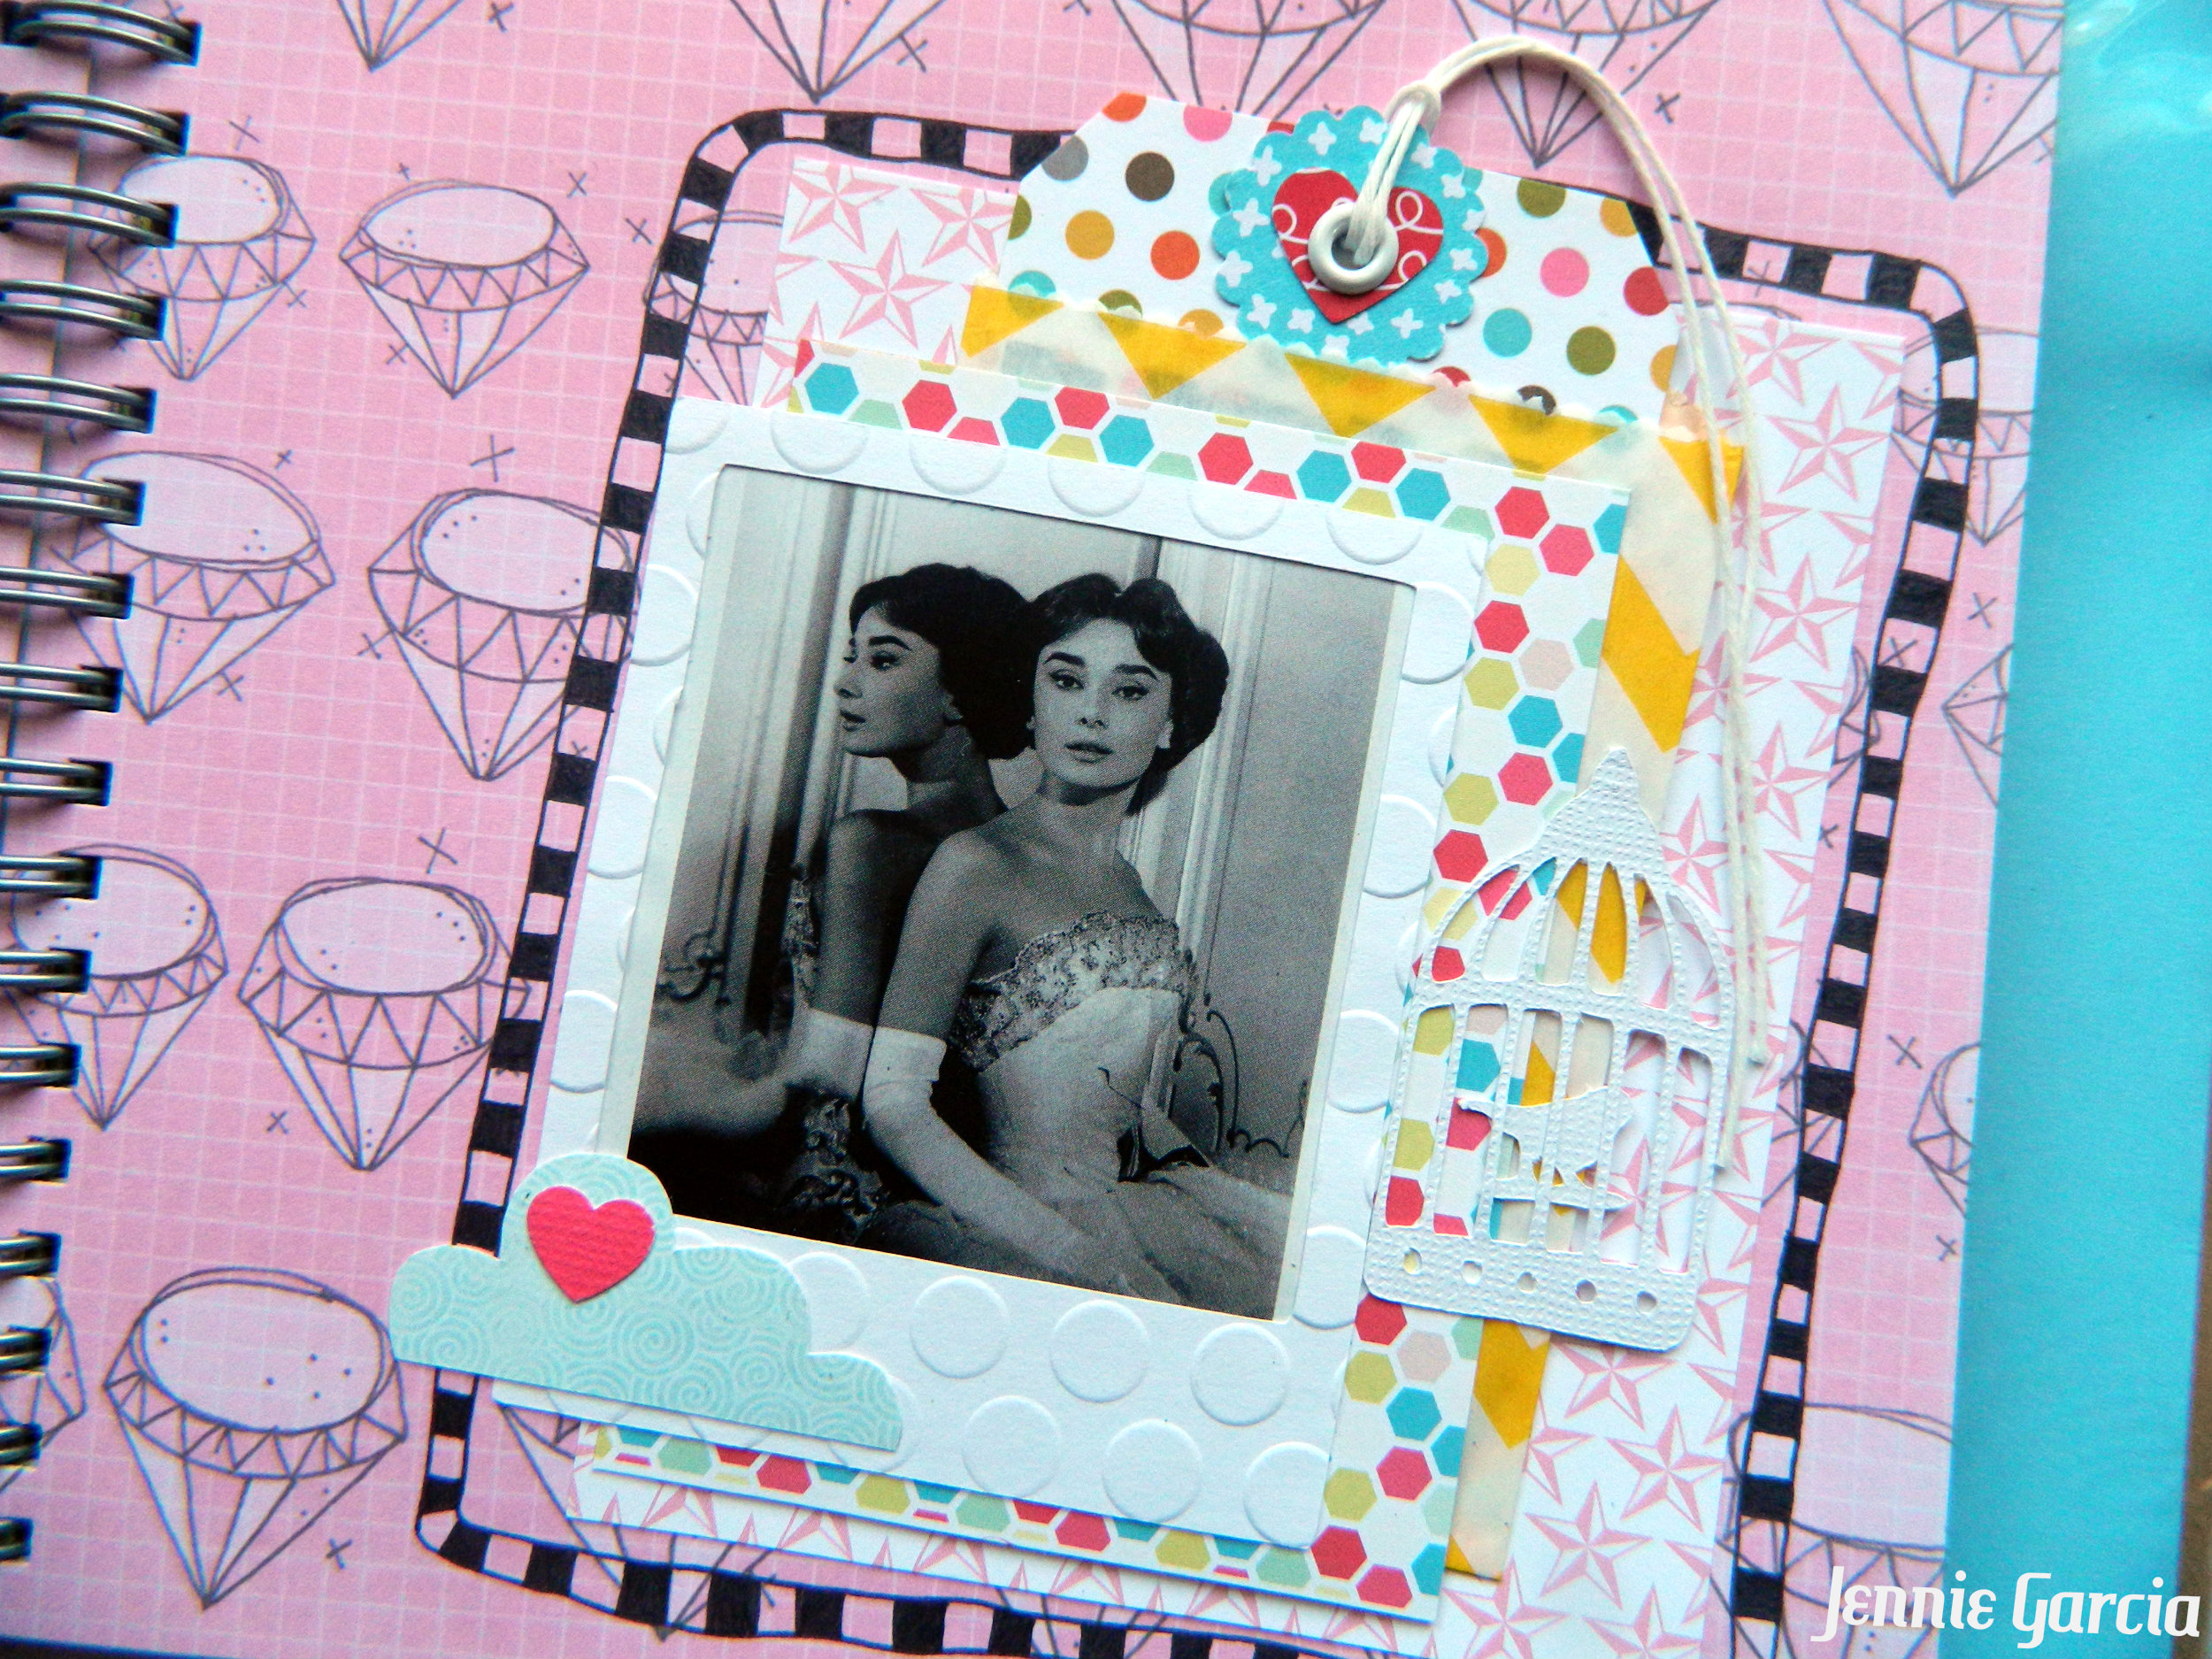
Real Gems By Jennie Garcia
 6
6 October is THINK PINK month and just the time to create a page for my sister Teresa, a Breast Cancer Survivor. The photos were taken at the Run for the Cure in Vancouver, and Teresa is the gal on the right beside the ribbon with sister Sharon on the left. […]
Think Pink! By Marie Browning
 2
2 Hi there! I hope this finds you looking forward to the weekend. We have finally gotten into some cooler weather and that is a good thing. Today I am sharing a notecard box and one of four notecards/envelopes that fit nicely inside. I am giving these to someone special. I […]
just a note….by melissa cash
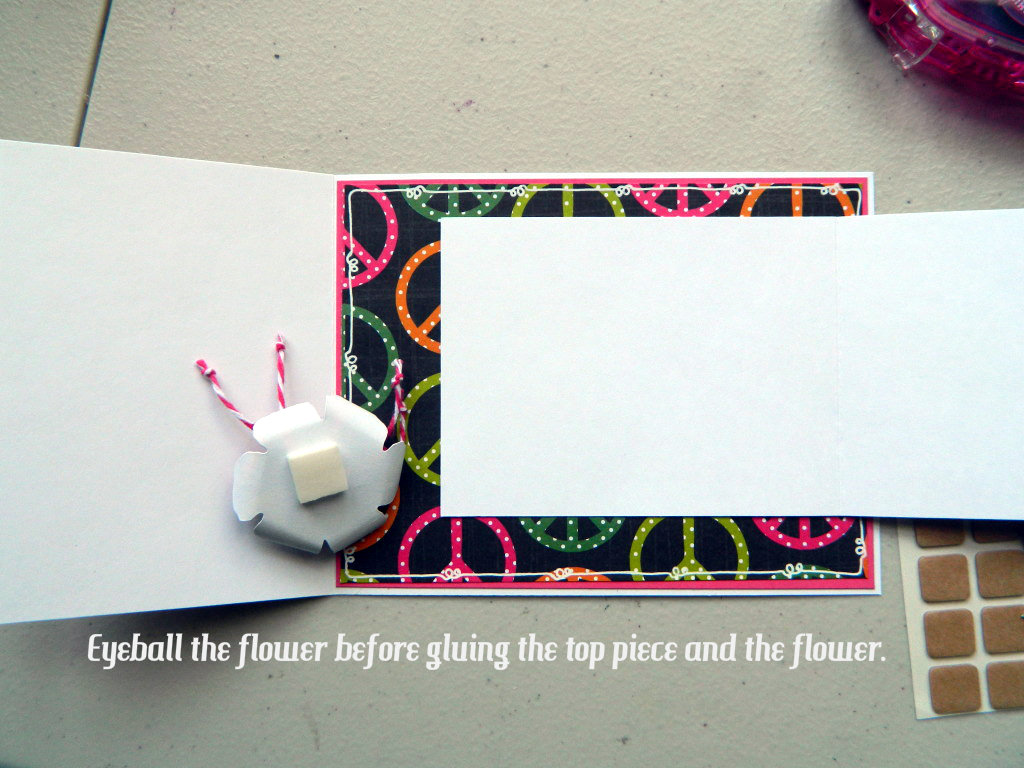
Today I have a tutorial on the Joy Fold Card. Is incredibly easy!! Don’t forget that October 6th is World Card Making Day!! The base will be a 4 1/2″ x 8 1/2 piece of cardstock scored at 5 1/2. Your card will still be an A2 card but, with […]
Hi Joyful Tutorial!! By Jennie Garcia
 5
5 Getting ready for CHA Creative Conference October 3rd and 4th in Mississauga, Canada! This is one of the Make & Takes I will be creating for the conference participants. The Mono Multi Liquid Adhesive is again the star in this vintage posy card! The flower petals are punched out of […]
Folded Flower Card by Marie Browning
This week on the Tombow blog we are partnering with Epiphany Crafts and I have been having fun playing with the Shape Studio Tool Round 14, Shape Studio Bubble Caps 14 and Metal Charms Round 14. I inked up this adorable sun image from Our Craft Lounge’s Summer Cheer set using […]
hello sunshine….by melissa cash
Hello! Wow, that is all I can say about the beautiful weather we have been having here in Cental CA. I just want to be outside all of the time! A couple of weeks ago, I attended The Great Yosemite Stamp Escape and one of the things that we do […]
watercolor butterflies….by melissa cash
TGIF! Today I am sharing a fun gatefold card with you. The black gatefold card base is a pre-scored card from American Crafts, they come in a pack of 12 which makes it easy to quickly reproduce your cards. I stamped the Magnolia image from Stampendous in Tuxedo Black Memento […]
purple and pretty…by melissa cash
Can you believe it, it’s April already? The first quarter of 2012 just flew by. Speaking of flying, I will be taking a little trip to New York soon to visit my sweet niece, Kelly and I have been busy trying to figure out what to wear as the […]
just a note…by melissa cash
TGIF! This week my fellow Tombow teamies and I have been sharing projects that we created using products from My Mind’s Eye. I received a wonderful selection of goodies from the Follow Your Heart-Be Amazing collection. For my first card, I used some of the papers from the 6 […]