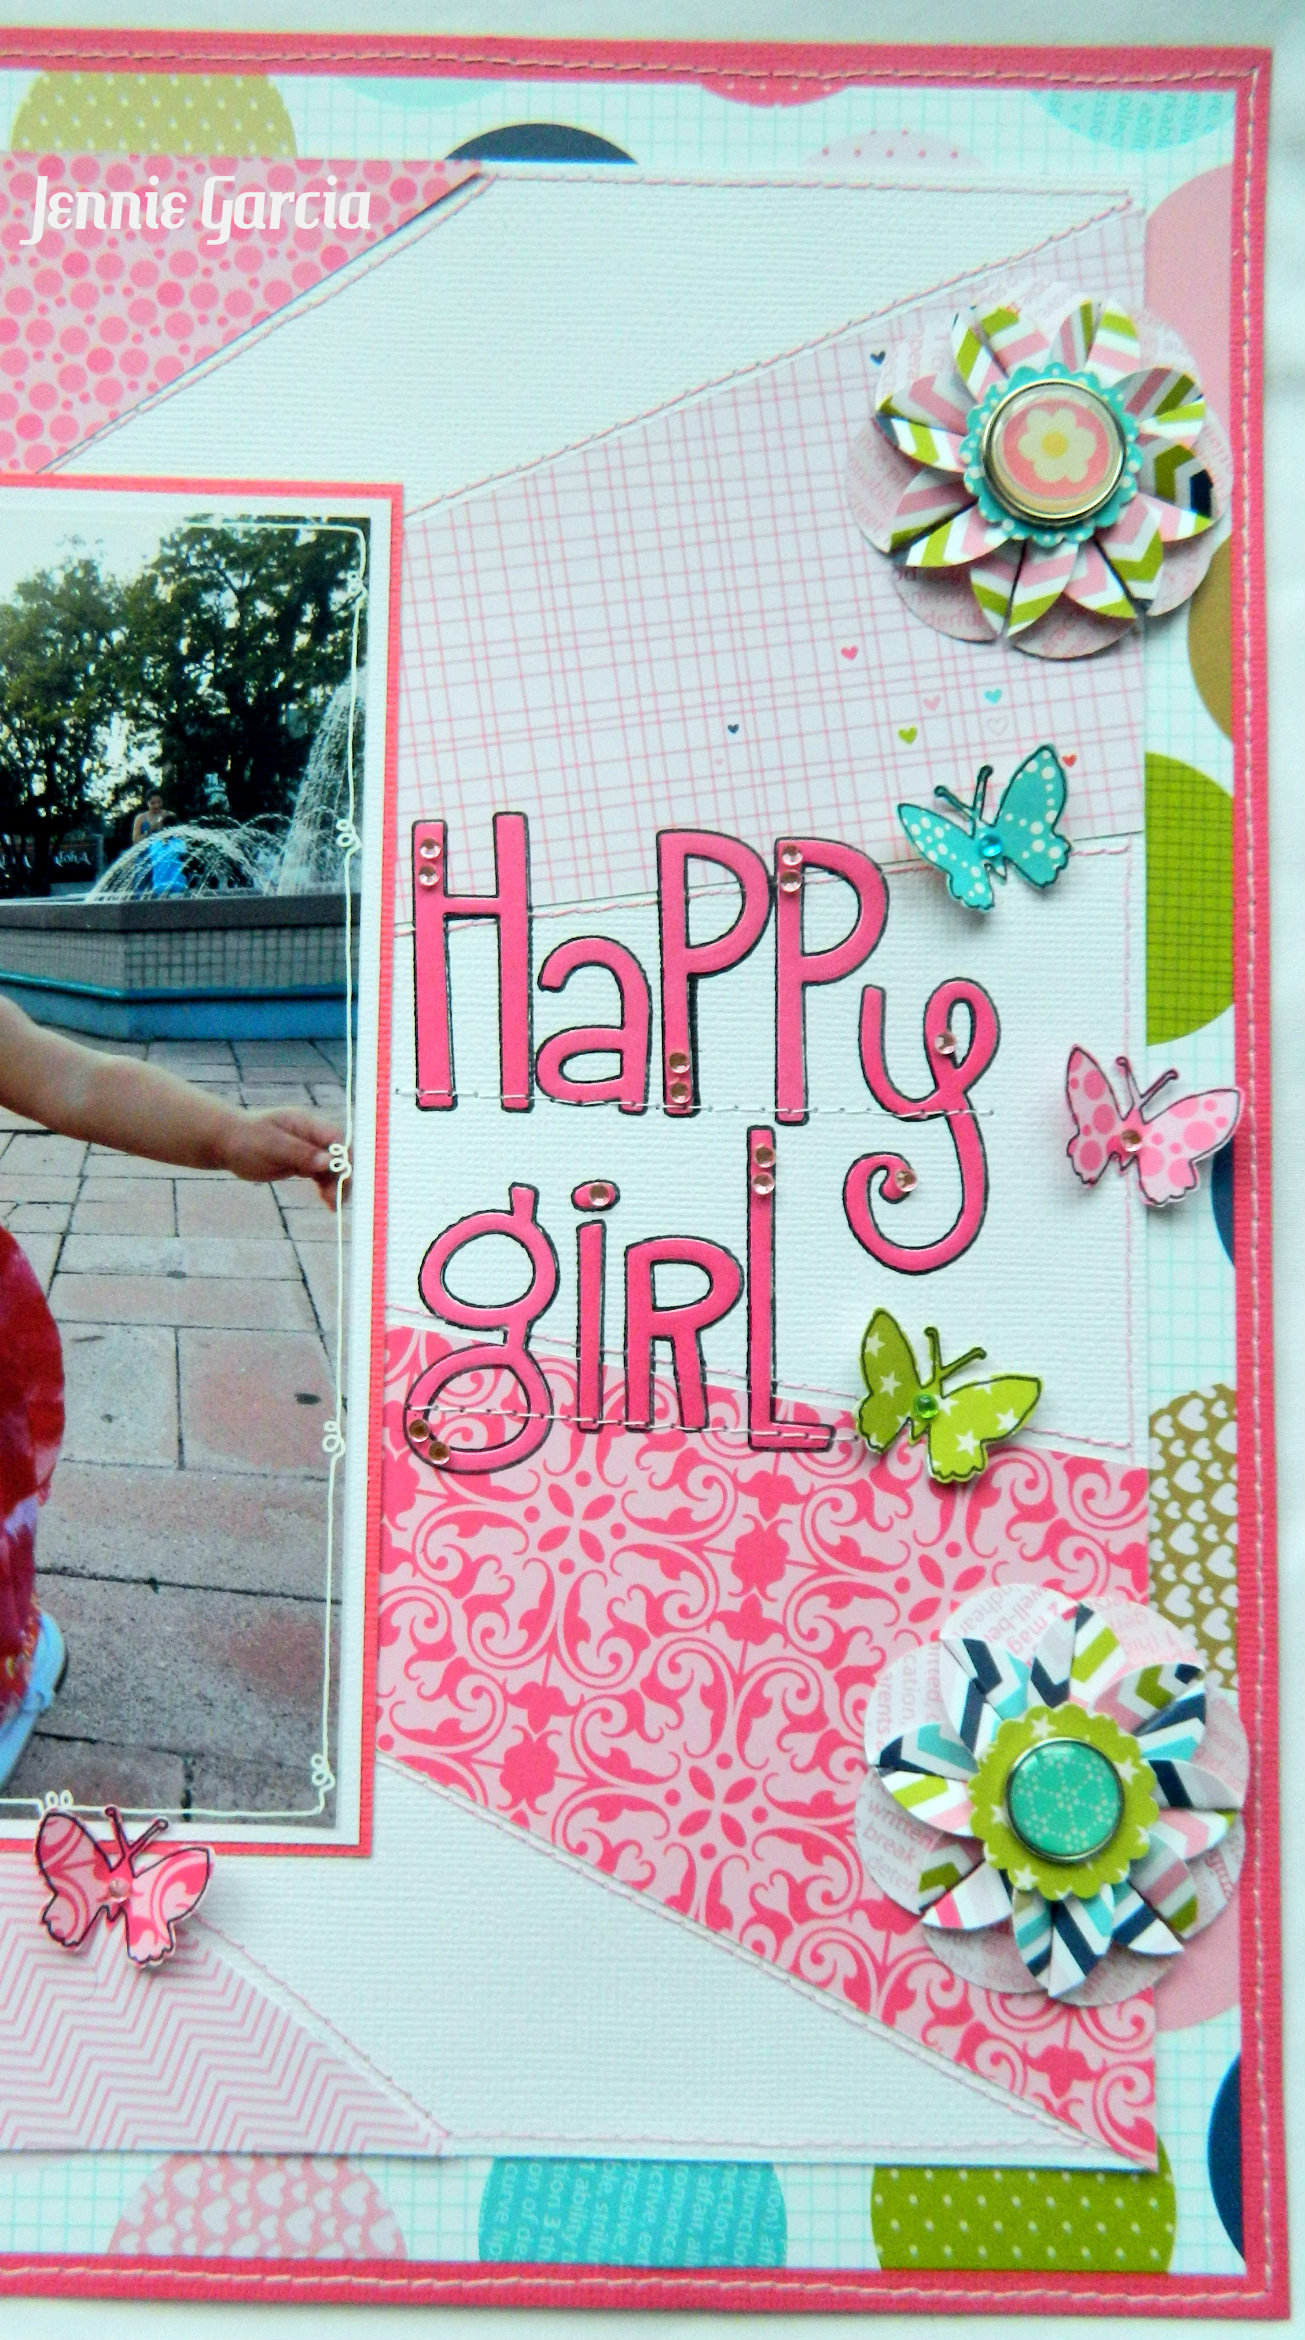
Posts Tagged ‘October Afternoon’
challenge calendar….by melissa cash

If you enjoyed this post please follow us on
i love quotes. they are inspirational, motivational little tid bits to get you through the day. maybe to be reflective, maybe to make you laugh, but always something you need to hear.
i wanted something front and center that i would see everyday, so i made a little frame to set by the mirror. i used some of my favorite paper and stickers from October Afternoon’s Seaside collection, as well as a 6×6 frame, a metal clip and Tombow MONO Multi Liquid Adhesive and Tombow MONO Permanent Adhesive Roller.
I cut the background paper to 6×6 and then layered paper and stickers using the Permanent Adhesive Roller.
Then I slid it back into the frame, under the glass and used the Multi to secure a clip to the front, on top of the glass. It will take a while to set, but by golly it sticks!
So when it comes to adding a quote, you can use a permanent or dry erase marker directly on the glass…
or use the clip to hold a quote torn from a magazine or printed from the computer.
Just a little pick me up each morning…and appropriately, the first quote that i want to clip up is:
Be the kind of woman that when your feet hit the floor each morning the Devil says “Oh crap, she’s up.” (apologies for lack of credit, as i do not know who originally said it…)
i’m trying to be that woman!
sarah
if you enjoyed this post then follow us on facebook and twitter! hop on over…
http://www.facebook.com/tombowusa
http://twitter.com/#!/tombowusa
i have read this book so many times…
to my kids, to my pre-kindergarten class…
children need to know they are loved, and this book gives so many wonderful examples of personalities, quirks and traits that parents love about their children.
each time i read it I knew that i had to make a scrapbook project based on this book. our challenge this week to create something based on a book pushed me to get it started.
i created a microsoft word document with the words from the book. there are two quotes to a page in two columns, and can easily be printed and cut in half vertically and/or horizontally to create the pages of the book. be sure to print a test page and adjust the wording once you choose what font you want.
(my book came out to be 4 ¼ x 4 ¾ because I didn’t print a test page. i’m making the mistakes so you don’t have too : } )
i wanted a gated album, so i used a piece of chipboard for the back and punched holes on either sides of the quote pages. i used my “cinch” binding tool from We R Memory Keepers to punch the holes and add the wire binding.)
then came the fun task of decorating it. this was a perfect project to use the wide array of Tombow adhesives available. I used Tombow MONO Multi to add pattern paper to the back cover, and Tombow MONO Adhesive Clear to add the “S” and “C” to the Hambly Screen Print/Transparency front cover. I used Tombow Power Bond to add the pictures and Tombow MONO Aqua for the embellishments. i used the strongest stuff, as i anticipate these albums will be looked at a lot. (Paper is from October Afternoon’s “Cherry Hill” and “Fly A Kite” collections)
here is the front cover before i put it together. i used the Dual Brush Pen to ink the edges of the letters, then attached them to the back side of the transparency.
a trick to using the MONO Adhesive Clear is to keep the application of the adhesive smooth. i use a surface i know i can rub the adhesive off of…and i’ll run the adhesive off the edge of the paper. that way it stays smooth and virtually invisible when it is used on the transparency.
i also like to do that when i have a tiny piece to add. take a look at this cherry stem. used the permanent adhesive runner on it and purposefully went off the edge. then i have full coverage and i’m not worried about the shape not sticking.
here are some of the other pages from the album.
did I mention i got a little ambitious and made one for each of my kids, that way it is personal and they don’t fight over it. i divided up the quotes from the story, about half for each book. however I made sure that when the quotes were divided i kept the rhyming ones together (it will make more sense when you read through the quotes listed on the microsoft word document). i also made sure the first two and the last two quotes appeared in each book.
i managed to use lots of my favorite “random” pictures from the last few months.
what book has moved you to create a project about it? let us know! we’d love to see your work!
if you read through to the end…. your reward is the word document (i hope…fingers crossed it links! email me at dolizah at hotmail dot com with “you are my i love you” in the subject line and i’ll send you the document).
If you enjoyed this post please follow us on
http://www.facebook.com/tombowusa and
http://twitter.com/#!/tombowusa
i’ve seen these itty bitty card classes advertised by the archiver’s stores and i just had to make some myself.
sometimes it is just fun to sit with some scrap cardstock, super fun pattern papers and embellishments (like these from october afternoon’s farm fresh line), and put together some quick and easy cards using my favorite adhesive dot runner. they don’t have to be elaborate or have a ton of stuff on them. heartfelt and personal make more of a statement when the recipient opens that envelope….speaking of which….now that i’ve got these itty bitty cards, i need to find some envelopes to put them in. sometimes my thinking is all backwards. either way, they sure were easy to make, and i love the itty bitty size.
quick tip – i LOVE using brads, but sometimes i want my paper to lay flat, and sometimes i decide i want to use the brad after i have stuck the paper down. an easy way to still use those brads is to cut off the prongs on the back. most brads will trim up easily with regular scissors. then use the Tombow MONO Multi, “a dot, not alot” and place the brad head (sans prongs) on top of the dot. viola! looks like a brad! (check out the front of the “i love you” card, the brad appears to be holding the tag on.)
how about something cute and portable to keep your holiday shopping organized…
this project has stumped me more than any other project…and I can name several others that got me!
my assignment was “shop til you drop”. so my first thought was…layout? but how many of us take cameras with us shopping and how many more of us remember to take that camera out and get a picture of the action?
well, perhaps if it was a girls day out, or a shopping adventure with your daughter who actually *WANTS* to shop with you now…then I can see the camera’s coming out. but, since this is posting the day after Thanksgiving, on Black Friday, when people are attempting for the best bargain possible and hoping to jump start the Christmas spirit by getting as many gifts as they can in one day, well then perhaps the camera is long forgotten at home or in your bag.
so, my next thought was to make something FUNCTIONAL to take with you while shopping and dropping. a few years ago i did a class using pockets…”Pockets, Flaps and Things that Move” was the title of this class. we made an accordion book, and on each panel was a different functional addition. i decided that i would attempt to re-fashion this accordion book as a way of creating a plan of attack when shopping for those sought after items. use the pockets to slide in clippings from ads, or make your own notes, cards or tags to add in there.
now, my next issue was… “let’s make this functional, but not spill all the secrets when prying eyes come back to look at your creation.” so, perhaps this can become more of a wish list, especially for those little ones many requests.
i used Tombow MONO Multi for the paper-to-paper adhesion, to keep it durable while putting it in my bag. to make the pockets i really like using Tombow MONO Aqua Liquid Adhesive. (don’t use the Tombow MONO Multi for pockets because it is meant to dry tacky, so if any of the glue leaks out from under the edge of the pocket, the items you slide inside will not slide well because of the sticky factor). the Glue Pen will also work for the pockets, if you work quickly. I used the Very Merry line from October Afternoon, Jillibean Soup letter stickers and journaling sprouts, and a corner rounder. in addition, don’t forget to keep a good writing pen with the organizer. using ribbon attached to the project, tie on a Dual Brush Pen, then it will always be at your fingertips when taking notes or crossing things off. write the name of each store you need to visit on the tabs OR write the name of the people you are shopping for (i’ve done both in my pictures) and then list the purchases you need to make.
either way you look at it, using an organizer that is cute and functional will make your shopping a little more manageable…or at least i hope it does!
HAPPY BLACK FRIDAY – good luck out there!
materials:
(5) double sided pattern papers
(4) pieces of cardstock, different colors
white cardstock (to make tags for the pockets)
coordinating stickers
letter stickers
pre-cut journaling circles
Tombow MONO Multi
Tombow MONO Powerbond
Tombow MONO Aqua
Tombow MONO Dual Brush Pen
directions:
cut (2) 12X12 pattern papers to 12×9
score each page two times, at 4″ and 8″, creating three panels/sections which can be folded accordion style
using Tombow MONO Multi adhere the two pages together by overlapping two of the panels
create several more “panels” – 4″x9″ and again using Multi to put them over the accordion folded panels
use the corner rounder on all corners
cut cardstock 3″x4″ to use for pockets, and round two of the corners
use Tombow MONO Aqua put glue on three sides of the cardstock- the bottom and two side to create the pockets
cut white cardstock to create tags (as many as you need)
using the pre-cut journaling circles and a circle punch make tabs for the top of each tag
decorate with stickers
make a belly band cut a cardstock strip 2″x12″, wrap it around the folded-up organizer
use powerbond to keep the strip together
decorate the front of the belly band with another pre-cut journaling circle and letter stickers
***if you liked this you may also like
Sarah’s Daddy Decor Project, Magnetic Boards or her ‘Up the Chimney He Rose‘ Cards***


start by going to home depot or lowes or a similar kind of store and picking up some sheet metal.
unfortunately the smallest piece i found at home depot was 12×18, so it needed to be cut down to fit the 8×10 frame. this was the most difficult part, but perhaps a very nice person in the store can help you out. so my 12×18 piece became two 8×10 pieces.
next i gathered up paper and embellishments that coordinated together. the finished picture is october afternoon’s report card line, and the in-process board used the cherry hill line, also by october afternoon. i picked up some chipboard circles that i had from bazzill basics, and i made sure i had my Tombow MONO MULTI liquid glue...my adhesive of choice when putting together chipboard and other altered projects. lastly i made sure i had my scissors and paper trimmer, some “raw” magnets and a picture frame. (take the glass out of the picture frame)
i cut my paper so it was about an inch to an inch and a half bigger than the sheet metal. then i spread Tombow MONO MULTI over the front of the metal. i adhered my pattern paper to the front and folded the excess to the back, gluing it down to the back too, also with my MULTI.
using stickers and paper scraps decorate the front of the sheet metal. i choose to do just a few simple strips.
then cover the chipboard circles with pattern paper, when the glue is dry cut from the pattern paper with scissors or rub the edges with sand paper. embellish the front with stickers, rub-ons, etc., and use Tombow MULTI to adhere a magnet to the back. fyi, “raw” magnets are pretty strong. when gluing them to the chipboard circles be sure to separate them so they don’t accidentally “stick together”.
not pictured…i also took Tombow MONO AQUA liquid glue and a foam brush and coated each finished chipboard circle/magnet, to seal the elements together and protect it a little.
my daughter loved helping to make these for her teachers. i let her pick the embellishments and put down the glue. it really goes together quickly, even when little hands are helping out. she even choose to use buttons for some of the magnets instead of chipboard pieces. nice touch miss c!
thank you to all you teachers! as a parent and a teacher myself i completely understand the challenges you face each day. you are truly appreciated!


